

ididit Column Add-Ons Aluminum Cruise Control Cover User Manual
PROPERTY OF
ididiT, inc
PROPERTY OF
ididiT, inc
PROPERTY OF
ididiT, inc
PROPERTY OF
ididiT, inc
PROPERTY OF
ididiT, inc
PROPERTY OF
Aluminum Cruise Control Cover Installation Instructions
For Part Number’s 2501000030, 2501000040
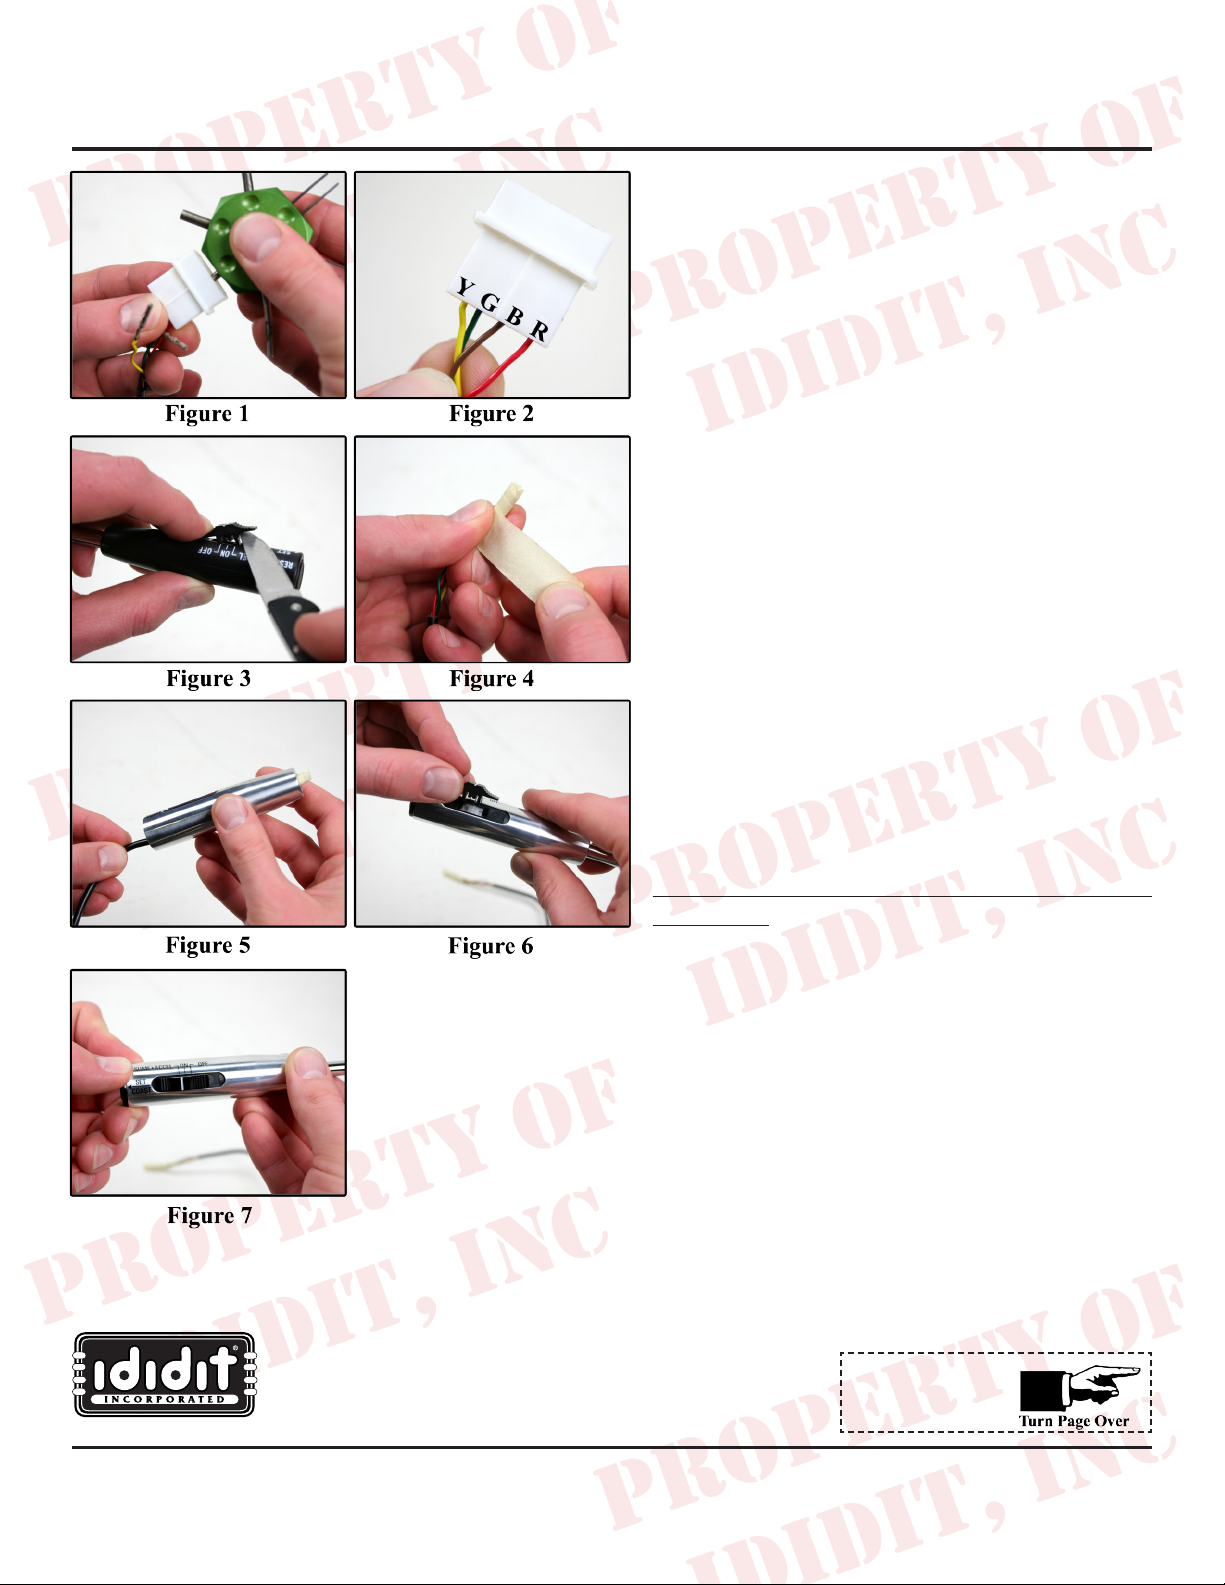
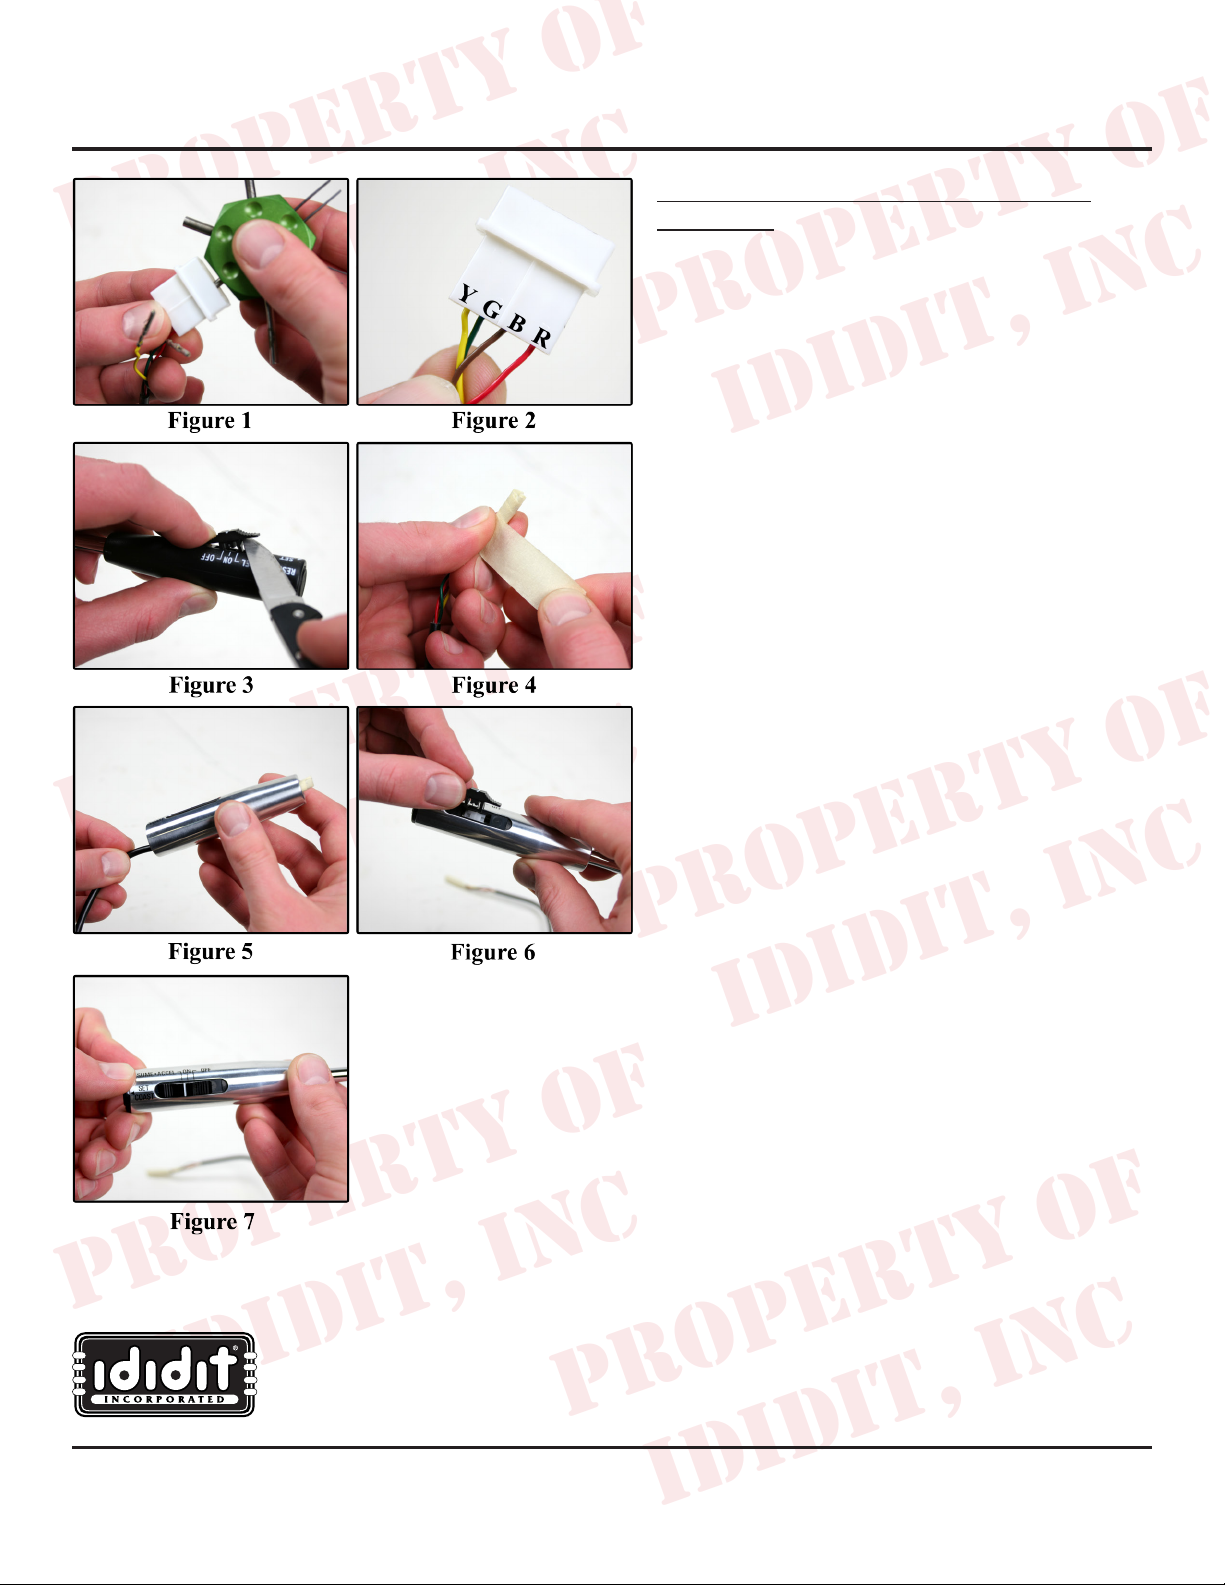
1. Remove the white plastic plug from the wires by
using a small screwdriver or electrical tool to
depress the locking tab on the pins. (Figure 1)
Remove the four pins from the connector. There
are letters on one side of the plug which coincide
with the colors of the wires. (B=Brown, R=Red,
Y=Yellow, G=Green) (Figure 2)
2. Using a thin pocketknife, gently pry the slide-switch
up and out of the cruise handle. (Figure 3) Set the
slide-switch to the side.
3. Wrap the loose wires in tape so they can easily
slide through the lever hole. (Figure 4) With the
large end rst, slide the Aluminum Cruise Cover
up the wires and onto the handle. You may have
to use a little force to get the wires from the lever
into the cover. Align cover so that it centers on the
slide-switch area and press it on. These items both
have a taper on them and should lock in place with a
rm tap against the palm. (If not add 1 rap of scotch
tape to tapered area on the plastic knob). (Figure 5)
Replace the slide-switch by simply pressing it into
its lock down mechanism. (Figure 6) Your cover
is now installed. (Figure 7)
If the steering column is a Tilt or Non-Tilt follow
these steps:
1. Remove the steering wheel and replace the turn
2. Replace the plastic plug by putting the pins back
3. Hook up the rest of the cruise control system and
www.ididitinc.com
ididit inc. 610 S. Maumee St. 49286 Tecumseh, MI PH: 517-424-0577 FAX: 517-424-7293
signal lever with the cruise lever. Using a orist
wire, feed the wires from the cruise handle through
the turn signal hole of the column sleeve. The access
hole for this is about 5/8” round and at 7:00. Feed
the pull wire down and back out of the exit hole.
Then attach the cruise wires and pull the wires with
this leader.
into the original holes. Refer to the color code on
the plug.
replace your steering wheel.
If your column is
Tilt & Telescopic
Instruction #: 8000010100 REV 01/14
PROPERTY OF
ididiT, inc
PROPERTY OF
ididiT, inc
PROPERTY OF
ididiT, inc
PROPERTY OF
ididiT, inc
PROPERTY OF
ididiT, inc
PROPERTY OF
ididiT, inc
Aluminum Cruise Control Cover Installation Instructions Cont.
For Part Number’s 2501000030, 2501000040
If the column is a Tilt & Telescopic follow
these steps:
1. Remove the locking lever or ring of the
telescoping feature. Remove the wheel assembly
(7/8 socket). Note: If you have an ididit column,
mark the adaptor to the shaft for alignment when
re-assembling.
2. Remove the current lever. Note: if this is already a
cruise, install a pull wire to retrieve the wire back
through (we reccomend orist wire).
3. Install the cruise cover on lever (follow the
instruction on the previous page.)
4. Feed the wire through the lever hole and into the
column.
5. There is an access hole through our column head
assembly. Look for this at about 7:00 just below
the turn signal lever. This channel leads through
the castings and into the tube of the column (this
includes GM columns).
6. Feed a piece of orist wire down through this hole
and out the wire exit hole where the rest of the
wires exit. We reccomend that you remove the
wire grommet to be able to see when you get there.
7. Once you pull the wire through, tape the 4 wires in
a square with the pull wire in the middle and loop
the pull wire so it cannot pull out.
8. Wiggle the wire bundle gently down through the
column. If this gets caught about 5 inches in, then
turn the wires while pushing and pulling with the
other hand. This normally lets them slide in a little
easier.
9. Replace the plastic plug by putting the pins back into
the original holes. Refer to the color code on the plug.
10. Hook up the rest of the cruise control system and
replace your steering wheel.
www.ididitinc.com
ididit inc. 610 S. Maumee St. 49286 Tecumseh, MI PH: 517-424-0577 FAX: 517-424-7293
Instruction #: 8000010100 REV 01/14
 Loading...