

Page 1

Page 2
Know your IDEXX VetLab
®
Station
It’s the hub of your in-house laboratory
Easily manage your IDEXX VetLab® analyzers and get a complete diagnostic picture
of each patient with an integrated results report.
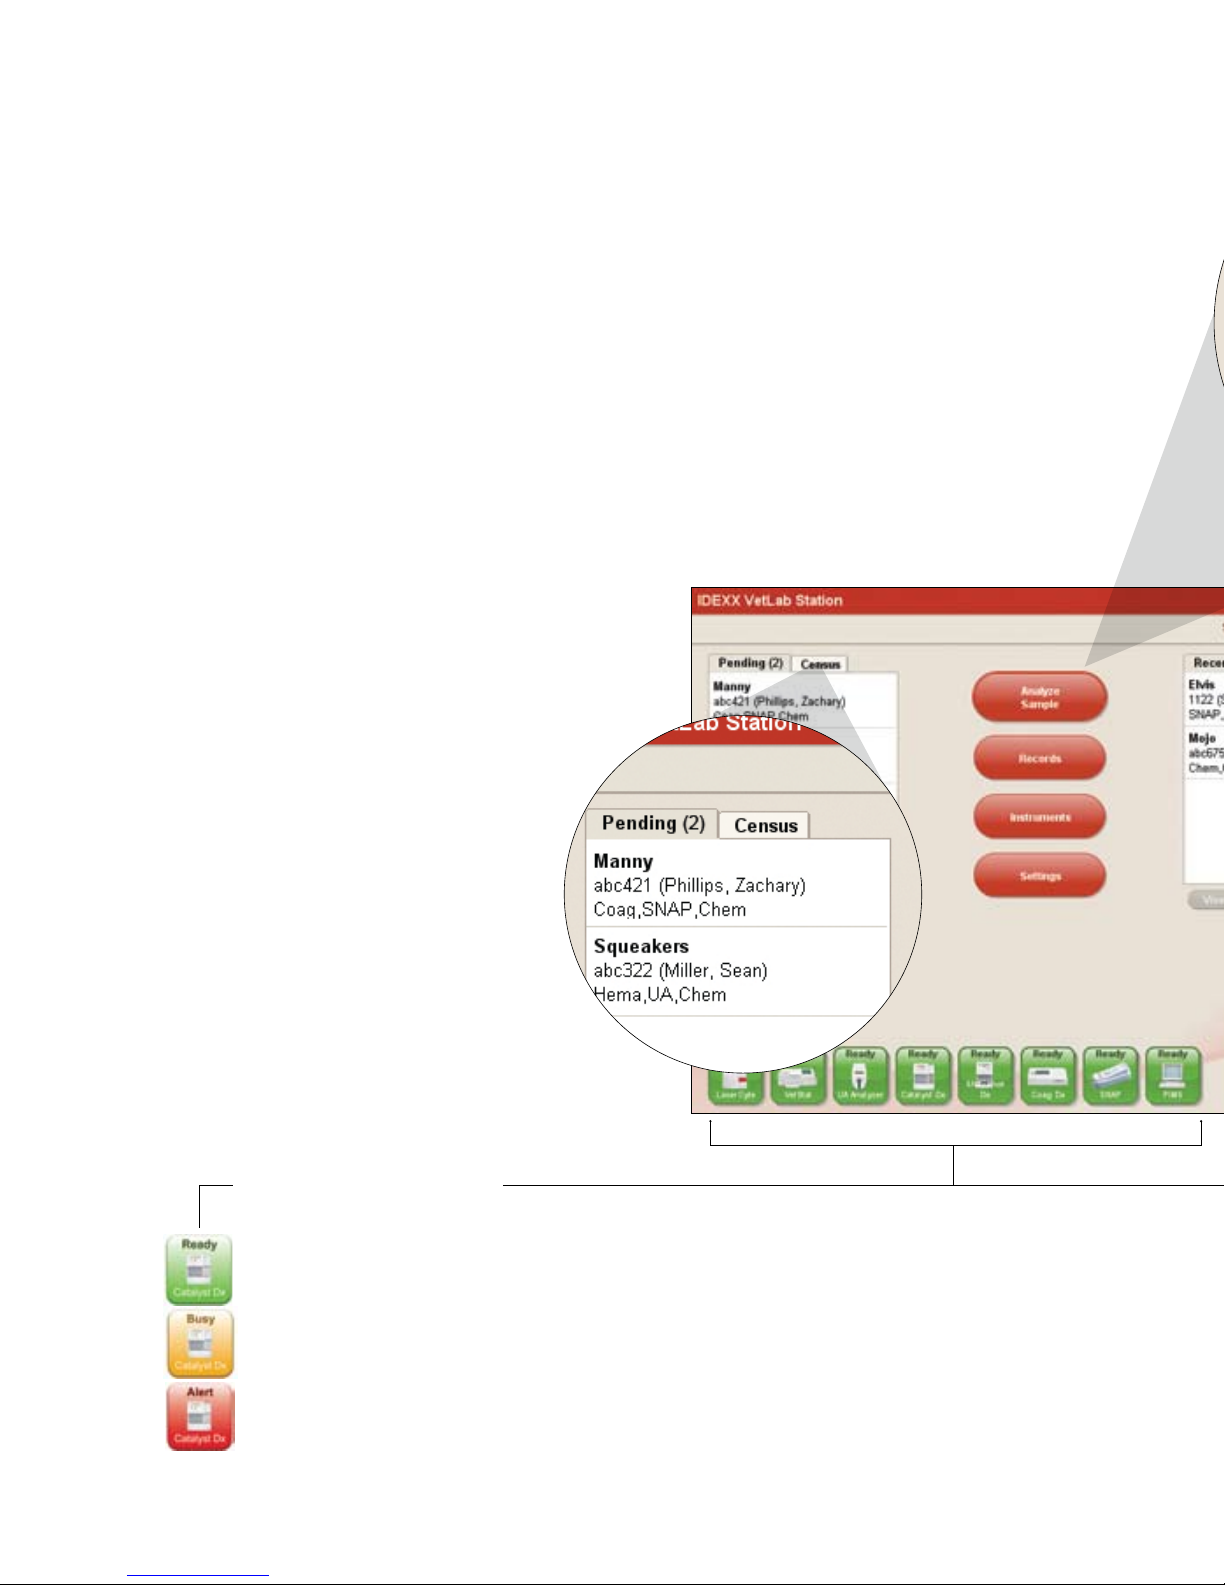
The Home Screen
The Home screen is the starting point for all
sample runs as well as for navigating the
IDEXX VetLab Station system.
Pending List
See which patients have
open requisitions in your
practice management
system.
Census List
Know which patients are
currently checked in via
your practice management
system.
Instrument Status Icons
Know which instruments are running and/or available with color-coded icons.
Green = Ready: connected and communicating with the IDEXX VetLab Station
Yellow = Busy: either running sample tests or performing maintenance
Red = Alert: prompts you to check an analyzer
Page 3
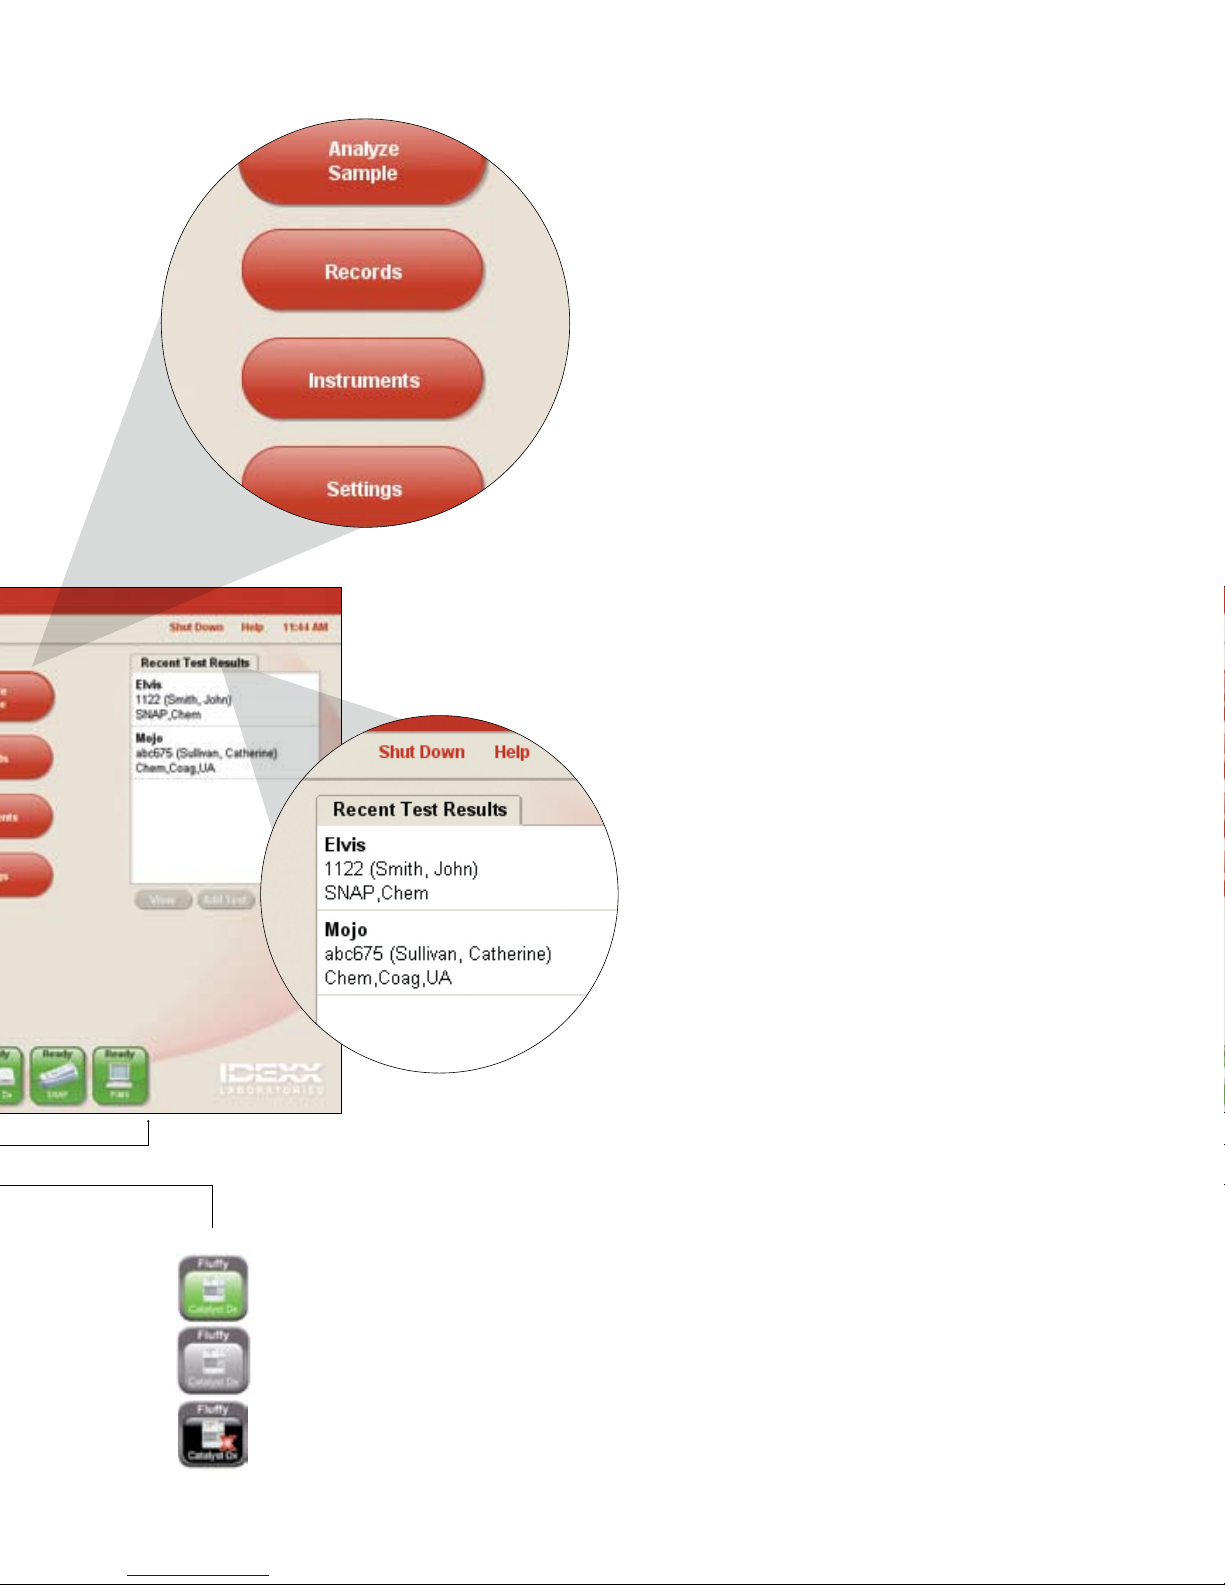
Analyze Sample
Initiate a sample run. Enter information
and select the instrument you want
to use.
Records
Find an existing record to view, print or
trend patient results.
Instruments
Access specific analyzer system
information and utilities.
Settings
Customize your options to fit your
clinic work flow.
Recent Test Results
Quickly view patient results
generated within the last three
days with this shortcut.
Green with Gray Border = Ready to Run: connected to IDEXX VetLab Station
and is ready to receive patient information
Light Gray = In Process: currently running sample for indicated patient
Black with Red X = Offline: occurs immediately after IDEXX VetLab Station has
started or if the IDEXX VetLab Station has lost connection with the instrument
Page 4

IDEXX VetLab® Station
Quick Reference Guide
Initiate a Sample Run
This can be done either with or without a connection to a
practice management system.
A
If you have either basic or no integration with your
practice management system:
1. Tap Analyze Sample.
2. Enter client and patient information and tap Next.
3. Select a Reason for Testing option and tap icon to select for current analysis.
4. Tap Run.
B
If you utilize IDEXX SmartLink® or IDEXX InterLinkTM technology:
1. Tap desired patient from the Pending List or Census List and then tap Run.
2. Select Reason for Testing, Confirm Life Stage and Doctor options.
3. Tap icon to select for current analysis.
4. Tap Run.
Trend Patient Results
Monitor patients and compare results over time to see subtle changes
and response to treatment.
1. Tap Records on the Home screen.
2. Select the desired patient and tap View Records.
3. Select 2–6 lab results and tap Trend.
4. Select 1–6 parameters to graph and then tap Trend.
Use Interpretive Guides
See common causes and get help interpreting your abnormal
diagnostic results.
1. On the Records: Test Results screen, tap an underlined parameter to
view its interpretive guide.
2. Tap Print Page to print the information.
A
B
Page 5

Enter SNAP® Test Results
Include SNAP test results in the patient’s diagnostic report and in the
electronic record.
1. Include a SNAP test when you initiate a sample run.
2. Tap the SNAP icon in the patient-specific job status area on the
Home screen.
3. Tap the image that matches your SNAP test results.
4. To add comments, tap Edit, enter the information, and then tap OK.
5. Tap OK to save the SNAP test results.
Print a SNAP Log Report
Print a comprehensive SNAP Log Report for a
specified time.
1. Tap the green SNAP icon on the Home screen and
tap Print SNAP Report. Select a date range for
your report.
2. Tap Print SNAP Log for a detailed report about
each test run for the specified time.
Or
Tap Print SNAP Summary for a report that displays
the number of SNAP tests run for the specified time,
plus a pie chart indicating the number of positive and
negative results for each test.
Add a Test to an Existing Patient Run
Attach additional test results to previously completed lab runs.
1. Select a patient from the Recent Test Results List on the Home screen
and tap Add Test.
2. If applicable, select a Reason for Testing option.
3. On the Select Instruments screen, tap an analyzer or SNAP icon.
• Tap Append Results to add the results (all original results are kept).
• Tap Merge/Replace Results to add results for tests new to the lab
• Tap New Results to add the results to the patient’s record as a new
Pink Lines DO NOT PRINT— To show cut-out area only
M
M MMaa aapp ppll llee ee HH HHii iill llll ll AA AAnn nnii iimm mmaa aall ll HH HHoo ooss sspp ppii iitt ttaa aall l
l
1
1 1122 22 MM MMaa aapp ppll llee ee HH HHii iill llll ll RR RRoo ooaa aadd d
d
D
D DDuu uurr rrhh hhaa aamm mm PP PPAA AA,, ,, 00 0088 8899 9955 5522 2
2
Page 6

Add a Test to an Existing Patient Run
Attach additional test results to previously completed lab runs.
1. Select a patient from the Recent Test Results List on the Home screen
and tap Add Test.
2. If applicable, select a Reason for Testing option.
3. On the Select Instruments screen, tap an analyzer or SNAP icon.
• Tap Append Results to add the results (all original results are kept).
• Tap Merge/Replace Results to add results for tests new to the lab
run and Replace Results for test that are repeated.
• Tap New Results to add the results to the patient’s record as a new
set of lab results.
Page 7

Trend Patient Results
Monitor patients and compare results over time to see subtle changes
and response to treatment.
1. Tap Records on the Home screen.
2. Select the desired patient and tap View Records.
3. Select 2–6 lab results and tap Trend.
4. Select 1–6 parameters to graph and then tap Trend.
Use Interpretive Guides
See common causes and get help interpreting your abnormal
diagnostic results.
1. On the Records: Test Results screen, tap an underlined parameter to
view its interpretive guide.
2. Tap Print Page to print the information.
Page 8

 Loading...