

Page 1

Motorola
iDEN®
Digital Multi-Service Phone
r750plus User’s Guide
1/15/03
@NTN9333A@
NTN9333-A
Page 2

Page 3

Tableof Contents
Table of Contents
Welcome ............................................................................................... 1
TTY Access.................................................................................................... 2
Large-Print Manuals....................................................................................... 2
Features of your r750plus Phone.................................................................... 2
Attaching and Charging the Battery............................................................... 4
Attaching the Battery .............................................................................. 4
Detaching the Battery.............................................................................. 4
Charging the Battery ............................................................................... 4
Battery and Charging Status.................................................................... 4
TurningOnYourr750plus Phone.................................................................. 5
Turning Off your r750plus Phone ..................................................................5
Connecting the Supplied Antenna........................................................... 6
Keypad Lock .................................................................................................. 6
Activating Keypad Lock ......................................................................... 6
Receiving Incoming Calls ....................................................................... 6
Receiving New Mail Messages............................................................... 7
Receiving Voice Mail ..............................................................................7
Receiving Private (Two-Way Radio) Calls............................................. 7
Deactivating Keypad Lock...................................................................... 7
Display Icons.................................................................................................. 8
About Modes and Menus ............................................................................... 9
Setting the Time and Date.............................................................................. 9
Changing the Display Language .................................................................. 11
Selectable Backlight Timer .......................................................................... 11
Making Phone Calls .......................................................................... 12
Using Other Dialing Methods ...................................................................... 12
Scroll ..................................................................................................... 12
Speed Dial ............................................................................................. 12
Automatic Redial................................................................................... 13
Last Number Redial .............................................................................. 13
Turbo Dial® Key................................................................................... 13
Plus Dialing ........................................................................................... 14
Hands-Free Speakerphone..................................................................... 14
Receiving a Phone Call ............................................................................... 14
Ending a Phone Call .....................................................................................14
What Is My Phone Number?........................................................................ 15
VibraCall® Alert.......................................................................................... 15
Selecting VibraCall Alert for All Incoming Calls and Messages ......... 15
iii
Page 4

Selecting VibraCall Alert for Individual Services................................ 16
Setting the Ringer Volume .......................................................................... 16
Setting a Ring Style for the Alternate Line ..................................... 16
Additional Phone Services ................................................................ 17
Call Waiting................................................................................................. 17
Turning Off Call Waiting ..................................................................... 17
Call Hold............................................................................................... 17
3-Way Calling....................................................................................... 18
Alternate Phone Line ................................................................................... 18
Setting the Active Line......................................................................... 18
Receiving a Call.................................................................................... 19
Receiving a Call on Your Alternate Line ............................................. 19
Receiving a Phone Call Using Speakerphone ...................................... 19
Missed Call Indicator................................................................................... 19
Call Forwarding ........................................................................................... 20
Unconditional Call Forwarding ............................................................ 20
Conditional Call Forwarding................................................................ 20
Creating, Editing, and Using Stored Lists....................................... 22
Combined Phone Number and Private ID List..................................... 22
Entering Numbers............................................................................ 22
Entering Names ............................................................................... 22
Storing Names and Numbers........................................................... 23
Pause Digit Entry............................................................................. 24
Editing and Erasing Phone List Entries........................................... 24
Editing and Erasing Private ID List Entries .................................... 25
Last 10 Calls Received and Sent Lists.................................................. 26
Quickstoreof Phone Numbers.............................................................. 26
Making Private Calls......................................................................... 28
Scroll ................................................................................................ 28
Name Search.................................................................................... 28
Receiving a Private Call .............................................................................. 28
Private/Group Mode Speaker ....................................................................... 28
Call Alert...................................................................................................... 29
Selecting a Call Alert Tone Style ................................................................ 29
Setting an Alert Tone Style ............................................................. 29
Sending a Call Alert..................................................................................... 29
Receiving a Call Alert .......................................................................... 29
Call Alert Queuing................................................................................ 30
Clearing or Queueing a Call Alert........................................................ 30
Responding to a Queued Call Alert...................................................... 30
www.mot.com/iDEN
iv
Page 5

Tableof Contents
Quickstore of Private IDs .............................................................................31
Storing Your Private ID ............................................................................... 31
Making Group Calls.......................................................................... 32
Receiving a Group Call................................................................................ 32
Adding and Storing a Talkgroup.................................................................. 32
Area Selection ..............................................................................................33
Private/Group Mode Speake ........................................................................33
Advanced Features............................................................................ 34
Multi-Simultaneous Talk Group Scan.......................................................... 34
Entering Group Mode............................................................................ 34
Initiating a Group Call........................................................................... 35
Responding to a Secondary Talkgroup ................................................. 35
Turning Scan On and Off ......................................................................36
Aliasing Talkgroup Mode ..................................................................... 36
Talkgroup Mode Selection by Direct Entry .......................................... 37
Talkgroup Mode Selection by Memory Scroll...................................... 37
Emergency Group Call................................................................................. 37
Placing an Emergency Group Call........................................................ 37
Canceling an Emergency Group Call.....................................................38
Receiving an Emergency Group Call.................................................... 38
Receiver Operations During an Emergency Call ..................................38
Status Message ............................................................................................. 38
Entering the Status Message Function .................................................. 39
Selecting a Status Message with Direct Entry ...................................... 39
Selecting a Status Message Using Memory Scroll................................ 40
Selecting a Target by Direct Entry........................................................ 40
Selecting a Target by Memory Scroll ................................................... 40
Selecting a Target by Alpha Search ...................................................... 40
Sending a Status Message ..................................................................... 41
Exiting the Status Message Function .................................................... 41
Receiving a Status Message .................................................................. 41
ID List Programming ............................................................................41
Isolated Site Operation................................................................................. 42
Entering ISO 42
Initiating a Group Call ...........................................................................43
Exiting ISO............................................................................................ 43
Other Operations ................................................................................... 43
Using Mail Services ........................................................................... 44
Net Mail........................................................................................................ 44
Voice Mail..............................................................................................45
v
Page 6

Alert Receipt During Phone Call.......................................................... 45
Message Mail............................................................................................... 46
Saving and Erasing Mail........................................................................ 46
Auto Call Back ...................................................................................... 47
Mail Memory Full.................................................................................. 47
Using Your Phone as a Modem ........................................................ 48
TTY Users ........................................................................................ 48
Setting Programming Menus............................................................ 49
About Error Codes ........................................................................................ 54
Optional Accessories ........................................................................ 56
Batterie......................................................................................................... 56
Charging the Battery............................................................................. 56
Battery Operating Instructions.............................................................. 56
Rapid Travel Charger................................................................................... 57
Using the Rapid Travel Charger (110V/220V/240V) .......................... 57
Rapid Travel Charger Operating Specifications................................... 57
Vehicular Battery Charger ........................................................................... 58
Using the Vehicular Battery Charger ................................................... 58
Removing the Vehicular Battery Charger ............................................ 58
Operating Specifications....................................................................... 58
Desktop Dual-Pocket Charger ..................................................................... 59
Charging a battery................................................................................. 59
Data Operation...................................................................................... 59
Inserting and removing a battery from the rear pocket......................... 60
Desktop Charger Status ......................................................................... 60
Desktop Charger Troubleshooting ........................................................ 60
Audio Adapter ...................................................................................... 62
Using the Audio Adapter...................................................................... 62
Attaching/Detaching the Earpiece Microphone or Headset ................. 62
Removing the Audio Adapter.......................................................... 63
Battery Belt Clip................................................................................... 63
Using the Battery Belt Clip ............................................................. 63
Leather Carry Case ............................................................................... 63
Hard-Install Car Kit.............................................................................. 64
Remote Speaker/Microphone ............................................................... 65
Attaching and Removing the Swivel Clip....................................... 65
Connectingthe Remote Speaker/Microphone to the Portable......... 65
Operation ......................................................................................... 66
vi
www.mot.com/iDEN
Page 7

Tableof Contents
Safety and General Information ...................................................... 67
RF Operational Characteristics .................................................................... 67
Exposure To Radio Frequency Energy ........................................................ 67
Portable Radio Product Operation and EME Exposure ............................... 68
Antenna Care......................................................................................... 68
Phone Operation.................................................................................... 68
Two-way radio operation ...................................................................... 68
Body-worn operation............................................................................. 68
Data operation ........................................................................................68
Approved Accessories........................................................................... 69
Electro Magnetic Interference/Compatibility............................................... 69
Facilities ................................................................................................ 70
Aircraft .................................................................................................. 70
Medical Devices........................................................................................... 70
Pacemakers............................................................................................ 70
Hearing Aids ......................................................................................... 70
Other Medical Devices ..........................................................................70
Use While Driving ................................................................................ 71
Operational Warnings................................................................................... 72
For Vehicles Equipped with an Air Bag ................................................72
Potentially Explosive Atmospheres ......................................................72
Blasting Caps and Areas ....................................................................... 72
Operational Cautions.................................................................................... 73
Antennas................................................................................................ 73
Batteries................................................................................................. 73
Cleaning and Drying Considerations .................................................... 73
Intrinsically Safe Radio
Information ........................................................................................ 75
FMRC Approved Equipment .......................................................................75
Repair of FMRC Approved Products ...........................................................77
Repair .....................................................................................................77
Relabeling ..............................................................................................78
Do Not Substitute Options or Accessories............................................ 78
Accessory Safety Information .......................................................... 79
Warranty............................................................................................ 81
Patent & Trademark Information ...................................................89
Owner’s Information......................................................................... 93
vii
Page 8

Important!
Be sure to read “Safety and General Information” on page
67 before usingyourphone.
viii
www.mot.com/iDEN
Page 9

Welcome
C
ongratulations on purchasing your Motorola iDEN r750plus data-capable,
multi-service, digitalportable phone. Superior features and state-of-the-art
technology help to keep you in constant touch with all your business and
personal contacts.
Your r750plus phone has so m any new and exciting features! With wireless
access to the Internet,youcan check on the latest news and weather, get stock
quotes,send and receivee-mail, anddownload information from yourcomputer.
A missed-call indicator lets you know that you received calls while you were
away.
And new ease-of-dialing features, such as Turbo Dial
Calls Received and Sent lists, help you to quickly make and return phone calls.
NOTE: Somefeatures maybenetwork dependent or subscription only, and
may not be available in all areas. Contact yourservice providerfor
more information.
The r750plus phone offers:
â
key and the Last 10
•Phone Mode—for cellular phone operation.
SeePage12.
•Private Mode—for two-way radio use to talk with one person.
SeePage28.
•Group Mode—for two-way radio use to talk with several people. See
Page 32.
•Net Mode—for accessing the built-in microbrowser.
See the Net Mode User’s Guide.
•Advanced Features—for monitoring multiple talkgroups, emergency
calls, status messages, and Isolated Site Operation (ISO) functions.
Dependent on Network and phone availability. See Page 34.
•Mail Services—for message, voice, a nd net mail. See Page 44.
•Fax and Data Transfer—for circuit data faxes and file transfers. See
Page 48.
NOTE: Thismanual describesthe features of your phoneas they wereset up at
the factory. However, yourcarrier or your organization may have
changed oradded features. Formore information,check with your carrier or your organization.
This manual provides information about how Net Mode works with various
featuresof your r750plus phone. For information on using the microbrowser
and other components of Net Mode, see the Net Mode User’s Guide.
1
Page 10

TTY Ac cess
TTY access is available on your phone. See the Wireless Data Services User’s
Guide for complete instructions.
Large-Print Manuals
A large-print version of the phone’sUser’s Guide is available. For more
information on Motorola productsfor people with disabilities, contactMotorola
Customer Care at 1-800-453-0920or TTY 1-877-483-2840.
Features of your r750 plus Phone
** Emergency Call Button(AFU only)
VibraCall
Status Light
Volume
Control/ List
Buttons
Push-To-Talk
(PTT) Button
MENUKey
Option Key
On/Off Key
* PunctuationKey
Alphanumeric
Keypad
*BackKey
Microphone
or
®
Alert On/Off Button
Antenna
Earpiece
Rubber
Over-Mold
Grip
Alphanumeric
Display
Option Key
Scroll Keys
Send/End Key
1
2
3
5
4
7
6
9
8
0
Mode Key
*HomeKey
*NextKey
Speaker Key
Accessory Connector
* These features are availablein the Net Mode browser.
** Emergency Call Key is red; VibraCall
NOTES: Remove theplastic filmlens protect or from the display before you use
your phone for the first time.
Some keys have multiple uses. For more information, see the Net
Mode User’s Guide.
Press any key or button to turn on the keypad backlight.
®
Alert key is black.
2
www.mot.com/iDEN
Page 11

Welcome
Antenna Install foroptimal signal.
Earpiece Hold to your ear to hear the other party.
Volume Control/
List Buttons
Push-To-Talk
(PTT) Button
ModeKey Press to changemodes.
Emergency Call
Button
or
VibraCall
Button
On/Off Key Pressandholdtoturnyourr750plusphone on or
StatusLight Shows thephone’s status.See Table 2 on page 5 for
Punctuation Key Add punctuationin the Net Mode browser (within
Back Key Return to the previous browser screen.
Microphone Use to speak during calls.
RubberOver-Mold
Grip
Alphanumeric
Display
MENUKey Press to scroll through menu options.
ScrollKeys Presst he left key to scroll backward or the rightkey
Option Keys Press the rightor left option key to select the menu
SEND/END Key Press to answer an incoming Phone call. After
Alphanumeric
Keypad
Next Word Key Press to display the next word choicein the browser
Home Key Press to returnto the browser Home menu.
Speaker Key Press to hear incomingcalls through the earpiece or
Accessory
Connector
®
Alert
Press to adjust volume levels in Phone, Private, and
Group modes.
Transmit a Private orGroup Call,or a CallAlert.
Press and holdthe PTT button to talk; release it to
listen.
Emergency CallButton: Activates Emergency
Group Callf eature (see
“EmergencyGroup
Call” on page 37).
VibraCall AlertButton: Turns on/off the VibraCall
Alert feature (see
“VibraCall® Alert” on page
15).
off.
more information.
T9™ Text Input).
Hold the phone more securely and comfortably with
the rubberizedgrip.
View up to four lines (12 characters per line) or six
lines (16 characters per line) on the display.
to scroll forward through menuoptions and lists.
option that appears in the display directly above the
key.
enteringa phone number, pressto begin an outgoing
Phone callor t o redial the entered phone number.
Press to end Phone calls.
Enter telephone numbers, Private CallIDs, and
alphanumeric characters.
(withinT9TextInput).
the speaker duringprivate and group conversations.
Connect battery charging, audio,and data
accessories.
3
Page 12
Attaching and Charg ing the Battery
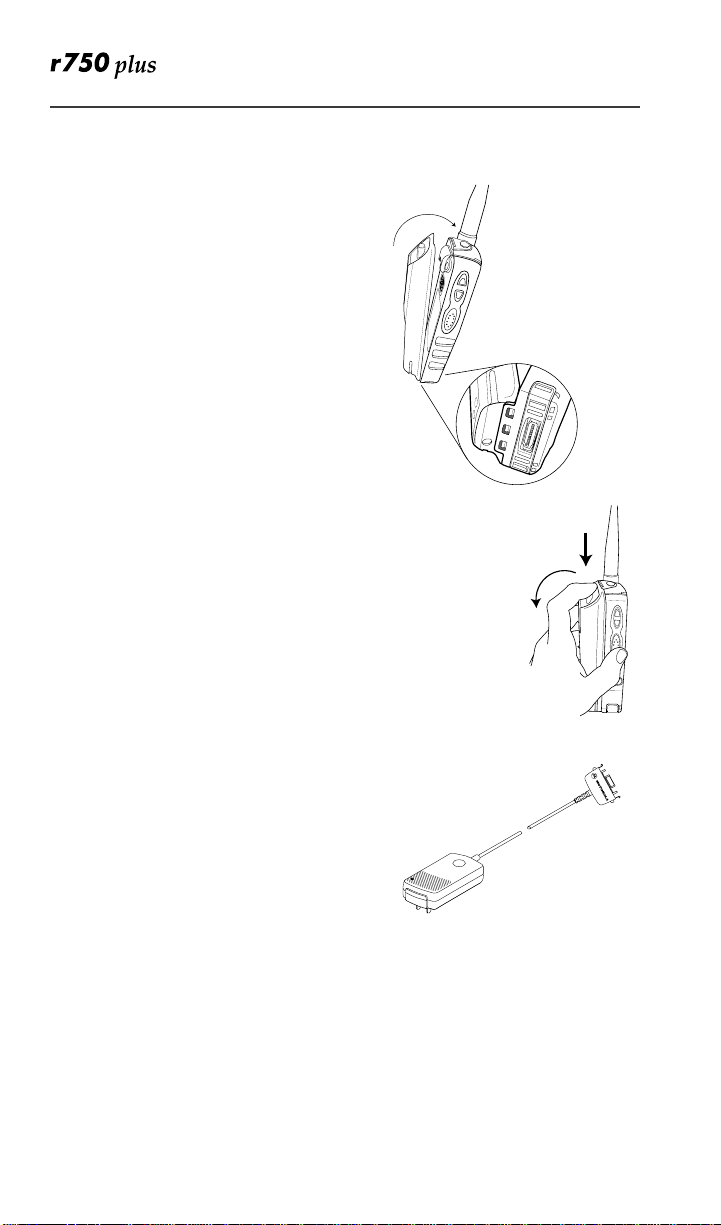
Attaching the Battery
1. Insert the battery bottom-end first into the battery guide holes on the housing of the phone.
2. Pushthe battery forward into the housing of the phone until it securely locks.
Detaching the Battery
1. Pressdown on the battery release button.
2. Pull on the battery and remove it.
Charging the Battery
You should charge your r750plus phone
batteryovernightbefore initial use. This
allows your batteryto achieveits maximum
capacityand life.
Connect the charger to the bottom of the
r750plus phone.
NOTE: For more information on charging
the battery, see
page 56
“Batteries” on
.
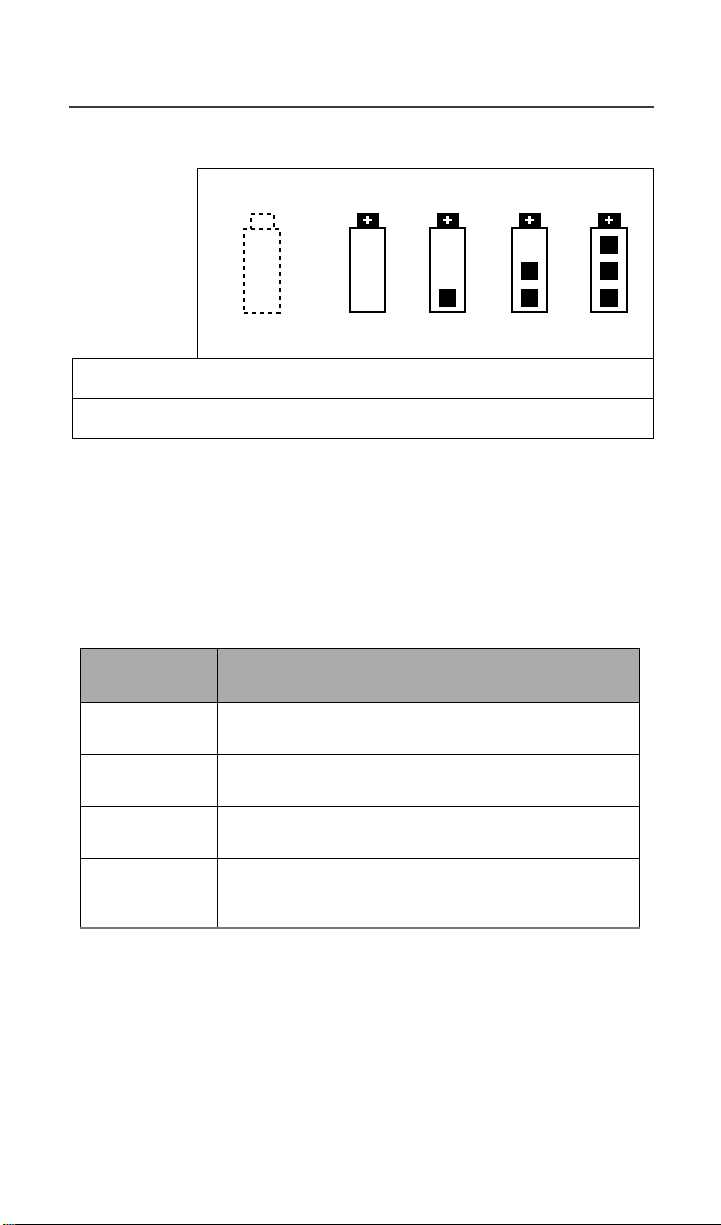
Battery and Charging Status
A low battery is indicated by a short, chirplike sound through the speaker. The battery
strengthindicator icon shows the remaining charge in your battery. Three bars
indicatesfull charge. As the chargeis reducedthrough use, the bars
progressively reduce from three to two bars, then one bar, then disappear. The
indicatorflashes when you have less than five minutes of talk time (see
Table 1 ).
www.mot.com/iDEN
4
Page 13
Welcome
Table 1: Battery Charging Status
Icon
Flashes
Charging Low Battery 0-30% 31-
Discharging Low Battery 0-10% 11-
60%
40%
6190%
4170%
91100%
71100%
Turning On Your r750plu s Phone
Pressandholdthe On/Off button f until a set of iconsappears on your display.
Next, a welcome message displayswhile the r750plus phone connects to your
carrier’s network.
The Status Light (LED) indicator on the r750plus phone showstheservice state.
See Table 2 .
Table 2: L ED Indicator
Status Light
r750plus phone status
Indicator
Flashing Red
Registering—your
r750plus phone is signing on to
your carrier’s network. Please wait.
Solid Red
No service—your
r750plus phone cannot sign on
because it is outside your carrier’sservice area.
Flashing
Green
Solid Green
In service—your
You can now place and receive calls.
In use—your
r750plus phone is ready to use.
r750plus phone is currently being used.
To make sure that you endedthe last call,
press e.
Turning Off your r750plus Phone
Press and hold the On/Off button f until you see the message“Powering Off”.
5
Page 14
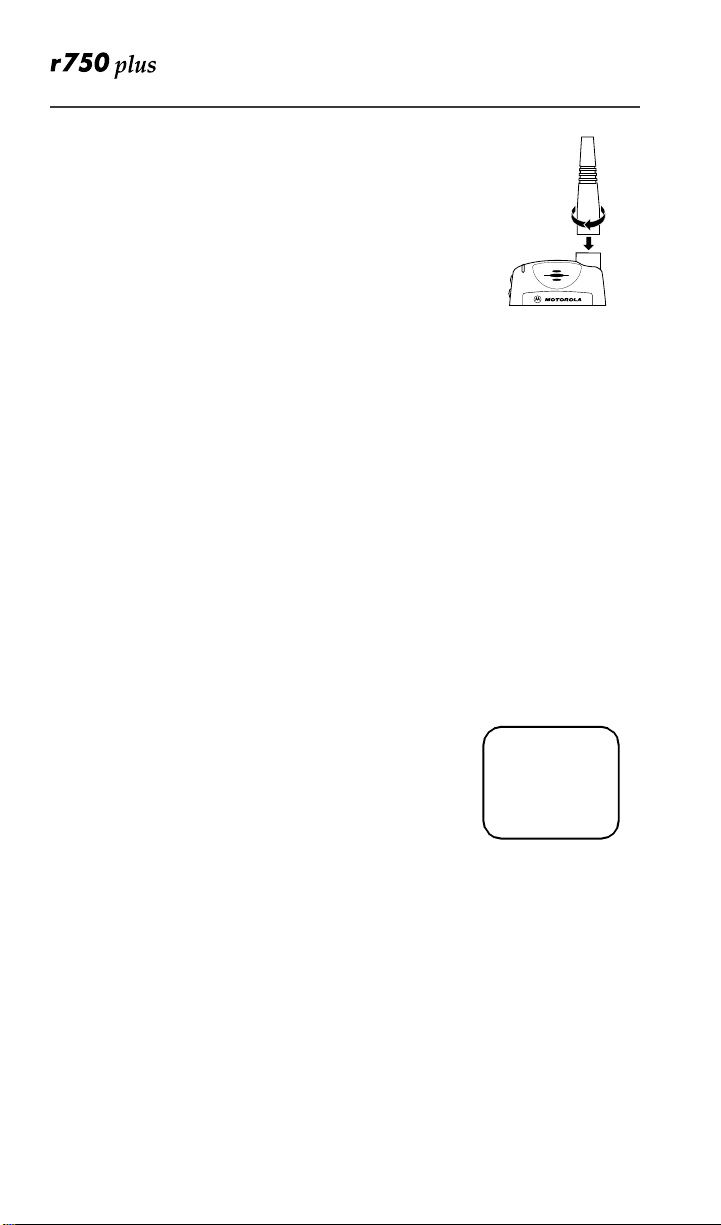
Connecting the Supp lied Antenna
Turn your r750plus phone off beforeinstalling or
removing the antenna.
Insert the bottom of the antenna into the screw-in base on
the top of the r750plus phone. Turn clockwiseby hand
until snug. Do not force.
NOTE: Connect only the suppliedNAF5075 antenna to
the antenna connector on your r750plus as it is
the only one that has been tested for compliance with Federal CommunicationsCommission requirements and authorized by them foruse on
this radio product. Please see
page 67
of this manual for morei nformation.
“Safety and General Information” on
Keypad L ock
The r750plus phoneincludes a Keypad Lock featurethatenables you to quickly
lock the phone’s keypad to avoid inadvertently pressing keys or placing calls.
Once Keypad Lock is activated, you can only perform the following tasks
(unless you receive an incomingcall, page, etc.):
•Turnyour phone On/Off
•Unlock the keypad
Activating Keypad Lock
Before locking your phone’s keypad,you may want to read this entire section to
learn how to respond to incoming calls, pages, etc.
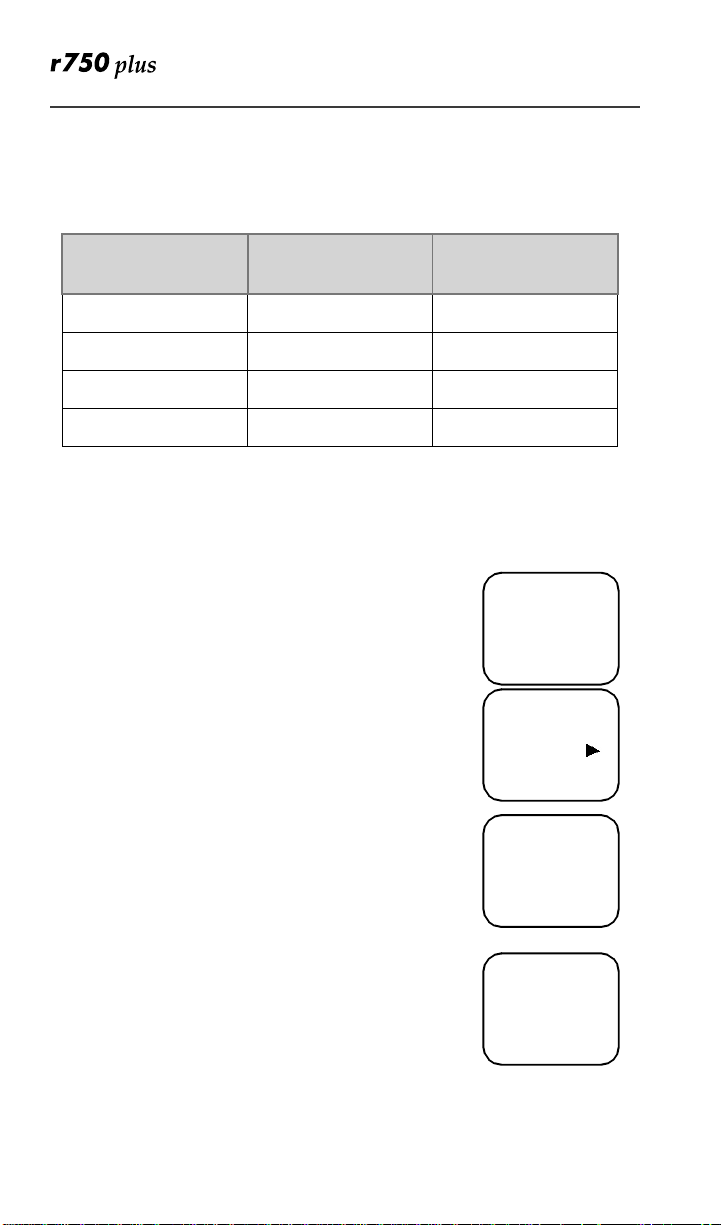
From the Phone Ready screen, simultaneouslypress*
and#.ThemessageKeypad Locked displays on your
phone.
NOTE: Whenever a key is pressed,while in Keypad
Lock mode,the “KeypadLocked” messagedisplaysasareminder.
adjb
Keypad
Locked
Receiving Incoming Calls
When you receive an incoming phone call, keypad lock will be temporarily
disabled. You m ay perform the following:
Presse to answer the call. Or,
•Presso under “End” to send the call to voice mail and reactivate
keypad lock.
6
www.mot.com/iDEN
Page 15

Welcome
Receiving New Mail Messages
When you receive a new mail message (see “Using Mail Services” on page 44
for more information), the keypad lock willbe temporarily disabled. You may
perform the following:
•
Presso under “Later” to return to Phone Ready and reactivate the
lock. Or,
• Presso under “Now”.Presso under “Read”.Presso under
“Save” or “Erase”. Once you have finished, press o under “Exit”
to return to Phone Ready and reactive the lock.
NOTE: If you have disabled the Message Mail Notification feature, only the
c icon will display. You will not receive the read Now/Later
options.
Receiving Voice Mail
When you receivea new voice mail (see “Voi ce Mail” on page 45) keypadlock
will be temporarily disabled. You mayperformthe following:
•
When New Voice MailWaiting displays, pressounder “Exit” to
return to Phone Ready and reactivate the lock. Or,
• Presso under “Dial” to access Voice Mail service. Once you have
finished, press # to exit Voice Mail, return to Phone Ready and
reactivate the lock.
NOTE: If you have disabled the Message Mail Notification,g icon will
display, however, “New Voice Mail Waiting” will not appear.
ReceivingPrivate(Two-Way Radio) Calls
When you receive an incoming private (two-way radio) call (see “Receiving a
Private Call” on page 28) the phone will automatically activatethe applicable
mode. Once the call is terminated and the DisplayTimer has expired,the phone
willreturn to Phone Readyand reactivate the lock.
Deactivating Keypad Lock
From the Phone Readyscreen, simultaneously press*
and #.ThemessageKeypad Unlocked displays on
your phone.
adjb
Keypad
Unlocked
7
Page 16
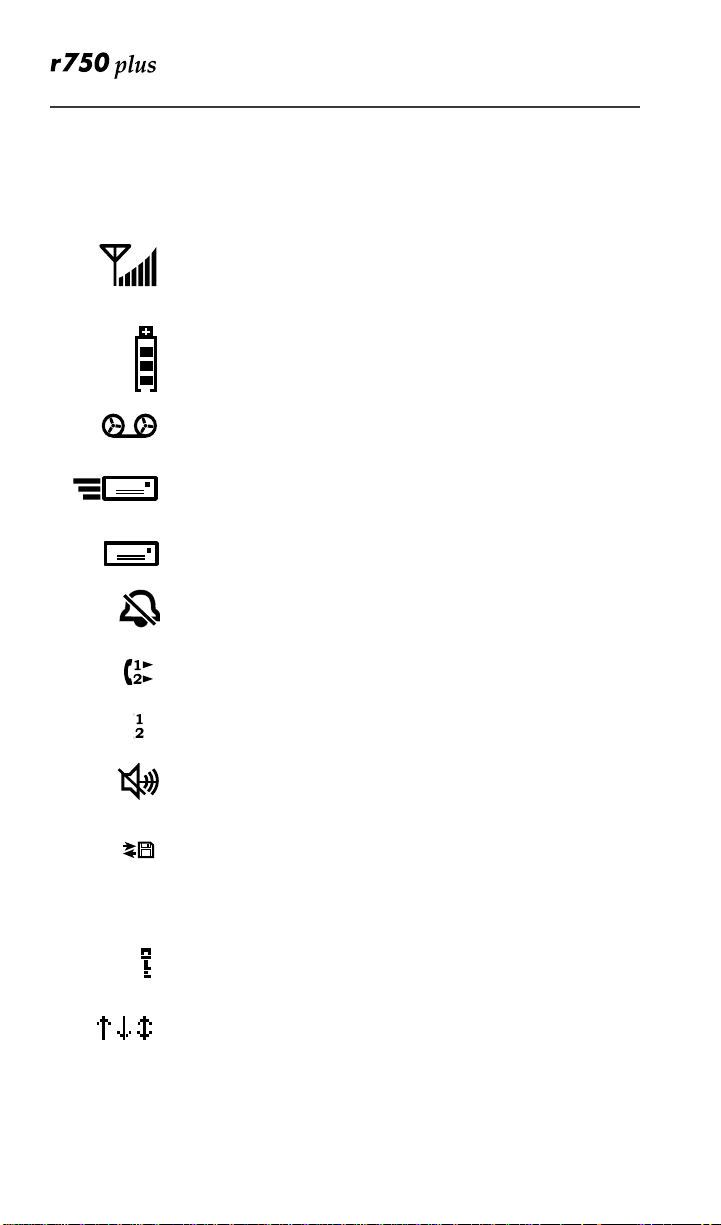
Display Icons
Displayiconsappear on the screen to inform you of existing conditions. See the
following list.
The following icons may appear along the topof the display.
Signal StrengthIndicator
Shows the signal strength. Six bars indicate the strongest
signal.Callsandmessages may not be sent or receivedin
no-signalareas.
Battery Strength Indicator
Shows the remaining charge in your battery.Three bars
show full charge. The indicatorflashes when you have
less than five minutes of talk time remaining.
Voice Mail
Indicates that unplayed messages are waiting in your
voice mail box.
New Message Mail
Indicatesthat you have new text messages in your mail
box.
Unread MessageMail
Indicates that you have unread Message Mail.
Vibrate All
Indicatesthat the VibrateAll option is turnedon.You will
not hear a r ing tone.
Call Forward
Indicatesthat incoming phone calls are being forwarded.
Active Line Indication
Displays the active phone line (1 or 2).
Private/Group Speaker
Indicatesthat the Private/Group speaker is off. You will
hear calls through the earpiece.
Packet Data
Indicates packet data registration. The blinking arrows
indicatesend and receive activity. For m ore information,
see the WirelessDataUser’sGuide.
Some of the following icons mayappear in the browser.
Secure Packet Data Connection
Indicatesthat your packet data information is encrypted
during transmission.
More Information
Indicatesthat there is moretext to read above, below, or
above and below the current screen.
8
www.mot.com/iDEN
Page 17

Welcome
About Modes and Menus
Modes and menus are the navigational tools, providing access to the various
featuresof your r750plus phone. Pressing the Mode keym takes you through
the mode choices. Pressingthe Menu keyn takes you through the menu
options within each mode.
There are four modes:
•
Phone—for cellular phone calls. See Page 12.
•
Private—for one-to-one radio calls. See Page 28.
•
Group—for radio calls with all individuals in a designated talkgroup. See
Page 32.
Net—for browseruse. See the Net Mode User’sGuide.
•
To change modes:
Pressm until you see the desired mode.
To select menu options:
Pressn untilyou see the desired menu option,then presso underthedesired
menuoptiontoselectit.
Setting the Time and Date
If your carrier providesthis option, youcansetyour phone to displaythecurrent
time and date. Unless the phone is turned off, it continues to display the current
time during a loss of service.
You have a choice of a 12- or a 24-hourclock format. See Table 3.
NOTE: When thisfeaturei s activated,your phoneautomaticallydisplays local
time.
Table 3: Time Display Options
12-Hour Display 24-Hour Display
12:00a 00:00
6:25a 06:25
12:00p 12:00
6:25p 18:25
9
Page 18
You have a choice of either a MM/DD (month/day) or a DD/MM (day/month)
date format. See Table 4:.
Table 4: Date Display Options
Date
Month/Day Format
(MM/DD)
Day/MonthFormat
(DD/MM)
January 2nd 01/02 02/01
January 31st 01/31 31/01
October 9th 10/09 09/10
December 31st 12/31 31/12
If your carrier activates the time and date, they are displayed on the third line in
all modes(Phone, Private, Group,N et). The time of day is also shownduringan
activePhonecall. The time and date are not displayed in Group mode whenyou
select an Area option.
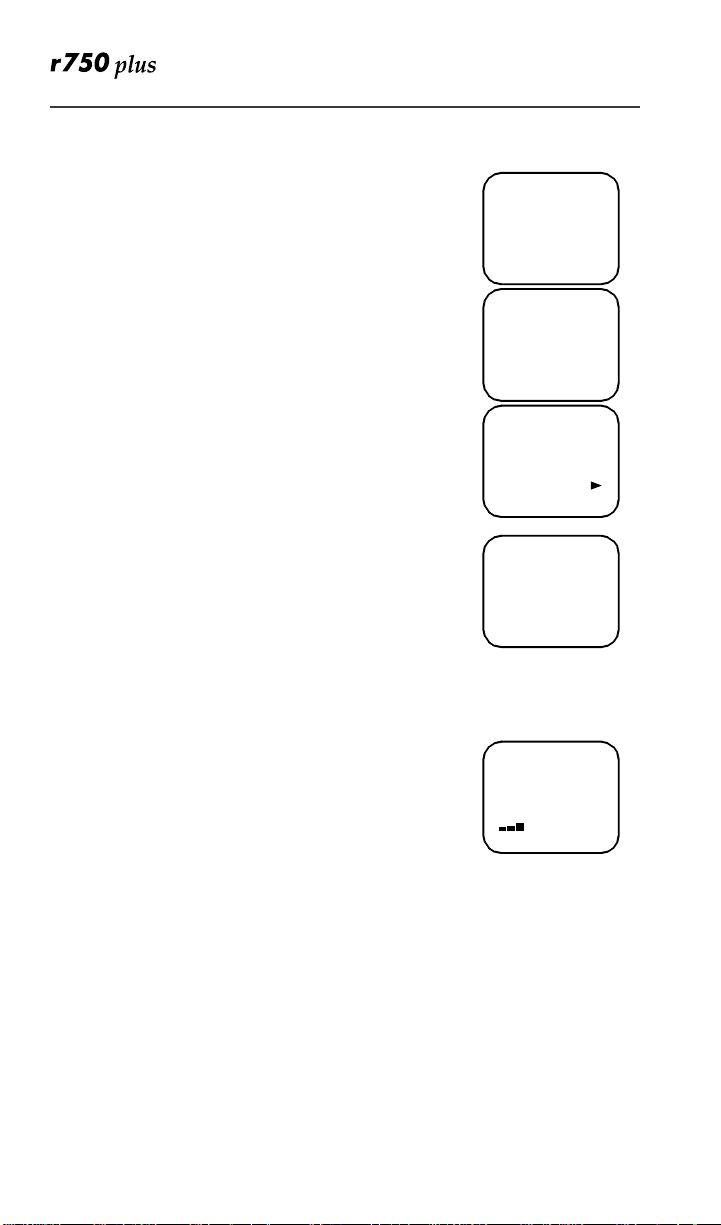
To set the time and date format:
1. Press*,#, 7,1.
2. Select “Ok”. The Time/Date screen displays.
The default (preset) time and date format that displays
dependson your carrier. You can acceptthe default format
or select an alternate format.
adjb
71=Time/
Date
Exit Ok
adjb
71=Time/
Display:On
Exit Off
3. Pressr until you see the Time Format screen.
4. Do one of the following:
• To use the 12-hour format, go to the next step.
• To use the 24-hourformat, select “24hr”. (See
adjb
Time Format
12 Hour
Exit 24hr
Table 3 on page 9.)
5. Pressr until you see the Date Format screen.
6. Do one of the following:
7. To use the MM/DD format, select “Exit”.
8. Or to use the DD/MM format,select “DD/MM”,then
adjb
Date Format:
MM/DD
Exit MM/DD
“Exit”. (See Table 4 on page 10.)
10
www.mot.com/iDEN
Page 19

Welcome
9. Select “Exit” again to leave the Time/Date Programmingoption.The
Readyscreen for each mode(Phone, Group,Private, andNet)nowdisplays
the selectedtimeand date formats.
Changing the Display Language
You can customize your r750plus phone to display one of four languages:
English,French,Spanish, or Portuguese.
To change the displayed language:
1. Press *, #,7,0.
2. Select “Ok”.
Press l orr to scroll through the language options.
Selecting“Exit” at any time retainsthe currentlanguage
selection.
3. When the desired language appears on your display,
select“Ok”. The displayed text immediatelychanges
to the selected language.
4. Select “Exit”.
The language that you select will be the displayed language.
adjb
70=Language
English
Exit Ok
adjb
Language
Français
Cancl Ok
Selectable B ac klight Timer
Your phone’s backlight is what illuminates the display when you receive or
make calls. Through your Programming Menu (*,#,16), you can customize the
amount of time that your backlight remains illuminated: 0, 10, 20, or 30
seconds. By choosingzero (0) seconds, all keypad backlighting, and the Status
Light, remains off (is disabled). This means, when choosing 0 seconds, the
r750plus phone enters completely dark mode. See “Setting Programming
Menus” on page 49 for more information.
11
Page 20

Making Phone Calls
In addition to making and receiving phone calls in Phone mode, you can
forward calls, use call waiting, put calls on hold, and create and use stored lists.
Phone Ready is the main screen.
NOTE: See “AdditionalPhone Services” on page 17for more information.
You can place a call by entering the phone number on the keypad.
1. From the “Phone Ready” screen, using the keypad, enter the desired number.
If you make a mistake, pressl once to move back one
digit, or select “Cancl” to start over.
2. Presse to place the call.
3. To end the call, presse .
Using Other Dialing Methods
To use other dialing me thods such as Scroll, Speed Dial, or Name
Search, name s and numbers must be programmed into your phone. See
“Creating, Editing, and Using Stored Lists” on Page 22.
Scroll
1. Fromthe Phone Ready screen,pressl orr to scroll backward or forward
through the stored list of numbers and names.
2. Presse to place the call.
3. To end the call, presse.
adjb
Phone Ready
Line1
10:42a 11/06
Exit Ok
Speed Dial
1. Fromthe Phone Ready screen,pressn untilyou seethe “Spd#” option on
thelastlineofyourdisplay.
2. Select “Spd#”.
3. Enterthe assigned speed-dial number (1-100). You will see the stored
name and phone number associated with the speed dial number.
4. Presse to place the call.
5. To end the call, presse.
www.mot.com/iDEN
12
Page 21

Making Phone Calls
Name Search
1. FromthePhoneReadyscreen,select “Name”.
2. Using the keypad, enter the first letter of the desired name, for example, to
search for the name Bob:
3. Enter “B” by pressing 2 twice.
4. Press r to scroll through allthe names starting with “B” until you see “Bob”.
5. Press e to place the call.
6. To end the call, press e.
AutomaticRedial
If you receivea “System Busy,Try Later” message, presse to have your phone
automaticallyredial the number. You willhear a ring-back tone whenthe call is
successful.
Last Num ber Redial
To redial the last number that you called, presse.
Turbo Dial
®
Key
TurboDial key enables youto quickly place a phonecallby simply pressingand
holding the numeric key on the keypad that corresponds to the stored entry in
your Phone list directory.There are nine Turbo Dial positions, 1 through9.
NOTE: If you areon a Phonecall, placethe call on hold before usingTurbo
Dial key.
From the Phone Ready screen:
1. SelectoneofthefirstnineentriesinthePhonelist
using key numbers1 through 9. For example,press
1 for Turbo dial #1. Keypad number 0 is not avail-
able for Turbo Dialing.
2. Press and hold the desired keyfor two secondstoactivate the Turbo Dial key. The phone begins to dial the
number and “Phone Ready” changes to “Phone-In
Use”.
adjb
Phone Ready
1
Cancl
adjb
Phone-In Use
Office
12:45p 10/18
13
Page 22

Plus Dialing
This feature enablesyou to place an International call from any country-without entering the local international access code.
1. Pressand hold0 fortwo seconds. A “0” appears, then changes to a “+”
that precedestheappropriate international access code neededto place the
call.
2. Enterthe international telephonenumber.
3. Presse.
Hands-Free Speakerphone
The r750plus phone provides the convenience of a speakerphone for holding
impromptu meetings or listening to your voice mail messages.
During speakerphone operation, you may either speak or listen, but you cannot
do both at the same time.
To use the speakerphone:
1. Select “Spkr.” The “Spkr” option flashes while the speakerphone is on.
2. Placethe phone 15-30inches(38-76 cm)away from you. In a noisy environment,you may want tomovether750plus phone closertoyou for better
transmission.
NOTE: If there is background noise in your area, you may have difficulty
hearing a caller’s voice or messages. To resolveth is problem:
(1) Pressn until you seethe “Mute” menuoption.
(2) To listen, pressounder“Mute”. The display changes from
“Phone-In Use” to “Phone-Mute”, indicating that the microphone is
muted.
(3) To speak, pressounder“Mute” again. Thedisplay changes from
“Phone-Mute” to “Phone-InUse”, indicating that the microphone is
on.
While the microphone is muted, you can hear incoming audio, but a
caller cannothear any speech coming from yourr750plus phone.
Rec e iving a Phone Call
Press one of the following keys:e, or*,or#. Or
press any numeric key (0 through 9). To activate the
speakerphone option, select “Spkr.”
Ending a Phone Call
Presse.
www.mot.com/iDEN
14
adjb
Incoming
Phone Call
End Spkr
Page 23

Making Phone Calls
What Is My Phone Number?
Press*,#,1 to display your own phone number.
adjb
VibraCall®Alert
VibraCall Alert isa vibration alertsystem that notifies you
of incoming Messages, Phone, Private, Group, and Data
calls.You can set a vibration alert for all services or for individualservices.
Whenyou setvibration alerts, they are setonlyforthe current line.Ifyou have a
second phone line, you must select that line and repeat the procedure for
selecting all services or selecting individual services to vibrate.
The alert choices are:
• Vibe All—produces a vibration alert for all incoming calls and messages.
• Phone Vibrate—produces a vibrationalertforincoming phone and circuit-
data calls.
• Phone Vibrate/Ring—produces a vibrationalert followedbya ring tone for
phone and circuit-data calls.
• Mail Vibe—produces a vibration alert for mail messages and net alerts.
• Group/Prvt Vibe—producesa vibration alert for incoming group and
private calls.
NOTE: If VibraCallAlert is set forincoming calls and messages, the power-up
sequence includesa b rief vibrate cycle.
1=Own Ph#
9545553434
Exit Edit
Selecting VibraCall Alert for All Incoming Calls and Messages
AdvancedFeature Units (redbutton on topofhousing): To
set a vibration alert for all incoming calls and messages:
1. Press*,#,9.
2. Select “All”. You will receive a brief vibration alert.
After you set the alert, the display returns to the previous
mode and q (the Vibrate All icon) appears at the top of
your display.
All Other (Non-AdvancedFeature) Units (black button on
top of housing): Perform the same steps as described above, or press the black
button on top of the r750plus phone.
adjb
9=Vibrate
Alert:Off
Exit All
aqjpb
Phone Ready
Line1 Vibe
10:54a 12/09
Name Mail
15
Page 24
Selecting VibraCall Alert for Individual Services
To set a vibration alert for specific phone or mail services:
1. Press*,#,9.
2. Pressn until you see t he “Selct” menu option.
adjb
9=Vibrate
Alert:Off
Exit All
3. Select “Selct”. The first choice is Phone Vibrate.
4. To view the Vibe/Ring vibrationalertchoices, press
n on the keypad.
adjb
9=Vibrate
Alert:Off
Selct
5. To view other choices, press r.
• To receive vibrationalerts only for Mail, select
“Mail Vibe”, then select “On”.
• To receive vibration alerts for Group and
Private calls, select “Group/Prvt”,thenselect
“On”.
adjb
Phone
Vibrate:
Vibrate Off
Exit Vibe
6. Select “Exit” to return to the Vibrate Alert menu.
7. Select “Exit” again to return to the previous mode.
adjb
Group/Prvt
Vibe:Off
Exit On
Setting th e R ing er Vo lum e
You canadjustthe ringervolumefor incomingcalls. If you havea secondphone
line, you must set each line separately. Be sureto select the desired line before
settingthe volume.
1. Press*,#, 3, 0.The“30=Ringer Volume” screen displays.
The display shows yourcurrent ringer volume.
2. Pressthe Volume Controlbuttonson the side of the
phone to listen as you raise or lower the volume. At
the lowest setting,the screendisplays “Ringer Volume Silent”.
3. Whenyou reach the desired level, select “Exit”.
adjb
30=Ringer
Volume
Exit
Setting a Ring Style for the Alternate Line
1. From the Phone Ready screen, pressn until you see “Line2”.
2. Select “Line2”.
3. Repeatthe procedure for "Setting an Alert Tone Style", above.
www.mot.com/iDEN
16
Page 25

Additional Phone Services
Additional Phone Services
NOTE: Somefeatures maybenetwork dependent or subscription only, and
may not be available in all areas. Contact yourservice providerfor
more information.
Call Waiting
Using the CallWaiting feature, you cananswer an incoming call when you are
on another call. Call Waiting is on unless you turn it off for a particular call.
1. After the alert tone, your display shows the incoming
number and asks “Accept Call?”. To accept the call,
select“Yes”. To decline the call, select “No”.
2. Press n, thenselect “Hold” to place the secondcall
onholdandreturntothefirstcall.Selecting “Hold”
switches you between the two calls.
3. To end the active call, press e.
T urning Off Call Waiting
adjb
5551212
Take Call
On Line 1
No Yes
adjb
Call 1-Hold
5551212
10:54a 12/09
Hold Name
You can turn off Call Waiting if you do not want to be interrupted during a call.
1. Press n until you see “Wait”, then select “Wait”.
2. Select “Off”. Call Waiting will be disabled for one call—but will automatically reset to “On” after that call.
Call Hold
When you are on a call, you can place the call on hold and make a second call.
1. To place the active call on hold, press n, then select “Hold”.Youmay
then answer or place another call.
2. To removethe call from hold, pressn, then select “Hold” again.
17
Page 26

3-WayCalling
If your carrier provides 3-way calling, you can combine
two ongoingphone callsinto one conversation. Thisoption
is available only when you initiate the second call.
After you place or receive a phone call:
1. Select “3way”. Thisaction places the current callon
adjb
Phone-In Use
5551212
10:42a 11/06
Hold 3way
hold.
2. Enterthe phone number for the second call and presse.
3. Whenthe secondcall is connected, select“3way” to join the
calls.Both phone numbers and “3way” appear on your screen.
4. To end the 3-way call, presse.
Alternate Ph one Line
If your phone is activated with two phone lines, you can switch between them.
To change phone lines, your phone must be at the Phone Ready screen. The
followingsettings are independent for each phone line. When you enablea
setting, it appliesonly to the active line.
• Ringer Volume
• Auto Answer
• One-minute Beep
• Automatic Display Timer
• Resettable Timer
• Total Call Timer
• Selectable Ring Styles
• Call Forwarding
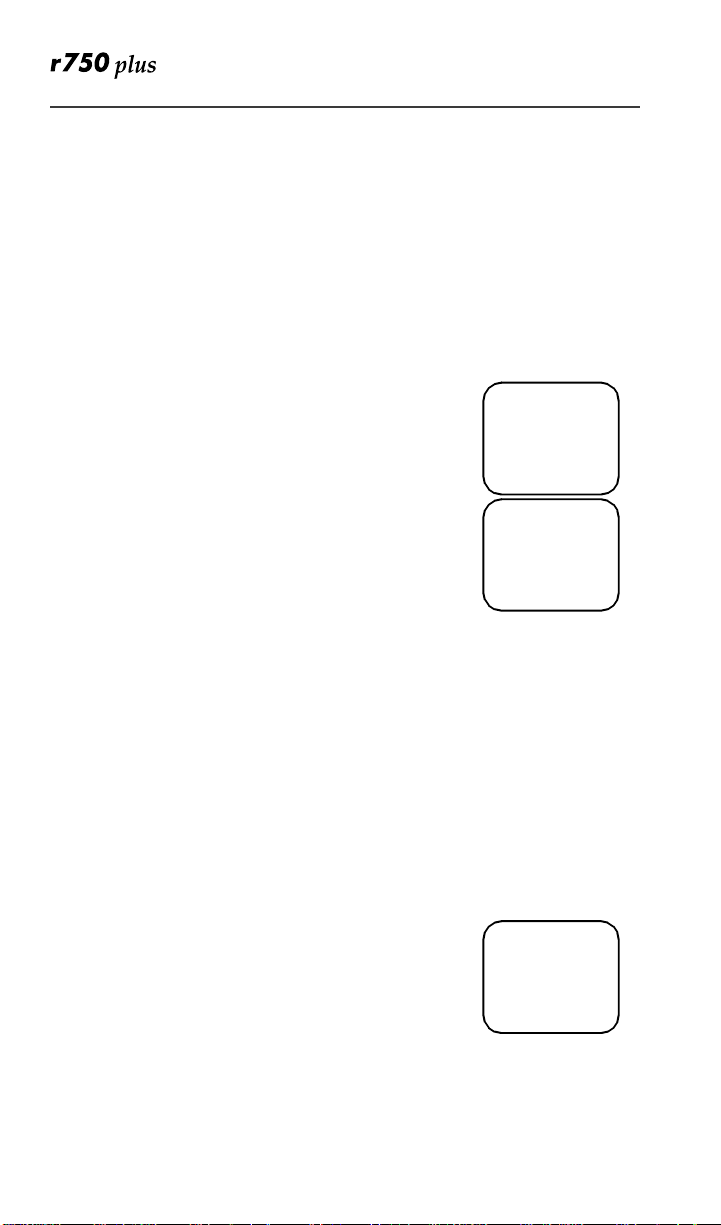
Setting the Active Line
At the “Phone Ready” screen:
1. Pressn until you see “Line2”. (If you are on Line 2, you will see “Line1”.)
2. Do one of the following:
• Select “Line2” to activate Line 2 when Line 1
is the active line.
• Or, select “Line1” to activate Line 1 when Line 2 is the
active line.
Outgoing callswill be made on the selected line.
www.mot.com/iDEN
18
adjb
Phone Ready
Line1
11:48a 08/21
Line2
Page 27

Additional Phone Services
ReceivingaCall
You can receive callson either line, regardless of the active line setting.
• If you receive a call on the currently active line, that icon simply flashes.
• If you receive a call on the line that is not currently active, the active line
icon remains lit and the alternate line icon flashes.
Receiving a Call on Your Alternate Line
1. Select “Ye s” to answerthecallon the otherline. Your previous call will be placedon hold.
2. Do one of the following:
• To end the call, presse.
• Or, to place the current call on hold, or to
adjb
3055551212
Accept Call
On Line 2?
No Yes
toggle betweencalls,pressn, then select
“Hold”.
When the call ends, the phone remains active in the last active line selected.
Receiving a Phone Call Using Speake rphone
Select “Spkr” to activate the speakerphone.
Missed Call Indicator
Your r750plus phone notifies you of received, but
unanswered, phone calls. If you subscribe to Caller ID, the
caller’s phone number is stored in your Last 10 Calls
Receivedlist. Your screen displays a flashing message,for
example,“2RcvdCalls”, with the number of missed calls.
Press any key to clear the flashing indicator.
To retrieve the missed calls:
1. FromthePhone Ready screen, press n. The menu optionschange to “Calls” and “Spd#”.
2. Select “Calls”. The Rcvd Calls screen opens with the
number, time, and dateof the last call that you
received.
3. Scroll to continue viewing the list.
adjb
Phone Ready
Line1
2 Rcvd Calls
Name Mail
adjb
Phone Ready
Line1
10:42a 11/06
Calls Spd#
adjb
Rcvd Calls
1=5552222
10:42a 11/06
Cancl Store
19
Page 28
Call Forwarding
Call forwarding letscallers reach you wherever you are. Youhave two options:
forward all incomingcalls(unconditional)or selectthose circumstances
(conditional) when you want your calls forwarded.
Unconditional Call Forwarding
Unconditional call forwarding sends all incoming callsto the designated
number.
NOTE: When you setunconditionalcall forwarding,your phone does notring.
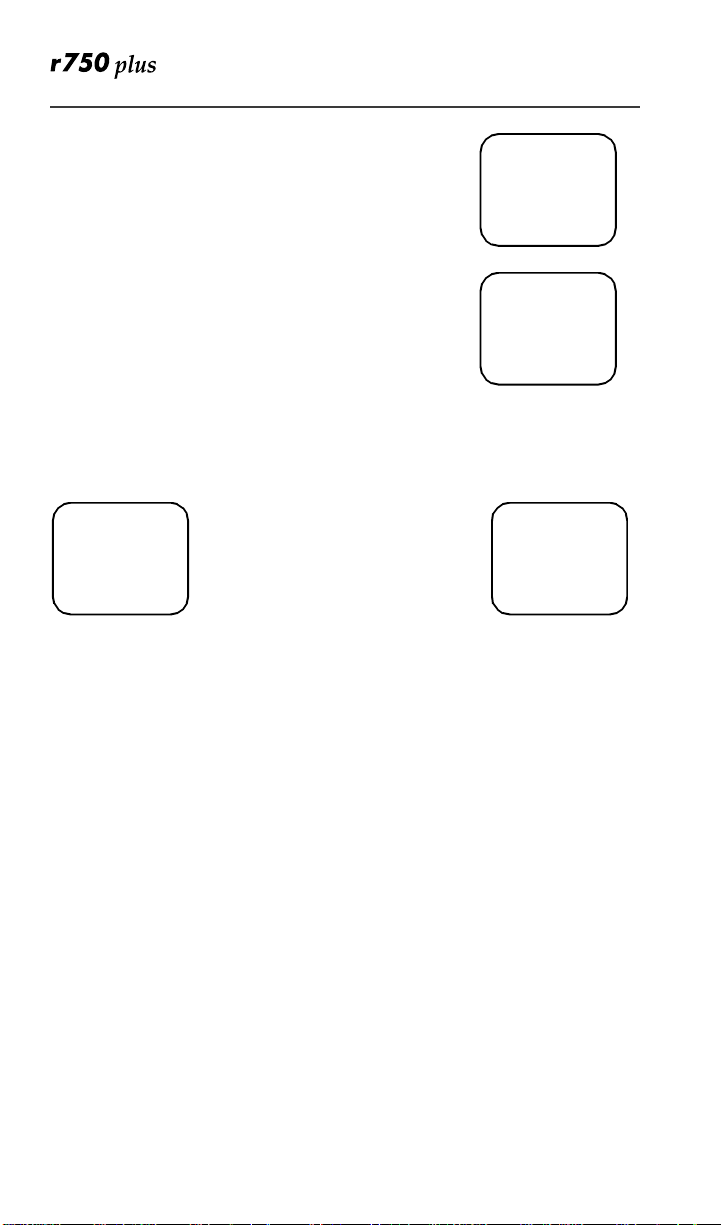
1. FromthePhone Ready screen, pressn until you see “Forwd” on the last line of the display.
2. Select “Forwd”.
3. To select the number where you want your calls for-
warded, do one of the following:
• Enter a number.
• Or, press the scroll keys to select a number
from your stored list.
4. Select “On”.
5. Afterthe “Please Wait” message displays, select “Exit”.
6. Notice that the Call Forward icon z appearson your displaywhen Uncon-
ditionalCall Forwarding is set.
adjb
Phone Ready
Line1
9:06a 9/03
Forwd Spd#
adjb
Forwd:Off
To:5551212
Exit On
Conditional Call Forwarding
You may want to forward your calls when your r750plus phone is:
• Busy on another call or accessing the browser (Busy)
• Not answered (NoAns)
• Outside the service area (NoRch).
NOTE: You must turn off Unconditional Call Forwarding before you can set
Conditional Call Forwarding options.
1. FromthePhone Ready screen, pressn until you see
“Forwd” on the last line of yourdisplay, then select it.
www.mot.com/iDEN
adjb
Phone Ready
Line1
9:06a 9/03
Forwd Spd#
20
Page 29

Additional Phone Services
2. Press n once again until you see “Busy” and “NoAns” on the last line of your display.
3. To forward your calls when your phone is in use, select“Busy”.
4. To forward your calls when you do not want to answerthem,select “NoAns”.
5. Press n again until you see “NoRch” and “Rc l#”.
• To forward your calls when you cannot be
reached, select “NoRch”.
• To see the call forward number,select “Rcl#”.
6. After you select the call forward option, either enter
the number where you want your calls to be forwarded, or press the scroll buttonsandselect a number.
7. Select “On”.
8. Select “Exit”.
9. You can set more than one condition by repeating steps 2 through 6.
adjb
Forward:Off
To:
Busy NoAns
adjb
Forward:Off
To:
NoRch Rcl#
21
Page 30

Creating, Editing, and Using
Stored Lists
A stored list is a directory of phone numbers and Private IDs and their related
names. Storedlistsare convenient because you do not have to remembernames
and numbers—you simply scrollthroughyour storedlist.
CombinedPhoneNumberandPrivateIDList
You can set a combined Phone and a Private ID with the associated name, which
eliminates the need to programthePrivate ID separately.You can add up to 100
numbers to your Phone list, store them with names, and assignthem to speeddial numbers.
Entering Numbers
To enter a number, press the corresponding key on the keypad.
Entering Names
To enter a letter, press the key the required number of times, which is related to
the letter’s position on the key. Table 5 describes how to enter eachletteron the
7 key.
Table 5: Entering Letters and Numbers on the Keypad
To enter:
P once.
Q twice.
R threetimes.
S four times.
7
To shift to lowercase letters, press and hold # after a letter is entered.
www.mot.com/iDEN
five times.
Press
7
22
Page 31

Creating, Editing, and Usi ng Stored Lists
Storing Names and Numbers
1. Press *,#,2,0.
2. Select “Ok”.
The next screen briefly displays the remaining number of
phone numbers and private IDs that you can store.
3. Enter the name thatyou wish to store.
Select “Store”.
See Figure 1 . for an example of entering a name.
Example
To store the name “TIM”:
1. Enter “T” by pressing 8 once.
2. Enter “I” by pressing
3. Enter “M” by pressing
4 three times.
6 once.
adjb
20=Phone/
Prvt List
Exit Ok
adjb
Available
98 Phone #
3 Prvt IDs
adjb
Enter Name
-
Exit Store
Figure 1. Entering a Name
2. Enter the phone numberthat you want to associate with this name and select “Store”.
To skip the Phone Number entry, select “Skip”.Youwill
go directly to the “Enter Prvt ID Number” screen.
The next screen displays the name that you entered and a
flashingspeed-dial number where the entry will be stored.
3. Do one of the following:
• To accept the speed-dialnumbershown, select
“Store”.
• To change the speed-dial number, enter
the desired speed-dial number. The speeddial number stops flashing.
4. At the next screen, enter the Private ID numberassociated withthe name that you entered then select
“Store”.
To skip the Private ID number entry, select “Skip”.
adjb
Enter Phone
Number
Skip Store
adjb
TIM
Spd#=3
Cancl Store
adjb
Enter PrvtID
Skip Store
23
Page 32

Pause Digit Entry
When storing a number, you can program your phone so that it will not only dial
a number but also pause and enteranother series of numbers such as a personal
identification number (PIN) or password. This feature is particularly useful for
automated services such as voice m ail and bankingsystems.
Here’s how it works: Let’s say you have a company voicemail accountthat you
frequently check whileon travel. And, to accessthat account currently you must
do the following:
• Dial your work number;
• Press * while the voice mail greeting is being played; and
• Enter your PIN to access your messages.
You can program your r750plus phone to enter allof the above informationfor
you. All you have to do is separate each entry with a pause.If you were to
program your phone to input the above information, the stored data would look
like this: 17035551234P1234. In this example, the first eleven digits represent
the number that must be dialed to accessyour voicemail. The P represents a 3
second pause.The last four digits representyour PIN.
You can use this feature not only to enterPINs and passwords but also to have
the phone automatically select menu options (i.e., press 1 to hear messages).
To create a three-secondpause followthe steps below:
•
Press and hold* for two seconds. The pause symbol (P) will
appear.
NOTE: You can enter up to 20 numbers/characters in a single entry, stored or
dialed. If you use a system that will not let you enter an option until the
automated message has played in its entirety, you can program your
phone to pausefor more than3 seconds.For example, performing the
abovestep twice will programtwo pausesand cause yourphone towait
6 seconds before entering the next set of numbers.
Editingand Erasing Phone List Entries
1. Press*,#, 2, 1.
2. Select “Ok”.The“Edit Entry?” screen displays.
3. Do one of the following: a. To edit anentry, select“Ok”.
(1) At the “Edit Entry” screen, pressr until the desired entryappears,
then select “OK.
(2) At the “Edit Number” screen, edit the phone number, if you wish,
then select “Store”.
(3) At the “Edit Name” screen, edit the name, if you wish, then select
“Store”.
(4) At the “Edit Spd#” screen, edit the speed number, if you wish, then
www.mot.com/iDEN
24
Page 33

Creating, Editing, and Usi ng Stored Lists
select “Store”.
b. To erasean entry:
(1) At the “Edit Entry” screen, press l orr.
(2) At the “Erase Entry” screen, select “Ok”.
(3) Scroll to the desired entry, then select “Ok”.Atthe“Erase Entry?”
screen,select “Yes”.
4. Select “Exit” to close the Phone List Edit screen.
Editing and Erasing Private ID List Entries
1. Press *, #, 2, 2.
2. Select “Ok”.The“Edit Entry?” screen displays.
3. Do one of the following: a. To edit an entry,select “Ok”.
(1) At the “Edit Entry” screen, press r untilthe desired entry appears,
then select“OK.
(2) At the “Edit ID” screen,edit the number,if you wish, then select
“Store”.
(3) At the “Edit Name ” screen,edit the name, if you wish, then select
“Store”.
b. To erase an entry at the “Edit Entry” screen, press l orr once, then
select “Ok”.Pressrto scroll to the desired entry, then select “Ok”.
At the “Erase Entry?” screen, select “Yes”.
4. Select “Exit” to close the Private ID List Edit screen.
25
Page 34

Last 10 Calls Received and Sent Lists
If you subscribe to your carrier’s Caller ID service,you canview, dial, and store
the list of the last ten phonenumbers received and the last ten phone numbers
dialed.
The most recent call sent or received appears first in your call list.
From the Phone Ready screen:
1. Pressn. The menu options change to “Calls” and “Spd#”.
2. Select “Calls”. The Rcvd Calls screen opens.
adjb
Phone Ready
Line1
12:55p 10/18
Calls Spd#
If the “Store” option appears,the numbercurrently displayed is not in your Phone list. Toadd the number to
your list, select “Store”.
If you want to see the Sent listbutthe “Store”option is
on your display, press
n until you se e the “Sent” menu
option.
adjb
Rcvd Calls
1=5554444
12:55p 10/18
Cancl Store
3. Do one of the following:
• To view the Calls Received list, use the Scroll
keytovieweachentry.
If the “Store” option is on your display,press n until
you see the “Rcvd” menu option.
adjb
Rcvd Calls
2=MAILBOX
12:56 10/18
Cancl Sent
• Or, to view the Calls Sent list, select “Sent”.
UsetheScrollkeytovieweachentry.
4. To view the Calls Receivedlist again,s elect “Rcvd”.
5. To close the Calls list, select “Cancl”.
adjb
Sent Calls
1=JOHN
12:56p 10/18
Cancl Rcvd
Quickstore of Phone Numbe rs
If you subscribe to your carrier’s Caller ID service, you can use Quickstore to
store the last number thatyou dialedor quickly store a number from the Last 10
Calls Received and Sent Listswithout having to enter the programming menu.
NOTE: As you scroll through the Last 10 CallsReceived or SentList, only the
name displays. If the nameis not available, the phone number displays.
To use Phone Number Quickstore, from either the Phone
Ready screen or from the Last 10 Calls Received or Sent
List:
1. Do one of the following:
• Togotothelastcallthatyoudialed,
press r.
adjb
Phone Ready
Line1
12:43p 07/22
Name Mail
• To view the Received and Sent Calls list,
press n until you see “Calls”, then select it.
26
www.mot.com/iDEN
Page 35

Creating, Editing, and Usi ng Stored Lists
2. Select “Store”. TheEnter Name screen displays.
3. Enter the name then select“Store”. The combined name and number entry is stored in the first
available storage space.
The Stored message displayswith the name that you
stored.
adjb
Phone Ready
0=5554455
Cancl Store
adjb
Enter Name
-
Cancl Store
adjb
JOHN
5551212
Stored
27
Page 36

Making Private Calls
A Private call is a one-to-one conversation between two people. In Private
mode, each phone is identified by a name or a number called a Private ID.
To make a Private Call:
1. Pressm until you see “Prvt Ready” on your display.
2. Use the keypad to enter the Private ID of the person that you want to reach.
3. To speak, pressand hold the PTT button, wait for t he chirp, then speak into the microphone.
4. To listen, release the PTT button.
To use Scroll or Name Search, you must have a Private ID list.
Scroll
1. Pressm until you see “Prvt Ready” on your display.
2. Pressl orr to scrollthrough the stored Private ID list.
3. Pressand hold the PTT button, wait for the chirp, then speak intothe microphone.
Name Search
1. Pressm until you see “Prvt Ready” on your display.
2. Select “Name”.
3. Pressthe key with the first letter of the name you are searching for.
4. Pressl orr to scroll through other stored names associated with the letter you entered.
5. Pressand hold the PTT button, wait for the chirp, then speak intothe microphone.
adjb
Prvt Ready
JOHN SMITH
12:43p 07/22
Alert Name
Receiving a Private Call
When you receive an incoming Private call, you hear a brief chirp-liketone.
Your r750plus phone automatically switches to Private mode, and the Private
ID or the nameof the caller displays.
1. Your phone must be idle, that is, not busy in an active call or on t he browser.
2. Wait for the caller to finish speaking.
3. Pressand hold the PTT button. Begin speaking after you hear the chirp.
Private/Group Mode Speaker
You can hear Private calls through either the earpiece or the speaker. Press the
Speaker buttonk on your r750plus phone to turn the Private/Group Mode
Speaker on or off.
28
www.mot.com/iDEN
Page 37

Making Private Calls
• With the Speaker on, you will hear incomingcalls through the speaker.
• With the Speaker off, you will hear incoming calls through the earpiece.
Call Alert
Call Alert enables you to page an individual by sending an audible tone. A Call
Alert allowsthe individual to respond when it is convenient. The alert plays
intermittently until the individual clears it.
Selecting a Call Aler t Tone Style
Your phone has ten selectable Call Alert tones.
Setting an Alert Tone Style
1. Press *, #, 3, 7.
1. The display shows your current Alert tone.
2. Select “Ok”.
3. Press l or r to scrollthrough the available Alert tone styles.
4. To listen to the selected Alert tone, press the Volume buttonson the side of the phone.
5. Select “Ok” to select the Alert tone shown.
adjb
37=Set Alert
Style:1
Exit Ok
adjb
Alert
Style 4
Cancl Ok
To leave the Alert tone style unchanged, select “Cancl”
6. Select “Exit”.
SendingaCallAlert
1. Press m to go to the “Prvt Ready” screen.
2. Select “Alert”.
3. Enter the Private ID, or press lorr to scroll to the
desired name. You may also select the name by pressingnand using Name Search.
4. Press the PTT button.
Receiving a Call Alert
When you receivea Call Alert,you willhearan alert toneandsee a messageon
your display.
• To answer the Call Alert, press the PTT button.
• To clear the Call Alert without answering it, select “Clear”.
adjb
Prvt Ready
JOHN
12:43p 07/22
Alert Name
adjb
Alert 0
JOHN
Exit Queue
29
Page 38

• To silence the Call Alert withoutclearing it, press any key other than the
PTT button.
NOTE: Until the Call Alert is clearedor returned, the alert plays intermit-
tently andyouwill not be able to receive any additionalPhone, Private,
Group,or Net calls.
Call Alert Queuing
If your carrier provides Call Alert Queuing, you can save up to eight Call Alerts
in a queue for later use.
After you respond to the Call Alert, it is removedfrom the queue.
Clearing or Queueing a Call Alert
When you receive a Call Alert, do one of the following:
• To clear a CallAlert, select “Clear”.
• To placetheCallAlert intot he queue, select“Que ue”.
Pressingm also queues the Call Alert.
If you receive multiple CallAlerts, the last received Call
adjb
Alert 3
JOHN SMITH
Clear Queue
Alert displaysand the remainingCallAlerts are stacked at
the beginning of the queue.
Responding to a Queued Call Alert
YoucanrespondtotheCallAlertsinanyorder.ToselectaCallAlertfor
response:
1. Select “Queue”.
2. Pressl orr to scroll to the desired Call Alert.
3. Pressthe PTT button to respond to the CallAlert.
30
www.mot.com/iDEN
Page 39

Making Private Calls
Quickstore of Private ID s
Quickstore allows you to quickly store a received or sent Private ID, without
having to enter the programming menu.
From the Private Ready screen, with the Private ID
displayed:
1. Select “Store”.
If anIDisgreater than12 charactersin length, the ID
wraps to the third line.
2. Enter the name associated with the Private ID.
3. Select “Store”. The Stored message displays.
If the list is full with the maximum 100 entries, you
will get the message, “Prvt List Full”. You cannot
add namesuntil you removes ome names from the list.
4. Next, the display returns to the Private Ready mode.
Storing Your Private ID
NOTE: For non-Crossfleet enabled networks only.
To store your Private ID in your r750plusphone:
1. Press *
2. Select “Ok”.
3. Enter the Private ID provided by your carrier.
4. Select “Store”.
To view your Private ID a t any time after you store it:
1. Press *
The next line displays your Private ID. This is the number suppliedbyyour
carrierthat you store in your phone.
2. Select “Exit”.
,#,2. The screen displays the message,“2=Own Pvt ID”.
,#,2. The screen displays the message, “2=Own Pvt ID”.
adjb
Prvt Ready
56781
12:43p 07/22
Alert Store
adjb
Enter Name
-
Cancl Store
adjb
JOHN
Stored
adjb
Prvt Ready
JOHN
12:43p 07/22
Alert Name
31
Page 40

Making Group Calls
A Group Call allows you to communicateinstantly with membersof a selected
Talkgroup–a pre-defined set of people whoshare a communication need.
Talkgroupsappear on your display as numbersor programmed names, such as
Talkgrp10or Sales Team.
TomakeaGroupCall:
1. Pressm until “Group Ready” displays.Your m ost
recentlyused talkgroup displays, for example,
“Talkgrp 10”.
2. To place a call, do one of the following:
• To speak to this talkgroup, press and hold the
PTT button. Wait for the chirp, then speak into
the microphone.
• To speak to another talkgroup, pressl or r until you see the
desiredtalkgroup name. Pressand holdthePTTbutton. Wait for the
chirp, then speak into the microphone.
3. To listen, release the PTT button.
Rec e iving a Gro u p Ca ll
When you receive an incomingGroupcall, you will hear a brief chirp-like tone.
Your r750plusphoneautomaticallyswitches to Group mode,and theTalkgroup
name displays.
1. Your phone must be idle, that is, not busy in an active call or on t he browser.
2. Wait for the caller to finish speaking, then press and hold the PTT button.
Begin speakingafteryou hear the chirp.
3. To listen, release the PTT button.
You can receivegroupcalls only in the Talkgroups thatyou areprovisioned for.
For more information, see “Adding or Storing a Talkgroup” on Page 32.
adjb
Group Ready
1:Tg1
S Off Sts
Adding and Storing a Talkgroup
To add and storea talkgroup name to your r750plus phone:
1. Press*
2. Select “Ok”.
3. At “Add New Entry?”, select “Ok ”.
4. At “Enter ID”, enter the desired talkgroup number and select“Store”.
5. At “Enter Name”, enter a name for the talkgroup and select “Store”.
32
,#,2,3.
www.mot.com/iDEN
Page 41

Making Group Calls
Area Selection
In Group mode, you can call only those talkgroup members in a specific
location. This is useful when you know where the individuals are located within
the servicearea.
1. Press m until you see “Group Ready” on your display.
2. Press n, thenselect “Area”.
3. Press l orr to scroll through the targeted areas specified by your local carrier.
4. Select “Ok” to select the targeted area.
Private/Group Mode Speaker
You can hear Group calls through either the earpiece or the speaker.
Press the Speaker buttonk on the r750plus phone to turn the Private/Group
Mode Spe aker on or off.
With the Speaker on, you will hear i ncoming calls through the speaker. This is
useful to monitor talkgroupactivity in Group mode.
With the Speaker off, you will hear incoming callsthrough the earpiece.
33
Page 42

Advanced Features
Some r750plusphones are provided with anadvanced featuresetas describedin
this section.Pleasecontact your s ervice provider for more information.
Mult i-Simulta neou s Talk Group Sc an
Multi-SimultaneousTalkgroup Scan (Scan) allows users within a fleet to
monitor more than one talkgroup. A Talkgroup Mode, within the range of 1255, is comprised of up to four talkgroups (one Primary Talkgroup and up to
three SecondaryTalkgroups). Calls can only be initiated on the user’sPrimary
Talkgroup; however, a user can respond to an active call on either a Primary or
Secondary Talkgroup. Both Primary and Secondary Talkgroups, as well as the
Talkgroup Mode, can be named (aliased). The Scan f eature is set to“ON”, but
the userhas the capabilityofdi sabling Scan through an option key.Theunit will
store the last Scan setting, and power on with that setting.
Entering Group Mode
1. Pressthef key to poweron your unit. Pressm to enter Group Mode. Two differentTalkgroup Modes are displayed below. The Primary Talkgroup is
indicatedto the right of the Talkgroup Mode. The display on the left shows a
non-aliased Primary Talkgroup, and the display on the right shows an aliased
Primary Talkgroup.
ab
Group Ready
Group Ready
102:Tg 15
102:Tg 15
S Off Sts
S Off Sts
Primary Talkgroup
Not Aliased
34
www.mot.com/iDEN
ab
Group Ready
Group Ready
3:Electricia
3:Electricia
S Off Sts
S Off Sts
Primary Talkgroup
Aliased
Page 43

Initiating a Group Call
Advanced Features
1. Press and hold the PTT button to initiate a group call on your Primary Talkgroup.
The exampleto the rightillustratesthedisplay if Fred
pressed the PTT button to initiatea call on the
ab
Group Ready
3:Electricia
S Off Sts
Electricians talkgroup. This is Fred’sPrimary
Talkgroupfor Mode 3.
Fred’sDisplay
All subscriber units that have affiliated with your
Primary Talkgroup as either a Primary or Secondary Talkgroup in any
Talkgroup Mode will receive your group call if they are not already engaged in
an active call.
The followingscreenswill be displayed on the receiversubscriber units
indicating they have joined the call. The second line of the display will indicate
the Mode number followed by Primary or Secondary Talkgroup,which may be
aliased.The third line of the display indicates the PTT-ID of the unit initiating
the group call, which can also be aliased.
Example: Jasonjoins the Electricianstalkgroup. He has
also selected Electricians as his Primary Talkgroup for
Talkgroup 3, but he has no alias for histalkgroup, so the
Talkgroup number (TG ID) is displayed. Fred’s PTT-ID
is displayed on the third line.
ab
Group Ready
3:Tg 3
ID:Fred
S Off Sts
Jason’sDisplay
Example: Julie joins the call and the unit updates the
alias to indicate active Secondary Talkgroup (Mode 1,
Secondary Talkgroup 3). Fred’s PTT-ID is displayed on
the third line.
Responding to a Secondary Talkgroup
ab
Group Ready
1:Electricia
ID:Fred
S Off Sts
Julie’sDisplay
1. To respond to a call on a Secondary Talkgroup, press the PTT button.
Example: Julie responds to Fred by pressing the PTT
button.
ab
Group Ready
1:Electricia
S Off Sts
Julie’sDisplay
35
Page 44
Fred has releasedhis PTTbutton, then begins to receive
Julie’sresponse.
ab
Group Ready
3:Electricia
ID:Julie
S Off Sts
Fred’sDisplay
Jason receivesJulies’s response.
After the Secondary Talkgroup call is completed, all
receiving subscriber units’ displays will revert to their
Primary Talkgroup of the selected Talkgroup Mode.
TurningScanOnandOff
ab
Group Ready
3:Tg 3
ID:Julie
S Off Sts
Jason’sDisplay
Thecapabilitytoturnscanonandoffisavailableasanoptionkey.
1. Pressthe “Scan” option key. Press the “SOff” soft option key to disable scan.
ab
Group Ready
Group Ready
18:Engineers
102:Tg 15
S Off Sts
S Off Sts
Scan Enabled Scan Disabled
ab
Group Ready
Group Ready
18-Engineers
3:Electricia
Scan Sts
S Off Sts
When Scan is disabled, you will not have access to your SecondaryTalkgroups
Aliasing Talkgroup Mode
The r750plus phone allows you to Alias Talkgroup Modes and Primary and
Secondary Talkgroups.
1. Press*, #, 2, 5.
2. Select “Ok”.
3. At “Add New Entry” select“Ok”.
NOTE: Press l or r to Edit or Erasea Talkgroup Mode Alias.
4. Enterthe ID of the desired talkgroup mode and press “Store”.
NOTE: The Aliased Modes are displayed only while scrolling through the Talk-
groupModeor during Direct Entry. In an idle or transmission state,
theModeIDnumberisdisplayed.ThisensuresthattheModeIDnumber and Primary Talkgroup aredisplayed simultaneously on screen.
5. Thenenter the name of the desired talkgroup mode alias and press “Store”.
36
www.mot.com/iDEN
Page 45

Advanced Features
TalkgroupMode Selection by Direct Entry
You may select a different Talkgroup Mode at any time.
1. Press the 1 key. To erase a digit, pressl. To clear all digits, press and
hold l. To return to your previously selected Talkgroup Mode, press the
“Cancl” option key.
2. Press the 8 key.
3. Press the PTT button or the “Ok” option key.
“Mode 18” will flash until affiliation is complete.
IfyouselectedtheTalkgroupModeby pressingthe
PTT button,you will initiatea call on your Primary
ab
Group Ready
18_
Cancl Ok
Talkgroup.
TalkgroupMode Selection by Memory Scroll
The Memory Scrollfeature allows you to use thel orr keys to scroll through
memory for Talkgroup Modes.
1. Press r.PressandholdthiskeytoAutoScroll through your lists more quickly.
2. Press the PTT button or the “Ok” option key.
NOTE:To transmit, press the PTT button; to listen
only, press “Ok”.
ab
Group Ready
Mode 18
Cancl Ok
Emergency G roup Call
NOTE: If your r750plus phone has a redbutton on topoft he housing,the
EmergencyCall feature is present.
Emergency Group Call is a carrier-dependent feature. Please contact your
carrier for service availability.
Placing an Emergency GroupCall
An Emergency Group Call allows a user to have priority access to his talkgroup
membersand provide them visual and audible indicationsof an emergency
condition. The Emergency call can be placedfromany mode (private,group,
phone, Net).
1. Press and holdtheEmergencyButton. The portablewill emit an emergency
start tone to indicate that you have successfully requested an emergency
call.
2. Press the PTT buttonto talk. The currently selected
Talkgroup Mode willbe selectedunlessyour organizationpre-programmed an emergencyTalkgroup
Mode. If this is the case, the pre-programmed
Emergency Talkgroup Mode will flash in the dis-
ab
EMERGENCY
1: SE Plant
ID:John
37
Page 46

play. The Talkgroup Mode appears in the second line of the display as
shown.
3. To end an emergency call, press and hold the Emergency Button for 3 seconds. The portable will return to the last selected talkgroup mode.The initiatorcannot exit the emergency callwithout firstcancellingtheemergency
call.
Canceling an Emergency Group Call
Press the Emergency Button until the unit generates an Emergency Call Cancel
tone.Thistone indicates thecancellationhas occurred.The displaywillreturnto
the non-emergency state.
An emergency call will be cancelledif no talkgroupactivity occurs for 30
seconds.The dispatcher, or any otherperson provisioned to cancel an
emergencycall can alsocancel the emergency call.
Receiving an Emergency Group Call
When an emergency call is initiated, other membersof the talkgroupwill be
notified of an emergency condition.
The receivingunit will hear an Emergency Receive
Tone, and the receiver’s display will change to indicate
the condition.
The first line of the displaywillindicate the ID or alias
of the person initiating the emergency call. The second
line will show you the Talkgroup Mode and Active
Talkgroupname or number. The third line shows you the ID or alias of the
person who is currently speaking. The third linewill remainblankwhenthe
receiving unit initiates a transmission.
ab
EMER:58
1:SE Plant
ID:Cheryl
S Off Sts
Receiver Operations During an Emergency Call
Other members of the Emergency Group Call can leave the emergency call and
change modes (phone, group,private, Net) while involved in the call.
While listeningto the emergency call, the receivingunit will not receive phone
calls,Call Alerts, Message Mails, Status Messages, Private Calls or other group
calls for the durationof the emergency call.
Status M ess age
Status Messagelets you send a pre-definedmessageto the dispatcher or to
another user’s ID. Up to ten pre-definedalphanumeric Status Messagesare
available such as “At Lunch” or “En Route”.
38
www.mot.com/iDEN
Page 47

Advanced Features
You can also send any numeric Status Message from 1-255. A Status Message
can be sent by selecting both the Status Message and target ID (alias) of the
person who is to receive the Status Message. You can reduce talk time by
sending Status Messages. You can also leave a Status Message for receivers
while they are away from their portables.
Entering the Status Message Function
1. Press the Status Option Key to get to the Status Message function. You
must be in Group or Private Mode to access this function.
The second line of the display shows the Status Mes-
sage (alpha or numeric) of the last successfully
sent status.
2. Press Option “Exit” to return to either the group or
Privatemode. Press Option “Targt” to go to the
ab
Sts Message
En Route
Exit Targt
Target ID selectionscreen.
Selecting a Status Message with Direct Entry
Direct Entry allowsyou to use the keypad to select the messageyou want to
send. Enterany numberfrom1-255 to select a Status Message. The number can
correspond to one of ten pre-programmed alphanumericstatus messages or any
other numeric Status Message w ithin the range of 1-255.
1. Press 2.
2. Press “Ok”. Pressing the PTT button at this time
will send the message to the last unitto which you
sent a successful message.
3. Press “Targt” to select a target for this message.
ab
Sts Message
2= At Lunch
Cancl Ok
39
Page 48
SelectingaStatusMessageUsingMemoryScroll
You can select Status Messages by using thel orr keys to scroll through the
ten named (aliased) Status Messageswhich you have programmed.
1. Pressr until you findthe message you want. In
this case we scrolled to the Status Message “At
Lunch”.
2. Press“Ok”.
3. Press“Targt” to selecta target for this message.
ab
Sts Message
At Lunch
Cancl Ok
Selecting a Target by Direct Entry
1. Enter the numeric ID of the person to whom you are sending the message.
2. Press“Ok”.
3. PressthePTTbuttontosendthemessagetothe selected ID.
ab
Sts Target
5= Rochelle
Cancl Ok
SelectingaTargetbyMemoryScroll
You can select a target by scrolling though the portable IDs or aliases by using
thel or r keys.
1. Pressthe r key until you find the person to whom you want to send the message.
2. Press“Ok”.
3. Pressthe PTT button. The display shows the message that has been sent.
ab
Sts Target
Julie
Cancl Ok
SelectingaTargetbyAlphaSearch
You can select a portable ID by selecting the first letter of the name (alias). If no
name is stored under a letter, the unit willautomatically search forward,
alphabetically, until the next name is found.
1. Pressthe “Name” key.
2. Pressa numeric key. i.e.: Press 7 three times to
view the names (aliases) that begin with the letter
R.
3. Use eitherthe l orrkeys to scroll to the name (alias) who is to receive the Status Message.
4. Pressthe PTT button. The display shows the message that has been sent.
ab
Name:Sts
R=Randy
Cancl Ok
40
www.mot.com/iDEN
Page 49

Advanced Features
Sending a Status Message
After selecting both a StatusMessageand a desired target ID, press the PTT
button to send the message. Two high pitched tones will be heard during
transmission.
If successful, two high pitched tones will be heard to
indicatethemessage was successfullydelivered to the
targetportable.
ab
Sts-Sent
Successful
If unsuccessful, an alert tone will be heard to indicate
thatthe targeted unit is busy, out-of-range, orturned-off.
In either case, the portable will return to the status
ab
User Not
Available
screen after 3 seconds.
Exiting the Status Message Function
Press them key to exit the Status Message screen. Pressing the “Exit” option
key from the Status Message screenwillalso allow you to exitthe status
message function.
Receiving a Status Message
The portable will receive a message along with alert
tones. To silence the recurringalert tones only, press
any key exceptm or the “Clear” optionkey.Incaseof
a non-aliasedsender ID, the Quickstore option is
available.
If a non-aliasedID is sent, the Quickstore softkey is
displayed.
All calls remain blocked until this message is cleared.
ab
Sts-Kelly
At Lunch
Clear
ID List Programming
Featuremenu#26allowsyoutoprogramtenstatus
messages,eachupto12characterslong.
ab
26=Sts Mesg
List Program
Exit Ok
41
Page 50

Isolated Site Operation
IsolatedSite Operation (ISO) allows group call communications to continue
within a single cell site when connectivity to the network is lost by allowing the
cell to operate in a local, one cell only mode. ISO is limited to dispatch
talkgroupcalls only. In all modes the display will update to include “-Isoft” on
the first line. Talkgroupcommunications will be limited to only those units that
are connected to the ISO cell, and only on the talkgroupor Talkgroup Mode that
the subscriberunit last used before the cell entered the ISO state.
Entering ISO
The portable will enter the ISO state when its cellbecomes isolated from the
network, assuming the portable has no available neighbor cells. It will display
one of the following screens:(The LED indicator is off in ISO unless the unit is
transmitting. While transmitting, the LED will be green.)
NOTE:If the portabl e is powered on in an ISO cell, it will enter the ISO state if
there areno available neighbor cells.
Phone Mode
Group Call Mode
PrivateCall Mode
Net Mode
ab
Phone-Isoft
Name Mail
ab
Group-Isoft
3:Electricia
S Off Sts
ab
Prvt-Isoft
Julie
Alert Name
ab
Net-Isoft
Julie
Alert Name
42
www.mot.com/iDEN
Page 51

Advanced Features
Initiating a Group Call
If the portable has Scan enabled when the site enters ISO, the portable will be
able to initiate a call on its Primary Talkgroup and can respond to calls started
on either the Primary or any Secondary Talkgroup.
The portable will not be able to select a new Talkgroup
Mode while in ISO condition.
If the portable has Scan disabled when the site enters
ISO,theportablewillbeabletoinitiateandrespondto
calls on the Primary Talkgroup only.
ab
Group-Isoft
3:Electricia
S Off Sts
Exiting ISO
When the cell returns to normal operation, the unit will
revertback to standard operation. The green LED
indicator will resume blinking.
If the unit goes out of range of the ISO cell and has no
available neighbor cells, the unit will go out of service.
ab
Group Ready
3:Electricia
S Off Sts
Other Operations
Since the ISO operation is limited to group calls only, any attempts to
communicate in other modes(phone, private, alert, status)willresult in a
“Service Not Available” message. However, allotherfunctions (memory scroll,
directentry, feature menu programming, etc.)are still operable.
43
Page 52

Using Mail Services
NOTE: Some features may be network dependent or subscription only, and
may not be available in all areas. Contact your service provider for
more information.
Your r750plus phone provides the following mail services:
• Net Mail
• Voi ce Ma il
• Message Mail
When you receive a new message, thec icon
appears and flashes.
• To read your new mailimmediately, select “Now”.
• To read your new maillater, select “Later”.
An asterisk* next to a mail service indicates new mail.
To use message services, select “Mail” from any Ready
screen.The inbox screenopens withyour message services
listed.
To select a message service, scroll to highlightthe service
or press the corresponding number. Forexample, to access
your Message Mail, press 2.
Net Mail
Net Mail alerts you when you receive alerts from the Browser, for example,
notification of an e-mail or fax.
From any mode:
1. Select “Mail”.
2. Select “Net Mail”, then select “Ok”.
The Alerts inbox opens and displays the type of Net Mail
alerts.
adc b
New Mail
Read?
Later Now
adc b
1>Voice Mail
*2>Mesg Mail
3>Net Mail
Exit Ok
adjb
1>Voice Mail
2>Mesg Mail
3>Net Mail
Exit Ok
The Inbox screen opens.
3. Scroll to the type of alert that you wish to view, then select “Ok”.
www.mot.com/iDEN
44
adjb
Inbox
1 Email
2 Fax
Ok Del
Page 53

Using Mail Services
4. To read the message, select “View”.
5. After you read the message, do one of the following:
adjb
Inbox:1unread
1*Lunch
2 MEETING
View Menu
adjb
LUNCH
----
With client at
12:00
Next Menu
• Select “Menu” to view a list of actions that you
can takefor this message,such as reply, delete,
save, and so forth.
• Or, select “Next” to read the next
message.
adjb
1>Reply
2>Delete
3>Save
4>GoTo Message
Ok More
Voice Mail
When your r750plus phone receives a Voice Mail message:
• Theg icon appears on your display.
• The Voice Mail alert tone sounds (if Mail Notification is turned on).
• The message, “New Voice Mail Waiting” appears on your display.
• An exclamation point (!) on the display indicatesthat you have at least one
urgent message.
From any mode:
1. Select “Mail”.
2. Select “Voice Mail”.
The Voice Mail inbox opens and displays the number of
your new and total Voice Mail messages.
To retrieve your voice mail immediately:
1. Select “Dial”. This action automatically places a call
to your voice mailbox. The most recent message is
retrieved first.
2. To close your voice mailbox, select “Exit”.
a gjb
1>Voice Mail
2>Mesg Mail
3>Net Mail
Exit Ok
a gjb
Voice Mail
1 New
1 Total
Exit Dial
Alert Receipt During Phone Call
Through your programming menu (*,#,15) you can delay Voice Mail and
MessageMail Alertsso that you are not interrupted by the alert tone while on a
call. You can choose the following:
•
Receive All Alerts
• Delay All Alerts
45
Page 54

• Receive Message Mail Alerts only
See “Setting Programming Menus” on page 49 for more information.
Message Mail
MessageMail can be either a numeric page or a text message of up to 140
characters. Your phone can receive and store 16 mail messages at any time.
1. To postpone reading your mail and to clear the display, select “Later”.The
iconstopsflashing but remainsonyour display to remindyou that you have
unread messages.
To read your mail now:
2. Select “Now”. The screenwillbriefly displaythenumber of new and saved
messages in your mailbox.
3. A list of all your messages will display. Highlight the message that you
wish to read and select “Read”.
To read you mail later:
4. From any mode, select “Mail”. The Mailbox opens.
adjb
1>Voice Mail
2>Mesg Mail
3>Net Mail
Exit Ok
5. Select “Mesg Mail”.
adjb
Message Mail
Your message mailboxopensand briefly displays the
number of new and saved messages currently in your
mailbox.
Next,alistof all messageswill display. Selectthemessage
thatyouwishtoreadandselect“Read”.
Saving and Erasing Mail
2 New
0 Saved
adjb
*>FR: Smith
*2>FR: Jones
Exit Read
Your message shows the time and date thatt he sender entered it in the network
After you read a text or numeric message, you can either
Save or Erase the message. Presso under the desired
option.
www.mot.com/iDEN
adjb
1>Call
5551212
11:15a 04/02
Erase Save
46
Page 55

Using Mail Services
Auto Call Back
You can respond to numeric pages and text messages containing a call-back
number.To automaticallydial a number containedwithin a Message Mail, press
e.
Mail Memory Full
If all 16 message registers are full, your phone displays the message“Mail
Waiting, Memory Full”. You cannot receive new Message Mailuntilyou empty
registerspace by erasing saved or unread messages.
47
Page 56

Using Your Phone as a Modem
NOTE: Some features may be network dependent or subscription only, and
may not be available in all areas. Contact your service provider for
more information.
You can use your r750plusphoneas a modem for data transfer from your
laptop,handheld device, or desktop computer. This is particularlyusefulwhen
there is no wired phone line (wall jack) available.
You simply attach a data cable (available separately)to your phone and your
computer.From that point, your phone is your modem. This allows you to send
or receive time-criticalinformationsuchas e-mail, a field service report,or
files.In addition,you can also send or receive faxes.
This type of wireless connection uses one of two types of data connection:
circuit-switched data and packet data.
• Circuit-switched data is typically used for sending and
receiving faxes and for transferring large files.
• Packet datais used for small filetransfers such as e-mail.
To use these services, you must install the iDEN Wireless Data Services
software (available separately). For more information on setting up your
computer and your r750plus phone for Packet and Circuit Data calls,see the
Wireless Data Services User’s Guide and contactyour carrier.
TTY Users
You can use your phone and computer in TTY mode. Your computer
screen and keyboard replace the standard TTY device. For more
information, please see the W ireless Data Services User’s Guide.
48
www.mot.com/iDEN
Page 57

Setting Programming Menus
Setting Programming Menus
You can customize the settings on your phone using the Programming Menu.
1. Press n until you see “Prgm” on the display.
2. Select “Prgm”.
3. Select “Ok”.
4. Press l orr to scroll to the desired Programming Menu Option or enter thenumberoftheOption.
NOTE: Youcan press *,#, andthen thecorresponding keypadnumberto
get to the desired programming menu.
Table 6: Programming Menu Options
Keypad
Number
Menu Option Function
1 Own Ph # Automatically store the telephone
2 Own Pvt ID Display the private numberof
3 Mail Display Turn on and off the New Mail
4 Manual Lock:Off Lock your phone to prevent
5 Auto Lock:Off Automatically lock your phone
6 AutoAnswer:Off Turnonoroffautomatic
number of your phone after you
receive the first incoming call
(Line1). You can also enter the
number and view it.
your phone.
message that is displayed with
incomingVoice,Message, or Net
Mail.
unauthorized use. You must enter
apasscodetounlockit.
each time it is powered on to
prevent unauthorized use.
answering of incomingphone
calls after 1-4 rings.
49
Page 58

Table 6: Programming Menu Options (Continued)
Keypad
Number
Menu Option Function
9 VibrateAlert:Off Receiveanon-audiblealertfor
10 Last Call Timer Display the duration of the most
11 Display Timer:Off Turn on or off automatic display
12 ResetTimer Display cumulativeairtime of all
13 TotalTimer Display cumulativeairtime of all
14 1 Minute Beep:Off Automatically signal each minute
15 Alert Receipt Delay Voice Mail and Message
incoming phone and circuit data
calls and messages. See
“VibraCall® Alert” on page 15.
recentphone call.
of the Last Call Timer at the end
of each phone call.
phone callssince last reset.
phone calls.
of elapsed phone airtimewithan
audiblebeep.
Mail Alerts so that users are not
interrupted by the alert tone while
on a call. Users can choose to:
DelayAll Alerts; Receive All
Alerts; Receive Message Mail
Alertsonly. See “Alert Receipt
During Phone Call” on page 45.
16 Backlight Timer Specify the duration of the
20 Phone/Prvt List Addphone and private numbersin
www.mot.com/iDEN
Backlight Timer(0, 10, 20, or 30
seconds).
one procedure.See “Combined
Phone Number and Private ID
List” on page 22.
50
Page 59

Setting Programming Menus
Table 6: Programming Menu Options (Continued)
Keypad
Number
Menu Option Function
21 Phone List Edit Edit and erase up to 100
22 Prvt ID List Edit Edit and erase up to 100 Private
23 TalkgrpList
Program
24 Area List Program Add/Edit/Erase numbers and
25 TalkgroupMode
List Program
26 StatusMessage
List Programming
30 Ringer Volume Set the ringer volume using the
frequently called phone numbers
and associatednames.See
“Editing and Erasing Phone List
Entries” on page 24.
numbers and associated names.
See “Editing and Erasing Private
ID List Entries” on page 25.
Add/Edit/Erase numbers and
associated names for up to 100
pre-programmed talkgroups. See
“Adding and Storing a
Talkgroup” on page 32
associated names for up to 50
targeted areas.
Add/Edit/Erase numbers and
associated names for up to 30 preprogrammedtalkgroup modes.
Add/Edit/Erase numbers and
associated names for up to 10
alphanumeric Status Messages.
volume control keys, or lower the
volume to silence the ringer. See
“Setting the Ringer Volume” on
page 16.
31 Set Ring Style Select a distinct ring style for
incoming phone calls.See
“Setting a Ring Style for the
Alternate Line” on page 16.
51
Page 60

Table 6: Programming Menu Options (Continued)
Keypad
Number
Menu Option Function
32 Mail Volume Set the v olu me of incoming
33 Earpiece Volume Set the default earpiecevolume
34 Keypad Volume Set the volume of the keypad
35 Speaker Volume Temporarily adjust the Group/
36 Spkr Vol Set Tone Turn the speakervolume set tones
37 SetAlertStyle Select a distinct Call Alerttone.
38 SilentGroup Silence all incoming Group call
Message Mail, Voice Mail, and
Net alert tones using the volume
control keys, or lower the volume
to silence the mail alert tones.
using the volume control keys.
tones using the volume control
keys, or to silence the keypad
tones.
PrivateSpeaker volume for noisy
environments.
on or off.
See “Selecting a Call Alert Tone
Style” on page29.
alertsand voice activity. When
set, your screen displays the
message, Group-Silent.
40 Change Passcode Changeyour secretfour-digitpass
60 Set Baud Rate Set the modembaudratebetween
61 Data Ring Volume Set the default data ringervolume
www.mot.com/iDEN
code from the initial setting 0000.
the phone and the PC. See the
Wireless Data Services User’s
Guide.
using the volume control buttons.
See the Wireless Data Services
User’s Guide.
52
Page 61

Setting Programming Menus
Table 6: Programming Menu Options (Continued)
Keypad
Number
Menu Option Function
62 Pgm Data # View your circuit data (fax)
63 IP Address Use the scroll keys to view the
64 Reset KBytes Tx/
Rx
65 Lines per Screen
(Browserand Mail
menu)
70 Language Select one of four languages for
71 Time/Date Select the format for the time and
number. See the Wireless Data
ServicesUser’sGuide.
Internet Protocol (IP) Address-1
for your browser, as programmed
in your phone.
If your phone is cabled to a
computer,view IP Address-2,the
stored IP address of your
computer.
See the Wireless Data Services
User’s Guide.
View the number of Kilobytes
sent and received for packet data.
See the Wireless Data Services
User’s Guide.
View the display in 4 lines, 12
characters or 6 lines, 16
characters.
your display text. The default is
English. See “Changing the
Display Language” on page 11.
date display. See “Setting the
Time and Date” on page 9.
NOTE: Important!Do not performthe following shadedmenu optionsunless
you are instructed to do so by your carrier.You could damage your
phone.
53
Page 62
Table 7: Other Programming Menu Options
Option
Number
41 Feature Reset Returns all feature settings to
42 Master Clear Performs FeatureReset and
43 Master Reset Resetsthephone’sidentification
44 Change Service
50 NAM Selectsalternate Numeric
51 Network ID Edits the pre-programmed
Menu Option Function
their original defaults.
erases all stored lists.
number.
Key
Changes or resets the fraud
preventionservice key.
AssignmentM odule (NAM).
Seel ocal carrier forinformation.
Network number listandselects
roamingoptions.
About Error Codes
You may receive operational status messages under certain conditions. Before
contacting your carrier, note the message, numeric code, and the conditions
under which it appeared. Table8 lists and describes the operationalstatus
messages.
Table 8: Error Codes
Status Messages Message Description
Number Not in Service Thenumber thatyouentered isnot
User Not Available The party that you called is either
www.mot.com/iDEN
54
valid.
busy, out-of-range, or turned off.
Please try again later.
Page 63

Setting Programming Menus
Table 8: Error Codes (Continued)
Status Messages Message Description
User Not Authorized The party that you called has not
Please Try Later This service is temporarily not
User Busy in Private The party that you called is busy
Service Restricted Thisservice wasrestrictedbyyour
Service Not Available This featureis notavailable on the
System Busy Try Later The system is experiencing heavy
Service Conflict This service cannot be enabled
Please Try Again An error occurred. Note the error
User Busy in Data The party that you called is busy
Self Check Error A fault was detected with your
purchased this service.
available. Please try again later.
in a Private call.
carrieror it was not purchased.
current network.
traffic. Please try again later.
because an incompatible service
has already been turned on.
code and try again.
inadatacall.
phone.Ift his error recurs,note the
error code and contact your
carrier.
Self Check Fail An operational fault was detected
withyourphone. Notethe numeric
code, turn your phone off, and
contact your carrierimmediately.
55
Page 64

Optional Accessories
Batteries
NOTE: For best results, charge the batteries within the temperature range of
10
°Cto40°C(50°Fto104°F).
NOTE:Prolonged charging is not recommended. See Table 9 forbattery charg-
ing guidelines.
Charging the Battery
To get the maximum use from the battery, charge it overnight before you use it
for the first time.See Table 9 for battery charging times.
Table 9: Battery Charging Times
Motorola Battery Charging
Timeto90%:
Kit Number Description
Chemistry
NTN9037 NiMH 100 minutes
NTN9038 Intrinsically
Safe
*
NiMH
* For users who work in hazardous environments,
IntrinsicallySafe Battery, NTN9038, is offered.
Please contact yourcarrier for availability and the
specific environments approved for this battery.
Rapid
Charger
100 minutes
Battery Operating Instructions
• Extreme temperatures will degradebattery performance. Do not storeyour
battery where temperatures exceed 60°C (140°F) or fall below -20°C(4°F).
• The battery capacitywill be degraded if stored for long periods while fully
charged. If long term storage is required, store at halfcapacity.
• For optimal battery life, use a Motorola iDEN approved NiMH Charger
with your Motorola iDEN NiMH battery. Other chargers may not fully
charge your NiMH or may yield a reducednumber of charge cycles.
www.mot.com/iDEN
56
Page 65

Optional Accessories
Rapid Travel Charger
Using the NTN9035 Rapid Travel Charger, you can charge a battery from an
electrical outlet.
Accessory Connec
Rapid Travel Charger
Figure 2. Using the Travel Charger
tor
Using the Rapid Travel Charger (110V/220V/240V)
1. While holding the r750plus phone with its frontfacing you, insert the
accessory connector (with the Motorola logo facing you) into the slot on
the bottom of the r750plus phone until you hear a click.
2. Insert the Rapid Travel Charger transformer into an AC wall outlet. The
power light (green LED) on the accessory power supply will come on.
Rapid Travel Charger Operating Specifications
Input voltage range: 110V/220V/240V.
Operating temperature range:0°Cto+50°C.
57
Page 66

Ve hi cula r B attery Charger
The NTN9034 Vehicular Battery Charger enables in-vehicle communications
by charging the NiMH battery and providing power to your r750plus phone.
The power light (green LED) will light when the Vehicular Battery Charger is
receiving power.
Accessory Connector
Figure 3. Using the Vehicular Battery Charger
Using the Vehicular Battery Charger
1. Attach the Vehicular Battery Charger’s accessory connector to the bottom
of the r750plus phone. Whileholding the r750plusphone with its front
toward you, insert the accessory connector (with the Motorola logo facing
you) into the slot on the bottom of the r750plus phone until you hear a
click.
2. Remove the vehicle’s cigarette lighter plug from the cigarette lighter receptacle.
3. Plug the Vehicular Battery Charger into the cigarette lighter receptacle.
The power light (green LED) will turn on.
4. The r750plus phone may be turned off, turned on, or in use.
Removing the Vehicular Battery Charger
1. Unplugthe Vehicular Battery Charger from the vehicle’s cigarette lighter receptacle.
2. Pressthe buttons on the accessory connector and pull the accessory connector from the bottom of the r750plus phone.
Operating Specifications
Operatingvoltage range: 10.8 - 33.0 Vdc.
Operating temperature range: -30°Cto+60°C
www.mot.com/iDEN
58
Page 67

Optional Accessories
Desktop Dual-Pocket Charger
The NTN9036 Desktop Dual-PocketCharger charges Motorola authorized
batteries, as listed on Page56, for the r750plus phone.
Alignment rails
Front pocket
Rear pocket
LED indicators
Pinchargecontacts
– phonewithBattery
Figure 4. Desktop Dual-Pocket Charger
– Battery only
Power supplycordreceptacle
(DC jack)
Charging a battery
1. Plugthe power supply DC jackinto the receptacle in the back of the Desktop Dual-Pocket Charger.
2. Plugthe transformer end of the power-supply cord into any standard AC wall outlet.
3. Insert an r750plus phone with an attached battery, into the charger’s front
pocket. To do this, align the slots on the sides of the battery with the rails
on the sides of the charger pocket. Make sure the metalcontacts on the
back of the battery are in contact with the charger contacts.
4. If the r750plus phone is properlyseated in the front pocket,the charger’s
front pocket LED indicator will light.
5. The chargerhasthecapabilityofdisplaying thebattery’s charge status. The
indicator will show t he f ollowing: solid red=1- 30%; solid yellow=31 60%; flashinggreen=61 - 90%; solid green=91 - 100%.
NOTE: Charging times may vary whenp erforming data operations.
Data Operation
1. Insert the flat end of the iDEN Data Cable (FLN9581A) into the phone’s
bottom Accessory connector.
2. Connect the opposite end of the data cable to the PC.
59
Page 68

Inserting and removing a battery from the rear pocket
Insert Remove
1
2
Figure 5. Addingand Removing a Battery from the Rear Pocket
1. Insert the battery with the Motorola label facing forward. To do this, align
the sides of the battery with the charger rails.
2. Make surethe metal contactson the back of the battery are in contactwith
the chargingcontacts.
3. To remove the battery, pull it up and out of the Charger.
NOTE: If a battery is in the rear pocket, and the phone with a battery is
inserted into the frontpocket, the battery in the front pocketwill
charge to full capacitybefore the battery in the rear pocketis charged.
The LEDfor the rearpocket flashesyellow, indicatingthat its batteryis
waitingtobecharged.
NOTE: To remove the battery from the rear pocket, hold the base of the
charger and pullthebattery up.
Desktop Charger Status
The Charger displays the battery’s charge status.Theindicator will show one of
the following:
solid red =1-30%; solid yellow =31-60%; flashing green =61-90%; solid green
=91-100%.
Desktop Charger Troubleshooting
If the battery is not charging and you see:
Flashing yellow indicator -
• The flashing yellow LED is used to indicate that the Charger’s
pocket is in a waitstate.
• If a battery is in the rear pocket, the rear pocket’s LED continues to
flash yellow until the battery in the front pocket is more than 90%
charged (front pocket’s LED is solid green). This is normal
operation.
• To protect your battery’s life expectancy,the Charger does not rapid
charge a battery when its temperature is below 5
www.mot.com/iDEN
60
o
C(41oF) or above
Page 69

45oC (113oF).
No LED indication -
• Check that the r750plus phone with battery, or a battery alone,is
inserted correctly.
• Makesure that the power supply is plugged into an appropriate AC
outlet and that the connector is properly seated.
• Rear pocket only: Remove the battery fromthe Charger.Usean
ordinarypencil eraser to clean the threemetal contacts on the
batteryand then place the battery in the Charger.
• If the LED indicator remains turned OFF, the battery may be
defective and should be replaced.
Flashing red LED indicator -
• Remove the battery from the Charger.Use an ordinary pencileraser
to clean the three metal contacts on the battery and then place the
batteryin the Charger.
• If the LED indicator remains turned OFF, the battery may be
defective and should be replaced.
Both LEDs flash red -
• This indicates that the incorrect power supply is plugged in.
Optional Accessories
61
Page 70

Audio Adapter
The FLN2854A Audio Adapter connects an earpiece microphone or headset to
your r750plus phone for privacy and hands-freeoperation.
The Audio Adapter fits onto the bottom of the r750plus phone and provides a
standard2.5mm jack connection for an earpiece microphone or headset.
The following audio accessories are compatible with the audio adapter:
• Earpiecewith Microphone (NTN8367)
• Headset with Boom Microphone(NTN8513)
• Lightweight Headset with M icrophone (NTN8496)
• Over-the-Ear Style Headset (NTN8497)
Audio Adapter
Release
Button
Connector
Release
Button
2.5mm jack
Figure 6. Using the Audio Adapter
Using the Audio Adapter
1. Holdthe phone and the Audio Adapter facing you so thatyou see the Motorola logo on the adapter.
2. Insert the Audio Adapter’s connectorinto the r750plus phone Bottom
Accessory Connector. You will hear the connector snap into place.
NOTE: When the audio adapterandearpiece or headset areconnected, all
audio, including tones, willbe routed to the audio accessory’s earpiece.
Attaching/Detaching the Earpiece Microphone or H eadse t
1. Insert the 2.5mm plug of the earpiecemicrophone or headset cord into the
jack of the Audio Adapter.
2. Pull on the plug, not on the cord, to remove the earpiece
microphone.
62
www.mot.com/iDEN
Page 71
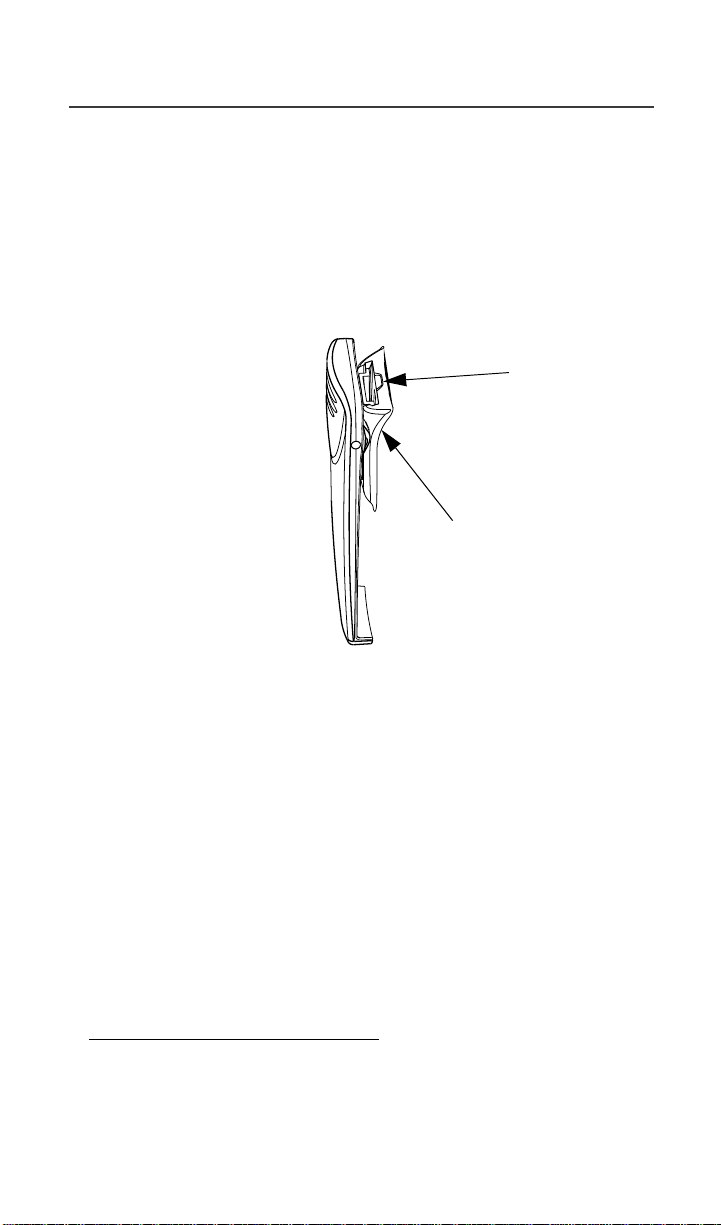
Optional Accessories
Removing the Audio Ada pter
1. Simultaneously press the release buttons located on either side of
the Audio Adapter and pull the Audio Adapter from the r750plus
phone.
BatteryBelt Clip
The HLN9844A Battery Belt Clip provides a convenient means by which to
carry your r750plus phone with you.
Belt Clip Tab
Battery (partial view)
Figure 7. Battery Belt Clip
UsingtheBatteryBeltClip
1. Slide the belt clip into the back of the battery (push until the clip locks into
place).
2. Clip the r750plus phone to your belt.
3. To remove the clip from the battery, push the holder tab outward and slide
the clip out of the battery.
NOTE: A small flathead screwdriveris recommendedto push the holder tab
outward when removing the clip.
Leather Carry Case
• The FLN9580ALeather Carry Case protects your r750plus phone while on
the go
• Includes a leather belt clip for easy attachment to a belt or purse
*
*Removethebeltclipfromthephone before inserting it intothe
leather case.
63
Page 72

• Accommodates most r750plus phone accessories includingtravel chargers,
audio accessories, vehicle accessories,anddata accessories.
Hard-Install Car Kit
NOTE: The FLN2570A Hard-InstallCar Kit enables in-vehicle communica-
tions by providing extended RF coverage,the ability to connect to 12Vdc or 24-Vdc power sources, data interface,and the ability to rapidcharge the battery.
The FLN2570A includes:
• Visor Microphone
• Remote PTT
• External 4-watt Speaker
• Phone Coupler
• JunctionBox.
An external Push-To-Talk (PTT) button is also included.W hen the phone is
turnedoff, the Hard-InstallCarKit charges theStandard battery in 75 minutesto
90% capacity. Charging time will be longer if the phone is operational during
chargetime.
64
Figure 8. Hard-Install CarKit
www.mot.com/iDEN
Page 73
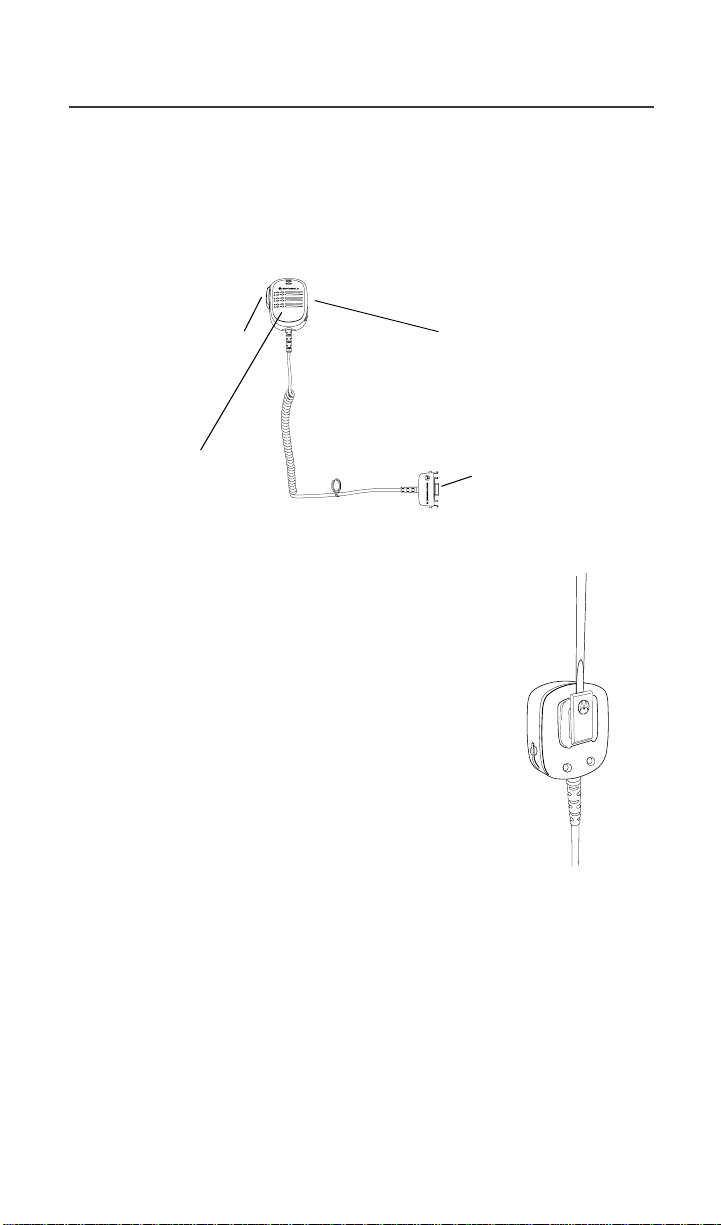
Optional Accessories
Remote Speaker/Microphone
The FLN2800A Remote Speaker/Microphone (RSM) provides a convenient
means of communicating by having a speaker, a microphone, and a Push-toTalk (PTT) button in a single,hand-held or clip-on accessory. The RSM also
includesa 3.5 mmaudiojack (located on the oppositeside of the PTT) to accept
secondary receiver audio accessories.
PTT Button 3.5mm Audio Jack
Speaker /
Microphone
Accessory
Connector
Attaching and Removing the Swivel Clip
To attach the swivel clip to the remote speaker/
microphone:
1. Position the clip with the release tab pointing
upwardand align the metal plate edges of the
swivel clip with the plastic slots on the RSM’srear
housing.
2. While holding the clipopen, slide the metal plate
inandpushdownfirmlyuntilthepartssnap
together.
To remove the swivel clip from the remote speaker/
microphone:
1. Carefully push the flat blade of a #2 slotted screwdriver (or similar instrument) between the RSM’s
housing and the swivel clip’s metal release tab, as
showninthefigure.
2. While performing step 1, push the swivel clip toward the top of the RSM.
3. As the release tab disengages, remove the screwdriver and pullt he swivel
clip completely away from the unit.
Connecting the Remote Speaker/Microphone to the Portable
To attach the accessory connector, position the portable so that it faces you.
65
Page 74
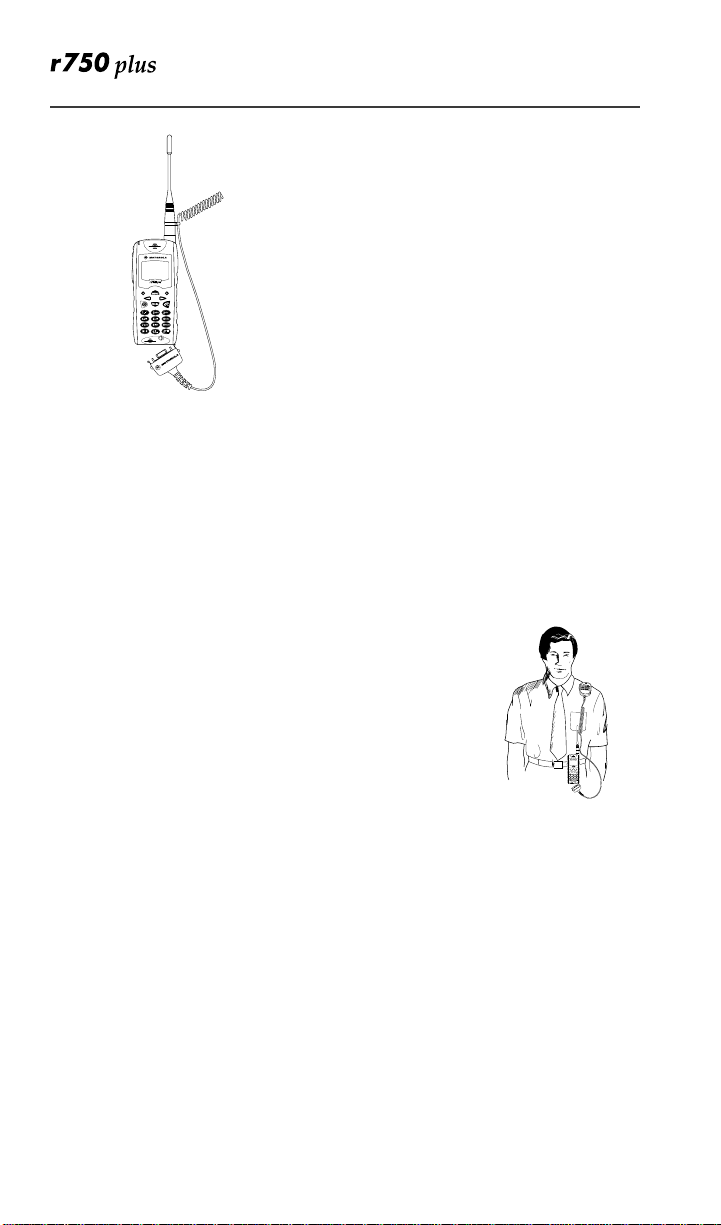
1.Position the accessory connector so that its
coiled cord extendsfromthe bottom of the portable and its latch is on your left.
2.Insert the RSM’s accessoryconnector into the
bottom of the portable (push both tabs on the
accessory connector when inserting into the portable).
3.Push the accessory connector firmly against the portable to make sure it i s held in place.
4.Attach the smallerend of the cable-restraint clip on the straight portion of the coiled cord.
5.Attach the larger end of the cable-restraint clip tothebaseoftheantenna.
6. Adjust the cord length in the smaller end of the cable restraint clip until it is comfortable.
Operation
Please read the safety information contained in the user’s guide supplied with
the portable before operating this equipment.
The remote speaker/microphone (RSM) only operates when the portable is in
the voice-dispatch mode (group or private call).
Wearing the RSM
For optimumperformance fromyour RSM, wear the radio
and RSM so that the accessory cord will not cross over or
touch the antenna. Also, try to wear the radio and
accessory combination fairly close to each other to avoid
strain on the accessory connector.
Receiving:
When the RSM is connected to the radio’s bottomaccessory connector, the
radio’s speakeris muted, and the audio is only heard from the RSM speaker.
Similarly,when a secondary receiver audio accessory is plugged into the 3.5
mm audio jack, audio to the RSM is rerouted to the secondary accessory.
Transmitting:
Connectingthe remote speaker/microphone to the radio does not disable the
radio’s microphoneand PTT button.
www.mot.com/iDEN
66
Page 75

Safety and General Information
Safety and General Information
IMPORTANT INFORMATION ON SAFE AND
EFFICIENT OPERATION.
READ THIS INFORMATION BEFORE USING
YOUR INTEGRATED MULTI-SERVICE
PORTABLE RADIO.
RF Operational Characteristics
Your radio productcontains a radio frequency transmitterto conveythe
information you wish to sendas well as occasionalautomatic signals used to
sustainconnection to the wireless network, and a receiver which enables you to
receivecommunication and connection information from the network.
Exposure To Radio Frequen cy En ergy
Your Motorola Radio Producti s designed to complywiththe following national
and international standards and guidelinesregarding exposure of human beings
to radio frequency electromagneticenergy:
• United States Federal Communications Commission, Code of Federal
Regulations; 47 CFR part2 sub-part J
• AmericanNational StandardsInstitute (ANSI) / Institute of Electrical and
Electronics Engineers (IEEE). C95. 1-1992
• Institute of Electrical and Electronics Engineers (IEEE). C95. 1-1999
Edition
• NationalCouncil on Radiation Protection and Measurements(NCRP) of
the United States, Report 86, 1986
• International Commission on Non-IonizingRadiation Protection (ICNIRP)
1998
• NationalRadiological Protection Board of the United Kingdom, 1995
• Ministryof Health(Canada). Safety Code 6. Limits of Human Exposure to
Radiofrequency Electromagnetic Fields in the Frequency Range from 3
kHz to 300 G Hz, 1999.
• Australian CommunicationsAuthority Radiocommunications
(ElectromagneticRadiation - Human Exposure) Standard 1999 (applicable
to wireless phones only)
To assure optimalradio product performanceand makesurehuman exposure to
radio frequency electromagnetic energy is within the guidelines set forth in the
above standards, always adhere to the following procedures:
67
Page 76

Portable Radio Product Operation and EME Exposure
Antenna Care
Use only the supplied or an approved antenna. Unauthorized replacement
antennas,modifications, or attachments could damage the phone and may
violateFCC regulations.
DO NOT hold the antennawhentheradio product is “IN USE”. Holding the
antenna affects call quality and may c ause the radioproduct to operate at a
higher power level than needed.
Phone Operation
When placing or receiving a phone call, or using the group and private call
functionswith a Group/Private Speaker OFF (muted speaker icon visible in the
display),hold your radio product as you would a wireline telephone.Speak
directlyinto the microphone.
Two-way radio operation
When using your radio product as a traditional two-way
radio while making group or private calls with the Group/
PrivateSpeaker ON (no speakericon visible inthedisplay),
hold the radio product in a vertical positionwith the
microphoneone to two inches (2.5 to 5 cm) away from
the lips.
Body-worn operati on
To maintain compliancewith FCC RF exposure guidelines, if you wear a radio
product on your body when transmitting, always place the radio product in a
Motorolaapprovedclip,holder, holster, case, or body harnessfor this
product.Use of non-Motorola-approved accessories may exceed FCC RF
exposure guidelines. If you do not use a Motorola approved body-worn
accessory and are not usingtheradio product in the intended use positionsalong
side of the head in the phone mode or in front of the face in the two-way radio
mode then ensure the antenna and the radio is kept the followingminimum
distancesfrom the body:
• Phone or Two-wayradio mode: one inch (2.5 cm)
• Data operation usingany data feature with or without an
accessory cable : two inches (5 cm)
www.mot.com/iDEN
68
Page 77

Safety and General Information
Approved Accessories
For a list of approved Motorola accessories call 1-800-453-0920, visit our
website at www.m ot.com/iden, or look in the accessory section of this manual.
THIS MODEL PHONE MEETS THE GOVERNMENT’S REQUIREMENTS FOR
EXPOSURE TO RADIO WAVES.
Your wireless phone is a radio transmitter and receiver. It is designed and manufactured not to
exceed the emission limits for exposure to radiofrequency (RF) energy set by the Federal
Communications Commission of the U.S. Government. These limits are part of comprehensive
guidelines and establish permitted levels of RF energy for the general population. The guidelines
are based on standards that were developed by independent scientific organizations through
periodic and thorough evaluation of scientific studies. The standards include a substantial safety
margin designed to assure the safety of all persons, regardless of age and health.
The exposure standard for wireless mobile phones employs a unit of measurement known as the
Specific Absorption Rate, or SAR. The SAR limit set by the FCC is 1.6W/kg.
conducted using standard operating positions specified by the FCC with the phone transmitting at
its highest certified power level in all tested frequency bands. Although the SAR is determined at
the highest certified power level, the actual SAR level of the phone while operating can be well
below the maximum value. This is because the phone is designed to operate at multiple power
levels so as to use only the powerrequired to reach the network. In general, the closer you are to a
wireless basestation antenna, the lower the poweroutput.
Before a phone model is available for sale to the public, it must be tested and certified to the FCC
that is does not exceed the limit established by the government-adopted requirement for safe
exposure. The tests are performed in positions and locations (e.g., at the ear and worn on the body)
as required by the FCC for each model. The highest SAR value for this model phone when tested
for use at theear is0.48 W/kgand whentested on the body, as described inthis userguide, is 0.59
W/kg during voice transmission using Phone Mode and 1.35W/kg during packet data
transmission. (Body-worn measurements differ among phone models, depending upon available
accessories and FCC requirements.) While there may be differences between the SAR levels or
various phones and at various positions, they all meet the government requirement for safe
exposure.
The FCC has granted an Equipment Authorization for this model phone with all reported SAR
levels evaluated as in compliance with the FCC RF emission guidelines. SAR information on this
model phone is on file with the FCC and can be found under the Display Grant section of http://
www.fcc.gov/oet/fccid after searching on FCC ID AZ489FT5800.
Additional information on Specific Absorption Rates (SAR) can be found on the Cellular
Telecommunications Industry Association (CTIA) web-site at http://www.wow-com.com.
______________________________________
* In the United States and Canada, the SAR limit for mobile phones used by the public is 1.6
watts/kg (W/kg) averagedover onegram of tissue.The standard incorporatesa substantial margin
of safety to give additional protection for the public and to account for any variations in
measurements.
*
Tests for SAR are
Electro Magnet ic Interference/Co mpati bil ity
NOTE: Nearly every electronic device is susceptible to electromagnetic
interference (EMI) if inadequately shielded,designed or otherwise configured
for electromagnetic compatibility.
69
Page 78

Facilities
To avoid electromagnetic interferenceand/orcompatibility conflicts, turn off
your radio product in any facility where posted noticesinstruct you to do so.
Hospitals or health care facilities may be using equipment that is sensitiveto
external RF energy.
Aircraft
When instructed to do so, turn off yourradio product when on board an aircraft.
Any use of a radio product must be in accordance with applicable regulations
per airline crew instructions.
Medical Devices
Pacemakers
The Health Industry Manufacturers Association recommends that a minimum
separation of 6 inches (15 cm) be maintained between a handheld wireless radio
product and a pacemaker. These recommendations are consistent with the
independent research by, and recommendations of, Wireless Technology
Research.
Persons with pacemakers should:
• ALWAYS keep the radio product more than 6 inches (15 cm) from their
pacemaker when the radio productis turned ON.
• Not carry the radio product in a breast pocket.
• Use the ear opposite the pacemaker to minimize the potential for
interference.
• Turn the radio product OFF immediately if you have any reason to suspect
that interference is taking place.
Hearing Aids
Some digital wirelessradio products may interfere with some hearing aids. In
the event of such interference, you may want to consult your hearing aid
manufacturer to discuss alternatives.
Other Medical Devices
If you use any other personal medical device, consult the manufacturerof your
device to determine if it is adequately shieldedfrom external RF energy. Your
physicianmay be able to assist you in obtaining this information.
www.mot.com/iDEN
70
Page 79

Safety and General Information
Use While Driving
Check the laws and regulations on the use of radioproductsin the area where
you drive. Always obey them.
When using the radio product while driving, please:
• Givefullattentiontodrivingandtotheroad
• Use hands-free operation, if available.
• Pull off the road and park before making or answering a call if driving
conditions so require.
.
71
Page 80

!!
Operational Warnings
For Vehicles Equipped with an Air Bag
Do not place a portable radio product in the area over the air bag or in the
air bag deployment area. An air bag inflates with great force.If a portable
radio is placed in the air bag deployment area and the airbag inflates, the
radioproduct may be propelled withgreat forceandcause seriousinjury to
occupants of the vehicle.
Potentially Explosive Atmospheres
Turn off your radio product, prior to entering any area with a potentially
explosiveatmosphere, unlessit isa radio producttype especiallyqualified
for use in such areas (for example, Factory Mutual Approved).Do not
remove,install, or charge batteries in such areas. Sparks in a potentially
explosiveatmosphere can cause an explosion or fire resulting in bodily
injury or even death.
NOTE: The areaswith potentially explosive atmospheresreferred to
above include fueling areas such as below decks on boats, fuel or
chemical transfer or storage facilities, areas where the air contains chemicalsorparticles, such asgrain,dustor metalpowders,
andanyother area where you would normally beadvised to turn
off your vehicle engine. Areas with potentially explosive atmospheres are often but notalways posted.
Blasting Caps and Areas
To avoidpossible interference withblasting operations, turnoff your radio
productwhenyouarenear electricalblasting caps,in a blasting area, or in
areas posted:“Turn off two-way radio”. Obey all signs and instructions.
www.mot.com/iDEN
72
Page 81

Safety and General Information
!
Operational Cautions
C a u t i o n
Antennas
Do not use any portable radio product that has a damaged antenna. If
a damaged antenna comes into contact with your skin, a minorburn can
result.
Batteries
All batteries can causeproperty damageand/or bodily injury, such as burns
if a conductive materialsuchas jewelry,keys, or beadedchains touches
exposed terminals. The conductive material may complete an electrical
circuit(shortcircuit) and become quite hot. Exercise care in handling any
chargedbattery, particularlywhen placing itinsidea pocket, purse,or other
container with metalobjects.
When the battery is detached from the phone, your batteries are packed
with a protective battery cover. Please use this cover for storing your
batteriesw hen not in use.
Cleaning and Drying Considerations
Using aleather carry case may helpprotect the surfacesand help prevent liquids
(e.g., rain) from entering into the interior of the radio product.This product is
not water proof, and exposing the unit to liquids may result in permanent
damage to the unit.
Ifyourradioproductinteriorgetswet,thendonottrytoacceleratedryingwith
the use of an oven or a dryer as this will damage the radio product and void the
warranty. Instead, do the following:
1. Immediately poweroff the radio product.
2. Remove Battery from radioproduct.
3. Shakeexcess liquid from phone.
4. Place phone andbattery in an areathatis at room temperatureand has good air flow.
5. Letphoneand battery dry for 72 hours before reconnectingthebattery and/
or powering on the phone.
73
Page 82

If the phone does not work after following the steps listed above, contact your
dealer for servicing information.
Clean the externals urfaces of the radio product with a damp cloth, using a mild
solutionof dishwashing detergent and water. Some household cleaners may
contain chemicals that could seriously damage the radio product. Avoid the use
of any petroleum-basedsolvent cleaners. Also, avoid applyingliquidsdirectly
on the radio product.
74
www.mot.com/iDEN
Page 83

Intrinsically Safe Radio Information
Intrinsically Safe Radio
Information
FMRC Approved Equipment
Anyoneintending to use a radioin a location where hazardousconcentrations of
flammable material exist (hazardousatmosphere) is advised to become familiar
withthe subject ofintrinsicsafety and withthe NationalElectricCodeNFPA 70
(National Fire Protection Association) Article 500 (hazardous [classified]
locations).
An Approval Guide, issued by Factory Mutual Research Corporation (FMRC),
lists manufacturers and the products approved by FMRC for use in such
locations. FMRC has also issued a voluntary approval standardfor repair
service (“Class Number 3605”).
FMRC Approvallabels are attachedto the radiotoidentify the unit as being FM
Approvedfor specified hazardous atmospheres. This label specifies the
hazardous Class/Division/Group along with the part number of the batterythat
must be used.Depending on the designof theportable unit,thisFM label can be
found on the back of the radio housing or the bottom of the radio housing.Their
Approval mark is shown below.
FM
APPROVED
75
Page 84

!
!
W A R N I N G
Do not operate radio communications equipment in a hazardous
atmosphere unless it is a type especially qualified (e.g. FMRC Approved)
for such use. An explosion or fire may result.
Do not operate theFMRCApproved Product in a hazardousatmosphere if
it has been physically damaged (e.g. cracked housing). An explosion or
fire may result.
Do not replace or charge batteries in a hazardous atmosphere. Contact
sparking may occur while installing or removing batteries and cause an
explosion or fire.
Do not replace or change accessories in a hazardous atmosphere. Contact
sparkingmay occur whileinstalling or removing accessories and cause an
explosion or fire.
Do not operate the FMRC Approved Product unit in a hazardous location
with the accessorycontacts exposed. Keep the connector cover in place
when accessories are not used.
Turn radio off before removing or installinga battery or accessory.
Do not disassemble the FMRC Approved Product unitin any way that
exposes the internal electrical circuitsof the unit.
Radios must ship from the Motorola manufacturing facility with the hazardous
atmosphere capability and FM Approval labeling. Radios will not be
“upgraded” to this capability and labeled in the field.
A modification changesthe unit’s hardware from its originaldesign
configuration. Modifications can only be done by the original product
manufacturer at one of its FMRC audited manufacturing facilities.
www.mot.com/iDEN
76
Page 85

Intrinsically Safe Radio Information
!
!
W A R N I N G
Failure to use an FMRC Approved Product unit with an FMRC Approved
battery or FMRC Approved accessories specificallyapproved for that
product may result in the dangerously unsafe condition of an unapproved
radio combination being used in a hazardous location.
Unauthorized or incorrect modification of anFMRCApproved Productunitwill
negate the Approval rating of the product.
Repair of FMRC Approved Products
REPAIRS FOR MOTOROLA FMRC APPROVED PRODUCTS
ARE T HE RESPONSIBILITY OF THE USER.
You may want to consider using a repair facility that operates under 3605 repair
service approval.
!
!
W A R N I N G
Incorrectrepair or relabeling of any FMRC Approved Product unit could
adversely affect the Approval rating of the unit.
Use ofaradiothat is notintrinsicallysafe in a hazardousatmospherecould
result in serious injury or death.
FMRC’s ApprovalStandardClass Number3605i s subject tochange at anytime
without notice to you, so you may wantto obtain a current copy of 3605 from
FMRC. Per the December, 1994 publication of 3605, some key definitions and
service requirements are as follows:
Repair
A repair constitutes something done internally to the unit that would bring it
backt o its originalcondition Approvedby FMRC. A repair shouldbe done in an
FMRC Approved facility.
Items not consideredas repairs are those in which an action is performed on a
unitwhichdoes not require the outer casingoftheunitto be opened in a manner
77
Page 86

which exposes the internal electrical circuits of the unit. You do not have to be
an FMRC Approved Repair Facility to perform these actions.
Relabeling
The repair facility shall have a method by which the replacement of FMRC
Approval labelsarecontrolled to ensure that any relabeling is limited to units
that were originallyshipped from the Manufacturer with an FM Approval label
in place. FMRC Approval labels shall not be stocked by the repair facility. An
FMRC Approval label shall be ordered from the original manufacturer as
needed to repair a specific unit. Replacementlabelsmay be obtained and
applied by the repair facility providing satisfactoryevidence that the unit being
relabeledwas originallyanFMRC Approved unit. Verificationmayinclude, but
is not limited to: a unit with a damaged Approval label, a unit with a defective
housingdisplayingan Approval label,or a customer invoice indicatingthe serial
number of the unit and purchase of an FMRC Approvedmodel.
Do No t Substitute Options or Accessories
The Motorola communications equipment certifiedby Factory Mutual is tested
as a system and consists of the FM Approved portable, FM Approved battery,
and FM Approved accessoriesor options, or both. This Approved portable and
batterycombination must be strictly observed. There must be no substitution of
items, even if the substitute has been previously Approved with a different
Motorola communications equipmentunit.Approved configurationsare listed
in the FM Approval guide published by FMRC, or in the product FM
Supplement. This FM Supplementis shipped with FM Approved radio and
batterycombination from the manufacturer. The Approval guide, or the
Approvalstandard Class Number 3605document for repairsand service, can be
ordered directly through Factory Mutual ResearchCorporation located in
Norwood, Massachusetts.
78
www.mot.com/iDEN
Page 87

Accessory Safety Information
Accessory Safety Information
IMPORTANT: SAVE THESE ACCESSORY SAFETY INSTRUCTIONS
• Beforeusing any batteryorbattery charger, readalltheinstructionsfor and
cautionary markings on (1) the battery,(2) the battery charger,which may
include a separate wall-mounted power supply or transformer, and (3) the
radio product using the battery.
• Do not expose any battery charger to water, rain, or snow as they are
designed for indoor or in-vehicle use only.
To reducethe riskof injury, charge onlythe rechargeable
batteries listed in the Accessories section of this manual.
!
!
W A R N I N G
• To reduce the risk of damage to the cord or plug,pull by the plug rather
than the cord when you disconnect the battery chargerfrom the power
source outlet.
• Do not operate any battery charger with a damagedcord or plug - replace
them immediately.
• Batterychargers may become warm during operation, but not hot. If it
becomeshotto the touch, unplugitfromthe power outlet immediatelyand
discontinue its use.
• Use of a non-recommendedattachment to a battery charger may result in a
risk of fire,electric shock, or injury to persons.
• Make sure the battery charger power cord is located so that it will not be
stepped on, tripped over, or subjected to damage or stress.
• An extensioncord should not be used with any battery charger unless
absolutely necessary. Use of an improper extension cord could result in a
riskoffire and electric shock. If an extension cord must be used, makesure
that:
❒
The pins on the plug of the extension cord are the same num-
ber, size, and shape as those on t he plug of the charger.
❒
The extension cord is properly wired and in good electrical
condition.
❒
The cord size is 18AWG for lengths up to 100 feet and 16AWG
for lengths up to 150 feet.
• Do not operate any battery charger if it has received a sharp blow, has been
dropped, or has been damaged in any way; take it to a qualified service
technician.
• Do not disassemble a battery charger; take it toa qualified service
technician when service or repair is required. Incorrectreassembly may
resultin a risk of electric shock or fire.
• Maximum ambienttemperature around the powersupplyor transformer of
any batterycharger should not exceed 40°C (104°F).
Other typesof batteriesmay burst,causing personalinjury
and damage.
79
Page 88

• The output power from the power supply or transformer must not exceed
the rating givenon the Desktop Dual-Pocket Charger.
• The disconnection from the line voltage is made by unpluggingthe power
supply from the AC receptacle.
• To reduce risk of electricshock, unplug any batterycharger from the outlet
before attempting any maintenance or cleaning.
• For optimum charging performance, turn off the radio productwhile
charging it in any batterycharger.
80
www.mot.com/iDEN
Page 89

Warranty
Warranty
Limited Warranty Motorola Communication Products
NOTE: This Warranty applieswithin the fifty (50) united statesand the Dis-
trictofColumbia.
I. W h at Th is Warra nty C overs and For How Long:
MOTOROLA, INC. (“MOTOROLA”) warrants the MOTOROLA
manufactured iDEN Communication Products listed below (“Product”)against
defectsin materialand workmanship under normal use andservicefor a period
of time from the date of purchase as scheduled below:
iDEN Subscriber Digital Mobile and
Portable Units
Product Accessories One (1) Year
Batteries One (1) Year
Rechargeable Batteries will be replaced during the applicable warranty period
if:
a. the battery capacity falls below 80% of rated capacity, or
b. the battery develops leakage.
MOTOROLA, at its options, will at no charge eitherrepairthe Product (with
new or reconditioned parts),r eplace it (with a new or reconditionedProduct), or
refund the purchase price of the Productduring the warrantyperiod provided it
is returnedin accordance with the terms of this warranty. Replacedparts or
boardsarewarranted for the balance of the originalapplicable warranty period.
All replaced parts of Product shall become the property of MOTOROLA.
This express limited warranty is extended by MOTOROLA to the original end
user purchaser only and is not assignableor transferable to any other party. This
is the complete warrantyfor the Product manufactured by MOTOROLA.
MOTOROLA assumes no obligations or liability for additions or modifications
tothiswarrantyunlessmadeinwritingandsignedbyanofficerof
MOTOROLA.Unless made in a separateagreement between MOTOROLA and
the original end user purchaser, MOTOROLA does not warrant the installation,
maintenance or service of the Product.
MOTOROLAcannotbe responsible in any way for any ancillaryequipment not
furnished by MOTOROLA which is attachedto or used in connection with the
Product,or for operation of the Product with any ancillary equipment, and all
such equipmentif expressly excluded from this warranty. Because each system
One (1) Year
81
Page 90

which may use the Product is unique, MOTOROLA disclaims liabilityfor
range, coverage, or operation of the systemas a whole under this warranty.
II. General Provisions:
This warranty sets forth the full extent of MOTOROLA’S responsibilities
regardingthe Product,Repair, replacement or refund of the purchase price, at
MOTOROLA’S options, is the exclusive remedy. THIS WARRANTY IS
GIVEN IN LIEU OF ALL OTHER EXPRESS WARRANTIES. IMPLIED
WARRANTIES, INLCUDING WITHOUT LIMITATION, IMPLIED
WARRANTIES OF MERCHANTABILITY AND FITNESS FOR A
PARTICULAR PURPOSE, ARE LIMITED TO THE DURATION OF THIS
LIMITED WARRANTY. IN NO EVENT SHALL MOTOROLA BE LIABLE
FOR DAMAGES IN EXCESS OF THE PURCHASE PRICE OF THE
PRODUCT, FOR ANY LOSS OF USE, LOSS OF TIME,INCONVENIENCE,
COMMERCIAL LOSS, LOST PROFITS OR SAVINGS OR OTHER
INCIDENTAL, SPECIAL OR CONSEQUENTIAL DAMAGES ARISING
OUT OF THE USE OR INABILITY TO USE SUCH PRODUCT, TO THE
FULL EXTENT SUCH MAY BE DISCLAIMED BY LAW.
III. State Law Rights:
SOME STATES DO NOT ALLOW THE EXCLUSION OR LIMITATION OF
INCIDENTAL OR CONSEQUENTIAL DAMAGES, OR LIMITATION ON
HOW LONG AN IMPLIED WARRANTY LASTS, SO THE ABOVE
LIMITATIONS OR EXCLUSIONS MAY NOT APPLY.
This warranty gives specific legal rights, and t here maybe other rights which
may vary from state to state.
IV. How to Get Warranty Service:
You must provide proof of purchase (bearing the date of purchase and Product
item serial number)in order to receive warranty service and, also, deliver or
send the Product item, transportation and insurance prepaid, to an authorized
warranty service location. Warranty service will be provided by MOTOROLA
through one of its authorized warranty servicelocations. If you firstcontact the
company which sold you the Product (e.g., dealer or communicationservice
provider), it can facilitate your obtaining warrantyservice. You can also call
MOTOROLA at 1-800-453-0920 for warrantyservicelocation information.
V. Wha t This Warranty Does Not Cover:
a. Defects or damage resulting from use of the Product in other thanits
normal and customary manner.
b. Defects or damage from misuse, accident, water, or neglect.
82
www.mot.com/iDEN
Page 91

Warranty
c. Defects or damage from improper testing,operation, maintenance,
installation, alteration,modification, or adjustment.
d. Breakage or damage to antennas unless caused directly by defects in
material workmanship.
e. A Product subjected to unauthorized Product modifications, disas-
semblies or repairs (including, without limitation, the addition to the
Product of non-MOTOROLA supplied equipment) which adversely
affect performance of the Product or interfere with MOTOROLA’S
normal warranty inspection and testing of the Product to verify any
warranty claim.
f. Product which has had the serial number removed or made illegible.
g. Rechargeable batteries if:
(1). Any of the seals on the battery enclosureof cells are broken or shoe
evidence of tampering.
(2) The damage or defect is caused by charging or using the battery in
equipmentor serviceother than the Product for which it is specified.
h. Freight costs to the repair depot.
i. A Product which, due to illegal or unauthorized alteration of t he soft-
ware/firmware in the Product, does not function in accordance with
MOTOROLA’S publishedspecifications or the FCC type acceptance
labelingin effect for the Product at the time the Product was initially
distributed from MOTOROLA.
j. Scratches or other cosmetic damage to Product surfaces that does not
affect the operation of the Product.
k. Normal and customary wear and tear.
VI. Patent and Softwa re P rovision s:
MOTOROLA will defend, at its own expense, any suit brought against the end
user purchaserto the extent that it is based on a claim that the Product or parts
infringe a United States patent, and MOTOROLA will pay those costs and
damages finally awarded against the end user purchaser in any such suit which
are attributable to any such claim, but such defense and payments are
conditioned on the following:
a. that MOTOROLAwillbe notified promptly in writing by such pur-
chaser of any notice of such claim;
b. thatM OTOROLAwill have sole control of the defense of such suit
and all negotiations for its settlement or compromise; and
c. Should the Product or parts become, or in MOTOROLA’S opinion be
likelyto become, the subjectof a claim of infringement of a United
States patent,that such purchaserw ill permit MOTOROLA,at its
83
Page 92

option and expense, eitherto procure for such purchaser the right to
continueto using the Productor parts or to replace or modifythesame
so that it becomes non-infringing or to grant such purchaser a credit
for the Product or parts as depreciated and accept its return. The
depreciation will be an equal amount per year over the lifetime of the
Product or parts as established by MOTOROLA.
MOTOROLA willhaveno liability with respect to any claim of patent
infringement which is based upon the combination of the Product or parts
furnished hereunder with software, apparatus or devices not furnished by
MOTOROLA, nor will MOTOROLA have any liability for the use of ancillary
equipmentor software not furnished by MOTOROLA which is attached to or
used in connection with the Product or any parts thereof.
Laws in the UnitedStates and other countries preserveforMOTOROLAcertain
exclusiverights for copyrighted MOTOROLA software, such as the exclusive
rights to reproduce in copies and distribute copies of such MOTOROLA
software. MOTOROLA software may be used in only the Product in which the
software was originally embodiedandsuch softwarein such Product may notbe
replaced, copied, distributed, modified in any way, or used to product any
derivative thereof. No other use including, without limitation, alteration,
modification, reproduction, distribution, or reverse engineering of such
MOTOROLA software or exercise or rights in such MOTOROLA software is
permitted. No l icense is granted by implication, estoppel or otherwise under
MOTOROLA patent rights or copyrights.
84
www.mot.com/iDEN
Page 93

Warranty
Limited Warranty Motorola Communication Products
(International )
NOTE:This Warranty applies within Singapore and the Philippines.
I. What This Warranty Covers and For How Long:
MOTOROLA warrants the MOTOROLA manufactured iDEN Communication
Productslistedbelow (“Product”) against defects in material and workmanship
under normal use and service for a period of time from the date of purchase as
scheduledbelow:
iDEN Subscriber Digital Mobile and
Portable Units
Product Accessories One (1) Year
Rechargeable Batteries will be replaced during the applicable warranty period
if:
a. the battery capacity falls below 80% of rated capacity, or
b. the battery develops leakage.
MOTOROLA, at its options, will at no charge eitherrepairthe Product (with
new or reconditioned parts),r eplace it (with a new or reconditionedProduct), or
refund the purchase price of the Productduring the warrantyperiod provided it
is returned in accordance with the terms of this warranty. Replaced parts or
boardsarewarranted for the balance of the originalapplicable warranty period.
All replaced parts of Product shall become the property of MOTOROLA.
This express limited warranty is extended by MOTOROLA to the original end
userpurchaser onlyandis not assignableor transferable to any other party. This
is the complete warrantyfor the Product manufactured by MOTOROLA.
MOTOROLA assumes no obligations or liability for additions or modifications
tothiswarrantyunlessmadeinwritingandsignedbyanofficerof
MOTOROLA. Unless made in a separate agreementbetween MOTOROLA
and the original end user purchaser, MOTOROLAdoes not warrant the
installation, maintenance or service of the Product.
MOTOROLAcannotbe responsible in any way for any ancillaryequipment not
furnished by MOTOROLA which is attachedto or used in connection with the
Product,or for operation of the Product with any ancillary equipment, and all
such equipment if expresslyexcluded from this warranty. Becauseeach system
which may use the Product is unique, MOTOROLA disclaims liability for
range, coverage, or operation of the system as a whole under this warranty.
One (1) Year
85
Page 94

II. General Provisions:
This warranty sets forth the full extent of MOTOROLA’S responsibilities
regardingthe Product,Repair, replacement or refund of the purchase price, at
MOTOROLA’S options, is the exclusive remedy. THIS WARRANTY IS
GIVEN IN LIEU OF ALL OTHER EXPRESS WARRANTIES. IMPLIED
WARRANTIES, INLCUDING WITHOUT LIMITATION, IMPLIED
WARRANTIES OF MERCHANTABILITY AND FITNESS FOR A
PARTICULAR PURPOSE, ARE LIMITED TO THE DURATION OF THIS
LIMITED WARRANTY TO THE FULL EXTENT SUCH MAY BE
DISCLAIMED BY LAW. IN NO EVENT SHALL MOTOROLA BE LIABLE
FOR DAMAGES IN EXCESS OF THE PURCHASE PRICE OF THE
PRODUCT, FOR ANY LOSS OF USE, LOSS OF TIME,INCONVENIENCE,
COMMERCIAL LOSS, LOST PROFITS OR SAVINGS OR OTHER
INCIDENTAL, SPECIAL OR CONSEQUENTIAL DAMAGES ARISING
OUT OF THE USE OR INABILITY TO USE SUCH PRODUCT, TO THE
FULL EXTENT SUCH MAY BE DISCLAIMED BY LAW.
III. How to Get Warranty Service:
You must provide proof of purchase (bearing the date of purchase and Product
item serial number)in order to receive warranty service and, also, deliver or
send the Product item, transportation and insurance prepaid, to an authorized
warranty service location. Warranty service will be provided by MOTOROLA
through one of its authorized warrantyservice locations. If you first contactthe
company which sold you the Product (e.g., dealer or communicationservice
provider), it can facilitate your obtaining warrantyservice.
IV. What This Warranty Does No t Cover:
a. Defec ts or damage resulting from use of the Product in other
than its normal and customary manner.
b. Defects or damage from misuse, accident, water, or neglect.
c. Defects or d amage from improper testing, operation,
maintenance, installation, alteration, modification, or
adjustment.
d. Breakage or damage to antennas unless caused directly by
defects in material workmanship.
e. A Product subjec ted to unauthorized Product modifications,
disassemblies or repairs (including, without limitation, the
audition to the Product of n on-MOTOROLA supplie d
equipment)
86
www.mot.com/iDEN
Page 95

Warranty
f. Pr oduct w hich has had the serial number removed or made
illegible.
g. Rechargeable batteries if:
1.Anyof the seals on the batteryenclosureof cellsare brokenor
shoe evidence of tampering.
2.the damage or defect is caused by charging or using the
battery in equipment or service other than the Product for which
it is specified.
h. Freight costs to the repair d epot.
i. A Product which, due to illegal or unauthorized alteration of
the software/firmware in the P rod uct, does not function in
accordance with MOTOROLA’S published specifications or
the local type acceptance lab eling in effect for the Product at
the time th e Product was initially distributed from
MOTOROLA.
j. Scratches or other cosmetic damage to Product surfaces that
does not effect the oper a tion of the Product.
k. Norm al and customary wear and tear.
l. Exclusion for defects or da m ag e arising from use of the
products in connection with non-MOTOROLA equipm e nt.
V. Patent and Software Provisions:
MOTOROLA will defend, at its own expense, any suit brought against the end
user purchaserto the extent that it is based on a claim that the Product or parts
infringe a United States patent, and MOTOROLA will pay those costs and
damages finally awarded against the end user purchaser in any such suit which
are attributable to any such claim, but such defense and payments are
conditioned on the following:
a. that MOTOROLA will be notifiedpromptly in writing by such
purchaser of any no tic e of such claim;
b. that MOTOROLA will have sole control of the defense of such
suit and all n egotiations for its settlement or compromise; and
c. Should the Product or parts become, or in MOTOROLA’S
opinion be likely to bec ome , the subject of a claim of
infringement of a patent, that such purchaser will permit
MOTOROLA, at its option and expense, either to procure for
such purchaser the right to continue to using the Pro duct or
parts or to repla c e or modify the same so that it becomes non-
87
Page 96

infringing or to gra nt such p urcha s er a credit for the Product or
parts as depreciated and accept its return. The depreciation
will be an equal amount per year over the lifetime of the
Product or parts as established by MOTOROLA.
MOTOROLA willhaveno liability with respect to any claim of patent
infringement which is based upon the combination of the Product or parts
furnished hereunder with software, apparatus or devices not furnished by
MOTOROLA, nor will MOTOROLA have any liability for the use of ancillary
equipmentor software not furnished by MOTOROLA which is attached to or
used in connection with the Product or any parts thereof. In no event shall
MOTOROLA be liable for any incidental, special or consequential damages
arisingfrom any claim of patent infringementor alleged infringement.
Laws in the UnitedStates and other countries preserveforMOTOROLAcertain
exclusiverights for copyrighted MOTOROLA software, such as the exclusive
rights to reproduce in copies and distribute copies of such MOTOROLA
software. MOTOROLA software may be used in only the Product in which the
software was originally embodiedandsuch softwarein such Product may notbe
replaced, copied, distributed, modified in any way, or used to product any
derivative thereof. No other use including, without limitation, alteration,
modification, reproduction, distribution, or reverse engineering of such
MOTOROLA software or exercise or rights in such MOTOROLA software is
permitted. No l icense is granted by implication, estoppel or otherwise under
MOTOROLA patent rights or copyrights.
88
www.mot.com/iDEN
Page 97

Patent & Trademark Information
Patent & Trademark Information
This product is protected under one or more of the following patents:
4291475,4365221, 4369516, 4374370, 4378603, 4390963, 4398265, 4400584,
4400585,4434461, 4455534, 4486624, 4491972, 4523155, 4546329, 4574243,
4581602,4581749, 4585957, 4593155, 4594657, 4602218, 4605987, 4616314,
4617520,4628529, 4629829, 4633141, 4636593, 4636741, 4648125, 4649543,
4654655,4680787, 4704588, 4711361, 4715063, 4717884, 4730195, 4731813,
4736277,4737976, 4741018, 4742562, 4761621, 4764737, 4775998, 4791527,
4794489,4797929, 4797947, 4798975, 4802236, 4803726, 4809356, 4811377,
4811404,4817157, 4827507, 4829543, 4831647, 4843621, 4845772, 4851966,
4852090,4860336, 4860341, 4868576, 4870686, 4872196, 4873683, 4876552,
4876656,4876740, 4879533, 4885553, 4887050, 4890199, 4896124, 4896361,
4897873,4903326, 4903327, 4904549, 4904992, 4905288, 4905301, 4912602,
4916262,4918431, 4918732, 4922178, 4941203, 4942570, 4945570, 4956854,
4959851,4963812, 4964121, 4970475, 4972355, 4972432, 4972455, 4975808,
4977589,4977616, 4979207, 4984219, 4984290, 4989230, 4992753, 4996529,
5008925,5010309, 5010570, 5014294, 5014346, 5017856, 5018188, 5020076,
5020091,5020092, 5020093, 5023580, 5023866, 5023911, 5025387, 5027388,
5028083,5028859, 5029233, 5036532, 5038253, 5040127, 5042071, 5045824,
5053924,5055800, 5055802, 5055803, 5057762, 5058136, 5059885, 5060264,
5063340,5065408, 5067139, 5070310, 5077757, 5077790, 5081674, 5083304,
5087004,5093632, 5095503, 5107487, 5109400, 5111162, 5113400, 5113436,
5117073,5117441, 5117449, 5117450, 5121047, 5121288, 5121412, 5122480,
5122722,5124889, 5127040, 5127042, 5127100, 5128834, 5133010, 5134717,
5140286,5140635, 5142551, 5142696, 5144533, 5146620, 5148471, 5148473,
5150075,5150359, 5150384, 5151643, 5152006, 5152007, 5153590, 5157693,
5160898,5162144, 5163159, 5164652, 5166596, 5166642, 5168522, 5170173,
5170485,5170492, 5175729, 5175759, 5175874, 5182749, 5185566, 5185790,
5187640,5187809, 5192924, 5193223, 5195106, 5195108, 5198887, 5200655,
5201069,5203009, 5203012, 5203013, 5203021, 5204977, 5205751, 5210793,
5211581,5212815, 5212826, 5214675, 5214774, 5216389, 5220290, 5220936,
5222078,5222104, 5222251, 5230007, 5230093, 5233506, 5233633, 5235492,
5237257,5237570, 5239127, 5241545, 5241548, 5241592, 5241688, 5242767,
5243355,5247544, 5247565, 5249302, 5251331, 5255292, 5257414, 5259005,
5260170,5260988, 5261119, 5262710, 5263052, 5263055, 5265271, 5267230,
5276588,5276707, 5276913, 5276915, 5278832, 5278994, 5280630, 5280637,
5280644,5285443, 5287013, 5287553, 5287555, 5287556, 5289505, 5297142,
5299232,5301365, 5308716, 5321705, 5321737, 5321847, 5323421, 5325405,
5325429,5327578, 5327642, 5331123, 5333153, 5336984, 5338909, 5343213,
5349588,5351245, 5359696, 5361400, 5363071, 5365549, 5366826, 5367538,
5367558,5371791, 5373101, 5375143, 5375258, 5379324, 5381114, 5384825,
5392000,5392023, 5392331, 5396654, 5401927, 5402447, 5402448, 5404580,
5404582,5406146, 5406562, 5408693, 5410275, 5410741, 5414711, 5420759,
89
Page 98

5424689, 5428362, 5428820, 5428836, 5430416,5432017, 5434947, 5436802,
5438684, 5442680, 5444764, 5446763, 5446766,5448763, 5448770, 5448771,
5453997, 5457744, 5459640, 5459774, 5461643,5463351, 5463406, 5463628,
5463646, 5463674, 5463688, 5463694, 5465409,5465412, 5469177, 5471671,
5475752, 5477192, 5485506, 5485513, 5486843,5487184, 5488649, 5490177,
5491739, 5493198, 5493700, 5493714, 5495206,5495208, 5497126, 5497382,
5497383, 5499273, 5499394, 5499397, 5502437,5504494, 5504812, 5506490,
5508709, 5509048, 5510693, 5511235, 5513078,5513996, 5519303, 5519346,
5519506, 5519777, 5524276, 5526398, 5528666,5530399, 5530922, 5533119,
5535258, 5535434, 5539360, 5542016, 5542103,5542106, 5542116, 5544250,
5546275, 5546380, 5551078, 5551627, 5553137,5553376, 5554996, 5555550,
5557743, 5559471, 5559522, 5559806, 5561436,5561437, 5561852, 5565881,
5566224, 5568548, 5570453, 5572223, 5572224,5574976, 5577267, 5577268,
5583520, 5584054, 5586146, 5588041, 5589796,5590177, 5594778, 5594951,
5598129, 5598431, 5600341, 5604050, 5604468,5604787, 5606332, 5606560,
5606730, 5613229, 5613863, 5615233, 5615259,5615260, 5621763, 5621766,
5625316, 5625683, 5628001, 5628057, 5628089,5629979, 5630159, 5630210,
5630213, 5630215, 5631538, 5633484, 5633786,5634202, 5640690, 5642368,
5646576, 5649306, 5649309, 5656914, 5656917,5657418, 5659601, 5660945,
5661433, 5664973, 5666429, 5668871, 5670912,5673001, 5673003, 5673287,
5674326, 5675591, 5675702, 5678201, 5678221,5678227, 5680063, 5684384,
5691947, 5692046, 5692101, 5696497, 5696821,5699070, 5699389, 5699408,
5701130, 5701244, 5701589, 5703470, 5703539,5703909, 5706019, 5706313,
5708445, 5710862, 5710987, 5711001, 5715520,5715524, 5717307, 5722052,
5724004, 5726983, 5729221, 5732350, 5737327,5737685, 5738954, 5739792,
5740525, 5742894, 5745116, 5745566, 5745848,5747970, 5748727, 5754141,
5754455, 5754583, 5754645, 5754956, 5758271,5760714, 5761300, 5761610,
5764100, 5764111, 5764730, 5764743, 5766794,5771182, 5771471, 5777521,
5777856, 5784368, 5784419, 5784585, 5787128,5787577, 5793315, 5793866,
5796822, 5797101, 5798716, 5799011, 5799256,5801513, 5801567, 5802111,
5805992, 5807012, 5808585, 5808586, 5809020,5809419, 5809421, 5809430,
5809433, 5809544, 5812093, 5812542, 5812590,5814798, 5815507, 5815570,
5815804, 5815805, 5815807, 5815820, 5821820,5822726, 5826224, 5831826,
5832080, 5832388, 5835006, 5835535, 5835785,5838202, 5841851, 5842122,
5844943, 5846094, 5848072, 5848152, 5848356,5848718, 5850440, 5854549,
5854785, 5854972, 5856763, 5856766, 5857148,5857192, 5859522, 5859567,
5859890, 5861853, 5862460, 5862493, 5864799,5865487, 5867063, 5867127,
5867140, 5867510, 5870670, 5872744, 5877633,5878075, 5878209, 5878336,
5878353, 5880637, 5880646, 5881377, 5889737,5889768, 5889859, 5892410,
5893036, 5894597, 5896054, 5896261, 5898933,5900829, 5901347, 5901357,
5903825, 5903852, 5905956, 5907418, 5907615,5909102, 5910944, 5912648,
5920549, 5920550, 5923007, 5924044, 5925835,5925942, 5926119, 5926503,
5926751, 5930268, 5930288, 5930299, 5933330,5936516, 5936972, 5939939,
5940452, 5940746, 5943027, 5945852, 5945964,5946395, 5949020, 5950131,
5950139, 5953413, 5954817, 5955700, 5955999,5956626, 5963848, 5963876,
5964858, 5966101, 5966667, 5966671, 5969545,5974042, 5977916, 5980268,
90
www.mot.com/iDEN
Page 99

Patent & Trademark Information
5982881,5983082, 5987012, 5988577, 5995050, 5996178, 5999115, 5999821,
5999832,6002922, 6002937, 6005498, 6006104, 6008636, 6009168, 6009309,
6009325,6009336, 6009552, 6011699, 6011784, 6011959, 6011961, 6012634,
6014376,6014552, 6016312, 6016422, 6018584, 6018651, 6018671, 6020787,
6021332,6023191, 6023615, 6025753, 6035182, 6035191, 6035522, 6038457,
6040683,6040720, 6041241, 6043721, 6043786, 6044153, 6047066, 6047084,
6049192,6049233, 6049532, 6049704, 6049725, D284759, D285439, D288432,
D288683,D 289156, D292578, D292920, D295627,D295973, D295975, D296187,
D297734,D 297735, D297736, D299136, D299137,D299232, D300742, D300827,
D301473,D 301476, D301883, D302015, D303656,D304189, D305427, D305717,
D306015,D 306163, D306293, D306299, D306441,D306583, D306594, D307271,
D309301,D 309451, D314173, D315330, D315346,D315543, D315559, D315565,
D315907,D 316417, D316859, D320780, D322783,D324024, D324388, D325028,
D325029,D 325032, D325583, D325915, D327061,D327062, D328302, D332261,
D332785,D 334746, D337332, D338012, D338887,D339127, D339335, D339336,
D339337,D 339564, D339578, D339581, D339582,D340709, D340710, D340711,
D340906,D 341589, D342248, D342663, D342729,D342730, D342741, D343173,
D343615,D 343616, D343834, D343835, D343836,D344087, D344271, D344444,
D344511,D 344512, D344945, D345977, D346785,D346786, D346798, D348071,
D348250,D 348427, D348470, D348665, D348666,D348668, D348674, D348880,
D349273,D 349701, D350113, D350348, D350349,D350350, D351375, D351840,
D352497,D 352503, D352946, D353131, D353361,D353587, D353588, D353591,
D354055,D 354062, D355181, D355895, D356084,D356309, D357224, D357249,
D357457,D 357680, D357681, D358148, D359052,D359734, D359735, D359959,
D360398,D 360632, D361070, D361763, D362840,D362852, D365094, D365817,
D366872,D 367640, D368479, D368696, D369162,D369359, D369797, D370016,
D370463,D 370672, D372237, D372481, D372703,D372896, D372919, D373585,
D373764,D 374013, D374014, D374227, D374424,D374872, D375732, D375733,
D375734,D 375932, D375935, D375952, D376127,D377792, D377934, D378366,
D378911,D 379558, D379624, D379981, D379982,D380468, D380751, D381021,
D381664,D 382537, D382538, D382872, D383115,D383748, D383749, D383759,
D384080,D 384662, D384951, D384952, D385271,D385283, D385555, D385873,
D385874,D 385875, D385877, D385888, D386175,D386494, D386757, D387054,
D387055,D 387199, D387346, D388078, D388079,D388080, D388081, D388082,
D388424,D 388429, D388430, D388775, D388783,D388793, D389157, D389476,
D389478,D 389488, D389641, D390221, D390222,D390509, D391567, D391955,
D391966,D 393470, D394256, D394423, D394425,D394433, D394438, D394439,
D395301,D 395302, D395431, D395642, D395875,D396472, D397337, D397689,
D397694,D 398926, D400161, D400165, D400204,D400209, D400496, D400526,
D400527,D 400874, D401554, D401929, D403265,D404397, D405080, D405782,
D405801,D 406098, D406191, D406586, D406695,D406812, D407063, D407685,
D407708,D 408401, D408402, D408418, D408783,D408815, D409186, D410459,
D410460,D 410929, D411165, D411196, D411202,D411204, D411507, D411535,
D411843,D 411844, D412000, D412487, D412709,D413893, D413898, D414159,
D415122,D 415499, D416226, D417224, D417449,D419155, D419290, D419565,
D419956,D 420008, D420977, D421005, D421443,D421982, D422275, D422595
91
Page 100

Additionalpatents are pending.
MOTOROLA, the Stylized M Logo and all other trademarks indicated as such
herein are trademarks of Motorola, Inc. ®Reg. U.S. Pat. & Tm. Off. ©
Copyright2000 Motorola, Inc. All rights reserved. Manufacturedunder one or
more of the U.S. patents listed in the User’sGuide.
T9 is a trademark ownedby Tegic Communications, Inc.
All other productor service names mentioned in this manual are the property of
their respective trademark owners.
92
www.mot.com/iDEN
 Loading...