

Page 1
Fiber Inspection Microscope
Operation Manual
Thank you for purchasing the IDEAL Fiber Inspection Microscope.
This instrument was designed to provide years of service while delivering true optical performance.
This instrument can be configured for either 100x or 200x magnification, depending upon the eyepiece used (10x or 20x). A universal 2.5mm connector adapter is included with the microscope and
various other universal or dedicated, interchangeable adapters can be purchased for use with the
microscope. This manual will provide you with the necessary information of the operation and maintenance of your new IDEAL Fiber Inspection Microscope.
User Safety Warning
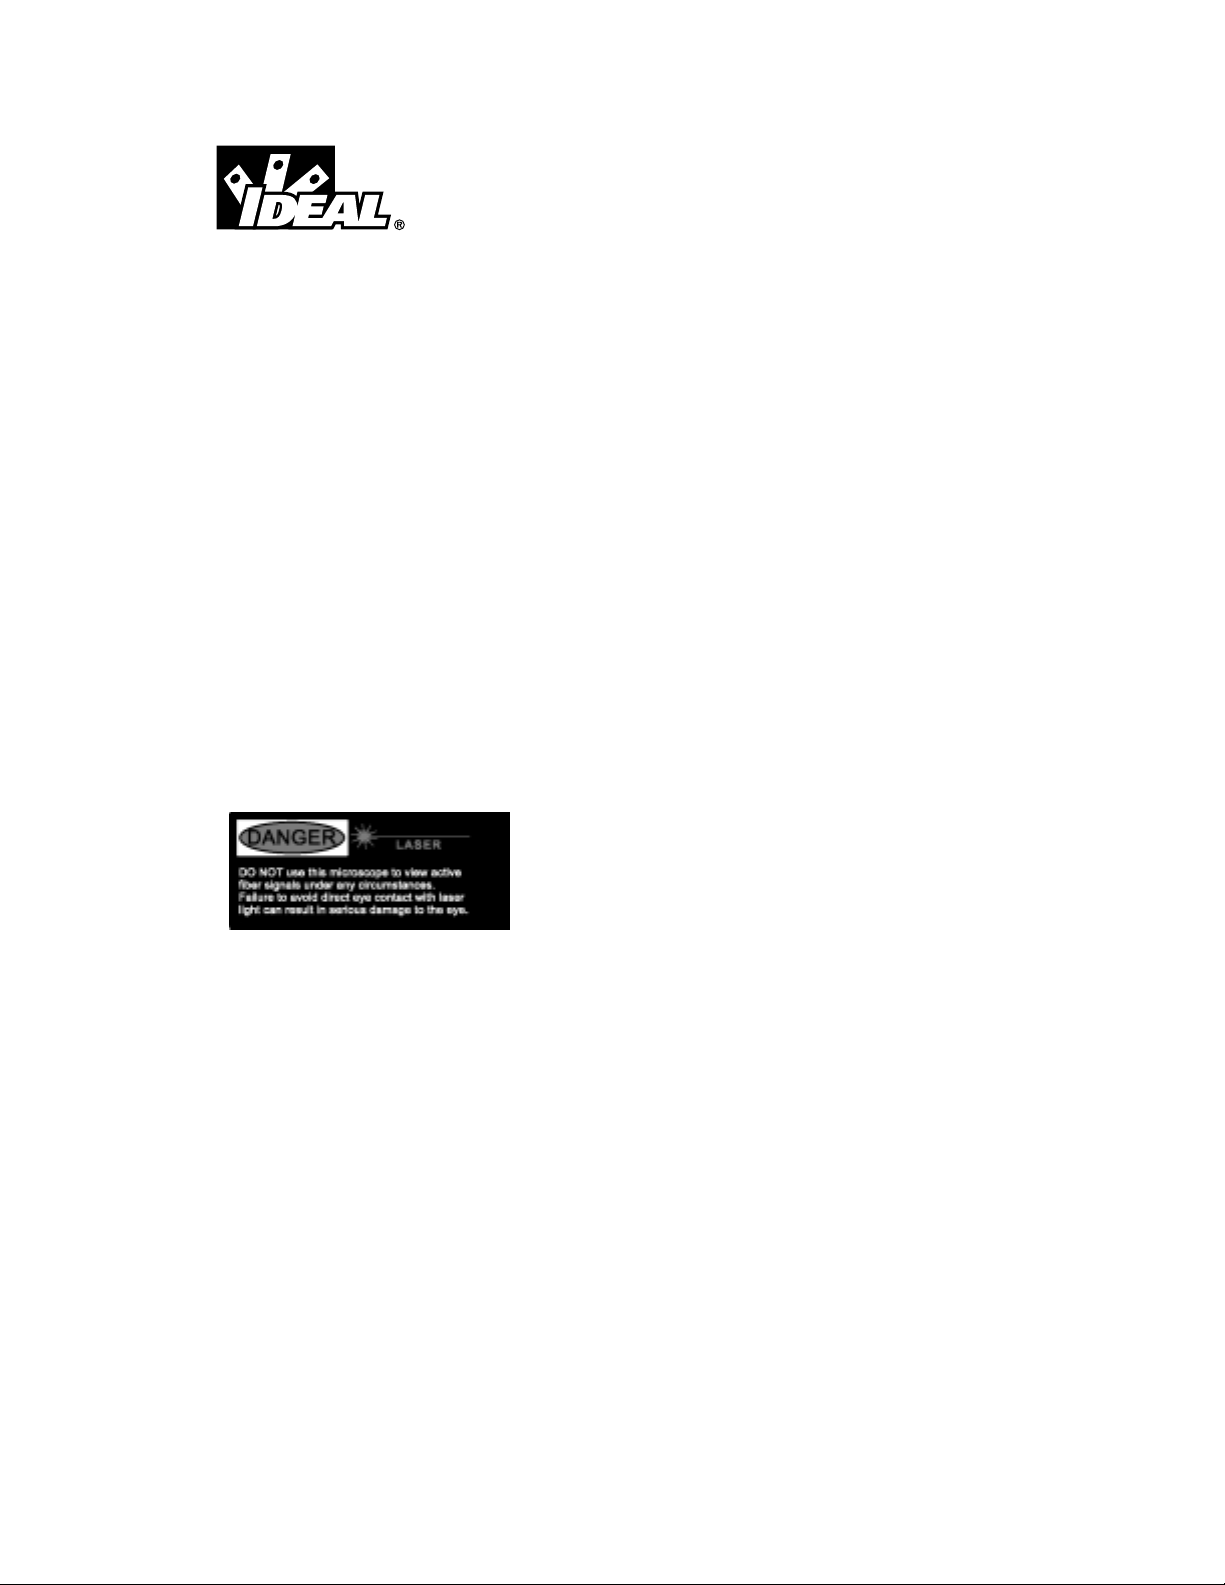
DO NOT use the Fiber Inspection Microscope to view active fiber signals under ANY circumstances.
Active fiber signals contain laser light, and direct eye contact
with laser light should be avoided. The failure to avoid direct
eye contact with laser light can result in serious damage to the
eye. The Fiber Inspection Microscope may magnify the laser
light in active fiber signals; direct eye contact with magnified
laser light should be avoided. Laser safety filters, as used on
the Fiber Inspection Microscope, are no substitute for practicing good laser safety. If you are unfamiliar with laser safety practices, seek out professional training. There are many capable trainers working
in the fiber optic field who can help.
This manual will explain the general use of the Fiber Inspection Microscope. However, it is important
to read the specific termination instructions published by the manufacturer of the connector you are
using. This will ensure proper termination. Also, be sure you have read the User Safety Warning and
fully understand that direct eye contact with laser light and magnified laser light should be avoided.
SETUP
Changing the Connector Adapter
The Fiber Microscope comes fully assembled. Just remove the instrument from its case, and it ’s
ready to use. The Universal 2.5mm Adapter should already be in place. If needed, other adapters may
be used. Unscrew the Universal Adapter from the microscope, and replace it with another.
OPERATION
1. Load the Fiber into the Adapter
#45-332
Page 2

Load the polished connector into the 2.5mm Universal Adapter (Part #693.008). Simply slide the ferrule (2.5mm) into the adapter port until you feel it hit a stop It may require a little pressure to get it
started as our adapter is equipped with a no-slip gripping mechanism.
It is important to slide the ferrule all the way to the stop. This will minimize any refocusing that needs
to be done when changing from one connector to the next. If you have purchased one of the dedicated
adapters, insert the connector just as you would into a patch bay or mated connector.
Special Instructions
MTRJ Adapter
When using the MTRJ adapter, only one fiber will be visible at a time. In order to inspect each fiber,
insert the connector and view the first fiber. Then, remove the connector from the adapter, rotate it
180°, insert again, and view the other fiber.
2. Turn the light on.
The light operates by pressing and holding the light switch.
3. Focus and view.
Once the connector is loaded and the light is on, hold the eyepiece up
to your eye and begin focusing. Grip the focusing eyepiece and turn it to focus the image.
The first time you use the microscope, it may take a little longer to find the image. Once you find the
image, very little refocusing is necessary if the connector is properly loaded.
Hint:
If you have trouble finding the image, there is a simple trick. Load the connector and check to see that
the light is on. Then turn the “Focus Adjustment” clockwise until you feel the tube hit a stop. At this
point, the objective is actually just touching the sample. If you look in the eyepiece, the image will be
dim or black. Now look into the microscope and begin slowly turning the tube counter-clockwise. This
will slowly back the lens away from the sample and at some point the fiber should come into view.
SERVICE AND MAINTENANCE
Changing the Batteries
1. Remove the battery cap and the three used batteries.
2. Replace with three type “LR44” batteries as shown above.
3. Replace the battery cap.
Changing the Eyepiece
1. Slide the rubber Eyecup off of the Focusing Tube.
2. After the Eyecup is removed, unscrew the Eyepiece from the Focusing Tube.
Page 3

3. Replace the Eyepiece and the Eyecup.
Maintenance
Keep this instrument clean and dry. It is built for durability and field use, but careful operation will
greatly extend life.
PARTS AND ACCESSORIES
Eyepiece 10x 693.007
Eyepiece 20x 45-336
Connector Adapters
Universal Adapter (2.5mm) 693.008
(For FC,SC,ST connectors.)
Universal Adapter (1.25mm) 45-334
(For LC or MU connectors.)
MTRJ Adapter 45-335
Over 80 other dedicated and universal adapters are available, which can be configured to work with
this microscope. Most of these adapters will require a coupling adapter: Part #693.009.
Please call your sales representative for more information:
Copyright 2002
All rights reserved.
 Loading...