

Page 1
IDEAL INDUSTRIES, INC.
TECHNICAL MANUAL
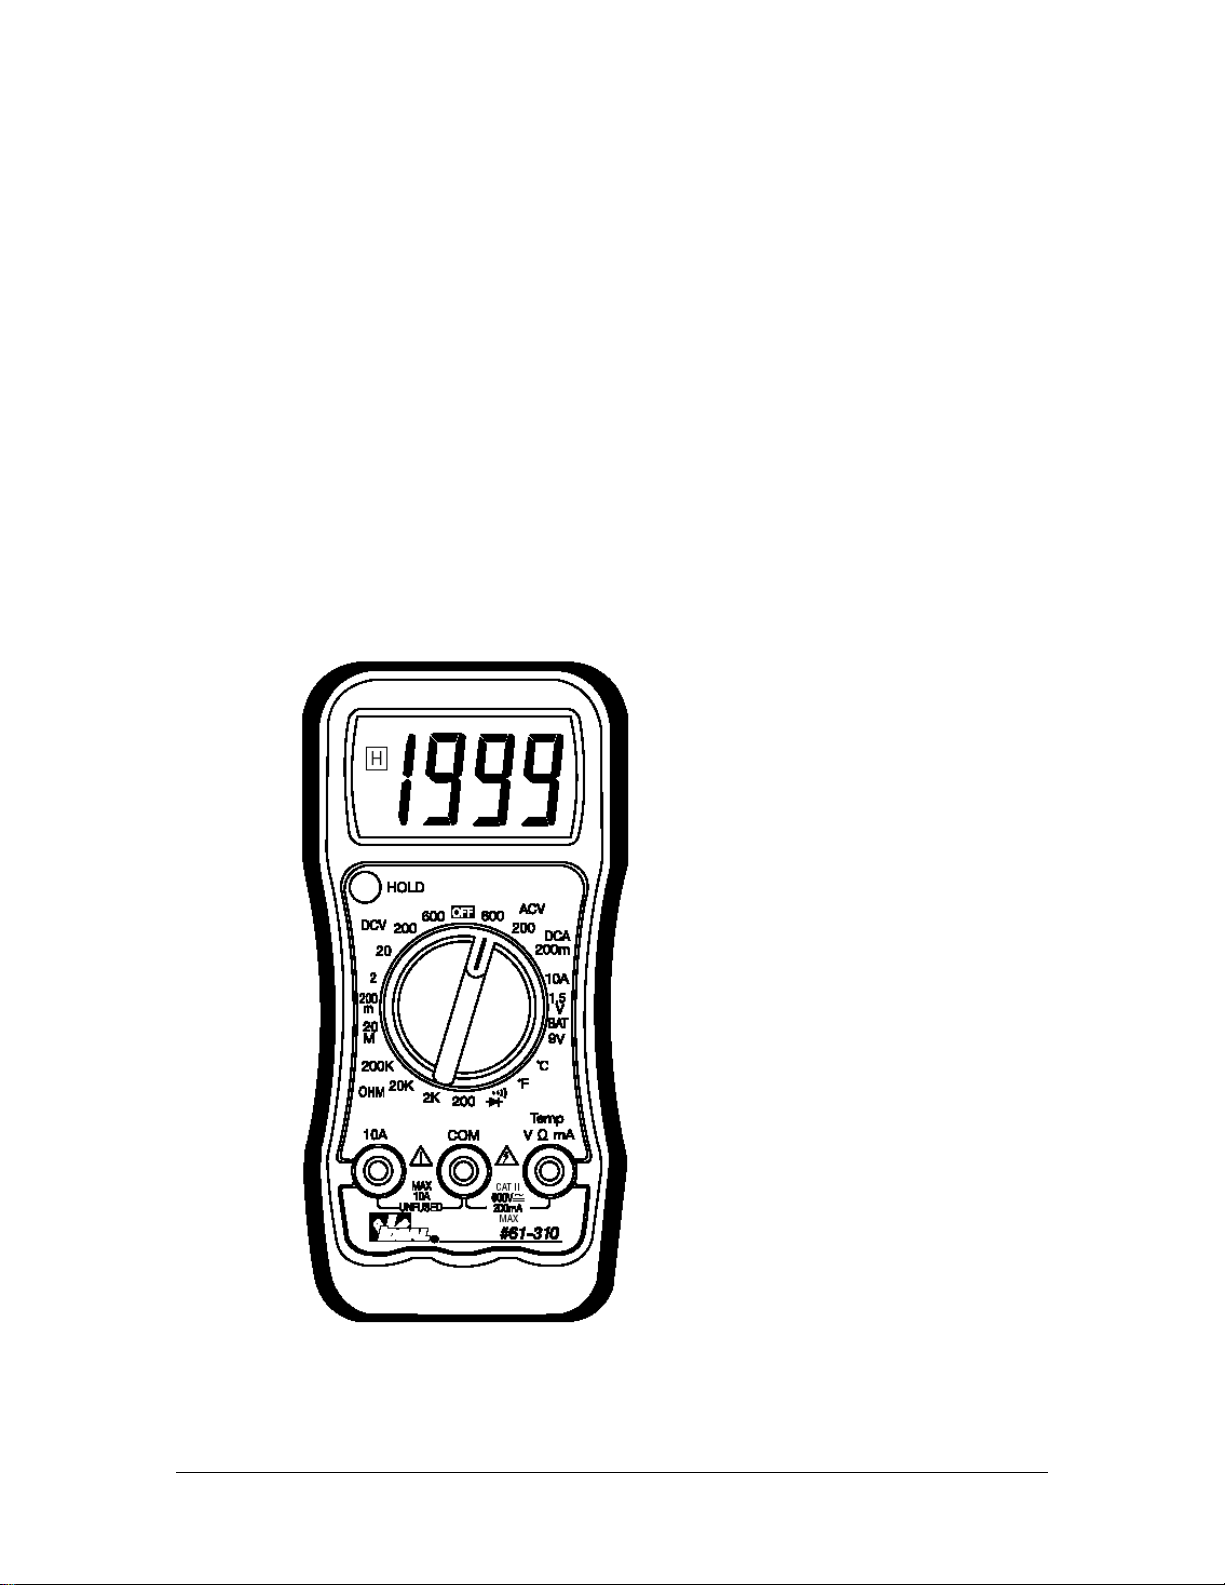
MODEL: 61-310
This Service Manual provides the following information:
● Precautions and safety information
● Specifications
● Basic maintenance (cleaning, replacing the battery and fuses)
● Performance test procedures
● Calibration and calibration adjustment procedures
Form Number: TM61310
Revision: 2. Date: August 2007
Form Number TM61310 Rev 2 Aug 2007
Page 2
TABLE OF CONTENTS Page
Introduction 1
Precautions and Safety Information 1
Symbols 1
Safety 2
Specifications 3
General Specifications 3
Measurement Characteristics 4
Voltage Specifications 4
Current Specifications 4
Resistance Specifications 5
Diode Check, Continuity, Temperature Specifications 5
Auto Power Off, Data Hold Function, Battery Test 5
Physical and Environmental Characteristics 6
Certifications and Compliances 6
Required Equipment 7
Basic Maintenance 8
Opening the Meter Case 8
Replacing the Battery 8
Replacing Fuses 9
Fuse Replacement 9
Cleaning 9
Performance Tests 10
Testing the Voltage Function 10/11
Testing the DC Current Function 11
Testing the Resistance Function 11/12
Testing the Diode and Continuity Functions 12
Testing the Temperature Function 12
Calibration 13
Calibrating DCV, ACV Functions 13
Calibration DC Current, Temperature 13
Form Number TM61310 Rev 2 Aug 2007
Page 3
Page 1
Introduction
Warning
To av ures
oid shock or injury, do not perform the verification tests or calibration proced
described in the manual unless you are qualified to do so.
Th y.
e information provided in this document is for the use of qualified personnel onl
Caution
The 61-310 series contain parts that can be damaged by static discharge.
Follow the standard practices for handling static sensitive devices.
For additional information about IDEAL INDUSTRIES, INC. and its products, and services,
visit IDEAL INDUSTRIES, INC. web site at:
www.idealindustries.com
Precautions and Safety Information
Use the meter only as described in the Se
pro
vided by the meter may be impaired. Read the “Safety Information” page before servicing
this
product.
In t hat pose hazard (s) to the user; a
his manual, a Warning identifies conditions and actions t
Ca
ution identifies conditions and actions that may damage the meter or the test instrument.
The
Symbols
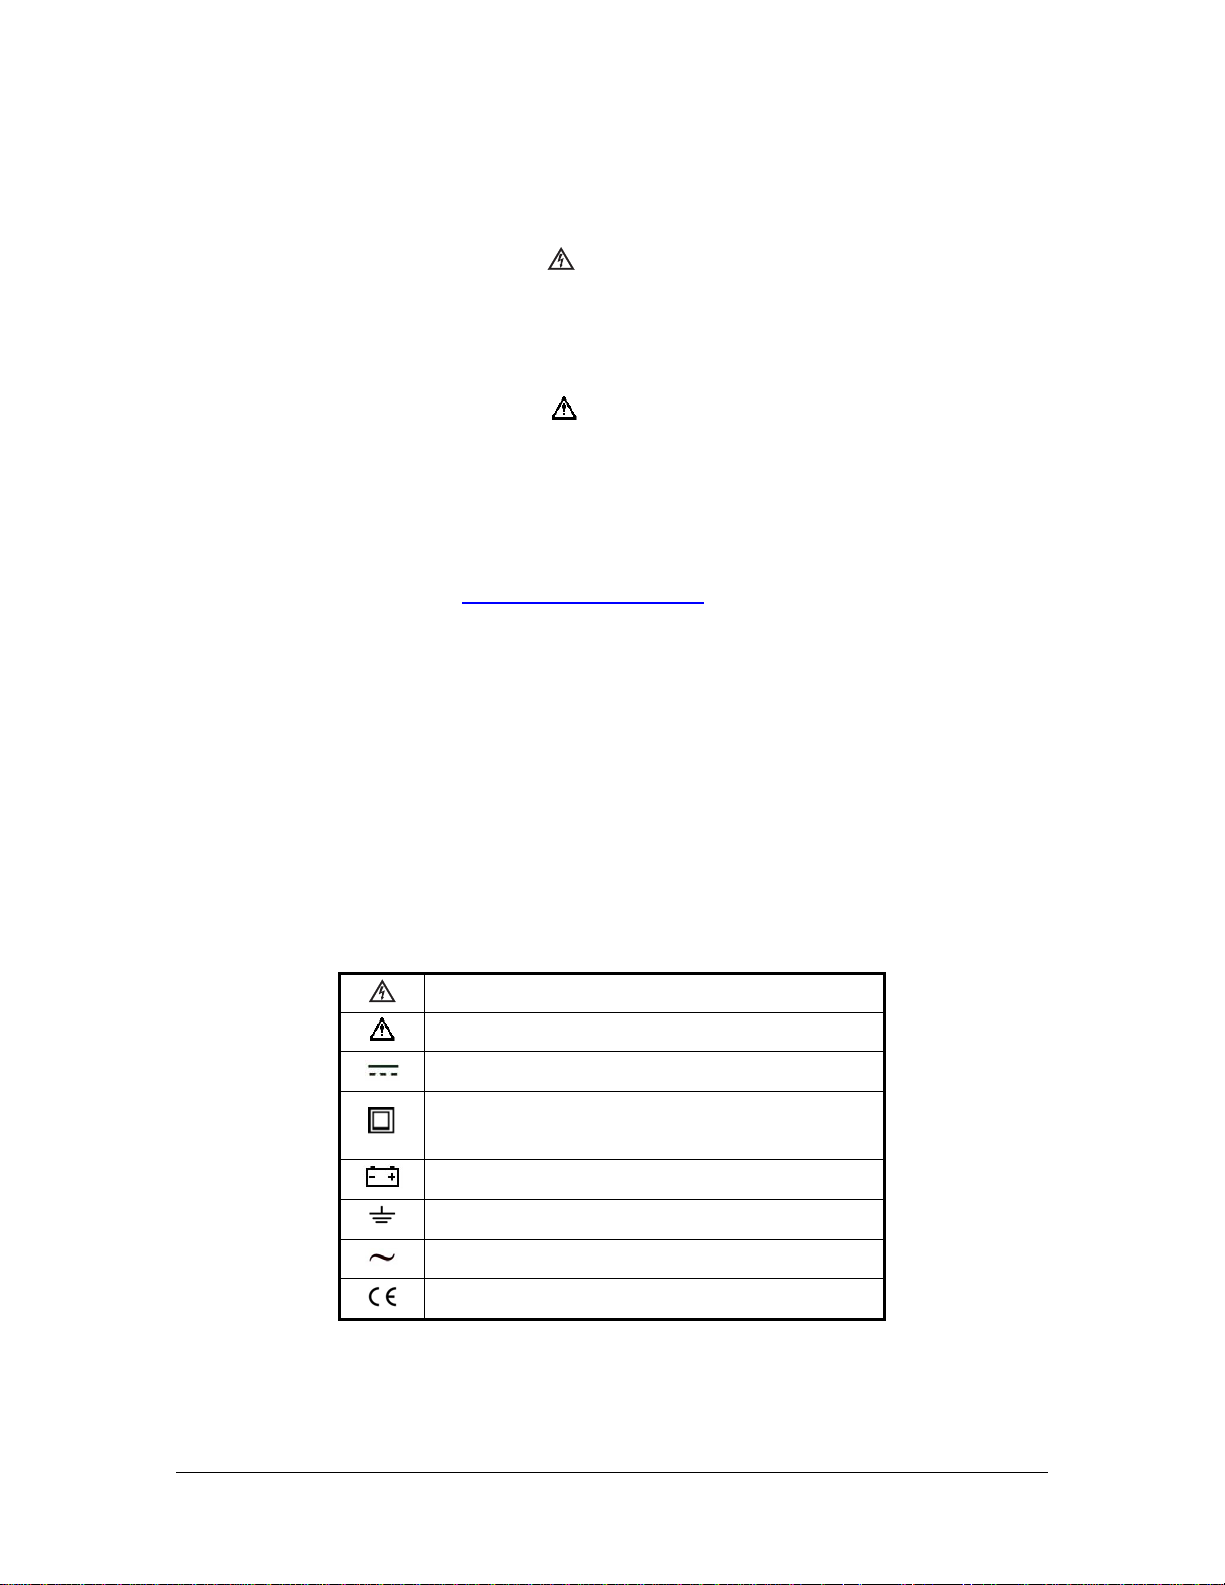
The symbols used on the meter and in this manual are explained in Table A.
e A. The Symbols
Tabl
rvice Manual. If you do not do so, the protection
Risk of electric shock
Refer to the manual. Important information.
DC measurement
Equipment protected by double or reinforced
insulation
Battery
Earth
AC measurement
Conforms to EU directives
Form Number TM61310 Rev 2 Aug 2007
Page 4

Page 2
SAFETY
Re uct or
view the following safety precautions to avoid injury and prevent damage to this prod
any
products connected to it. To avoid potential hazards, use the product only as specified.
For operating instructions, see the 61-310 Digital Multimeter Instruction Manual.
CAUTION: These statements identify conditions or practices that could result in damage to
the equipment or other property.
WARNING: These statements identify conditions or practices that could result in personal
injury or loss of life.
Specific precautions
Use proper Fuse. To avoid fire hazard, use only the fuse type and rating specified for this
pro
duct.
Do not operate without covers. To avoid personal injury, do not apply any voltage or current
to t
he product without covers in place.
Electric overload. Never apply a voltage to a connector on the product that is outside the
ran
ge specified for that connector.
Av d electric shock. To avoid injury or loss of life, do not connect or disconnect probes or test
oi
lea
ds while they are connected to a voltage source.
Do not operate in wet/damp conditions. To avoid electric shock, do not operate this product
in w
et or damp conditions.
Form Number TM61310 Rev 2 Aug 2007
Page 5
Page 3
SPECIFICATIONS
All
specifications are warranted unless noted typical and apply to the 61-310.
Sta ry
ted accuracies are at 23°C±5°C at less than 70% relative humidity and without the batte
ind
icator displayed.
Ge
neral specifications
Characteristics Description
Display count 3 ½ digit liquid crystal display, 1999 count
Numeric update rate 3 times / sec
Polarity display Automatic, positive implied
Over range display “OL“ is displayed
Low Battery indicator is indicated
Automatic power-off time Automatic backlight off = 30 minutes
Power source 9Vbattery, NEDA 1604, JIS006P, IEC6F22
Maximum input voltage 600V CAT II between V and COM
Maximum floating voltage 600V CATII between any termianl and earth ground
Maximum mA input current, V/ma and COM Fused 250mA at 250Vrms
Maximum A input current, 10A and COM 10A , not Fused, max time is no longer that 15 seconds
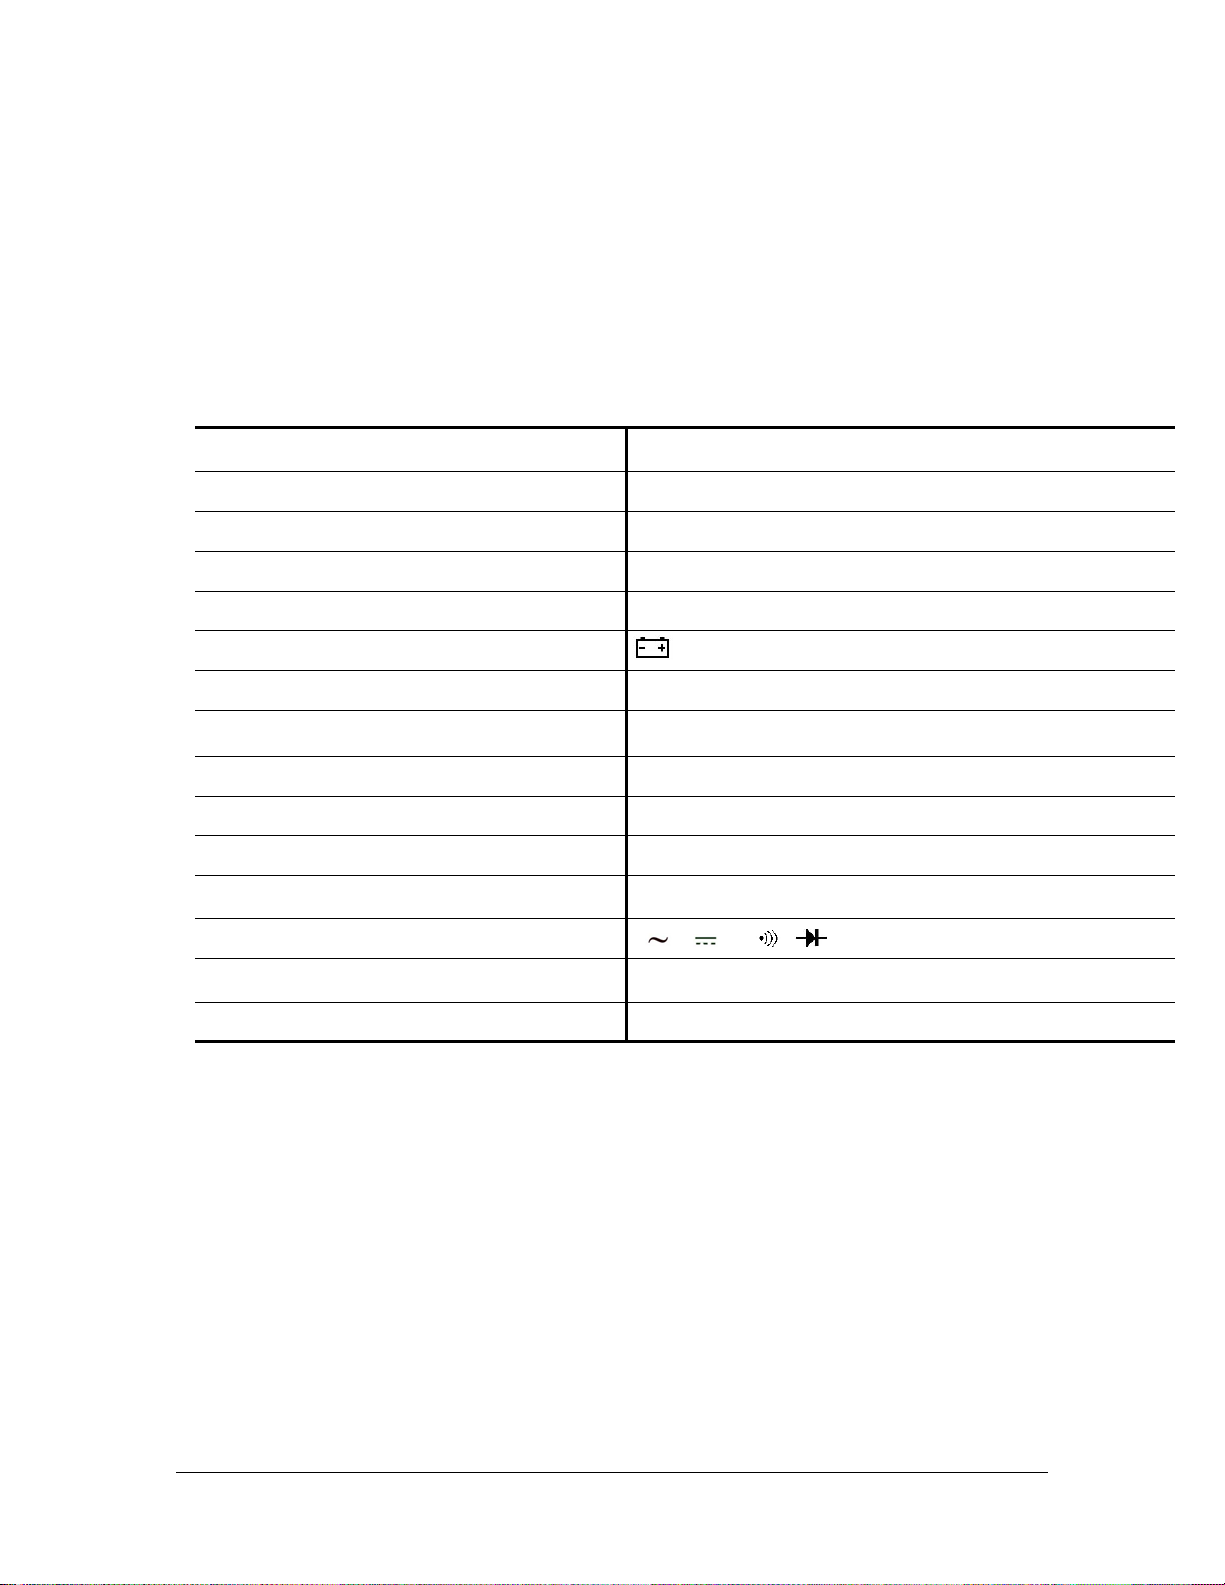
V connector V , V , , , , mA, Temperature
Temperature Coefficient 0.1×(Spec. Accuracy) per °C, <18°C or >28°C
Battery Life
Alkaline 9V, approximately 200 hours
Form Number TM61310 Rev 2 Aug 2007
Page 6

Page 4
Me
asurement Characteristics
Ac
curacy is ±(% reading + number of digits) at 23°C ± 5°C, less than 80% R.H.
(1)
DC Volts
Range Resolution Accuracy
Over voltage
protection
200.0mV 100μV
2.000V 1mV
0.5% + 2
20.00V 10mV
600V rms
200.0V 100mV
600V 1V 0.8% + 2
Inp
ut Impedance: 10MΩ
(2)
AC Volts
Range Resolution Accuracy
200.0V 100mV
600V
1V
40-400Hz
1.2% + 10
1.2% + 10
Over voltage
protection
600V rms
Input Impedance: 4.5MΩ
AC Conversion Type: Average sensing rms indication calibrated to the sine wave in put.
(3) DC Current
Resolution Accuracy Overload protection Range
200.0 mA 25 se 0.1mA 1.5% + 2 0mA/250V Fast Blow Fu
10.00A* .01A 3.0% + 5 Not fused, 15 sec Max
*
Caution: Do not make high current measurements on the 10A scale for longer that 15
ec ds s onds. This should be followed by a 15 minute cool down period. Exceeding 15 secon
may cause damage to the meter and/or the test leads.
Form Number TM61310 Rev 2 Aug 2007
Page 7

Page 5
(4) Resistance
Range Resolution Accuracy
Over voltage
protection
200.0Ω *1 0.1Ω 0.8% + 4
2.000KΩ 1Ω
20.00KΩ 10Ω
0.8% + 2
250V rms
200.0KΩ 100Ω
2.000MΩ 1KΩ
20.00MΩ *2 10KΩ 3.0% + 3
en circuit Voltage: -1.5V approx.
Op
1
5 digit of reading rolling.
*
<
2
*
± 2% of reading rolling.
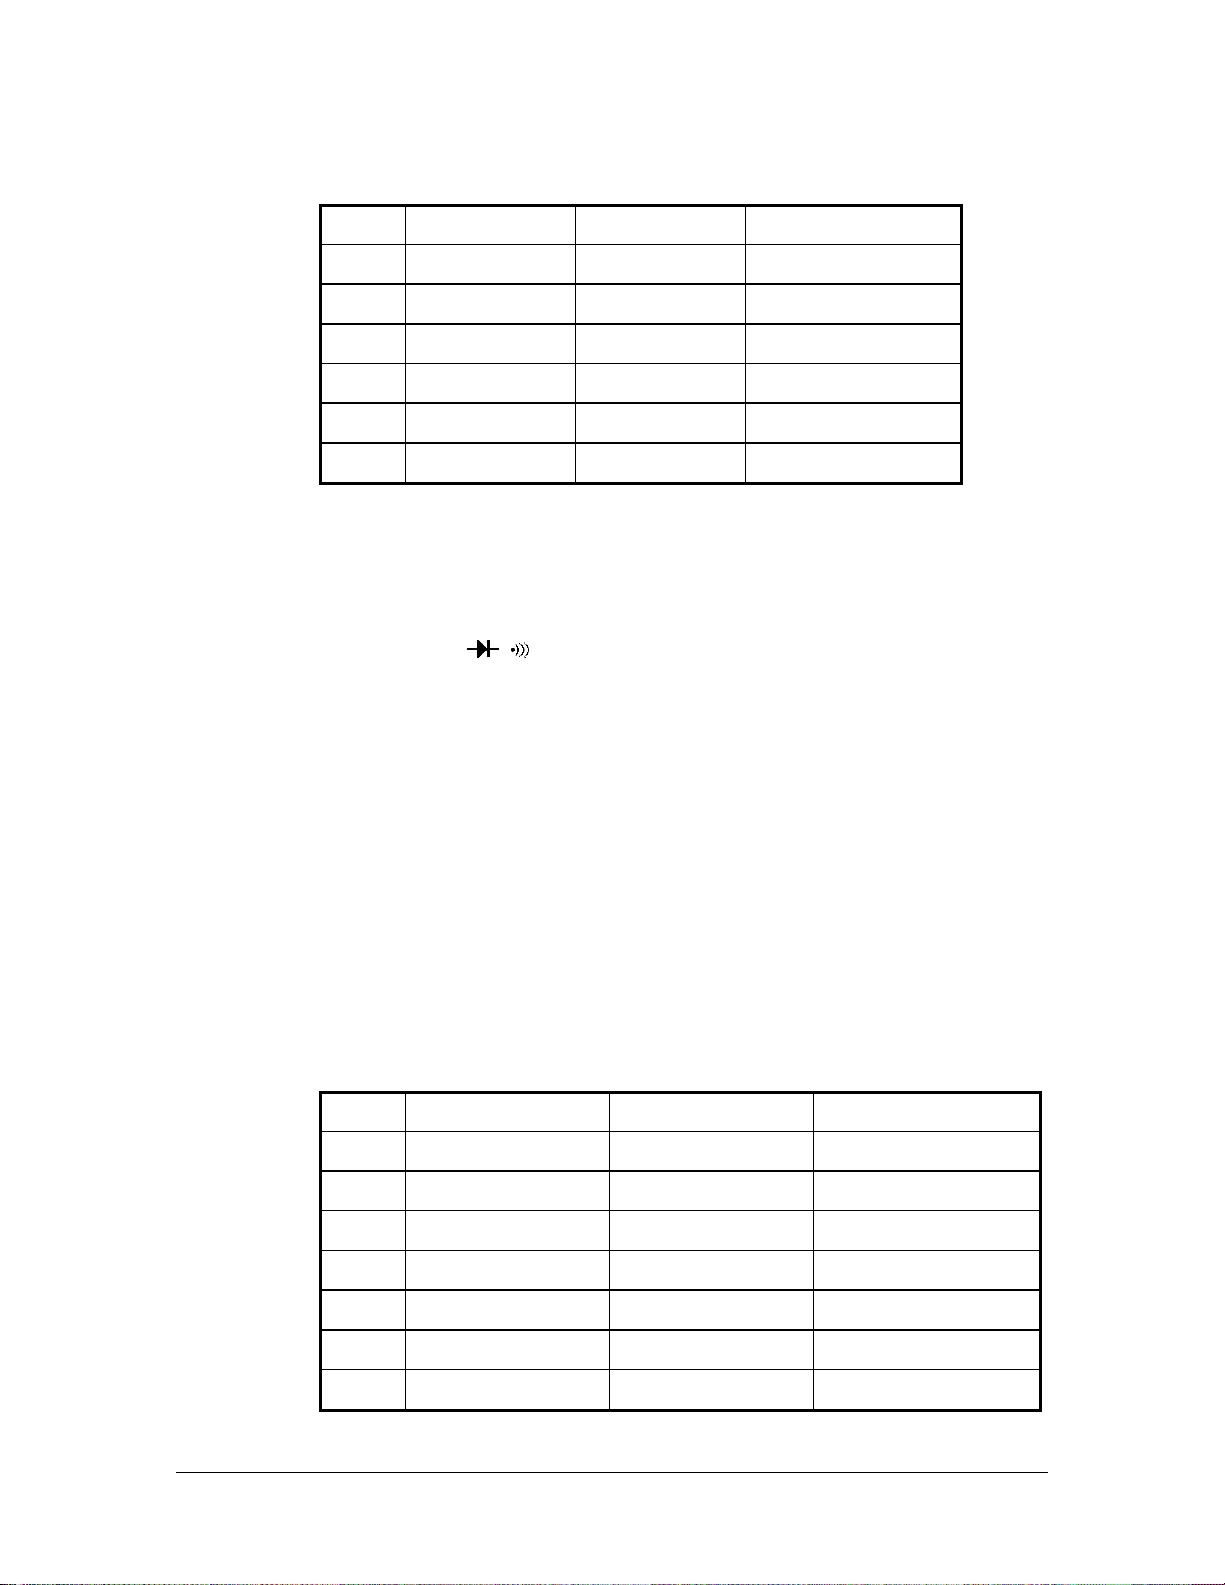
(5)
Diode Check and Continuity
Range Resolution Accuracy
Max. Test
Current
Max. Open
Circuit Voltage
1mV Not specified * 1mA, approx. 2.8V, approx.
Ov
erload Protection: Not specified
Co a
ntinuity: Built-in buzzer sounds when resistance is less than approximately <30 Ω with
res
ponse time of approximately 100 msec.
(6)
Temperature: Type K thermocouple
Range Resolution Accuracy
Overload
protection
-20 to 16 ºC
17 to 400 ºC
401 to 750 ºC
1º 2.5% + 10
1º 1.0% + 5
1º 2.5% + 10
Not Specified
-4 to59 ºF
60 to 750ºF
751 to 1382ºF
1º 2.5% +19
1º 1.0% +9
1º 2.5% +19
(7)
Auto Power Off (APO)
If th
e meter idles for more than 15 minutes, the meter automatically turns the power off.
(8)
Data Hold
Pre lay.
ss the HOLD button to freeze the reading in the display, “H” will appear on LCD disp
Pre OLD button again to release the data hold function.
ss the H
(9)
Battery Test 1.5 and 9V
Tes tely 120mA
t current 1.5V is approxima
9.0V is approximately 9mA
Form Number TM61310 Rev 2 Aug 2007
Page 8

Page 6
Physical and Environmental Characteristics
Characteristics Description
Dimensions (H×W×D)
150mm(H) ×76mm (W) ×38mm(D) (with holster)
5.9” (H) x 3.0”(W) x1.5”(D)
Weight (with battery& holster) 0.219Kg (7.1 oz.)
Environmental characteristics Description
Temperature operating range 0 to +40°C
Non-Operating -20 to +60°C <80% R.H.
Humidity (operating) <75% R.H.
Altitude 6561.7 Ft. (2000m)
Indoor Use Indoor Use
Certifications and compliances
Safety
Complies with UL 61010B-1
Input Safety Rating
V / Ω/Temp/mA, UL 61010B-1, UL 61010-B-2-031, EU
61010-1 EN61010-2-031, Cat II 600Volts
CAT III: Distribution level mains, fixed installation.
CAT II: Local level mains, appliances, portable equipment
I: Signal level, special equipment or parts of equipment,
CAT
telecommunication, electronics.
Pollution Degree 2
EC Declaration
of Conformity
Do not operate in environments where conductive
Pollutants may be present.
Meets the intent of Directive 89/336/EEC for Electromagnetic
Compatibility and Low Voltage Directive 73/23/EEC for product
safety. Compliance was demonstrated to the following specifications
as listed in the official Journal of the European Communities:
En 55011 Class A: Radiated and Conducted Emissions.
En 50082-1 Immunity:
IEC 801-2 Electrostatic Discharge
IEC 801-3 RF Radiated
En 61010-1 Safety requirements for electrical equipment for
measurement, control, and laboratory use.
Form Number TM61310 Rev 2 Aug 2007
Page 9

Re
quired Equipment
Required equipm le B. If the recommended models are not available,
equipment with equivalent specifications may be used.
Repa performed only b
irs or servicing should be y qualified personnel.
Table
B. Required Equipment
E Characteristics ended Model
quipment Required Recomm
ent is listed in Tab
Page 7
Calibrator
AC Voltage Range: 0
Accuracy: ±0.07% (Bas
Freq 1KHz
uency Range: 40
Accuracy: ±2%
DC Voltage Range: 0
Accuracy: ±0.006% (Basic)
Current Range:
Accuracy: A sic)
DC: ±0.02
Frequency Source:
Accuracy: ±
Amplitude: 0.5V p-p 1.0V p-p (square wave)
Accuracy: ±
Resistance R
racy: ±
Accu 0.03% (Basic)
Capacitance
Accuracy: ±
0
C (40Hz to 1KHz): ±0.08% (Ba
% (Basic)
0.001%
5%
ange: 1Ω
Range: 1pF
0.10% (Basic)
~
~
~
~ 10A
5.00Hz
~
750V AC
ic)
1000V DC
~ 100MHz
~ 100MΩ
~ 10mF
Fluke 5500 or Wavetek
0 Calibrator or
910
equipment
Form Number TM61310 Rev 2 Aug 2007
Page 10
Page 8
Basic Maintenance
Warning
avoid shock, remove the test leads and any input signalsTo before opening the case or
rep
lacing the battery or fuses.
Op
ening the Meter Case
Caution
d an unintenti er assembly on a
protec . Whe uit connect
tive surface n the case of the meter is open, circ ions are exposed.
1. Disconnect test lead ary switc d remove
the test leads f
rom front terminals.
2. For battery replacement follow instructions under Replacing the Battery section
3. For Fuse repla e Replacement section.
cement follow instructions in the Fus
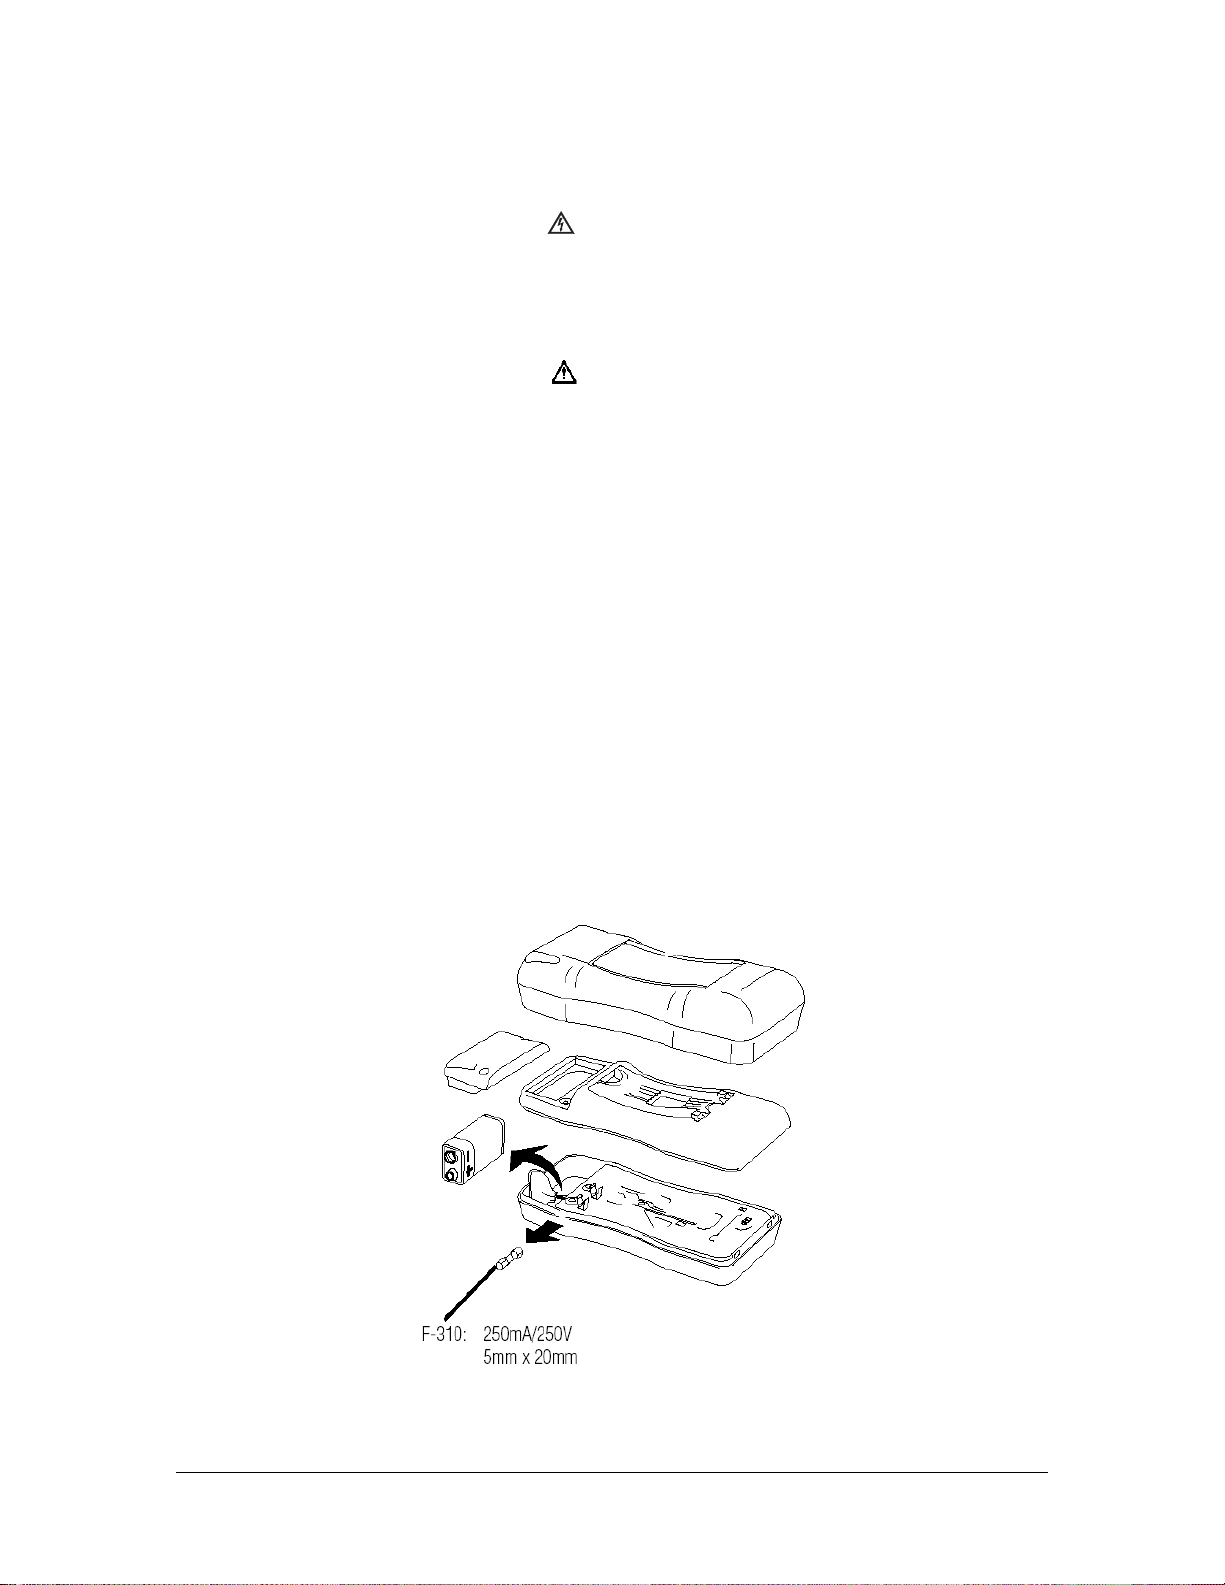
Replacing the Battery
The 61-310 meter is po s are, NEDA 1604, JIS006P, IEC 6F22
1. Remove the ru
wered by a 9V battery, type
bber holster.
2. Remove the two screws on the battery cover and open the battery cover.
3. Unsnap the old battery and snap in the new battery.
4. Return the battery cover and reinstall the two battery cover screws.
5. Replace the ru
bber boot.
ircuit, always place the uncoTo avoi onal short c vered met
h to OFF, ans from any live source, turn the rot
Battery and Fuse Replacement
FIGURE 1
Form Number TM61310 Rev 2 Aug 2007
Page 11

Replacing Fuses
Warning
To avoid electrical shock, remove the test leads and any input signals before replacing
battery or fuses.
To prevent d
current interrupt rating:
F-310 Fuse: 250mA 250V FAST BLOW
Fu
se Replacement
The 61-310 replacement fuse is part number: F-310
Fuse Rating is: 250mA 250V FAST BLOW
1. Remove the rubber holster.
2. Remove the two screws on the battery cover and open the battery cover.
3. Remove the two screws under the battery cover.
4. Lift up on the back
5. Retu
6. Return the battery cover and reinstall the two battery cover screws.
7. Replace the rubber boot.
amage or injury, INSTALL ONLY quick acting fuses with the following Amp/Volt
Fuse
case until the case unsnaps from the front case near display.
• Replace the defective fuse with the standard rated fuse for this meter.
rn the back case cover, reinsert the case screws.
• It is recommended to
replace the old battery with a new battery.
Caution Use only a fuse with the amperage, interrupt voltage, and speed rating
specified.
Cleaning
Warning
To avoid electrical shock or damage to the meter, never allow water inside the case. To avoid
damaging the meter’s housing, never apply solvents to the meter.
Page 9
the
Form Number TM61310 Rev 2 Aug 2007
Page 12

Page 10
ormance Tests
Perf
The following performance test
uracy of each meter function against the meter’s specifications.
acc
s verify the complete operability of the meter and check the
uracy specifications are valid for a period of one year after calibration, when measured at
Acc
an operating temperature of 18°C to 28°C and a maximum of 80% relative humidity.
To perform the following tests, it is not necessary to open the case, no adjustments are
essary, merely make
nec the required connections, apply the designated inputs, determine if
the reading on the meter display falls within the accept
able range indicated.
e meter fails any of these tests, it needs calib
If th ration adjustment or repair.
Testing the Voltage Function
To verify accuracy in the AC and DC voltage ranges, do the following:
1. Turn the rotary switch to “DCV” function and range shown in Table1.
2. Conn t
ec the calibrator to the V and COM inputs on the meter.
3. Set the calibrator for the voltage from steps 1 to 7 in Table 1.
4. Com re
5. If the display reading falls outside of the range shown in Table 1, the m
pa the reading on the meter display with the display reading shown
eter does not
in Table 1.
meet specification.
Table 1: DC Voltage Test:
Step
Range
Input Reading
1 200mV 188.8 to 191.2 190.0mV
2 200mV 2.0mV 1.8 to 2.2
3 2V 1.900V 1.888 to 1.912
4 2V -1.900V -1.888 to -1.912
5 20V 19.00V 18.88 to 19.12
6 200V 190.0V 188.8 to 191.2
7 600V 600V 593 to 607
6. Turn the rotary switch to the “ACV “ function and range shown in Table 2.
7. Set the calibrator for the voltage and frequency from step 1 to 6 in Table 2.
8. Compare the reading on the meter display with the display reading shown in Table 2.
9. If the display reading falls outside of the range shown in Table 2, the meter does not
meet specification.
Form Number TM61310 Rev 2 Aug 2007
Page 13

Page 11
e Test: Table 2: AC Voltag
Step
1
2
3
4
5
6
Range
200V
200V
200V
200V
600V
600V
Input Frequency
Reading
2.0V 60Hz 1.0 to 3.0
2.0V 400Hz 1.0 to 3.0
190.0V 60Hz 186.7 to 193.3
190.0V 400Hz 186.7 to 193.3
600V 60Hz 583.0 to 617.0
600V 400Hz 583.0 to 617.0
Testing the DC milliamp
1
. Turn the rotary switch to the DCA function and range shown in Table 3.
2. Apply the inputs for step
s and DC amps Function
s 1-3 in Table 3.
3. For each input, compare the reading on the meter display to the reading for your
in Table 3.
4. If the display reading falls outside of the range shown in Table 3, the mete
specification.
Table 3: DC Current Test:
meter
r does not meet
Step
1
2
3
Range
200 mA
200 mA
10 A
Source Reading
2.00 mA 1.8 to 2.2
190.0 mA 186.9 to 193.1
10.00 A 9.65 to 10.35
Testing the Resis ce Fun
To verify the accur of the e function following:
1. Connect the calibrator to and COM on the meter.
2. Turn the rot switch to OHM. function e shown
3. Apply the inputs for step Table 4.
4. Compare th eter disp adings to t y readin
5. If the display reading falls out e of the range shown in Table 4, the s not meet
tan ction
acy resistanc , do the
V
ary and rang in Table 4
s 1-6 in
e m lay re he displa gs in Table 4.
sid meter doe
specification.
Form Number TM61310 Rev 2 Aug 2007
Page 14
Page 12
Table 4: Resistance Test:
Step
Range
Source Reading
1
2
3
4
5
7
*200 OHM
*200 OHM
2K OHM
20K OHM
200K OHM
20M OHM
2.0Ω 1.6 to 2.4
190.0Ω 188.3 to 191.7
1.900K 883 to 1Ω 1. .917
19.00K 18.83 to 19.17 Ω
190.0K 188.3 to 191.7 Ω
19.00M 18.40 to 19.60 Ω
*Lead resistance on the 200 ohm range is not included in error.
Checking the Diode Test Function
To check the diode test function, do the following:
1 n the meter. . Connect the calibrator to the V and COM inputs o
2. Turn the rotary switch to
.
3. Apply 1.500V DC. The meter display should read approx. 1.500V dc.
4. Apply a 20-ohm resistor to the meter, the built-in buzzer buzzes.
Testing the Temperatur
e Function
Before beginning this test allow 30 minutes for the meter and calibrator temperature adapter
reach ambient temperature.
To verify the accuracy of the Temperature function, perform the Following:
1. Apply the temperatures in s
temperature adapter to the meter
teps 1 - 7 to the VTemp and COM inputs using a
.
2. Turn the rotary switch to ºC or ºF (Range is –20 to 750 ºC or –4 to 1382 ºF)
3. Compare t reading eter dis reading in
Note : Meter sele the pro tom h meas few seconds.
4. If the display reading falls o tside of the range wn in step meter
he on the m play to the Table 4.
cts per range au atically. Eac
sho
urement takes a
s 1–7 of Table 4, the u
does not meet specification.
Table 5: Temperature Test:
to
Step
1
2
3
4
5
6
7
Form Number TM61310 Rev 2 Aug 2007
Range
ºC
ºC
ºC
ºC
ºF
ºF
ºF
Source
Reading
-20 ºC -30 to -10
0 ºC -10 to 10
400 ºC 391 to 409
750 ºC 721 to 779
-4 ºF -23 to 15
32 ºF 13 to 51
1382 ºF 1328 to 1436
Page 15

Page 13
Cali
bration Procedure
To Recalibrate your meter: It is recommended that the Multimeter be ca ch year.
1. Perform calibration at an a rature of 23°C±2°C and a relative humidity of
<70% Dis nect the te s and turn th ff. Rem s from the
front terminals.
2. Position the meter face down. Remove the battery cover screws and the 2 bottom
case cove crew
3. Lift the en f the e cover unt nsnaps from the case top at the
end neare the L
(A) DCV and ACV Calibration (Adjust VR1)
1. Set the rotary switch to the "200m
r s
d o
st CD.
s.
bottom cas il it gently u
mbient tempe
st leadcon e meter o ove the test lead
V DC" position.
librated once ea
2. Set the output of the DC calibrator for 190.0m
COM input terminals on meter.
3. Using a small flat-tipped screwdriver to adjust VR1 until the display re
mV.
4. Disconnect the DC calibrator fro
DC A Calibration (Adjust VR5)
(B)
1. Set the rotary switch to the "10 A DC" position.
2. Set the output of the calibrator to 5A DC
3. Connect the calibrator current ou
meter.
4. Using a small flat-tipped screwdriver to adjust VR4 until the display r
5.05 amps
(C)
ºC Calibration (Adjust VR2)
1. Set the rotary switch to the "ºC " p
2. Set the output of the cali
3. Connect the calibrator ture output to emp and COM inals
brator to 0 ºC
Tempera the V//T input term
m the meter.
tput to the 10A and COM input terminals on
osition.
V ±0.02% and connect to V//Temp and
ads 198.9 to 190.1
eads 4.95 to
4. Using a small flat-tipped screwdriver, adjust VR2 for a 0ºC ±1ºC (-1 to 1) display
(D)
ºF Calibration (Adjust VR3)
1. Set the ro witch to the "ºF " position.
2. Set the output of the calibrator to 32 ºF
3. Connect the calibrator Te output to the V/Temp and Com input
4. Using a small flat-tipped screwdriver adjust VR3 for a 32ºF ±1ºF (31 to 33) display
Form Number TM61310 Rev 2 Aug 2007
tary s
mperature
 Loading...