

Page 1
Connecting the LightScanner
1. Make sure the power is OFF on the LightScanner.
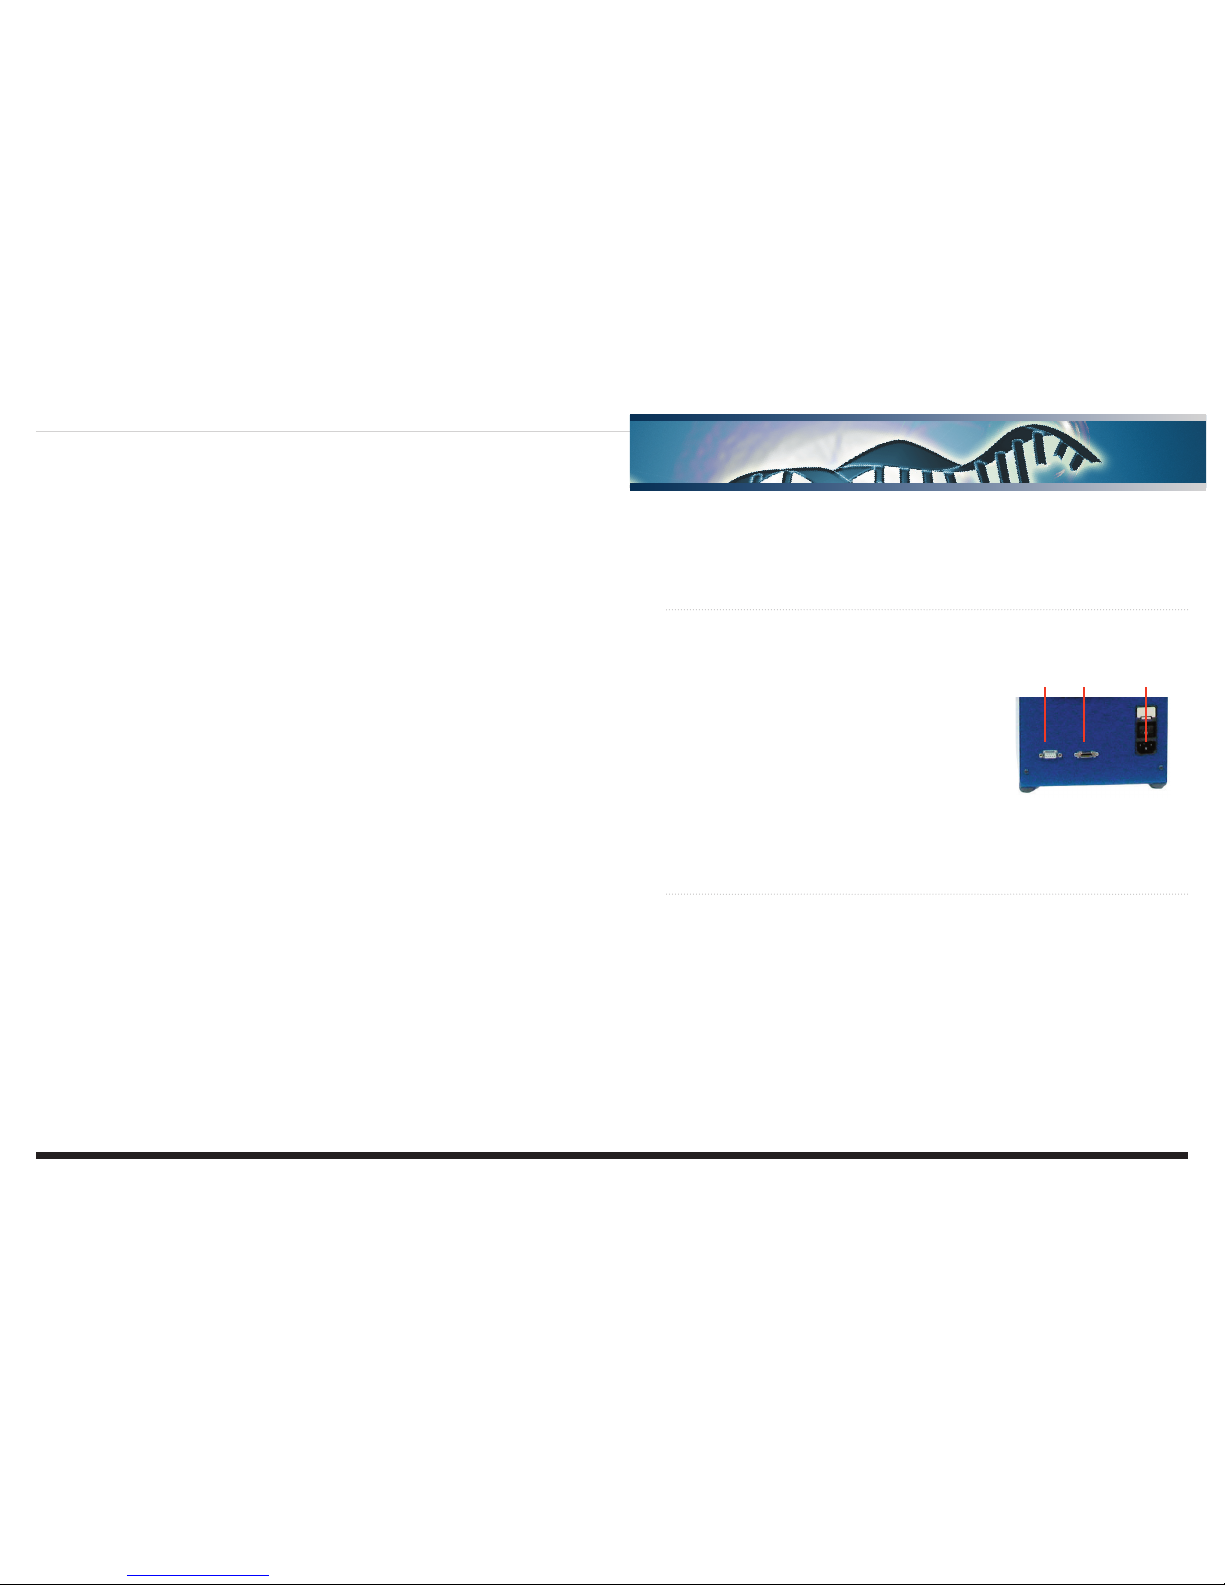
2. Connect the cables to the instrument (all on the back panel) in the following order:
a. Power cord
b. Camera cable (snap on, make sure the connection is secure)
c. Serial cable
3. Next plug in the power cord to the wall power source.
4. Connect the camera cable to the computer tower (connection on the
bottom of the tower).
5. Connect the serial cable to the computer.
6. Connect the remainder of the computer cables (monitor, mouse,
power etc).
7. Turn on the computer.
8. Turn on the power switch on the back of the LightScanner instrument. You will hear two beeps, the sound of
a fan and the
RED power light on the front of the instrument will turn on.
9. You are now ready to run the LightScanner.
Camera Check
A quick check to confirm that the camera is communicating with the computer should be performed.
Open the camera software found under:
Programs >> Roper Scientific >> RS config
1. A table will open displaying a NAME in the Camera 1 box, usually “Camera 1” confirming that the camera is
communicating with the computer.
2. If there is not a name displayed and the boxes are gray, it indicates that the computer is not communicating
with the camera. If this is the case, please contact Idaho Technology technical support.
3. Open the following program:
Programs >> Roper Scientific >> Pvcam test
4. Select Collect Image. This will generate an image of the heat block confirming that the camera is working
correctly.
5. Once you see the image click
Done.
LightScanner
®
Start-Up and
Installation Instructions
for Users
Idaho Technology Inc. | www.idahotech.com
LightScanner® Start-Up and Installation Instructions for Users
Power
Switch
Serial
Port
Camera
Port
LSCN-PRT-0021 Rev 01
Page 2

Calibration
After an instrument is installed, a plate position calibration will need to be performed. This calibration is performed
in the
Run window and requires a full plate of samples. For 96-well instruments, this can be done with the plate in
the Start-up Kit.
1. Double-click on the LightScanner icon on the desktop.
2. Choose the
Run tab.
3. Insert the prepared plate into the instrument, notched edge first. The instrument should beep when the plate
is loaded and the door closed.
4. Press the Calibrate Map button.
5. An image of a plate with
cross-hairs will appear. The
cross-hairs can be moved
using the mouse.
Note: Instructions for calibration are also at the top of the
screen.
a. First move the cross hairs
over the center of the well
at the top left corner (A1)
making sure the cross is
in the middle of the well
(sometimes this is not the
brightest part). Right-click
and click Enter.
b. Next, repeat with the top
right well (A12)
c. Lastly, repeat for the
bottom left well (H1)
d. The software should
produce an image of the
plate where every well is
ringed by a pink line.
e. Confirm that the positions
of the wells are not
skewed.
6. If you are not happy with
the results of the calibration,
repeat with a different plate.
Sometimes adhesive material
from the film may produce
pink streaks on the lip of a well, if this happens repeat the calibration using a different plate.
7. Calibration should be repeated if the instrument is moved to a new location.
8. Weekly or monthly re-calibrations are not necessary. It is only to be done the first time the instrument is setup or after it has been moved.
Performing a Run
To perform the first run follow the instructions in the LightScanner Operator’s Manual.
Remember, if using bar-coded plates the bar code must be read prior to starting the run.
Customer and Technical Support
Reach Us On the Web
Idaho Technology’s Web site is:
http://www.idahotech.com
We strongly encourage users to visit our Web site
for answers to frequently asked questions, updated
information and additional insights into operating
the LightScanner Instrument.
Reach Us By E-mail
support@idahotech.com - Customer Support
it@idahotech.com - General Support
Reach Us By Phone
Technical support is available during:
8 a.m. to 5 p.m. - Mountain Standard Time
For technical support call:
1-800-735-6544 - United States and Canada
(801) 736-6354 - Utah
+1-801-736-6354 - International*
*Note: The IDD prefix (represented by a “+”)
for the United States is the international prefix
number needed to place a call
from the coun-
try listed
to another country. This is followed
by the country code for the country you are
calling; The country code is “1”.
Idaho Technology Inc. | www.idahotech.com
LightScanner® Start-Up and Installation Instructions for Users
1 2
3
Cross hatch is
over the center of
the circle, and not
on the darkest part
of the well
Calibrate in the
following order
When finished,
the pink circles
need to be
centered around
each well. This
image shows a
good example of
a calibrated plate
 Loading...