

Page 1
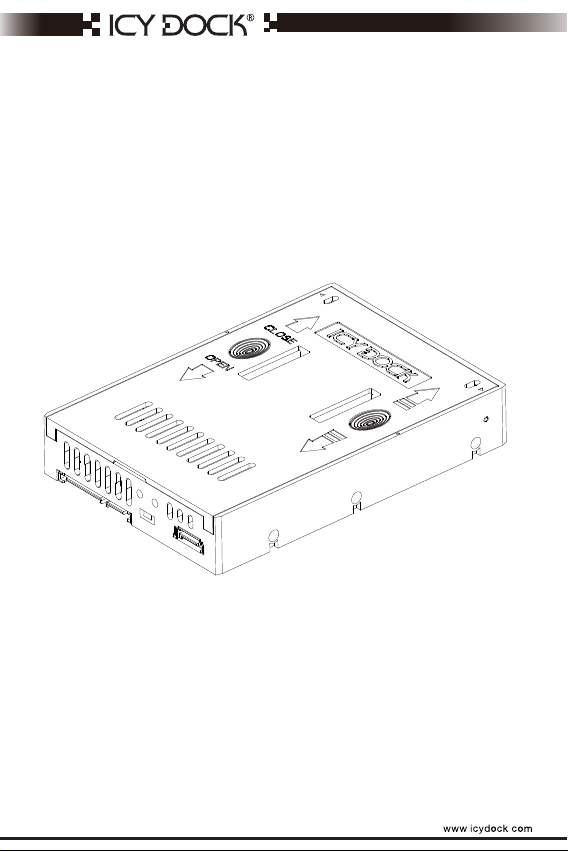
MB882HX-1SB
2.5”SSD Xpander
HDD
Page 2
English
1
Quick Installation Guide
The dimensions of the SSD Xpander are the same as a standard 3.5” SATA HDD, and can be
installed in the same manner using the same type of screws or the case’s fastening system. For
an overview of the behavior once set up, please see Section 7 for the partition layout. Before
proceeding with the installation, please make sure that the computer is powered off. Below is
diagram to assist in the installation.
Stromkabel
1.Using the installation procedure in Section 4, place the SSD into the SSD Xpander and into a 3.5”
drive bay of choice. Also place the 3.5” SATA HDD into a 3.5” drive bay of choice, preferably in
close proximity to the SSD Xpander for convenience.
2. Connect a SATA 15-pin power cable from the power supply to the rear of the 3.5" SATA HDD.
3.Connect a SATA 15-pin power cable from the power supply and a SATA 7-pin data cable from the
motherboard to the respective connections on the rear of the SSD Xpander, using the left SATA
connections.
4.Connect a SATA 7-pin data cable from the rear of the 3.5" SATA HDD to the right SATA
connection on the rear of the SSD Xpander.
5.Power on the system, and install your OS to the new partition.
!
Please note: when setting up the SSD Xpander, any data that was previously on either the
SSD or the HDD will be erased when the partitions are automatically created on the device.
Please be sure to back up all data that may be on the drives before proceeding with the
installation.
2
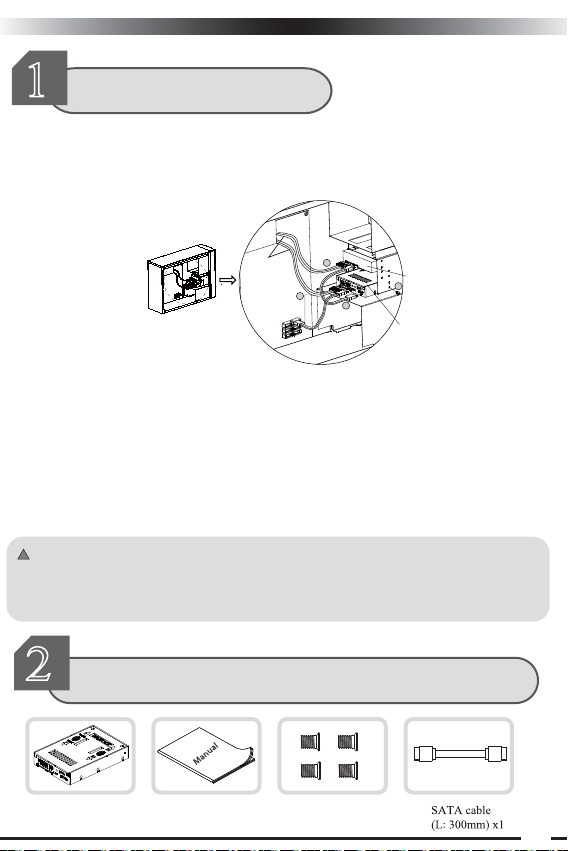
Package Contents
HDD
2
3
4
# 6-32 screw x 4Manual x 1 Body of the product x 1
HDD
1
SSD Xpander
Page 3
English
If the products shown above are different than the products included in the packaging, please
contact the seller or retailer for replacement.
3
A)15-pin SATA Power Connector B) 7-pin SATA Data Connector
D) 7-pin SATA Data Input Connector from HDD
G) Screw holes
4
Product Chart Introduction
HDD
ABC
E GD F
E) Top Cover F) Unit Body
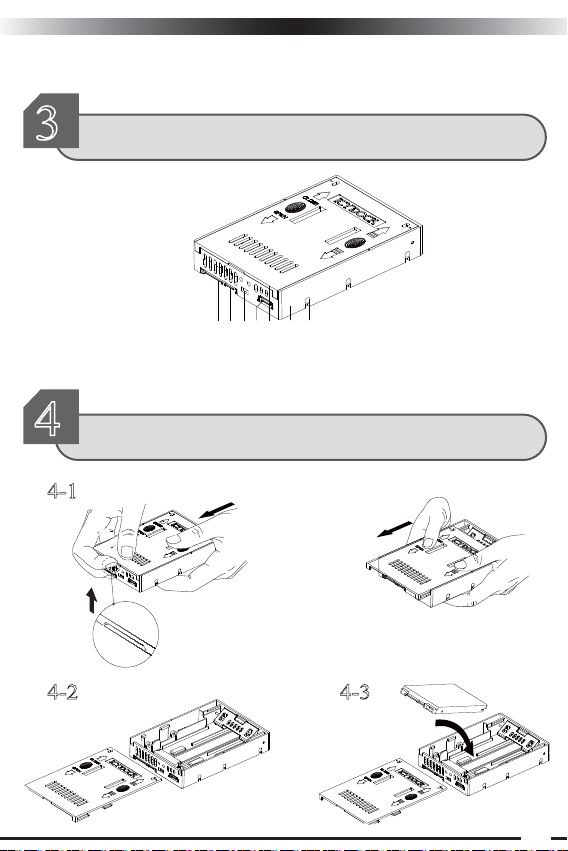
How to install the SSD
4-1
OR
HDD
4-2 4-3
C) Air Flow Vents
HDD
SSD
HDD
HDD
Page 4

4-4 4-5
English
Make sure the triangle icon on the
cover is in line with the circle icon
on the body, then close the lid.
5
How to remove the SSD
HDD
5-1 5-2
HDD
6
1.Install the SSD into the SSD Xpander (See Section 4 of the manual for steps)
2.Place the SSD Xpander in a 3.5” drive bay of your choice. Secure the SSD Xpander using
supplied 4 #6-32 screws, or the case’s fastening system.
3.Secure the 3.5" SATA HDDof your choice into another 3.5” drive bay. For convenience, use
a drive bay that is in close proximity to the SSD Xpander so that cabling will be more
manageable.
SSD Xpander installation steps
HDD
HDD
Connect the SATA power connector
from power supply to 2.5”/3.5”HDD
SSD Xpander
Page 5

English
4.On the rear of the SSD Xpander, the leftmost connections will be addressed first. The 15-pin
power connection is to be hooked up to a 15-pin power cable from the power supply. The 7-pin
SATA connection is to be hooked up to a 7-pin SATA cable from a SATA port on the
motherboard or controller card being used.
Power Supply
HDD
SSD Xpander
Connect the SATA power connector
from power supply to SSD Xpander,
then connect the SATA data connector
from motherboard to SSD Xpander
5.Next, the rightmost 7-pin SATA connection is to be hooked up to a 7-pin SATA cable coming
from the 3.5" SATA HDD being used. This connection is the input to the SSD Xpander.
HDD
SSD Xpander
6.Verify all connections are secure and in the correct locations, and then turn the system on.
Once on, enter the BIOS boot device menu in order to confirm the SSD Xpander is recognized
as shown in the image below.
7.Finally, install the operating system of choice on the drive. Please refer to the operating
system documentation for proper steps. If an existing system is to be used, please refer to drive
cloning software documentation if the destination volume is smaller than the source volume.
Page 6

English
7
SSD Xpander capacity expansion graphic integration
The Icy Dock SSD Xpander is a means of combining an SSD’s high performance with the high
capacity of a HDD. Once the SSD Xpander is set up, the SSD Xpander will automatically create
2 partitions. The first partition will be approximately double the capacity of the SSD used. The
second partition will be the size of the HDD minus double the capacity of the SSD. For our
example, we will assume a 40GB SSD and 320GB HDD being used with Microsoft Windows
XP. After set up, the first partition will be approximately 74.54GB, and the second partition will
be approximately 223.54GB. The high-speed partition should contain any type of application or
file that requires high performance, such as operating system files, games, and audio/video
software. All other files can be placed on the second partition such as documents, music, and
other software.
Image 1: Below shows the drives as they would appear in Windows XP Disk Management if
connected individually to their own SATA ports on the system.
Image 2: Below shows the 2 partitions that are created once both drives are integrated into the
Icy Dock SSD Xpander.
SSD Xpander Partition Layout:
High Performance Partition 2×SSD Capacity
HDD Partition HDD Capacity – 2×SSD Capacity
Note 1: SSD Xpander supports SATA II (3Gbps) interface. For maximum performance, use a
SATA II (3Gbps) 3.5” HDD in conjunction with the SATA II (3Gbps) 2.5” SSD of your choice.
Note 2: Due to different algorithms used to calculate drive capacities, actual capacities may
vary depending on the operating system used and hard drive manufacturer.
Standard hard drive manufacturers:
1GB = 1,000 MB 1MB = 1,000 KB 1KB = 1,000 byte,
Page 7

English
Operating system algorithms:
1GB = 1,024 MB 1MB = 1,024 KB 1KB = 1,024 byte
In so doing, the hard disk manufacturers 1GB = 1000 × 1000 × 1000 / (1024 × 1024 × 1024) ≈
Windows operating system 0.9313GB
Hard disk manufacturers labeled 40GB ≈ 40 × 0.9313 ≈ Windows operating system 37.27GB
Hard disk manufacturers marked 320GB ≈ 320 × 0.9313 ≈ Windows operating system 298.09GB
Combination of the two disk partitions were 37.27 * 2 = 74.54GB, 298.09-74.54 = 223.54GB
Note 3: It is required to manually assign a drive letter and format in Windows Disk
Management for the second partition that is created by SSD Xpander.
Note 4: When using SATA III (6Gbps) interface, the maximum speed achieved will be that of
the SATA II (3Gbps) interface.
8
1.Q:How can I check that the computer is detecting the SSD Xpander correctly.
A: You can check on the drive inside the BIOS of your computer. Please refer to your
motherboard or computer documentation to find out how to access this feature.
2.Q: What happens to the data on the volumes if the SSD or HDD fails?
A: In most cases, all data will be lost due to the nature of the chipset. To be safe, we
recommend regularly backing up all important data
3.Q: Does this product support AHCI and S.M.A.R.T.?
A: Yes, the SSD Xpander supports AHCI and S.M.A.R.T. functionality.
4.Q: If the SSD Xpander fails, but the SSD and HDD are known to be operating normally, how
can the original system be recovered?
Q & A
Page 8

English
A:Once the product has been repaired or replaced by Icy Dock or an authorized technician, the
original SSD and HDD can be reconnected to the SSD Xpander to resume the original system
set up.
5.Q: How can I verify that the SSD Xpander has been successfully integrated with the HDD?
A: The first way is using the BIOS of your computer or motherboard, as described in the
question 1. The second way is to check that the two partitions are created and that they are
correct size. Partition 1 should be double the capacity of the SSD, and partition 2 should be the
capacity of the HDD minus the size of partition 1. These values may differ between different
operating systems and drive manufacturers.
6. Q: I understand this product is designed for SSD+HDD combination, but I’m wondering if I can
use SSD+SSD combination with SSD Xpander?
A: It’s feasible. However, you won’t see any speed advantage from the SSD+SSD combination,
plus you will lose some capacity from the setup, therefore, we don’t recommend using the SSD+
SSD combination with SSD Xpander.
NOTE:
Material objects shall be referred to for product specifications. Our company has the right to
modify product specifications without further notice.
ICY DOCK will not be liabl for any software, hardware and any data stored with in or
interfacing with our product whichresults to damages or dysfunctions.ICY DOCK will only
be responsible for repairs and services of ICY DOCK’s ownproduct.For any further inquiries
related to ICY DOCK products, please visit http://www.icydock.com
Page 9

9(5
 Loading...