

Page 1
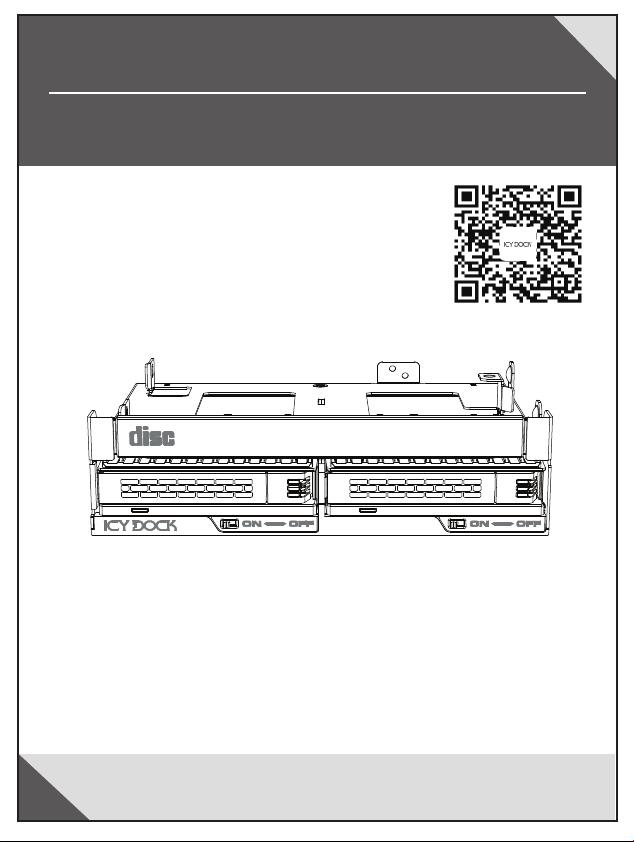
ExpressCage
2 x 2.5" SAS/SATA SSD/HDD Mobile Rack with (Ultra) Slim
ODD Bay to 5.25" Bay
Copyright © ICY DOCK International. All Rights Reserved. 650256 VER 1.0
Page 2
Package Contents
1
del paquete
Packungsinhalt
包裝說明
Contenu
包装说明
Contenido
Device
× 6 × 4 × 10
4 × M3*6 flat head screws
for 2.5" HDD/SSD
(2 x screws for spare parts)
Note: Please use the included screws to secure the drive(s).
Note: Please use the included screws to secure the drive(s).
Device Information Geräteinformationen
2
Información del dispositivo
User manual
3 x M2*2.5 pan head screws for
Ultra Slim / Slim ODD
(1 x screw for spare parts)
本体説明
Informations dispositif
機體說明 机体说明
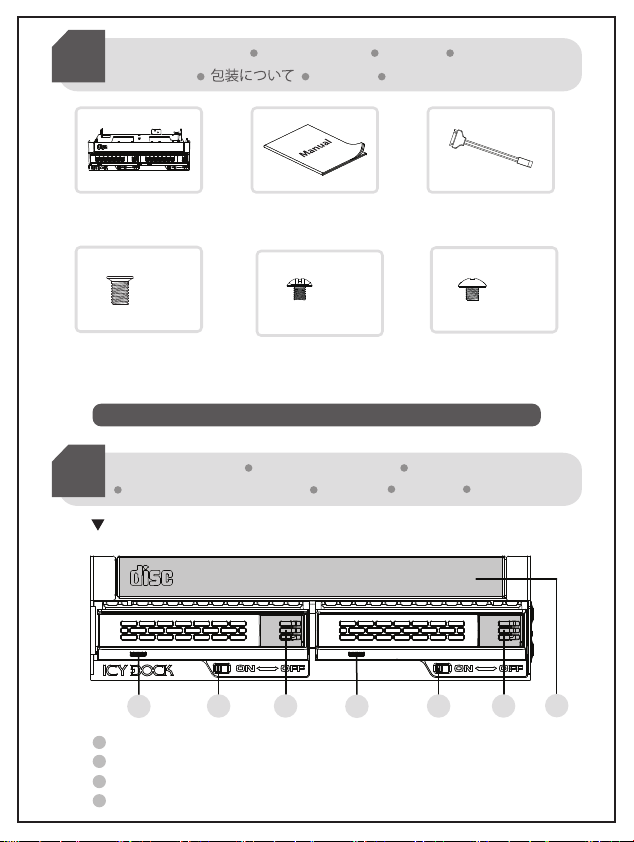
Front View
1
LED Indicator (Device power: solid blue light; HDD access: blinking blue light)
1
Drive Power On/Off Switch
2
3
Drive Tray Ejection Button
4
Slim ODD Dust Cover Plate / Slim ODD Slot
2
3
6 Pin Slimline SATA to
15 Pin SATA power cable
8 x M3*2.5 pan head
screws for device
(2 x screws for spare parts)
21
3
4
Page 3
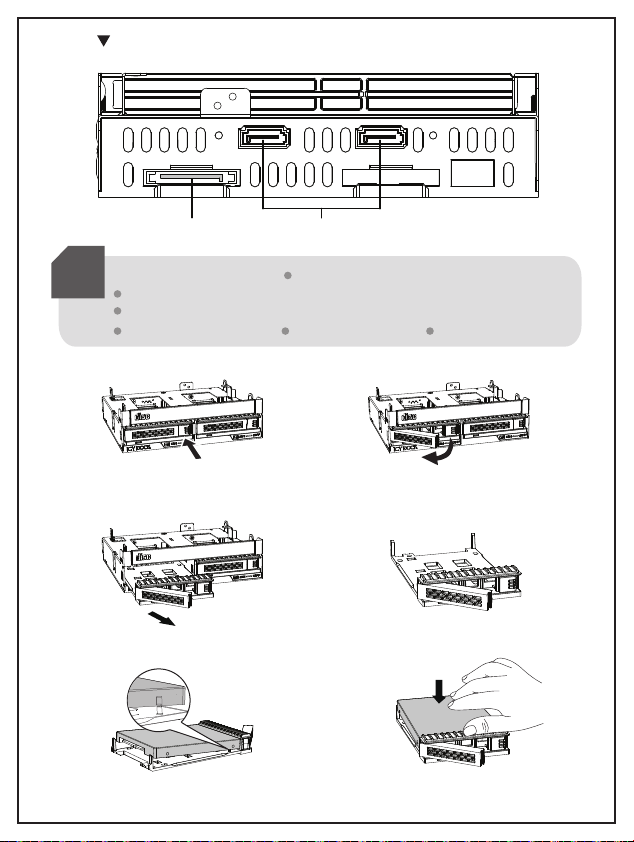
Rear View
15 Pin Power 7 Pin SATA
2.5" HDD/SSD Installation Installation einer 2,5" HDD/SSD
3
Installation du disque dur/SSD 2,5"
Instalación de unidad de disco duro o unidad de estado sólido de 2,5"
2.5" HDD/SSD取付手順
3-1 3-2
2.5寸硬盘安装步骤2.5吋硬碟安裝步驟
Push the drive tray ejection button to
eject the drive tray.
3-3 3-4
Pull the drive tray out from the device.
3-5 3-6
HDD
SSD
Press down the front of the drive to align
with the built-in screws on the tray.
The drive tray latch will pop open once
the drive tray ejection button is pushed.
SSD
HDD
Press down the rear of the drive to secure
the drive onto the tray.
Page 4

3-7
Once the drive is installed onto the tray, insert
the tray back into the device.
Note: The ExpressTray supports tool-less drive installation. The patented mechanical design
inside the enclosure will fully secures the drive once the ExpressTray is inserted into the
enclosure. To prevent dropping your drives, please do not flip the ExpressTray when there's a
hard drive or solid state drive placed on it.
Optional - Two M3*6 screw can be installed on the rear underside of the tray
for extra drive stability
3-8
M3*6 Screws
Ultra Slim / Slim ODD Installation Optisches Ultra Slim / Slim
4
Laufwerk installieren
Installation de lecteur Ultra Slim ODD / Slim ODD
バイスの取付手順
Installation de lecteur de disque optique ultrafin
スリムタイプ ODD デ
超薄型 / 薄型光碟機安裝步驟
9.5mm / 12.7mm
笔记本光驱安装步骤
4-1
ODD Dust Cover Plate
Remove the front Slim ODD dust cover plate first before inserting Ultra Slim / Slim
ODD into the device.
Page 5

4-2 Slim ODD installation (for 12.7mm height ODD)
ODD Dust Cover
4-2-1
The removed ODD
dust cover plate can be
be stored on the side.
4-2-2
Insert the Slim ODD
from the front of the
device.
4-2-3
M2*2.5 Screws
Use 3 x M2*2.5 screws to secure the sides
and rear of the slim ODD to the MB732SPO-B
device.
4-3 Ultra Slim ODD installation (for 9.5mm height ODD)
4-3-1
Insert the Ultra Slim ODD from the front
of the device.
Device Installation Installation eines Gerätes Installation du
5
dispositif Instalación del dispositivo de
裝置安裝步驟
6 Pin Slimline
to 15 Pin SATA
Power Cable
7 Pin SATA Cable
15 Pin Power Cable
设备安装步骤
4-3-2
M2*2.5 Screws
Use 3 x M2*2.5 screws to secure the sides
and rear of the ultra slim ODD to the
MB732SPO-B device. The removed ODD dust
cover plate can be installed as a spacer as
shown in the image above.
デバイス取付手順
M3*2.5 Screws
lnsert the device into external 5.25" bay and use the included 8 x M3*2.5 screws to secure the
device onto the 5.25" bay.
Connect the 15 Pin SATA power, 7 Pin SATA data and 6 Pin Slimline to 15 Pin SATA power
cables (if needed) to the device to complete the installation.
Page 6

1.
REMARQUES
2.
ICY DOCK will not be liable for any software, hardware, or data stored or interfacing with ICY DOCK
product
resulting into damages or malfunctions. ICY DOCK is only responisble for repairs and services of
ICY DOCK products.
3.
When using SAS drives, the host requires SAS compatible motherboard or SAS card installed.
Due to different drive specifications for the drive access light signal, some drives may not support the
4.
access LED. If the LED does not function, but the user is able to read and write to the drive, it would fall
under this category. If the LED does not function, and the drive cannot be read or written to, please
contact us for troubleshooting.
5. To utilize the hot swap function, the host must also support hot swap. To check if your host supports
hot swap, please refer to the motherboard or controller card specifications and documentation.
6.
1. ICY DOCK
2. I
Bei Verwendung von SAS-Festplatten muss im Host-System ein SAS-kompatibles Motherboard
3.
oder eine SAS-Karte installiert sein.
4. Auf Grund unterschiedlicher Spezifikationen kann es vorkommen, dass manche Laufwerke das
HDD-Zugriffssignal nicht unterstützen. Dieser Fall trifft zu, wenn Sie Lese- und Schreibzugriff auf das
Laufwerk haben, die LED aber kein Zugriffssignal anzeigt. Sollten Sie keinen Lese- und Schreibzugriff
auf das Laufwerk haben und die LED auch nicht funktionieren, so kontaktieren Sie uns bitte zur zur
Fehlerbehebung.
5. Um Hot Swap zu nutzen muss diese Funktion von dem Host unterstützt werden. Konsultieren Sie
hierfür bitte die Bedienungsanleitung Ihres Mainboards oder Ihrer Controller-Karte.
6.
1. ICY DOCK
2. ICY DOCK ne pourra être tenu responsable de la perte ou dégradation de tout logiciels, matériels ou
données suite à des dommages ou des disfonctionnements de matériels utilisés avec nos produits
ICY DOCK. La responsabilité de ICY DOCK ne pourra être engagées que pour ces propres produits.
3.
Lorsque vous utilisez des disques SAS, l'hôte doit être équipé d'une carte mère
compatible SAS ou d'une carte SAS.
4. A cause des différentes spécifications des signaux d'accès, certains disques durs ne supportent pas
l'accès. Si la LED témoin ne s’allume pas, alors le disque dur n’est pas pris en charge, contactez-nous
pour un dépannage.
5. Pour profiter pleinement la fonction Hot-Swap, vérifiez que votre configuration accepte également la
fonction Hot-Swap.
6. Si vous souhaitez obtenir plus d’informations sur nos produits, vennez visiter notre site:
http://www.icydock.fr
1. ICY DOCK se reserva el derecho de cambiar las especificaciones técnicas no relacionadas y está
sujeto a cambio sin previo aviso.
2. ICY DOCK no asumirá ninguna responsabilidad por ningún software, hardware o dato almacenado
en los productos ICY DOCK, o que interactúe con estos, que provoque daños o averías. ICY DOCK
solamente asumirá la responsabilidad de reparaciones y tareas de servicio de productos ICY DOCK.
NOTA
注釋
Page 7

1.弊社は本製品のバージョンアップ及び変更の権利を有し、その時別途通知はしません。
2.弊社は本製品の修理にのみに責任を負います。その他のソフトウェア、ハードウェア、デー
タに起因する障害については責任を負いません。
Page 8

 Loading...