

Icy Box IB-AC640a Installation Manual

Installation
Installation Guide
External enclosure for SATA
slim line CD/DVD-ROM drives
up to 9.5 mm
IB-AC640a
Package Content
1x IB-AC640a, 1x Y-cable, 1x accessories,
1x quick installation guide
Key Features
• Premium aluminium case
• Supports SATA slim line CD/DVD ROM drives
up to 9.5 mm
• USB bus powered – no power supply is necessary
• Supports: PC & Mac
• Plug & Play
• USB 2.0 interface
Verpackungsinhalt
1x IB-AC640a, 1x Y-Kabel, 1x Zubehör,
1x Schnellinstallationsanleitung
Hauptmerkmale
• Hochwertiges Aluminium Gehäuse
• Unterstützt: SATA Slimline CD/DVD-ROM Laufwerke
bis zu 9,5 mm
• Unterstützt PC & Mac
• Plug & Play
• USB 2.0 Verbindung
Installationsanleitung
Externes Gehäuse für SATA
slim line CD/DVD-ROM Laufwerke bis zu 9,5 mm
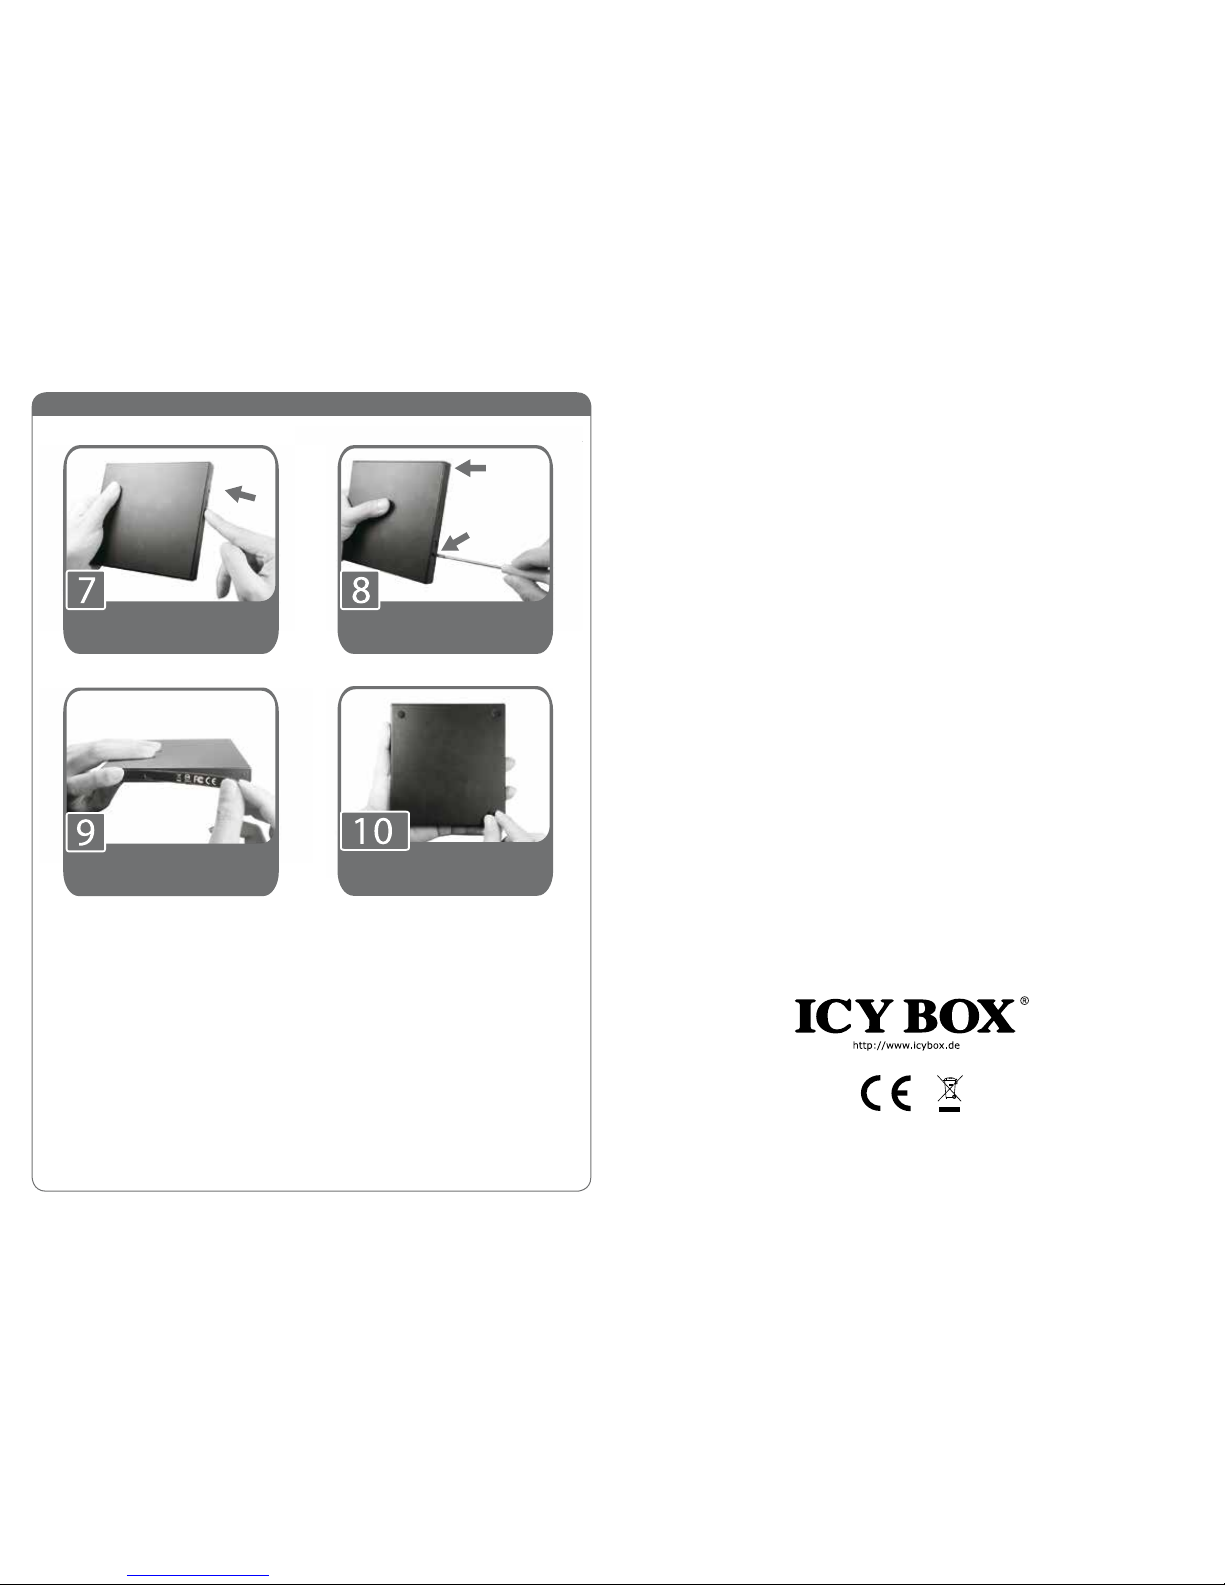
Eject the DVD drive's tray by poking
this hole with a pin.
Take the bezel o of the drive.
Make sure the bezel is rmly
attached on the DVD drive.
Install the new bezel on the DVD
drive.
Insert the DVD drive into the new
enclosure.
Unlock the bezel with a screwdriver.
Installation
© Copyright 2015 by RaidSonic Technology GmbH. All Rights Reserved
The information contained in this manual is believed to be accurate and reliable. RaidSonic Technology GmbH assumes no responsibility for any errors contained in this
manual. RaidSonic Technology GmbH reserves the right to make changes in the specications and/or design of the above mentioned product without prior notice. The
diagrams contained in this manual may also not fully represent the product that you are using and are there for illustration purposes only. RaidSonic Technology GmbH
assumes no responsibility for any dierences between the product mentioned in this manual and the product you may have.
Push the DVD Drive into the
enclosure.
Put the sticker on the bakc of the
enclosure as shown in the picture.
Fasten the screws on the back of the
enclosure as shown in the picture.
Stick the rubber pads on the bottom
of the enclosure if neccessary.
 Loading...