

ICU Medical 20677 Installation Manual
Installing the Hospira MedNet™ Plug ‘n Play Module List 20677
For use with Hospira Plum A+ Infusers with software version 10.3 and higher
Note: The recommended tool for this procedure is a No. 2 Phillips screwdriver.
CAUTION: Use proper ESD grounding techniques when handling components. Wear an antistatic wrist strap and
use an ESD-protected workstation. Store the PWA in an antistatic bag before placing it on any surface.
D
To replace the module, proceed as follows:
1. Press [ON/OFF] to power the infuser OFF.
2. Disconnect the infuser from AC power.
CAUTION: Infuser must be powered off for at
least 2 minutes prior to removing the module.
3. Carefully place the infuser face down.
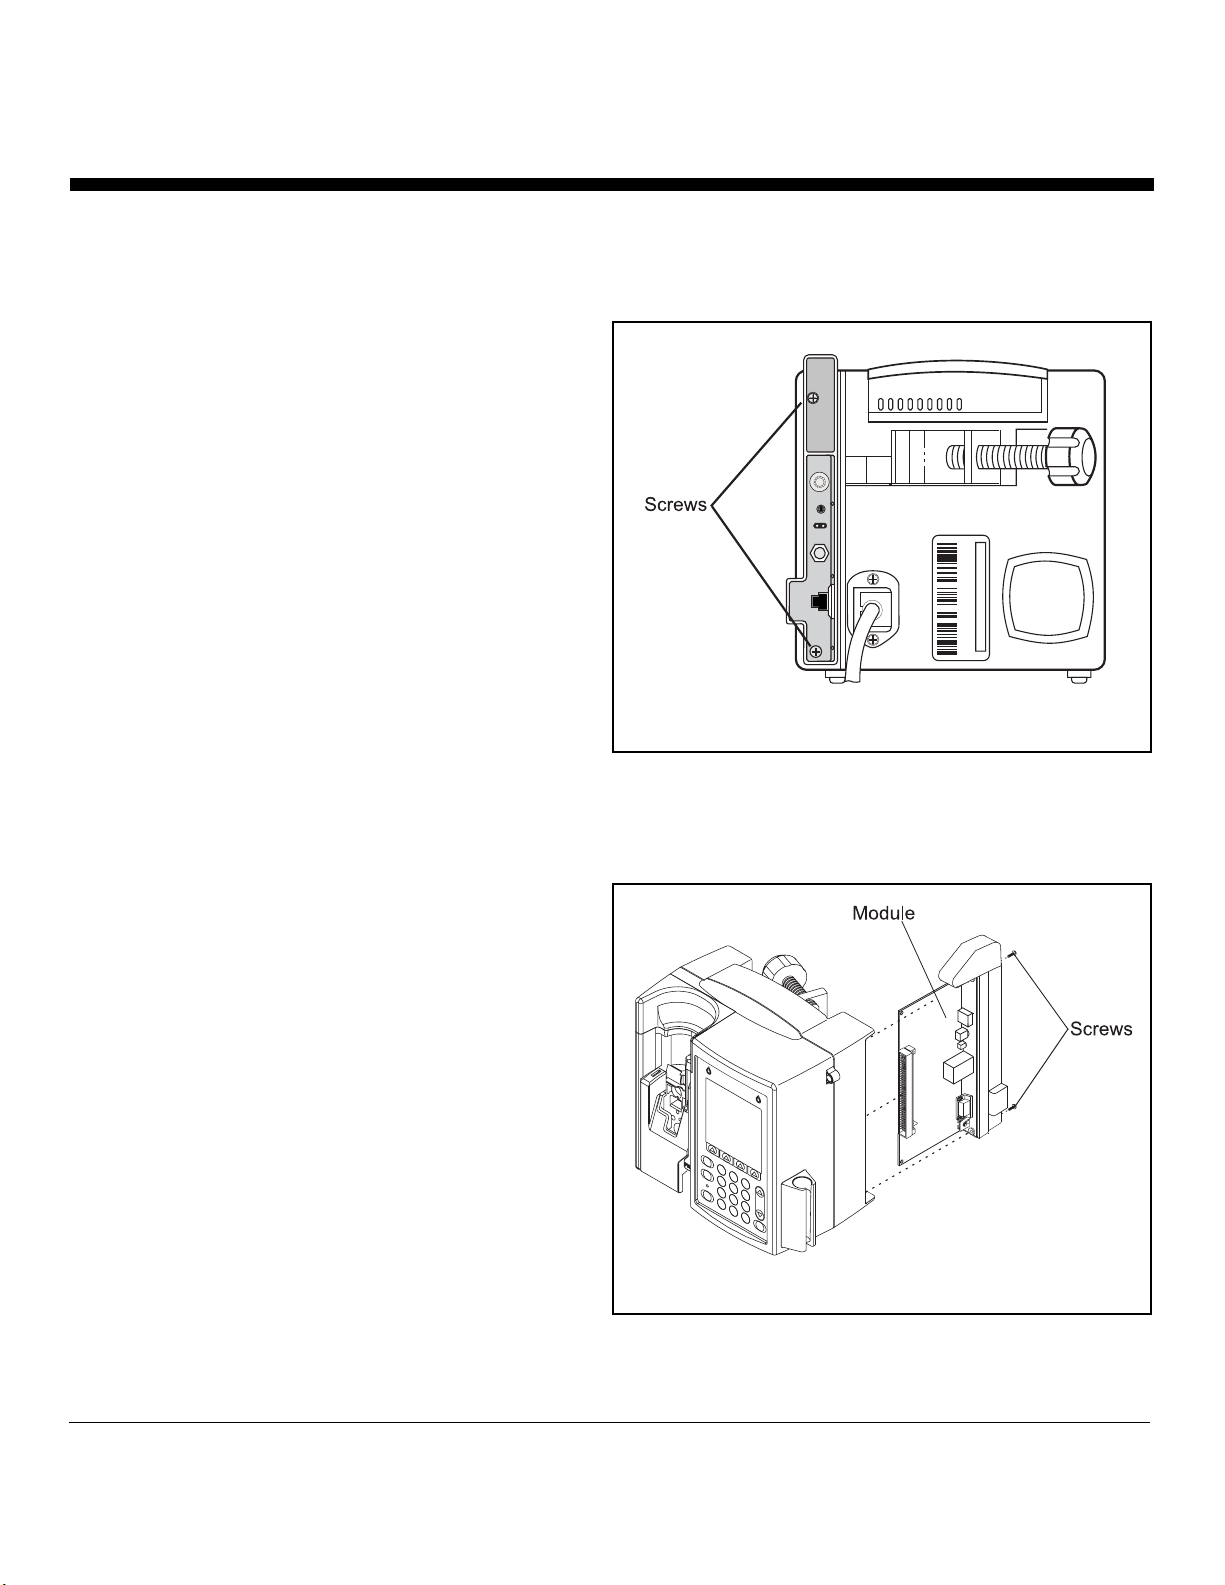
4. Using a No. 2 Phillips screwdriver, remove the two
screws from the module (one in the upper left
corner and one in the lower left corner). Refer to
Figure 1.
5. Carefully pull the module away from the infuser.
Note: When removing the module, note the
placement guides the peripheral PWA rests
between.
6. Install the replacement module in the exact reverse
order of removal using the screws and lock
washers included with the replacement module.
Refer to Figure 2.
Note: Verify the mod ule is placed properly between
the guides and fits correctly into the CPU PWA.
7. Connect the infuser to AC power.
8. To verify successful module replacement, power
ON the infuser and let the system perform its selftests. The screen will display an E453 Malfunction.
9. Power the infuser OFF, and then ON again.
10. If upgrading from version 12.x, The infuser is
ready for operation.
11. If upgrading from version 10.x or 11.x:
Figure 1. Remove Screws
a) Enter the serial number.
a) Power the infuser OFF , and then ON again.
The infuser is ready for operation.
Hospira, Inc.
Lake Forest, IL, U.S.A
Figure 2. Insert Module
Copyright 2005 735-95537-002 (Rev. 05/05)
 Loading...