

ICU Medical 20677 Users Guide

7.2 REPLACEMENT PROCEDURES
7.2.6
CE MODULE REPLACEMENT
The recommended tool for this procedure is a No. 2 Phillips screwdriver.
The replacement parts for this procedure are:
CE Module
Screw, 4-40 x 1/4, Pan Head, Square Cone
CAUTION: Use proper ESD grounding techniques when handling components.
Wear an antistatic wrist strap and use an ESD-protected workstation. Store the PWA
in an antistatic bag before placing it on any surface.
CAUTION: When replacing the CE module, carefully check the Ethernet MAC
address on the module label to assure it matches the infuser barcode.
Note: Replacing the CE module does not change the existing biomed settings.
To replace the CE module, see Figure 7-3, Rear View of the Infuser, and Figure 7-4,
CE Module Replacement, then proceed as follows:
1. Press [ON/OFF] to turn off the infuser, and disconnect the device from AC power.
2. Carefully set the infuser face down.
3. Using the Phillips screwdriver, remove the two 4-40 screws from the CE module.
4. Carefully pull the assembly away from the infuser.
Note: When removing the CE module, note the placement guides where the
peripheral PWA rests.
5. Install the replacement CE module in the exact reverse order of removal.
Note: Verify the peripheral PWA is placed properly between the guides and
fits correctly into the CPU PWA.
To verify successful CE module replacement, perform the PVT in Section 5.2.
Technical Service Manual 7 - 9 430-95551-001-DRAFT
SECTION 7 REPLACEABLE PARTS AND REPAIRS
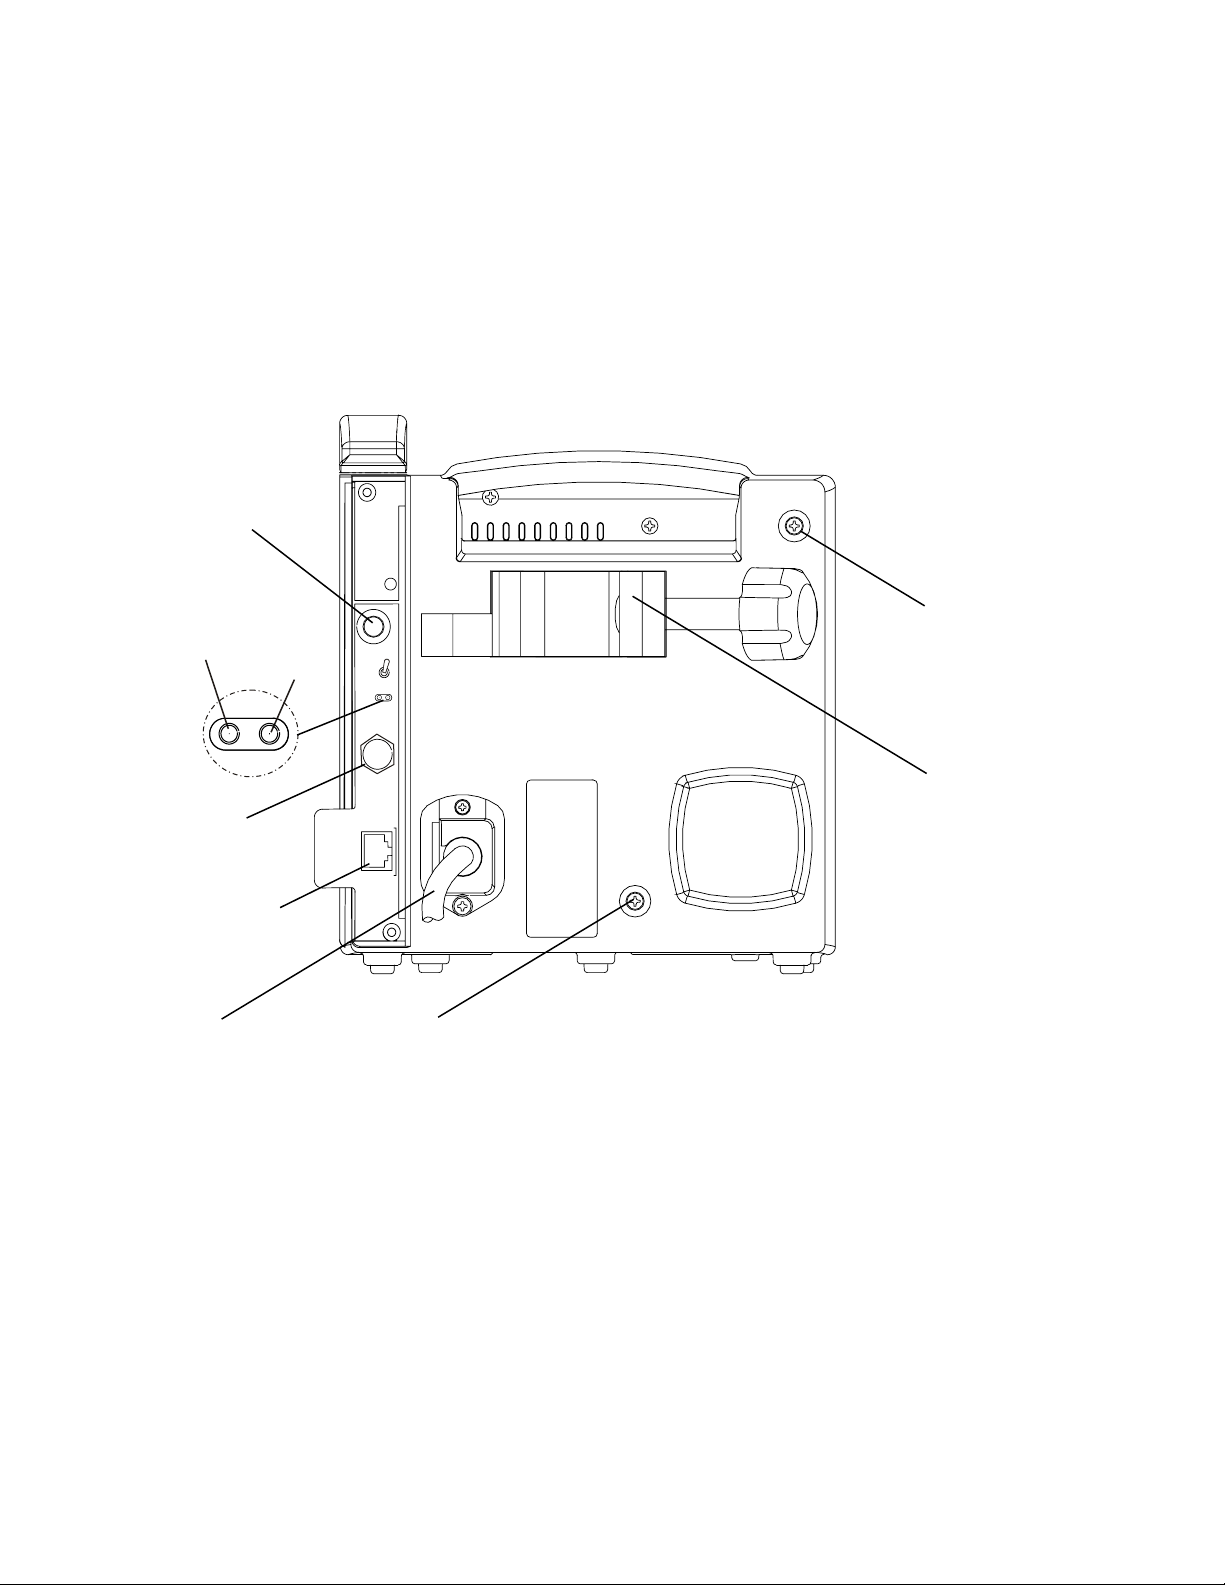
VOLUME
CONTROL
KNOB
GREEN
LED
YELLOW
LED
NURSE
CALL
JACK
RJ45
ETHERNET
CONNECTOR
AC POWER CORD
6-32 X 2 1/2
PAN HEAD
SCREW
POLE CLAMP
ASSEMBLY
6-32 X 3 1/4
PAN HEAD
SCREW
05K01043
Figure 7-3. Rear View of the infuser
430-95551-001-DRAFT 7 - 10 Plum A+ with Hospira MedNet
 Loading...