

Page 1
PSY1 Stem Psychrometer
Quick Start Guide
Version 4.4 29/10/2014
ICT International
Enabling better global research outcomes in soil,
plant & environmental monitoring.
Page 2

2
Contents
Quick Start Guide................................................................................................ 3
PSY1 Start Up Check List................................................................................... 4
System Requirements........................................................................................... 5
Hardware................................................................................................................ 5
Software................................................................................................................. 5
Screen Resolution................................................................................................... 5
Power Requirements and Charging the PSY1 Internal Battery...................... 6
Connecting a Power Supply to the Instrument...................................................... 7
Connecting Power Directly via Solar Panel...........................................................8
Connecting Power via External 12V Battery or the ICT CH24.............................9
Connecting Power via External 12V Battery and Solar Panel ............................ 10
Sharing an External 12V Battery and Solar Panel via Daisy Chaining.................11
Clean the Psychrometer Chamber.....................................................................12
Install the PSY1 Software & USB Driver......................................................... 13
Turn the Instrument On.....................................................................................13
Connect to the Instrument via USB Cable........................................................14
Set the Measurement Protocols.......................................................................... 25
Calibrate the Psychrometer................................................................................. 26
Install the Sensor.................................................................................................. 27
Set the Logging Interval...................................................................................... 28
Download Data .................................................................................................... 28
Analyse Data......................................................................................................... 29
Contact Details........................................................................................back cover
ICT International
Enabling better global research outcomes in soil, plant & environmental monitoring.
Set Date & Time and Power Management ........................................................24
Instrument Information ......................................................................................23
MCC RF Connection Software Procedure Step 2:..........................................22
MCC RF Connection Software Procedure Step 1:...........................................20
Alternatively: if you are using a MCC1 Wireless Radio Modem...................19
Connecting the Wireless Hardware via a USB Cable.......................................19
USB Connection Software Procedure Step 3:..................................................18
USB Connection Software Procedure Step 2:..................................................17
USB Connection Software Procedure Step 1:..................................................16
Connect via USB Cable.......................................................................................15
Page 3

3
Quick Start Guide
NOTE: This manual should be used in conjunction with the instructional videos
provided by ICT International to compliment each section of operation.
These videos are located on the ICT YouTube site:
http://www.youtube.com/user/ictintl
WARNING – The Thermocouples of the Stem Psychrometer Chamber are
made from very fine wire only 25 µm in diameter. NOTE: Human hair is on
average 100 µm thick. You will require a dissection microscope with a 20X
magnification objective setting to view the thermocouples. You cannot see
them or manipulate their position with the naked eye. Thermocouples are
easily broken if handled incorrectly by unprepared operators. Please WATCH
the video Adjusting the Thermocouples : https://www.youtube.com/watch?
v=kNsZnSYDBPE&list=UUxtXEr9V3UE5XzDQr6wwtRg
before removing the chamber’s calibration lid.
Photo: 25 µm Chromel/Constantan thermocouples viewed under a
dissection microscope at 20X magnification.
ICT International
Enabling better global research outcomes in soil, plant & environmental monitoring.
Page 4
4
Freight: TBA
If you break the microscopic 25 micron
psychrometer thermocouples it will cost:
Replacement Thermocouples: $220
Labour: $120 / hour
Packing & Handling: AU $45
PSY1 Start Up Check List
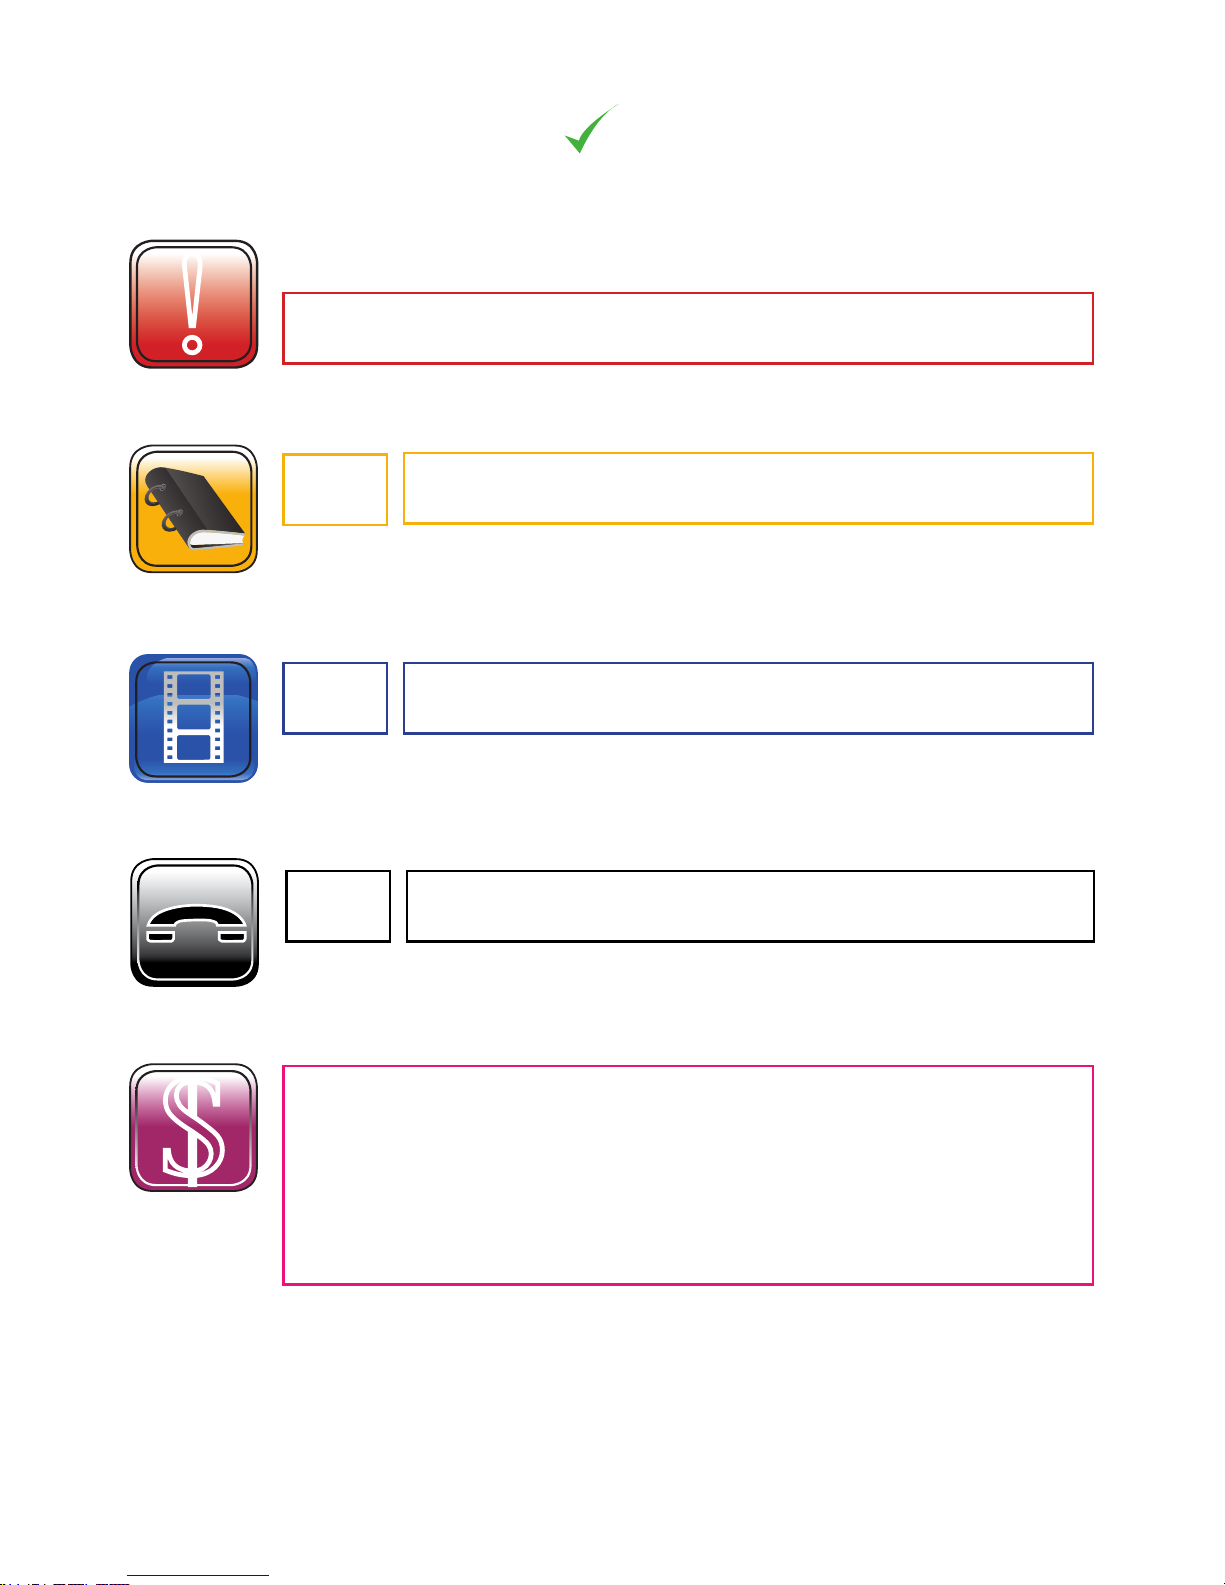
!
Please Read,
Understand and Complete this checklist before unpacking the PSY1
WARNING!
Have you read the manual?
http://ictinternational.com/support/product-manuals/
Have you watched the videos?
http://www.youtube.com/user/ictintl
$
ICT International
Enabling better global research outcomes in soil, plant & environmental monitoring.
If you are unsure about anything regarding your
Psychrometer contact ICT International before use.
email: sales@ictinternational.com.au phone: +61 2 6772 6770
Page 5

5
System Requirements
Hardware:
The ICT Instrument software does not require a powerful computer.
Minimum Recommended System Specifications:
Intel Atom 1.66 GHz and 1GB RAM or higher.
Software:
Screen Resolution:
The ICT Instrument software is written to a fixed screen resolution of 857 x 660
(it does not Auto Resize) and works best on current model laptops that have a
screen size of 11.6” or larger and a default screen resolution of 1366 x 768 (the
vertical height of 768 being most important otherwise you can't see the bottom of
the software window).
ICT International
Enabling better global research outcomes in soil, plant & environmental monitoring.
The ICT Instrument software is compatible with the following
Windows Operating Systems:
a.
b.
c.
d. Windows Virtual OS run from a Mac computer
Windows Vista
Windows 7
Windows 8 and 8.1
Page 6

Power Requirements and Charging the PSY1 Internal Battery
The PSY1 is a self contained instrument that incorporates a lithium polymer
battery. Before using the instrument, this battery MUST be charged.
To choose from a range of charging options see :
Connecting a Power Supply to the Instrument (pages 7 to 11).
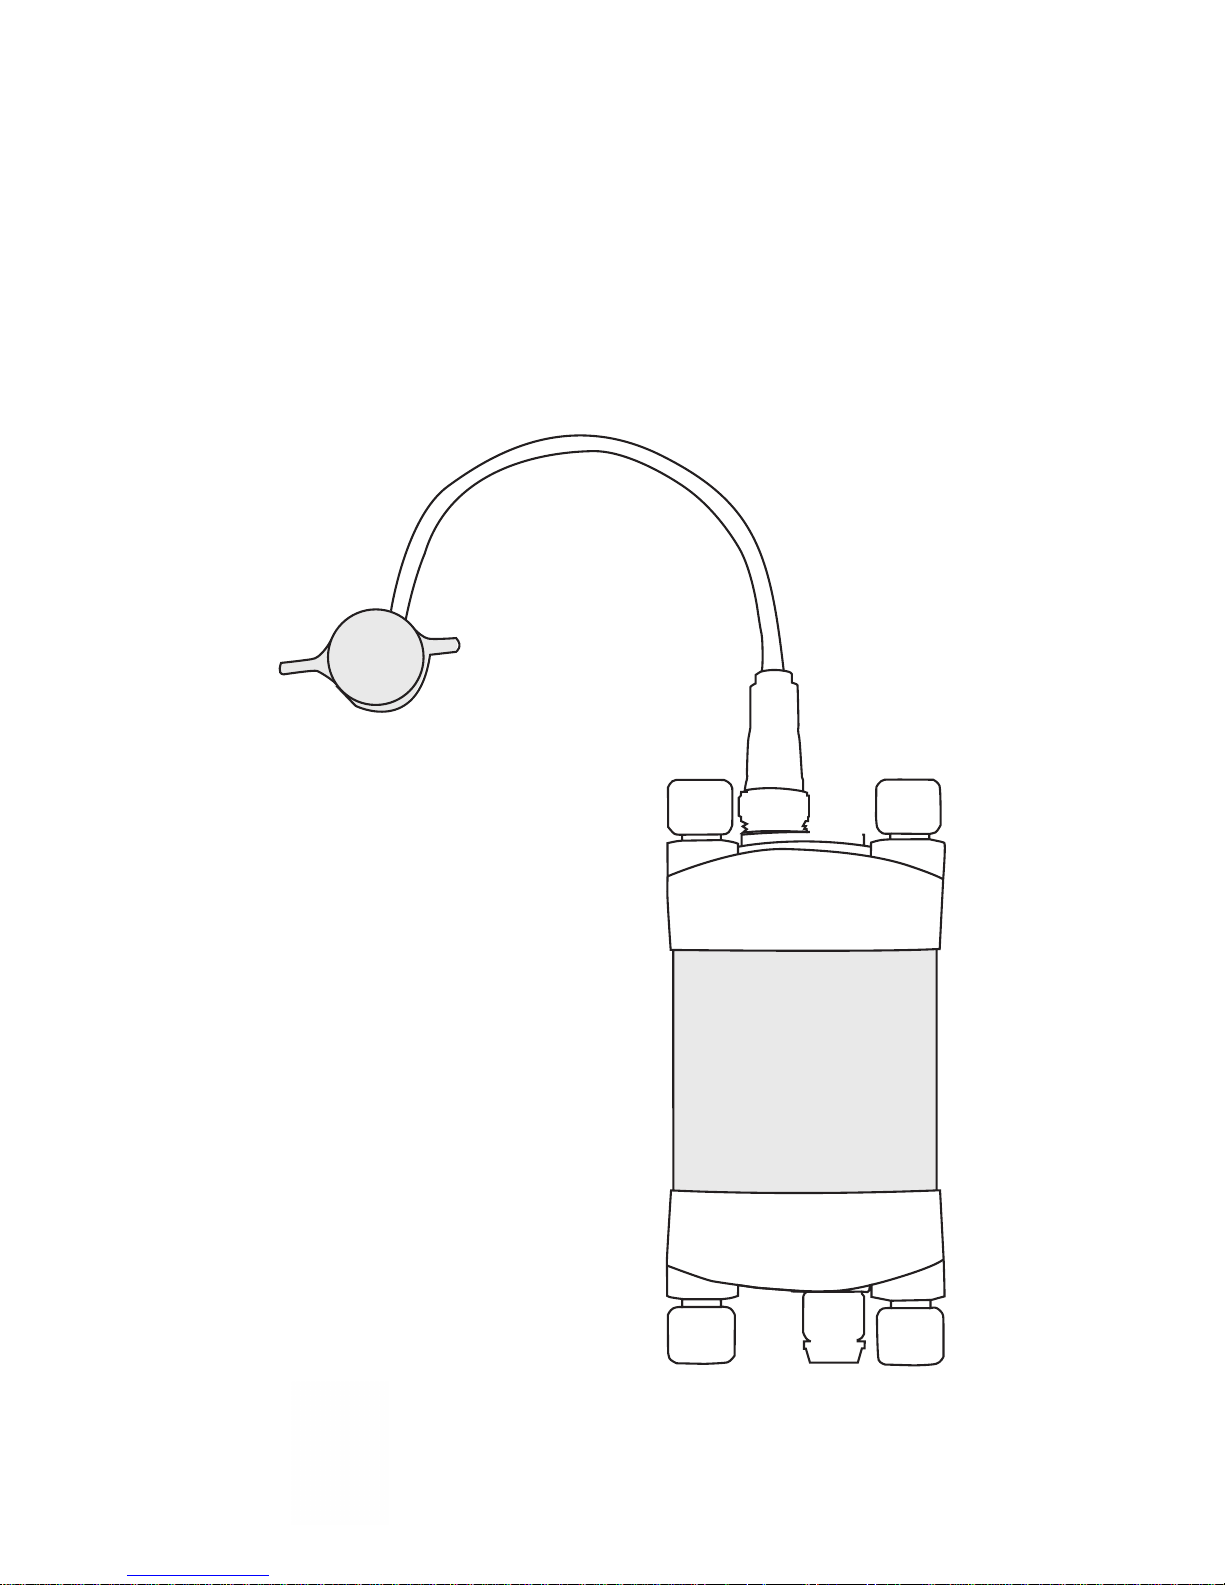
The unique power-bus plug design was developed by ICT International to
simplify the electrical wiring process. It minimises the need for custom tools in
thefield, requiringonlythattheoutercablesheathbestrippedbacktoexpose
thecopper wire. See section: Connecting a Power Supply to the Instrument
(page7)Noothertoolsarerequiredwithallnecessarycomponentsfully
incorporated into the instrument design. Retaining straps ensure that the
power-bus plugs do not separate from the instrument when removed from the
power-bus during wiring preparation and connection of external power.
6
ICT International
Enabling better global research outcomes in soil, plant & environmental monitoring.
The PSY1 can be charged from a range of external voltages via the Bus Plugs,
however there are limits. For the PSY1 to correctly charge, the external power
supply must be within a voltage range of 8Volts DC to 30Volts DC at all
times. If the voltage falls below 8Volts DC the logger will automatically stop
using the supply to charge the internal battery. 30Volts DC is a predetermined
maximum voltage that the PSY1 can handle. Supply voltages that exceed this
level are not recommended and may cause accidental triggering of the
protection circuitry. Triggering this circuit may result in semi-permanent
disabling of the external power which will require the PSY1 to be sent back to
ICT for repair.
Page 7

7
1
2
3
4
5
6
7
8
9
10
see pages 8 - 11
Remove both ICT
bus plugs from
one end of the logger
ICT International
Enabling better global research outcomes in soil, plant & environmental monitoring.
Connecting a Power Supply to the Instrument
Individual Power Supply Connections
Page 8
8
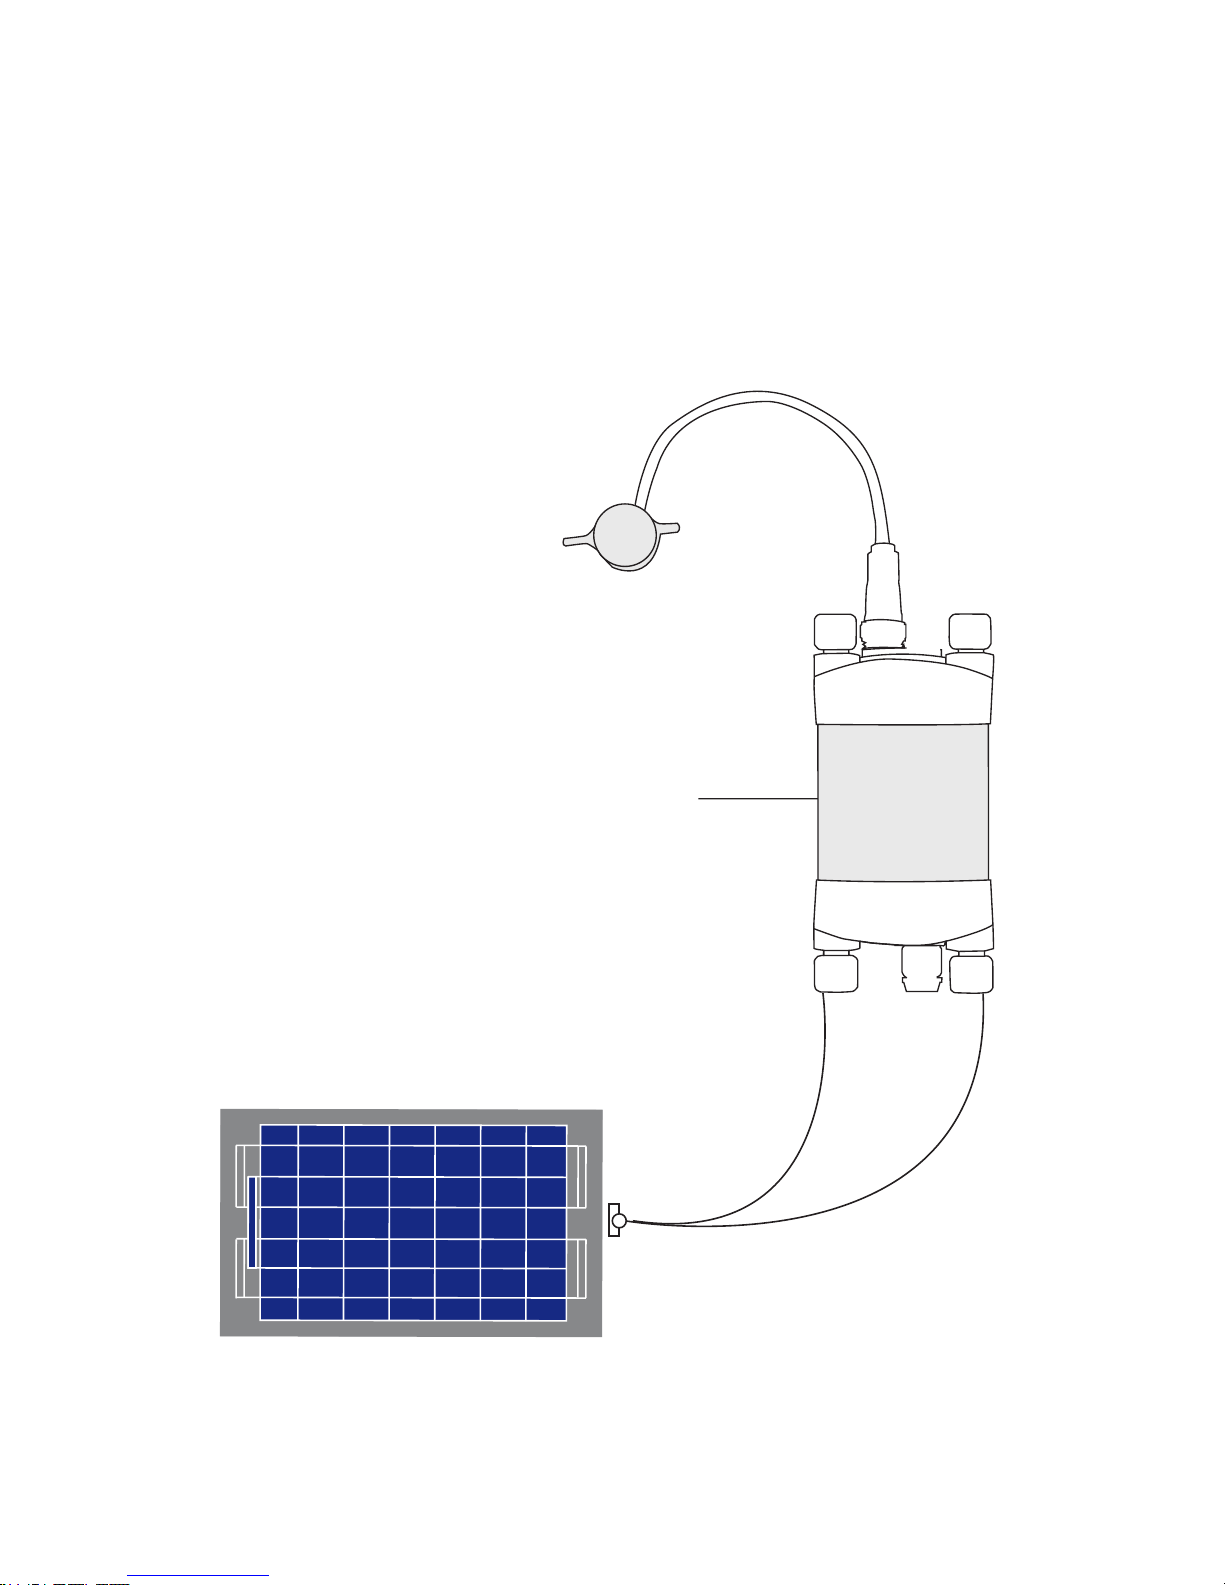
Connecting Power Directly via Solar Panel
Solar Panel
ICT International
Enabling better global research outcomes in soil,
plant & environmental monitoring.
PSY1
Page 9

9
External 12V Battery
Connecting Power via External 12V Battery or the ICT CH24
ICT International
Enabling better global research outcomes in soil, plant & environmental monitoring.
12V Battery alone does
not guarantee
continuous operation
or charging of the PSY1
PSY1
CH24 Power Supply
is a 24V DC output
charger that trickle
charges the internal
lithium polymer battery
of the ICT Instruments
PSY1
CH24
Page 10

10
Connecting Power via External 12V Battery and Solar Panel
Solar Panel
External 12V Battery
Solar Regulator
ICT International
Enabling better global research outcomes in soil, plant & environmental monitoring.
PSY1
Page 11

11
Sharing an External 12V Battery and Solar Panel via Daisy Chaining
Solar Panel
External 12V Battery
PSY1
PSY1
PSY1
Solar Regulator
ICT International
Enabling better global research outcomes in soil, plant & environmental monitoring.
Page 12

12
Clean the Psychrometer Chamber
The Stem Psychrometer consists of two very small welded thermocouples
made of very fine wire only 25 µm in diameter. AGAIN NOTE: Human hair
is, on average 100 µm thick. You will require a 20X dissection microscope to
view the thermocouples.
This makes the sensor very sensitive to measuring water potential, but equally as
sensitive to dirt and even mild oxidation. It is recommended that before starting
any measurements you clean the thermocouples. The cleaning process involves
using an organic solvent such as chloroform or an electronics contact cleaner
such as CRC qd Electronics Cleaner or CRC CO Contact Cleaner. Watch the
video: Cleaning the Psychrometer:
https://www.youtube.com/watch?v=SaQzdIOOJs&list=UUxtXEr9V3UE5XzDQr6wwtRg
ICT International
Enabling better global research outcomes in soil, plant & environmental monitoring.
Page 13

Install the PSY1 Software & USB Driver
(a) (c)
The PSY1 Stem Psychrometer software can also be downloaded from the
ICT International Software Downloads Page:
http://www.ictinternational.com/support/software/
(b)
Insert the supplied DVD into the computer. The DVD will auto-run and a menu
will appear on-screen. Select "software" (a) then choose "USB Driver" (b) and
then "PSY1 Installation Software" (c).
Turn the Instrument On
When the instrument is turned on the green light (visible through the light tube,
adjacenttothecommunicationport)willflash rapidlyforafewsecondsduring
startup.OncethePSY1hasstartedthegreenlightwillflashonceevery 10
seconds to indicate it is on.
To turn on your PSY1, connect the Instrument to a computer via a USB cable.
Alternatively the PSY1 can either be turned on manually by pressing the power
button or automatically by connecting an external power supply via the Bus Plugs.
13
ICT International
Enabling better global research outcomes in soil, plant & environmental monitoring.
Page 14

14
Connect to the Instrument via USB Cable
Connect the USB cable to the instrument. The PSY1 will be detected by the
computer automatically and the driver will also install automatically.
Double click the PSY1 software icon on the desktop to open the software.
ICT International
Enabling better global research outcomes in soil, plant & environmental monitoring.
LED light pipe
On/Off Switch
USB Port
SD Card
Page 15

15
USB Cable
ICT International
Enabling better global research outcomes in soil, plant & environmental monitoring.
Connect via USB Cable
PSY1
Page 16

16
USB Connection Software Procedure Step 1:
Click the icon “Connect to PSY”
ICT International
Enabling better global research outcomes in soil, plant & environmental monitoring.
Double click on the PSY Software Icon on your desktop. Select “Connect to PSY”,
then select “Find Devices” to search for the target instrument, Select the target
instrument from the Available Devices within the Device Selection Window.
Page 17

17
USB Connection Software Procedure Step 2:
You must first choose the connection type “USB” then Click “Find Devices”
to search for the instrument via USB cable.
ICT International
Enabling better global research outcomes in soil, plant & environmental monitoring.
Page 18

18
USB Connection Software Procedure Step 3:
After you highlight the target device then click “Select Device”.
ICT International
Enabling better global research outcomes in soil, plant & environmental monitoring.
Find on the list the device that matches the serial number of the target PSY1.
Double click on the device to connect. Alternatively highlight then click "select
device" to connect.
Page 19

19
Alternatively, if you are using a MCC1 Wireless Radio Modem
Connecting the Wireless Hardware via a USB Cable
Connect the MCC1 to a computer via a USB Cable.
Double click the PSY Software icon on the Desktop to open the software
and click the icon “Connect to PSY”.
USB Cable
MCC1
ICT International
Enabling better global research outcomes in soil, plant & environmental monitoring.
PSY1
Page 20

20
MCC RF Connection Software Procedure Step 1:
Make sure the MCC1 has been detected then highlight.
Choose the connection type “RF” instead of "USB"
ICT International
Enabling better global research outcomes in soil, plant & environmental monitoring.
Change the Connection Type from "USB" to "RF" and click “Find Devices”.
When "ICT Compatible RF Modem" appears double click on it to bring up the
RF Device Chooser Window.
Page 21

21
ICT International
Enabling better global research outcomes in soil, plant & environmental monitoring.
Then select "Discover", The PSY software will now use the MCC to perform
a wakeup routine, and search for instruments within range.
A set amount of time is used to find devices, If they have not all appeared
wait for 1 minute and perform a merged rescan to fill the list.
Page 22

22
MCC RF Connection Software Procedure Step 2:
Click on device.
After you highlight the device click “Connect”.
ICT International
Enabling better global research outcomes in soil, plant & environmental monitoring.
Page 23

Instrument Information
On the PSY Software, fields are given for Naming and adding a Comment,
These fields are specific to the individual serial numbers of the PSY1 loggers.
This naming system can be helpful for experiments, for instance naming them
based on location or purpose of the PSY1 and to tell them apart easily.
Of the two fields, the Name field ties to the PSY1 serial number within the RF
and USB chooser list, this makes it easier to find the logger you wish to connect
to when using multiple PSY1 loggers in the field.
Entering Information:
1) To edit the fields the original text needs to be erased, select the X next to the field you need to clear.
2) Type in the desired description – make sure to keep it short or abbreviated to a naming scheme.
3) Select “Update Sensor Information” – this will save both fields into the PSY1 memory (note this
will retain in the loggers memory regardless of SD Card present or removed.)
4) For the update to be successful, you will need to power down the PSY1 for 5 minutes and then
power it back up. To do so, remove external power to the bus plugs, disconnect in the PSY software
and power down by the power button (hold in for 2+ seconds) or use the power down command in the
PSY software – once the software disconnects remove USB cable if USB cable was used.
5) When ready use the power button to turn the logger back on or alternatively power can be turned on
automatically by connecting external power and/or a USB cable.
23
ICT International
Enabling better global research outcomes in soil, plant & environmental monitoring.
Page 24

Set Date & Time
The date and time are accessible via the commands menu along the top menu bar
of the PSY1 software. The date and time can be automatically set to the date &
time of the computer that the PSY1 is connected to by selecting the option
"Update Computer Time". An
alternativeoptionisprovidedtoupdatethe
instrumenttoauserdefinedtime. This is very important as Psychrometers are
often deployed in regions away fromyourusualoffice or local timezone.Theday,
monthandyearcanbesetbyclicking on the cell and using the arrows to scroll to
the required values. This is the same for both hours and minutes. Alternatively,
you can type the value directly into each cell. Then click update and the new date
& time will be saved to the real time clock of the PSY1’s microprocessor.
Power Management
The PSY1 logs the instrument's internal battery voltage, the external charging
supply voltage and external charging current. The battery voltage and external
supply voltage are automatically selected in SD Card logging options and
cannot be disabled. These parameters are set to be helpful in troubleshooting
suspect logging problems that typically can be caused by power supply issues.
24
ICT International
Enabling better global research outcomes in soil, plant & environmental monitoring.
Page 25

25
Set the Measurement Protocols
Each installation will be slightly different. For this reason, measurement protocols
such as the Sensor Calibration slope and intercept, Peltier Cooling Pulse options
or Chamber Heating schedule should be set before deploying the instrument and
checked periodically throughout the experiment.
Measurement Options: The default settings are a cooling time of 10 seconds
and a wait time of 6 seconds. This ensures that water in the atmosphere of the
chamber condenses and cools the thermocouple. A wait time of six (6) seconds
allows for stabilisation of the psychrometeric wet bulb depression.
Reverse Warming: Should not be required for a clean psychrometer and
is an advanced option typically only required for very humid conditions.
Chamber Heating: Should be employed whenever the psychrometer is subjected
to very cold temperatures at night that could induce condensation. If such
conditions are expected, A good protocol to follow is to employ chamber heating
between 5:00AM and 10:00AM to prevent the chamber form becoming colder
than the stem.
ICT International
Enabling better global research outcomes in soil, plant & environmental monitoring.
Page 26

26
Calibrate the Psychrometer
The Stem Psychrometer MUST BE calibrated before each installation.
The calibration employs a 6 point measurement protocol using NaCl solutions of
known molalities. The calibration must be done under isothermal conditions at a
controlled temperature of 25 °C to generate a specific slope and intercept that
characterises the specific response of the individual thermocouples. A detailed
calibration function is provided within the PSY1 software that can be used to
generate and automatically load your new calibration into the PSY1 firmware.
Watch the videos – Stem Psychrometer Calibration SP08, SP09 and SP10 for
details. The calibration is applied and tracked via the four-digit serial number
of the psychrometer chamber and will remain in the instrument in non-volatile
RAM until changed by the user. This number must be manually entered into the
instrument firmware. Watch the video Stem Psychrometer Calibration Function
Demo for details.
ICT International
Enabling better global research outcomes in soil, plant & environmental monitoring.
Page 27

27
Install the Sensor
Installation is an important aspect that is best explained by watching the series of
installation videos, namely SP03, SP04 and SP05.
Care must be taken to prepare the site for installation.
(a) Portrays latex exudates seeping from the stem. It would be unacceptable to
install the Stem Psychrometer under these conditions.
(b) Portrays a stem that has been prepared appropriately. The xylem under the latex
source is exposed. Here the Stem Psychrometer can be successfully installed.
NOTE: Any living tissue or cells left behind will grow into the chamber and
cause terminal damage to the thermocouples of the psychrometer chamber and
need to be returned to ICT International for repair. Please Request an RMA#
http://ictinternational.com/support/rma-form/ before returning anything to ICT.
(a) (b)
ICT International
Enabling better global research outcomes in soil, plant & environmental monitoring.
Page 28

Set the Logging Interval
The PSY1 Stem Psychrometer has a minimum temporal logging resolution of
10 minutes. This limit is imposed by the thermodynamics of the psychrometric
principle. The PSY1 Stem Psychrometer chamber must be allowed time
to dissipate all thermal gradients and re-equilibrate with the stem prior to
commencing a new measurement.
Note: In order for your
measurement changes to take
effect you must click “Update
Measurement Mode”
Download Data
Data can be downloaded in a number of ways. The simplest is to click the green
Download Data icon on the main window under the Instrument Information
section.
If a data file exists on the MicroSD Card then a Windows Explorer
window automatically loads. The window provides a choice of directories
to save the data file to. Alternatively, the MicroSD Card can be physically
removed and read by a computer using a USB Adapter.
28
ICT International
Enabling better global research outcomes in soil, plant & environmental monitoring.
Page 29

29
Analyse Data
Data is saved as a CSV file and can be analysed in your preferred software
package. The SFT Sap Flow
Tool software can also be used in combination with
SFM1 Sap Flow Meter data or the AWS Automatic Weather Station data for
advanced data analysis.
ICT International
Enabling better global research outcomes in soil, plant & environmental monitoring.
Page 30

www.ictinternational.com
sales@ictinternational.com.au
Phone: 61 2 6772 6770
Fax: 61 2 6772 7616
PO Box 503, Armidale, NSW, Australia, 2350
ICT International
Enabling better global research outcomes in soil,
plant & environmental monitoring.
 Loading...