

Page 1
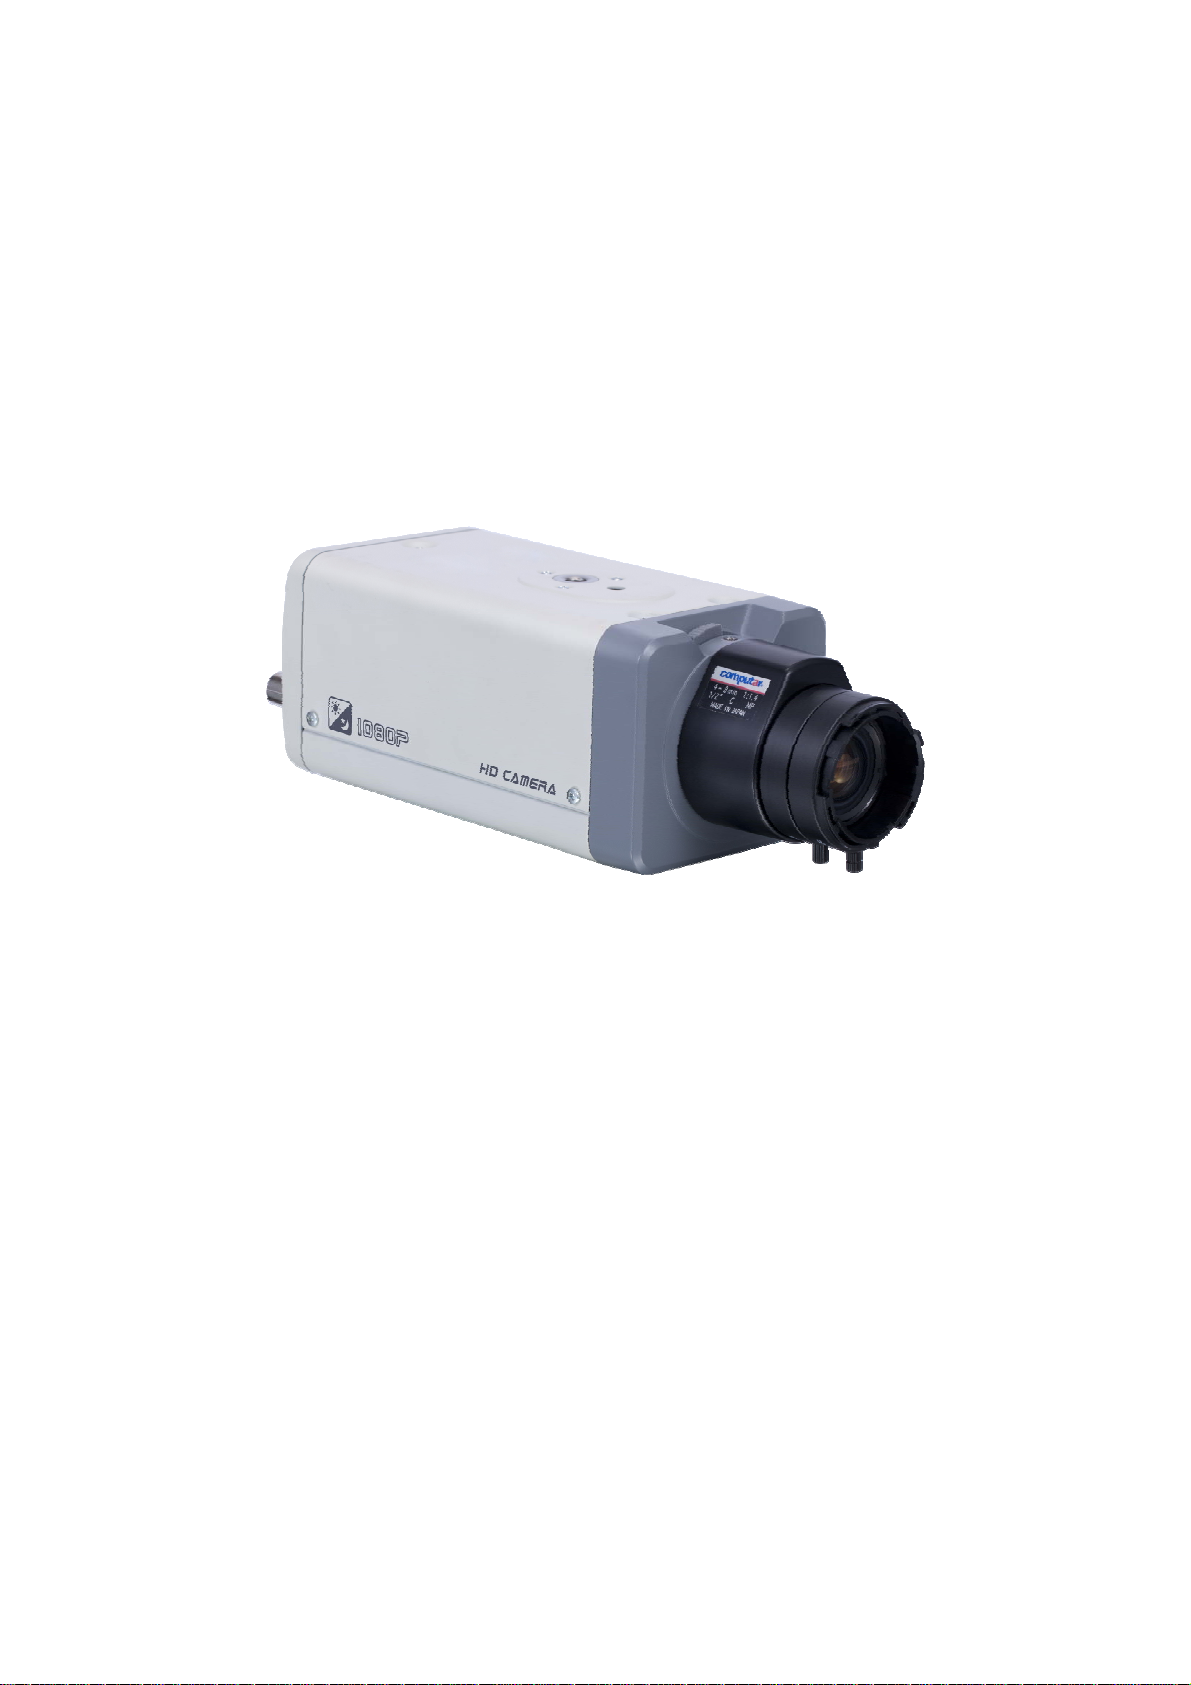
CMOS HD Digital Camera User's Manual
Version 1.0
Page 2

Welcome
Thank you for purchasing our camera!
This user’s manual is designed to be a reference tool for your system.
Please read the following safeguard and warnings carefully before you use this series product!
Please keep this user’s manual well for future reference!
Page 3

Important Safeguards and Warnings
1.Electrical safety
All installation and operation here should conform to your local electrical safety codes.
The power shall conform to the requirement in the SELV (Safety Extra Low Voltage) and the Limited
power source is rated 12V DC or 24V AC in the IEC60950-1.
Before you replace the SD card, please unplug the power cable and then remove the shell
We assume no liability or responsibility for all the fires or electrical shock caused by improper handling
or installation.
We are not liable for any problems caused by unauthorized modification or attempted repair.
2.Installation
Do not apply power to the camera before completing installation.
Do not put object on the camera.
3.Environment
This series camera should be installed in a cool, dry place away from direct sunlight, inflammable,
explosive substances and etc.
The working temperature ranges from -10℃ to +55℃. Please keep it away from the electromagnetic
radiation object and environment.
Please keep the sound ventilation.
Do not allow the water and other liquid falling into the camera.
4. Daily Maintenance
Current series camera has no power button. Please unplug all corresponding power cables before your
installation.
Do not touch the CCD or CMOS part; you can use the blower to clean the dust on the surface of the
lens. You can use the dry cloth with some alcohol to clear if necessary.
Please keep the dustproof cap back to protect the CCD or CMOS part if the camera does not work for a
long time.
If there is too much dust on the housing, please use the water to dilute the mild detergent first and then
use it to clean the device with the clear dry cloth. Finally use the dry cloth to clean the device.
5. Accessories
Please open the accessory bag to check the items one by one in accordance with the list below.
Contact your local retailer ASAP if something is missing or damaged in the bag.
Accessory Name Amount
Unit
C/CS adapter
Quick Start
Guide
■ 1
■ 1
■ 1
Page 4

CD
■ 1
Page 5

Table of Contents
1 General Introduction ..................................................................................................................6
1.1 Overview........................................................................................................................6
1.2 Feature...........................................................................................................................6
1.3 Specifications................................................................................................................6
1.3.1 Performance...........................................................................................................6
1.3.2 Factory Default Setup...........................................................................................7
2 Framework...................................................................................................................................8
2.1 Rear Panel.....................................................................................................................8
2.2 Side Panel ...................................................................................................................10
2.3 Lens..............................................................................................................................10
3 Installation .................................................................................................................................12
3.1 Lens Installation..........................................................................................................12
3.1.1 Auto Aperture Lens .............................................................................................12
3.1.2 Manual Lens.........................................................................................................12
3.1.3 Remove Lens.......................................................................................................13
3.2 I/O Port.........................................................................................................................13
4 HDC Configuration Tool ..........................................................................................................15
4.1 Overview......................................................................................................................15
4.2 Operation .....................................................................................................................15
Appendix Toxic or Hazardous Materials or Elements ...............................................................19
Page 6
1 General Introduction
1.1 Overview
This series camera conforms to the HD-SDI specifications. It supports high speed video signal,
almost no delaying in the transmission. The HD-SDI interface adopts the coaxial cable and uses
the BNC port as the cable standard.
This series product has the Megapixel definition and supports the DC 12V/AC 24V power.
1.2 Feature
Data
Transmission
Peripheral
Equipment
Power
Assistant
Function
z Adopt coaxial cable. Use the BNC port as the cable standard.
z Support peripheral equipment connection via the RS485 port, each
peripheral equipment control protocol and interface can be set freely.
z External power adapter. Support DC 12V/AC 24V power supply.
z Day/Night mode auto switch (ICR switch.)
z Backlight compensation: screen auto split to realize backlight
compensation to adjust the bright.
z Support auto iris function.
1.3 Specifications
1.3.1 Performance
Please refer to the following sheet for performance specification.
Model
Parameter
Syst
em
Main
Processor
Video Parameter
Image Sensor 1/2.8-inch CMOS
Pixel
Day/Night
Mode
Auto Iris DC drive
Gain Control Fixed/Auto
White Balance Manual/Auto
Exposure
Mode
Video Frame
Rate
Video Bit Rate
Video Mirror Support mirror, support negative image.
Video Setup Support parameter setup such as brightness, contrastness.
Video
Information
Lens Provided
Lens Interface C/CS optional
HDC-HF3300P/N
High performance processor
2048(H)*1536(V)
Support day/night mode switch and IR-CUT at the same time.
Manual/Auto(It ranges from 1/50 to 1/10000)
Conform to the SDI specifications SMPT274/292 protocol
PAL: 1920*1080@25fps;NTSC:1920*1080@30fps
OSD menu
6
Page 7

Interfac
e
AUX
Video Output
Reset Hardware Reset button
RS485 Port Set video parameter
General Parameter
Power Support AC 24V/DC 12V power
Power
Consumption
Working
Temperature
Working
Humidify
Dimensions 70×63.2×149.5
Weight 650g
Installation
1-channel SDI port
7W MAX (5W MAX when the ICR switch)
-10℃~+55℃
10%~90%
Support various installation modes(Enclosure and bracket is optional)
1.3.2 Factory Default Setup
Please refer to the following sheet for factory default setup information.
Function
Configuration Type
Item Name
HDC-HF3300P/N
COM Setup
Parameter
Note:
Please press the Reset button for 5 seconds to restore the factory default setup if the device can
not work properly or it can not boot up.
COM No. COM01
Baud rate 115200
Parity None
Data bit 8
Stop bit 1
Current status N/A
Color
Exposure
Brightness 50
Contrastness 50
Hue 50
Saturation 50
BLC 30. Disable off
Shutter Auto
Gain 50
Aperture Auto
Exposure
Compensation
Mirror Disable off
Negative
Video
WB Auto
Day/night
mode
Sharpness 7
Scene Setup Cloudy. Indoor
0
Disable off
Auto
7
Page 8

2 Framework
2.1 Rear Panel
This series camera real panel is shown as below. See Figure 2-1.
Figure 2-1
Please refer to the following sheet for detail information.
Interface Name Connector Function
AC 24V/ DC 12V Power port z Power port.
z Input 12V DC or
AC 24V
STATUS
Indication Light
Red light z The red light is on
when the system
is working
properly.
z It flashes when
the system is
upgrading.
8
Page 9

Green light z Hardware
Yellow light z Software
indication light. It
is on after the
hardware loaded
successfully.
indication light. It
is on after the
software loaded
successfully.
IN
NO
C
G GND Alarm input ground
A RS485_A port.
B
RX
TX
Reserved port N/A
RS485 port
Reserved port
I/O port
end.
It is to control the 458
tool to set the video
parameter.
RS485_B port.
It is to control the 458
tool to set the video
parameter.
N/A
G
NA
RESET RESET button z Restore factory
default setup.
z When system is
running normally
(power indication
light is red), press
the RESET button
9
Page 10

for at least 5
seconds, system
can restore
factory default
setup. Yellow light
flikers.
HD-SDI Send out the SDI
video stream
conforming to the HD-
SDI specifications.
GND Please make sure the
device is securely
earthed to prevent the
thunderstorm strike.
2.2 Side Panel
Please refer to the following interface for side panel dimension information. The unit is mm. See
Figure 2-2.
Figure 2-2
2.3 Lens
Please refer to the following interface for lens dimension information. The unit is mm. See Figure
2-3.
10
Page 11

Figure 2-3
11
Page 12

3 Installation
3.1 Lens Installation
3.1.1 Auto Aperture Lens
Please follow the steps listed below for auto aperture lens installation. The interface is shown as
in Figure 3-1 and Figure 3-2.
z Remove the CCD protection cap of the device, and then line up the lens to the proper
installation position. Turn clockwise until the lens is fixed firmly.
z Insert the lens cable socket to the auto lens connector in the side panel.
z When it is ∞, you can turn the ADJUST screw to adjust the focus circle to adjust the focal
distance.
Figure 3-1
3.1.2 Manual Lens
Install C type lens
z Remove the CCD protection cap; use the cross-head screwdriver to remove the screw near
the focal circle. Then please turn counter clockwise to move the focal circle out for several
millimeters. Now you can focus manually.
z Then please use the cross-head screwdriver to fix the screw back firmly. Secure the focal
circle.
z Install the C/CS adapter to the camera.
z Finally, line up lens to the proper installation. Turn clockwise to fix the lens firmly.
Install CS type lens
z Remove the CCD protection cap; use the cross-head screwdriver to remove the screw near
the focal circle. Then please turn counter clockwise to move the focal circle to the end and
now you can focus manually.
z Then please use the cross-head screwdriver to fix the screw back firmly. Secure the focal
circle.
z Finally, line up lens to the proper installation. Turn clockwise to fix the lens firmly.
12
Page 13

Figure 3-2
3.1.3 Remove Lens
Please follow the steps listed below to remove lens. The interface is shown as in Figure 3-3.
z Turn the lens counter clockwise and then remove it from the camera.
z Unplug the auto lens cable socket from the auto lens connector. If you are using the manual
aperture lens, please skip to the following step.
z If there is no lens, please put the CCD protection cap back to protect the CCD.
Figure 3-3
3.2 I/O Port
Install Cable
Please follow the steps listed below to install the cable. See Figure 3-4.
Use the small slotted screwdriver to press the corresponding button of cable groove. Insert the
cable into the groove and then release the screwdriver.
Remove Cable
Please follow the steps listed below to remove the cable.
Use the small slotted screwdriver to press the corresponding button of cable groove. Remove the
cable out of the groove and then release the screwdriver.
13
Page 14

Figure 3-4
14
Page 15

4 HDC Configuration Tool
4.1 Overview
You can use HDC configuration tool to set the device parameter and upgrade the system.
4.2 Operation
Double click the “485Configs.exe” icon; you can see an interface is shown as in Figure 4-1.
In the device interface, you can view COM setup, parameter setup, OSD, upgrade information
and etc.
The parameter interface is shown as in Figure 4-1.
Figure 4-1
The OSD interface is shown as in Figure 4-2.
Figure 4-2
The upgrade interface is shown as in Figure 4-3.
15
Page 16

Figure 4-3
You can refer to the following sheet for detailed information.
Item Note
COM Setup
COM Select the corresponding COM number.
Baud rate Default value is 115200 (Read-only)
Parity None
Data bit Default value is 8 (Read-only).
Stop bit Default value is 1 (Read-only).
Parameter
Setup
Current status Display the corresponding COM status.
Color
Exposure Shutter It is to set the shutter time. It includes the following
Brightness
Contrastness z It includes two options: Enable/disable. You can
Hue Set the hue value to adjust the video hue. The value
Saturation Set the saturation value to adjust the video saturation.
BLC The BLC has three options: manual/auto/disable. You
Set the brightness value to adjust the video bright and
dark level. The value ranges from 0 to 100.
check the box to enable the contrastness
function.
z After you enabled this function, you can set the
different value to control the contrastness. The
value ranges from 0 to 100.
Please note the BLC function and the contrast
function can not be valid at the same time.
ranges from 0 to 100.
The value ranges from 0 to 100.
can check the box to select the corresponding mode.
z In the manual mode, the value you set here is the
actual backlight value.
z In the auto mode, the value ranges from 0 to 100
according to the actual environments.
z In the disable mode, the BLC function is disabled.
The value ranges from 0 to 100.
Please note the BLC function and the contrast
function can not be valid at the same time.
modes.
z Auto: System auto adjusts the shutter time
according to the current environments,
z Manual: 1/50s, 1/120s, … . The shutter time is
16
Page 17

1/50s, 1/120s, …
z Customized zone: After you selected current
mode, you can see there is a period setup
interface. System can auto adjust in the period
you specified.
z Customized value: After you selected the mode,
you can see the time period setup interface. You
can input the shutter value in the current
interface.
Gain It includes two modes: auto/manual. You can check
the box to select the corresponding mode.
z In the manual mode, your input value is the actual
value.
z In the auto mode, the value ranges from 0 to the
setup value according to the actual environments.
Aperture It includes two options: auto/no-auto.
z In the auto mode, system can automatically
adjust the best aperture value according to the
current environments.
z In the non-auto mode, the aperture is all open.
Exposure
compensation
FPGA version FPGA software and hardware version number.
Others
Default Restore system default setup.
Mirror It is the pan rotation. You can check the box to enable
Negative
video
WB It includes: disable, auto, sunny, cloudy, home, office,
Sharpness It is to set the video sharpness level. There are total
Day/night
mode
Scene setting You can select the corresponding scene mode
There are 15 levels ranging from -7 to 7. You can set
the corresponding value to adjust the video total
brightness.
this function. Otherwise it is in normal mode.
It is to turn the bright part to the dark part and turn the
dark part to the bright part. You can check the box to
enable this function. Otherwise it is in normal mode.
night, customized.
In the customized mode, you need to put a white
paper before the lens and then click the Trigger
button.
16 levels.
It includes: day/night/auto.
z In the auto mode, system automatically sets the
day or night mode according to the current
environments.
z In the day mode, the video is color.
z In the night mode, the video is black and white.
according to the various environments.
Save Save current setup
OSD Go to the main menu. Use the up/down button to the
corresponding item and then use the left/right button
to adjust the parameter.
System upgrade Select the upgrade file and update the system.
The OSD setup interface is shown as in Figure 4-4.
17
Page 18

Figure 4-4
18
Page 19

Appendix Toxic or Hazardous Materials or Elements
Toxic or Hazardous Materials or Elements Component Name
Pb Hg Cd Cr VI PBB PBDE
Circuit Board Component ○ ○ ○ ○ ○ ○
Device Construction Material ○ ○ ○ ○ ○ ○
Wire and Cable ○ ○ ○ ○ ○ ○
Power Adapter ○ ○ ○ ○ ○ ○
Packing Components ○ ○ ○ ○ ○ ○
Accessories ○ ○ ○ ○ ○ ○
O: Indicates that the concentration of the hazardous substance in all homogeneous materials in
the parts is below the relevant threshold of the SJ/T11363-2006 standard.
X: Indicates that the concentration of the hazardous substance of at least one of all
homogeneous materials in the parts is above the relevant threshold of the SJ/T11363-2006
standard. During the environmental-friendly use period (EFUP) period, the toxic or hazardous
substance or elements contained in products will not leak or mutate so that the use of these
(substances or elements) will not result in any severe environmental pollution, any bodily injury or
damage to any assets. The consumer is not authorized to process such kind of substances or
elements, please return to the corresponding local authorities to process according to your local
government statutes.
Note
z This user’s manual is for reference only.
z Slight difference may be found in user interface.
z All the designs and software here are subject to change without prior written notice.
z If there is any uncertainty or controversy, please refer to the final explanation of us.
z Please visit our website for more information.
19
 Loading...