

Page 1
P1
WP-8xx8-CE7
Quick Start
v2.0, Nov 2020
Packing List
In addition to this guide, the package includes the following items:
WP-8128-CE7
WP-8428-CE7
WP-8828-CE7
A SD/microSD adapter
and microSD card
Win-GRAF PAC &
Software Utility CD
Screw Driver
Technical Support
service@icpdas.com
www.icpdas.com
Resources
How to search for drivers, manuals and
spec information on ICPDAS website.
For Mobile Web
For Desktop Web
Model Name
Model Name
Page 2
P2
1
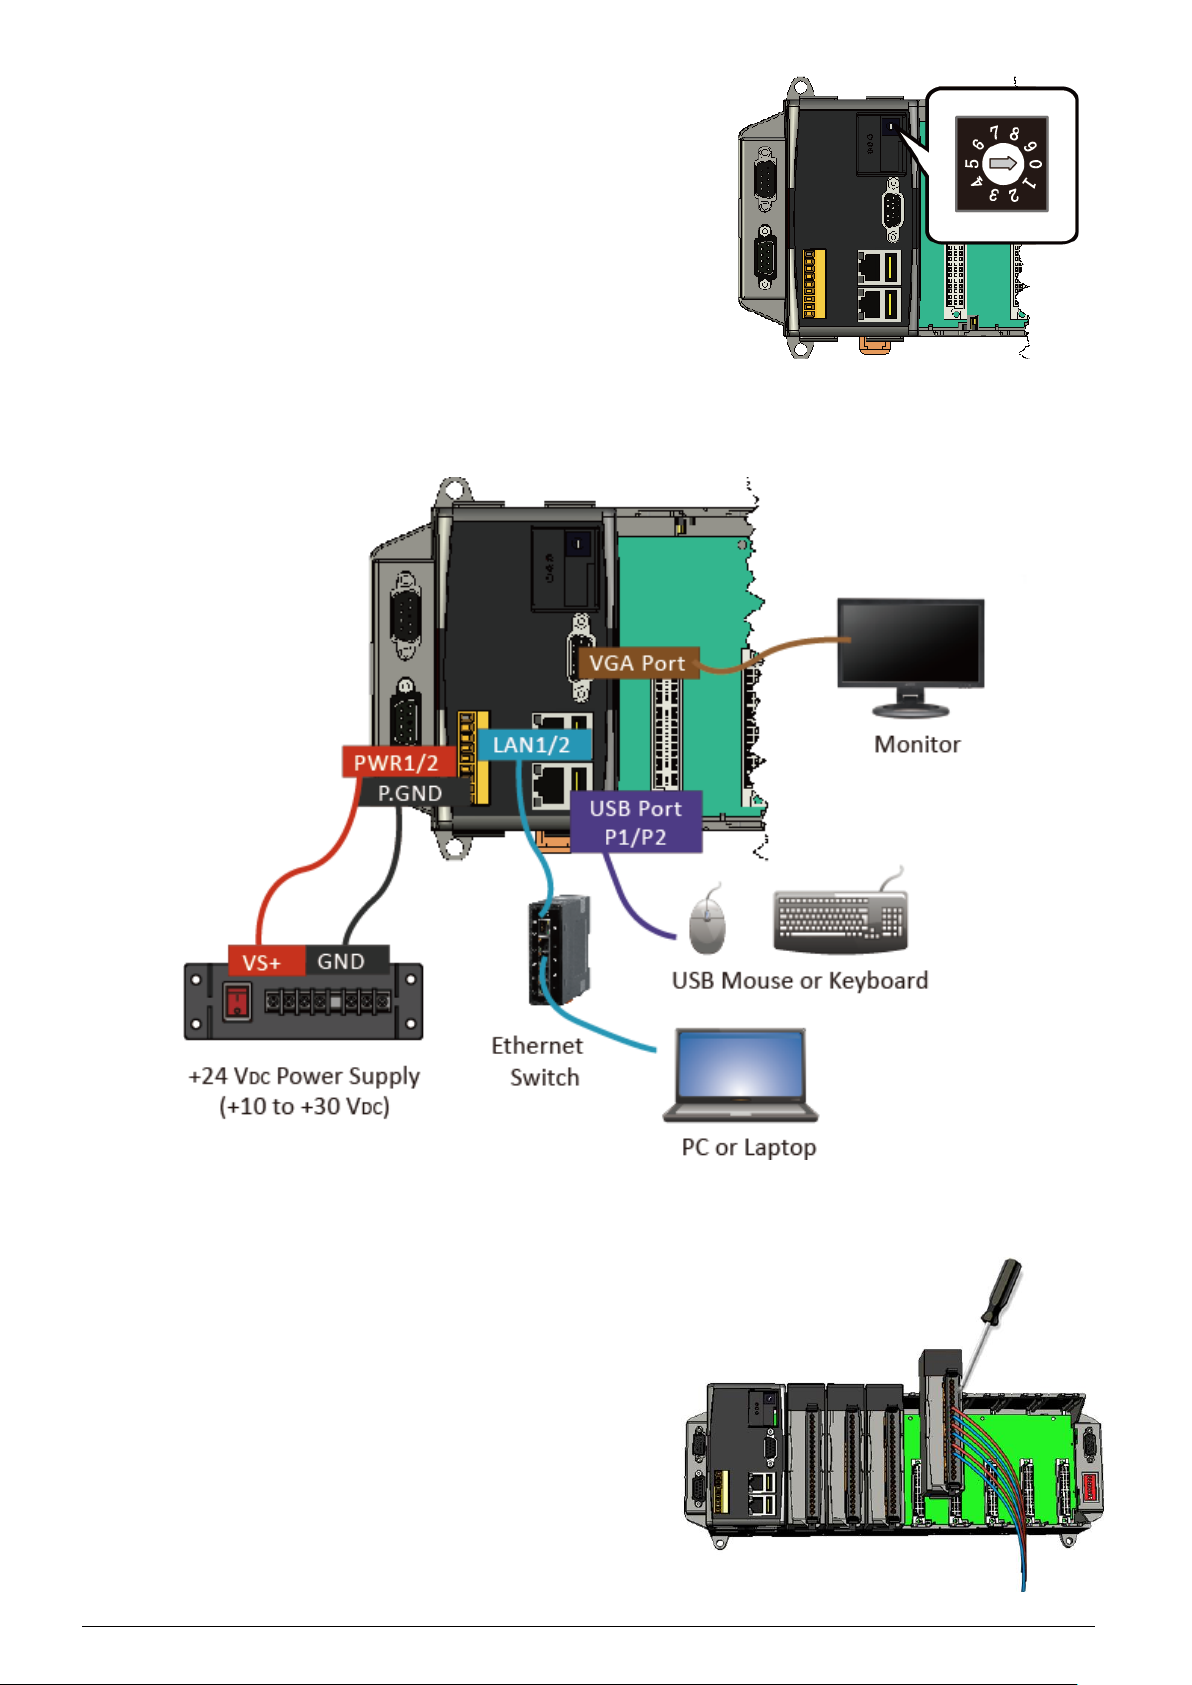
Configuring the Boot Mode
Before starting any installation, be sure that
the switch is placed in the『0』position.
2
Connecting to PC, Monitor and Power Supply
3
Inserting the I/O Module and Wiring Connection
WP-8xx8-CE7 has 1/4/8 I/O expansion slots and only supports
high profile I-8K and I-87K series I/O modules.
For more information about this expansion
I/O modules, please refer to the website.
Page 3
P3
4
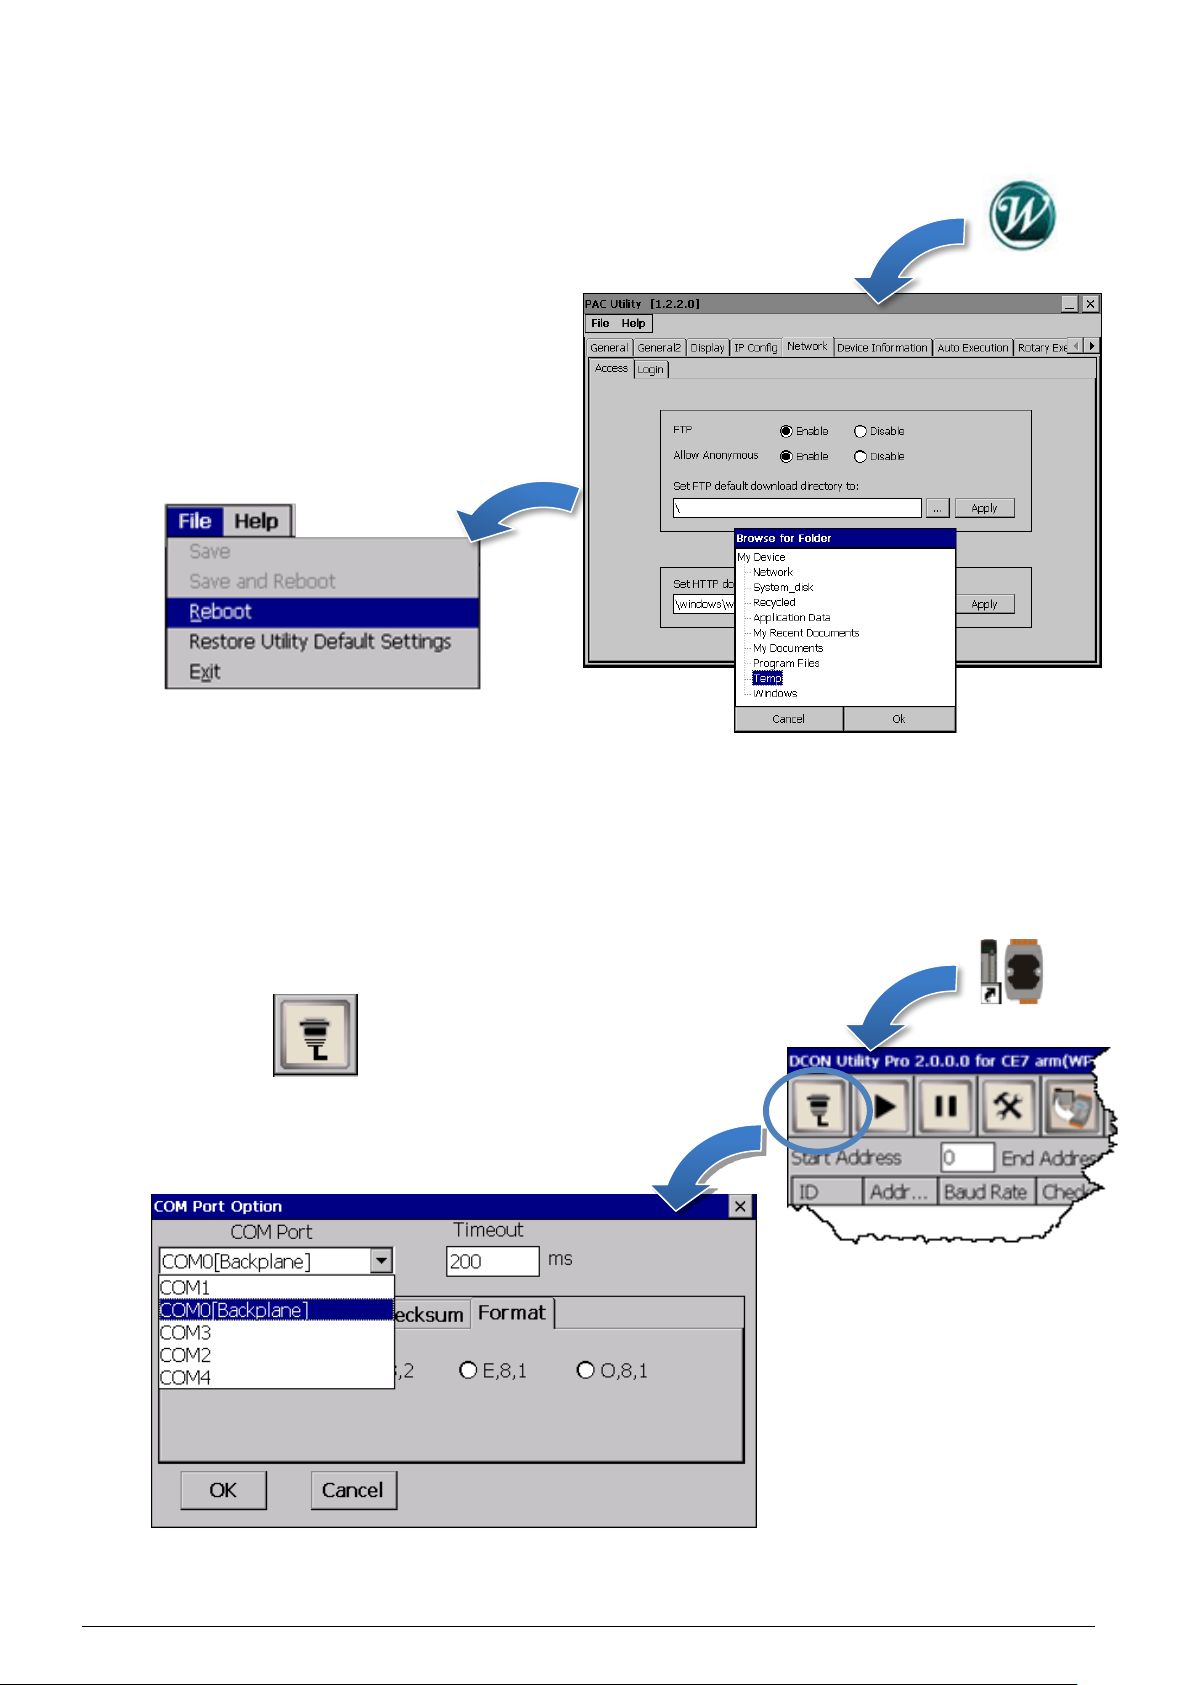
Using PAC Utility to Manage the WP-8xx8-CE7
1) Double-click the PAC Utility on the desktop.
2) Configure IP address (DHCP), FTP
Server, Auto Execution files…, etc.
3) Reboot the WP-8xx8-CE7 for
changes to take effect.
5
Using DCON Utility Pro to Configure I/O Modules
1) Double-click the DCON Utility Pro on the desktop.
2) Click the button.
3) Configure the communication settings.
Page 4
P4
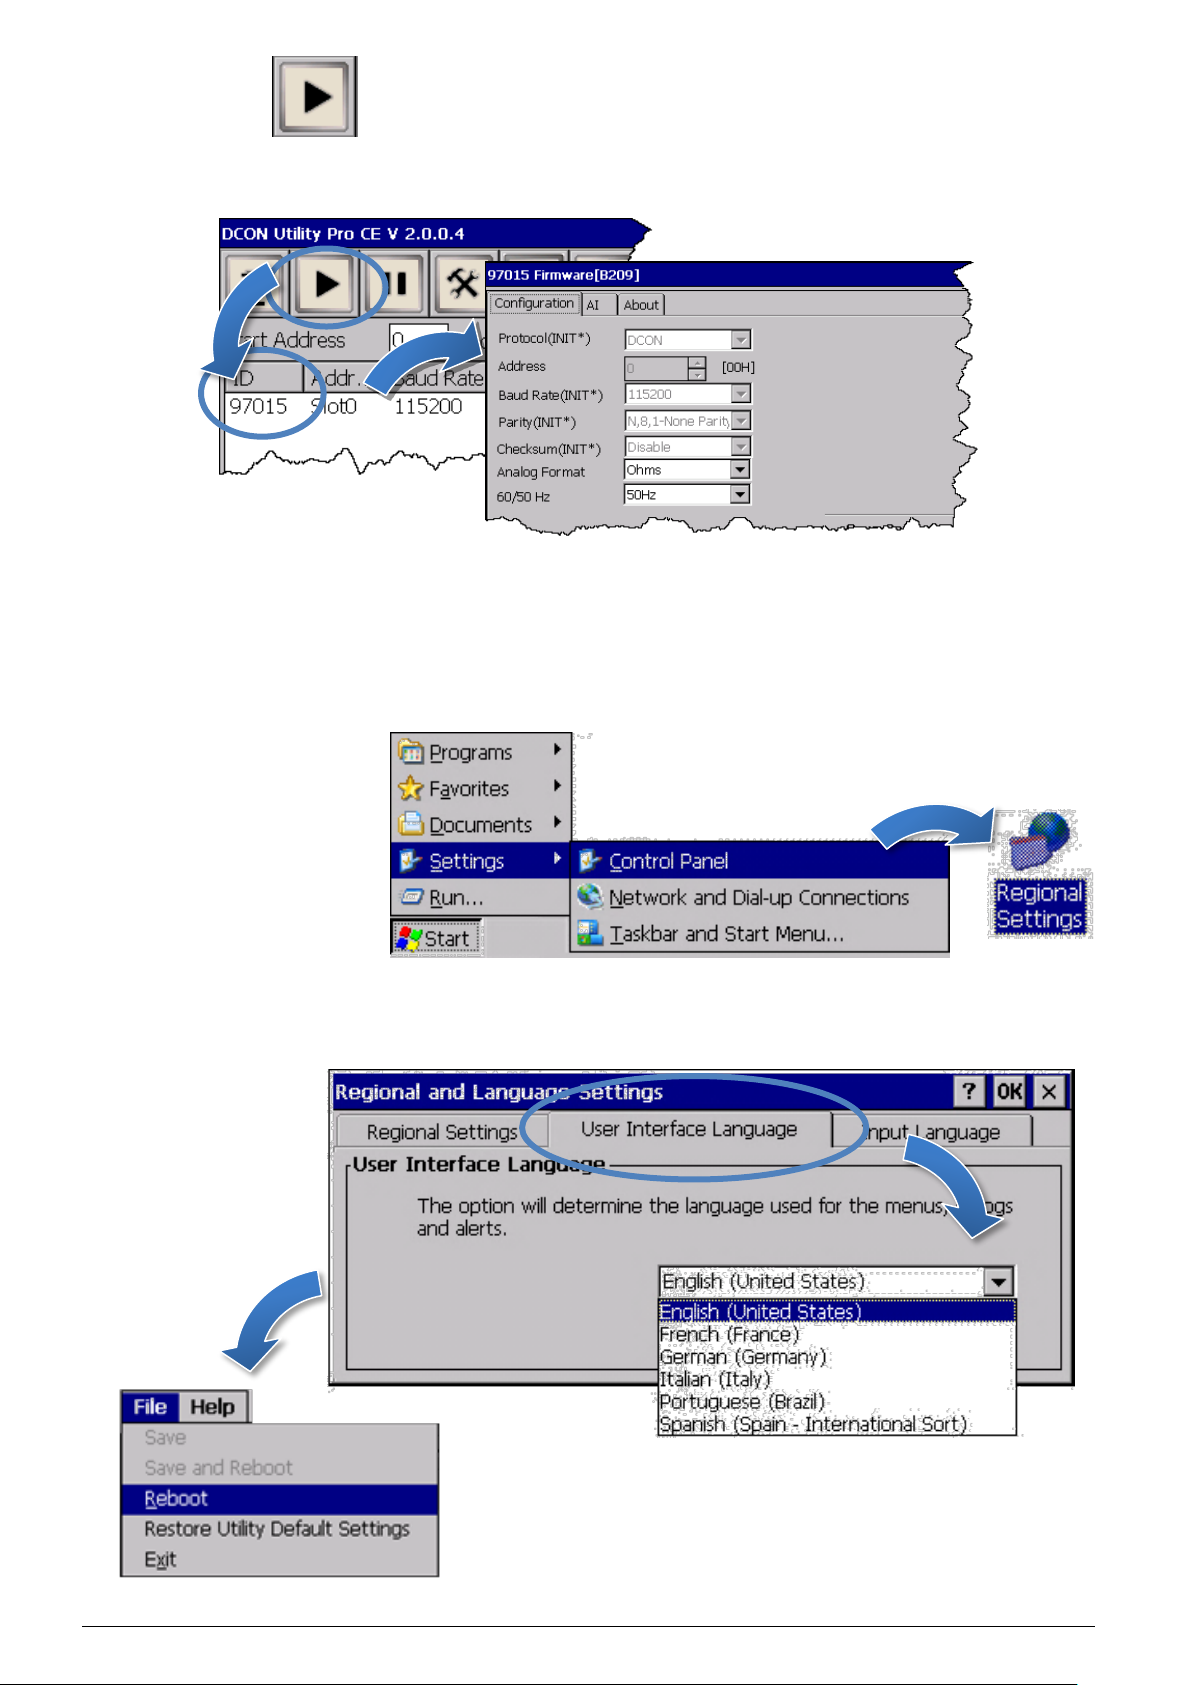
4) Click the button.
5) Click the module name to configure the I/O module.
6
Changing
the User Interface Language
1) Click Start menu, point to Settings, click Control Panel, and then click
Regional Settings.
2) Click User Interface Language tab, choose to your local language, and
then click OK.
3) Run the PAC Utility, and then reboot the
WP-8xx8-CE7 for changes to take effect.
 Loading...