

ICPDAS I-7242D Quick Start User Manual
I-724D DNS/Modbus RTU Quick Start User Guide, July 2006, Version 1.1 ------ 1
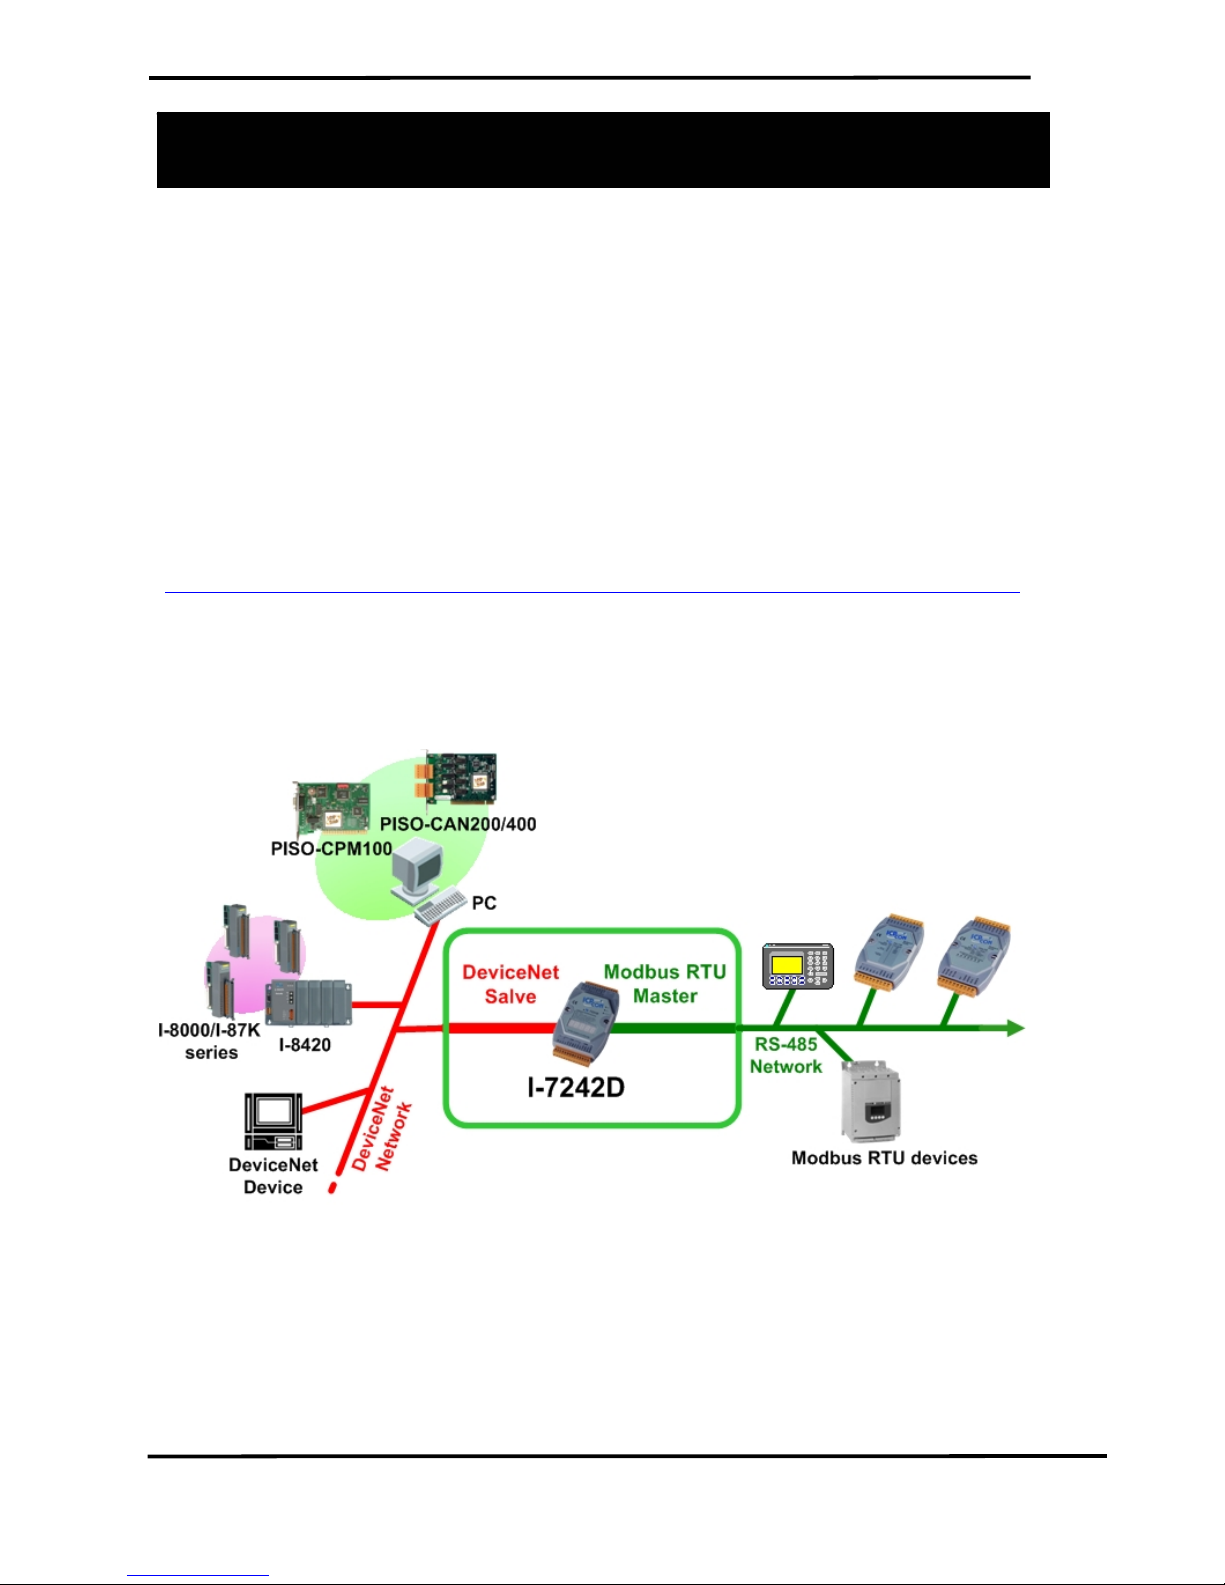
The I-7242D DNS/Modbus RTU Gateway
Quick Start User Guide
1. Introduction
This user guide introduces the user how to implement the I-7242D
module into their applications in a quick and easy way. Therefore, it only
provides the basic instructions. For more detailed information, please refer
to the I-7242D user manual located on the ICPDAS CD-ROM or download
it from the ICPDAS web site:
ftp://ftp.icpdas.com.tw/pub/cd/can_cd/devicenet/gateway/i-7242d/manual/
The sake of this manual is focused on helping users to quickly
familiarize themselves with the I-7242D module. Users can apply the
I-7242D module as follows.
I-724D DNS/Modbus RTU Quick Start User Guide, July 2006, Version 1.1 ------ 2
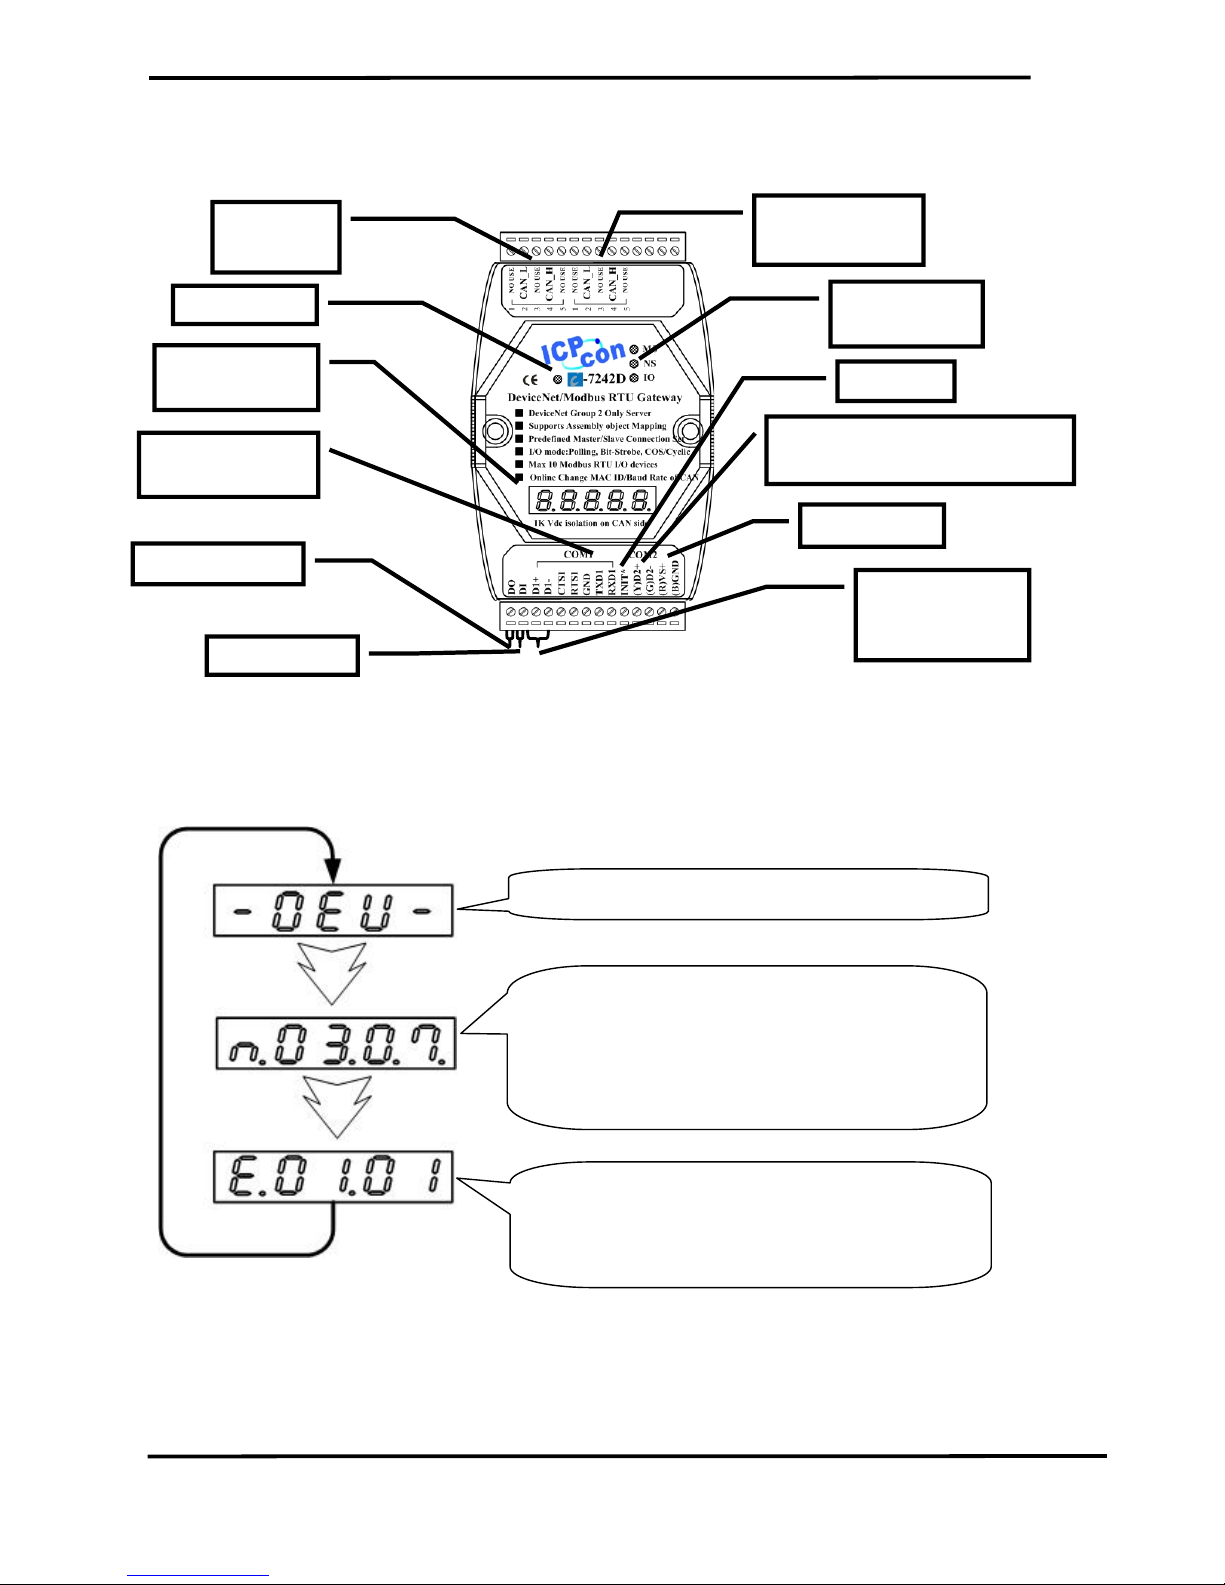
2. Hardware Structure
Bypass CAN
Bus Connecto
CAN Bus
Connector
r
DeviceNet
S
tatus LED
7-segment
LED dis
3. 5-digital 7-segment LED Displays
For more information, please refer to section 2.5 of the I-7242D User’s Manual.
play
s
RS-232 Port
RS-485 Port
(
Connect to Modbus devices
)
RS-485 Port
(Reserved for
Power Input
Init * pin
A
larm Output
Step1. Display the string “-DEV-”
Step2. It means that the I-7242D is in the
normal operation mode. Its MAC ID is 0x03.
CAN baud rate is 125 Kbps and RS-485 baud
rate is 115.2 Kbps.
Step3. It means that there is one message lost
from I-7242D to Modbus device which device
address is 0x01. The number format is hex.
I-724D DNS/Modbus RTU Quick Start User Guide, July 2006, Version 1.1 ------ 3
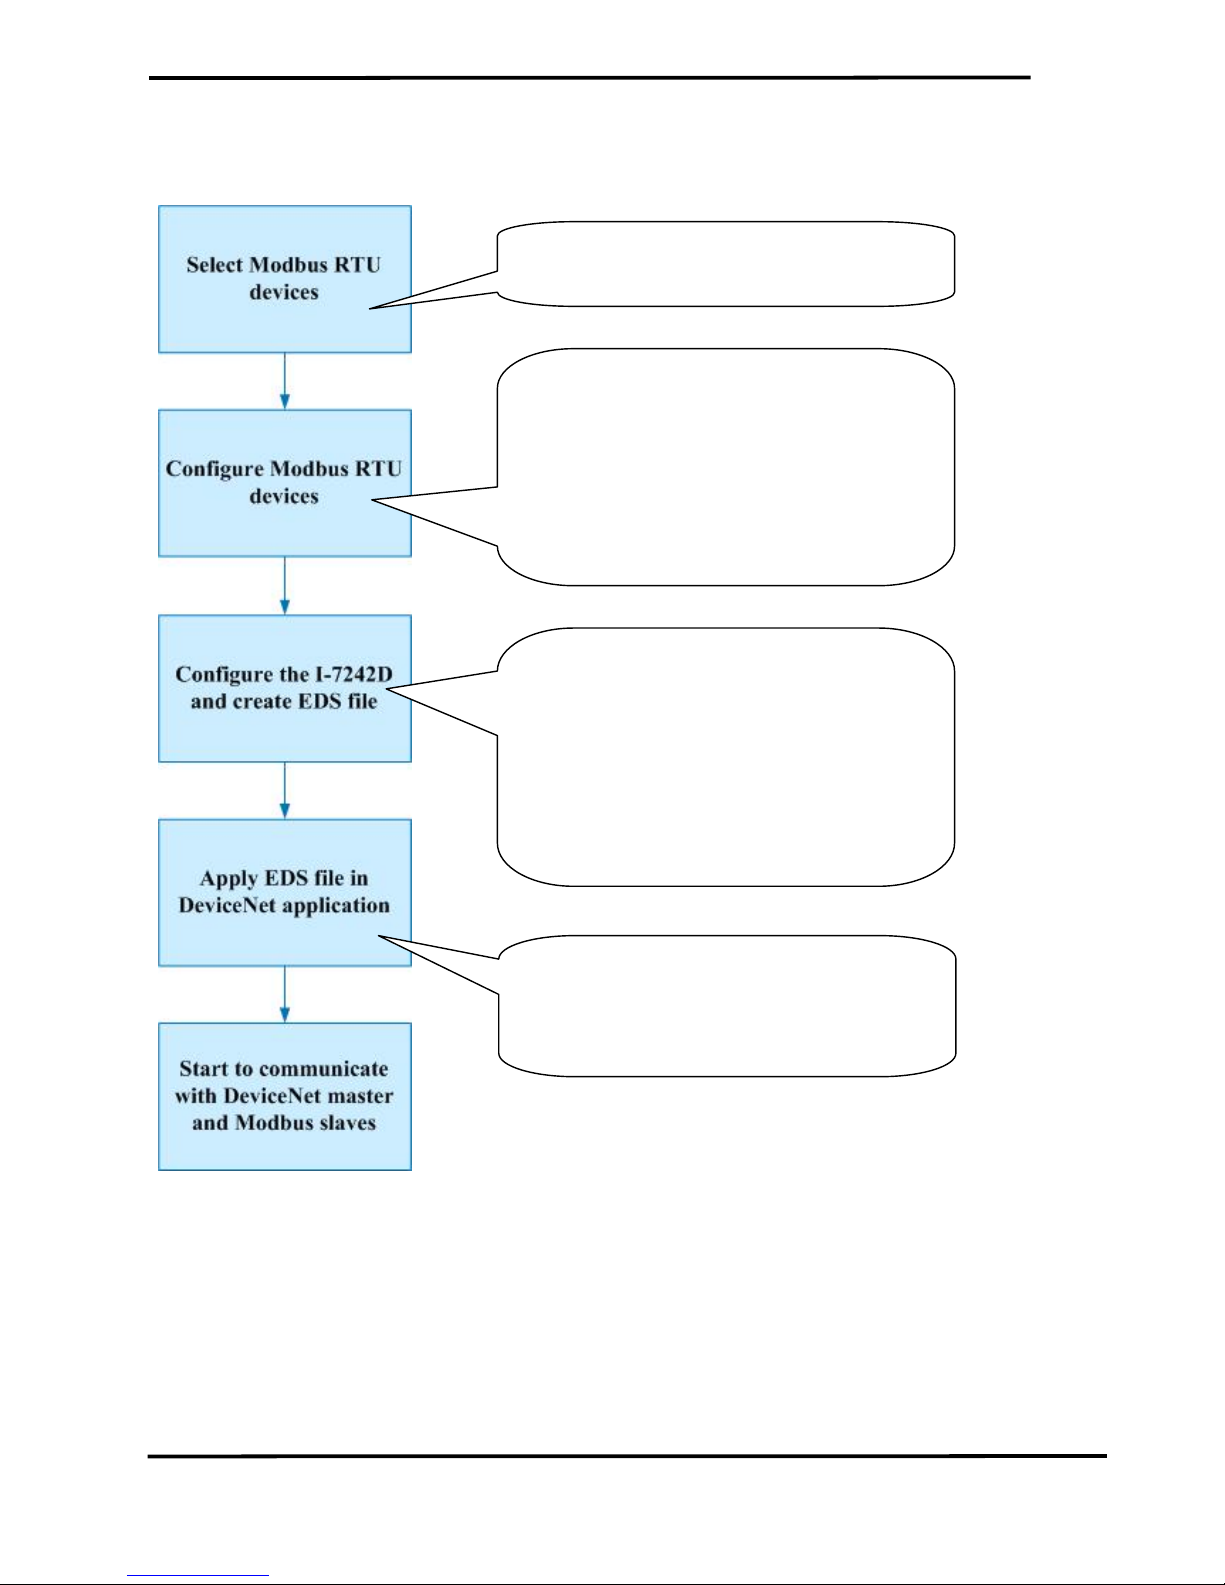
4. Configuration Flowchart
Select the necessary Modbus RTU devices
in the DeviceNet network.
1. Connect the COM2 port from the I-
7242D to these Modbus RTU devices.
2. Connect the COM1 port from the I-
7242D to the PC’s COM port with the
download cable, CA0910F.
2. Power on the I-7242D and execute the
DNS_MRU Utility in order to
configure the I-7242D. Then it will
establish the EDS file automatically.
After configuring the I-7242D and creating
the specific EDS files, apply the EDS file
in your DeviceNet application.
1. Initial the I-7242D by connecting the
Init * pin with the GND pin.
 Loading...