

Icon Q QT1028, qt1028k, QT9028K User Manual
USER MANUAL


Welcome and Important Notices
I. Assembling
...................................02
...................................................................03
....................................................03
...................................03
..........................03
............................................................04
..............04
..........................................04
.........................................04
..............05
...................................................06
....................................07
..........................................08
.......................08
...............................................08
..........................08
............................08
.................................................08
...........................................09
.............................................................................09
.......................................................09
.......................................................10
1.1 Unpack
1.2 Charge the battery
1.3 Install the memory card
II. Getting started
2.1 Turn your device on and off
tuoyal eciveD 2.2
2.3 Home screen
2.4 Add items to the home screen
2.5 Task bar
2.6 panel
2.7 Auto rotation
neercs eht kcolnu & kcoL 8.2
2.9 Enter text
2.10 Customize your device
2.11 Manage applications
2.12 Security.
2.13 Reset tablet
III. Web
3.1 Email
3.2 Gmail
3.3 Browser....................................................11
.................................................12
............................................................13
...................................13
.....................................................14
....................................................15
............................................................................17
..................................................17
......................................................17
...........................................18
................................................18
.................................................................18
.....................................18
........................................................18
....................................................19
..................................................20
3.4 App Store
IV. Entertainment
4.1 Super-HD Player
4.2 Music
4.3 Camera
V. Tools
5.1 Calendar
5.2 Alarm
5.3 File Manager
5.4 Calculator
VI. Connectivity
6.1 USB Connection
6.2 Wi-Fi
VII. Safety Precautions
VIII. Care & Maintenance
..............................................................21IX. Specifications
INDEX:
1
N o t i f i c a t i o n
.................................................19 6.3
Bluetooth

WELCOME
Thank you for purchasing this tablet.
Running on the latest operating system, with a highly responsive capacitive touch screen, this tablet is
designed for your ease of use.
We also hope this tablet will meet your needs for work or for play, with its support for 3D gaming, chatting,
movie playback, e-reading, and more.
Before beginning, please refer to this user guide carefully, and read through at least once for the best user
experience.
IMPORTANT NOTICES
• The new battery will be in its best condition after the battery is fully charged and discharged 2-3 times.f
• The tablet can support USB charging. You may also use the AC adaptor supplied.
• While using the earphones, if the volume is excessively high it may cause hearing damage. Please adjust
the volume to a moderate level and balance the tablet usage time.
• Do not disconnect the tablet suddenly while formatting, or uploading and downloading files, as it may
lead to program errors.
• Do not dismantle the tablet by yourself, and do not use alcohol, thinner or benzene to clean its surface.
• The tablet is not moisture and water resistant. Please do not use it in a damp environment.
• Do not drop or hit the tablet on a hard surface, or the screen may get damaged.
• Do not upgrade the
by yourself. This will cause damage to your tablet.
2
I. ASSEMBLING.
1.1 Unpack.
Check your product box for the following items.
• telbaT
• launam resU
• retpadA
• elbaC BSU
You can purchase additional accessories if desired.
1.2 Charge the battery.
Before using the device for the time, you must charge the battery.
art a htiw ecived eht egrahc nac uoY .1 vel adapter or by connecting the device to a PC with a USB cable.
2. The "battery full" icon will appear on the screen when the device has finished charging.
Warning! Use only original batteries and chargers. Unapproved chargers or cables can cause batteries to explode or
damage your device.
1.3 Install the memory card.
segdir dlog eht htiw drac yromem a tresnI .1 facing downwards.
2. Push the memory card into the slot until it clicks.
Note: elbitapmoc ylluf eb ton yam sdnarb emos tub ,sdrac yromem rof sdradnats yrtsudni devorppa sesu ynapmoc ruO
.ecived ruoy htiw
3
II. GETTING STARTED.
2.1 Turn your device on and o.
To turn on your device, press and hold the power key.
To turn off your device, press and hold the power key, and then tap OK.
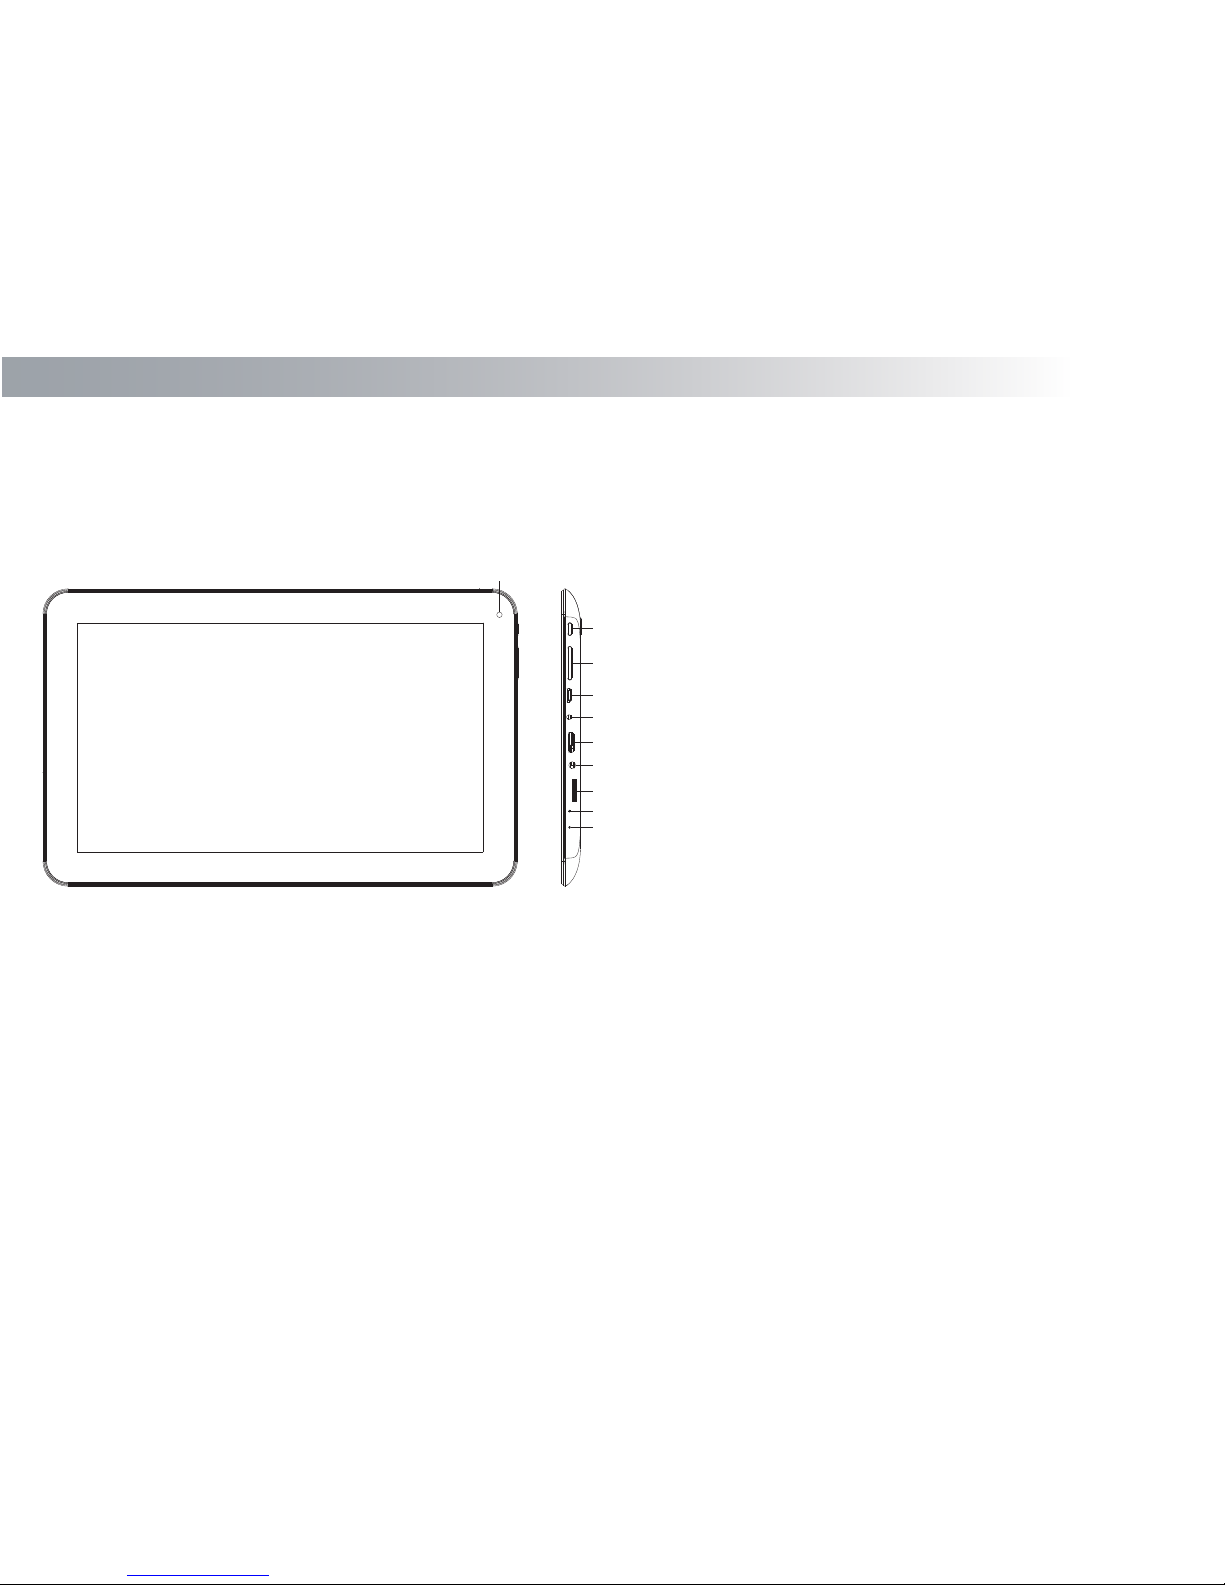
2.2 Device layout.
2.3 Home screen.
The home screen has multiple panels. Scr
oll
left
or right t
o the panels
on the home
scr
een, to view indicator icons, wid-
gets, shortcuts to applications, and other items.
1. Open the search bar
2. Access the application list and widget screen.
4
1. Camera
2. POWER
3. VOL+/-
4. USB
5. Headphone jack
6. HDMI
7. DC IN
8. TF CARD
9. RESET
10. MIC
1
2
3
4
5
6
7
8
9
10
3. Task bar
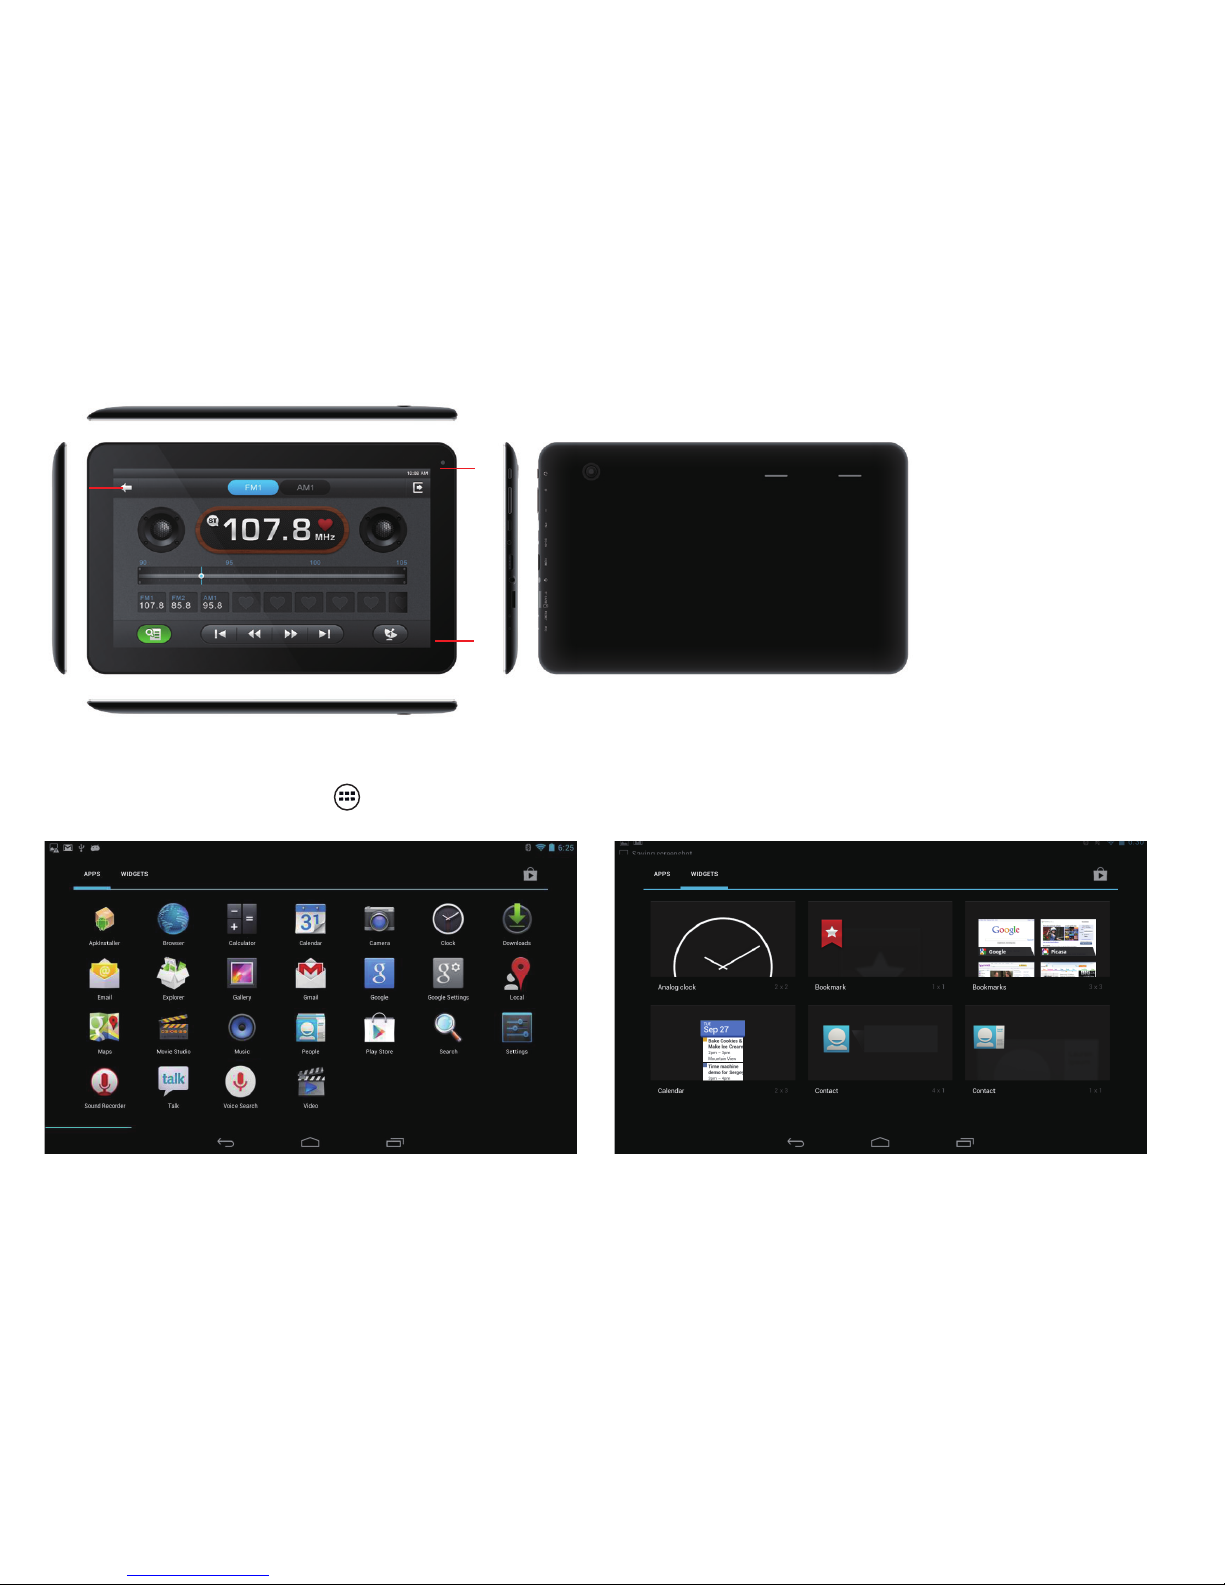
2.4 Add items to the home screen.
5
From the home screen, tap the icon to access the application list shown below.
2
3
1
Scroll left or right to view more items.
To add items to the home screen, tap and hold an item, then drag the item to a new location.
To remove items from the home screen, tap and hold an item, then drag the item to the Remove area at the top of the home
screen.
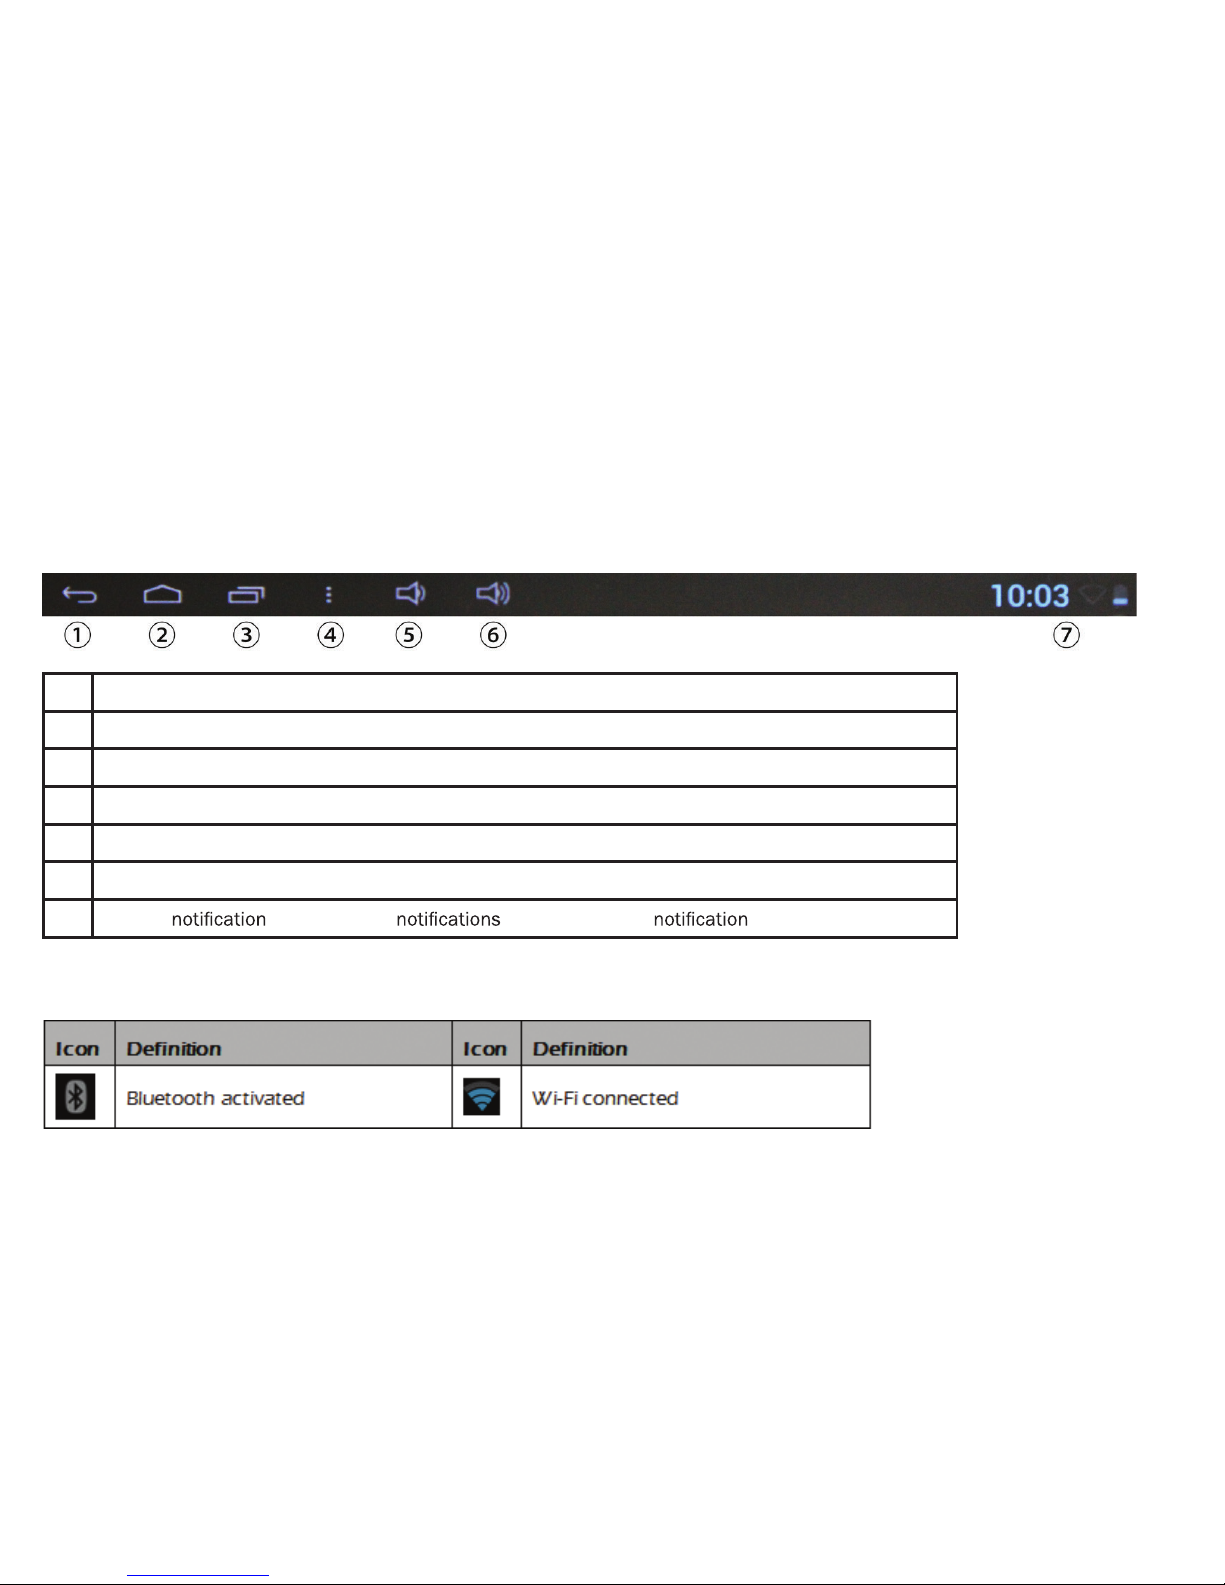
2.5 Task bar.
The task bar is shown at the bottom of the screen. It displays commonly used option buttons, battery level indicator, current
time and other indicator icons.
1 Return to previous screen.
2 Return to home screen.
3 View the applications you have accessed recently.
4 Open a list of options available on the current screen.
5 Adjust the device volume to low level.
6 Adjust the device volume to high level.
7 Display
icons. Tap the area to open the panel.
Indicator icons
6
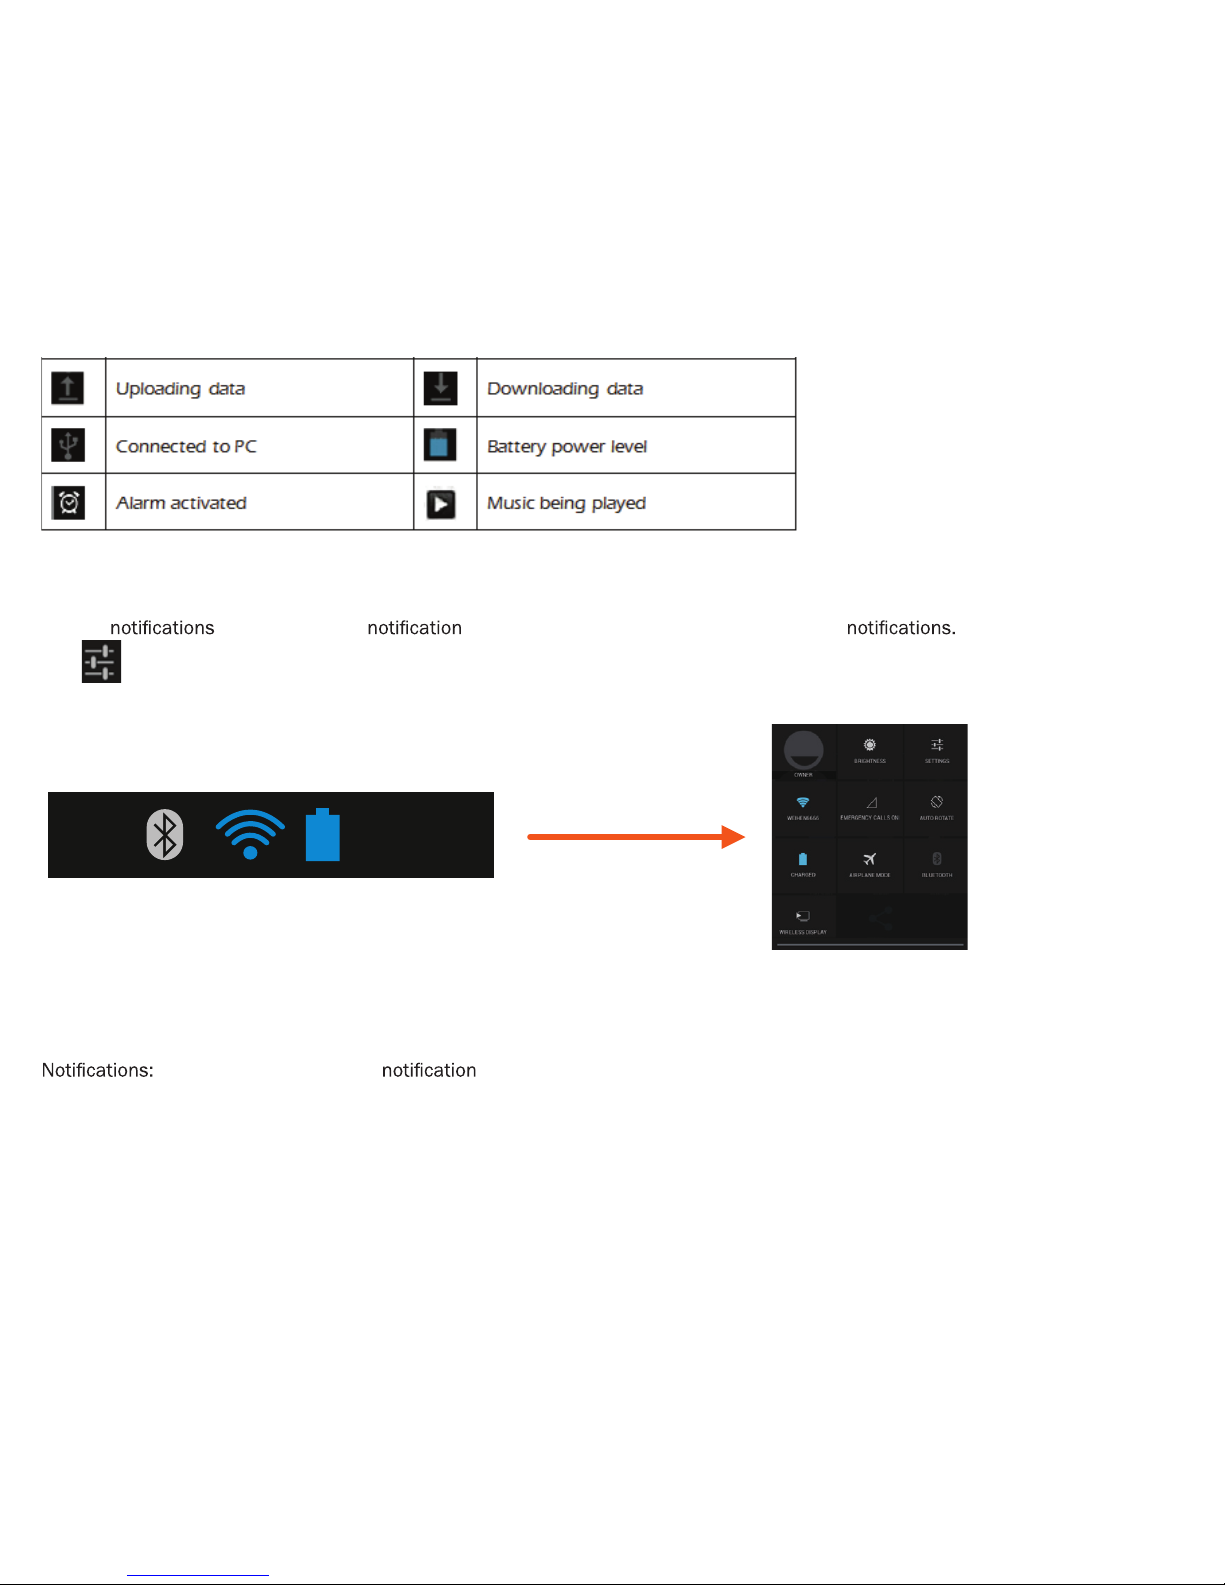
Tap the area to open the panel shown below. You can access a list of
Tap
f noitcennoc sseleriw etavitcaed ro etavitca ot eatures and other settings.
SRPG/MSG etavitcaeD ro etavitcA :edom enalpriA
Wi-Fi: Activate or deactivate the Wi-Fi connection.
Auto-rotate screen: Activate or deactivate the auto rotation feature.
AUTO: Adjust the basic brightness level of the display to lighter or darker.
Volume: Adjust the device volume
Activate or deactivate the feature.
Settings: Access Settings application.
6:25
7
2.6 Notication panel.
2.7 Auto rotation.
If you rotate the device while using some features, the interface will automatically rotate as well. To prevent the interface from
rotating, open the
panel and select Auto-rotate screen, then scroll it to OFF.
2.8 Lock & unlock the screen.
To unlock the screen, tap and hold the lock icon, then drag it to the unlock area where the unlock icon is.
To lock the screen manually, press Power key.
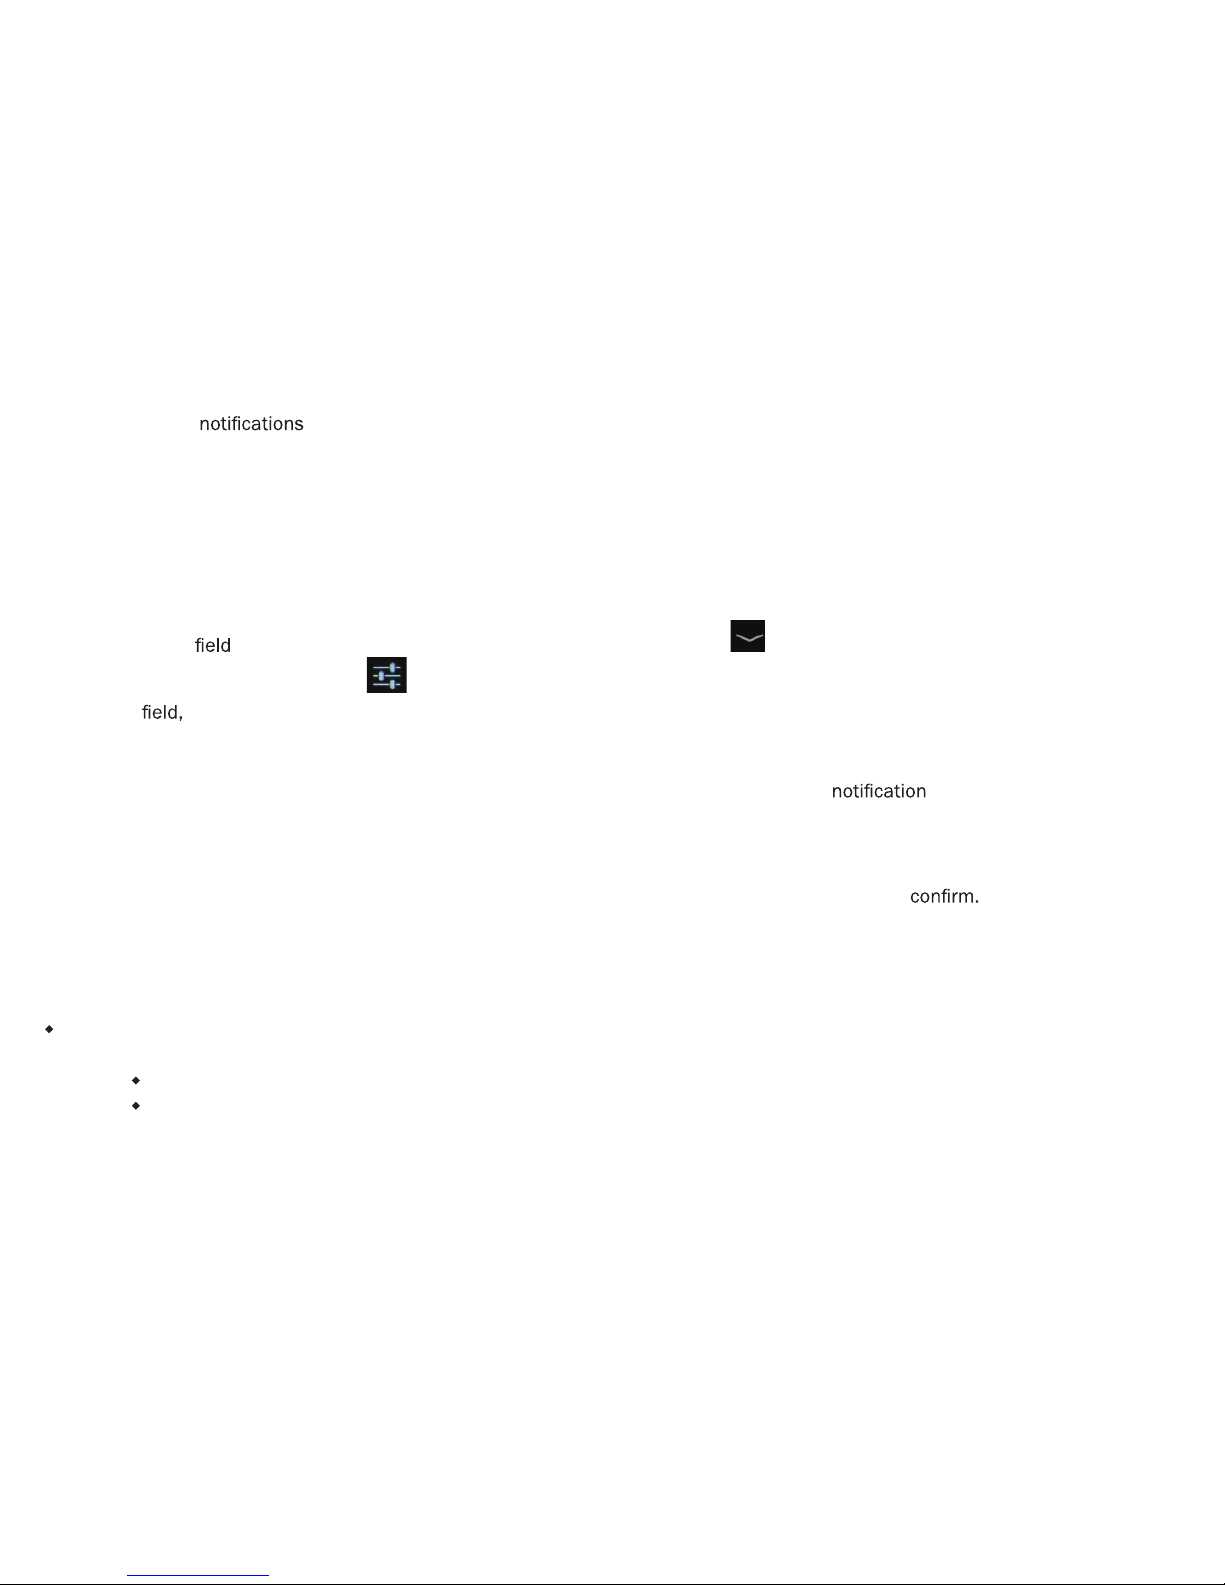
2.9 Enter text.
You can enter text by selecting characters on the virtual keyboard.
Tap the text input
to display the virtual keyboard. To hide the keyboard, tap
from the task bar.
To change the text input method, tap
from the task bar.
From a text
you can use the copy and paste feature for fast inputting.
2.10 Customize your device.
To customize your device according to your preferences, tap Settings from application list or panel.
2.11 Manage applications.
To manage the applications installed on your device, tap Settings-App.
1. To uninstall an application, select DOWNLOADED, then select an item and tap Uninstall, tap OK to
2. To stop or change the settings of an application, select RUNNING, then select an item and tap the option you need.
2.12 Security.
You can protect your device and data by setting screen lock or encrypting your tablet.
Set a screen lock
To set a screen lock, tap Settings-Security-Screen lock from application list.
None: Deactivate the screen lock.
Slide: Slide to unlock the screen.
8

PIN: Enter a numeric PIN to unlock. When prompted, enter the PIN to unlock the screen.
Pattern: Draw a pattern to unlock. Follow the instructions to draw your lock pattern. When prompted, draw the
pattern to unlock the screen.
Password: Enter a passcode to unlock. When prompted, enter the passcode to unlock the screen.
Screen time-out
Select Settings-Display-Sleep from application list. You can set the time before the screen times out and goes into lock mode.
Encrypt tablet
You can encrypt your accounts, settings, downloaded apps and their data, media and other
Once y
ou encrypt your ta
ble
t,
y
ou must enter a numeric PIN or password to decrypt it each time you switch on your device.
2.13 Reset tablet.
potksed dna metsys ruoy teser nac uoY se rht seulav lanigiro rieht ot sgnitt ough the following steps:
1. Select Settings-Backup and reset from application list.
2. Tap Factory data reset.
3. If you want to erase all data on your tablet, such as music, pictures, and other data, tap Erase SD card checkbox to check it
off.
4. Tap Reset tablet.
The device resets to the factory default settings automatically.
Warning! Factory data reset will erase all data from your device and SD card, including your Google account, system and
.snoitacilppa dedaolnwod dna ,sgnittes dna atad noitacilppa
3.1 Email.
To receive and send mail, you must have a remote mailbox service. This service may be offered by a service provider. Your
III. WEB.
9
device is compliant with applicable internet standards for POP3/IMAP/Exchange.
Before you can send or receive mail on your device, you need to set up an email account and
the email settings correctly. You can more than 1 mailbox.
Set up your email.
1. Tap Email from application list.
2. Use the mailbox guide to set up your mailbox, tap Next until it’s done.
tes neht ,TNUOCCA DDA-sgnitte S paT .thgir reppu eht ta nottub noitpo eht pat ,tnuocca liame rehtona dda ot deen uoy fI .3
up the email account with the mailbox guide.
When you are
ed ruoy ot dedaolnwod eb lliw segassem liame eht ,tnuocca liame eht pu gnittes vice. If you have created
more than two accounts, you can switch between email accounts. Select an account name at the top left of the screen and
.morf segassem eveirter ot tnaw uoy eno eht tceles
Delete your email account
.liamE tceles dna tsil noitacilppa eht nepO .1
.eteled ot tnaw uoy tnuocca liame eht dna sgnitteS tceles neht ,thgir reppu eht ta nottub noitpo eht paT .2
3. Tap Remove account.
ot KO paT .4
Create and send email
.noitacilppa liamE nepO .1
2. Tap
.
oT nI .3
enter the recipient’s email addresses manually and separate them with a comma. Add more recipients by tapping
Cc/Bcc.
4. To insert attachments, tap the option button at the upper right and select Attach
5. Enter the subject and the text.
6. Tap SEND to send the email.
3.2 Gmail.
You can retrieve new email messages from the Google Mail web mail service to your inbox. Before you can send or receive mail
on your device, you need to set up a Gmail account.
10

Create a Gmail account
If you don’t have a Google Account, tap New, then follow the on-screen instructions to create a new one.
Set up a Gmail account
If you want to add an existing account, tap Existing, enter your email address and password, and then select Next. When you are
.ecived ruoy ot dedaolnwod eb lliw segassem liame eht ,tnuocca liame eht pu gnittes
View email messages
1. When you open the email account, the amount of unread email messages is displayed at the title bar and the unread email
messages are displayed in bold.
.ti pat ,egassem liame na weiv oT .2
.niaga noci rats eht pat ,kram eht lecnac oT .etad eht woleb noci rats eht pat ,egassem liame tnatropmi na kram oT .3
Create and send an email
1. Tap
.
oT nI .2
enter the recipient’s email addresses manually and separate them with a comma. Add more recipients by tapping
Cc/Bcc.
hcattA tceles dna thgir reppu eht ta nottub noitpo eht pat ,stnemhcatta tresni oT .3
4. Enter the subject and the text.
5. Tap SEND to send the email.
3.3 Browser.
Tap Browser from application list to access the web.o
Browse webpages
1. a hcnual ot resworB tceleS
homepage.
a ssecca oT .2
webpage, select the URL input enter the web address of the webpage, and select Go.
3. To zoom in, place two
on the screen and spread them apart. To zoom out, move your closer together. You can
also double-tap the screen.
Add windows
You can have multiple windows open at one time.
pat ,wodniw wen a dda oT .1
at the title bar.
.wodniw eht fo eltit eht pat ,wodniw a pu nepo oT .2
11

3. To close the window,
tap
at the title bar
.
Set homepage
1
. T
ap the option button at the upper right.
2. Select Se
ttings-General-Set homepage.
3. Enter the web address of the desired webpage.
Add bookmarks
While navigating a website, tap upper right hand corner of the screen and the icon
to add current URL to your
bookmark list and easily access it later.
View bookmarks and history
Tap
to open the bookmark list and the recent history. Tap a bookmark or any entry to display the webpage.
Customize browser
To make adjustments in your browser settings, tap the option button at the upper right, and then select Settings.
3.4 App Store.
id snoitacilppa fo ecnadnuba na daolnwod ylisae ot uoy swolla erots ppa dellatsni-erp ehT rectly to your device. Before using the
app store, you must
create an account.
1. From the application list, tap the app store.
2. Create a new account, or use your existing account to access the app store.
.derised sa snoitacilppa daolnwod dna rof hcraeS .3
.snoitcurtsni neercs-no eht wolloF .4
Note:
1. All applications offered by any app stores are developed by a third party. To get more information about the developers, you
can read
the descriptions of each application.
.snoitacilppa ytrap-driht yb desuac seussi ecnamrofrep rof elbail ton si ynapmoc
ruO .2
12
 Loading...