

ICIDU BeBook Pure User Manual

Contents:
BeBook Pure Overview ..................................................................................... 5
Charging the BeBook Pure ................................................................................ 7
Battery tips: ....................................................................................................... 7
Switching the BeBook Pure On/off ................................................................... 8
Transferring files ............................................................................................... 8
Transferring files SD Card .......................................................................... 9
MICRO SD card .......................................................................................... 9
Transferring books with DRM protection. .............................................. 10
BeBook Pure read menu ................................................................................. 11
BeBook Pure main menu ................................................................................ 13
Keyboard ......................................................................................................... 15
Library ............................................................................................................. 15
Sorting the library ................................................................................... 16
Search books in library ............................................................................ 16
List view ................................................................................................... 16
Thumbnail view ....................................................................................... 16
Reading a book ................................................................................................ 17
Flipping pages ......................................................................................... 17
Using the menu within a book ................................................................ 18
Add bookmarks ....................................................................................... 18
Bookmarks .............................................................................................. 18
Table of contents .................................................................................... 19
Go to page ............................................................................................... 19
2

Search ...................................................................................................... 19
Margin ..................................................................................................... 19
Rotate screen .......................................................................................... 20
Auto flip ................................................................................................... 20
Add to favorites ....................................................................................... 20
About Book.............................................................................................. 20
Bookmarks .............................................................................................. 20
Remove bookmarks ................................................................................ 21
Favorites .................................................................................................. 21
Explorer ................................................................................................... 21
Search files in explorer ............................................................................ 21
Deleting files in explorer ......................................................................... 21
Internal/external memory ...................................................................... 22
Search .............................................................................................................. 22
Pictures/Photos ............................................................................................... 23
Accessing the menu while viewing a picture .......................................... 23
Zoom in/out ............................................................................................ 23
Rotate ...................................................................................................... 23
Information ............................................................................................. 23
Slide show ............................................................................................... 23
Settings ............................................................................................................ 24
Power settings ......................................................................................... 24
Standby ................................................................................................... 24
Date & Time ............................................................................................ 24
3

Language ................................................................................................. 24
Format Device ......................................................................................... 25
Restore default settings .......................................................................... 25
Device information .................................................................................. 25
DRM authorization info ........................................................................... 25
Resetting the BeBook Pure ............................................................................. 25
Troubleshooting .............................................................................................. 27
The BeBook Pure does not respond. ....................................................... 27
Battery life is short .................................................................................. 27
The BeBook Pure does not open certain books. ..................................... 27
The BeBook Pure cannot be used while connected to a PC .................. 27
Maintenance ........................................................................................... 28
Battery ..................................................................................................... 28
Usage ....................................................................................................... 28
Specifications .................................................................................................. 29
Warranty: ........................................................................................................ 30
Copyrights and Trademark Notice .................................................................. 31
Disclaimer ........................................................................................................ 32
4

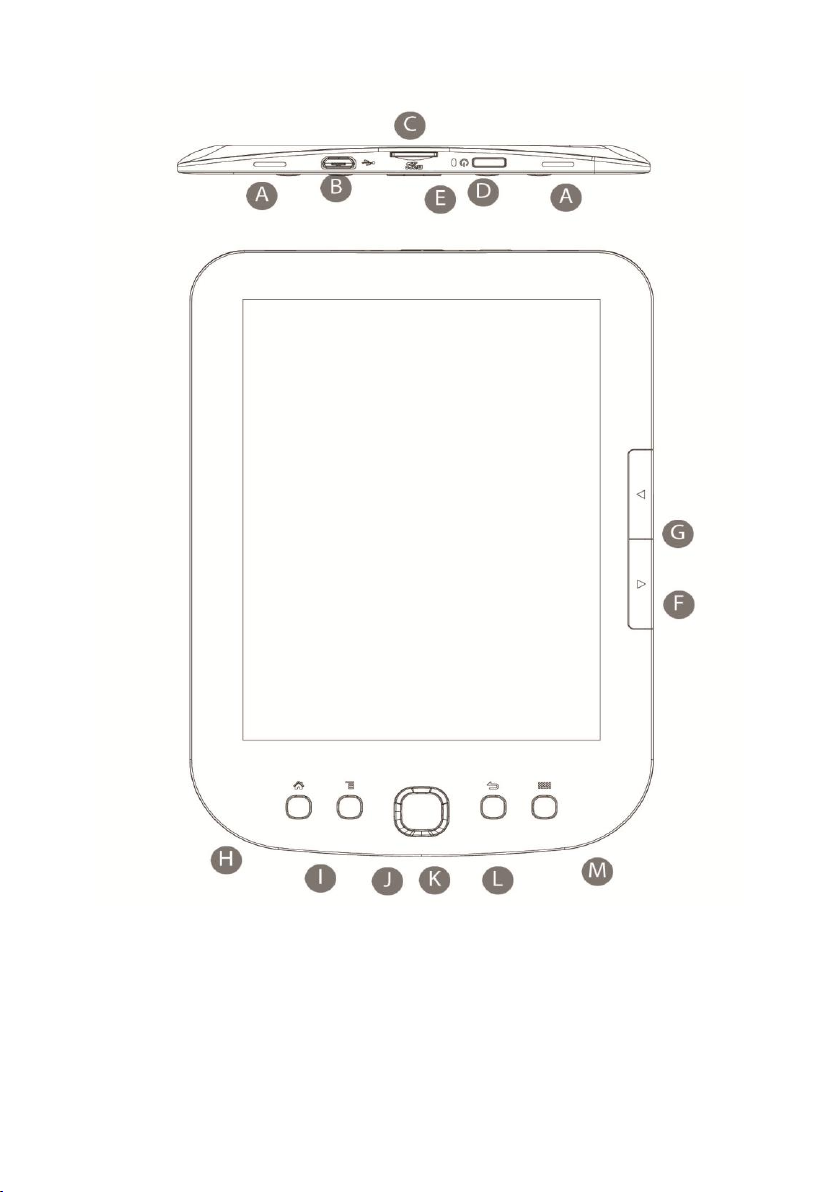
BeBook Pure Overview
A) Clip slots Use the clip slot to attach a protective cover.
B) USB jack Connect the USB cable to the USB jack and a PC, notebook
or BeBook Travel Charger.
C) Memory Card Slot Insert a Micro SD card to expand the memory of
the BeBook Pure.
D) Power Button Use the Power Button to switch the BeBook Pure
on/off.
E) Charging Indicator Indicates that the BeBook Pure is being charged.
F) Page Forward Go to the next page of the book you are currently
reading.
G) Page Back Go to the previous page of the book you are currently
reading.
H) Home Go to the read menu.
I) Menu Go to the main menu.
J) Four way button Navigate through the main menu and read menu.
K) Enter Confirm your selection in the main menu and read menu.
L) Return Go to the previous menu page. Hold the return button to go
to the Read menu.
M) Keyboard Display the keyboard interface.
5
6
Charging the BeBook Pure
Charge the BeBook Pure with the supplied USB Cable and a PC or
notebook. Charge the BeBook Pure for at least four hours before first
use.
Make sure the PC is switched on. Connect the USB cable to the BeBook
Pure and connect the other end to a USB port on your PC or notebook.
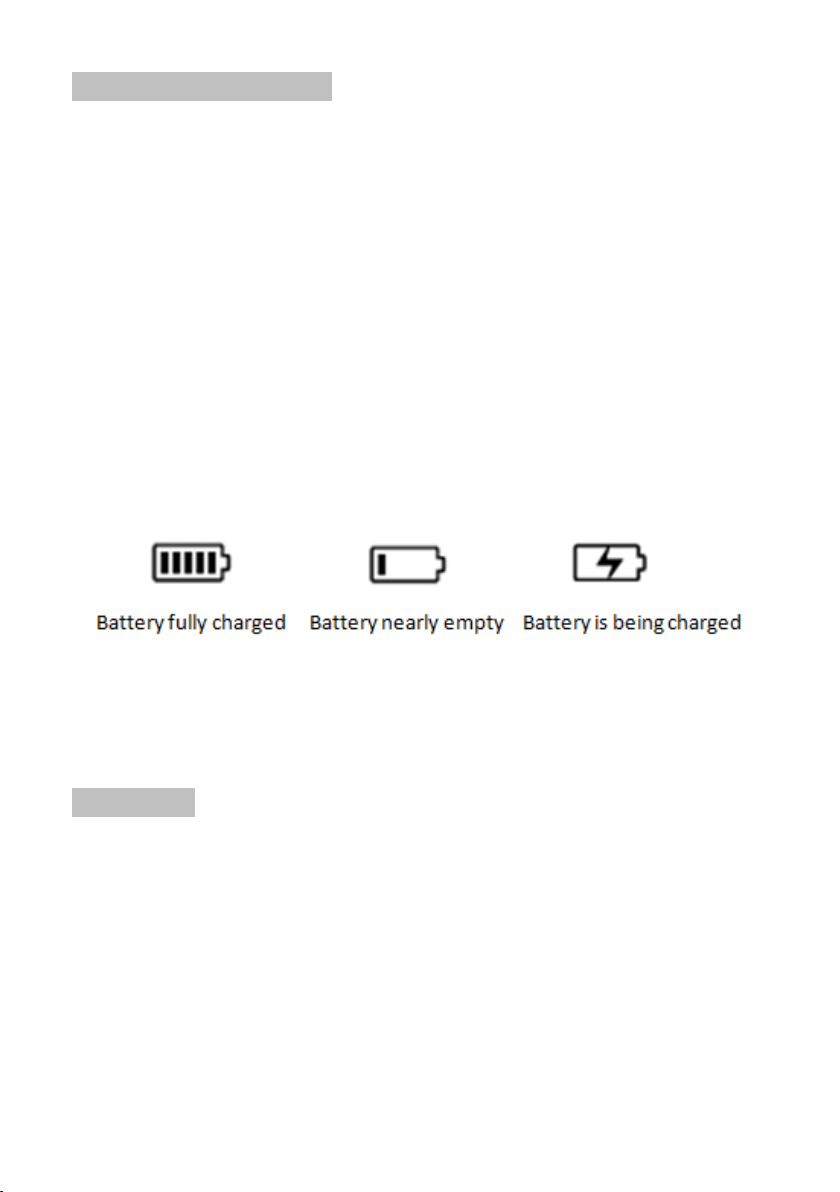
The USB connection screen will appear. The BeBook Pure is now
connected to your PC. The LED light on top of the BeBook Pure will
light up to indicate the BeBook Pure is being charged.
The BeBook Pure needs to charge for approximately four hours. The
LED light on top of the BeBook Pure will switch off to indicate that the
device is fully charged.
To charge your BeBook Pure without a PC or notebook, use the BeBook
USB Travel Adapter (separately available).
Battery tips:
To use the BeBook Pure during charging, remove the device from your
PC or notebook. Use your computers “Safely Remove Hardware”
function and leave the USB cable attached to both the BeBook Pure
and PC or notebook.
Make sure you recharge the BeBook Pure in time. When discharged
fully the lifetime of the battery strength may decrease.
7

In case the battery depletes fully, it may take a couple of minutes
before the BeBook Pure starts charging.
If you do not use the BeBook Pure for an extended period of time, use
the standby mode to save energy. Press the power button once to put
the BeBook Pure in or out of standby mode. Alternatively you can shut
down the BeBook Pure completely.
Switching the BeBook Pure On/off
The BeBook Pure can be switched On/Off by holding the power button
for three seconds. If the BeBook Pure does not switch on, please
charge the BeBook Pure as described until the LED light turns off.
Transferring files
1. Connect the BeBook Pure using the included micro USB cable.
2. Wait until the USB connection is confirmed and the USB connection
logo appears on the screen of the BeBook Pure.
3. The BeBook Pure will appear as an external drive on your computer
which can be accessed through your Windows explorer.
4. You can now transfer files by dragging or copying them to the
external drive named “BeBook”.
5. After transferring the files please make sure to safely remove the
BeBook Pure from your computer by using the “safely remove
hardware” option on your PC or notebook.
8
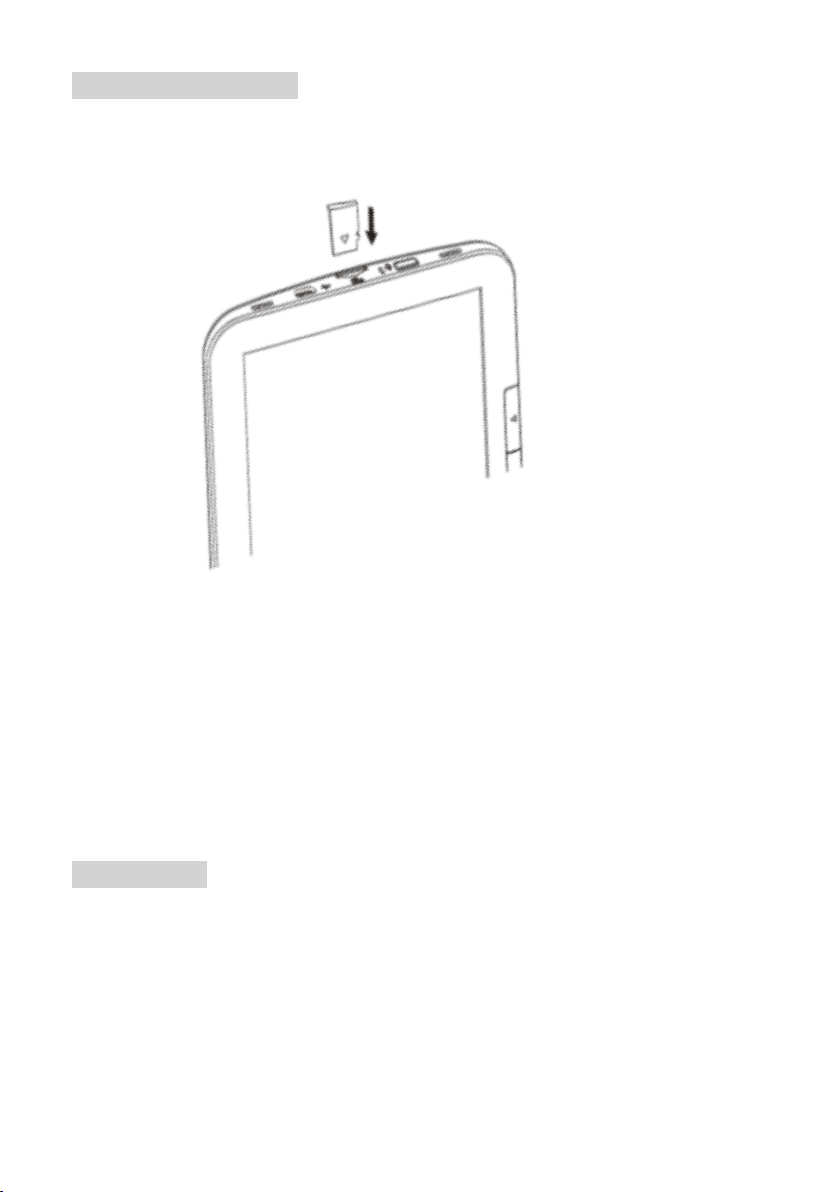
Transferring files SD Card
Insert the Micro SD card (sold separately) in the Micro SD card slot on
the BeBook Pure. When the BeBook Pure is connected to the computer
the Micro SD card will be recognized as an external disk. Follow the
same procedure as with the internal memory to transfer books the
Micro SD card.
MICRO SD card
If the BeBook Pure does not detect the Micro SD card after inserting it,
remove the card and reinsert again.
9

Do not remove the Micro SD card from the device while the external
memory is being used. Doing this can damage both the card as the
Ereader.
Before formatting the Micro SD card make sure you have backed up all
the files on it. Preferably format the Micro SD card in FAT 32.
Transferring books with DRM protection.
Many books in EPUB and PDF format are protected with the Adobe
DRM against unauthorized copying. To read these books on the
BeBook Pure, these books have to be transferred using Adobe Digital
Editions Software.
1. If you do not have an Adobe ID yet, go to
https://www.adobe.com/cfusion/membership, “Create an Adobe
Account” and follow the instructions.
2. Download and install the Adobe Digital Editions software and log in
with your Adobe ID. You can download the Adobe Digital Editions from
http://www.adobe.com/products/digitaleditions/.
3. After the software is successfully installed, you can buy digital
books. These books will be automatically loaded in your Adobe Digital
Editions.
4. Connect the BeBook Pure to your PC or notebook. Adobe Digital
Editions will ask to authorize the BeBook Pure. Answer this request
with “yes”.
5. You can now transfer protected books between Adobe Digital
Editions and the BeBook Pure. The BeBook Pure will be shown as an
external drive in Adobe Digital Editions.
10
 Loading...