

Page 1
Operating Instructions
Page 2

Page 3
Page 4
First Edition (November 1982)
References
or
servi
ces
in
do
t h
not
is
book
imply
to
IBM products, programs,
that
IBM inten
ds
to
ma ke
these available outside the United States.
This
book may contain typographical
errors.
If
you w i
sh
to
report such errors
use
the
other remarks,
the
back
of
the book. If
reader's comment
the
removed, send your comments
Bld
g. 962-3, Lexington, Kentucky
sendi
ng
t he form you agree t
informat
to
© International Business Machin es Corporation, 1982
ion you provide
you .
hat
without
or
form
has
to
IB
M,
Dept. F98,
40511
IB
M may
any obligation
techni
or
make
form
been
.
By
use
cal
in
the
Page 5
Contents
Introdu
The
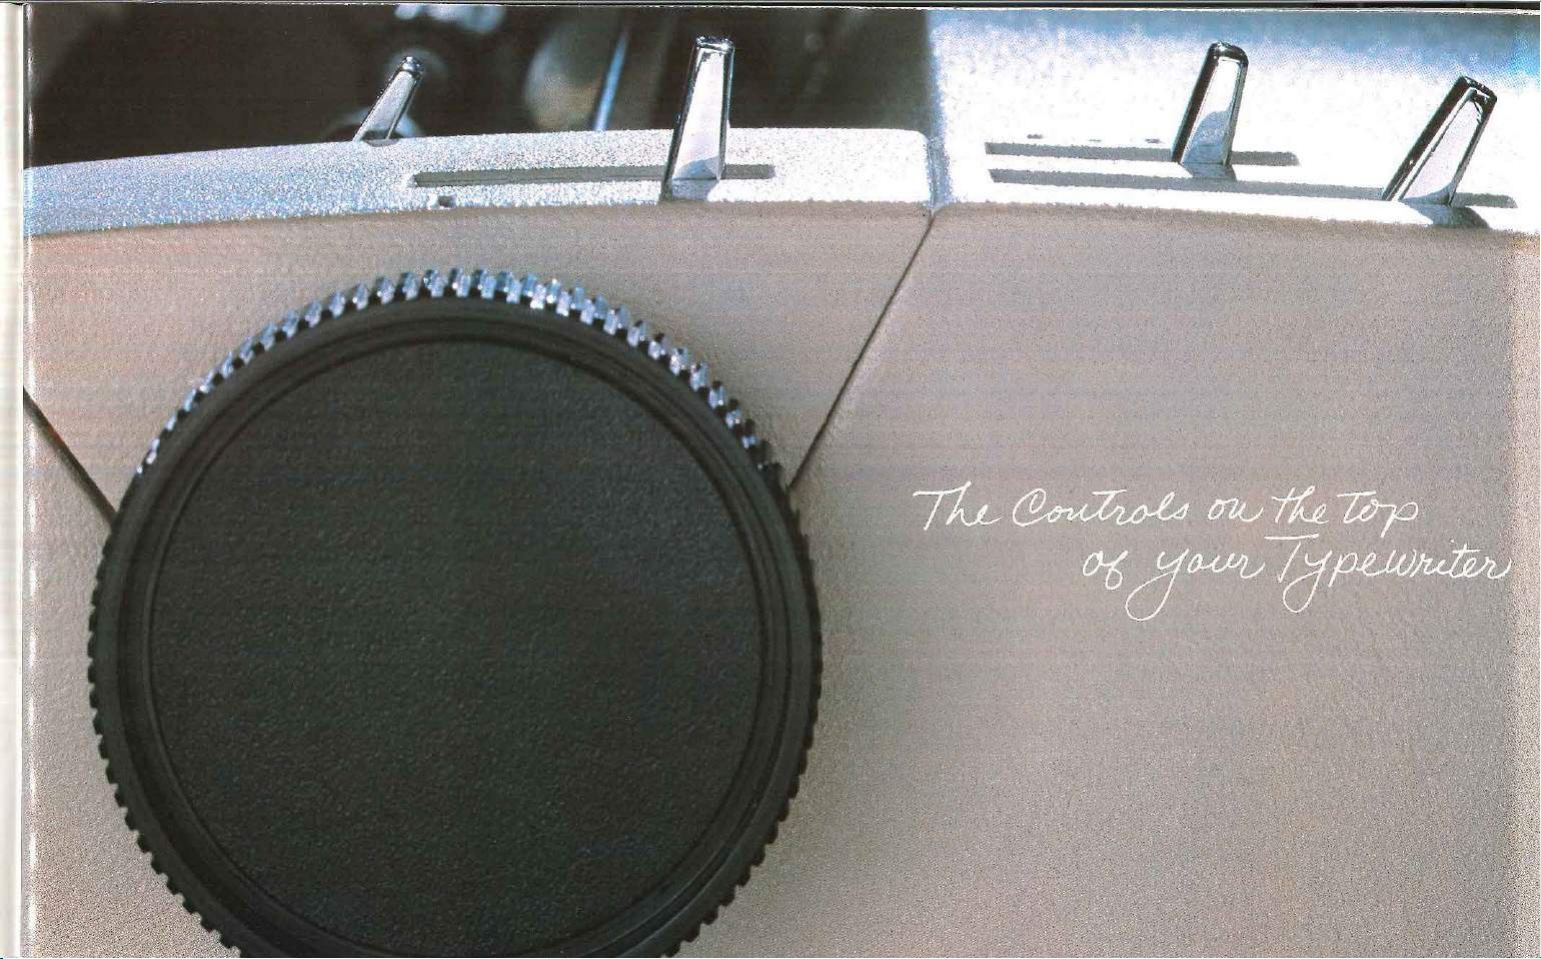
The Controls on
Li
Paper
Paper Guide 7
Paper
Copy Guide and Copy Guide
Inserting Paper . . . . . . . . . 9
Line Finder . . . . . . . . . . . . . . . .... .
P
cti
on To use t he page-end indicator . . . . . .
Parts
of
Your T
ypewriter
the
ne
Space
Lever . . . . . . . . . . . . . . . . . . . . . . . . . 7
Re
lease Lever 7
Ba
il . . . . . . . . . . . . . . • . . . s
To
center paper . . . . . . .
To
insert paper . . . . . . . . . . . . . . . . . . . . . . . 9
To
use
the lin
e finder
la
ten
Knobs .........
. .... . . . . . ....... 2
Top of Your Typewrit
Sca
le 8
..........
. .... . . ....
..... . . . 8
.....
. . ....
........ . 1 o
...
er
. . . 1 O
. .
..
1 O
Variab
Platen
Page-End Indicato r
Ready Reference Chart
The Keybo ard on
On/Off
Marg
To
Ma
rgin Release Key
To move
To
Tab
Contro
To
To
To
Tab
Key
le . . . . .
.........
You
Control (ON/
in
Sca
le and
set
or
change
to
type thro
l
set a
tab stop
clear a
clear all tab stops ...
(TAB)
the left
ugh
(SE
T and
tab
. . ....
OFF)
Margin
the
(MAR
the ri
CLR)
. .
stop
..
. . . . . ... . . . .....
...
. .
.....
. .... .
..
. . . . . . 11
..
. . . .... 11
r T
ypewriter
. . . . . . . . . ... . . 14
Stops ..............
left
or rig
ht
marg
in . . .
REL) ....
of
t he
ght margin .
. . .
........... . . . . . . ....
..
. . . . . . . . . . . . .
...
.......
left
....
. . .... .
. . . . .
. . .......
margin
.......... 15
. . . . . . . . . .
....
...••....
.. ..
. . .
. . 10
..
...
. . .
...
..
..
..
. .
11
15
15
15
15
16
16
16
16
16
Shift
Keys
and Shi
ft
To
type uppercase characte rs
To
keep
the
typewri
To
release
the
shi
Repeat
Keys
....
. . . .
Carrier Return
Index Key
Hyphen/U
Backspace Key
Spacebar ... . . . . . . . .
Co rrecting Key ...... .
To
correct er
Key
(INDEX)
nde
rline Key
(BACKSPACE) ...
rors ...
Lock
(SHIFT
and
LOCK) ... .
ter in uppercase . .......
ft lock
. .
...
. . . .
....
.....
...
. . . . . .... . . . . . 18
(RETURN)
.......... ...
..
........ .
. . • .
.......
. ..•. .
....
. . . . . . .... . . . . . . 18
.. ..... .
. . .
.....
.. ..
. . . .
. .... .
.•...
. . . . 18
. .
...... . 18
. . . . . . . 19
........
..
..
. . .
..
17
17
. 17
17
18
18
19
Page 6
Insid
e Yo
ur Typewriter
Cardholder
To
Drawing Lines . . . . . . . . . .
To
To draw
Impression Control . . . . . . . . .
To
Type Elements ........
. . . . . . .
realig n characters
draw a ve
rtical line . . . . . .
for
a co rrection
a horizont al line . . . . . . . . .
ch
ange
the impress ion control setting
..
. . . .
.....
. . . . . . .
23
..
23
.23
23
..
23
..
23
...
. .
23
...
24
Changing Type Element s . . . . . . . . . . . . . . .25
To
t ake
off
To
put
on
an element . . . .
an element . . .
.......
. . . . .... .
..
25
..
25
Ribbons .
To
remove a ribbon
To
insta
Correcting
To
remove
To install
Typi
ng
Stencils
Number ....
Serial
To
locate
....
. . .... .
ll
a ribbon .
....
...
. . .
Tape
the
tape ...
new
tape . . . . . . . . . . . . . . . .
.
the serial
numbe
...... . . . . .... . .
...... . . . .... .
.. ..
. . . . . . . . .
.
...
.......
.
.
r . . . .
..
26
...
26
.. ..
26
. .
...
27
. .
...
27
....
27
. .
..
28
.•.... 28
. . . 28
pplies
and
Su
Ordering Supplies ....... ..
Type Elemen
Service
ts
. . . . . . . .
. .
....... ........
...
. . . . . . . .
Ribbon and Co rrecting Tape . . .... . . .
IBM
210
Correctabl e Ri
I
BM Color Correctab le R
I
BM
800 T
-11
1 Ribbon Cassette . . .
Correcti
ng
Tape
bbon Cassette . .
ibbon
Cassette . . . . 34
. . .
.....
Service . . .
ng
for
Cari
Ch ecklist
Index
YourTypewr
for
Proper
..
. . . .
iter
Type
writ
. . . . . . . . . . .
er Operation
....
. . .... . .... .
......
. . .
.....
..
30
...
30
..
34
34
34
34
. .35
. . .
35
. . . . 35
..
36
Page 7
Page 8
2
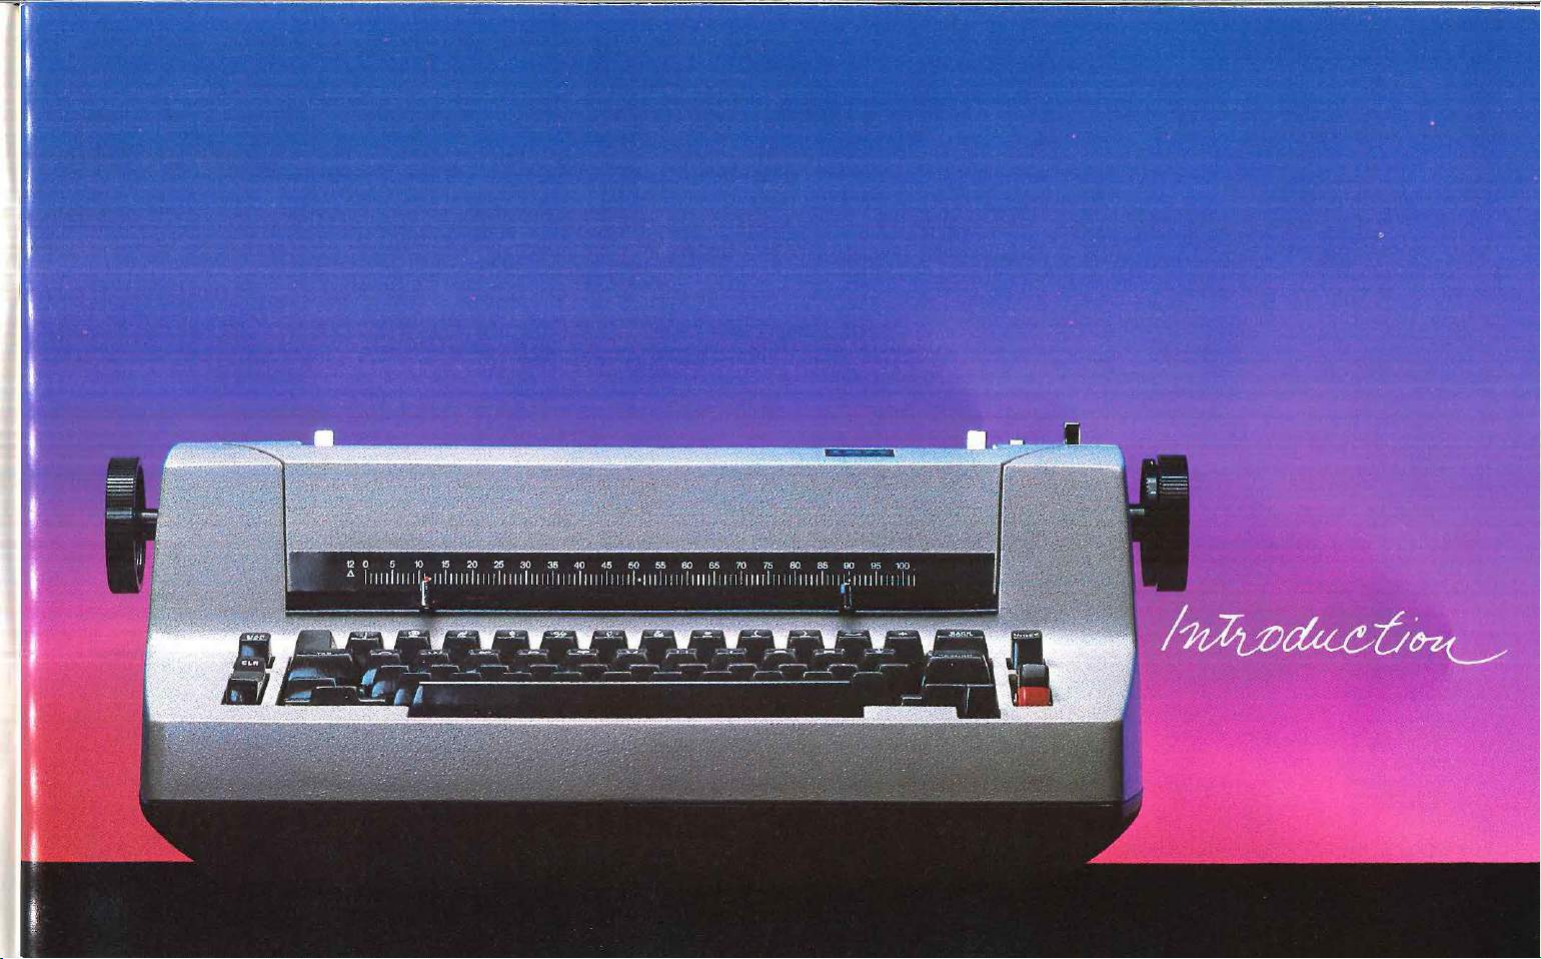
For years
, businesses have
used
IBM typewriters
give their documents a professional appearance .
With your new
IB
M typewrit
er;
you too can enjoy
high-quality typing.
Your IBM typewriter features
An
88-character type element that
•
the
page
across
wide variety
• A correction key
• A choice
as
of
type styles
fo
of
single, space-and-a-half,
:
moves quickly
you type and offe
r semi-a utomatic correction
rs you a
or
double
line spacing
An easy
•
-to-remove, long-lasting ribbon and
co
rr
ecti
on
tape
to
Use these
features
on
your
new
typewriter
you create beautifully typed documents!
Thank you
for
choosing an
IBM
typewriter. We
hope you enjoy it.
to
help
T
he
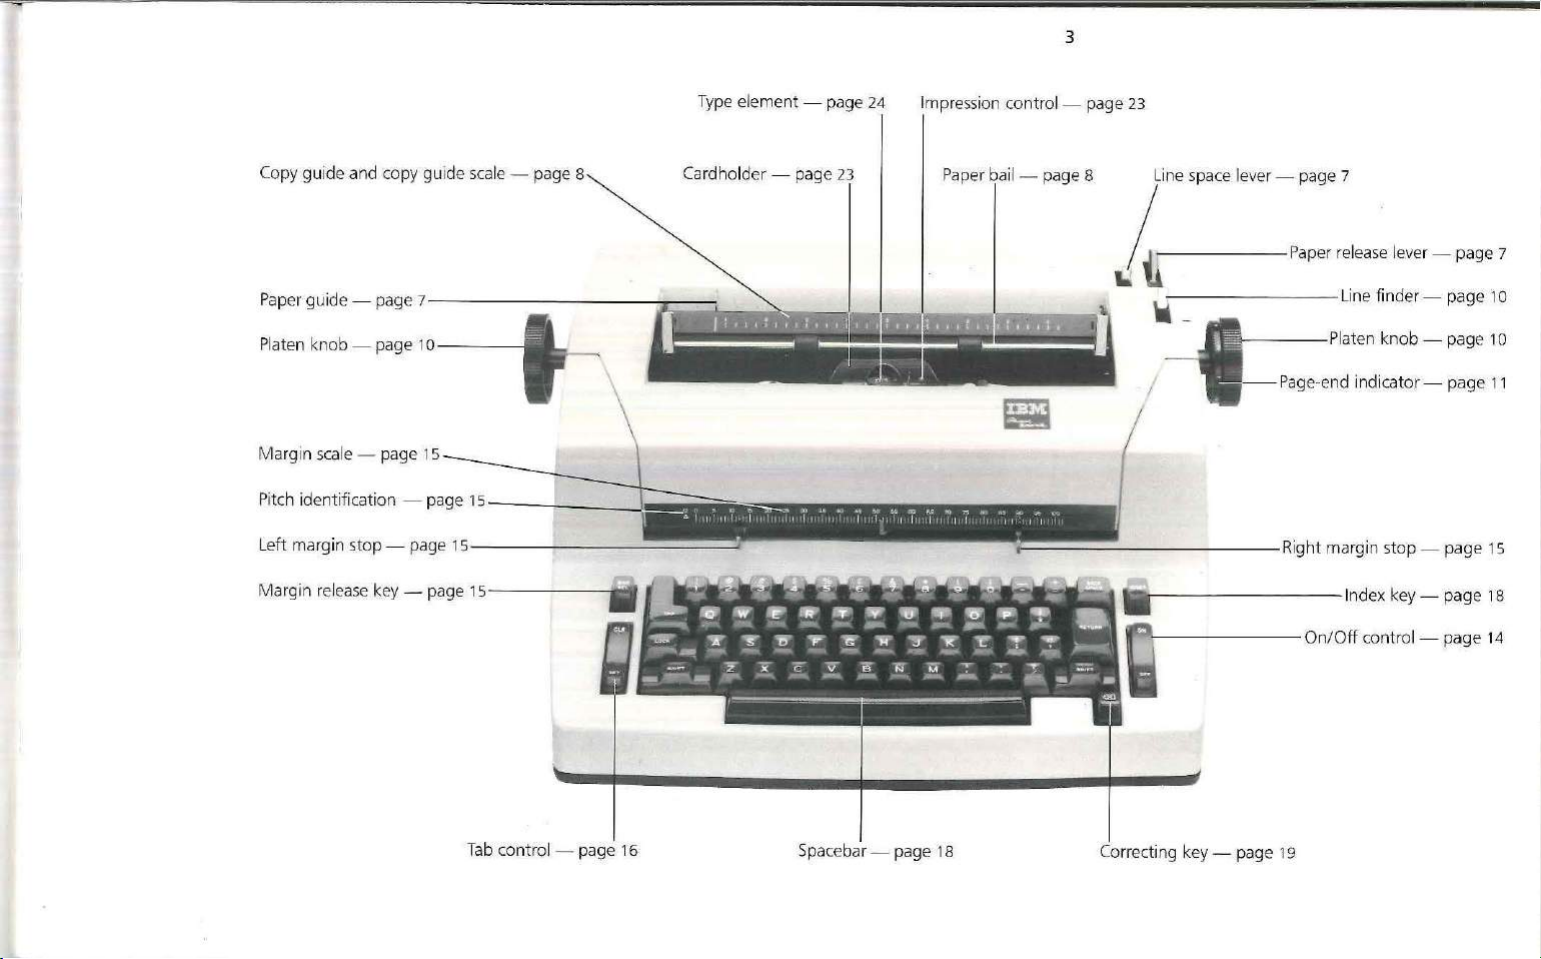
Parts ofYourTypewriter
While you read the instructio
picture
to
help you find and identify the par
your typewriter.
ns, use
the following
ts
of
Page 9
~
-
---
---
-
~--
- - -
Copy
gu ide and copy guide scale - page 8 Cardholder - page
--
=~---......_-._.....
................
T
yp
e element - page
_________________
3
24
Impre
ssi
on
co ntrol - page 23
23
Pa per bail - page 8
1
'e
_______
space le, ec - ,
:~~:
,~lease l
e,e
c - page 7
'!!!!!!!!!!!!_
Paper gui
Pl
Ma rgin
Lef
de
- page
atec kcob -
t margin stop - page 15-
scal
e - page 1 5
page
7--
---
10~
--~-
Tab control - page 16
- - -
--
---.
---
a~
$ o b m M «
4
\
I 11 11
'I
I l 1 1 I • I ii I
--
- - -
-~
Sp
\'
· ! I I I t ti! I / 11
aceba r- page
18
!r
1 11 1 11 ii I
-
----
w~
/
-------
11:11
s.---------
Q
-------
Cor
recting key - page 19
Lin
e finder- page l O
Plate n knob - page 1 o
--
Pa
ge-end indicato r - page 11
Righ t margin stop - page 15
--lnde
On
x
key-p
/
Off
control - pag e 14
age 18
Page 10

Page 11
Page 12
8
r---~-------
. . . . . . . . I
I I I I
I
I
---
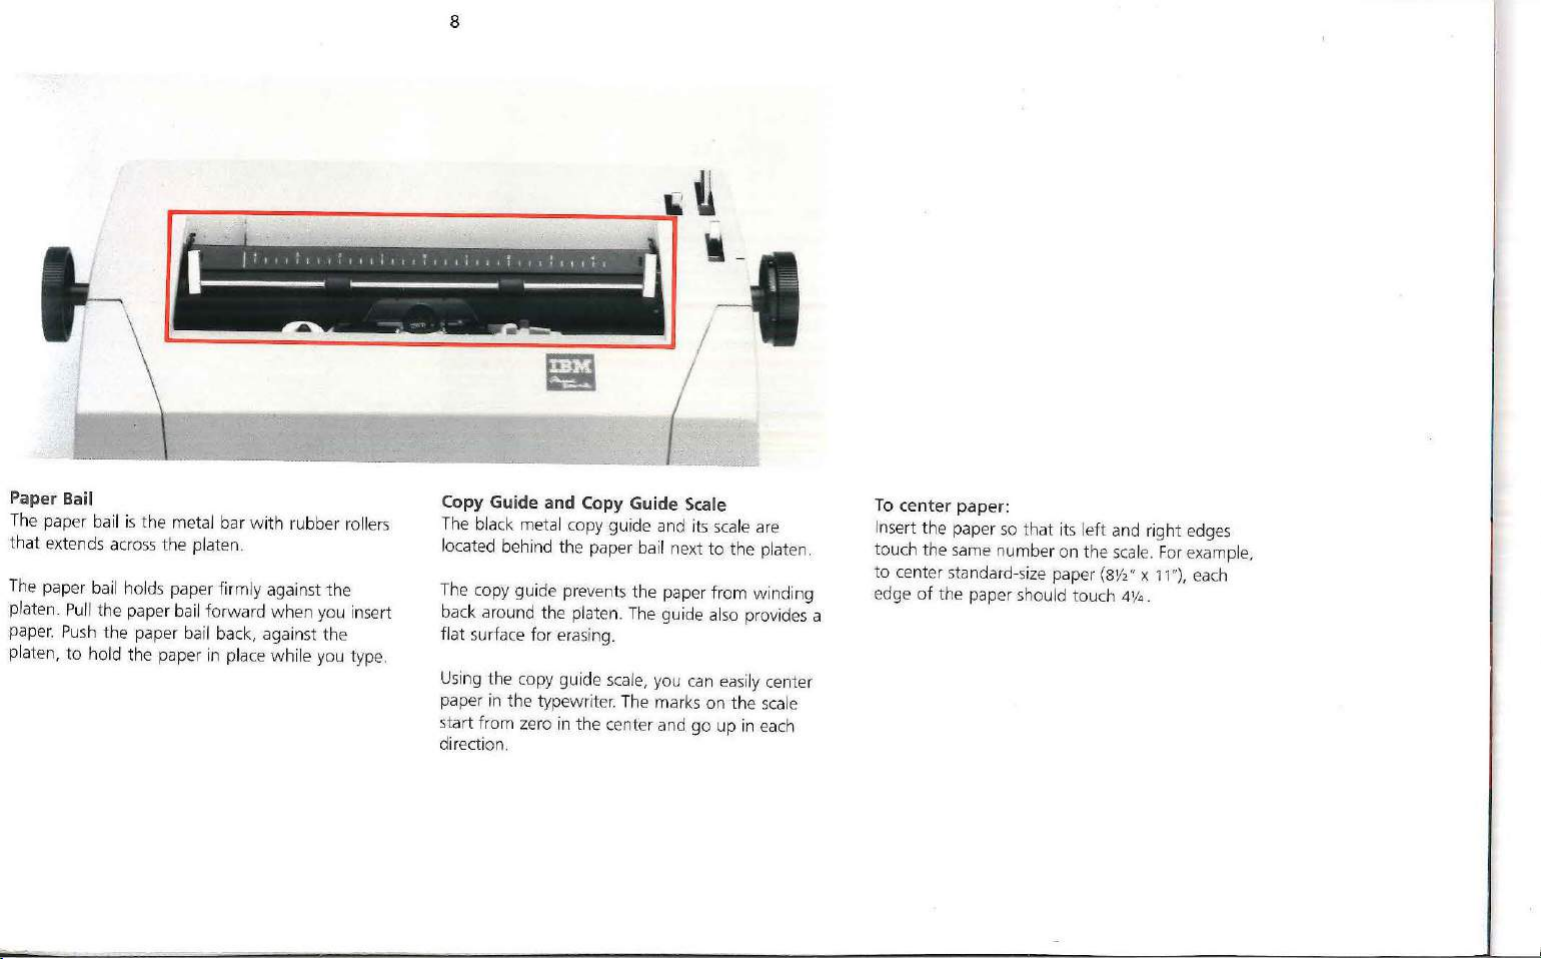
Paper Bail
The
paper bail
that
extends across the platen.
The
paper bail holds paper firmly against the
Pull
platen
paper.
Push
platen, to hold the paper
is
the metal bar
the paper bail forward when you insert
the paper bail back, against the
with
in
place while you type.
It
I I I I I I I I I I I I I I I I I I I I I I I l I I
rubber rollers
Copy Guide and Copy Guide Scale
The black metal copy guide and its
located behind the paper bail next
The copy guide prevents the paper
back around the platen.
flat surface
Using the copy guide
paper
in
the typewri
start from
direction.
JI
The
for
erasing.
scale,
ter.
The marks on the
zero
in
the center and go up in
-==
~
/~
scale
are
to
the platen.
from
winding
guide also provides a
you
can
easily center
scale
eac
To
center paper:
so
Insert the paper
touch the
to
edge
h
same
center standard-size paper
of
the paper should touc
that its l
number on the
eft
and
scale.
(BY,"
h 4
right
x 11 "),
1
/4 .
edges
For
example,
each
Page 13
. • . . . . . . . I
I I I I I I I I I I I I I I I I I I I I I I t I I I I
I
I
---
9
It
I I I I I -
--
.
;:-,•
. .
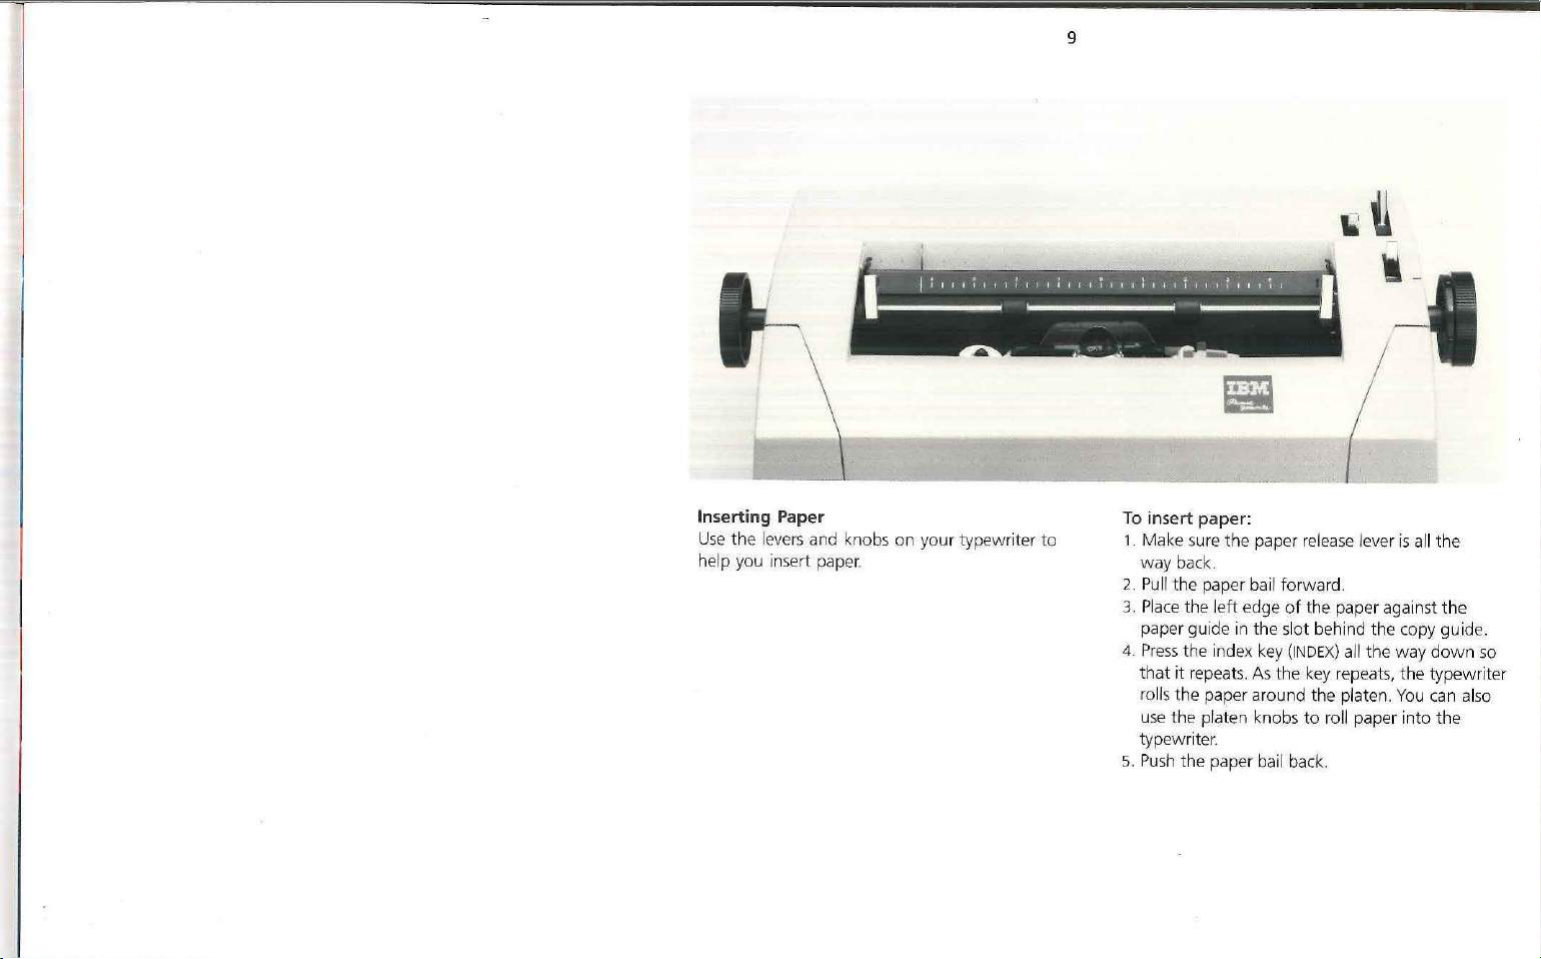
Inserting Paper
Use
the levers and knobs
he
lp you i
nse
rt paper.
on
your typewriter
to
To
ins
ert paper:
1. Make sure the paper
way
back.
2.
Pu
ll the paper bail forward .
3 . Pl
ace
the
left
edge
paper
gui
de in the slot behind t
4. P
ress
the index key
that
it
repeats. As the key repeats, t he
rolls the paper around the platen.
use
the platen knobs
ri
ter.
typew
5.
Pus
h the paper bail back.
release
of
the paper against
(INDEX)
to
roll paper
lever is all
he
copy guide.
all the way
You
into
the
the
down
typewr
can also
t he
so
iter
Page 14

10
. . . . • . . . . I
I I I I I I I I I I I I I I I I I I I I I I I I I I I I I I I I
I
I
---
It
•,
_
Line Finder
Use
the line finder to leave a typewritten line and
return to it again. For exampl
to
use
the
lever
when
Erase
•
•
Type
superscripts
• Create doub
• M ake corrections
the
To use
1.
Pull
the
line finder
the
2. Turn
you
3.
Type your inserti
4. Turn
typing line .
5.
Push the
6.
Pr
platen knob
wan
t.
the
platen knob
line finder away
ess
t he carrier return key
le
line
or
underlines
finder:
toward
on
you:
subscripts
you.
to
move
or
correction.
to
move
from
(RETURN).
e,
you may wa
to
the line
to the orig
you.
nt
inal
Platen Knobs
the left
Using
t he platen manually.
help you insert paper or move up
page
to
and right platen knobs, you
Use
t he platen knobs to
a different typing line.
or
down
can roll
the
Platen Variable
Press
ing
in
the left platen knob allows
to
roll freel
permanently change
e.
lin
or
addition
align
y.
If you ne
s.
the
paper.
Using th
ed
to reinsert
use
the
the
is
platen variable, you can
the
position
platen variable
a page
of
the
for
to help
typing
corrections
platen
you
Page 15

Page-End Indicator
is
The page- end indicator
right platen knob.
mark half-i nch increments and sh
of
inches remaining
To
use
the
page-end indicator:
1.
Align the paper w i
copy guide
2. Find
length
3. Rotate the page-end indicator until
se
tting
of
the platen knob.
When the typing line
bottom
number
(see
the
indicator setting opposi
on
the
reference chart
is
at
the small horizontal mark
of
the page, the indicator shows the
of
inches remaining.
the round dial
The
white numbers and
to
the
bottom
th
the top
photo).
is four inches
edge
ow the
of
te
on
or less
on
dashes
number
the page.
of
the
your paper
this page.
the
correct
to
the
from the
the
left
11
•
Ready Reference For Page-End Indicator Settings (For Paper 3"
Length
Paper (Inches)
3"
3V2"
4"
4V2"
5"
5V2"
6"
6V2"
7"
7\/2"
8"
8\/2"
Of
Indicator
Setti
ng
1Y
2 10"
2V2
3 11"
3V,
4 12"
0 1
V2
1V2
2
2 9
Length
P
aper (Inches)
9"
V2"
10V2
"
1V2"
1
2\/2
"
13"
13V,"
14"
To
Of
w
14" Long)
Standa rd Si
ze
Indicator
Setting
2V2
3
3V2
4
0
y,
1 V,
2
2 V2
3
Page 16

Page 17

Page 18

14
Typing is conveni
because
comfor
toured
its g radual slope places all
table reach
keys
fit
your fingers, making typing
more comfortable.
ent
and
of
the home row.
easy
on
your typewriter
keys
w ithin
The
con-
On/Off
The on/
bottom ri
To
the cont rol
Control (ON/OFF)
off
control (
ght
side
of
ON/OFF)
the keyboard.
switch t he type writer on,
(ON)
. T
he
red p
appears when the typewri
ng:
Ke
ep hai
r,
Warn i
(such
as bracelets, necklaces, neckti
printing
To pre
and ribbon
ve
nt long hair, f ingers, and personal arti
from getting caug
machine, you
e
nsure
that
other persons
fin gers, and personal objects
area
ht
o n the ro
should
comply w i
is located on
press
ort
ion
te
r is on.
when t
he
tat
ing shaft in the
th th
do also.
the
the
top
part
of
the control
es)
out
of
the
typewriter is on.
cle
is
warning and
of
s
Page 19

15
Margin Scale
Th
e margin
directly above t he keyboard on t he front
typewriter. The red ar
sca
le
as
position.
ve
ry simple operat ion.
The pit
side
of the margin
pit
ch (
eli
w hich means t
ch.
Alwa
in
typew
ri
and
Margin
sca
le and margi n stops are l
you type shows you the exact typing
These
featur
ch
of your typewriter is s
sca
te) typewriter with a 12-p itch margin scale,
ha
t 12 charact ers fit in
ys use a 12-pitch type e lement
ter.
Stops
row
t hat m
oves
along the
es
make marg in resetting a
how
n o n the left
le. Your
typewriter is a 12-
each
oca
of
on
ted
your
typed
t his
To set
or
cha
nge
t he le
ft
or
rig
ht mar
g in :
P
ush
in on the appropriate margin st
to the correct
Use the spacebar
w ay w hen setti
ca
rri
er's
You can spa
but you cannot type t hro ugh t he right margin
unl
ess
prese
you pr
pos
ition on t he margin
to
move the carrier out of t
ng a margin t o t he right of t he
nt location
ce
and tab throug h
ess
.
the ma rgin release key
op
the
right margi
and slide
sca
le.
(M
AR REL
he
n,
M argin Release Key (MAR REL)
it
).
Us
e the margin release key (M
ca
rri
er beyond t he left or right margi
To
move
to
t he le
ft
of
the
1.
Press
t he carrier return key (
t he carrier t o t he left margin.
Press
2 .
3.
To t ype
1. When
2. Cont inue typing.
the margin rel
Press
the back
backsp
ace thro
through the right
th
e keyboard
re
lease k
ey
(M
ease
space key (
ugh the ma rgin.
locks, pr
AR REL)
AR
REL) t o
n.
left margin:
RETURN)
key
(M
AR REL
BACKSPACE)
marg
in :
ess
the margin
to
mo
).
to
ve the
retu
rn
Page 20

Tab
Control
Use
the
tab
to
board
To
1.
set
set a tab
Press
the
spacebar
desired point on
the
2. Press
set
(SET
and
control on
and
clear tabs.
stop:
the
end
(S
CLR)
the
to
move t
writing
ET)
of
left side
he
lin
e .
the
tab cont
of the
ca rrier
to
rol.
key-
the
16
To
clear
all
tab stops:
1. Press
2. Press
the
spacebar
carrier
all the
way
and
hold down t he clear end (CL
tab
control while you press t
RETURN).
(
clearing
T
he
carrier moves
all stops
or
tab key (
to
the
right.
as it moves .
TAB)
he
carrier r
to the
to move t he
R)
of
the
etu
rn key
left margi n,
Tab Key
(TAB)
To move t he carrier to a ta b s
(T
AB)
. Repeat ing this ac
each pr
ese
t t ab s
es
key do
not cause the carri
ma rgin, un le
ss a tab stop
top
ti
on moves t
on t
he
is se t at the right margin.
top
, press the tab key
he
ca rrier to
writing line
. The tab
er t o stop a t
the
rig
ht
To
clear a tab stop :
1. Press t
2.
he
tab
key
to
w ish
clear.
Press.t he clear e nd (CLR)
(TAB)
to move
of
the t
to
the
stop
ab control.
you
Page 21

Shi
ft
Keys and S
Use
the shi
ft
type upperca
hift
Lock (SHIFT
and shift lock
se cha
racters.
keys
and
(SHIFT
LOCK)
and
LOC
17
K) t o
To
t y
pe
Pr
ess
and hold
shift
key (
you w ant.
upperc
ase
characters:
dow
n either t he l
SHIFT)
w hile you type the character(s)
eft
or right
To
keep
Pr
ess
upperca
(
SH
IFT
To
relea
ess eit
Pr
the typewriter
the shi
ft
lock key (LO
se
characters wit hout pr
) each
ti
me.
se
the
shift lock:
her t he left o r right shi
in uppercase :
CK)
to type severa l
ess
ing the shi
ft
key
(SHIFT).
ft
key
Page 22

18
Keys
he
following
r typematic, keys:
Ca
rri
Ind
ex
Hyphen/Underline key
Backspace k
Spacebar
Correcting key ( )
)r sing le action,
:t
ion, pr
down.
er
return key
key (I
ess the key
keys
on
(RETURN)
NDEX)
ey
(BACKSPACE)
press
your typewriter are repeat,
the
key l ightly. For repeat
to
its second leve l and hold
Carrier Return
To
move the carrier
the
paper vert
(RETURN).
to
its second
key
Index
Key
To
move the paper verti
(INDEX).
the
second level
is easy
and exact when you drop
the platen and then hold
Hyphen/Underline
For single action, touch
action, pr
down.
ically,
Fo
r continuous
(INDEX)
Press
it
ess
the key
Key
(RETURN)
to
the
press
lev
el
and hold it
lightly
for
for
repeat action.
Key
to
left margin and move
t he carrier return key
vertica
l spacing,
cally,
press the index key
single actio
the
down
the index k
the
key light
its second level and hold
press
down
.
n;
hold
Paper
insertion
paper behind
ly.
For
it
ey.
repeat
the
at
Backspace
Touch the backspace key
move
carrier back
key
Key
(BACKSPACE)
the
carrier back one space.
toward
to
its second level and hold
the left margi n faster,
(BACKSPACE)
To
move t he
it
down
lightly
press
.
to
the
Spacebar
To
move the carrier forward one space, touch and
release
t he spaceba
and smoothly across the page,
to
its second
carrier reaches t he ri
moves the carrier
stopping. You
rele
ase
key
it
r.
lev
el and hold it
thro
do not have
(MAR
REL).
To
move
the carri
pr
ess
down.
ght
margin , the spacebar
ugh
the right
to
press
er
qu ickly
the
spacebar
When
the
margin
withou
the margin
f
I
t
Page 23

I
)
19
Correcting Key (
Your
typewr
ri
ght
side
of
errors quickly and
To correct errors:
1.
Press
the correcting key ( )
the last incorrectly typed character. Because the
correcting key repeats
you can quickly move
the beginning
Example :
correctign
~)
iter has a correcting key on the
the keyboard
of
to
easily.
when
to any
the typing lin
help you correct
to
backspace
you hold
character
it
toward
e.
kye
I
rec
last incor
t character
down,
bottom
to
2.
Retype
the
incorrect character
the
pa
per.
Example:
correctign
3.
Press
the correcting key
next incorrect characte
erase it
from
the
Example:
correctign
to
ky
to
backspace
r. Retype the character
paper.
k
erase
it from
to
the
to
4. Repeat step 3 until you correct all the errors.
Ex
ample:
correcti
5.
Type the correct
Example:
correcting
If
you are typing carbon copies, correct
usual way a
t he original.
To
cancel
the
after you press
cha
racter(s)
key
fter
you er
ase
the character(s)
correcting process,
the correct ing key.
press
them
in the
from
spacebar
Page 24

Page 25

Page 26

22
The ins ide
• The carrier
• The cardholder
• The impression control
Th
•
• The ribbon and correcting tape
• The serial
The carrier moves
type element across the typing line .
carrier
key
of
your typewriter contains:
e type element
number
to
the l
eft
(RETURN)
.
from
left
to
right, carrying the
margin, press the carrier return
To
return the
Page 27

23
Cardholder
he
clear plastic cardholder holds paper, cards, and
T
envelopes
line toward the bottom
the
The red verti
holder shows the position
be
hol der
To
1. Position the charact
at the
2.
t owa
close
to
the platen.
base
of
the typing line.
cal
line at the
typed.
Use
the
red
to
realign
characters.
realign characters
top
of
the cardho
Roll the
paper down to the horizontal line
rd
the bottom of the
The
red
horizontal
of
the cardhold er indicates
top
center of the card-
of
the next character
vertic
al
line on the card-
for
a correction:
ers
in
the small verti
lder.
car
dholder (
photo).
3. Position your paper
acter r
ests just above the lin
so
the bottom
e,
as
of each
shown.
cal
see
lines
char-
to
Drawing
Use the cardholder
To
1.
the top
2. Using the platen knobs
Lines
to
help you draw li
draw
a vertical li ne:
Pla
ce
a pencil or ballpoint pen in the
of
the cardho lder.
or
down t he page .
(You
can also
index ke
forward, then use the platen kno
dow
n the page. With the line fi nder forward,
the platen rol
original p
To
draw
la
ce
1. P
t he cardhol
2.
Us
ing t
ls
freely. Retu
os
ition when you finish.)
a horizontal line:
a penc
il
or ballpoi
der.
he
spacebar, move
rn
the line finder to its
nt
pen
the carr
the page.
nes.
not
ch on
y, roll
up or
pull the line f inder
bs
to roll
up or
in
the notch on
ier
across
Impression Control
T
he
impre
ssi
on control l
of
the type element. You
sion control setting
of
the element.
To change t he impression control setting :
Push
the lever
backw a
l
eve
r against the notches when
rd
to
to the
eve
r is l
oca
can
change t he impres-
to
adjust the striking force
the right and slide
desired
number.
you
ted t o t he right
it
forw
ard
Do
not force the
cha
nge
settings .
Use
the following list
impression con
1-3 = offset masters
tro
as
a guide for setting the
l:
3 = most typing
3-5
= st enc
ils
and carbon
sets
or
Page 28

24
Type Elements
Most
IBM
type elements are shipped in
unique protective container. You
red plastic containers
more
than
one element, simply clip the containers
together using the clear plastic connectors.
The
follow
each element:
• The name
Prestige Elite)
An
•
pitch. Th e triangle points
when t he typewriter
• The I
• A threera
on
release
ing information appears on the
of
open triangle above a 12,
BM
logo
digit part n
ised
number
top
of
the
lever.
to
store elements.
the type style (for example,
to
w ard t he platen
is
in lowerc
umber (for ex
s. The part
eleme
nt
number
und
er
the
IBM's
can
use the sturdy
which
stands
ase
.
ample, 143) in
is
located
end
of the
To
store
top
of
for
12
Each
type element carries a different type style. T
diff
erent type sty
to
your needs.
Note: The lever
Only those elements
character have a
you distingui
same type name
on
white
sh
between
les
but
to
choose the one most suit ed
each element
with
lever. This
two
differing in this one way.
is
a specially req uested
white
elements bearing t he
ry
usually black.
lever helps
Page 29

25
<I,. • t
'~
1
..
· ~
Changing Type Elements
se
Using t he relea
can change elements in seconds.
When you
typewriter, make sure t
the
low
ercase position. The triang
ment should poi
shou
ld
be able t o read the name
on
the
element. Never for
ually rotating or
lever on the type element, you
put
an element on
nt
toward
ti
lting
hat
it
the
the
ce
on
the post.
or take
typewriter
platen, and you
the
one o
ff
the
is
in
le
on
the ele-
of
the type style
element by man-
To
take
off
an
element:
1. Switch the typewriter on.
2.
Press
and release
typewriter is in lowercase.
3.
Switch t he typewriter off.
4. Lift the release lever
it
clicks. When you hear the clic
open and shou ld stay open wi
5. Hold the lever and
off
the element post.
the shift
on top
raise
key
(SHIFT)
so
the
of
the element until
k,
the lever
thout
the element straight up
is
pressure.
To
put
on
an
element:
1. Switch the typewriter on.
2.
Press
and release
typewri
ter
3.
Switch t he typewrit
4. Lift the
open and shou ld stay open wit h
5 . Hold the element by
it
h
th e
6.
Once
lever until it clicks.
release
it cli
cks
. When you hear the
on the post
ave
the type element in t he correct position ,
tr
iangle on the element points
the
element
is
in
lowercase.
lever on
in
the shift
er
off
.
top
the
release lever and place
front
of
the ribbon. If you
is
in position, pre
key
(SHIFT
of
the element
click,
the lever
out
)
so the
pressure.
to
the
ss
down
unt
is
platen.
the
il
Page 30

Ribbon
Yo
ur t
ypew
riter
uses
You
cassette.
able Ribbon
Ribbon
Information
is in the section
name and reorder
on
the
To
see
lo
ok
at
can u
Cassette. IBM Color Correctable
Cass
ett
e,
on
ordering ribbons and
underside of the ribbon
ho w much
t he ribbon-en d indicat
a correctable film ribbon
se
either
the IBM
or
IBM 800
called " Supplies
number
ribbon remains in
T-111 Ribbon
and Service
of
each ribbon appear
cassette
or
(A).
210
Correct-
Cassette.
oth
er supplies
." The
.
the cassette,
26
To
remove a ribbon:
1.
Press
t he spacebar
ent
er.
c
2. Switch the typew riter o
3. Lift
th e cover.
4. Keep the paper bail against the platen.
5.
Mov
e the ribbon load lever (B)*
position (1
6.
Using
and off.
''Th e ribbon load lever
be moved if the correction tape load lever
the load position.
).
bot
h h ands, lift
to
move the carrier
ff
.
the cassette s
on
your typewri
to
the
traight
ter cannot
to
load
the
(C)
up
is in
To
install a ribb
1.
Be sure the ribbon load lever (
position (1).
Us
ing
2.
two
posts.
3.
Push
down
4 . Turn t he knob on t he cassette in the directi
the arrow until the uninked part o f
disappears inside the
not tig
direction o f the arrows.
5.
Move the ribbon load lever
at
ing p
6.
Close the cover.
bot
h hands, pla
firmly on
ht ,
turn
osi
tion (2
o n :
ce
the
the
cass
cassette. If
the knob on the
(B)
).
B)
is
in t
he
load
cass
ette over the
ette.
th
e ribbon
the
ribbon is
cassette in the
back t o t he oper-
on
of
Page 31

Correcting Tape
Be
sure to u
the ribbon you
spool
use
a blue tape spool
wit
se
the correcting tape
are usi
h a ribb
a blue knob.
on
ng.
Use
an orange tape
w hich
has
wit
h a ribbon which
that
matches
an orange knob;
has
the
tape
To remove
1. Move the tape lo
2. To
li
ft
off
the empty tape spool
s
li
ght ly clockwise.
:
ad
lever
Remove
(J)
t o the right. *
(K),
twist it
the take-up spool.
*The tape load lever cannot be moved if the
is
ribbon load lever
in the load position.
27
To inst
all
new
tap
e:
Use
an
orange tape spool
an
orange knob; use a blue tape spool
ribbon wh i
1. Gently
ch has
a blue knob.
se
parate t he two tape spool
with
them connected by t he orange
ta
pe (le
ader
).
2. Pl
ace
the new tape spool (K) on the l
3.
Th
rea
d the unink
guide (L
behin
4.
),
d t he guide
Pl
ace
the take-up spool
Turn t he takearrow unt il t he unink
5. Move t he tape load lever
close
must
ed
tape (leader) through t
behind the
sepa
(N).
(0)
up
spool in the direction of t
ed tape
the lever befo
re
rator w ire (M), and
on the right spindl
(J)
to
you begin
a ribbon w hich
with
a
s,
but
keep
or
blue uninked
eft spindl
is
past the guid e.
the left. (You
to
type.)
has
e.
he
e.
he
Page 32

28
---
------
- - - -
--
~
Typing Stencils
ls
To type stenci
th
e le
ft
the control
To
return
contro
l.
, push the ribbon/stencil control to
so
t he S lines
to
lock it in place.
to reg
ular typing , pu
This automatically moves the control
the printing position.
up
under t he mark. Rel
sh
t he button
eas
e
on the
to
Serial Nu
To
1.
2.
3. Look
mb
er
locate
the
serial number:
Use
the tab key
w
ay
to
the right.
Rais
e the typewrit er cove
for the ser
(TAB)
to
move the carrier all the
r.
ial
number on t he le
ft
directly below t he platen on the metal bar
be
hind the black
base
plate.
side,
Page 33

Page 34

30
Ordering Supplies
You
Call
·
(exclud
can order
IBM Direct
in
g Puerto
IB
M supplies by calling
at
t he
following
Rico):
800-631-5582
800-526-2484 (Alaska and Hawaii)
us
toll-free!
toll-free numbers
Type Elements
The w i
de
range
of
type styles available from
covers virtually every typing application. You'll
an element
or
der
pli
nes
characters, punctuation ma
You can order any of the follo
for
your typewrit
right
type elem
and forei
for
every typing
ents applicab
gn
languages -
er.
job. You
le
to
specific disci-
with
rks,
and symbol
win
g t ype elements
can
special
s.
IB
M
find
even
Page 35

31
Name, Order
Adjutant
Number
(1167129)
and Type Sample
ABCDEFGHIJKLMNOPQRSTUVWXYZ
abcdefghijklmnopqrstuvwxyz
1 2 3 4 5 6 7 8 9 0 - -
!@#$%¢&*()
+
~\;.'",./?
Artisan
12-72 (1167131)
ABCDEFGHIJKLMNOPQRSTUVWXYZ
abcdefghijklmnopqrstuvwxyz
1 2 3 4 5 6 7 8 9 O - =
@#$%¢&''<()
t.
; ; I
II
, • / ?
+
Name, Order
Auto
Elite ( 1167208)
Number
and Type Sample
ABCDEFGHIJKLMNOPQRSTUVWXYZ
abcdefghijklmnopqrstuvwxyz
1 2 3 4 5 6 7 8 9 o - =
! @ # $ % ¢ & * ( ) +
tt;
Courier
ABCDEFGHIJKLMNOPQRSTUVWXYZ
abcdefghijklmnopqrstuvwxyz
1 2 3 4 5 6 7 8 9 0 - =
:'",./?
12 (1167132)
@#$%¢&*()
I
II
' .
+
I ?
Name, Order
Courier
ABCDEFGHIJKLMNOPQRSTUVWXYZ
abcdefghijklmnopqrstuvwxyz
1 2 3 4 5 6 7 8 9 0 =
!@#$%¢&*()
Dual
Gothic
12
' .
Number
Italic
(1167133)
'
,,
(1167136)
and Type Sample
I ?
' .
+
ABCDEFGHIJKLMNOPQRSTUVWXYZ
abcdefghijklrnnopq rstuvwxyz
1 2 3 4 5 6 7 8 9 0 - =
@#$
t!;
%¢
&*()
'",./?
+
Page 36

Name.
Order
Elite
72
(1167137)
Number
and
Type Sample
ABCDEFGHIJKLMNOPQRSTUVWXYZ
abcdefghijklmnopqrstuvwxyz
1 2 3 4 5 6 7 8 9 O - =
1 @ # $ % ¢ & * ( ) +
··'"
k k
2 4 , • , • •
/?
32
Numb
er
and
Name, Order
Letter Gothic (1167138)
ABCDEFGHIJKLMNOPQRSTUVWXYZ
abcdefghijklmnopqrstuvwxyz
1 2 3 4 5 6 7 8 9 0 - =
! @ # $ % ¢ & * ( ) +
:k:k··'"
2 4 , • ' • •
Type Sample
/7-
Name, Order
Olde World (1167250)
ABCDff~HXJKCmN~F~R,SstU~mxyz
abctlefghijklmnopqrstuvwxyi
1 2 3 4 5 6 7 8 9 0 - =
! @ # $ % ¢ & * ( ) +
1 1 + • ' " / ?
2 4 1 • , • •
Number
and
Type Sample
Large Elite 72 (1167161)
ABCDEFGHIJKLMNO
PQRSTUVWXY
abcdefgbijklmnopqrstuvwxyz
1 2 J 4 5 6 7 8 9 0 - =
!@#$%¢&*()
.l
.l. , , I
2 4 J • J • •
II
/ ?
+
Z
Light Italic (1167139)
ABCDEF
GHIJKLMNOPQRSTU
VWXYZ
abcdefghijkZrrmopqrstuvwxyz
1 2 3 4 5 6 7 8 9 0 - =
! @ # $ % ¢ & * ( ) +
kk
'2 '4
··'"
, •
.,
/?
• •
Prestige
Elit
e 72 (1167143)
ABCDEFGHIJKLMNOPQRSTUVWXYZ
abcdefghijklmnopqrstuvwxyz
1 2 3 4 5 6 7 8 9 0 - =
! @ # $ % ¢ & * ( ) +
~!t;;:'",./?
Page 37

Name,
Order
Scr
ibe
( 11671
Number
44)
and Type Sample
ABCDEFGHIJKLMNOPQRSTUVWXYZ
abcdefghijklrnnopqrstuvwxyz
1 2 3 4 5 6 7 8 9 0 - -
!@#$%¢&:':()
+
~\;:'",./?
Script (1167145)
ABCVEFGHIJKLMNOPQRSTUVWXYZ
abede69h,<.jk£mnoµqJz1,~uvwxyz
1 Z 3 4 5 6 7 8 9 0 - =
1@#$%1&*
kh.··'"
2 4 , • 1 • •
1 ) +
/?
Order
Name,
Symbol 12
00
ljl
V
t r e
E
A n l
l
T X 0
9 0
= l
1T
II
J
Number
(1167004)
<I:>+<
-+
I:
X u
I
A
..
A
:::
cc
K W µ \)
)
r;;
{ }
.
and Type Sample
,r
D,
l 2 3 4
t >
T
-
±
'
t - f
§
r2
::e
a
0 p y
5 6 7 8
r
r
l
a
s
"l
'\.,
ijJ
e
I
,I-
¢
cr
33
Name,
Order
Number
Symbo
l II (
11
67243)
µ £ o X o -- - + l = -
D ]
V
23'~.
'§©
E:
>
and Type Sample
.>
./
II
t'.}
d
o*o-···£
\
) t
- _ I •
C~:t•I ...
N ' , 1 ® 9 O * %
--
/ o
/!,.
II
Page 38

34
Ribbon and Correcting Tape
IBM
210
IBM
Correctable
Color
Correctable Ribbon Cassette
Ribbon Cassette
Shelf Life: Three years
Colors: Black, Dark Brown,
Medium
Medium Blue
Average Character Yield:
Packaging: One ribbon
208,000*
per
box
Reorder Numbers:
Black:
1299508
Dark Brown:
Medi
um Green: 1299511
Medium
* Colors
character yield
1299510
Blue : 1299512
othe
r than black have an average
of
150,000.
Green,
IBM
800
T-111
Ribbon Cassette
Shelf Life: T
wo
years
Color: Black
Average Character Yield:
800,000
Packaging: One ribbon per box
Reorder Number:
1299509
Correcting Tape
IB
M Lift-
off
Tape works with the IBM 210
Co
rrectable Ribbon Cassette and the IBM Color
Correctable Ri
typed cha ract
bbo
n Cassette. It lifts incorrectly
ers
off
the
page.
Reorder Nu mber:
IBM Lift-o
IB
BOO T-111
typed character
Reo
IBM
ff
Tape: 1136433
M
Tech
Ill
Cover-up
Ribbon Cassette . It covers
s.
rder Nu
mbe
r:
Tech Ill Cover-up
Tape
Tape:
works w ith
up
113
6435
the
incorrectl y
I
BM
Page 39

35
Service
For
service, return your
IBM
service location.
location,
Hawaii
Caring
Use only a mild detergent
and painted portions
some cleaning fluids harm the typewriter.
To clean the type element, remove the element
from
call
1-800-631-5582. In Alaska and
call
1-800-526-2484.
for
Your Typewriter
the typewriter and
typew
riter
to
the nearest
For
the nearest
to
of
the typewriter because
use
IBM
clean the plastic parts
a dry brush and cloth.
service
Checklist
If
your typewriter isn't working properl
check the
If
the typewriter does
electric cord is plugged i
part
If
nothing prints on the paper, make sure
ribbon/stencil contro l is
If
the carrier will
off
release
the
If
erratic line spacing occurs, make su
finder
of
for a
carri
for
Proper
follow
the ON/
OFF
few
seconds, t hen on.
key
(MAR REL)
er.
is all
the
way back.
Typewriter
ing before you take it
not
come on, be su
nto the
control
not
not
move, switch
or
tab key
Operation
out
is
pressed
in the stencil
the
Press
(TAB)
y,
for
service.
re
t he
let and the on
down
.
the
pos
ition.
typewriter
t he marg
to rel
re
in
ease
the line
If
the ribbon
t
hat the
installed correctly. Check
ribbon
If
wrong characters
erratic character spacing occurs,
ment
element
the element will have
If
you
make sure the correcting tape is installed prope
Check the ribbon and correcting tape spools
be sure they are t he same co lo r.
the orange tape spool matc
the blue tape spool matches t he blue ribbon.
is
not printing proper
ribbon and correcting tape
to
available
on
the
left spool
or
partial characters print,
ly,
have
make sure
of
the cartridge.
or
the type ele-
was dropped, check the bottom
for
a broken
get
no correction
tooth
. If a
toot
to
be replaced .
or
partial correction,
hes
t he orange ribbon;
For
example,
make sure
been
the
re
of
the type
h is broken,
is
rly.
to
Page 40

36
Index
Ba
cksp ace key
Bail, paper
Capital le
Carb
on
Car
dholder
Draw
Cari
ng
for-your typewriter
Carrier .
Ca
rrier return key (RETURN)
Centering paper . . . . . . . . . . .
Changi
ng
Correcting t ape . . . . . .... ......
Ribbons
Type elements .........
Checklist for
(BACKSPACE) ........
................. . . . . .
tter
s,
typin g
...
. .
..................
copies, correcting .... ....
.......
ing lin
............ . . . .
... ... ..........
es ......
proper
. . ....
...
....
.. ..
...
. . . .... .
.....
typewriter
. . : . .
. . . . . . ....
...
. . .
. . . . .
operation ....
..
. . . .
....
. .
18
.. ..
. . . . . . 8
17
....
.......
19
....
. .....
23
....... 23
. .... . . .....
............ 22
.. ..
...
........
.....
....
35
....
..
18
...
. . . . 8
. .
27
. . . . . .
26
....... 25
. . .
35
Contro
ls
on
the top
Copy gui
Correcting
Correcting key ( ) ... ....
Correcting t a
Corrections,
Dial on
Drawing
de
...
Scale . . . . .... . . . . .
erro
Canceling .
Changing
Installing
Matching rib
Ord ering
Removing
right
lines ... . . .
of
. .
...
. . . ...............
rs ... . . . . . .
.....
. . .......
pe
.....
. . . . .
......
. . . . . . . .
bon . . . .
.....
. ........
..
...
. . .
making
platen knob
.. ..
........
your t
...
......
.......... . ....... . .
...
.....
. .
...... .
ypewriter ...
...
. . .
.......
...
. .
........
...
. .... ....
................
. .......
.......
. . .
.. ..
.. ..
...
. . .... . .... 34 Horizontal lin
. . .
...... . . . . . 27 Hyph
. ....
.........
........
. .....
. .
....... 23
. .... . 6 Elements. type
....
. s Changing .
. . .
..
s
.. ..
19 Labeling
...
19
19
....
. .
27
. .
....
27
27
19 Impression control .
. ....
11
Container
....
List . .
......
Ordering .......
Pu
tti
ng
on
Taking o
En
d-of
Er
rors, correcting .....
Index key (INDEX) ... ..........
Inserting paper . ....
ff
-page indicator ............ ..
en/
und
erli
....
. . . .
....
. . . ......
. . . . . . . ......
..............
. .
...... . .....
...
...
. . .
.........
es, draw
ne
key ... . . .
.......
ing ........
...
.. ..
...
..
. . .... .
. . . . .
. . .
. . . . . .
...
. .
............ 25
. .
...
. .
....
......
. .
.....
.......
.. .....
...
..........
... ...
......
...
. .
...
............
. . . .... . . ....
......... .
. . .
...
...
. .
.. 31-
...
. . .....
. . .... . .
......
. .
.... 23
. . . . . . . 18
.....
...
30-
24
. .
24
33
33
. .
25
..
25
11
19
23
18
. . 9
Page 41

37
Installing
Correcting tape
Ribbon . . .... .
Type elements . .
I
ntroduction
..
..
Keyboard ...........
. . . . . . . . .
. . . . . . . . . .... . . . . . . . .
. . . .
......
. . . .
.....
Knobs, platen
Left . . . . 10
Right
........
. . . . .... . . . .
....
. . .
Lever
Line find er . . . . .
..
. . . . .
Line space . . . . . . . . . . . . . . . . . . . . . . 7
......
. .
... ...
. . ....
Paper release
Line
finder
. . . . . . . . . . . . . . . . . . . . . . . . . . . . 1 o
Li
nes
Dr
awing
On cardholder ...
. . . . . . . . . . . . . . . . .
...
. . . . . . . . . . . . . . . . ....
.......
27
...
26
..
25
14
10,11
.. . 10
23
23
2
7
Line space lev
Making
er
correct ions . . . . . . . .... . . .... . . . . . . 19
Margin
Changing . .
Release key
Scale ...
Red
Setting . . . . . .
...
(MAR
REL)
....
.
. . . ....
..........
arrow
. . . . . . . . . . . . . . . . .15
..
. . . . .
.. ..
. . . .... . .
....
...
....
. .15
...
Stops . . . . . . . . . . . . . . . . . . . . .
N
umb
er, serial . . . . .
Off/on
(ON/OFF)
On/off
(ON/OFF) control . . . . . . . . . . . . . . . . . 14
Orde
ring suppli
control . . . . . . .
es
...
. •... . .
.. .....
....
. . . . . .
. . . . . . .
Correcting tape . . . . . . . . . . . . . . . . .34
Ribbon
..
Ty
pe elements ... . .....
Page-end
indicat
. . .... . .
or
. . .....
. . . 30-
..
.... 7
..
15
..
15
...
15
15
28
14
. . 34
33
. . .
11
Paper
Ba
C
Gui
nserting
I
Releas
Parts
Pitch
il
enter
ing . . . . .....
de
. . . . . . . . . . . .... .... .
Marks
. . .... . .
. .
...
..
e lever ... . . .
of
you r typewriter
..
. .
.....
. .... .... . . . . . . . . . ......
. . " . . . . . . . . . . . . . 8
. . . . .... . . . ......
. . .
...
. . .
.
.......
........
.......... .... .
...
. . · - ·
...
...
Plat en knobs
Le
ft
..
Right
Plat
en variable . . . . . . . . . . . . . . . . . . . . .1 o
Ready reference for p ageRepe
at keys
........
. . . . . . . ........
. .
..........
end
. . . . ....... . . 10
. . .....
indicat
or
. . . . . . . . . . . . . . . . 18
...
...
..
..
15,24
. 10,
. 8
..
..
_ . 7
2,3
11
.1
7
7
9
1
Page 42

Remov
ing Sten
Cor
rec
ting tape ....... . . .
Ribbon .... . . .......
Type ele
Rib
Changing
Installing . .
Orde
Removing . . . .
Scale, copy guide
Se
rial number . . .... .............
S
ervi
Settings for pag
Shift key
Sh
ift
Sp
aceba
ments ... . . .
bon Ribb
. . . . . . . . . .... . .... . ..........
......
.................... ..
ri
ng
ce
...
lock (L
r . .
.......
. .... .... . .
(SHIFT) .
OCK)
.......
. . . .
.. ..
. .... .......... . .
..
. . .
e-e
nd indicat
...
. .... . . .
. ........
. . . . ...........
...
. . .... .... . .
. . . . . . .
....
.......
.. ..
...
.....
....
. . .
...
. . . .
.. ..
.. ..... .... . .34
. .
.........
.. ..
. . . . . . 8
. .
. . . . . . ........ . . . .35
or ............
.. ..
...
....
. . .... . . . . . . . .
. . .
....
27
...
. 26
...
25
. 26
. 26
....
. 26
....
28
...
11
. .... 17
....
17
..
18
38
cil
s,
typing . .
Supplies
Correcting tape . . . . . .
Ord
ering . . . .
on
. ........
Type elemen
ab
T
Cleari
ng a
Cleari
ng one ........
Control ..
Key . . . . . . . . ....... . . .... . . . . . . . . . . .... 16 Changing .... ............ . . . . . . .......
Setting
. . .
Toll-free number for ordering supplies
Tw
elve
pitch .... .... .
..........
. . . . . ...........
...................
........ .... .... . .... .
...
. ....... . .... . . . ....
ts .......
ll
. . . . . . . . . . . . . . . .
. . . . . ........ . .
. ............... ..
. . .
...
. . . . . ..............
...... . . . . . .
....
.. ..
.......
28
T
ype
Cha
34
..
30-
34
.34
.. 30-3
3 Ordering ... . .
Co
L
abe
Li
st ........ . . . . . . . ..... .. ..
Putting on
....... . . . . 16 Taking off . .
. . ........
...
. ...... 15,2
. . 16
. . . . . 16
. . . . 16
. . . . .
.30
Typ
ematic ke
Typing line
Identifyi
Typing stencils ... . .
4
Up
percase charact
Variable, plate
Vertical lin
elements
nging . . . . . . . . .
...
. .... . . . ....
ntainer ................... . .
ling .... . . ...............
. .....
.............
. . .
......... . . ...... ...
...
. . . . . . . . .... . . .... .
ys
. . .......
ng .........
ers
.....
. . ....
. . . . ........
.. ..
. .
..............
, typing .... . .
n . . . . . .... .... . . . . .... . . .... 10
es,
drawi
ng
. . ............
......
. .... . .... 24
......
.. ..... . . . 25
. .
.•..
. . . 31-
. 30-33
....
....
. . . . 18
...... .
. .... .
.......
...
...
..
. .
25
24
33
25
. 1 o
23
28
17
. 23
Page 43

a,
C
Reader's
Comment
Form
Perso
IBM
Operating Instructio
Fo
You
ments
subject matter, with
may
su
incurring any obli
nal Typewriter
rm No . S544-4017-0
may
use
t his form
about
this publicat ion , its organi zation, or
use
or
distribute whatever information you
pply in any way it
gation
ns
to
communicate your com-
the understanding
believes
appropriate w ith
to
you . Your comments
that
will be sent to the author's depa rtment for
eve
r review and action, if
any,
are deemed
appropriate.
IBM
out
what
Note: Copies
at
th
e locati
ease dir
Pl
to
your
offi
ce serving yo
of
IBM publications are
on
to
which t h
ect any requests
IB
M re
pr
ese
ntative
ur locality.
is
for
or
form
copi
to
the
es
not
stocked
is addressed.
of publications
I
BM
branch
for
Thank you
is necessary if t
an IBM
fo
rw ard your comment s,
to the
your cooperation.
his
is mail
office
or
repr
address in t he editi
ed in
esentative
or
you may ma il directly
on
notice
No
postage stam p
the
USA
. (Elsewhere,
w ill be happy
on
t he back
to
of
the title page.)
Possible
completeness, organi
you wish a rep l
and date.
What
topics
is your
for
comment are: clarity, accuracy,
za
tion , retrieval, leg ibili ty. If
y, give your name, mailing address,
occupation?
__
______
Note:
Sta
ples can
mail sorting equipment.
sens
itive
or other gummed tape
cause
probl
Please use pressu
ems wit
to
seal th
h automat ed
re-
is form .
_
-
Page 44

5544-4017-0
Reader's Comment Form
Fold and
tape
Please
do not staple
--
~---==
111111
.
W::::
.-..U......:~
Fold a nd
NO
POSTAGE
NECESSARY
IF
MAILED
INTHE
UNITED
:WWW
tap
STATES
L
e
Fold a
nd
tape
----
----
- -
---
- - -
___
- -
- - -
---
,_
---
---
--
11)
BUSINESS
FIRST
CLASS
P
OSTAGE WILL BE PA
International Business Machines Corporation
Department
New
740
Lexington, Kentucky 40511
F98, Building 962-3
Circle Road N.W.
Pl
ease do not staple
REPLY
PERMIT
NO.
ID
BY ADDR
40
ESSE
MAIL
ARMONK, N.Y.
E:
Fo
ld and tape
IBM Person al
Typewrite
r O
per
ati
ng
lon
Cut a
Instructions
g line
Printed in USA S 544-40 1 7 -0
Page 45

-
-
- - -----
-
-
- - -
=~
International
Information
IPD
Form No.
Printed
PN
1338550
--
--
_..
-..
in
- -
-~-
---
=
Business Machines Corporation
Products Division
S544
-4017-0
USA
1;'
=®
 Loading...