

Page 1

soft ware
Learning Management System R1
Customization Guide June 2003
Page 2

Disclaimer
THE INFORMATION CONTAINED IN THIS DOCUMENTATION IS PROVIDED FOR
INFORMATIONAL PURPOSES ONLY. WHILE EFFORTS WERE MADE TO VERIFY THE
COMPLETENESS AND ACCURACY OF THE INFORMATION CONTAINED IN THIS
DOCUMENTATION, IT IS PROVIDED “AS IS” WITHOUT WARRANTY OF ANY KIND,
EXPRESS OR IMPLIED. IN ADDITION, THIS INFORMATION IS BASED ON IBM’S CURRENT
PRODUCT PLANS AND STRATEGY, WHICH ARE SUBJECT TO CHANGE BY IBM WITHOUT
NOTICE. IBM SHALL NOT BE RESPONSIBLE FOR ANY DAMAGES ARISING OUT OF THE
USE OF, OR OTHERWISE RELATED TO, THIS DOCUMENTATION OR ANY OTHER
DOCUMENTATION. NOTHING CONTAINED IN THIS DOCUMENTATION IS INTENDED
TO, NOR SHALL HAVE THE EFFECT OF, CREATING ANY WARRANTIES OR
REPRESENTATIONS FROM IBM (OR ITS SUPPLIERS OR LICENSORS), OR ALTERING THE
TERMS AND CONDITIONS OF THE APPLICABLE LICENSE AGREEMENT GOVERNING
THE USE OF IBM SOFTWARE.
Licensed Materials - Property of IBM
©Copyright IBM Corporation 1985, 2003 All rights reserved.
US Government Users Restricted Rights - Use, duplication or disclosure restricted by GS ADP
Schedule Contract with IBM Corp.
Lotus Software
IBM Software Group
One Rogers Street
Cambridge, MA 02142
List of Trademarks
IBM, the IBM logo, AIX, AS/400, DB2, LearningSpace, LearningSpace Forum, IBM Directory
Server, RS/6000, iSeries, xSeries, MQSeries, Cloudscape, Netfinity, OfficeVision, OS/2, OS/390,
OS/400, S/390, Tivoli, WebSphere, 1-2-3, cc:Mail, Domino, Domino Designer, Freelance
Graphics, iNotes, Lotus, Lotus Discovery Server, Lotus Enterprise Integrator, Lotus Mobile
Notes, Lotus Notes, Lotus Organizer, LotusScript, Notes, QuickPlace, Sametime, SmartSuite, and
Word Pro are trademarks or registered trademarks of International Business Machines
Corporation in the United States, other countries, or both.
Crystal Reports is a registered trademark of Crystal Decisions Corporation in the United States,
other countries, or both.
Page 3

Pentium is a trademark of Intel Corporation in the United States, other countries, or both.
Java, JavaServer Pages, JavaBeans, JavaScript, J2EE, JDBC, Sun Enterprise, and Sun Solaris are
trademarks of Sun Microsystems, Inc. in the United States, other countries, or both.
JReport and JReport Designer are trademarks of Jinfonet Software, Inc. in the United States, other
countries, or both.
Macromedia, Pathware, and Dreamweaver are registered trademarks of Macromedia, Inc. in the
United States, other countries, or both.
Netscape and Netscape Navigator are registered trademarks of Netscape Communications
Corporation in the United States and other countries.
Oracle is a registered trademark of Oracle Corporation in the United States, other countries, or
both.
PKZIP is a registered trademark of PKWARE, Inc. in the United States, other countries, or both.
SmartForce is a trademark of SkillSoft Corporation in the United States, other countries, or both.
SQL Server and Internet Explorer are trademarks of Microsoft Corporation in the United States,
other countries, or both. Windows, Windows NT, Active Directory, and Outlook are registered
trademarks of Microsoft Corporation in the United States, other countries, or both.
UNIX is a registered trademark of The Open Group in the United States and other countries.
Other product, company, and service names mentioned herein may be the trademarks, registered
trademarks, or service marks of their marks of their respective owners.
Page 4

Table of Contents
Chapter 1 Customizing the IBM Lotus Learning Management System User
interface ...........................................................................................................................1
A disclaimer and a word about conventions.......................................................................................2
Acronyms and abbreviations................................................................................................................. 2
Chapter 2 Changing settings through the user interface or XML ..............................5
Chapter 3 Controlling access to features through permissions ................................ 7
To add a role to the system .................................................................................................................... 7
To modify permissions settings for an existing role........................................................................... 8
To assign a role to a user ........................................................................................................................ 8
To automatically assign a role to a user ........................................................................................... 8
To explicitly assign a role to a user ................................................................................................... 8
Chapter 4 Customizing Help ........................................................................................ 11
The Anatomy of a Help topic............................................................................................................... 11
Editing an existing Help topic ............................................................................................................. 16
Replacing a context-sensitive Help topic ........................................................................................... 16
Adding your own Help topic............................................................................................................... 17
Chapter 5 Customizing JavaServer Pages ................................................................. 19
Overview ................................................................................................................................................ 19
LMS JSP tag libraries......................................................................................................................... 20
The Anatomy of a JSP ....................................................................................................................... 23
Making global changes ......................................................................................................................... 31
Applying customization sets............................................................................................................ 32
Changing the application style........................................................................................................ 32
Updating page text............................................................................................................................ 35
Adding and replacing graphics....................................................................................................... 36
Changing individual JSPs..................................................................................................................... 38
Changing the style of an individual JSP.........................................................................................38
Changing the functionality of an individual JSP........................................................................... 39
Chapter 6 Customizing Search .................................................................................... 45
Customizing user searches................................................................................................................... 45
Adding LDAP attributes to User Search pages............................................................................. 45
Removing fields from User Search pages....................................................................................... 46
Customizing Offerings Catalog searches ........................................................................................... 47
Adding custom fields to the Offerings Catalog............................................................................. 47
Removing fields from Offerings Search pages.............................................................................. 47
Customizing course management and resource searches ............................................................... 47
Table of Contents iii
Page 5

Removing fields from the Search pages ......................................................................................... 48
Chapter 7 Customization sets...................................................................................... 49
Creating a customization set................................................................................................................ 49
Installing a customization set on the Offline Learning Client......................................................... 54
Chapter 8 Creating a tab............................................................................................... 57
The Users page....................................................................................................................................... 57
users.jsp............................................................................................................................................... 58
navigation.xml ....................................................................................................................................... 62
The <module>, <trail>, and <step> tags: main pages and linked pages................................... 64
The <name> tag: page names and resourced text......................................................................... 65
The <target> tag: struts action-mapping........................................................................................ 65
The <content> tag: JSP file names ................................................................................................... 65
The <label> tag: breadcrumbs ......................................................................................................... 65
The <title> tag: title bar text............................................................................................................. 67
The <permissions> tag: permission to display the page.............................................................. 67
The <helpPage> tag: context-sensitive Help.................................................................................. 67
Adding custom permissions ................................................................................................................ 67
Example .................................................................................................................................................. 71
Index............................................................................................................................... 87
iv IBM Lotus Learning Management System Release 1 Customization Guide
Page 6

Chapter 1
Customizing the IBM Lotus Learning Management
System User interface
There are several ways you can tailor the IBM® Lotus® Learning Management System (LMS)
interface to control the product's look and feel and the user's access to its features. Depending on
the nature of the changes you want to make, customization can involve one or more of the
following:
• Changing default settings that affect what the user can see and do. You can do this either
through the Administrator interface or by editing XML files.
• Editing properties, template, graphics, and style sheet files.
• Editing the HTML files that constitute the Help system.
• Editing the application’s JavaServer Pages™ (JSPs)changing the HTML content, adding
or removing custom tags or overriding the default settings of their attributes, adding or
changing functionality by including Java™ code or JavaScript™, adding or removing
include statements, inserting or changing forward statementsor writing your own.
• Copying and renaming portions of the directory tree on the Learning Management
Module server (LMMS) and Delivery server (DS) and editing the copied files to create a
new interface. (The aggregation of such copied and edited files, together with the
information necessary to locate the files and identify the set of users to whom they apply,
is known as a customization set.)
• Creating custom reports. (This process is described in the Administrator’s Guide.)
• Writing directly to the LMS database.
This document describes the aspects of the Student interface that you can customize without
having to write directly to the LMS database or program in Java. The LMS database schema is
described in the Administrator's Guide.
Note: If you are upgrading to the LMS from a version of LearningSpace® that you have
customized, changes that you made to the LearningSpace interface will be lost because the
implementations of the two applications are radically different. Changes that you make in the
LMS interface may be lost when you upgrade to subsequent versions of the product or reinstall
the current version. It is therefore advisable to save backup copies of all files that you customize.
The user interface consists of a number of JSPs whose visual attributes you can modify. These
visual attributes include the following:
• static text
• colors and fonts
• graphical images
• background colors
• frame dimensions
Chapter 1: Customizing the user interface 1
Page 7

Static text is resourced in .properties and .txt files in the properties (and, in the case of the LMM
server, templates) directories for the LMM and Delivery servers and the Offline Learning Client
(under source\resources). These directories contain resource bundles for the various languages
that the LMS supports.
Colors and fonts are typically specified in a Cascading Style Sheet (CSS) file. CSS files are
grouped by browser type (under Web\<server>\css\<language>\<browser>, for example,
Web\LMM\css\en\styInternetExplorer5).
Graphical imagesGIF and JPEG filesreside in the images directory for the LMM and Delivery
servers and the Offline Learning Client in the web directory (for example, web\LMM\images).
As suggested earlier, you can modify a JSP’s functionality as well as its display attributes, by
editing the JSP itself. The JSP files for the web\LMM server, Delivery server, and Offline
Learning Client reside in the web\LMM, web\ds, and web\duc directories, respectively.
A disclaimer and a word about conventions
This document is not an exhaustive description of all the ways in which you can customize the
LMS. Rather, it covers a broad range of changes that customers typically want to make to the
application to customize its look and feel and control users’ access to features.
Some changes that you can make to the application are specific to a particular window, while
others are system wide. For example, if you change the text of the aboutLMM.title property in the
ApplicationResources.properties for the LMM, this will affect only one JSP (aboutLMM.jsp).
However, if you change the text of, say, the button.cancel property in the
ApplicationResources.properties for the LMM, this change will be realized in all the LMM JSPs
that have a Cancel button. Examples in this document remark on this distinction only where it
might not be obvious.
As mentioned previously, the application’s CSS files are browser-specific, one set being for use
with Internet Explorer™ and another for use with Netscape®. These two sets of style sheets do
not differ significantly from each other; they differ in their details. Rather than show changes for
both style sheets, the examples in this document refer to the style sheets for Internet Explorer,
with the understanding that the examples could, with minor adjustments, apply equally well to
the style sheets for Netscape.
Note: When you edit a CSS file, your changes should appear in the interface the next time the
user logs on. (If not, emptying the user's browser's cache should remedy the situation.) When you
edit a .properties file, however, you need to stop and restart the Web Publishing Service for your
changes to take effect. The reason for this difference is that CSS files are processed immediately
by the client, while .properties files are processed by Java code on the server.
Acronyms and abbreviations
The following table contains a list of possible unfamiliar acronyms and abbreviations used in this
document or appearing in the directory tree, or both:
2 IBM Lotus Learning Management System Release 1 Customization Guide
Page 8

Acronyms and abbreviations
Acronym or
What it stands for
Abbreviation
CSS Cascading Style Sheet
DS Delivery Server
DUC Offline Learning Client (Disconnected Use Client)
EAR (file) Enterprise Archive (file)
JSP JavaServer Page
LDAP Lightweight Directory Access Protocol
LMM Learning Management Module
LMMS Learning Management Module Server
LMS Learning Management System (can refer either to the application or just to the
LMM)
LMSS Learning Management System Server (same as LMMS)
SSO Single Sign-on
TLD (file) Tag Library Descriptor (file)
WAR (file) Web Application Archive (file)
WAS WebSphere Application Server
WPS WebSphere Portal Server
Chapter 1: Customizing the user interface 3
Page 9

4 IBM Lotus Learning Management System Release 1 Customization Guide
Page 10

Chapter 2
Changing settings through the user interface or XML
You can customize the application by changing various of the settings that are established when
you first install and configure the system. There are three ways to do this:
• Edit one or more of the XML files in which initial system values are stored.
• Enter or change values in the Settings module of the Administrator interface.
• Edit the application database directly, changing the appropriate record in the
application_setting table.
When you install and configure the application, a number of XML files receive values that
determine such things as where the application looks for Help files, what the initial settings are
for user preferences (such as time zone, language locale, and whether to display hover Help), the
maximum number of entries to include in an LDAP search result set, and so on. You can change
these initial settings by editing these files, which reside in the classes directory.
The three XML files of most interest are settings.xml, ds-settings.xml, and duc-settings.html. The
first of these controls settings on the LMM server; the second controls settings on the Content
Delivery server; and the last applies to the Offline Learning Client.
Here is what the preferences settings section of settings.xml looks like:
================================================================
PreferenceSettings
default user preference settings component
================================================================
-->
<preferences component="com.lotus.elearn.settings.PreferenceSettings"
timezone="EST" language="en" locale="en_US" tooltips="yes"
recordPerPage="10" calendarState="viewMonth" primaryCalendar="gregorian"
secondaryCalendar="gregorian" datepickerCalendar="gregorian"
firstDayOfWeek="1" />
-
<!--
================================================================
ds-settings.xml looks much the same as settings.xml in this example. There is no comparable
entry in duc-settings.html (because in this case the client gets its settings from settings.xml).
In any case, you can change the attribute values in these XML files by editing the files with a text
editor and then stopping and restarting the server. If you change settings.xml, you should change
ds-settings.xml and, where relevant, duc-settings.xml as well.
However, editing the XML files is not the preferred way to change system settings. Where
possible, using the Administrator interface to make changes is both simpler and less apt to result
in unwanted inconsistencies between server settings. (Not all settings that you might want to
change are exposed through the Administrator interface, but most of them are.)
So, for example, to make global changes in preferences, you can click the Settings tab in the
Administrator interface, click LMM Server, General Settings, and then User Defaults and enter
the desired new values. These will override the settings in the XML files.
Chapter 2: Changing settings 5
Page 11

Changes that you make through the Administrator interface are written to the application_setting
table in the application database and take precedence over settings in the XML files. If you want
to revert to the values in the XML files, you need to delete the relevant record(s) in the
application_setting table.
Note: users can have the last word on preferences settings by making changes through the
Preferences dialog box, which they can invoke from the Navigation bar. Thus, the settings that a
user specifies in the Preferences dialog box override settings that an administrator has made in
the Settings module (which in turn override the defaults specified in settings.xml).
6 IBM Lotus Learning Management System Release 1 Customization Guide
Page 12

Chapter 3
Controlling access to features through permissions
You can limit or expand users’ access to the application’s features and functionality by setting the
permissions that define the roles that you assign to those users. These roles can either be ones
that come prepackaged with the application (Anonymous, Student, Administrator, Instructor,
and Manager) or ones that you create yourself. The Course Administrator Help system and the
System Administrator Guide explain how to create, modify, and assign roles to users.
There are two ways to assign a role to a user:
• You can assign a role automatically, by matching string. That is, the role is automatically
assigned to all the Learning Management System users who are identified in the LDAP
directory by the matching string you specify. The assignment automatically applies to
current Learning Management System users and to new users when they are added to the
Learning Management System database.
• You can assign one or more roles to existing the Learning Management System users
interactively.
Both of these methods are described below.
When you assign multiple roles to a user, the user enjoys the union of the privileges for those
roles. For example, by default, a user assigned the Student role doesn’t have permission to run
reports. By default, a user assigned the Instructor role does have permission to run reports.
Assuming that you don’t change the default settings, if a user is assigned both roles, he or she has
permission to run reports.
The Anonymous role is a special case. When users initialize the application, they are assigned the
Anonymous role until such time as they log in or exit. When users log in, the Anonymous role
no longer applies to them. So, for example, if you were to change the permissions for the
Anonymous role to allow anonymous users to run reports (not that you probably would), users
whose sole role is Student who ran the application could run reports until they logged in, after
which they couldn’t because their privileges as Anonymous had been discarded when they
logged in.
Automatically assigned roles are a somewhat different special case. If you automatically associate
a role with the set of users in the LDAP directory that are identified by a matching string, you
can’t override this assignment for a user by running the application, locating the user, and
changing his or her role assignments. For example, if everybody in your LDAP directory
identified by the string *,ou=Cambridge,o=IBM is automatically assigned the role of Student and
you want to remove this role assignment from user John Doe who is identified by that matching
string and assign him the role of Instructor instead, you need to either change the user’s LDAP
record so that the user is no longer identified by the matching string or change the matching
string that identifies the users to whom you want to automatically assign the role.
That being said, the following sections are a reminder for how to add a role to the system, change
the permissions for an existing role, and assign a role to a user.
To add a role to the system
1. Open the Administrator interface.
2. Click the Users tab.
3. Click Manage Roles.
4. Click Add Role.
Chapter 3: Controlling access to features 7
Page 13

5. Enter the name of the new role and a description, and then click Save. This adds the role
to the role list.
6. Click the name of the new role in the list. This displays the Role Details page.
7. Check the permissions you want to grant to users assigned this role in the various
categories you can select from the category drop-down box.
To modify permissions settings for an existing role
1. Open the Administrator interface.
2. Click the Users tab.
3. Click Manage Roles.
4. Click the name of the role whose permissions you want to reset.
5. Check the permissions you want to grant to users assigned this role in the various
categories you can select from the category drop-down box.
To assign a role to a user
As mentioned previously, there are two ways to assign roles to users: explicitly or automatically.
The first method involves searching for users in the system, selecting the ones to whom you want
to assign a role, and assigning them that role. The latter method involves specifying a matching
string and letting the application assign the users identified by that string the role you specify.
To automatically assign a role to a user
1. Open the Administrator interface.
2. Click the Users tab.
3. Click Manage Automatic Assignments. The application displays a list of existing roles.
4. Click the role that you want the application to automatically assign to users in the LDAP
directory.
5. Click Add Automatic Assignment, select a match type (Name, Attribute, or Group), and
enter the matching string to be used in identifying users in the LDAP directory to whom
you want to assign the selected role.
6. Click Add.
To explicitly assign a role to a user
1. Open the Administrator interface.
2. Click the Users tab.
3. Click Manage Users. The application displays the user search dialog box.
4. Enter the search criteria that identify the users to whom you want to assign a role and
then click Search.
5. Select the users you want from the result set by checking the box next to their names.
6. Click Add Selected.
8 IBM Lotus Learning Management System Release 1 Customization Guide
Page 14

7. Click Continue. The application displays a dialog box from which you can assign roles by
clicking Assign Roles. When you click Assign Roles, the application displays a list of the
roles defined in the system. Select one or more of these to assign to the selected user(s).
8. Click Save to complete the role assignment(s).
Chapter 3: Controlling access to features 9
Page 15

10 IBM Lotus Learning Management System Release 1 Customization Guide
Page 16

Chapter 4
Customizing Help
Every Help topic consists of four files, all of which are editable:
• The file that defines the layout of the graphical bar displayed at the top of every Help
window. Student and Course Administrator Help topics have slightly different headers.
• The file that defines the navigation bar containing a list of links at the left of every Help
window.
• The file containing the topic content. Topic content files are all named
<prefix>_<topic>_b.html, where <prefix> identifies the topic as being a Student or Course
Administrator Help topic. By convention, the prefix sh_ identifies a Student Help topic;
ch_ identifies a Course Administrator Help topic.
• The map file that defines the frameset in which the header, navigation bar, and topic
content are displayed. Map files are all named <prefix>_<topic>.html where
<prefix>_<topic> matches the <prefix>_<topic> of the corresponding content file.
All of these files reside in a single directory on a server. Student and Course Administrator Help
topics reside in separate subdirectories. Depending on how you configure the application after
installation, there may be copies of the Help system on multiple servers. Users of the Offline
Learning Client download (Student) Help to their workstations. If Help is installed on multiple
servers, you should make any changes on all of them. Users of the Offline Learning Client should
be advised to download a new version incorporating your changes.
Users access topics in the Help system in either of two ways:
• From the Student or Course Administrator Help table of contents or index.
• By clicking the ? icon on the current page. When the user clicks this icon, the application
displays the Help topic relevant to that page. This is known as context-sensitive Help.
The following sections look at the construction of a sample of a Help topic and describe the
various ways in which you can customize a Help window’s display attributes and content,
redirect context-sensitive Help, and add a new Help topic to the system.
The Anatomy of a Help topic
The following example shows the component parts of the Help topic for the Student Preferences
dialog box.
The map file sh_preferences.html looks like this:
<html>
<head>
<title>IBM Lotus Learning Management System Student Help</title>
</head>
<frameset rows=33,* border=0 frameborder=no framespacing=0>
<frame name=header title="Help Header"
src="sh_help_header_h.html"scrolling=no framespacing=0 frameborder=no
border=0 marginwidth=0 marginheight=0 noresize>
<frameset cols=150,* border=0 frameborder=no framespacing=0>
<frame name=navigation title="Help Navigation"
src="sh_help_navigation_l.html" scrolling="auto" framespacing="0"
frameborder="No" border="0" marginwidth="0" marginheight="0" noresize>
Chapter 4: Customizing Help 11
Page 17

<frame name=content title="Help Topic" src="sh_preferences_b.html"
scrolling=auto framespacing=0 frameborder=no border=0 marginwidth=0
marginheight=0 noresize>
</frameset>
</frameset>
</html>
The file sh_help_header_h.html defines the layout of the graphical bar that appears at the top of
all Student interface Help topics, sh_help_navigation_l.html defines the navigation bar that
appears on the left of each Student help topic containing links to other parts of the Help system,
and sh_preferences_b.html is the file containing the topic text in this example.
You could edit sh_preferences.html the content of the title attribute in the frame name tags,
adjust the dimensions of the frameset and its components, and specify different links for the
header, navigation bar, and topic. The title attribute is included for the benefit of users using textto-speech software.
The header file sh_help_header_h.html looks like this:
<head>
<title>Help Header</title>
<SCRIPT LANGUAGE="JavaScript">
<!—
if (navigator.appName.indexOf('Netscape') > -1) {
document.write('<LINK HREF="ns_style.css" REL="styleSheet"
TYPE="text/css">');
} else {
document.write('<LINK HREF="ie_style.css" REL="styleSheet"
TYPE="text/css">');
}
// -->
</SCRIPT>
</head>
<html>
<body class="h-page-bg" marginheight="0" marginwidth="0">
<!-- Top Table -->
<table cellpadding="0" cellspacing="0" border="0" width="100%">
<tr class="logo-bg">
<td width="3"><img src="transparent.gif" width="3"
height="1" alt="" border="0"></td>
<!-- Lotus Brand -->
<td class="logo-text" nowrap valign="middle"><img src="lvchelplotus.gif" width="50" height="33" alt="Lotus" border="0"></td>
<td class="logo-text" nowrap valign="middle"> Learning
Management System Student Help<br><img src="transparent.gif"
width="137" height="1" alt="" border="0"></td>
<!-- Gutter -->
12 IBM Lotus Learning Management System Release 1 Customization Guide
Page 18

<td width="46" class="logo-textbg"><a
href="#PageContent"><img src="transparent.gif" width="2" height="20"
alt="skip to page content" border="0"></a><img src="transparent.gif"
width="44" height="1" alt="" border="0"></td>
<!-- IBM logo -->
<td class="mosaic-bg" width="100%" align="right"><img
src="lvc-helpibm.gif" width="59" height="33" alt="IBM logo"
border="0"></td>
</tr>
</table>
</body>
</html>
The <SCRIPT>…</SCRIPT> block tests for which browser you’re using and points to the
appropriate Cascading Style Sheet (CSS) in the Help directory to manage display attributes, such
as font and background color, of the Help header and navigation bar. You can change these
display attributes by editing ns_style.css or ie_style.css (or both) or by pointing to a different
Cascading Style Sheet of your own devising. If you edit the CSS files rather than point to one of
your own, these changes will ripple through the whole Student Help system.
You can alter the ALT tag text, and change the banner textLearning Management System
Student Help. You can edit, replace, or remove the lvc-help-*.gif files. You can change the banner
graphic in either of two ways:
• Edit or replace the file lvc-helpmosaic.gif.
• Edit ns_style.css or ie_style.css (or both), replacing the background-image URL with one
that locates the banner graphic you want:
.mosaic-bg {
background-image: url(lvc-helpmosaic.gif);
background-repeat: repeat-x;
You can use transparent.gif to adjust the spacing of elements in the header.
The file that defines the navigation bar, sh_help_navigation_l.html,
looks like this:
<html>
<head>
<title>Help Navigation</title>
<SCRIPT LANGUAGE="JavaScript">
<!--
if (navigator.appName.indexOf('Netscape') > -1) {
document.write('<LINK HREF="ns_style.css" REL="styleSheet"
TYPE="text/css">');
} else {
document.write('<LINK HREF="ie_style.css" REL="styleSheet"
TYPE="text/css">');
Chapter 4: Customizing Help 13
Page 19

}
// -->
</SCRIPT>
</head>
<BODY TEXT="#000000" LINK="#0066cc" VLINK="#666600" ALINK="#993300"
CLASS="nav-bg" TOPMARGIN=0 MARGINLEFT=10>
<table width="100%" cellpadding="0" cellspacing="0" border="0">
<!-- vertical spacing -->
<tr><td colspan="2"><img src="transparent.gif" width="1"
height="16" alt="" border="0"></td></tr>
<tr>
<td><img src="transparent.gif" width="10" height="1" alt=""
border="0"></td>
<td width="100%"><a href="sh_contents.html" class="navtext" target="_top">Contents</a></td>
</tr>
<!-- vertical spacing -->
<tr><td colspan="2"><img src="transparent.gif" width="1"
height="8" alt="" border="0"></td></tr>
<tr>
<td><img src="transparent.gif" width="1" height="1" alt=""
border="0"></td>
<td><a href="sh_index.html" class="nav-text"
target="_top">Index</a></td>
</tr>
<!-- vertical spacing -->
<tr><td colspan="2"><img src="transparent.gif" width="1"
height="8" alt="" border="0"></td></tr>
<tr>
<td><img src="transparent.gif" width="1" height="1" alt=""
border="0"></td>
<td><a href="sh_glossary.html" class="nav-text"
target="_top">Glossary</a></td>
</tr>
<!-- vertical spacing -->
<tr><td colspan="2"><img src="transparent.gif" width="1"
height="8" alt="" border="0"></td></tr>
<tr>
<td><img src="transparent.gif" width="1" height="1" alt=""
border="0"></td>
<td><a href="sh_faq.html" class="nav-text"
target="_top">Frequently Asked Questions</a></td>
</tr>
<!-- vertical spacing -->
<tr><td colspan="2"><img src="transparent.gif" width="1"
height="8"></td></tr>
14 IBM Lotus Learning Management System Release 1 Customization Guide
Page 20

<tr>
<td><img src="transparent.gif" width="1" height="1" alt=""
border="0"></td>
<td><a
href="http://doc.notes.net/cct/LearningSpace.nsf/LSCore?OpenForm"
class="nav-text" target="_ ">Feedback on Help?</a></td>
</tr>
</table>
</body>
</html>
You can change the navigation bar’s display attributes by editing
ns_style.css or ie_style.css (or both) or by pointing to a different
Cascading Style Sheet of your own devising. (Again, if you edit the CSS
files rather than point to one of your own, these changes will ripple
through the user interface.)
You can alter the contents of the navigation bar by rearranging,
adding, or removing rows in the <table>…</table> block.
Finally, the content file sh_preferences_b.html looks like this:
<HTML>
<HEAD>
<META NAME="searchterms" CONTENT="changing your
preferences,preferences, changing,ToolTips,pop-up Help,hover
Help,records per page,mouse-over Help,display settings">
<META NAME="topic" CONTENT="Changing your display preferences">
<TITLE>Changing your display preferences</TITLE>
</HEAD>
<BODY TEXT="#000000" LINK="#0066cc" VLINK="#666600" ALINK="#993300"
BGCOLOR="#ffffff" BACKGROUND="background_b.gif" MARGINHEIGHT=0
TOPMARGIN=0 MARGINWIDTH=25 LEFTMARGIN=25>
<H2>Changing display preferences</H2>
<p>By clicking Preferences in the Navigation bar, you can see and
change your personal display preferences. To close the window without
changing your preferences, click Cancel.</P>
…
<P> </P>
<P> </P>
<P> </P>
<P> </P>
<P> </P>
<P> </P>
<P> </P>
<P> </P>
</body>
</html>
Chapter 4: Customizing Help 15
Page 21

You can ignore or remove the <META> tags at the beginning of the file.
These are used in generating the Index. Otherwise, you can edit this
file as you would any other standard HTML file.
Editing an existing Help topic
Open the _b.html, edit it, and save your work.
Replacing a context-sensitive Help topic
You can replace a context-sensitive Help topic by linking to a different topic, which can be either
another topic in the existing Help system or one that you write yourself. The mechanism for
replacing the link varies, depending on whether the associated JSP is a pop-up or not. For a popup, edit the jsp:param name “helpPage” attribute in the JSP. For example, if you want to change
the link for context-sensitive Help for the Preferences dialog box, change sh_preferences.html to
some other HTML file in the directory identified by the relative path student/ in preferences.jsp:
<%--
preference.jsp
Description:
Allows users to modify their preferences
--%>
<%@ taglib uri="/WEB-INF/tld/Struts-html.tld" prefix="html" %>
<%@ taglib uri="/WEB-INF/tld/lms.tld" prefix="lms" %>
<jsp:include page="popupHeader.jsp" flush="true">
<jsp:param name="messageKey" value="toolbar.preferences"/>
<jsp:param name="header" value="toolbar.preferences"/>
<jsp:param name="helpPage" value="student/sh_preferences.html"/>
</jsp:include>
<lms:form action="/prefSubmit.do">
<%--
For JSPs that aren’t pop-ups, edit the <helpPage> attribute of the description of the JSP in
Navigation.xml. For example, you might replace the context-sensitive help topic for the Student
Home page, sh_usinghome.html with some other HTML file in the directory identified by the
relative path student/:
- <module>
<name>studenthome</name>
<target>/studentHome.do</target>
<content>studentHomeWelcome.jsp</content>
<label>navigationTab.studentHome</label>
<title>navigationTab.studentHome</title>
<permissions>Home_Module</permissions>
<helpPage>student/sh_usinghome.html</helpPage>
16 IBM Lotus Learning Management System Release 1 Customization Guide
Page 22

Note: You can replace a Help file with one in another directory by specifying the appropriate
relative path and file name. For example, you might change the helpPage parameter in
preferences.jsp to
<jsp:param name="helpPage" value="courseadmin/ch_mypreferences.html"/>
or, assuming that you had created and populated a myhelp directory at the same level as the
student and course administrator Help directories, you might change the <helpPage> tag in the
student home entry in Navigation.xml to
<helpPage>/myhelp/welcome.html</helpPage>
or the like.
Adding your own Help topic
You can add your own Help topics to the system and create Index entries and links in the Table
of Contents for them. The following procedure assumes that you want to add a topic to the
Student Help system. The procedure for adding a topic to the Administrator Help system is
essentially the same, the only significant differences being the prefix to the file namesch_
instead of sh_ and the subdirectory in which you store the files.
1. Create a map file like the one described above in “Anatomy of a Help topic”
(sh_preferences.html). For example, you might create a file named sh_my_topic.html to
which the corresponding content file will be named sh_my_topic_b.html:
<html>
<head>
<title>IBM Lotus Learning Management System Student Help</title>
</head>
<frameset rows=33,* border=0 frameborder=no framespacing=0>
<frame name=header title="Help Header"
src="sh_help_header_h.html"scrolling=no framespacing=0
frameborder=no border=0 marginwidth=0 marginheight=0 noresize>
<frameset cols=150,* border=0 frameborder=no framespacing=0>
<frame name=navigation title="Help Navigation"
src="sh_help_navigation_l.html" scrolling="auto" framespacing="0"
frameborder="No" border="0" marginwidth="0" marginheight="0"
noresize>
<frame name=content title="Help Topic" src="sh_my_topic_b.html"
scrolling=auto framespacing=0 frameborder=no border=0
marginwidth=0 marginheight=0 noresize>
</frameset>
</frameset>
</html>
2. Create the content file (sh_my_topic_b.html). Since you’ll need to enter Index entries by
hand if you want the topic to be available through the Index, you don’t need to include
<META> tags:
<HTML>
<HEAD>
Chapter 4: Customizing Help 17
Page 23

<TITLE>Your title goes here (for example, My Topic)</TITLE>
</HEAD>
<BODY TEXT="#000000" LINK="#0066cc" VLINK="#666600"
ALINK="#993300" BGCOLOR="#ffffff" BACKGROUND="background_b.gif"
MARGINHEIGHT=0 TOPMARGIN=0 MARGINWIDTH=25 LEFTMARGIN=25>
<H2>Your title goes here (for example, My Topic)</H2>
<p>Your topic text goes here.</P>
</BODY>
</HTML>
3. If you want to link to this topic from the Table of Contents, open sh_contents_b.html,
enter the appropriate text, and save your work. For example:
<A HREF="sh_notifications.html"
target="_top">Notifications</A><br>
<A HREF="sh_my_topic.html" target="_top">My topic</A><br>
<A HREF="sh_enrolled.html" target="_top">Enrolled courses</A><br>
4. If you want to link to this topic from the Index, open sh_index_b.html in the .war file,
enter the appropriate text, and save your work. For example:
<dt>ToolTips <dd><a href="sh_preferences.html" target="_top"
title="Link to topic">Changing your display preferences</a>
<dt>topic details <dd><a href="sh_coursedetails.html"
target="_top" title="Link to topic">Course and activity details
</a>
<dt>topic, my <dd><a href="sh_my_topic.html" target="_top"
title="Link to topic">My topic</a>
18 IBM Lotus Learning Management System Release 1 Customization Guide
Page 24

Chapter 5
Customizing JavaServer Pages
You can customize the Learning Management System application by customizing its JavaServer
Pages. This chapter contains the following information:
Overview
• LMS JSP tag libraries
• The Anatomy of a JSP
Making global changes
• Applying customization sets
• Changing application style
• Updating page text
• Replacing graphics
Changing individual JSPs
• Changing a JSP’s style
• Altering a JSP’s functionality
Overview
The architecture of the Learning Management System application is based on Struts 1.1, beta 2,
which is part of The Jakarta Project, sponsored by Apache Software Foundation. The Struts
architecture helps to separate logic from presentation in a JavaServer Page application using the
MVC (Model-View-Controller) design pattern. In this design pattern, the Model component
represents the business logic of the application, the View represents the display mechanism, and
the Controller passes control from the request to the model and from the model to the view.
In the Learning Management System application, a user request triggers the initialization of a
controller servlet that parses a configuration file. The configuration file, named Struts-config.xml,
maps the request to the appropriate action class to handle it. Action classes on the Learning
Management System server have a .do extension and those on the Delivery server have a .ds
extension. Once the handler performs the action, it calls a form class to structure the result. It also
determines which JavaServer Page the response should be forwarded to for display in the
browser. The Struts-config.xml file contains action mappings that map the forwards returned by
the actions to specific JavaServer Pages. The Struts-config.xml file contains both global forwards
and one or more additional forwards for specific actions. You can find documentation defining
the Struts architecture at http://jakarta.apache.org/Struts/
The view component of the MVC model is handled by JavaServer Pages in the Learning
Management System. The JavaServer Pages reside on each server hosting the application.
JavaServer Pages (JSPs) are pages comprised of standard HTML, JavaScript, Java scriptlets, and
JSP tags. JSP tags are similar to HTML tags; both define display characteristics for elements on a
page. However, JSP tags differ in that they also serve as references to Java code. Each JSP tag
triggers the execution of a piece of Java code written and stored elsewhere in the application. The
attributes of a JSP tag serve as the parameters to pass to the Java class.
A JSP is served to a browser client from the server of the hosting application. It works like this:
when a JSP-based application is deployed, the server pre-compiles the JavaServer Pages into a
servlet, which executes any code triggered by the JSP tags on the page and dynamically generates
the response page content. These pre-compiled JSPs are stored in the server’s file directory. When
.
Chapter 5: Customizing JavaServer Pages 19
Page 25

a user makes a request or performs an action, the server handles the action, and then retrieves the
appropriate JSP to display the response in HTML. You can find documentation defining the JSP
1.2 specification, on which the LMS JSPs are based, at http://java.sun.com/products/jsp/.
The servers in the LMS application display their responses to requests differently. The Learning
Management System server displays its responses using either a popup JSP or a template JSP that
provides additional formatting to the page, called the adminTemplate.jsp. The Delivery server
displays its responses using a framing JSP called delivery.jsp. To step through the source code for
these pages, see “The Anatomy of a JSP.”
LMS JSP tag libraries
The servers that host the LMS application support custom JSP tags from multiple JSP tag
libraries. Each library has a tag library descriptor (TLD) file, which is an XML-formatted file that
defines the attributes of the JSP tags in the library and the Java classes to call when each tag is
encountered on a page.
The tag library descriptor files in the IBM Lotus LMS are named as follows:
IBM Lotus Learning Management System tag library descriptor files
Tag Library Name Purpose:
lms.tld Executes the basic functionality of the LMS application. Used by the JSPs in
every component of the LMS application.
Struts-bean.tld Calls JavaBeans™ from a JSP. Based on the Struts architecture.
Struts-html.tld Defines the basic HTML content of a JSP, such as button and checkbox elements.
Based on the Struts architecture.
Struts-logic.tld Incorporates common programmatic logic into a JSP. Based on the Struts
architecture.
The Delivery and Offline Learning Client servers contain the following TLD files in addition to those listed
above:
Tag Library Name Purpose:
chat.tld Executes the functionality used in conducting a live chat from within the
application.
delivery.tld Defines the functionality specific to the delivery and offline servers, such as the
activity and course tools.
delivery-js.tld Customizes the frames used to format the delivery and offline client
applications.
These TLD files are stored in the following directory:
[serverName]>WEB-INF>tld
where [serverName] is one of the following directory names:
• “LMM”: Represents the Learning Management System server
• “DS”: Represents the Delivery server
• “DUC”: Represents the Offline Learning Client server
The anatomy of a TLD file
The tag library descriptor (TLD) file is a text file in XML format that defines the JSP tags used in
an application. In this section we will look at one such JSP tag. The url tag is a tag that references
a Uniform Resource Locator (URL). It belongs to the lms tag library and is defined in the lms.tld
file.
This section illustrates how to:
• Reference a tag in a JSP
• Define a tag in the TLD file
20 IBM Lotus Learning Management System Release 1 Customization Guide
Page 26

Referencing the url tag in a JSP
The following code is excerpted from the catalogManageCurriculumEntryManage.jsp:
<script language="javascript">
function openUserSearchPopup()
{
var href = "<lms:url>/searchUserPopup.do?formName=<%= formName
%></lms:url>";
<lms:window href="href" title="UserSearch" width="600" height="700"
scrollbars="true" resizable="true" />
}
</script>
When called, the openUserSearchPopup() script opens a popup window and populates it with
the searchUserPopup JSP, which displays a standard search form. The searchUser.jsp file, which
is included in the searchUserPopup.jsp file contains the following code:
String formName = request.getParameter("formName");
This code sets a new variable called formName equal to the formName variable passed to it from
the lms:url tag. Essentially, the lms:url tag is formatting the text in its body as a valid URL, which
is passed to the lms:window tag as the content of its href attribute. The lms:window tag does the
work of opening a window and displaying the content referenced by the URL.
Defining the url tag in the TLD file
The following XML-formatted text is an excerpt from the lms.tld:
<tag>
<name>url</name>
<tagclass>com.lotus.elearn.taglib.UrlTag</tagclass>
<bodycontent>Jsp</bodycontent>
<attribute>
<name>encodeURL</name>
<required>false</required>
<rtexprvalue>false</rtexprvalue>
</attribute>
<attribute>
<name>useCustomDsPath</name>
<required>false</required>
<rtexprvalue>true</rtexprvalue>
</attribute>
<attribute>
<name>useCustomLmmPath</name>
<required>false</required>
<rtexprvalue>true</rtexprvalue>
</attribute>
<attribute>
<name>id</name>
<required>false</required>
Chapter 5: Customizing JavaServer Pages 21
Page 27

<rtexprvalue>true</rtexprvalue>
</attribute>
</tag>
The tag name is defined in the <name> tag:
<name>url</name>
The next line identifies the location of the Java source code to execute when this url tag is
encountered on a JSP:
<tagclass>com.lotus.elearn.taglib.UrlTag</tagclass>
The source code for all of the Java classes specified in the LMS custom TLD files is stored in the
following directory:
[serverName]>WEB-INF>classes>com>lotus>elearn>taglib
The url tag source is no exception; the UrlTag.java file is stored in the lmm>WEBINF>classes>com>lotus>elearn>taglib directory.
The bodycontent tag provides information on the content of the body of the JSP tag and is
intended for use by page composition tools:
<bodycontent>Jsp</bodycontent>
“Jsp” indicates that the body of the tag contains nested JSP syntax. Page composition tools know
how to handle Jsp syntax. Some JSP tags have bodycontent tags that contain “Empty.” This
specifies that no text can display in this tag when it is executed.
Once the properties of the JSP tag are defined, any attributes associated with the JSP tag are then
defined before the closing JSP tag (</tag>) is reached. Each attribute has a name tag and two
more informational tags, the “required” and “rtexpvalue” tags. If the required tag is set to “true,”
any time you include the JSP tag in a page, you must provide a value for this attribute for the tag
to be evaluated properly. The rtexpvalue tag indicates whether or not the value of the attribute
may be dynamically calculated at request time, as opposed to being a static value determined at
translation time.
The first attribute of the url tag, named encodeURL, is not required and its value cannot be
dynamically calculated at request time. This attribute takes a Boolean value that indicates
whether or not to call the HTTPResponse.encodeURL() method to encode the URL included in
the body of the tag into a browser-readable format. This attribute should be set to true for URLs
that target other pages in the application, since it encodes the URL with the session ID, if
necessary. (For browser clients that do not accept cookies, this is the only way to pass the session
ID and maintain the session state information for the application.)
<attribute>
<name>encodeURL</name>
<required>false</required>
<rtexprvalue>false</rtexprvalue>
</attribute>
The next two attributes, the useCustomDsPath and useCustomLmmPath attributes, are also not
required. The values of these attributes can be dynamically calculated at request time. These
attributes take Boolean values and indicate whether or not the customization set paths provided
for the Delivery(DS directory) and Learning Management System (LMM directory) servers
should be used in locating the URL included in the body of the tag. The default value for these
tags is “true,” which indicates to apply the customization set path to the supplied URL, if a
customization set exists. Setting these to false forces the retrieval of a resource from a specific
URL regardless of whether customization sets are in effect for an application.
22 IBM Lotus Learning Management System Release 1 Customization Guide
Page 28

<attribute>
<name>useCustomDsPath</name>
<required>false</required>
<rtexprvalue>true</rtexprvalue>
</attribute>
<attribute>
<name>useCustomLmmPath</name>
<required>false</required>
<rtexprvalue>true</rtexprvalue>
</attribute>
The fourth attribute, the id attribute, is not required and can be dynamically calculated at request
time. By including this attribute in a url tag and setting it equal to a string, you are creating a
PageContext variable named with the string you supply.
<attribute>
<name>id</name>
<required>false</required>
<rtexprvalue>true</rtexprvalue>
</attribute>
The end of the url tag is indicated by a closing tag tag that follows the last attribute’s closing tag:
</tag>
The Anatomy of a JSP
This section defines the JSPs that structure the display of the content of the Learning
Management System and Delivery servers.
Learning Management System server
The JSPs that reside on the Learning Management System server are displayed in two ways. They
either display as popups, which have little or no header and navigation information, or they
display in the adminContentPage section of the adminTemplate.jsp, which functions as a
template that formats the page content. Stepping through the source code of the adminTemplate
JSP illustrates how to perform standard JSP tasks, such as:
• Defining a page as a JSP
• Including tag library descriptor files
• Referencing Struts tags and standard JSP actions
• Including JavaScript source code
Looking at the adminTemplate.jsp source code also illustrates how the following tasks are
handled by the Learning Management System server in particular:
• Localizing page text
• Determining the user’s browser type and language preference
• Including the JSPs that comprise the main template
You can find the full source code for the adminTemplate.jsp file in the WEBINF>classes>resources>lmm directory. The code below is an excerpt from this file.
Defining a page as a JSP
Chapter 5: Customizing JavaServer Pages 23
Page 29

The first block of executable code is a page directive that applies to the entire page and specifies
the language of the page as Java and sets the MIME type and character encoding to use for the
response:
<%@ page language="java" contentType="text/html;charset=UTF-8" %>
Including tag library descriptor files
The next block of code is made up of taglib directives. These identify the names of the tag
libraries associated with the page. They also identify the prefixes to use before tags from each
library.
<%@ taglib uri="/WEB-INF/tld/Struts-bean.tld" prefix="bean" %>
<%@ taglib uri="/WEB-INF/tld/Struts-html.tld" prefix="html" %>
<%@ taglib uri="/WEB-INF/tld/Struts-logic.tld" prefix="logic" %>
<%@ taglib uri="/WEB-INF/tld/lms.tld" prefix="lms" %>
Referencing Struts tags
The next line of code is an html tag from the Struts-html tag library. The “html” before the colon
is the prefix representing the Struts-html tag library and the “html” after the colon represents the
tag in that library named html:
<html:html locale="true">
The value “true” in the locale attribute indicates to set the current locale for the user if needed.
This prompts the servlet to retrieve the locale from the requesting browser. The value returned
determines which language-version resources to use for the rest of the session.
Localizing page content
The next group of tags makes up the head HTML tag. The META tag defines the character set to
use for the HTTP response message header. In the next line, we see another JSP tag at work. The
message tag in the lms tag library is programmed to retrieve the resource key specified in the key
attribute from the .properties resource file and display it on the page. Since the content of the
application.title resource key in the ApplicationResource.properties file for the LMM application
contains the text, “IBM Lotus Learning Management System,” this is text that displays as the title
on the adminTemplate page. See “Updating page text.”
<head>
<META http-equiv="Content-Type" content="text/html;charset=UTF-8">
<title><lms:message key="application.title" /></title>
Including standard JSP actions
The next line of code is a standard JSP action called the getProperty tag. This tag and any others
that have a jsp prefix are standard JSP actions and are available for use in all JSPs. See the
JavaServer Pages 1.2 Specification downloadable from
http://www.jcp.org/aboutJava/communityprocess/final/jsr053/for more details. The
getProperty tag initializes a JavaBean, which is a reusable Java component, and retrieves a
property from it.
Determining the user’s browser type and language preference
The property being requested, the “styleSheetLink” property, contains the name of the
appropriate CSS file to apply to the page based on the type of browser that is submitting the user
request.
<jsp:getProperty name="BrowserSniffer" property="styleSheetLink"/>
24 IBM Lotus Learning Management System Release 1 Customization Guide
Page 30

Including JavaScript source code
The next two script tags incorporate the JavaScript source files tree.js and script.js into the page so
that functions contained in these JS files can be called from the page.
<script language="JavaScript" src="js/tree.js"></script>
<script language="JavaScript" src="js/scripts.js"></script>
The chunk of JavaScript code between the <script> and </script> tags refreshes the window to
apply the styles of the CSS file specified by the Bean to the page, then adds functionality to
determine the number of results to return when searches are performed.
Including the JSPs that comprise the main template
The body of the page includes several other JSP pages that constitute the sections making up the
adminTemplate page. The first two pages included are the adminHeader and adminNavItems
JSPs. Another standard JSP action, the include tag, is used to incorporate the adminHeader.jsp
and adminNavItems.jsp files. The HTML table, tr, and td tags help to structure the layout of the
content.
<body leftmargin="0" topmargin="0" marginwidth="0" marginheight="0"
onUnload="unload();" onLoad="<%= onLoad %>" >
<%---------------------------------------------------------------------
--------------
The first jsp page to include is adminHeader, which contains the logo
image and
preferences buttons.
After that, the adminNavItems page includes all of the main tabs
----------------------------------------------------------------------
------------%>
<table width="100%" border="0" cellspacing="0" cellpadding="0"
background="">
<tr>
<td background="images/bckPrimHeader.jpg">
<table width="100%" border="0" cellspacing="0" cellpadding="0">
<tr>
<td><jsp:include page="adminHeader.jsp" flush="true"/></td>
</tr>
<tr>
<td valign="bottom" background=""><br><jsp:include
page="adminNavItems.jsp"
flush="true"/></td>
</tr>
</table>
</td>
</tr>
</table>
In the following piece of code, the JSP uses a JavaBean to query the request to determine if the
current navigation mode is the student home page. If it is, the studentHomeNavigation.jsp is
included in the page also. This piece of code demonstrates how Struts-logic.tld tags work. The
logic:match tag checks if the value of the navKey variable, which checks the request for the
Chapter 5: Customizing JavaServer Pages 25
Page 31

current navigation mode, is equal to “studenthome.” If it is, the jsp:include tag within the
logic:match tag is executed.
<bean:define id="navKey"
value="<%=com.lotus.elearn.navigation.NavigationUtil.getNavKey(request)
%>"/>
<logic:match name="navKey" value="studenthome" location="start">
<td width="190" valign="top">
<jsp:include page="studentHomeNavigation.jsp" flush="true"/>
</td>
<%---------------------------------------------------------------------
--------------
This table cell controls the margin between the student navigation and
the content
area.
----------------------------------------------------------------------
------------%>
<td width="3"><lms:spacer width="3" height="1" /></td>
</logic:match>
Otherwise, the next table row included in the page contains the adminTask.jsp. This table row is
followed by some empty rows to add space between frames.
<tr>
<td class="formBoxTitleBg" colspan="3" valign="middle" nowrap>
<jsp:include page="adminTask.jsp" flush="true"/>
</td>
</tr>
The next table row checks again to make sure the current navigation mode is not studenthome. If
it is not, it then checks to make sure the current navigation mode is not invalidForm. If it is not, it
includes the adminLocation.jsp.
<tr><td class="formBoxBg" width="15"><lms:spacer width="15"
height="1" /></td>
<td class="formBoxBg">
<logic:notMatch name="navKey" value="studenthome"
location="start">
<logic:notPresent name="invalidForm">
<jsp:include page="adminLocation.jsp" flush="true"/>
</logic:notPresent>
</logic:notMatch>
The final section of code includes the adminContentPage.jsp:
<div class="formBoxPositionInner">
<jsp:include page="adminContentPage.jsp" flush="true"/>
</div>
</td>
26 IBM Lotus Learning Management System Release 1 Customization Guide
Page 32

<td class="formBoxBg" width="15"><lms:spacer width="15"
height="1" /></td>
</tr>
</table>
</td>
</tr>
</table>
</td>
</tr>
</table>
</body>
</html:html>
The content of the adminContentPage.jsp is determined by the navKey value in the request.
This is the source code for the adminContentPage:
<%---------------------------------------------------------------------
-------------adminContentPage.jsp
This is the page that includes the appropriate content page based on
the current nav param
-----------------------------------------------------------------------
------------%>
<%@ taglib uri="/WEB-INF/tld/Struts-bean.tld" prefix="bean" %>
<%@ taglib uri="/WEB-INF/tld/Struts-logic.tld" prefix="logic" %>
<%@ taglib uri="/WEB-INF/tld/lms.tld" prefix="lms" %>
<%---------------------------------------------------------------------
--------------
If there is no nav param, then we are in an invalid state, probably
because of the back button, or a bookmark. In that case, simply
forward to the invalid form page
----------------------------------------------------------------------
------------%>
<logic:notPresent name="invalidForm">
<lms:navUtil id="contentPage" property="contentPage"/>
<%-- This anchor is here for accessibility. DO NOT REMOVE IT --%>
<a name="#navskip"></a>
<jsp:include page="<%=pageContext.getAttribute(\"contentPage\")%>"
flush="true" />
</logic:notPresent>
<logic:present name="invalidForm">
<jsp:include page="invalidForm.jsp" flush="true" />
</logic:present>
Again, the taglib directives are used to include the lms and Struts tag libraries. Then the navUtil
tag of the lms library is called. This tag looks at the page specified as the current page by the
navigationControllerBean. Using the “property” attribute of the navUtil tag, it then requests the
value of the “contentPage” property of the Bean. Since the id attribute of the navUtil tag is also
Chapter 5: Customizing JavaServer Pages 27
Page 33

specified with a value of “contentPage,” the returned value is stored in a pageContext object
variable that can be referenced later in the page as a variable called “contentPage.” If no value is
returned by the navigationControllerBean, the invalidForm.jsp page displays. Otherwise, the
appropriate page for the current navigation mode in the application displays. The JSP include
action determines which page to display by retrieving the contentPage attribute of the
pageContext object variable, which was just set by the lms:navUtil tag.
Delivery server
The Delivery server has a framing JSP named delivery.jsp. This page contains resizable frames
made up of the system.jsp, courseTree.jsp, courseTools.jsp, and activity.jsp files. Each JSP has a
corresponding frameID value that is used by the doReloadFrame tag of the delivery-js tag library
to determine how to populate a frame when it needs to be reloaded because of an action that
occurred in another frame. The activity.jsp contains the activityTools.jsp and appropriate page
content. Stepping through the source code of the delivery JSP illustrates how to perform standard
JSP tasks, such as:
• Including tag library descriptor files
• Including JavaScript source code
Looking at the delivery.jsp source code also illustrates how the following tasks are handled by
the Delivery server in particular:
• Localizing page text
• Populating a frameset in a JSP
• Displaying errors to the user
• Defining resizable frames
The source code for the delivery.jsp file is stored in the WEB-INF>classes>resources>ds
directory.
Including tag library descriptor files
The page and taglib directives specify that the page contains Java code and that, like the
adminTemplate.jsp, a Struts tag library is included, the Struts-bean.tld file. Unlike the
adminTemplate, the delivery.tld and delivery-js.tld files are associated with the page, instead of
the lms tag library.
<%@ page language="java" contentType="text/html;charset=UTF-8" %>
<%@ taglib uri="/WEB-INF/tld/delivery.tld" prefix="delivery" %>
<%@ taglib uri="/WEB-INF/tld/delivery-js.tld" prefix="js" %>
<%@ taglib uri="/WEB-INF/tld/Struts-bean.tld" prefix="bean" %>
Localizing page text
The title of the page is located in the DeliveryResources.properties file in the WEBINF>classes>resources>ds>properties directory, which contains the following resource key:
ds.application.title= IBM Lotus Learning Management System
Note that the message tag that is being used to define the key to retrieve from the .properties file
is using the “delivery” prefix. This indicates that the message tag resides in the delivery.tld file.
<html>
<head>
<meta http-equiv="Content-Type" content="text/html; charset=UTF-8">
<title><delivery:message key="ds.application.title"/></title>
28 IBM Lotus Learning Management System Release 1 Customization Guide
Page 34

Including JavaScript source code
The next piece of code includes the JavaScript code from the ds>js>delivery.js file in the page so
that the functions in the code can be called from the current page.
<script language="JavaScript" src="js/delivery.js"></script>
Populating a frameset in a JSP
The next chunk of code uses the doReloadFrame, frame, and action tags from the delivery-js.tld
file to create a JavaScript function that correctly reloads the specified frame when an action
occurs in another frame.
<js:doReloadFrame>
<js:frame
name="system"><delivery:action>system</delivery:action></js:frame>
<js:frame
name="courseTree"><delivery:action>courseTree</delivery:action></js:fra
me>
<js:frame
name="courseTools"><delivery:action>courseTools</delivery:action></js:f
rame>
<js:frame
name="activity"><delivery:action>activity</delivery:action></js:frame>
</js:doReloadFrame>
Displaying errors to the user
The next chunk of code uses the define tag of the Struts-bean tag library to retrieve the context
parameter of the delivery_context JavaBean. The code inside the script opening and closing tags
is JavaScript code that defines the load function which reports any errors generated by the
context parameter. If errors are encountered, the code displays the errors in an alert box on the
page.
<bean:define id="context" name="delivery_context" scope="request"
type="com.lotus.elearn.delivery.DeliveryContext"/>
<script language="Javascript">
var mainDeliveryServerFrame = true;
var contentWindow = null;
var API = null;
function load()
{
<% if (context.getErrorMessageKey() != null) { %>
alert("<delivery:errorMessage
key="<%=context.getErrorMessageKey()%>" filter="false"/>");
<% } %>
API = window.frames['system'].document.applets['api-adapter'];
}
</script>
</head>
Chapter 5: Customizing JavaServer Pages 29
Page 35

Defining resizable frames
The final chunk of code defines the sizes of the resizable frames on the page:
<frameset onload="load()" rows="44,*" frameborder="yes" border="4"
framespacing="4">
<frame name="system" src="<delivery:action>system</delivery:action>"
marginwidth="0" marginheight="0" scrolling="no" noresize>
<frameset cols="199,*" frameborder="yes" border="4" framespacing="4">
<frameset rows="*,187" frameborder="yes" border="4"
framespacing="4">
<frame name="courseTree"
src="<delivery:action>courseTree</delivery:action>"
marginwidth="0" marginheight="0" scrolling="auto">
<frame name="courseTools"
src="<delivery:action>courseTools</delivery:action>"
marginwidth="0" marginheight="0" scrolling="auto">
</frameset>
<frame name="activity"
src="<delivery:action>activity</delivery:action>"
marginwidth="0" marginheight="0" scrolling="no">
</frameset>
</frameset>
</html>
The activity.jsp contains a frameset for the activityTools.jsp and page content. The source code for
the activity.jsp follows:
<%@ page language="java" contentType="text/html;charset=UTF-8" %>
<%@ taglib uri="/WEB-INF/tld/delivery.tld" prefix="delivery" %>
<%@ taglib uri="/WEB-INF/tld/delivery-js.tld" prefix="js" %>
<html>
<head>
<meta http-equiv="Content-Type" content="text/html; charset=UTF-8">]
<js:doReloadFrame>
<js:frame
name="activityTools"><delivery:action>activityTools</delivery:action></
js:frame>
<js:frame
name="content"><delivery:action>content</delivery:action></js:frame>
</js:doReloadFrame>
</head>
<frameset rows="26,*" frameborder="no" border="0" framespacing="0">
<frame name="activityTools"
src="<delivery:action>activityTools</delivery:action>"
marginwidth="0" marginheight="0" scrolling="no" noresize>
<frame name="content"
src="<delivery:action>content</delivery:action>"
marginwidth="0" marginheight="0" scrolling="auto">
30 IBM Lotus Learning Management System Release 1 Customization Guide
Page 36

</frameset>
</html>
The body of the delivery:action tag identifies the action used to display the frame. The body
maps to the action path in the Struts-config.xml file on the Delivery server. The JSP defined in the
path attribute of the forward tag is the JSP to display in the frame if the action results in that
forward. For example, the activityTools delivery:action tag corresponds to the following action
mapping:
<action path="/activityTools"
type="com.lotus.elearn.action.delivery.FrameActivityToolsAction">
<forward name="success" path="/activityTools.jsp" />
</action>
The type attribute of the action defines the FrameActivityToolsAction as the action handler. Once
the action is handled, the handler returns a forward value. If the forward it returns is “success,”
the mapping identifies activityTools.jsp as the page to display in the frame.
The URL of the page to display in the content frame is either:
• If the action handler determines that there is content to display, the base URL supplied by
the content package and any other parameters needed to track the content define the page
to display.
• If there is no content to display, the frame displays a JSP that contains details of the
activity currently selected in the activityTools frame. The frame determines which page to
display based on the content action mapping in the Struts-config.xml file. The content
action mapping entry follows:
<action path="/content"
type="com.lotus.elearn.action.delivery.FrameContentAction">
<forward name="faceToFaceDetails"
path="/activityDetailsFaceToFace.jsp" />
<forward name="genericDetails" path="/activityDetailsGeneral.jsp" />
<forward name="lvcDetails" path="/activityDetailsLVC.jsp" />
<forward name="topicDetails" path="/topicDetails.jsp" />
<forward name="courseDetails" path="/courseDetails.jsp" />
</action>
This mapping instructs the content frame to display one of the following pages, depending on the
current activity:
• If the activity is a course, courseDetails.jsp
• If the activity is a topic, topicDetails.jsp
• If the activity is a face-to-face exercise, activityDetailsFaceToFace.jsp
• If the activity is a live chat, activityDetailsLVC.jsp
• If it is any other activity, activityDetailsGeneral.jsp
Making global changes
You can make changes that apply to all the JSPs on a given server in the following areas:
• Application style
• Page text
Chapter 5: Customizing JavaServer Pages 31
Page 37

• Images
Applying customization sets
When you create a customization set, you create a new branch in the application directory to
house the files that contain alternative resources for the application, including graphics, style
sheets, and .properties files. For details, see “Creating customization sets.”
This chapter, which describes customizing JSPs, defines how to add and edit graphics,
.properties, and CSS files. In the procedures that follow, steps are provided for adding and
editing files in the standard directory. If you are adding or editing files in a customization set,
complete the following steps in addition to those defined in the subsequent topics:
1. From the Settings module of the Administrator interface, click Manage Customization
Sets.
2. From the list of customization sets, select the set you are editing and click the Edit
button.
The Edit Customization Set window displays.
3. Select one of the following checkboxes:
• Use CSS: Overrides the default CSS files with the CSS files in the customization set
subdirectory.
• Use text: Overrides the default .properties files with the .properties files in the
customization set subdirectory.
• Use custom images: Overrides the default image files with the image files in the
customization set subdirectory.
4. Click the Save button at the bottom of the dialog box.
Changing the application style
The default global styles of the JSPs that make up the LMS application, their background colors
and font styles, for example, are defined by a set of cascading style sheets (CSS files). To change
the global style of the application, you can edit the existing CSS files or add your own to the
application. To change the style of a single JSP, see “Changing the style of an individual JSP.”
Note: Most of the existing pages in the LMS application contain HTML and custom JSP tags with
class or id attributes that correspond to styles in existing CSS files. If you delete a class or id from
an existing CSS file, you must remove the references to it from each JavaServer Page that uses it.
For example, the table cell element tag, <td class="formBoxBg" width="15">, which displays in
the adminTemplate.jsp, is an HTML tag that calls the formBoxBg class defined in the general.css
file to set the table cell background color. If you delete the formBoxBg class from the general.css
file or delete the general.css file and do not provide a replacement definition or file, this will
result in unpredictable formatting for any elements referencing that class on the page.
Each server has a separate set of CSS files for the application it hosts. The Learning Management
System server, Delivery server, and Offline Learning Client server each have their own set of CSS
files. These are broken down into:
• Language-version: Based on the locale code specified in the browser request
• Browser-type: Based on the browser with which the user accesses the application
The BrowserSniffer Bean, which determines what type of browser the current request is coming
from, is called from the initial pages in the application. This Bean also reads the locale attribute of
the browser request. Based on this information, it applies the appropriate version of the CSS files
to the current and subsequent pages. For example, the BrowserSniffer Bean is called from the
32 IBM Lotus Learning Management System Release 1 Customization Guide
Page 38

adminTemplate.jsp page, which is the page that defines the format for most of the pages on the
Learning Management System server. For more information on the adminTemplate.jsp, see “The
Anatomy of an LMS JSP.”
The file directory containing the CSS files is structured as follows:
[serverName]>css>[languageCode]>[browserType]
where [serverName] equals one of the following:
• lmm: Represents the Learning Management System server.
• ds: Represents the Delivery server.
• duc: Represents the Offline Learning Client server.
See the definitions of the [languageCode] and [browserType] directory names below.
Language-version
The LMS application directory contains CSS files for multiple languages. Having separate CSS
file sets for each supported language enables you to design pages that are aesthetically familiar to
different cultures. For example, you can change a background color that is considered offensive
to one culture to a more appropriate color in the corresponding language-version CSS file. The
only difference in the CSS files that are included by default with the LMS application is in the
reading orders assigned to the INPUT and TEXTAREA elements. The Arabic CSS file (found in
the “ar” directory) sets the reading order from right to left. All other CSS language files set the
reading order from left to right.
The [languageCode] directory name is supplied as a two character language code. For example,
English is represented by “en,” Spanish is represented by “es,” and German is represented by
“de.”
Browser-version
The IBM Lotus Learning Management System supports Microsoft Internet Explorer, version 5.5
and later and Netscape, version 6.0 and later. The application supports separate style sheets for
each browser because a single format setting can often display differently in each browser. To
keep a consistent look and feel, you can tweak the format settings in each browser-version CSS so
that the page displays alike to the user regardless of which browser is accessing it.
The [browserType] directory name can be supplied as either of the following:
• styInternetExplorer5: Represents Internet Explorer, version 5.5 or later
• styNetscape6: Represents Netscape, version 6 or later
Note: To keep the application consistent, if you make a change that is not language- or browserspecific to one CSS file set, duplicate that change across all of the CSS file sets. You can also
remove CSS files for languages you do not intend to support.
Editing existing CSS files
To edit a CSS file:
• Open the CSS file you want to change in a text editor, then make and save your changes.
Any changes you make to an existing style are reflected in any JSP that references that style.
Before making changes, be sure to know where the styles you are updating are used and that no
JSPs will be disrupted by the changes.
Chapter 5: Customizing JavaServer Pages 33
Page 39

Adding your own CSS files
You can add your own CSS files for use in the application. You can reference styles from custom
files in addition to the styles included in the CSS files that come with the LMS application by
default.
To add a CSS file:
1. Copy your custom CSS file into the
[serverName]>css>[languageCode]>[browserType] directory.
If you are adding a CSS file to a customization set, copy your custom CSS file into the
[serverName]>customSetName>css>languageCode>browserType directory. See
“Applying customization sets.”
This directory also contains a general.css file.
2. Open the general.css file in a text editor.
3. Edit general.css to include the following directive:
@import url(myStyles.css);
where myStyle.css is the name of the CSS file you are adding to the directory.
4. Repeat this step for each CSS file you want to include. Remember to duplicate these
changes in the CSS file sets in the corresponding directories of each language and
browser the application supports.
Replacing CSS files
You can replace all existing CSS files with your own CSS files for use in the application.
To replace the CSS files:
1. Copy your custom CSS file into the
[serverName]>css>[languageCode]>[browserType] directory.
If you are replacing a CSS file in a customization set, copy your custom CSS file into the
[serverName]>customSetName>css>languageCode>browserType directory instead. See
“Applying customization sets.”
This directory also contains a general.css file.
2. Open the general.css file in a text editor.
3. Remove all content from the file. Add only the following statement:
@import url(myStyles.css);
where myStyle.css is the name of the CSS file you are adding to the directory.
4. Repeat this step for each CSS file you want to include. Remember to duplicate these
changes in the CSS file sets in the corresponding directories of each language and
browser the application supports.
Changing the font size or font style of the application
To apply a global change, such as increasing the default font size of the text in the application or
changing the font style, you can edit the CSS files. The default font style and size are defined at
the beginning of the CSS. For example, the English-version, IE5 general.css file for the lmm server
contains the following entry:
*{
font-family:Verdana,Arial,Sans-Serif;
font-size:xx-small;
}
34 IBM Lotus Learning Management System Release 1 Customization Guide
Page 40

To increase the default font size, change the “font-size:” value from xx-small to small or medium.
To change the font style, replace the values in the “font-family:” setting with the fonts you want
the application to use.
Several of the classes in the CSS specify specific font sizes and styles that you have to change
individually. These include the SPAN.hdrGeneral, DIV.hdrMainItem001, TD.hdrFolderDetails,
and many other classes. If you want to change the font size of an item that has a class style
assigned to it, search the CSS files for the class name to see if a specific font size has been
assigned to that item and change it in the class definition of the CSS file.
Updating page text
The power of a JSP lies in its ability to supply dynamic content. The LMS application takes
advantage of this ability by resourcing much of the text on the pages of the application in
properties files (which are files named with a .properties extension). Instead of placing static text
in the source HTML for the page, you can reference a resource key in a .properties file that
contains the translated value. You can then set up the application to retrieve different .properties
files based on the locale of the browser or user preferences. This way, you can cater the text to
specific user types. Storing text strings in .properties files is especially useful for maintaining
multiple language applications.
The LMS application uses .properties files to define static text for errors and resources in each of
the servers hosting the application. The .properties files are stored in the following directory:
[serverName]>WEB-INF>classes>resources>[serverName]>properties
where [serverName] equals one of the following:
• lmm: Represents the Learning Management System server.
• ds: Represents the Delivery Server.
• duc: Represents the Offline Learning Client server.
Each properties directory contains the following two .properties files:
• ApplicationErrors.properties: Contains the resource keys for error messages.
• ApplicationResources.properties: Contains the resource keys for application resources.
A set of these files is available for each language supported by the application. The language of
the .properties file is specified by an underscore followed by the language code after the file
name. For example, the German ApplicationErrors .properties file is named
ApplicationErrors_de.properties. This naming convention is followed for all the .properties files,
except the English-language version .properties files, which are the default .properties files for
the application. The English-language .properties files have no underscore and language code
following the file names.
The .properties files in the IBM Lotus LMS application are located in the directories listed in the
table below. The files listed are English-version files, so there are no language codes attached to
the file names.
IBM Lotus Learning Management System application properties files
Server Name Directory English-Language .properties Files
Learning
Management System
Delivery WEB-
Offline Learning
Client
WEBINF>classes>resources>lmm>properties
INF>classes>resources>ds>properties
WEBINF>classes>resources>duc>properties
ApplicationErrors.properties
ApplicationResources.properties
ApplicationErrors.properties
ApplicationResources.properties
ApplicationErrors.properties
ApplicationResources.properties
Chapter 5: Customizing JavaServer Pages 35
Page 41

A number of the tags in the lms custom tag library, such as the button or img tags, contain
attributes that reference .properties file entries to supply language-specific text on the page. One
tag, the message tag, is specifically designed to retrieve .properties file entries. For example, the
title of the adminTemplate.jsp is supplied using the message tag. Instead of defining its title as
<title>IBM Lotus Learning Management System</title>, the adminTemplate.jsp specifies the
content of the HTML title tag as follows:
<title><lms:message key="application.title" /></title>
<lms:message … /> contains the backend code that looks up the string value to display on the
page. The key attribute of the message tag, key=”application.title,” defines the resource key in the
.properties file to retrieve. In this example, the resource key to retrieve is the application.title
resource key. At request time, the server executes the Java code specified in the message tag, it
determines which .properties file to associate with the current browser, and then retrieves from it
the resource key supplied by the key attribute. Since the ApplicationResource.properties file
contains the following resource key:
application.title = IBM Lotus Learning Management System
the title that displays on the adminTemplate JSP is “IBM Lotus Learning Management System.”
Using the message tag, you enable the application to dictate which text to display. For example,
the .properties file could supply the title in Spanish if the locale code specified by the browser
request is the Spanish language code “es.” In this case, the application retrieves the
application.title resource key from the ApplicationResource_es.properties file which can be set up
to contain a Spanish-language version of the title.
You can edit existing .properties file entries or add new entries to existing files. Any changes you
make to .properties file entries are reflected in any JSPs that references those entries.
To edit page text:
1. Open the .properties file for the language code you want to edit from the WEBINF>classes>resources>[serverName]>properties directory in a text editor.
If you are editing .properties files in a customization set, open the .properties file from the
[serverName]>WEB-INF>classes>resources>[serverName]>customSetName>properties
instead. See “Applying customization sets.”
2. Edit the resource key you want to change, then save and close the file.
3. Ask the server administrator to refresh the file on the server. Your changes are not
visible until this step is completed.
Adding and replacing graphics
You can add or replace the default graphics that display in the LMS application with your own
custom graphics files.
To add graphics:
1. Add a new image file by copying it into the [serverName]>images directory.
If you are adding a graphics file to a customization set, copy it to the
[serverName]>customSetName>images directory. See “Creating a customization set.”
2. Rewrite any references to the old file name with the new graphic file name.
For example, if the new graphic file is called userName.gif, you can replace the following
tag:
<lms:link><lms:img src=”images/name.gif”… /></lms:link>
with:
<lms:link><lms:img src=”images/userName.gif” … /></lms:link>
36 IBM Lotus Learning Management System Release 1 Customization Guide
Page 42

To replace graphics:
• Replace the existing image file in the [serverName]>images directory with the image you
prefer to use. Retain the original image’s file name.
Replacing the application logo
The standard IBM Lotus Learning Management System logo which displays in the header of the
application pages is included using custom tags. This section defines how the following servers
specify the graphic files and alternate text they use for their logos:
• Learning Management System server
• Delivery server
Learning Management System server
The graphic to use as the application logo for the Learning Management System server is defined
in application source code that is not editable. You cannot access this code. The Java code
triggered by the lms:logo tag retrieves the “lmsBrandingLogo.gif” graphic from either the
standard lmm>graphics directory or the customization set subdirectory, if the application has
been set up to use custom images.
The adminHeader JSP includes the lms:logo tag as follows:
<td width="93%" class="ancLogoPlacement" valign="top">
<a href="#navskip">
<lms:img src="images/px.gif" altKey="header.skipToMainContent"/>
</a>
<lms:logo altKey="image.alt.logo" />
</td>
To replace the graphic used for the logo on the Learning Management System server, follow
these steps:
1. Rename the replacement graphic to “lmsBrandingLogo.gif.”
2. Rename (or remove) the existing lmsBrandingLogo.gif file.
3. Add the graphic file by copying it to the [serverName]>images directory.
If you are adding the logo graphic to a customization set, copy it to the
[serverName]>customizationSetName>images directory. See “Applying customization
sets.”
The altKey attribute of the lms:logo tag defines the text to display as alternate text for
accessibility compliance. The value for the key is the name of the .properties file resource key to
retrieve and display as the alternate text for the image. The altKey attribute above contains
image.alt.logo. The English-version ApplicationResources.properties file for the lmm server
contains the following resource key:
image.alt.logo = IBM Lotus Learning Management System
If you change the logo to display a custom company logo, you may also want to change the
image.alt.logo resource key in the .properties file to contain a text string that is compatible with
the change.
Delivery server
The Delivery server includes the logo using the delivery:logoURL tag. The Java code triggered by
this tag takes a parameter that defines the graphic file to use as the logo. You can supply this
parameter by editing the resource attribute of the logoURL tag.
The system.jsp file includes the delivery:logoURL tag as follows:
Chapter 5: Customizing JavaServer Pages 37
Page 43

<td width="93%" class="systemLogoPlacement" valign="top">
<img src="<delivery:logoURL
resource="images/lmsBrandingLogo.gif"/>"
alt="<delivery:message key="ds.application.title"/>"
width="209"
height="22">
</td>
To replace the graphic used for the logo on the Delivery server, follow these steps:
1. Add the graphic file by copying it to the [serverName]>images directory.
If you are adding the logo graphic to a customization set, copy it to the
[serverName]>customSetName>images directory. See “Applying customization sets.”
2. Replace the resource attribute value with the name of the replacement graphic file.
For example, if the logo graphic is called, “myCompanyLogo.gif,” rewrite the logoURL
tag to read:
<delivery:logoURL resource=”images/myCompanyLogo.gif”/>
To edit the alternate text for the logo image, follow these steps:
1. Add a text string to display as alternate text for the logo image to the appropriate
.properties files.
2. Replace the value of the key attribute with the resource key for the text value you just
added the .properties files.
Changing individual JSPs
You can make the following changes to individual JSPs:
• Changing a JSP’s style
• Altering a JSP’s functionality
Changing the style of an individual JSP
You can change the style of an individual JSP by replacing the references to CSS styles on an
HTML or JSP tag with either static HTML or with references to custom styles defined in a new or
edited CSS file.
Replacing a reference to a CSS style
In the adminTask.jsp, the following table cell element displays a Help icon that links to a contextsensitive Help document:
<td class="hdrHelpIcon">
<a href="javascript:openContextHelp('<lms:getHelpPage/>')">
<lms:img src="images/help_jc_16.gif" altKey="help.select"/>
</a>
</td>
“hdrHelpIcon” corresponds to the TD.hdrHelpIcon entry in the general.css file for the Learning
Management System server. The English-version, IE5-compatible CSS defines the
TD.hdrHelpIcon entry as follows:
TD.hdrHelpIcon{
text-align:right;
38 IBM Lotus Learning Management System Release 1 Customization Guide
Page 44

}
To customize the Help icon to align left instead of right, either:
• Replace the class attribute with static HTML to define the alignment of the text as follows:
<td align=”left”>
This option works for quick fixes, but requires that you edit each individual setting any
time you want to update an alignment style. Alternatively, if you reference a CSS class, by
changing the setting in one place only -- the CSS class entry, you can update all references
at once.
• Create a new entry to the general.css file or in a custom CSS file* included in the
general.css file, called hdrHelpILeft and define it as follows:
TD.hdrHelpILeft{
text-align:left;
}
Reference the new entry in the page using the following syntax:
<td class=”hdrHelpILeft”>
(*For information on creating a custom CSS file, see “Adding your own CSS file.”
A third option is to edit the existing hdrHelpIcon class entry in the CSS to contain the following
description:
TD.hdrHelpIcon{
text-align:left;
}
However, this option would change the definition of the class globally instead of changing it
within the scope of a single JSP. For more information on global style changes, see “Changing the
application style.”
Changing the functionality of an individual JSP
You can change how an individual JavaServer Page functions by editing or removing its JSP tags.
)
Editing existing JSP tags
You can change how a JavaServer Page functions by editing its JSP tags. You can change the
values set for a JSP’s attributes, remove non-required attributes, or add attributes that are
attributed to the tag in the TLD file, but are not included in the tag.
For example, editing the attributes of the lms:button tag drastically changes the behavior of the
resulting button on a JSP. Depending on the attributes supplied, the lms:button tag can navigate
through the application, submit forms or cancel form submission. Likewise, the attributes you
supply with an lms:hidden tag can determine whether you are setting or getting values from the
JSP’s associated form Bean.
Specifying the next page to display
This code, for a Continue button on the catalogCreateCourseConfirm JSP, uses the nav attribute
to define the next action to perform.
<lms:button captionKey="button.continue" nav="<%=setFolderKey%>"
tooltipKey="button.alt.continue"/>
Once clicked, this button launches the page defined in the setFolderKey variable on the current
page.
Chapter 5: Customizing JavaServer Pages 39
Page 45

Submitting a form
If you remove the nav attribute and add an onClick attribute, you completely change the
functionality of the button. This code, for the Login button on the loginForm JSP for the Learning
Management System server, executes a JavaScript submitForm() function when the button is
clicked. This effectively logs the user into the application.
<lms:button captionKey="button.login"
onClick="javascript:submitForm('loginForm');"
tooltipKey="button.login"/>
The Login button on the deliveryLoginForm JSP for the Delivery server contains similar code:
<lms:button captionKey="ds.toolbar.login"
onClick="javascript:submitForm();"
tooltipKey="ds.toolbar.login"/>
Canceling the submission of a form
If you remove the onClick attribute and add an isSubmit attribute set to false, the button now
specifically prevents the entries on the current form from being saved. This code, for a Cancel
button on the assignVendor JSP, sets the isSubmit attribute to false. It includes an href attribute
that contains JavaScript code which instructs the current window to close when the button is
clicked.
<lms:button captionKey="button.cancel" isSubmit="false"
tooltipKey="button.cancel"
href="javascript:window.close()"/>
To edit a tag:
1. Look at the TLD file referenced by the prefix of the tag you want to edit.
This contains a list of attributes associated with the tag.
2. Edit the JSP tag to add, remove, or change the values of the tag’s attributes.
Note: Do not remove required attributes. The TLD file identifies attributes that are
required by specifying “true” in the body of the <required> tag.
For more information on looking at the TLD file to see a tag’s attributes, see “The anatomy of a
TLD file.”
Editing form Bean values with the lms:hidden tag
The lms:hidden tag is a tag that produces an HTML input tag with a type attribute value set to
“hidden.” This tag enables you to get and set values in the form Bean (which is a Java component
that, among other things, saves user input) associated with the current form.
The name attribute identifies the form Bean. The property attribute represents a property setting
in the form Bean. The value attribute sets the input tag values, which can be later saved to the
form bean. If you do not supply a value attribute, the HTML input tag gets values for specified
properties from the form Bean.
The following code creates a hidden HTML input tag. Because a value attribute is supplied, the
resulting input tag sets the “destination” property of the form Bean associated with the
assignVendor.jsp to that value. The value is set using a JSP expression that gets the value of the
destination parameter from the user request:
<lms:hidden property="destination"
value='<%=request.getParameter("destination")%>'
/>
40 IBM Lotus Learning Management System Release 1 Customization Guide
Page 46

If no value attribute were supplied, the hidden input tag would retrieve a value for the
destination property from the form Bean.
The following lms:hidden tag, which is used in the catalogCourseMasterDetail.jsp keeps a copy
of the current form’s keywords in the form Bean by supplying values for the name and property
attributes.
<lms:hidden name="<%=formName%>" property="unmodifiedKeywords" />
This is useful because, if a user encounters an error or otherwise leaves the form temporarily, the
keywords can be repopulated with the values saved in the form Bean.
The following lms:hidden tag, which is used in the catalogCreateCourseConfirm.jsp, creates an
HTML hidden input tag that captures the userEvent property.
<lms:hidden property="userEvent" />
This property can be modified by JavaScript triggered by user actions. For instance, JavaScript in
the catalogTrailHeader.jsp, which is included in the catalogCreateCourseConfirm.jsp, can
reassign a value to the userEvent property when a user clicks a button to initiate a new event.
Removing JSP tags
You can remove a JSP tag from a JavaServer Page by deleting the tag and its associated HTML
formatting tags from the page. Removing JSP tags does not only remove elements like buttons
and fields from the page, but also removes associated functionality. For example, if you want to
remove the ability for users to add custom fields to a Course Details page, you can eliminate the
labels, fields and buttons that support this functionality.
The JSP that represents the Course Catalog>Register Course Entry>Course>Course
Master>Course Details page in the Administrator interface is the catalogCourseEntryDetails.jsp.
This page contains code that displays a popup window in which you can add, delete, or edit
custom fields. The source code resides in the WEB-INF>classes>resources>lmm>
catalogCourseEntryDetails.jsp directory and begins at line 167 with the following commented out
text:
<%-//////////////////////////////////////
// custom fields
//////////////////////////////////////
--%>
The section of code that displays the Custom Fields section of the page ends with line 283, which
contains the code:
</logic:iterate>
Removing the 115 lines of code between these two points removes the “Custom Fields” section
header, the Edit button with its Custom Fields label, and the list of existing custom fields from
the Course Details page.
The Custom Field Header section of the code uses an lms:message tag to reference the
appropriate .properties file to supply the header label:
<lms:message key="catalog.createEntry.details.customFieldDetails"/>
The next section of code, Manage Custom Fields, uses the lms:message tag to supply the text in
the customFields resource key of the appropriate .properties file and the lms:label tag to situate
the label in the correct place on the page:
<lms:label for="customFields"><lms:message
key="catalog.attrib.course.customFields"/></lms:label>
It then includes an lms:button tag. This tag displays a button on the page. The “captionKey”
attribute defines the text to display as a label on the button by retrieving the button.edit resource
Chapter 5: Customizing JavaServer Pages 41
Page 47

key from the appropriate .properties file. Similarly, the “tooltipKey” attribute defines the
resource key to retrieve for display in the window status bar when the button is moused over to
define the action the button performs. The “href” attribute defines the action to perform when the
button is clicked. This href calls the customFieldsPopup() function, which is Javascript code that
is defined in the page header. Setting the “secondary” attribute to true diminishes the visibility of
the button by changing it to a duller color:
<lms:button captionKey="button.edit"
tooltipKey="button.alt.manageCustomProperties"
href="javascript:customFieldsPopup();"
secondary="true"/>
The last section of code displays a list of any existing custom fields stored in the application.
This piece of code iterates over the customField objects in the CustomFieldHelper class which
accesses the previously created custom fields:
<logic:iterate id="customField" name="<%= formName %>"
property="customFields"
type="com.lotus.elearn.model.CustomFieldHelper">
This code retrieves from each returned custom field a value to use for the label:
<lms:label beanClass="com.lotus.elearn.model.CustomFieldHelper"
instance="<%=customField%>"
id="<%=customField.getValidationLabelId(cfName)%>">
<lms:staticText name="customField" property="name" />
</lms:label>
It then checks to see if it's a text box type field:
<logic:equal name="customField" property="type"
value="<%=Integer.toString(CustomFieldConst.TYPE_TEXTBOX)%>">
or a drop down box type field:
<logic:equal name="customField" property="type"
value="<%=Integer.toString(CustomFieldConst.TYPE_DROP_DOWN)%>">
This code, which follows the check for a text box field, defines how to display the content of the
textbox field, if present, or the default value for the text box field, if available, or an empty text
box field, if no other value is supplied:
<%-- if a value for this entry is present, display that --%>
<logic:present name="customField" property="val">
<input type="text" size="20" name="<%=cfName%>"
value="<%=customField.getVal()%>"/>
</logic:present>
<%-- if a value for this entry is NOT present, display the default
or a blank
%>
<logic:notPresent name="customField" property="val">
<%-- default value if present --%>
<logic:present name="customField" property="defaultValue">
<input type="text" size="20" name="<%=cfName%>"
value="<%=customField.getDefaultValue()%>"/>
</logic:present>
<%-- blank --%>
<logic:notPresent name="customField" property="defaultValue">
<input type="text" name="<%=cfName%>" size="20" value=""/>
42 IBM Lotus Learning Management System Release 1 Customization Guide
Page 48

</logic:notPresent>
</logic:notPresent>
</logic:equal>
This code, which follows the check for drop-down box field, defines how to display the content of
the drop-down box field, if present. Displaying the content of the drop down box requires
denoting which of the available options is selected. If no option is selected, displays the default
value as the selected option:
<%-- ========== --%>
<%-- select box --%>
<%-- ========== --%>
<logic:equal name="customField" property="type"
value="<%=Integer.toString(CustomFieldConst.TYPE_DROP_DOWN)%>">
<select name="<%=cfName%>" id="<%=customField.getName()%>">
<%-- iterate over the options --%>
<logic:iterate id="optionValue" name="customField"
property="optionValues"
type="java.lang.String">
<%
//-- if the entry has a value, make it selected. --//
if ( null != customField.getVal() ) {
if ( optionValue.equals(customField.getVal()) ) {
%>
<option value="<%=optionValue%>"
selected><%=optionValue%></option>
<%
} else {
%>
<option value="<%=optionValue%>"><%=optionValue%></option>
<%
}
//-- the entry has no default, make the default option selected.
--//
} else {
if ( optionValue.equals(customField.getDefaultValue()) ) {
%>
<option value="<%=optionValue%>"
selected><%=optionValue%></option>
<%
} else {
Chapter 5: Customizing JavaServer Pages 43
Page 49

%>
<option value="<%=optionValue%>"><%=optionValue%></option>
<%
}
} //end getVal
%>
</logic:iterate>
</select>
</logic:equal>
</div>
</td>
</tr>
</logic:iterate>
Removing JSP tags from the page source has a powerful effect on the resulting pages in the
interface. Remove with care.
44 IBM Lotus Learning Management System Release 1 Customization Guide
Page 50

Chapter 6
Customizing Search
You can perform these types of searches in the user interface:
• User Search
The User Search page appears when you roster or manage users in the Users module,
when you enroll users or change their results in the Course Management module, when
you supply contact information in the Course Catalog, and when you work with
locations, rooms, or instructors in the Resources module.
• Offerings Catalog Search
The Advanced Search page appears when you click Advanced Search from the Offerings
Catalog search page.
• Course and Resources Searches
The Course Management module has search pages for courses. The Resources module has
search pages for Locations, Rooms, Vendors, and Instructors.
You can add and remove search criteria from User and Offering Catalog search pages. You can
remove criteria from Course and Resources search pages.
Customizing user searches
Information about rostered users is contained in an LDAP directory used by the Learning
Management System. The User Search page allows you to search for people by using attributes
that are typically found in an LDAP directory, as well as some attributes that are specific to the
Learning Management System.
Adding LDAP attributes to User Search pages
The default LDAP attributes supported are: First Name, Last Name, Common Name, User ID, Email Address, Department Number, and Organization. To add support for other attributes
(including attributes custom to your LDAP directory), follow these steps:
1. Modify the <ldap> section of the LMS settings.xml file to:
• Add an entry in the <ldap> / <users> / <attributes> subsection for each attribute you
want to include (if it is not there already). This subsection is already populated with a
number of attributes that aren't shown on the User Search page (BusinessCategory,
City, Employee Number, Employee Type, and so on).
For example, to add the attribute HealthPlanChoice, the attribute line would look like
this:
<attribute name="HealthPlanChoice" type="java.lang.String" />
• Make sure a mapping exists for the attribute in the appropriate object classes in the
<ldap> / <users> subsection. This is especially important for attributes that are
custom to your LDAP directory. For example, if the custom attribute is named
planChoice in your LDAP directory, the mapping would look like this:
<mapping name="HealthPlanChoice" ldapAttribute="planChoice" />
2. Modify the <user> / <customAttributes> subsection of the LMS settings.xml file to
add an <attribute> entry for the attribute you added in Step 1. For example, for the
Chapter 6: Customizing Search 45
Page 51

attribute HealthPlanChoice, the attribute link would look like this:
<!--================================================================
User Settings
================================================================ -->
<user component="com.lotus.elearn.user.UserMgrImpl"
anonymousAccess="enabled"
automaticRostering="enabled">
<customAttributes>
<attribute name="HealthPlanChoice" />
</customAttributes>
</user>
3. Modify the LMS file, ApplicationResources.properties, by adding a line that converts
the string to something user-friendly; for example:
HealthPlanChoice = Employee's Health Plan
The user-friendly text will appear in the User Search page as a description of the attribute.
Do this for the ApplicationResources.properties file for each language.
All user searches automatically show the additional LDAP attributes; you don't need to edit the
User Search page manually. The picture below shows a User Search page with the additional
attribute "Manager."
Removing fields from User Search pages
If you want to remove one of the default fields provided on the User Search pages, edit
searchUser.jsp to delete the corresponding code and text.
46 IBM Lotus Learning Management System Release 1 Customization Guide
Page 52

Customizing Offerings Catalog searches
The Learning Management System allows you to create a pool of custom fields that can be
applied to course offerings to add more details.
Adding custom fields to the Offerings Catalog
The custom field editor appears when you click Edit at the bottom of a Course Details page.
Although you add a field in the context of a single Course Offering, custom fields are available to
anyone who creates a Course Offering. If you designate a custom field as searchable, it appears in
the Advanced Search page, which is launched from the Offerings Search page. The picture below
shows the Offerings search page with a searchable custom field named "Dress Code."
Removing fields from Offerings Search pages
If you don't want to show all the fields provided on the Offerings Search page, edit
searchCourseCatalogAdvanced.jsp to remove the code for the text and text box that you want
to remove. To remove custom fields from the system, delete them by editing the custom field list
from any Course Details page.
Customizing course management and resource searches
Searches in the Course Management and Resources module show fields that are defined in the
Learning Management System database. These fields allow users to perform searches based on
relevant criteria.
Chapter 6: Customizing Search 47
Page 53

Removing fields from the Search pages
If you want to remove fields from the Search pages, edit the appropriate .jsp to remove the code
for the text and text box that you want to remove.
• Course searches: searchCourses.jsp
• Location searches: searchLocation.jsp
• Room searches: searchRoom.jsp
• Instructor searches: searchInstructors.jsp
• Vendor searches: searchVendor.jsp
48 IBM Lotus Learning Management System Release 1 Customization Guide
Page 54

Chapter 7
Customization sets
You can create what are in effect alternative versions of the application and send specified users
to one or another of these rather than to the default interface when they log in. To do this, you
copy the directories containing the files you want to change (or replace) into a directory structure
that mimics your original, make your changes, and then, in the Administrator interface, specify
the location of the customized files and the users to whom the interface that they define is
applicable. These alternative sets of files and the information concerning their location and use
are called customization sets.
The advantage of customization sets is that you can tailor the application’s look and feel and
functionality for different sets of users rather than having to make global changes that affect all
users. For example, you might want to create customization sets for different users based on their
membership in one or the other of two different LDAP groups, providing one user interface and
feature set for, say, users belonging to the Sales group and another for users in the Development
group.
A customization set can include custom versions of any or all of the following:
• The branding logo. This is the graphic that the application displays in the upper left
corner of each page.
• Images. These GIF files include icons, buttons, bullets, and the like, which you can edit or
replace.
• Help. See “Customizing Help” for a description of the Help system, how it works, and
how you can customize it.
• Cascading Style Sheets (CSSs). These control such display attributes as color and font.
• JavaServer Pages (JSPs). See “Customizing JavaServer Pages” for a description of the
various ways in which you can customize the application’s JSPs.
• E-mail and notification templates. These files contain the resourced static text that appears
in e-mail and other messages in the application.
• Properties files. These files contain the resourced static text that appears elsewhere in the
applicationlabels, button text, error message text, and so on.
• The logoff URL. This is URL of the page to which the user is sent when he or she logs out
of the application.
The information that you specify in the Administrator interface when you create a customization
set on the LMM server is automatically communicated to the Delivery server (or servers).
However, if you create a directory structure to hold custom files on the LMM server, you need to
create a comparable structure on the Delivery server (or servers) and populate it with custom
files if you want your changes to be uniform across the application. Similarly, if you have
deployed the application such that some of the files the application uses are stored on an HTTP
server, you need to copy their customized counterparts to the appropriate location or locations
on that server.
Creating a customization set
The following steps assume that you’re creating a customization set on the LMM server for the
users belonging to the LDAP group Sales and that, for simplicity, all the files of interest reside on
the LMM server and that you want the customization set to use custom style sheets, images,
resource strings and templates, and a customized Help system:
Chapter 7: Customization sets 49
Page 55

1. Copy the application’s Web directory on the LMM server to a new Web directory and
give it an appropriate namefor example, SalesCSand then copy the application’s
resource files to a directory with the new name:
LMM
CSS
images
etc.
WEB-INF
classes
com
resources
LMM
properties
templates
lib
etc.
Thus:
LMM
CSS
images
etc.
SalesCS
CSS
images
etc.
WEB-INF
classes
com
resources
LMM
properties
templates
SalesCS
properties
templates
lib
etc.
Note: You only need to copy those directories containing files that you plan to customize
for use by the customization set. So, for example, if SalesCS were not going to use custom
Cascading Style Sheets instead of the defaults, you would not copy the LMM CSS
directory into the SalesCS directory. On the other hand, if you wanted SalesCS to use a
custom version of, say, the English language version of the LMM’s general.css for Internet
Explorer, you would need to copy the complete LMM\CSS directory tree with all its
language versions and subdirectories.
50 IBM Lotus Learning Management System Release 1 Customization Guide
Page 56

2. Make whatever changes you want to the JavaServer Pages, Cascading Style Sheets, image
files, properties files, and templates in the SalesCS directory hierarchy.
3. When you’ve finished, replicate your work (except for the templates folder) on the
Delivery server (or servers).
4. Install your custom Help system. This is a three-step process:
a. Install the default Help system, which means creating a directory on an HTTP server
(in this example, myServer.myCompany.com/myDirectory) and unzipping the LMS
Help WAR file there.
b. Put the Help for your customization set in a subdirectory of the default Help system.
Again, the directory tree for the customization set’s Help system must exactly mirror
that for the default Help system:
myServer.myCompany.com/myDirectory
help
da
student
authoring
guides
courseadmin
de
en
etc.
SalesCS
da
student
authoring
guides
courseadmin
de
en
etc.
c. Make the application aware of the location of the default Help system. You can do this
in either of two ways: by following the directions in "Configuring on-line help" in the
Installation Guide, or by specifying the URL to the Help directory in the LMS Settings
module (Settings - LMM - General Settings - General).
5. Log in to the Administrator interface and add the customization set that you’ve created to
the system. To do this, click the Settings tab, then Manage Customization Sets, then Add.
The application displays a dialog box with the following edit controls:
• Titlea name that uniquely identifies the customization set you created in step 1.
• LMM Resource Directorythe name of the directory in which the customization
set’s property and template files reside (in this case, SalesCS) on the LMM server.
• LMM Web Directory the name of the directory in which the customization set’s
JSPs, images, CSS, and (depending on your configuration) Help files reside (in
this case, SalesCS) on the LMM server.
• Delivery Server Resource Directory the name of the directory in which the
customization set’s property files reside on the Delivery server(s). If you wanted
the characteristics of SalesCS to propagate to the Delivery server(s), you can
simply copy relevant portions of the LMM directory tree to the appropriate
Chapter 7: Customization sets 51
Page 57

locations in the Delivery server directory tree. In that case, the resource directory
would again be named SalesCS.
• Delivery Server Web Directory the name of the directory in which the
customization set’s JSPs, images, CSS, and (depending on your configuration)
Help files reside (in this case, SalesCS) on the Delivery server(s).
• Matching Sting Typethe type of LDAP entity (user, group, or attribute)
identified by the matching string you enter below. For testing purposes, you
might choose Name and, in the Matching String edit control, enter a matching
string that uniquely identifies you. Once satisfied that the customization set
behaves the way you want, you can revisit the Matching String Type and
Matching String edit controls and enter the appropriate values to assign the
customization set to the intended users. In the present example, you would select
Attribute as the string type and enter Sales as the matching string.
• Matching Stringa string that identifies the LDAP users to whom the
customization set is to be assigned. The following table gives some examples of
matching strings:
52 IBM Lotus Learning Management System Release 1 Customization Guide
Page 58

Table of sample matching strings
Type Example matches
User Fulano de Tal/Cambridge/IBM
cn=Fulano de Tal,ou=Cambridge,o=IBM
cn=Jan Doe,ou=West5,ou=Weston,o=IBM
*/Cambridge/IBM
*,ou=Cambridge,o=IBM
*
Group GroupCD/Groups/whatever
cn=GroupCD,ou=Groups,o=whatever
Attribute
preferredLanguage=fr
preferredLanguage=*
preferredLanguage
preferredLanguage=
preferredLanguage!=*
preferredLanguage!=
preferredLanguage!=fr
departmentNumber=1*
sn=Jones
A person (Fulano de Tal) at IBM in
Cambridge
Same as above
A person (Jan Doe) at the West5
office of IBM in Weston
Anyone at IBM in Cambridge
Anyone at IBM in Cambridge
Anyone at all
Everybody in this group
Everybody in this group
Everybody with this attribute with
a value fr
Everybody with this attribute no
matter what its value (if any)
Same as the above
Everybody with this attribute to
which no values or an empty
value has been assigned
Everybody who doesn’t have this
attribute
Everybody who doesn’t have this
attribute or has it with a nonempty value assigned to it
Everybody who doesn’t have this
attribute or has it without the
value fr assigned to it
All users whose department
number begins with 1.
All users whose surname is Jones.
• Logo URLthe branding logo to be displayed on each of the application’s pages.
• Logoff URLthe URL of the page to be displayed when a user exits from the
application.
The dialog box also contains a number of checkboxes:
• Use Custom Imagesunchecked, the customization set uses the image files in the
LMM Images directory; checked, the image files in the customization set’s Images
directory are to be used.
• Use Help unchecked, the customization set uses the Help files in the LMM Help
directory; checked, the files in the customization set’s Help directory are to be
used.
• Use CSS unchecked, the customization set uses the CSS files in the LMM CSS
directory; checked, the files in the customization set’s CSS directory are to be
used.
• Use JSP unchecked, the customization set uses the JSPs in the LMM Web server
directory; checked, the JSPs in the customization set’s Web server directory are to
be used.
• Use templates unchecked, the customization set uses the templates for e-mail
and notifications in the LMM server’s resources directory; checked, the templates
in the customization set’s resources directory are used.
Chapter 7: Customization sets 53
Page 59

• Use text unchecked, the customization set uses the files in the LMM properties
directory; checked, the files in the customization set’s properties directory are to
be used.
6. Reboot the server(s) to complete the process of defining and assigning the customization.
Installing a customization set on the Offline Learning Client
You can create what are, in effect, customization sets for use on the Offline Learning Client. To do
this:
1. Install the Offline Learning Client on the WebSphere Application Server.
2. Navigate to duc.war (in the installedApps\DefaultNode\duc.ear directory), and edit its
contents as you like, altering or replacing files, adding new files to be referenced by those
files, or both.
For example, you might substitute a custom graphic for the one that appears at the top of
the About box (lmsBrandingAbout.gif). You could do this in either of two ways:
• Edit lmsBrandingAbout.gif.
• Create a different graphic file (say, myAboutGraphic.gif) in the duc\images
directory, and edit the file that refers to it (aboutDS.jsp, in the DUC root
directory), replacing the reference to lmsBrandingAbout.gif with a reference to
myAboutGraphic.gif.
3. Create a Zip file containing just the customized files, making sure to preserve the server
directory structure (placing custom JSPs in the DUC root directory, custom images in the
DUC\images directory, and so on):
DUC
anonymous
CSS
images
etc.
WEB-INF
classes
com
resources
DUC
properties
lib
etc.
So, if all you did was change lmsBrandingAbout.gif, that’s the only file you would
include in the Zip file. If, on the other hand, you changed aboutDS.jsp and created a
graphic for it (myAboutGraphic.gif), you would include both the edited aboutDS.jsp and
myAboutGraphic.gif in the Zip file. The Zip file would then look like this:
Zip file
Name Type Modified Size Path
aboutDS.jsp
myAboutGraphic.gif
4. When users install the Offline Learning Client, they can enter the path to this Zip file in
the installation dialog box. As part of the installation process, the application unzips the
JavaServer Page
IrfanView GIF..
11/26/2002 …
11/26/2002 …
5,659
47,923
Images\
54 IBM Lotus Learning Management System Release 1 Customization Guide
Page 60

file, inserting the custom files in the appropriate locations, overwriting any files in the
default installation that have custom counterparts.
Finally, if you changed lmsBrandingAbout.gif and included it in the Zip file (and the user
entered the path to the Zip file at install time), the user will see the custom graphic file in
the About box when he or she runs the Offline Learning Client. If you changed
aboutDS.jsp and created a graphic for it (myAboutGraphic.gif), included these two files in
the Zip file, and the user enters the Zip file path at install time, the customized JSP
overwrites the one installed by default, the custom graphic which it references is
displayed, and the default graphic (lmsBrandingAbout.gif) is ignored.
Chapter 7: Customization sets 55
Page 61

56 IBM Lotus Learning Management System Release 1 Customization Guide
Page 62

Chapter 8
Creating a tab
You can create a custom tabbed page to display along with the standard tabbed pages―Home,
Student Catalog, Users, and so on. What you have to do to accomplish this depends on the sort of
content you want the page to have.
At a minimum, you need to do the following:
1. Create a JavaServer Page with the content you want to display when the user selects the
tab.
2. Add a permission to the PERMISSION database table to control access to the page. (See
“Adding custom Permissions.”)
3. Add the permission description to ApplicationResources.properties and appropriate
language versions if you plan to localize the application.
4. Edit the definition of those roles to which you want to assign permission to access the
page.
5. Edit navigation.xml to include a definition of the page (and any JSPs to which the page
provides links).
The following additional steps (which are beyond the scope of this document) are involved if the
JSP contains server logic:
6. Create an action class to handle user input to the JSP.
7. Edit struts_config.xml to add action mapping for the JSP.
A look at what’s involved in displaying one of the standard tabbed pages―the Users
page―should give you an idea of how you might create a custom tab and allow users to access it.
The Users page
The Users page looks like this:
The tab’s label (Users) and the page label (Manage Users) are specified in the resource file
...classes/resources/lmm/properties/ApplicationResources.properties:
Chapter 8: Creating a tab 57
Page 63

navigationTab.users = Users
users.manageUsers.task = Manage Users
The navigationTab.users and users.manageUsers.task resources in turn are specified in the
<label> and <title> attributes, respectively, in the definition of the Users module in
...classes/navigation.xml (which will be described in more detail later):
<!--
===/// users ///===
-->
<module>
<name>users</name>
<target>/userManagementInit.do</target>
<content>users.jsp</content>
<label>navigationTab.users</label>
<title>users.manageUsers.task</title>
<permissions>User_Management</permissions>
<helpPage>courseadmin/ch_users_overview.html</helpPage>
users.jsp
The JSP that executes when a user selects the Users tab is users.jsp, which resides in the
…classes/resources/lmm directory. The file consists of the following sections:
1. Copyright and brief description.
2. Identification of the tag library that the file will use:
<%@ taglib uri="/WEB-INF/tld/lms.tld" prefix="lms" %>
3. User instructions:
<span class="idxIntro"><lms:message
key="users.instructions"/></span>
4. A table:
<table cellpadding="0" cellspacing="0" border="0"
summary="<lms:message key="users.tableSummary"/>">
…
</table>
The resource that defines the user instructions resides in
...classes/resources/lmm/properties/ApplicationResources.properties:
users.instructions = Add users to the Learning Management System, and
assign roles and profiles to each user.
The style that defines the font size in which the user instructions string is displayed resides in
…lmm\css\en\styInternetExplorer5 (or styNetscape6)\sectionIndex.css.
The table, which takes up the bulk of the file, consists of three major sections, each of which
consists of three table rows enclosed in a <lms:permissionCheck>…</lms:permissionCheck>
58 IBM Lotus Learning Management System Release 1 Customization Guide
Page 64

block. (The table’s summary attribute refers to a resourced string that text-to-speech software can
read, summarizing the contents of the table.)
The permissionCheck tag encapsulates Java code that looks to see if the current user has the
permission (or permissions) specified in the tag’s permissionName parameter. If the user doesn’t
have the specified permission or permissions, LMS does not display the contents of the block.
For example, the rows containing the code to display the Users label and the Roster Users and
Manage Users links are enclosed in a <lms:permissionCheck>…</lms:permissionCheck> block
that checks to see if the user has Roster_Users or Manage_Users permissions. If the user has
neither of these permissions, LMS skips to the end of the block and does not display these rows.
If the user has either or both of these permissions, LMS displays the Users label and then goes on
to the code to display the Roster Users row, which is itself enclosed in a
<lms:permissionCheck>…</lms:permissionCheck> block that checks to see if the user has the
Roster_Users permission:
<%--
-----------------------------------------------------------------------
START User Group
-----------------------------------------------------------------------
--%>
<lms:permissionCheck permissionName="Roster_Users, Manage_Users">
<tr>
<td colspan="2" class="idxTaskHeader">
<span class="idxTaskHeader"><lms:message
key="users.users.title"/></span>
</td>
</tr>
<%--
-----------------------------------------------------------------------
START Roster Users
-----------------------------------------------------------------------
--%>
<lms:permissionCheck permissionName="Roster_Users">
…
</lms:permissionCheck>
<%--
The row containing the section label (in this case, Users) consists of a style specification
(idxTaskHeader), which is defined in … sectionIndex.css, and a resource string (users.users.title),
which is defined in ApplicationResources.properties.
The subsequent rows of the table that appear as a bullet followed by a labeled link followed by
some descriptive text each consist of two cells, Cell A and Cell B.
Cell A contains a table consisting of a single row whose two cells contain the bullet graphic and a
non-breaking space, respectively. In the present example:
<td width="1" valign="top">
Chapter 8: Creating a tab 59
Page 65

<table cellpadding="0" cellspacing="0" border="0">
<tr>
<td valign="middle"><lms:img src="images/bulletIndex.gif"
width="9" height="8" altKey="image.alt.select"/></td>
<td class="idxTaskItem" valign="middle"> </td>
</tr>
</table>
</td>
Cell B contains a <lms:link>…</lms:link> block followed by a non-breaking space followed by a
resource string:
<td width="100%" valign="middle" class="idxTaskPadding">
<div class="idxTaskPadding">
<lms:link styleClass="idxTaskItem" nav="users.rosterUsers"
tooltipKey="users.rosterUsers.subtitle">
<lms:message key="users.rosterUsers.subtitle"/></lms:link> -
<span class="idxTaskDesc"><lms:message
key="users.rosterUsers.description"/></span>
</div>
</td>
The link tag, which resides in ...web/lmm/WEB-INF/tld, is defined as follows:
<tag>
<name>link</name>
<tagclass>com.lotus.elearn.taglib.LMSLinkTag</tagclass>
<bodycontent>JSP</bodycontent>
<attribute>
<name>nav</name>
<required>false</required>
<rtexprvalue>true</rtexprvalue>
</attribute>
<attribute>
<name>href</name>
<required>false</required>
<rtexprvalue>true</rtexprvalue>
</attribute>
<attribute>
<name>styleClass</name>
<required>false</required>
<rtexprvalue>true</rtexprvalue>
</attribute>
<attribute>
<name>id</name>
60 IBM Lotus Learning Management System Release 1 Customization Guide
Page 66

<required>false</required>
<rtexprvalue>true</rtexprvalue>
</attribute>
<attribute>
<name>tooltipKey</name>
<required>false</required>
<rtexprvalue>true</rtexprvalue>
</attribute>
<attribute>
<name>permissionName</name>
<required>false</required>
<rtexprvalue>true</rtexprvalue>
</attribute>
</tag
In the present example, the tag is passed three parameters:
• styleClass – a reference to the style that defines the font size in which the link text is
displayed. This style is defined in …lmm\css\en\styInternetExplorer5 (or
styNetscape6)\sectionIndex.css.
• nav – a reference to the JSP to be displayed when the user clicks the Roster Users link. The
value passed here (users.rosterUsers) is the value of the <title> attribute in the definition
of the target JSP in navigation.xml, where the actual file to which it refers is specified in
the <content> attribute:
<name>rosterUsers</name>
<target>/default.do</target>
<content>usersRosterUsers.jsp</content>
<label>users.rosterUsers.roster</label>
<title>users.rosterUsers</title>
<permissions>Roster_Users</permissions>
<helpPage>courseadmin/ch_add_users.html</helpPage>
• tooltipKey - a reference to the resourced string to be displayed when the user mouses
over (or otherwise navigates to) the link text. This string is defined in
…ApplicationResources.properties and is required to ensure that the application meets
the accessibility requirements of the US Rehabilitation Act (Section 508):
users.rosterUsers.subtitle = Roster Users
The resource string that constitutes the final element in the table row
(users.rosterUsers.description) also resides in …ApplicationResources.properties:
users.rosterUsers.description = Add users to the Learning
Management System.
The next row of the Manage Users table, which contains the Manage Users link, is essentially the
same as the one just described, differing from it only in the particular permission checked,
Chapter 8: Creating a tab 61
Page 67

resource strings referenced, and link. The other sections on the page (Roles and Profiles) differ
from the Users section only in their details.
navigation.xml
Navigation.xml provides the following information about each of the JSPs to which a user can
navigate:
• Whether the JSP is a main page (such as the Users page) or a linked page (such as the
Roster Users page).
• The page name used in referring to the JSP’s resourced text in
ApplicationResources.properties.
• The struts file that handles action mapping for the JSP.
• The JSP’s file name.
• A reference to the resource that identifies the page when it appears as a “breadcrumb,”
that is, as an element in the navigation trail displayed in the upper right-hand corner of a
linked page.
• A reference to the resource that appears in the page’s title bar.
• A reference to the permission that the user needs to have been granted in order to display
the page.
• The path to the Help topic to be displayed when the user clicks the context-sensitive Help
icon (?) for the page.
For example, the section of navigation.xml that provides this information about the Users page
and its links looks like this:
<!--
===/// users ///===
-->
<module>
<name>users</name>
<target>/userManagementInit.do</target>
<content>users.jsp</content>
<label>navigationTab.users</label>
<title>users.manageUsers.task</title>
<permissions>User_Management</permissions>
<helpPage>courseadmin/ch_users_overview.html</helpPage>
<!—
Roster Users Trail
-->
<!--
users.rosterUsers
-->
<trail>
<name>rosterUsers</name>
<target>/default.do</target>
<content>usersRosterUsers.jsp</content>
62 IBM Lotus Learning Management System Release 1 Customization Guide
Page 68

<label>users.rosterUsers.roster</label>
<title>users.rosterUsers</title>
<permissions>Roster_Users</permissions>
<helpPage>courseadmin/ch_add_users.html</helpPage>
<!--
users.rosterUsers.search
-->
<trail>
<name>search</name>
<target>/default.do</target>
<content>usersRosterUsersUserSearch.jsp</content>
<label>users.rosterUsers.search</label>
<title>users.rosterUsers.search</title>
<permissions>Roster_Users</permissions>
<helpPage>courseadmin/ch_users_ldapsearch.html</helpPage>
<!--
users.rosterUsers.search.confirm
-->
<trail>
<name>confirm</name>
<target>/default.do</target>
<content>usersRosterConfirm.jsp</content>
<label>users.rosterUsers.import.confirm</label>
<title>users.rosterUsers</title>
</trail>
<!--
users.rosterUsers.search.fail
-->
<trail>
<name>fail</name>
<target>/default.do</target>
<content>usersRosterUsersFailure.jsp</content>
<label>users.rosterUsers.import.confirm</label>
<title>users.rosterUsers</title>
</trail>
</trail>
</trail>
etc.
</module>
Schematically, the complete <module>…</module> block has the following structure:
<module>users [the page displayed when you click the Users tab]
<trail>rosterUsers [the page displayed when you click Roster Users on the Users
main page]
<trail>search [the page displayed when you click Roster one or more users
on the Roster Users page]
<trail>confirm</trail> [the confirmation box displayed when
Chapter 8: Creating a tab 63
Page 69
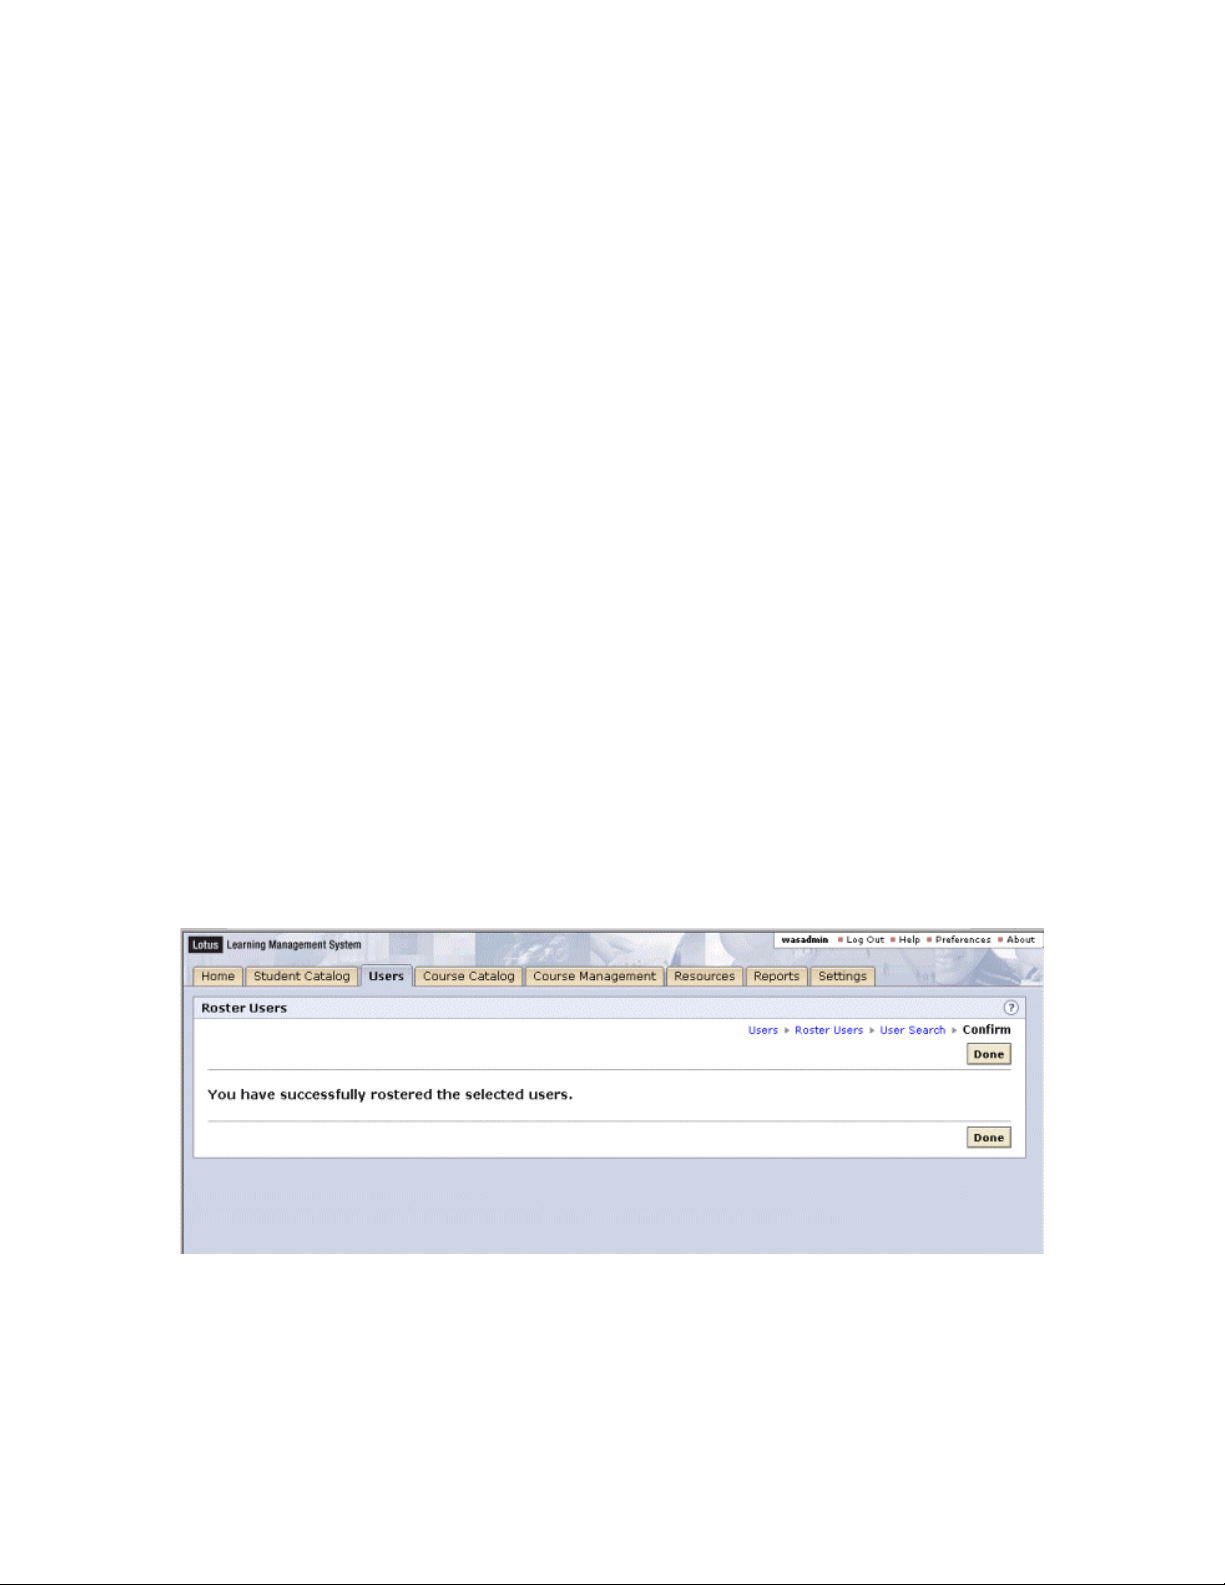
the user clicks Continue in the User search
page and rostering has been successful]
<trail> fail</trail> [the message box displayed when
the user clicks Continue in the User search
page and rostering has been unsuccessful]
</trail>
[group search, roster from file, auto-roster trails]
</trail>
<trail>ManageRoles
etc.
</trail>
<trail>ManageProfiles
etc.
</trail>
<trail>ManageUsers
etc.
</trail>
</module>
The <module>, <trail>, and <step> tags: main pages and linked pages
A <module>…</module> block consists of the definition of the tabbed page followed by one or
more <trail>…</trail> blocks, which themselves may contain <trail>…</trail> (or
<step>…</step>) blocks. A <trail>…</trail> block contains the definition of a page to which the
previous page contains a link. (A <step>…</step> block contains the definition of a page, such
as a confirmation box, that the application displays as the result of a user action that doesn’t
involve explicitly invoking a link. Navigation.xml is not consistent in its use of <step>…</step>
blocks, sometimes benignly using <trail>…</trail> blocks instead.)
As an example of trails, the Users main page has a link to the Roster Users page, which in turn
has a link to the User Search page, which (when rostering is successful) invokes a confirmation
box:
The relative location of the <module>…</module> blocks in navigation.xml determines the
order in which the tabs are displayed: the studenthome module is defined first, then the
studentCatalog module, then the users module and, as a result, the order in which the tabbed
pages is displayed is Home, Student Catalog, Users. You can change the order in which tabbed
pages are displayed by cutting and pasting <module>…</module> blocks.
64 IBM Lotus Learning Management System Release 1 Customization Guide
Page 70

The <name> tag: page names and resourced text
The <name> tag specifies the string to be used in the resource file
ApplicationResources.properties when defining text elements displayed by a JSP.
By convention, if a JSP is a link in a trail, its name is qualified by the name of the JSP that invoked
it. So, for example, users is the name of the page from which the page named rosterUsers is
invoked, and users.rosterUsers.desc is the string that ApplicationResources.properties defines as
the page description for the rosterUsers page (“From the list below, choose how you would like
to roster users.”):
The <target> tag: struts action-mapping
The <target> tag specifies the struts action-mapping file for a JSP. The value /default.do tells the
application to use the LMS default action handler. A JSP that involves server logic (for example,
when the page contains a POST request) needs to have a custom action-mapping file associated
with it.
The <content> tag: JSP file names
The <content> tag identifies the JSP to be displayed.
The <label> tag: breadcrumbs
The <label> tag specifies the string in ApplicationResources.properties whose definition is
displayed in the breadcrumb trail in the upper right of the page below the ? icon. For example,
the <label> tags for for the Users main page, the roster users page, the user search page, and the
confirmation box for successful rostering are navigationTab.users, users.rosterUsers.roster,
users.rosterUsers.search, and users.rosterUsers.import.confirm. These are defined in
the resource file as follows:
navigationTab.users = Users
users.rosterUsers.roster = Roster Users
users.rosterUsers.search = User Search
users.rosterUsers.import.confirm = Confirm
Chapter 8: Creating a tab 65
Page 71

If you don’t want to display the breadcrumbs for a given JSP, you can include the
<breadCrumbsInvisible> tag in the <trail>…</trail> or <step>…</step> block and set it to yes.
For example, you could suppress the breadcrumbs in the roster users confirmation box shown
above as follows:
<!--
users.rosterUsers.search.confirm
-->
<trail>
<name>confirm</name>
<target>/default.do</target>
<content>usersRosterConfirm.jsp</content>
<label>users.rosterUsers.import.confirm</label>
<title>users.rosterUsers</title>
<breadCrumbsInvisible>yes</breadCrumbsInvisible>
</trail>
66 IBM Lotus Learning Management System Release 1 Customization Guide
Page 72

The <title> tag: title bar text
The <title> tag tag specifies the string in ApplicationResources.properties whose definition is
displayed in the JSP’s title bar.
The <permissions> tag: permission to display the page
The <permissions> tag specifies the name of the permission (as it appears in the PERMISSION
table in the LMS database) that a user needs to have been granted in order to display the JSP.
Permissions and how to create them are described in “Adding custom permissions.”
The <helpPage> tag: context-sensitive Help
The <helpPage> tag specifies the Help page to be displayed when the user clicks the ? icon to
invoke context-sensitive Help for the JSP. The contents of the tag consist of the relative path to
Student or Course Administrator Help (student/ or courseadmin/) followed by the file name.
See “Customizing Help” for more information on the Help system and how you can customize it.
Adding custom permissions
The LMS user roles you are assigned determine the elements of the user interface you can access
and the actions you can perform. A role is a collection of permissions, some of which control
access to navigation items (that is, pages to which you can navigate, such as the Users tab or the
User Search dialog), while others control your ability to execute checked methods (that is,
procedures that perform update operations on the LMS database, such as rostering users or
creating customization sets).
Two database tables deal with permissions: the PERMISSION table and, in some cases, the
CASCADED_PERMISSION table. Each record in the PERMISSION table defines a single
permission, while each record in the CASCADED_PERMISSION table defines an inheritance
relationship between two records in the PERMISSION table such that if a user is granted the socalled parent permission, he or she is automatically granted the associated child permission. The
definition of these two tables in the current release of the LMS is described below.
Note: the LMS database schema may change in subsequent releases of the product.
The PERMISSION table consists of records with the following composition:
Chapter 8: Creating a tab 67
Page 73

PERMISSION table
Field Datatype Allow Nulls Values
oid CHAR(20) N nnnnnnnnnnnnnn00PERM
name VARCHAR(128) N X_Y
perm_id INTN N n
description VARCHAR(255) Y A description of what the permission
allows a user to do
category INTN Y -1 = checked method, 0 = Home, 1 =
Student Catalog, 2 = Course Catalog, 3 =
Users, 4 = Course Management, 5 =
Resources, 6 = Reports, 7 = Settings
status CHAR(1) Y A = active, I = inactive, D = delete
updatetime DATETIME Y The application supplies the date and time
the record was last changed.
oid
By convention, values for this field end in 00PERM. The value of the perm_id field precedes the
00PERM ending. The perm_id value is preceded by as many zeros as it takes to pad the value out
to 20 characters.
name
A string, often with its component parts separated by underscores (see examples below), which
the application removes when it displays the permission name on the Roles Details page in the
user interface.
perm_id
An integer that uniquely identifies the permission.
description
Text describing what the permission allows the user to do. To make the description appear in a
localized version of the application, you need create a name-value pair consisting of the
permission name (with its underscores, if any) and this description in the appropriate language’s
ApplicationResources.properties file.
category
An integer. Avalue of –1 designates a permission for what is called a checked method. A checked
method is a Java method belonging to the product’s API that you need permission to execute.
Checked method permissions can be contrasted with navigation permissions, that is,
permissions that allow users to access different parts of the user interface. The values between 0
and 7 represent the permission categories listed in the drop-down box on the Role Details page.
status
Typically, records are Active. However, if you execute a SQL DELETE statement against the
PERMISSION table, the records identified by the specified search criteria are not actually be
deleted but, rather, marked as Deleted and still remain in the database.
updatetime
When a record in the PERMISSION table is changed, the LMS writes the date and time that the
change occurred to the database.
The following table contains sample records from the PERMISSION table:
68 IBM Lotus Learning Management System Release 1 Customization Guide
Page 74

Sample PERMISSION records
OID
0000000000000000PERM
PERM_ID 0
NAME
DESCRIPTION
Home_Module
Permission to see Home module
CATEGORY 0
STATUS A
UPDATETIME
OID
0000000000000100PERM
PERM_ID 1
NAME
DESCRIPTION
Home_Weeks_Activities
View this week’s activities
CATEGORY 0
STATUS A
UPDATETIME
OID
PERM_ID
NAME
DESCRIPTION
CATEGORY
STATUS
0000000000002700PERM
27
User_Management
Access User Management section
3
A
UPDATETIME
OID
PERM_ID
NAME
DESCRIPTION
CATEGORY
STATUS
0000000000002800PERM
28
Roster_Users
Permission to add or delete users
3
A
UPDATETIME
OID
0000000000003000PERM
PERM_ID 30
NAME
DESCRIPTION
Manage_Roles
Permission to create and modify roles
CATEGORY 3
STATUS A
UPDATETIME
OID
0000000000009300PERM
PERM_ID 93
NAME
DESCRIPTION
com.lotus.elearn.permissions.RoleMgrImpl.addRole
""
CATEGORY -1
STATUS A
UPDATETIME
The CASCADED_PERMISSION table consists of records with the following composition:
Chapter 8: Creating a tab 69
Page 75

CASCADED_PERMISSION table
Field Datatype Allow Null Values
child_oid CHAR(20) N nnnnnnnnnnnnnn00PERM
parent_oid CHAR(20) N mmmmmmmmmmmmmm00PERM
As mentioned earlier, if a user has been granted the parent permission, he or she is automatically
granted the child permission. For example, a user who has been granted permission to manage
user roles is automatically given permission to add roles to the system, that is, to execute the
addRole method.
The following record from the CASCADED_PERMISSION table specifies that a user with
Manage_Roles permission is automatically given permission to execute the addRole method, that
is, add roles to the system:
Sample CASCADED_PERMISSION record
PARENT_OID
CHILD_OID
0000000000003000PERM
0000000000009300PERM
You add a permission to the database by executing a SQL statement like the following (which, in
this case, adds the permission that allows a user to access the User Management module):
INSERT INTO PERMISSION (OID, PERM_ID, NAME, DESCRIPTION, CATEGORY,
STATUS) VALUES ('0000000000002700PERM', 27,'User_Management', 'Access
User Management section',3, 'A');
The values for OID and PERM_ID should be unique and conform to the conventions described
above. In other words, the value for PERM_ID should be 1 higher than the currently highest
value in the database for this field (as it is a requirement that the values for PERM_ID in the table
be consecutive), and the new value should be included in the value for the new OID
(immediately before the final 00PERM). The value for the CATEGORY field should designate an
existing category (because there is no currently exposed mechanism for adding new categories to
the system).
After adding a permission to the database, you should add an entry to
…classes\resources\lmm\properties\ApplicationResources.properties that contains the
permission’s description. For example,
User_Management = Access User Management section
The reason for doing this is to enable localization of the application: the permission description in
the database is in English, but LMS looks in the appropriate language version of
ApplicationResources.properties before it looks in the database when it comes to display
permission descriptions on the Role Details page.
Finally, if a permission applies to a navigation item, you need to include a reference to it in
navigation.xml in the <permissions>…</permissions> tag of the description of the JSP to which
it applies. For example:
70 IBM Lotus Learning Management System Release 1 Customization Guide
Page 76

<module>
<name>users</name>
<target>/userManagementInit.do</target>
<content>users.jsp</content>
<label>navigationTab.users</label>
<title>users.manageUsers.task</title>
<permissions>User_Management</permissions>
<helpPage>courseadmin/ch_users_overview.html</helpPage>
…
</module>
Example
The following example describes the process of adding and granting access to a simple custom
tabbed page (customTab.jsp) with links to two other pages (customHello.jsp and
customGoodbye.jsp). The process involves the following steps:
1. Create the three JSPs and copy them to the …classes\resources\lmm directory.
2. Create a Help mapping file (ch_customtab.html) and corresponding content file
(ch_customtab_b.html) to be displayed when the user clicks the context-sensitive Help
icon ? on any of these pages, and copy these files to the English-language course
administrator Help directory (...Help\en\courseadmin).
3. Add the permissions to the LMS database necessary to display the tabbed page and links
(Custom_Tab, Say_Hello, and Say_Goodbye).
4. Edit the (English-language) properties file that stores resource strings to include text to be
displayed in the three JSPs and in the roles list to be populates with the new permissions.
5. Edit navigation.xml to include definitions for the three JSPs.
6. Grant the new permissions to users whom you want to be able to display the JSPs. You
can do this either by modifying an existing role or roles or by creating a role with these
permissions and then assigning that role to users of your choice.
1. Copy the JSPs
The main page (customTab.jsp) looks like this:
<%---------------------------------------------------------------------
customTab.jsp
Copyright (c) 2003, IBM Corporation. All rights reserved.
Created: 03-15-02
Main index page for custom module. Links to two custom jsps.
---------------------------------------------------------------------%>
<%@ taglib uri="/WEB-INF/tld/lms.tld" prefix="lms" %>
<%--
-----------------------------------------------------------------------
START Index Content Area
Chapter 8: Creating a tab 71
Page 77

-----------------------------------------------------------------------
--%>
<span class="idxIntro"><lms:message
key="customTab.instructions"/></span><br/><br/>
<table cellpadding="0" cellspacing="0" border="0" summary="<lms:message
key="customTab.tableSummary"/>">
<%--
------------------------------------------------------------------------------------------
START Greetings Group
--------------------------------------------------
--%>
<lms:permissionCheck permissionName="Say_Hello, Say_Goodbye">
<tr>
<td colspan="2" class="idxTaskHeader">
<span class="idxTaskHeader"><lms:message
key="customTab.customTab.title"/></span>
</td>
</tr>
<%--
-----------------------------------------------------------------------
START Hello
-----------------------------------------------------------------------
--%>
<lms:permissionCheck permissionName="Say_Hello">
<tr>
<td width="1" valign="top">
<table cellpadding="0" cellspacing="0" border="0">
<tr>
<td valign="middle"><lms:img src="images/bulletIndex.gif"
width="9" height="8" altKey="image.alt.select"/></td>
<td class="idxTaskItem" valign="middle"> </td>
</tr>
</table>
</td>
<td width="100%" valign="middle" class="idxTaskPadding">
<div class="idxTaskPadding">
<lms:link styleClass="idxTaskItem" nav="Greetings.hello"
tooltipKey="customTab.hello.linktext">
<lms:message key="customTab.hello.subtitle"/></lms:link> -
<span class="idxTaskDesc"><lms:message
key="customTab.hello.subtitle"/></span>
</div>
</td>
</tr>
72 IBM Lotus Learning Management System Release 1 Customization Guide
Page 78

</lms:permissionCheck>
<%--
-----------------------------------------------------------------------
END Hello
-----------------------------------------------------------------------
--%>
<%--
-----------------------------------------------------------------------
START Goodbye
-----------------------------------------------------------------------
--%>
<lms:permissionCheck permissionName="Say_Goodbye">
<tr>
<td width="1" valign="top">
<table cellpadding="0" cellspacing="0" border="0">
<tr>
<td valign="middle"><lms:img src="images/bulletIndex.gif"
width="9" height="8" altKey="image.alt.select"/></td>
<td class="idxTaskItem" valign="middle"> </td>
</tr>
</table>
</td>
<td width="100%" valign="middle" class="idxTaskPadding">
<div class="idxTaskPadding">
<lms:link styleClass="idxTaskItem" nav="Greetings.goodbye"
tooltipKey="customTab.goodbye.linktext">
<lms:message key="customTab.goodbye.subtitle"/></lms:link> -
<span class="idxTaskDesc"><lms:message
key="customTab.goodbye.subtitle"/></span>
</div>
</td>
</tr>
</lms:permissionCheck>
</lms:permissionCheck> <%-- greetings section --%>
<%--
-----------------------------------------------------------------------
End Goodbye
---------------------------------------------------------------------
--%>
<%--
-----------------------------------------------------------------------
END greetings Group
----------------------------------------------------------------------
Chapter 8: Creating a tab 73
Page 79

</table>
<%--
----------------------------------------------------------------------
END Index Content Area
-----------------------------------------------------------------------
--%>
When a user with the appropriate permissions displays customTab.jsp, the page will look like
this:
The first linked page (customHello.jsp) looks like this:
<%---------------------------------------------------------------------
customHello.jsp
Copyright (c) 2003, IBM Corporation. All rights reserved.
Created: 05-30-02
The hello page for the greetings trail.
---------------------------------------------------------------------%>
<%@ taglib uri="/WEB-INF/tld/lms.tld" prefix="lms" %>
<%--
----------------------------------------------------------------------
BEGIN Done button
----------------------------------------------------------------------
--%>
<div class="frmButtonSetPaddingTop">
<table border="0" cellpadding="0" cellspacing="0" border="0"
width="100%">
74 IBM Lotus Learning Management System Release 1 Customization Guide
Page 80

<tr>
<td width="95%"><lms:spacer type="standard" /></td>
<td width="1">
<div class="btnCommonPadding">
<lms:button captionKey="button.done" tooltipKey="button.done"
nav="Greetings"/>
</div>
</td>
</tr>
</table>
</div>
<lms:hRule type="hRuleButtonSetTop" />
<%--
---------------------------------------------------------------------
END Done button
----------------------------------------------------------------------
--%>
<lms:spacer type="standard" />
<%--
----------------------------------------------------------------------
BEGIN hello message
---------------------------------------------------------------------
--%>
<table border="0" cellpadding="0" cellspacing="0" border="0"
width="100%">
<tr>
<td width="95%"><span class="hdrGeneral"><lms:message
key="customTab.hello.helloMessage"/></span></td>
<td width="1"></td>
<td width="1"></td>
</tr>
</table>
<%--
-------------------------------------------------------------------
END hello message
----------------------------------------------------------------------
--%>
<lms:hRule type="hRuleButtonSetBottom" />
<%--
Chapter 8: Creating a tab 75
Page 81

----------------------------------------------------------------------
BEGIN Done button
----------------------------------------------------------------------
--%>
<div class="frmButtonSetPaddingBottom">
<table border="0" cellpadding="0" cellspacing="0" border="0"
width="100%">
<tr>
<td width="95%"><lms:spacer type="standard" /></td>
<td width="1">
<div class="btnCommonPadding"><lms:button captionKey="button.done"
tooltipKey="button.done" nav="Greetings"/></div>
</td>
</tr>
</table>
</div>
<%--
----------------------------------------------------------------------
END Done button
---------------------------------------------------------------------
--%>
When customHello.jsp is displayed, it will look like this:
76 IBM Lotus Learning Management System Release 1 Customization Guide
Page 82

The second linked page (customGoodbye.jsp) looks like this:
<%---------------------------------------------------------------------
customGoodbye.jsp
Copyright (c) 2003, IBM Corporation. All rights reserved.
Created: 05-30-02
The goodbye page for the auto greetings trail.
---------------------------------------------------------------------%>
<%@ taglib uri="/WEB-INF/tld/lms.tld" prefix="lms" %>
<%--
----------------------------------------------------------------------
BEGIN Done button
----------------------------------------------------------------------
--%>
<div class="frmButtonSetPaddingTop">
<table border="0" cellpadding="0" cellspacing="0" border="0"
width="100%">
<tr>
<td width="95%"><lms:spacer type="standard" /></td>
<td width="1">
<div class="btnCommonPadding">
<lms:button captionKey="button.done" tooltipKey="button.done"
nav="Greetings"/>
</div>
</td>
</tr>
</table>
</div>
<lms:hRule type="hRuleButtonSetTop" />
<%--
----------------------------------------------------------------------
END Done button
----------------------------------------------------------------------
--%>
<lms:spacer type="standard" />
<%--
----------------------------------------------------------------------
BEGIN goodbye message
----------------------------------------------------------------------
--%>
Chapter 8: Creating a tab 77
Page 83

<table border="0" cellpadding="0" cellspacing="0" border="0"
width="100%">
<tr>
<td width="95%"><span class="hdrGeneral"><lms:message
key="customTab.goodbye.goodbyeMessage"/></span></td>
<td width="1"></td>
<td width="1"></td>
</tr>
</table>
<%--
----------------------------------------------------------------------
END goodbye message
----------------------------------------------------------------------
--%>
<lms:hRule type="hRuleButtonSetBottom" />
<%--
----------------------------------------------------------------------
BEGIN Done button
----------------------------------------------------------------------
--%>
<div class="frmButtonSetPaddingBottom">
<table border="0" cellpadding="0" cellspacing="0" border="0"
width="100%">
<tr>
<td width="95%"><lms:spacer type="standard" /></td>
<td width="1">
<div class="btnCommonPadding"><lms:button captionKey="button.done"
tooltipKey="button.done" nav="Greetings"/></div>
</td>
</tr>
</table>
</div>
<%--
---------------------------------------------------------------------
END Done button
---------------------------------------------------------------------
--%>
When this customGoodbye.jsp is displayed, it will look like this:
78 IBM Lotus Learning Management System Release 1 Customization Guide
Page 84

2. Create Help files
You need to associate a Help topic with each JSP so that when the user clicks? to display contextsensitive Help, the application will not display the Page Not Found screen. You could, of course,
send the user to the index or table of contents or some other existing Help topic, but for the sake
of illustration, assume that you would create a topic appropriate to the custom JSPs. You would
then copy these files to the English-language course administrator Help directory
(...Help\en\courseadmin).
In this example, the Help mapping file is ch_customtab.html, and the corresponding content file
is ch_customtab_b.html:
customtab.html
<html>
<head>
<title>IBM Lotus Learning Management System Administrator
Help</title>
</head>
<frameset rows=33,* border=0 frameborder=no framespacing=0>
<frame name=header title="Help Header" src="ch_help_header_h.html"
scrolling=no framespacing=0 frameborder=no border=0 marginwidth=0
marginheight=0 noresize>
<frameset cols=150,* border=0 frameborder=no framespacing=0>
<frame name=navigation title="Help Navigation"
src="ch_help_navigation_l.html" scrolling="auto" framespacing="0"
frameborder="No" border="0" marginwidth="0" marginheight="0" noresize>
Chapter 8: Creating a tab 79
Page 85

<frame name=content title="Help Topic" src="ch_customtab_b.html"
scrolling=auto framespacing=0 frameborder=no border=0 marginwidth=0
marginheight=0 noresize>
</frameset>
</frameset>
</html
customtab_b.html
<html>
<head>
<META NAME="searchterms" CONTENT="custom tab">
<META NAME="topic" CONTENT="Greetings">
<title>Greetings</title>
</head>
<BODY TEXT="#000000" LINK="#0066cc" VLINK="#666600" ALINK="#993300"
BGCOLOR="#ffffff" BACKGROUND="background_b.gif" MARGINHEIGHT=0
TOPMARGIN=0 MARGINWIDTH=25 LEFTMARGIN=25>
<H2>Salutations</h2>
<p>Come on: you don't really need help on this, do you?</p>
</body>
</html>
80 IBM Lotus Learning Management System Release 1 Customization Guide
Page 86

See “Chapter 4: Customizing Help” for instructions on how to create custom Help topics.
3. Add permissions to the LMS database
A user needs permission to display the tabbed page and its two links. As in the case of Help, you
could use existing permissions (making the appropriate changes in customTab.jsp’s
<lms:permissionCheck>…</lms:permissionCheck> blocks and in navigation.xml’s
<permissions> tag), but custom permissions give you more precise control over access. See
“Adding custom permissions” earlier in this chapter for more information about permissions.
To add permissions to the database, first ascertain the currently highest value for the PERM_ID
field in the PERMISSION table. You can do this by executing the following SQL query:
SELECT MAX(PERM_ID) FROM PERMISSION
(At this writing, the highest PERM_ID is 420.)
Execute the following SQL statements to add the custom permissions that this example uses:
Chapter 8: Creating a tab 81
Page 87

INSERT INTO PERMISSION (OID, PERM_ID, NAME, DESCRIPTION, CATEGORY,
STATUS) VALUES ('000000000042100PERM', 421,'Custom_Tab', 'Access
Greetings page',7, 'A');
INSERT INTO PERMISSION (OID, PERM_ID, NAME, DESCRIPTION, CATEGORY,
STATUS) VALUES ('000000000042200PERM', 422,'Say_Hello', 'Display Hello
mesage',7, 'A');
INSERT INTO PERMISSION (OID, PERM_ID, NAME, DESCRIPTION, CATEGORY,
STATUS) VALUES ('000000000042300PERM', 423,'Say_Goodbye', 'Display
Goodbye message',7, 'A');
4. Edit ApplicationResources.properties
For a variety of reasons, you should resource the text that your JSPs will display rather than
including that text as hard-wired HTML into those files. This takes a little more work, but it’s
good practice. Accordingly, this example refers to the following strings that have been added to
ApplicationResources.properties, some of which are referenced in the JSPs, in navigation.xml,
and in the code that populates the descriptions in the roles lists in the Administrator interface
(under Users > Manage Roles > some role):
########
# customTab static text
########
navigationTab.customTab = Greetings
customTab.customTab.label = Salutations
customTab.instructions = Click under Ave atque Vale to display a
greeting.
customTab.tableSummary = There are two hot links on this page that you
can click to display a greeting.
customTab.customTab.title = Ave atque Vale
customTab.hello.linktext = Hello
customTab.hello.subtitle = Click here to display a Hello salutation.
CustomTab.goodbye.linktext = Goodbye
customTab.goodbye.subtitle = Click here to display a Goodbye
salutation.
customTab.hello.label = Hello
customTab.hello.title = Ave
customTab.hello.helloMessage = Hi, there.
customTab.goodbye.label = Goodbye
customTab.goodbye.title = Vale
customTab.goodbye.goodbyeMessage = Farewell.
########
# customTab permission descriptions
########
Custom_Tab = Access Greetings page
Custom_Tab.name = Custom Tab
Say_Hello = Display Hello message
82 IBM Lotus Learning Management System Release 1 Customization Guide
Page 88

Say_Hello.name = Say Hello
Say_Goodbye = Display Goodbye message
Say_Goodbye.name = Say Goodbye
5. Edit navigation.xml
You need to add a <module>…</module> block to navigation.xml to display the custom
(Greetings) tab and the custom pages associated with it ( customTab.jsp, customHello.jsp and
customGoodbye.jsp). Where you place this block relative to the other <module>…</module>
blocks in the file determines the order in which the tab appears with respect to the other tabs in
the user interface.
For example, if the first <module>…</module> block in navigation.xml is the one that specifies
the student Home page and its links, Home appears as the leftmost tab (assuming that the user
has permission to display it). If you want to make your custom tab be the leftmost, insert the
<module>…</module> block that defines it above the one for student Home.
Thus:
<navigation>
<!--
===/// Greetings ///===
-->
<module>
<name>Greetings</name>
<target>/default.do</target>
<content>customTab.jsp</content>
<label>navigationTab.customTab</label>
<title>Salutations</title>
<permissions>Custom_Tab</permissions>
<helpPage>courseadmin/ch_customtab.html</helpPage>
<!-- Greetings.hello -->
<trail>
<name>hello</name>
<target>/default.do</target>
<content>customHello.jsp</content>
<label>customTab.hello.label</label>
<title>customTab.hello.title</title>
<permissions>Say_Hello</permissions>
<helpPage>courseadmin/ch_customtab.html</helpPage>
</trail>
<!-- Greetings.goodbye -->
<trail>
<name>goodbye</name>
<target>/default.do</target>
Chapter 8: Creating a tab 83
Page 89

<content>customGoodbye.jsp</content>
<label>customTab.goodbye.label</label>
<title>customTab.goodbye.title</title>
<helpPage>courseadmin/ch_customtab.html</helpPage>
</trail>
</module>
<!--
===/// studenthome ///===
-->
<module>
<name>studenthome</name>
etc.
6. Assign permissions
Users need to be granted permission to display the tabbed page and either or both of the pages to
which it offers links. You grant permissions through the LMS user interface. You can do this in
either of two ways:
• Edit the definition of an existing role (or roles), granting the desired permissions to users
who have been assigned that role (or roles).
• Define a new role with the appropriate permission(s), and assign that role to users. (The
permissions for multiple roles assigned to a user are in an OR relationship: users assigned
roles A and B have the union of the permissions for A and B.)
To edit the definition of an existing role:
1. Open the Users page and click Manage Roles.
2. Click the role to which you want to grant the new permissions.
3. Select the permission category in which the permissions are listed (in this case, Settings).
4. Check the appropriate boxes and save your work.
84 IBM Lotus Learning Management System Release 1 Customization Guide
Page 90

To create a role and assign it to users:
1. Open the Users page and click Manage Roles.
2. Click Add Role.
3. Enter the name of the new role (for example, Greetings) and a description of what users
assigned that role can do.
4. Click on the name of the role when it appears in the Roles page.
5. Select the permission category in which the permissions are listed (in this case, Settings).
6. Check the appropriate boxes and save your work.
7. Back out to the Users main page and click Manage Users.
8. Locate and select the users to whom you want to assign the new role.
9. Click Assign Roles, check the appropriate box, and save your work.
Chapter 8: Creating a tab 85
Page 91

86 IBM Lotus Learning Management System Release 1 Customization Guide
Page 92

Index
abbreviations, 2
acronyms, 2
catalog, 47
context-sensitive Help, 16
course offerings, 47
CSS files
adding custom, 34
editing, 34
replacing, 34
custom fields, 47
customization sets, 49
applying, 32
creating, 49
installing on the Offline Learning Client, 54
Delivery Server
activity.jsp file, 30
delivery.jsp file, 28
fonts
changing globally, 35
Form Bean properties
editing, 40
graphics
replacing globally, 36
Help, 11
adding topics, 17
content files, 15
context-sensitive, 16
editing, 16
frameset files, 11
header files, 12
navigation bar files, 13
image files
replacing globally, 36
JavaServer Pages
defined, 19
JSP tag libraries, 20
JSP tags
adding custom, 39
defined, 19
LDAP attributes of users, 45
LDAP directory, 45
Learning Management System Server
adminContent.jsp file, 27
adminTemplate.jsp file, 23
lms.tld file, 20
button tag, 39
hidden tag, 40
message tag, 36
navUtil tag, 28
url tag, 20
logo
replacing, 37
Logo
replacing, 38
matching strings, 52
navigation.xml, 62
permissions, 7
adding, 67
cascaded, 69
properties files, 35
resources, 47
roles, 7
adding, 7
assigning, 8
modifying, 8
searching
course offerings, 47
resources, 47
users, 45
settings, 5
settings.xml, 45
standard JSP actions, 24
Struts architecture
defined, 19
Struts tags
referencing, 24
style
changing globally, 32
changing on one JSP, 38
tabbed pages
creating, 57
Chapter 8: Creating a tab 87
Page 93

Tag library descriptor files(TLD files), 20
text
resourcing globally, 35
users, 45
XML settings files, 5
88 IBM Lotus Learning Management System Release 1 Customization Guide
Page 94

Printed in USA
 Loading...