

Page 1

Infoprint MFP 30/35
User’s Guide
IBM
G510-2441-00
Page 2

Page 3

Infoprint MFP 30/35
User’s Guide
IBM
G510-2441-00
Page 4

Edition: October 2002
Lexmark and Lexmark with diamond design are trademarks of Lexmark International, Inc., registered in the United States and/or other
countries.
ScanBack is a trademark of Lexmark International, Inc.
PostScript
Other trademarks are the property of their respective owners.
®
is a registered trademark of Adobe Systems Incorporated.
Copyright advisory
It may be illegal to copy certain materials without permission or license, including documents, images, and currency. If you are not sure
whether you have permission, seek legal advice.
© Copyright 2002 Lexmark International, Inc.
All rights reserved.
UNITED STATES GOVERNMENT RESTRICTED RIGHTS
This software and documentation are provided with RESTRICTED RIGHTS. Use, duplication or disclosure by the Government is subject
to restrictions as set forth in subparagraph (c)(1)(ii) of the Rights in Technical Data and Computer Software clause at DFARS 252.2277013 and in applicable FAR provisions: Lexmark International, Inc., Lexington, KY 40550.
Page 5

Contents
Chapter 1: Getting started............................................................. 1
How do I use the to u ch sc reen?............... .................. .................. .. ................ 1
How do I use the numeric keypad and buttons?............................................ 2
How do I scan from the scanner bed?............................................................ 3
How do I log in?.............................................................................................. 3
How do I access o n lin e h el p ? ................. .. .................. .. .................. .. .. ............ 3
Chapter 2: Copying........................................................................ 4
How do I make a quick copy? ........................................................................ 4
How do I cancel a copy job? ........................... .................. .. .................. .. ....... 4
...while the original documents are scanning ........................................... 4
...while the c o pi es are printing ..... ................. ... ................. ... ................. .. .. 5
How do I copy from one size to another size? .............................. ................. 6
How do I make tra n sp a rencies?........... .................. .. .................. ................. .. . 7
How do I copy to letterhead?.......................................................................... 7
How do I copy to the multipurpose feeder?...................... .................... .......... 8
How do I make copies from a book or magazine?......................................... 9
How do I make duplex copies?.................................................................... 10
How do I reduce and enlarge copies?.......................................................... 11
How do I collate co p ie s ? .................... ................. ... ................. ... ................. . 12
How do I staple copies? ............................................................................... 13
How do I punch holes in copies?.................................................................. 13
How do I make co lo r co p ies?........ ... ................. .. .................. .. .................. .. . 14
How do I copy photographs?.................................................................... .. .. 15
How do I copy multiple pages onto one page? ........................................ .. .. 16
How do I place s epa rator sheets betw ee n co p y jo b s?...... .. .................. .. ..... 17
How do I create a b o ok l e t? ................. .. .................. .. .................. .. ................ 18
How do I print the date and time at the top of each page?........................... 19
Contents
iii
Page 6

Contents
How do I add a message overlay to copies?................................................ 20
How do I improve the copy quality? ............................................................. 21
Chapter 3: Faxing......................................................................... 22
How do I enter fax numbers?................... ... ................. .................. .. ............ 22
...entering shortcut numbers ................................................................... 22
...entering stored numbers from the address book ................................. 22
How do I send a fax?.................................................................................... 23
...from my comp u te r ............................... .. .................. .. .. .................. .. .... 23
...at a later time ....................................................................................... 23
How do I create a Fax Queue?.................................................................... 24
How do I cancel a fa x job?.......................... .. ................. .................. .. .......... 25
...while original documents are scanni ng ............................................... 25
...after it has been scanned .................................................................... 25
How do I create shortcuts?........................................................................... 26
How do I create a single number shortcut? ............................................ 26
How do I create a mu lt i-number shortc u t? .............. ... ................. ... ........ 26
How do I send a fax cover page? ................................................................. 28
How do I change the fax resolution?.................................... ........................ 29
How do I adjust the lighter/darker setting?................................................... 29
Chapter 4: Printing....................................................................... 30
How do I access the virtual printer operator panel?..................................... 30
How do I cancel a p rint job?.... ................. .................. .. .................. .. ............ 31
How do I print confidential jobs? ................................. .. ............................... 32
How do I delete confidential jobs?................................................................ 33
How do I print Verify, Reserve, and Repeat jobs?....................................... 34
How do I delete Verify, Reserve, and Repeat jobs?............... ...................... 36
Chapter 5: Scanning to e-mail .................................................... 37
How do I enter e-mail addresses with the virtual keyboard?............. ........... 37
How do I enter e-mail addresses using shortcut numbers?......................... 37
How do I enter e-mail addresses from the Address Book?.......................... 37
How do I send an e-mail?............................................................................. 38
How do I send an e-mail to multiple addresses?............................... .. ......... 38
How do I cancel an e -mail?.................... .. .................. .. .................. .. ............ 38
How do I add an e-mail subject and message? ..................................... ...... 39
Contents
iv
Page 7

Contents
How do I improve the image quality?............... .......................................... .. 40
How do I reduce the file size?...................................................................... 41
How do I change the scan file type?........................... .................... ............. 42
How do I scan in color?................................................................................ 43
How do I create an e-mail shortcut?............................................................. 44
How do I create a FTP shortcut?.................................................................. 44
How do I use other scan methods?.............................................................. 45
How do I set up and use Scan to PC profiles?............................................. 45
How do I set up and use ScanBack profiles?............................ .. ................. 46
Contents
v
Page 8
1
Getting started
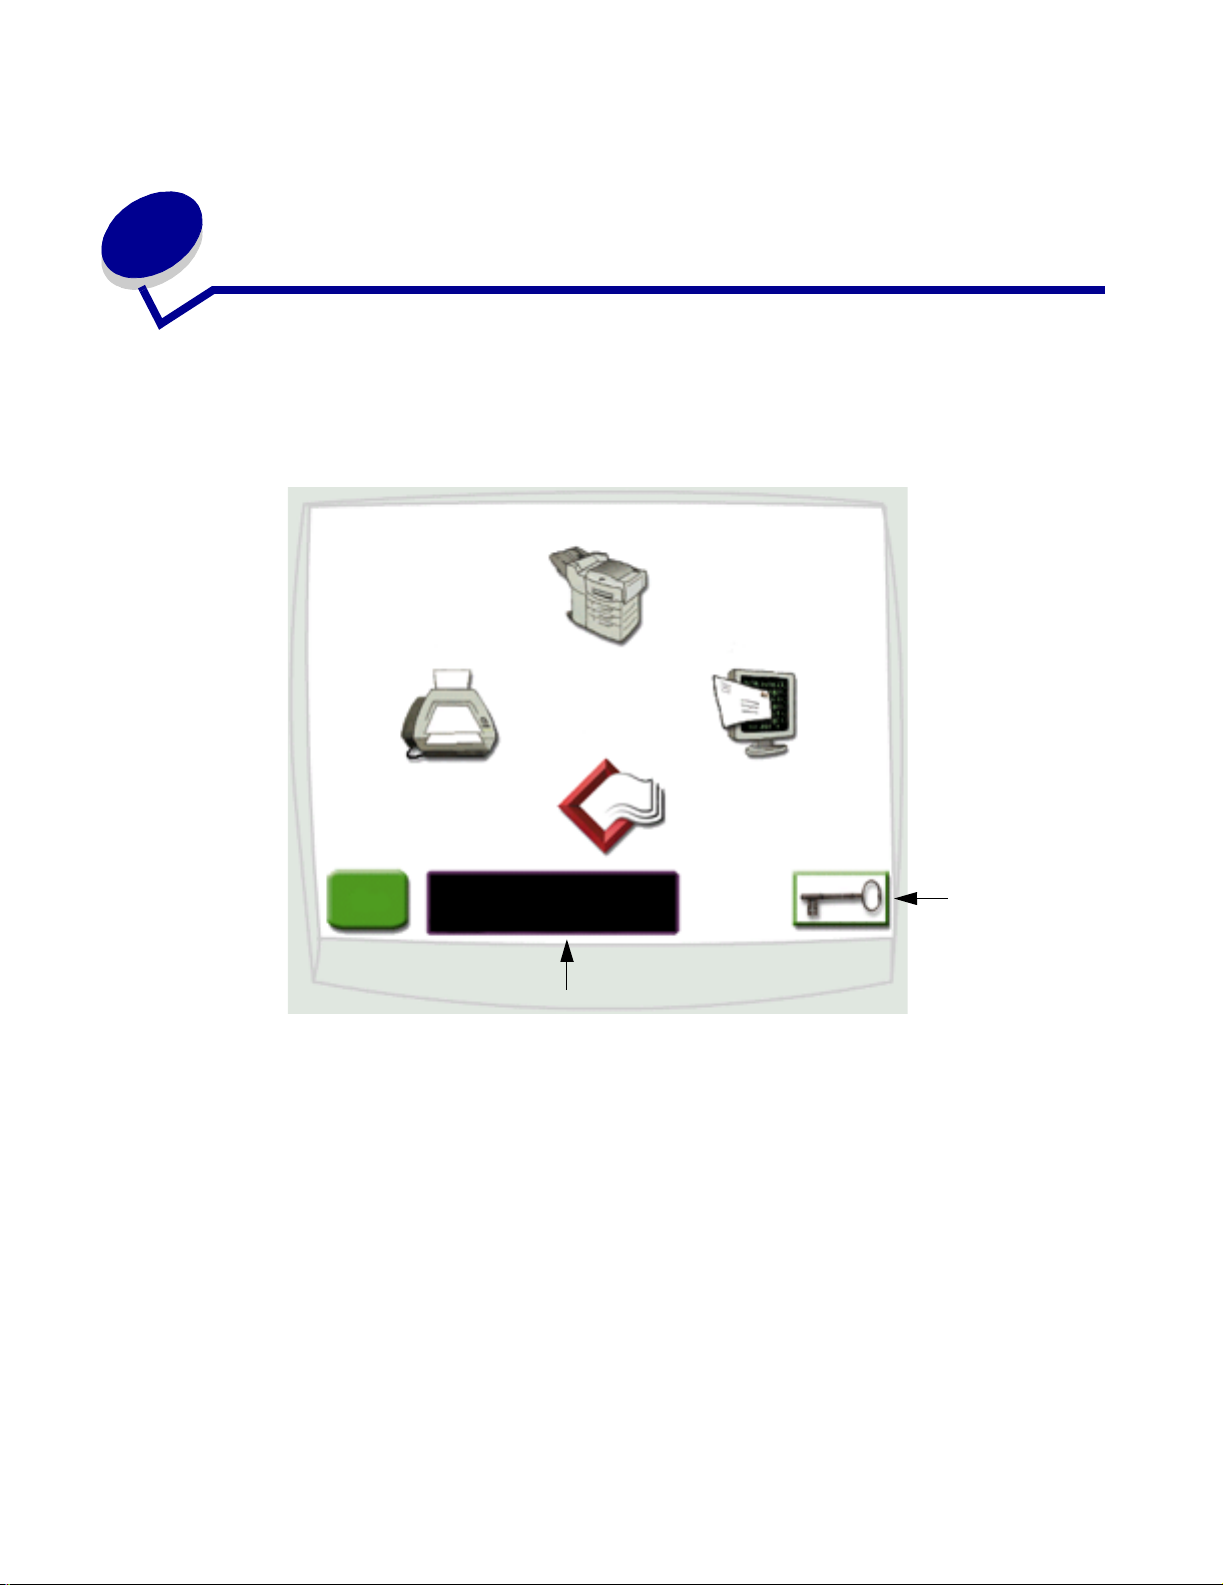
How do I use the touch screen?
Use the touch screen to access functions and make select ions.
Copy
Fax
Profiles
Tips
Display window
• Touch Copy to change copy settings.
• Touch Fax to send fax j obs and change fax settings.
• Touch E-mail to send scan jobs and change e-mail settings.
• Touch Profiles to access stored profiles. If a profile does not exist, this icon will not be
displayed.
E-mail
Key icon
• Touch the Key icon to access the virtual printer operator panel and add administrator
settings.
• Review the display windo w for current multifunction printer (MFP) status and messages.
• Touch Tips to access online help.
Getting started
1
Page 9
Getting started
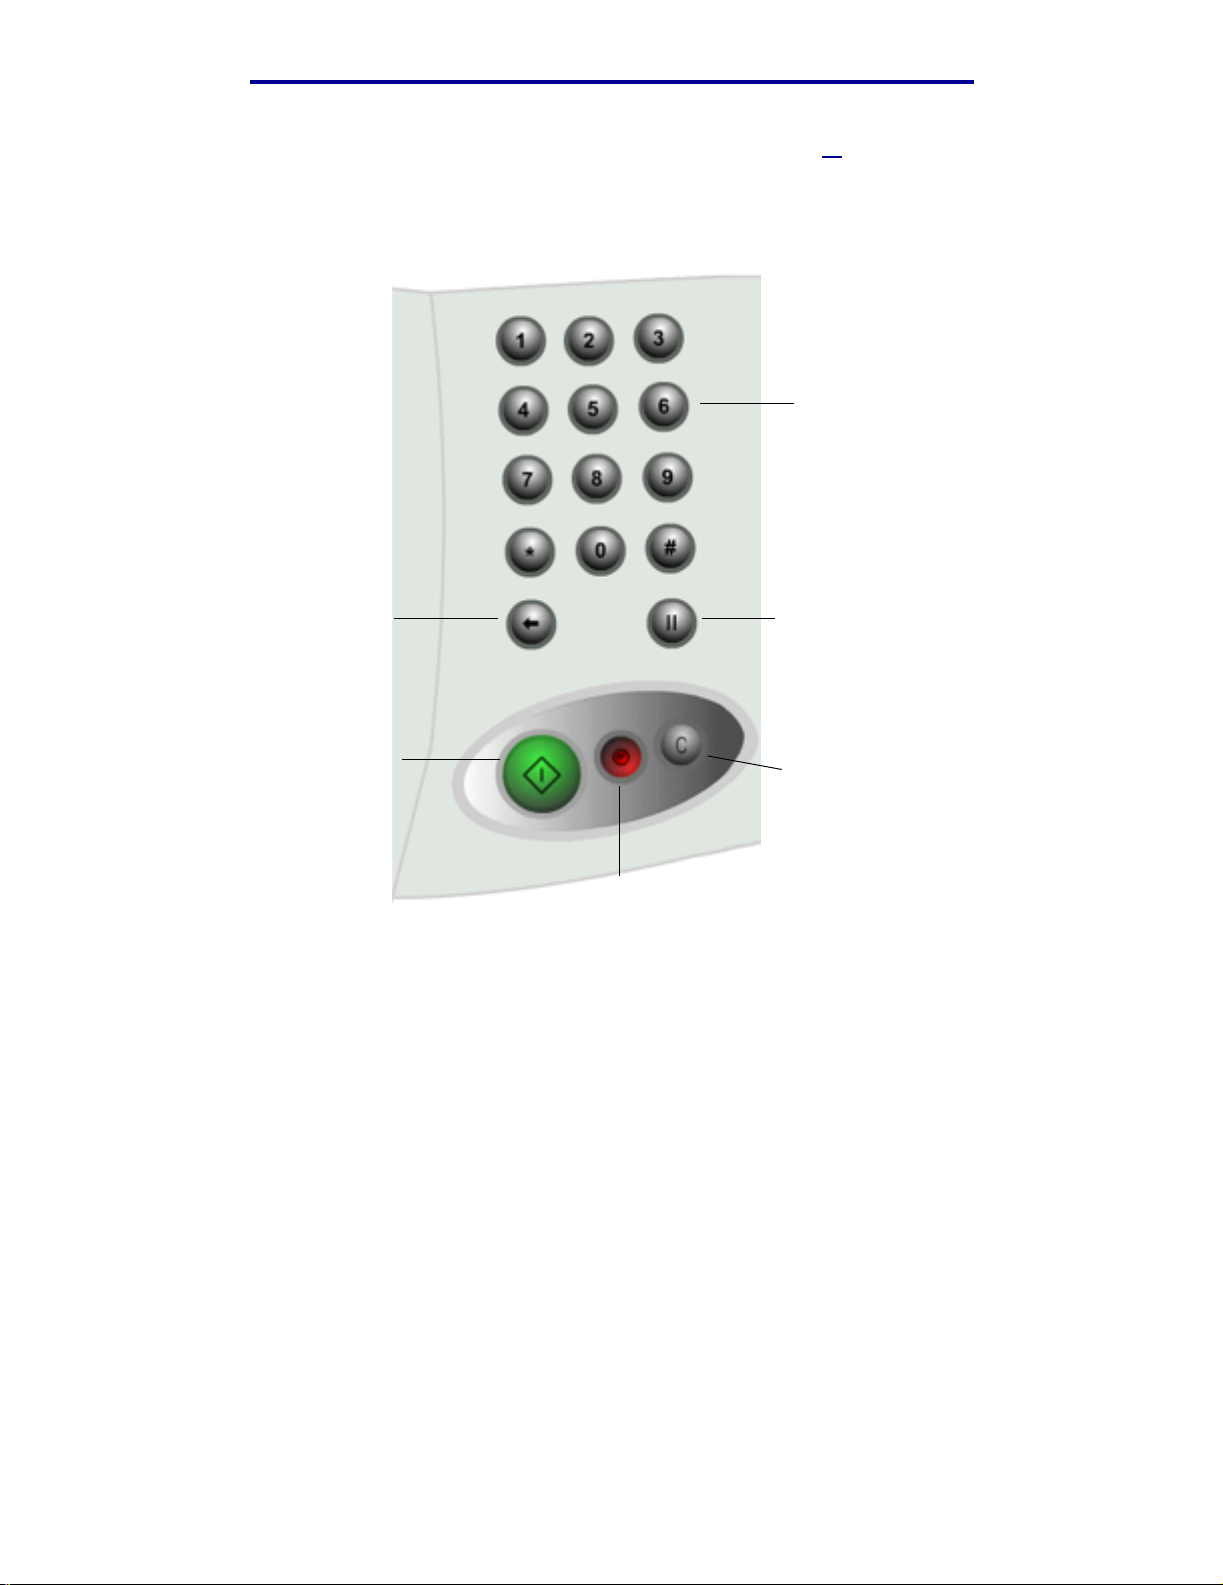
How do I use the numeric keypad and buttons?
Use the numeric keypad and buttons to enter information and send commands to the MFP, such as
copy, stop, or clear a job.
Numeric
keypad
Backspace
button
Start button
Stop button
Dial pause
button
Clear All
button
• Press Start to start copy jobs, send faxes, and scan to e-mail.
• Press the red Stop button to pause the MFP.
When you are ready to resume from a pause, touch Resume on the touch screen.
• Press the Clear All button to clear all settings back to their default values .
• Use the numeric keypad to specify the number of copies, enter a fax number, or enter a
shortcut number.
How do I use the numeric keypad and buttons?
2
Page 10

Getting started
How do I scan from the scanner bed?
Use the scanner bed, or glass, portion of the scanner for original documents , such as books, that are
unsuitable for the automatic document feeder.
1 Lift the document feeder cover.
2 Place your original document face down on the glass.
3 Close the document feeder cover.
4 Use the touch screen to make your selections.
5 Press Start.
6 Touch Scan Next if you have more pages to scan.
7 Touch Done when you are finished.
Warning: To prevent damage, do not let the document feeder c over fall on the scanner bed.
How do I log in?
You may have to log in to the MFP before you can use it. To log in:
1 Make sure you ha v e a user I D and pass w ord. If y ou do not ha v e an ID and pas sw ord, get one
from your administrator.
2 Touch the function you want to use.
3 Use the virtual keyboard to enter your user ID and then touch Login.
4 If required, use the virtual keyboard to enter your password and then touch Login.
5 Use the touch screen to make your selections.
How do I access online help?
You can get online help at almost any time.
1 Touch Tips.
2 Use the index to navigate through the help topics.
3 Touch Exit Tips to return to where you were before accessing help.
How do I scan from the scanner bed?
3
Page 11

2
Copying
How do I make a quick copy?
1 Load your original document in the MFP.
2 Use the numeric keypad to specify the number of copies you want.
3 Press Start.
Note: If you are unsatisfied wit h the quality of the copy, see “How do I improve the copy
quality?” on page 21.
How do I cancel a copy job?
...while the original documents are scanning
If you are scanning a document using the automati c document feeder, touch Cancel while
Scanning… is displayed on the touch screen.
If you are scanning a document using the scanner bed, touch Cancel while Scan Next Page /
Done is displayed on the touch screen.
Copying
4
Page 12
Copying
...while the copies are printing
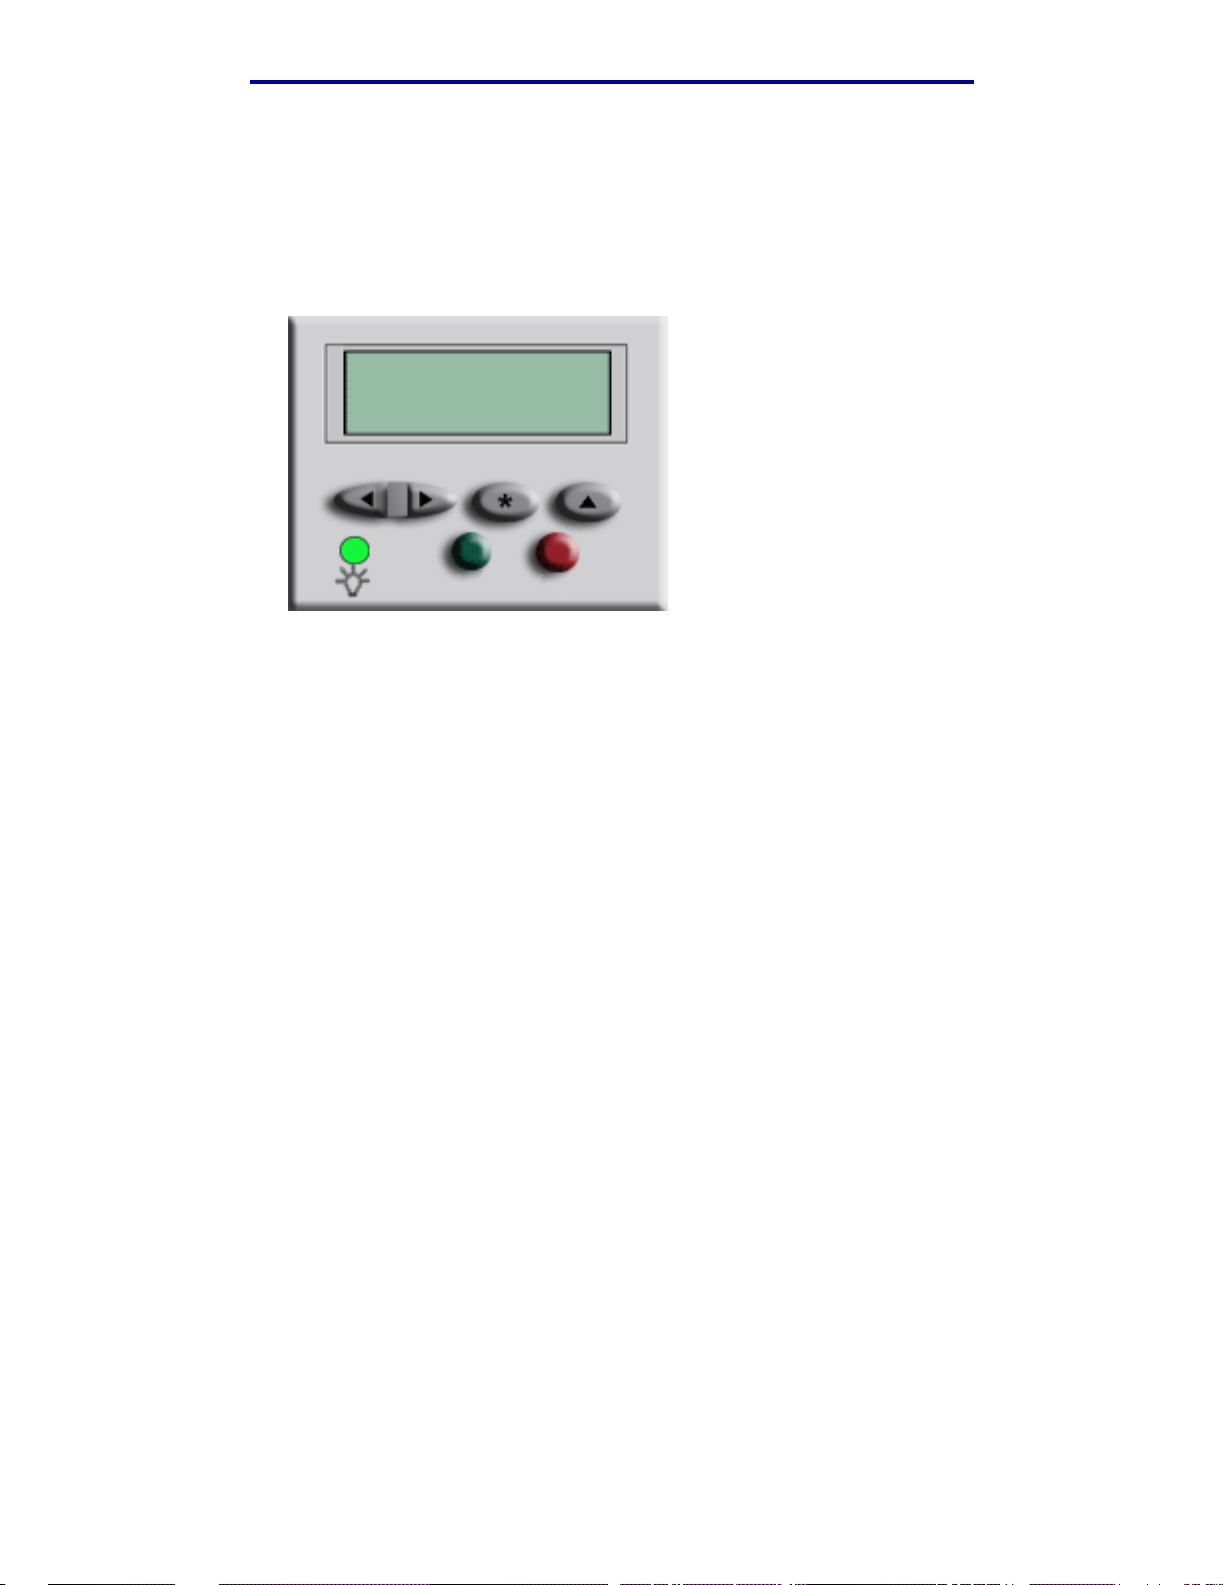
1 Touch the Key icon.
2 Touch Printer Operator Panel.
3 Touch Menu or until you see JOB MENU Cancel Job and then touch Select. .
JOB MENU
Cancel Job
1 Menu 2 Select 3 Return 4
Go 5 Stop 6
4 Touch Back and then touch Home to return to the W elcome screen.
How do I cancel a copy job?
5
Page 13

Copying
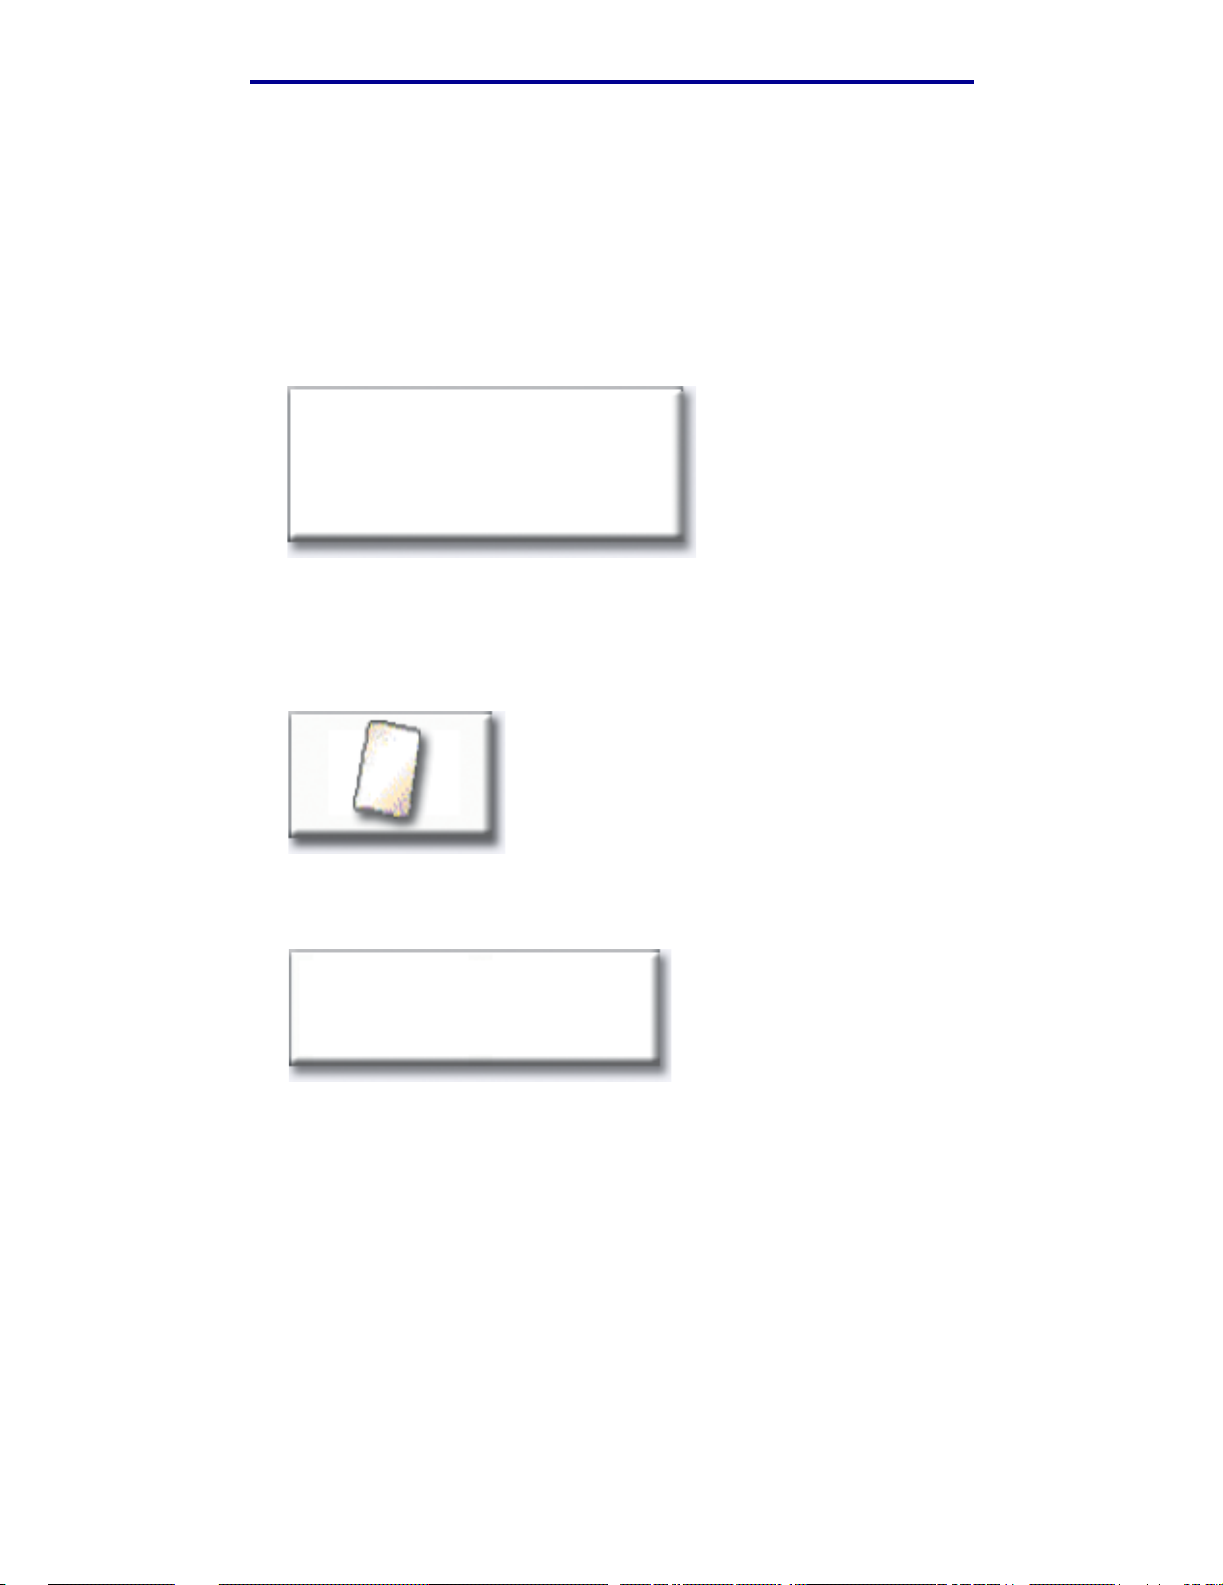
How do I copy from one size to another size?
1 Load your original document in the MFP.
2 From the home screen, touch the Cop y icon.
3 Touch Copy from: and then identify the size of your original document.
Legal
(8 1/2” x 14”)
For example, Legal.
4 Touch Copy to: and then select the si ze you want the copy to be. The MFP will s cale the s iz e
automatically.
For example, Letter .
5 Press Start.
If the media type you want is not available, you may want to use the multipurpose feeder to
make your copies. See “How do I copy to the multipurpose feeder?” on page 8 for detailed
instructions.
How do I copy from one size to another size?
6
Page 14

Copying
How do I make transparencies?
1 Load your original document in the MFP.
2 From the home screen, touch the Cop y icon.
3 Touch Copy to: and then touch the tray that contains transparencies.
For example:
Letter (8 1/2” x 11”)
Transparency
Tray 1
Note: If you do not see Transparency as an option, speak with your administrator.
4 Press Start.
How do I copy to letterhead?
1 Load your original document in the MFP.
2 From the home screen, touch the Cop y icon.
3 Touch Copy to: and then touch the tray that contains letterhead.
For example:
Legal ( 8 1/2 ” x 14”)
Letterhead
Tray 2
Note: If you do not see Letterhead as an optio n, speak with your administrator.
4 Press Start.
How do I make transparencies?
7
Page 15
Copying
How do I copy to the multipurpose feeder?
1 Load your original document in the MFP.
2 Load the type of paper you want your copies to be printed on into the multipurpose feeder
(refer to your printer Setup Guide for the locati on.)
3 From the home screen, touch the Cop y icon.
4 Touch Copy to: and then touch MP Feeder.
MP Feeder
5 Touch the size of print media you are copying to and then touch Enter.
For example:
Legal
(8 1/2” x 14”)
6 Touch the type of print media you are copying to and then touch Enter.
For example:
Colored Paper
7 Touch Done.
8 Press Start.
How do I copy to the multipurpose feeder?
8
Page 16
Copying
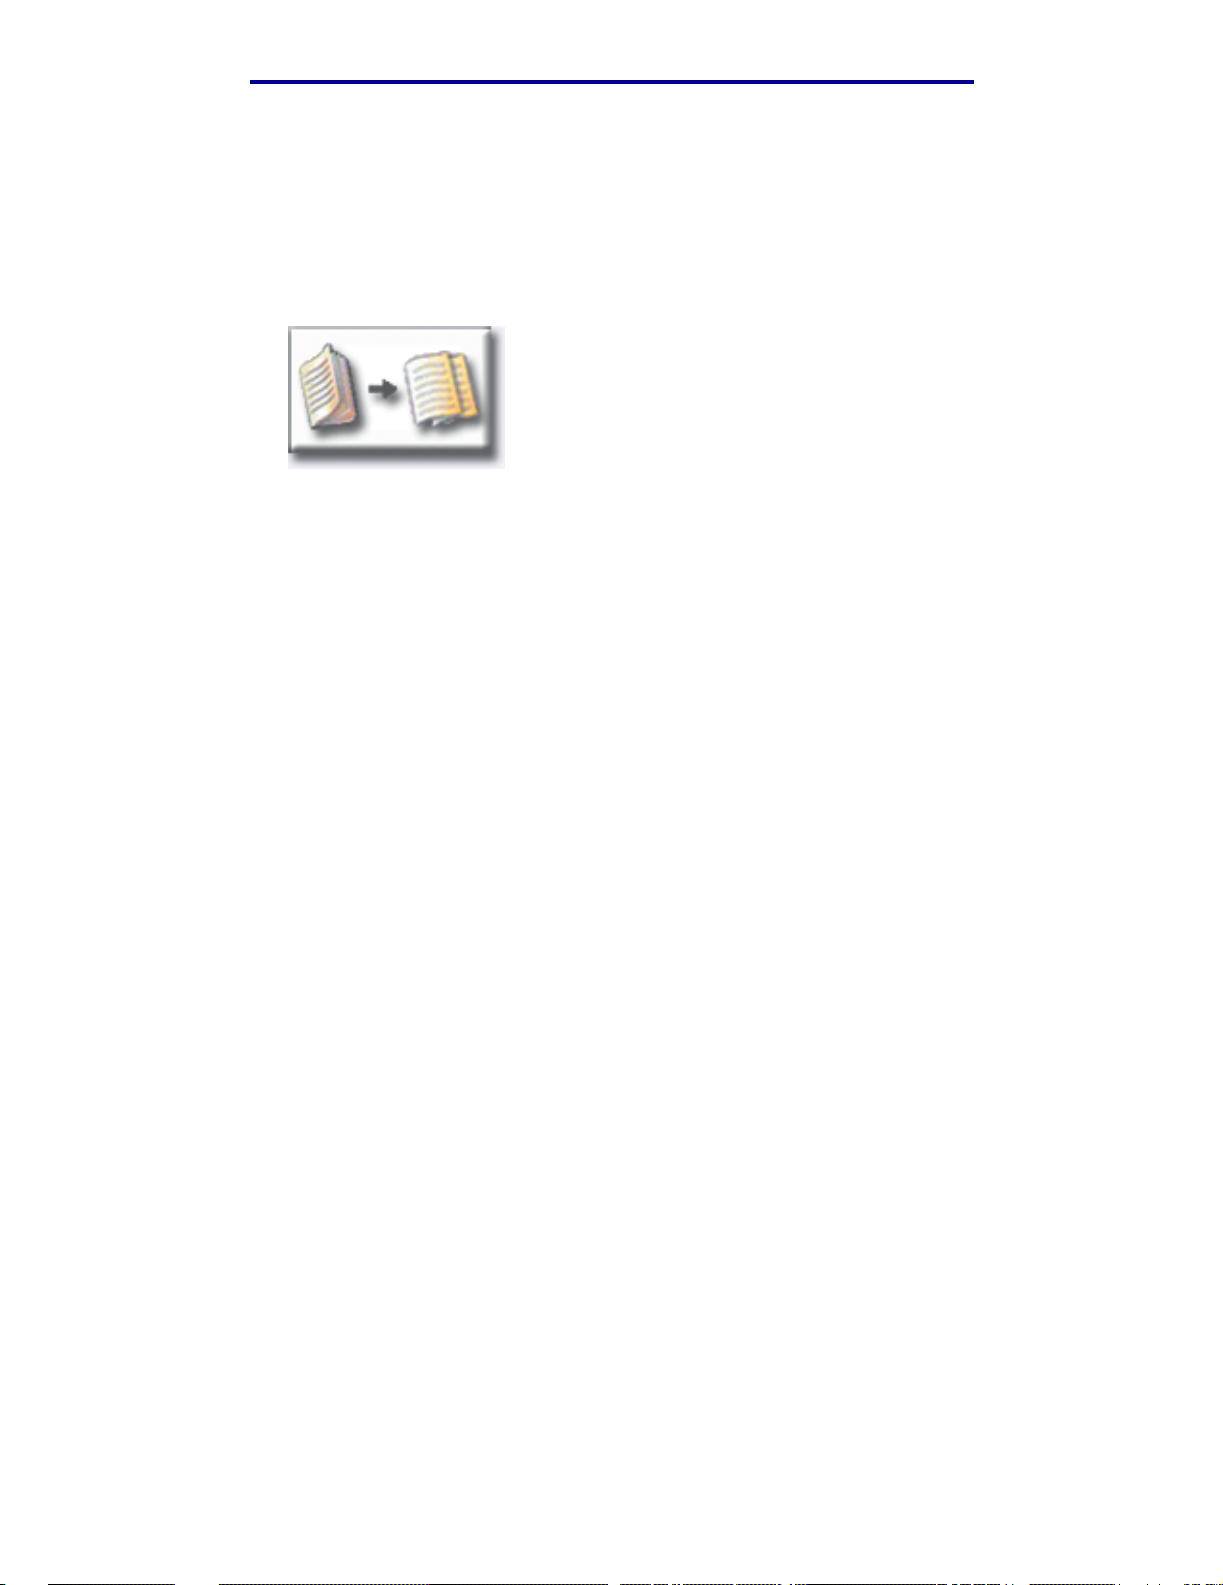
How do I make copies from a book or magazine?
1 From the home screen, touch the Cop y icon.
2 Touch Copy from:
3 Touch Book Original and then touch Back.
4 Align the book appropriately on the scanner bed.
5 Close the document feeder cover.
6 Press Start.
7 Touch Scan Next if you have more pages to scan.
8 Touch Done when you are finished.
Note: This feature may not be available on your MFP.
How do I make copies from a book or magazine?
9
Page 17
Copying
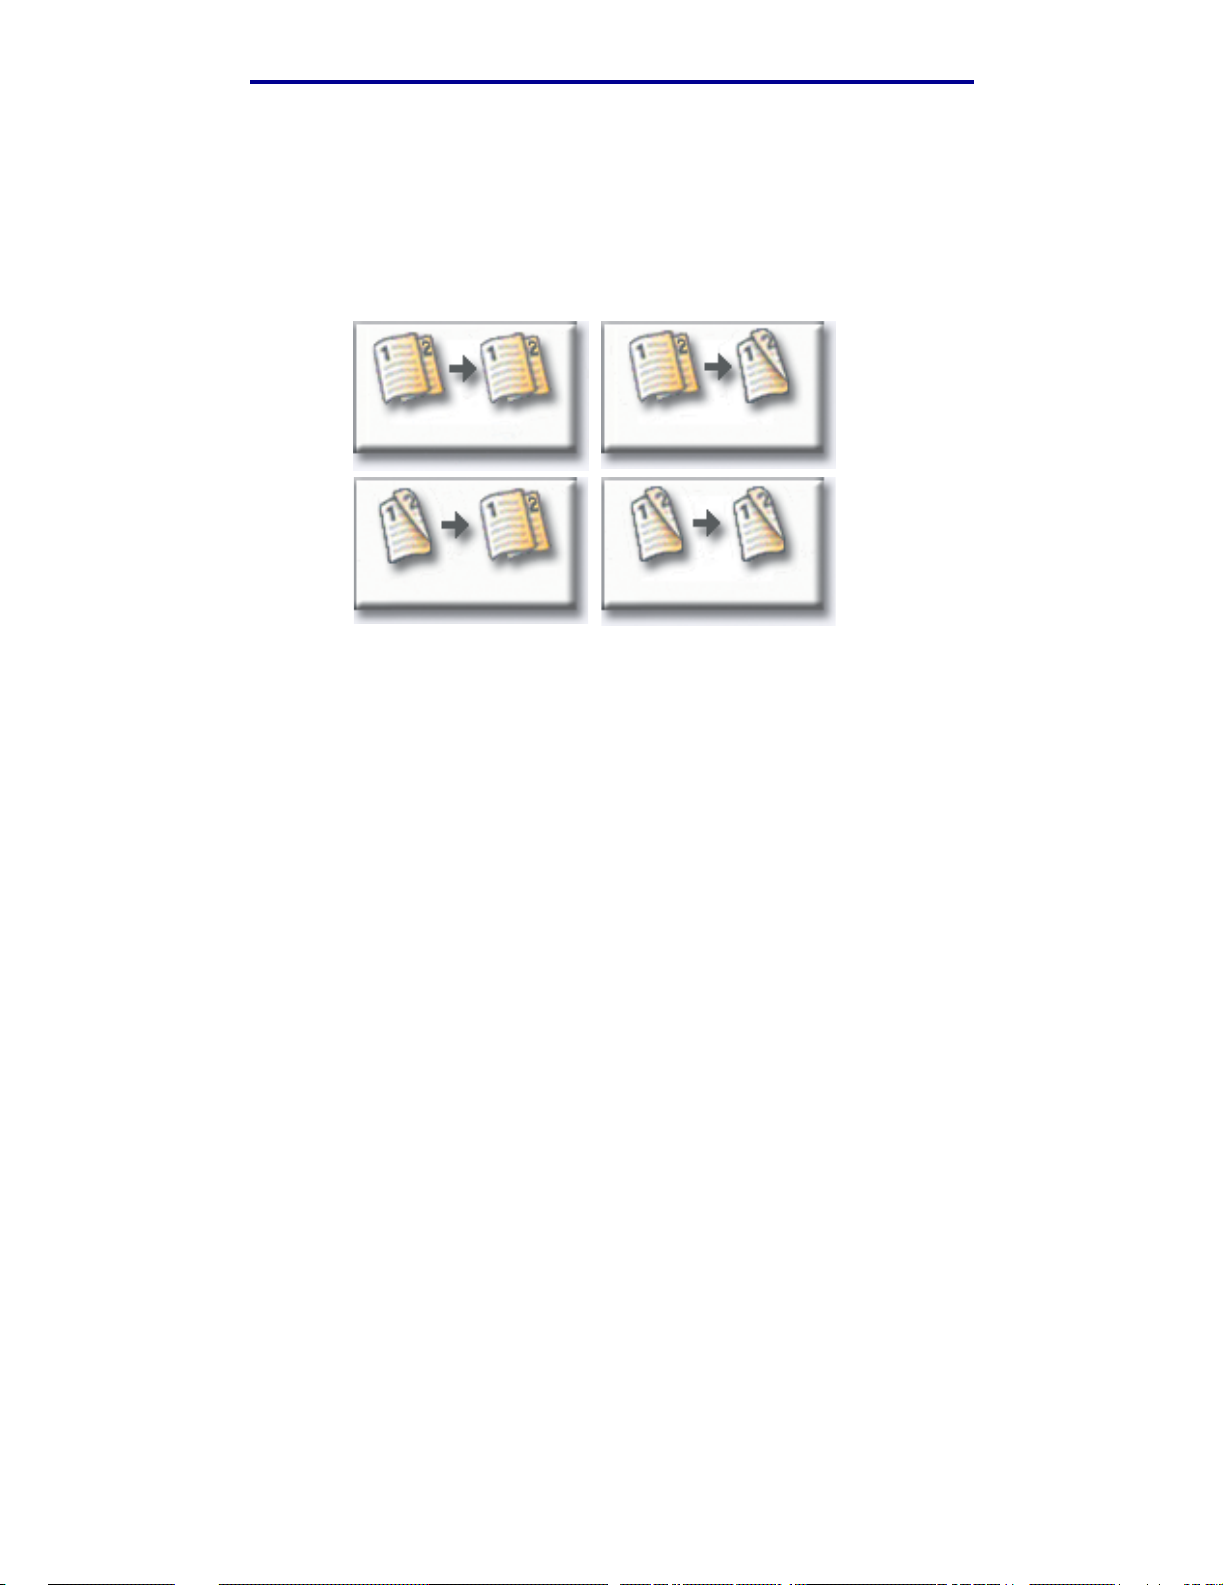
How do I make duplex copies?
1 Load your original document in the MFP.
2 From the home screen, touch the Cop y icon.
3 Touch the button that looks like how you want your copies to print.
1-->1-sided
2-->1-sided 2-->2-sided
The first number represents sides of the original documents; the second number represents
sides of the copy.
For example, select 1-->2-sided if you have 1-sided originals and you want 2-sided copies.
1-->2-sided
4 Press Start.
How do I make duplex copies?
10
Page 18
Copying
How do I reduce and enlarge copies?
Copies can be reduced to 25% of the original document or enlarged to 400% of the original. The
default for Scale is Auto. If you leave Scale set to Auto, the content of you r original document will be
scaled to fit the size of the paper onto which you are copying.
To reduce or enlarge a copy:
1 Load your original document in the MFP.
2 From the home screen, touch the Cop y icon.
3 From Scale, touch + or – to enlarge or reduce your output.
Scale
Auto
Note: Touching Copy To or Copy From after setting Scale manually will turn the scale
value back to Auto.
4 Press Start.
How do I reduce and enlarge copies?
11
Page 19

Copying
How do I collate copies?
If you want y our copies collated, you don’t need to do anything: this is the defa ult setting.
If, however, you don’t want your copies collated, you can change the setting:
1 Load your original document in the MFP.
2 From the home screen, touch the Cop y icon.
3 Use the numeric keypad to enter the number of copies you want.
4 Touch Off if you do not want your copies collated.
Off
For example, two copies of three pages will print page 1, page 1, page 2, page 2, page 3,
page 3.
5 Leave Collate On if you want your copies collated (this is the default setting).
On
For example, two copies of three pages will print page 1, page 2, page 3, page 1, page 2,
page 3.
6 Press Start.
How do I collate copies?
12
Page 20

Copying
How do I staple copies?
1 Load your original document in the MFP.
2 From the home screen, touch the Cop y icon.
3 Touch the staple button that looks like how you want your copies stapled.
4 Press Start.
Note: These features may not be available on your MFP.
How do I punch holes in copies?
1 Load your original document in the MFP.
2 From the home screen, touch the Cop y icon.
3 Touch the Punch icon.
4 Press Start.
Note: This feature may not be available on your MFP.
How do I staple copies?
13
Page 21

How do I make color copies?
1 Load your original document in the MFP.
2 From the home screen, touch the Cop y icon.
3 Touch Color.
Color
Note: This feature may not be available on your MFP.
4 Press Start.
Copying
How do I make color copies?
14
Page 22

Copying
How do I copy photographs?
1 Place your photograph on the scanner bed.
2 From the home screen, touch the Cop y icon.
3 Touch Photo.
Photo
4 Touch Color if you have a color photograph and want a color copy.
Color
Note: This feature may not be available on your MFP.
5 Press Start.
6 Touch Scan Next if you have anot her photograph you want to scan.
7 Touch Done when you are finished.
How do I copy photographs?
15
Page 23

Copying
How do I copy multiple pages onto one page?
1 Load your original document in the MFP.
2 From the home screen, touch the Cop y icon.
3 Make your duplex choice.
4 Touch Advanced options.
5 Touch Paper Saver.
Paper Saver
6 Touch the button that looks like the output you want.
2 on 1 Portrait
2 on 1 Landscape
For e xample , if y ou ha v e f o ur portrait-oriented originals that y ou want copied t o the same s ide
of one sheet, touch 4on1 Portrait.
4 on 1 Portrait
4 on 1 Landscape
7 Touch Print Page Border s if you want a box drawn around each page on the copies
8 Touch Done.
9 Press Start.
How do I copy multiple pages onto one page?
16
Page 24

Copying
How do I place separator sheets between copy jobs?
This option is useful when you are making many copies of a multipage document. Separator sheets
placed between the cop y jobs make it much easier to identify, separate, and distribute copies.
1 Load your original document in the MFP.
2 From the home screen, touch the Cop y icon.
3 Touch Advanced Options.
4 Touch Separator Sheets.
5 Touch On or Off to indicate whether or not you want separator sheets to be placed between
your cop y jobs.
6 Touch Done.
7 Press Start.
How do I place separator sheets between copy jobs?
17
Page 25
Copying
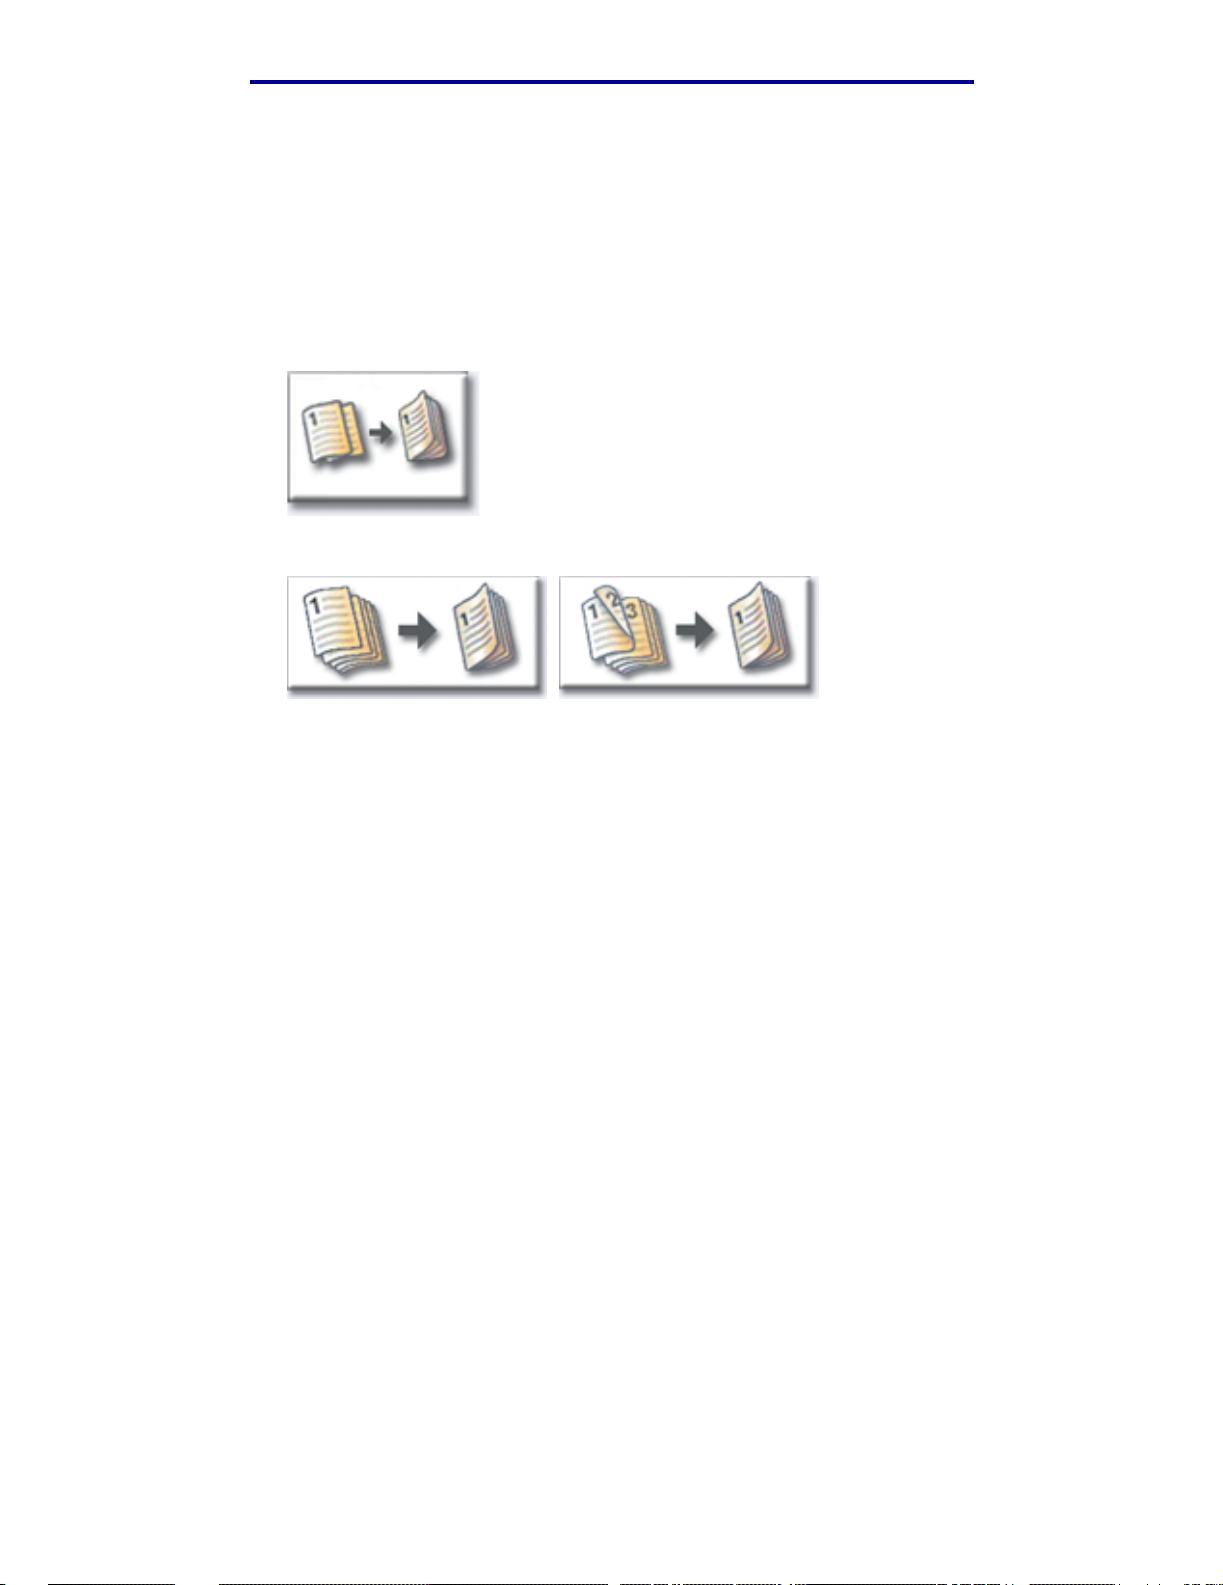
How do I create a booklet?
1 Load your original document in the MFP.
2 From the home screen, touch the Cop y icon.
3 Touch Advanced Options.
4 Touch Create Booklet.
5 Touch the button that represents whether your originals are 1-sided or 2-sided.
1-sided originals 2-sided originals
6 Touch Done.
7 Press Start.
8 Staple (if desired) and fold the copies as appropriate.
How do I create a booklet?
18
Page 26

Copying
How do I print the date and time at the top of each page?
1 Load your original document in the MFP.
2 From the home screen, touch the Cop y icon.
3 Touch Advanced Options.
4 Touch Date/Time Stamp.
5 Touch On to indicate that you want the date and time to appear at the top of your copy jobs.
6 Touch Done.
7 Press Start.
How do I print the date and time at the top of each page?
19
Page 27

Copying
How do I add a message overlay to copies?
1 Load your original document in the MFP.
2 From the home screen, touch the Cop y icon.
3 Touch Advanced Options.
4 Touch Message Overlay.
Message Overlay
5 Touch the button that represents the message y ou want to appear on your copies.
6 Touch Done.
7 Press Start.
How do I add a message overlay to copies?
20
Page 28

Copying
How do I improve the copy quality?
1 Load your original document in the MFP.
2 From the home screen, touch the Cop y icon.
3 Touch Advanced Options.
4 Touch Color/Content.
Note: This feature may not be available on your MFP.
5 Touch the icon that best represen ts what you ar e cop yi ng (f or e xample , Text or Photo, Gr ay or
Color).
6 Touch Done.
7 Press Start.
How do I improve the copy quality?
21
Page 29

3
Faxing
How do I enter fax numbers?
In addition to touching the numbers on the Fax destination screen or pressing the numbers on the
numeric keypad, you can also enter fax numbers by:
...entering shortcut numbers
1 Load your original document in the MFP.
2 From the numeric keypad, press # and the destination shortcut number.
3 Touch Next Number to enter another address.
4 Touch Fax It or press Start to send your job.
...entering stored numbers from the address book
1 Load your original document in the MFP.
2 Touch Fax and then touch Address Book.
3 Use the virtual keyboard to enter a name and then touch Search.
4 Touch the name to add it to the Fax to: list.
5 Touch New Search if you want to return to the virtual keyboard without adding a name to the
Fax to: list.
6 Touch Fax It or press Start to send your job.
Faxing
22
Page 30

Faxing
How do I send a fax?
1 Load your original document in the MFP.
2 Touch Fax and enter a fax number.
3 Touch Next Number to enter another f ax number.
Press the # key twice to place a “#” at the beginning of a fax number.
To place an asterisk (*) within a fax number, use the asterisk button.
To place a three second dialing pause within a fax number, use the Dial Pause button. Dial
pause will appear as a comma in the Fax to: box.
4 Touch Fax It or press Start to send your job.
...from my computer
Faxi ng fro m your computer lets yo u send ele ctroni c doc uments without l ea vi ng y our desk. Thi s gives
you the flexibility of faxing document s directly from software applications.
1 From your software application, click File ➠ Print.
2 From the Print window, select your MFP and then click Properties.
Note: In order to perform this function from your computer, you must have a PostScript
printer driver f or your MFP.
3 Choose the Paper tab and change Output format: to Fax.
4 Click OK. At the next screen, click OK.
5 From the Fax screen, enter the name and number for the fax recipient.
6 Click Send to send your job.
...at a later time
1 Load your original document in the MFP.
2 Touch Fax and enter the fax number(s).
3 Touch Options and then touch Advanced Options.
How do I send a fax?
23
Page 31

Faxing
4 Touch Delayed Send.
Note: While scanned faxes wait for tr ansmission they are listed in the Fax Queue.
5 Change the time and date to when you want to send the fax and then touch Done.
6 Press Start to scan and store your job.
How do I create a Fax Queue?
Once you successfully scan a docu ment, you will ha v e crea ted a Fax Queue. The Fax Queue is a list
of outgoing f axes w aiting t o be sent, as well as any incoming f ax es . A F ax Queue ca n also be created
with a single outgoing fax. For example, i f the MFP were s et f or ten redial s and y ou recei v ed an ‘er ror
line busy’ signal when attempting to fax, a queue would be created while the MFP waited to dial
again.
How do I create a Fax Queue?
24
Page 32

Faxing
How do I cancel a fax job?
...while original documents are scanning
From the automatic document feeder:
• Touch Cancel while Scanning… is displayed on the touch screen.
From the scanner bed:
• Touch Cancel while Scan Next Page / Done is displayed on the touch screen.
...after it has been scanned
1 Touch Fax.
2 Touch Options.
3 Touch Advanced Options.
4 Touch Fax Queue.
Note: If Fax Queue is grayed out (not available), you cannot cancel any faxes.
5 Touch the button that represents the fax you want to cancel.
6 Touch Done.
How do I cancel a fax job?
25
Page 33

Faxing
How do I create shortcuts?
Instead of entering the entire phone number of a fax recipient on the control panel each time you
want to send a fax, you can create a permanent fax destination and assign a shortcut number.
How do I create a single number shortcut?
1 From y o ur computer, enter the IP address of the MFP in the URL field (address bar) of your
Web browser. If you do not know the IP address, see your administrator.
2 Click Configuration (in the left frame of your browser window) and then click Manage
Destinations (in the right frame of your browser window).
Note: You may be asked t o enter a pass word. If y ou do not hav e an ID and pass word, ge t
one from your administrator.
3 Click Fax Desti nations Setup.
4 Enter a unique name for the shortcut and specify the fax number.
5 Assign a shortcut number. If you enter a number that is already in use, you are prompted to
select another number.
6 Click Add.
7 Walk o ver to the MFP and load your original document.
8 From the numeric keypad, press # and then enter your shortcut number.
9 Touch Fax It or press Start to send your job.
How do I create a multi-number shortcut?
1 From y o ur computer, enter the IP address of the MFP in the URL field (address bar) of your
Web browser. If you do not know the IP address, see your administrator.
2 Click Configuration (in the left frame of your browser window) and then click Manage
Destinations (in the right frame of your browser window).
3 Click Fax Desti nations Setup and enter a unique name for the shortcut.
4 Enter the fax numbers for the group. Make sure you separate each fax number with a
semicolon (;).
5 Assign a shortcut number. If you enter a number that is already in use, you are prompted to
select another number.
6 Click Add.
7 Walk o ver to the MFP and load your original document.
How do I create shortcuts?
26
Page 34

Faxing
8 From the numeric keypad, press # and then enter your shortcut number(s).
9 Touch Fax It or press Start to send your job.
How do I create shortcuts?
27
Page 35

Faxing
How do I send a fax cover page?
1 Load your original document in the MFP.
2 Touch Fax.
3 Enter your fax number.
4 Touch Options.
5 Touch Fax Cover P a ge.
Fax
Cover
Page
6 Use the virtual keyboard to enter information in the To:, From:, and Message: screens.
Touch Enter when you have completed each screen.
7 From the verification screen, touch Done if the fax co ver page looks the way you want it to.
Touch Back if you want to make changes. Touch Cancel if you do not want to send a fax
cover page.
8 Press Start to send your job.
How do I send a fax cover page?
28
Page 36

Faxing
How do I change the fax resolution?
1 Load your original document in the MFP.
2 Touch Fax.
3 Enter your fax number.
4 Touch Options.
5 Touch the button that represents the resolution you want.
For example, Standard.
(200 dpi)
Standard
Fine
(300 dpi)
Super Fi ne
(400 dpi)
Ultra Fine
6 Press Start to send your job.
How do I adjust the lighter/darker setting?
1 Load your original document in the MFP.
2 Touch Fax.
3 Enter your fax number.
4 Touch Options.
5 From Lighter/Darker, use the arrows to adjust the quality of y our fax.
6 Press Start to send your job.
How do I change the fax resolution?
29
Page 37

4
Printing
How do I access the virtual printer operator panel?
The virtual printer operator panel can be used for a wide v ariet y of tasks, such as printing held jobs,
canceling print jobs, and changing various settings.
To access the virtual printer operator panel:
1 From the Welcome screen, touch the Key.
2 Touch the Printer Operator Panel button.This virtual printer operator panel functions exactly
like the operator panel on your printer.
Printer Operator Panel
Printing
30
Page 38

Printing
How do I cancel a print job?
1 Access the virtual printer operator panel.
2 Touch Menu until you see JOB MENU Cancel Job and then touch Select.
JOB MENU
Cancel Job
1 Menu 2 Select 3 Return 4
Go 5 Stop 6
3 Touch Back and then touch Home to return to the W elcome screen.
How do I cancel a print job?
31
Page 39

Printing
How do I print confidential jobs?
1 From your software application, click File ➠ Print.
2 From the Print window, select your MFP and then click Properties.
3 Choose the Paper tab and change Output format: to Confidential Print.
4 Enter a user name and a 4-digit password, using only the numbers 1-6.
5 Click OK. At the next screen, click OK.
6 From the MFP, access the virtual printer operator panel.
7 Touch Menu until you see JOB MENU and then touch Select.
8 Touch Menu until Confidential Job is displayed and then touch Select.
9 Enter the Per sonal Ident ificat ion Number (PIN) associ ated with your confidential job. Use the
buttons on the virtual operator panel to enter the four-digit PIN.
JOB MENU
Confidential Job
1 Menu 2 Select 3 Return 4
Go 5 Stop 6
Note: If you enter an invalid PIN, the message No Jobs Found. Retry? is disp layed.
Touch Go to reenter the PIN, or touch Stop to exit the menu.
10 Touch Menu until Print All Jobs or Print a Job is displayed and then touch Select.
– To print a particular job , touch Menu un til the name of the job is displayed and then touch
Select.
– If you are prompted to enter the number of copies you want to print, touch Menu> or
<Menu to increase or decrease the number on the virtual printer operator panel and then
touch Select.
11 Touch Go to print the selected jobs.
How do I print confidential jobs?
32
Page 40

Printing
How do I delete confidential jobs?
1 Access the virtual printer operator panel.
2 Touch Menu until you see JOB MENU and then touch Select.
3 Touch Menu until Confidential Job is displayed and then touch Select.
4 Enter the Per sonal Ident ificat ion Number (PIN) associ ated with your confidential job. Use the
buttons on the virtual operator panel to enter the four-digit PIN.
JOB MENU
Confidential Job
1 Menu 2 Select 3 Return 4
Go 5 Stop 6
Note: If you enter an invalid PIN, the message No Jobs Found. Retry? is disp layed.
Touch Go to reenter the PIN, or touch Stop to exit the menu.
5 Touch Menu until Delete All Jobs or Delete a Job is displayed and then touch Select.
To delete a particular job, touch Menu until the name of the job is displayed and then touch
Select.
6 Touch Go to delete the selected jobs.
How do I delete confidential jobs?
33
Page 41

Printing
How do I print Verify, Reserve, and Repeat jobs?
Verify Print lets you print the first copy of a complex multiple copy print job then holds the remai ning
copies until you either continue printing the job or delete the job using th e printer operator panel.
Reserve Print lets you store a print job on the printer for printing at a later time. For example, this
option makes it convenient for you to store forms, spreadsheets, or presentations used by several
people.
Warning: All jobs stored on the printer are lost when you turn off or reset the printer.
Repeat Print lets you print the requested number of copies of a print job and also stores a copy that
can be printed later. For example, this option makes it easy for you to print more copies for
presentations, meetings, and general handouts.
Warning: All jobs stored on the printer are lost when you turn off or reset the printer.
1 From your software application, click File ➠ Print.
2 From the Print window, select your MFP and then click Properties.
3 Choose the Paper tab and change Output format: to Verify Print, Reserve Print,
or Repeat Print.
4 Enter a user name.
5 Click OK. At the next screen, click OK.
6 From the MFP, access the virtual printer operator panel.
7 Access the virtual printer operator panel.
8 Touch Menu until you see JOB MENU and then touch Select.
9 Touch Menu until Held Jobs is displayed and then touch Select.
10 Touch Menu until Print All Jobs or Print a Job is displayed and then touch Select.
JOB MENU
Print All Jobs
Menu Select Return
Go Stop
– To print a particular job, touch Men u until the name of the job is displayed and then touch
Select.
How do I print Verify, Reserve, and Repeat jobs?
34
Page 42

Printing
– If you are prompted to enter the number of copies you want to print, touch Menu> or
<Menu to increase or decrease the number on the virtual printer operator panel and then
touch Select.
11 Touch Go to print the selected jobs.
How do I print Verify, Reserve, and Repeat jobs?
35
Page 43

Printing
How do I delete Verify, Reserve, and Repeat jobs?
1 Access the virtual printer operator panel.
2 Touch Menu> until you see JOB MENU and then touch Select.
3 Touch Menu> or <Menu until Held Jobs is displayed and then touch Select.
4 Touch Menu> or <Menu until Delete All Jobs or Delete a Job is displayed and then
touch Select.
JOB MENU
Delete All Jobs
Menu Select Return
Go Stop
To delete a particular job, touch Menu> or <Menu until the name of the job is disp layed and
then touch Select.
5 Touch Go to delete the selected jobs.
How do I delete Verify, Reserve, and Repeat jobs?
36
Page 44

5
Scanning to e-mail
How do I enter e-mail addresses with the virtual keyboard?
1 Load your original document in the MFP.
2 Touch E-mail.
3 Use the virtual keyboard to enter the recipient's address in the To: field.
4 Touch Next Address to enter another address.
5 Touch Send It or press Start to send your job.
How do I enter e-mail addresses using shortcut numbers?
1 Load your original document in the MFP.
2 From the numeric keypad, press # and the destination shortcut number.
3 Touch Next Address to enter another address.
4 Touch Send It or press Start to send your job.
How do I enter e-mail addresses from the Address Book?
1 Load your original document in the MFP.
2 Touch E-mail.
3 Use the virtual keyboard to enter y our search information.
4 Touch Search Address Book.
5 Touch the name that you want to add to the To: field.
6 Touch Send It or press Start to send your job.
Scanning to e-mail
37
Page 45

Scanning to e-mail
How do I send an e-mail?
1 Load your original document in the MFP.
2 Touch E-mail.
3 Enter the recipient's address.
4 Touch Send It or press Start to send your job.
How do I send an e-mail to multiple addresses?
1 Load your original document in the MFP.
2 Touch E-mail.
3 Enter an e-mail address.
4 Touch Next Address.
5 Enter another address.
6 Touch Send It or press Start to send your job.
How do I cancel an e-mail?
• From the automatic document feeder, touch Cancel while Scanning… is displayed on the
touch screen.
• From the scanner bed, touch Cancel while Scan Next Page / Done is displayed on the
touch screen.
How do I send an e-mail?
38
Page 46

Scanning to e-mail
How do I add an e-mail subject and message?
1 Load your original document in the MFP.
2 Touch E-mail.
3 Enter an e-mail address.
4 Touch Options.
5 Touch E-mail Subject.
E-mail
Subject
6 Use the virtual keyboard to enter a subject line and then touch Enter.
7 Touch E-mail Message.
8 Use the virtual keyboard to enter a message and then touch Enter.
9 Press Start to send your job.
How do I add an e-mail subject and message?
39
Page 47

Scanning to e-mail
How do I improve the image quality?
1 Load your original document in the MFP.
2 Touch E-mail.
3 Enter an e-mail address.
4 Touch Options.
5 Touch the Highest Resolution button to incre a se the scan dots per inch (dpi) of the image
that will be sent.
Smallest
File Size
Note: Increasing the file resolution also increases the file size.
6 Press Start to send your job.
Highest
Resolution
How do I improve the image quality?
40
Page 48

Scanning to e-mail
How do I reduce the file size?
1 Load your original document in the MFP.
2 Touch E-mail.
3 Enter an e-mail address.
4 Touch Options.
5 Touch the Smallest File Size button to red uce the scan dpi of the image that will be sent.
Smallest
File Size
Note: Reducing the file size also reduces the image quality.
6 Press Start to send your job.
Highest
Resolution
How do I reduce the file size?
41
Page 49

Scanning to e-mail
How do I change the scan file type?
1 Load your original document in the MFP.
2 Touch E-mail.
3 Enter an e-mail address.
4 Touch Options.
5 Touch the button the represents the file type you want to send.
.PDF .JPEG .TIFF .PS
Note: If you are unsure about what file type to use:
•PDF:This creates a single file with multiple pages, viewable with Adobe®
Acrobat® Reader® . Adobe® Acroba t® Reader® is pro vided f ree by Ado be at
http://www.adobe.com. PDF works well with both text and graphics.
• JPEG: this creates and attaches a separate file f or each page of y our o riginal,
and is viewable by most web browsers and g raphics programs. JPEG works
best with color or gr ayscale images such as photographs, and not as w ell with
text or line art.
• TIFF: this either creates multiple files or a single fi le, depending on the setting
chosen by your syst em administrator. The file size is usually larger than an
equivalent JPEG, but TIFF works equally well with color, gray scale and black
and white images. TIFFs are view able by most graphics programs.
•PS: this creates a single fil e with mu lt ip le pages , suitable for sending (via FTP,
for example) to a PostScript compatible printer. Few appli cations will open
PostScript files for viewing.
6 Press Start to send your job.
How do I change the scan file type?
42
Page 50

Scanning to e-mail
How do I scan in color?
1 Load your original document in the MFP.
2 Touch E-mail.
3 Enter an e-mail address.
4 Touch Options.
5 Touch Color.
Color
Note: This feature may not be available on your MFP.
6 Press Start to send your job.
How do I scan in color?
43
Page 51

Scanning to e-mail
How do I create an e-mail shortcut?
1 From y o ur computer, enter the IP address of the MFP you want to scan to in the URL field
(address bar) of your Web browser.
2 Click Configuration (in the left fr a me) and then click Manage Destinations (in the right
frame).
Note: You may be asked t o enter a pass word. If y ou do not hav e an ID and pass word, ge t
one from your administrator.
3 Click E-mail Destination Setup.
4 Enter a unique name for the recipient and specify the e-mail address.
Note: If you are entering multip le addresses, make sure y ou separate each addr ess with
a comma (,).
5 Choose your scan settings (Format, Content, Color, and Resolut ion).
6 Enter a shortcut number and then click Add. If you enter a number that is already in use, you
are prompted to select another number.
7 Walk over to the MFP and load your original document.
8 Use the numeric keypad to enter your shortcut number.
9 Press Start to send your job.
How do I create a FTP shortcut?
1 From y o ur computer, enter the IP address of the MFP you want to scan to in the URL field
(address bar) of your Web browser.
2 Click Configuration (in the left fr a me) and then click Manage Destinations (in the right
frame).
3 Click FTP Destination Setup .
4 Enter a unique name for the recipi ent and specify the FTP address.
5 Choose your scan settings (Format, Content, Color, and Resolut ion).
6 Enter a shortcut number and then click Add. If you enter a number that is already in use, you
are prompted to select another number.
7 Walk over to the MFP and load your original document.
8 Use the numeric keypad to enter your shortcut number.
9 Press Start to send your job.
How do I create an e-mail shortcut?
44
Page 52

Scanning to e-mail
How do I use other scan methods?
The advantage to using other scan methods, such as Scan to PC or ScanBackTM, is that your
computer does not have to be directly connected to the MFP in order for you to receive the image.
You can scan the document back to y our computer over the network b y creating a scan profile on
your computer and then downloading the profile to the MFP.
A scan profile includes all the necessary inf ormation about your original document and presets the
touch screen of the MFP to those settings.
How do I set up and use Scan to PC profiles?
1 From y o ur computer, enter the IP address of the MFP you want to scan to in the URL field
(address bar) of your Web browser.
2 Click Create Scan Profile and then click PC Scan Profile.
3 Follow the instructions on the screen to create a profile.
4 Select a location to store the scan on your computer.
5 Assign a profile name. This is the name that will display in the Profiles li st on the MFP.
6 Click Submit to send the profile to the MFP.
7 Walk o ver to the MFP and load your original document.
8 Touch Profiles.
Note: The Profiles icon will only appear on the MFP home page if there are profiles
available.
9 Find your profile by scrolling through the list of names.
10 Touch the name of the profile you set up from your computer. Your job starts automatically.
11 Return to your computer.
Image Received is displayed i n the job status window. Once your scan output fil e appears in
the list, it has been saved to the PC. You can select it and launch an application to open the
file.
How do I use other scan methods?
45
Page 53

Scanning to e-mail
How do I set up and use ScanBack profiles?
The ScanBack utility i s on the MFP CD t hat came in the box with your MFP. For complete installation
instructions, refer to the document included on the MFP CD.
The followi ng instructions assume ScanBack is installed on your computer.
1 From y o ur computer, launch the ScanBack utility.
2 Select the MFP you want to use and then click Setup....
3 Follow the instructions on the screen s to def ine y our original document and t he type of ou tput
you want.
4 Select a location to store the scan.
5 Assign a Profile Name. This is the name th at will display in the Profiles list.
6 Click Finish to send the profile to the MFP.
7 Walk over to the MFP and load your original document.
8 Touch Profiles.
Note: The Profiles icon will only appear on the MFP home page if there are profiles
available.
9 Find your profile by scrolling through the list of names.
10 Touch the name of the profile you set up from your computer. Your job starts automatically.
11 Return to your computer. Your scan file is saved in the directory that you specified.
How do I set up and use ScanBack profiles?
46
Page 54

Index
A
accessing the virtual printer
operator panel 30
address book 22, 37
B
booklet, creating 18
buttons
Color 43
FTP 42
JPEG 42
PDF 42
PS 42
TIFF 42
C
canceling email 38
canceling fax job 23
cloning 16
collating 12
color
e-mail 43
scanning 43
color copies 14
confidential jobs
deleting 33
printing 31, 32
copying
adding message overlay 20
advanced options 16, 17,
18, 19, 20
booklet 18
canceling a job 4
collating 12
duplex 10
from a book 9
from multipurpose feeder 8
hole punching 13
making color copies 14
page borders 16
paper saver 16
photographs 14, 15
printing date and time 19
quick copy 4
reducing and enlarging 11
separator sheets 17
sizing 4, 6
stapling 13
to letterhead 7
cover page 28
D
date and time, printing 19
deleting
held jobs 36
repeat jobs 36
reserve jobs 36
verify jobs 36
dpi 29
duplex copying 10
E
e-mail
adding subject and message
39
canceling 38
changing the file type 42
creating shortcuts 44
entering addresses 37
FTP 42
improving quality 39, 40
JPEG 42
multiple addresses 38
PDF 42
reducing file size 41
ScanBack profiles 46
scanning in color 43
sending 38
TIFF 42
using address book 37
using profiles 45
using shortcut numbers 37
enlarging copy size 11
F
fax queue 24, 47
faxing
adjusting light/dark setti ng
29
advanced options 23, 25
canceling a fax 25
canceling a job 23
changing resolution 29
cover page 28
creating shortcuts 26
delay sending 23
entering shortcuts 22
entering stored numbers 22
from computer 23
sending a fax 23
file size
reducing 39, 40, 41
file type, changing 42
FTP 42
FTP shortcuts 44
H
held jobs
deleting 36
printing 34
hole punch 13
I
image quality, improving 39
Index
47
Page 55

Index
J
JPEG 42
L
light/dark setting 29
M
message overlay 20
multipurpose feeder 8
multi-up 16
N
N-up 16
P
page borders 16
paper saver 16
PDF 42
photographs 14, 15
print job
canceling 31
printer operator panel,
accessing 30
printing
held jobs 34
repeat jobs 34
reserve jobs 34
verify jobs 34
profiles 45, 46
shortcuts, creating 26, 44
staple 13
stored numbers, entering 22
T
TIFF 42
transparencies 7
V
verify jobs 34, 36
Q
quick copying 4
R
reducing copy size 11
repeat jobs 34, 36
reserve jobs 34, 36
resolution, changing 29, 39,
40
S
Scan to PC profiles 45
ScanBack profiles 46
separator sheet 17
shortcut numbers 37
shortcut numbers, entering 22
Index
48
Page 56

Page 57

Readers’ Comments — We’d Like to Hear from You
Infoprint MFP 30/35
User’s Guide
Publication No. G510-2441-00
Overall, how satisfied are you with the information in this book?
Very Satisfied Satisfied Neutral Dissatisfied Very Dissatisfied
Overall satisfaction hhhhh
How satisfied are you that the information in this book is:
Very Satisfied Satisfied Neutral Dissatisfied Very Dissatisfied
Accurate hhhhh
Complete hhhhh
Easy to find hhhhh
Easy to understand hhhhh
Well organized hhhhh
Applicable to your tasks hhhhh
Please tell us how we can improve this book:
Thank you for your responses. May we contact you? h Yes h No
When you send comments to IBM, you grant IBM a nonexclusive right to use or distribute your comments in any
way it believes appropriate without incurring any obligation to you.
Name Address
Company or Organization
Phone No.
Page 58

___________________________________________________________________________________________________
Readers’ Comments — We’d Like to Hear from You
G510-2441-00
_________________________________________________________________________________________
Fold and Tape Please do not staple Fold and Tape
IBMR
NO POSTAGE
NECESSARY
IF MAILED IN THE
UNITED STATES
Cut or Fold
Along Line
BUSINESS REPLY MAIL
FIRST-CLASS MAIL PERMIT NO. 40 ARMONK, NEW YORK
POSTAGE WILL BE PAID BY ADDRESSEE
IBM Corporation
Information Development IBM Printing Systems Depatment
H7FE
Building 004M PO Box 1900 Boulder, CO
80301-9817
_________________________________________________________________________________________
Fold and Tape Please do not staple Fold and Tape
G510-2441-00
Cut or Fold
Along Line
Page 59

Page 60

IBMR
Part Number: 75P4833
Printed in U.S.A.
G510-2441-00
(1P) P/N: 75P4833
 Loading...