

Page 1
Page 2
Kerr15_TOC.fm Page 1 Wednesday, September 5, 2001 6:17 PM
Table of Contents
Your New Monitor . . . . . . . . . . . . . . . . . . . . . . . . . . . . . . . . . . . . . . . . . . . . . . . . . . . . . . . . . . . . . . . . . . 2
Connecting Your Monitor . . . . . . . . . . . . . . . . . . . . . . . . . . . . . . . . . . . . . . . . . . . . . . . . . . . . . . . . . 2
Front Panel . . . . . . . . . . . . . . . . . . . . . . . . . . . . . . . . . . . . . . . . . . . . . . . . . . . . . . . . . . . . . . . . . . . . 3
Direct Access Buttons . . . . . . . . . . . . . . . . . . . . . . . . . . . . . . . . . . . . . . . . . . . . . . . . . . . . . . . . . . . . 4
Operation . . . . . . . . . . . . . . . . . . . . . . . . . . . . . . . . . . . . . . . . . . . . . . . . . . . . . . . . . . . . . . . . . . . . . . . . . 5
On Screen Display(OSD) . . . . . . . . . . . . . . . . . . . . . . . . . . . . . . . . . . . . . . . . . . . . . . . . . . . . . . . . . 5
Monitor function control . . . . . . . . . . . . . . . . . . . . . . . . . . . . . . . . . . . . . . . . . . . . . . . . . . . . . . . . . . 5
Brightness . . . . . . . . . . . . . . . . . . . . . . . . . . . . . . . . . . . . . . . . . . . . . . . . . . . . . . . . . . . . . . . . . . 5
Contrast . . . . . . . . . . . . . . . . . . . . . . . . . . . . . . . . . . . . . . . . . . . . . . . . . . . . . . . . . . . . . . . . . . . . 5
Width & Height . . . . . . . . . . . . . . . . . . . . . . . . . . . . . . . . . . . . . . . . . . . . . . . . . . . . . . . . . . . . . . 5
Horizontal & Vertical Position . . . . . . . . . . . . . . . . . . . . . . . . . . . . . . . . . . . . . . . . . . . . . . . . . . 5
Pincushion . . . . . . . . . . . . . . . . . . . . . . . . . . . . . . . . . . . . . . . . . . . . . . . . . . . . . . . . . . . . . . . . . . 6
Balanced Pincushion . . . . . . . . . . . . . . . . . . . . . . . . . . . . . . . . . . . . . . . . . . . . . . . . . . . . . . . . . . 6
Geometry . . . . . . . . . . . . . . . . . . . . . . . . . . . . . . . . . . . . . . . . . . . . . . . . . . . . . . . . . . . . . . . . . . 6
Trapezoid . . . . . . . . . . . . . . . . . . . . . . . . . . . . . . . . . . . . . . . . . . . . . . . . . . . . . . . . . . . . . . . 6
Rotation . . . . . . . . . . . . . . . . . . . . . . . . . . . . . . . . . . . . . . . . . . . . . . . . . . . . . . . . . . . . . . . . 6
Parallelogram . . . . . . . . . . . . . . . . . . . . . . . . . . . . . . . . . . . . . . . . . . . . . . . . . . . . . . . . . . . 6
Moiré . . . . . . . . . . . . . . . . . . . . . . . . . . . . . . . . . . . . . . . . . . . . . . . . . . . . . . . . . . . . . . . . . . . . . . 6
Color . . . . . . . . . . . . . . . . . . . . . . . . . . . . . . . . . . . . . . . . . . . . . . . . . . . . . . . . . . . . . . . . . . . . . . 6
Degauss . . . . . . . . . . . . . . . . . . . . . . . . . . . . . . . . . . . . . . . . . . . . . . . . . . . . . . . . . . . . . . . . . . . . 7
Reset . . . . . . . . . . . . . . . . . . . . . . . . . . . . . . . . . . . . . . . . . . . . . . . . . . . . . . . . . . . . . . . . . . . . . . 7
Information . . . . . . . . . . . . . . . . . . . . . . . . . . . . . . . . . . . . . . . . . . . . . . . . . . . . . . . . . . . . . . . . . 7
Language . . . . . . . . . . . . . . . . . . . . . . . . . . . . . . . . . . . . . . . . . . . . . . . . . . . . . . . . . . . . . . . . . . . 7
OSD Lock/Unlock . . . . . . . . . . . . . . . . . . . . . . . . . . . . . . . . . . . . . . . . . . . . . . . . . . . . . . . . . . . . 7
Troubleshooting . . . . . . . . . . . . . . . . . . . . . . . . . . . . . . . . . . . . . . . . . . . . . . . . . . . . . . . . . . . . . . . . . . . . 8
Power Saver . . . . . . . . . . . . . . . . . . . . . . . . . . . . . . . . . . . . . . . . . . . . . . . . . . . . . . . . . . . . . . . . . . . . . . . 9
Display Modes . . . . . . . . . . . . . . . . . . . . . . . . . . . . . . . . . . . . . . . . . . . . . . . . . . . . . . . . . . . . . . . . . . . . . 9
Specifications . . . . . . . . . . . . . . . . . . . . . . . . . . . . . . . . . . . . . . . . . . . . . . . . . . . . . . . . . . . . . . . . . . . . . 10
Compliances
FrançaisEspañolDeutschItaliano EnglishPortuguese
English - 1
Page 3
Kerr15_main_1.fm Page 2 Wednesday, September 5, 2001 6:16 PM
Your New Monitor
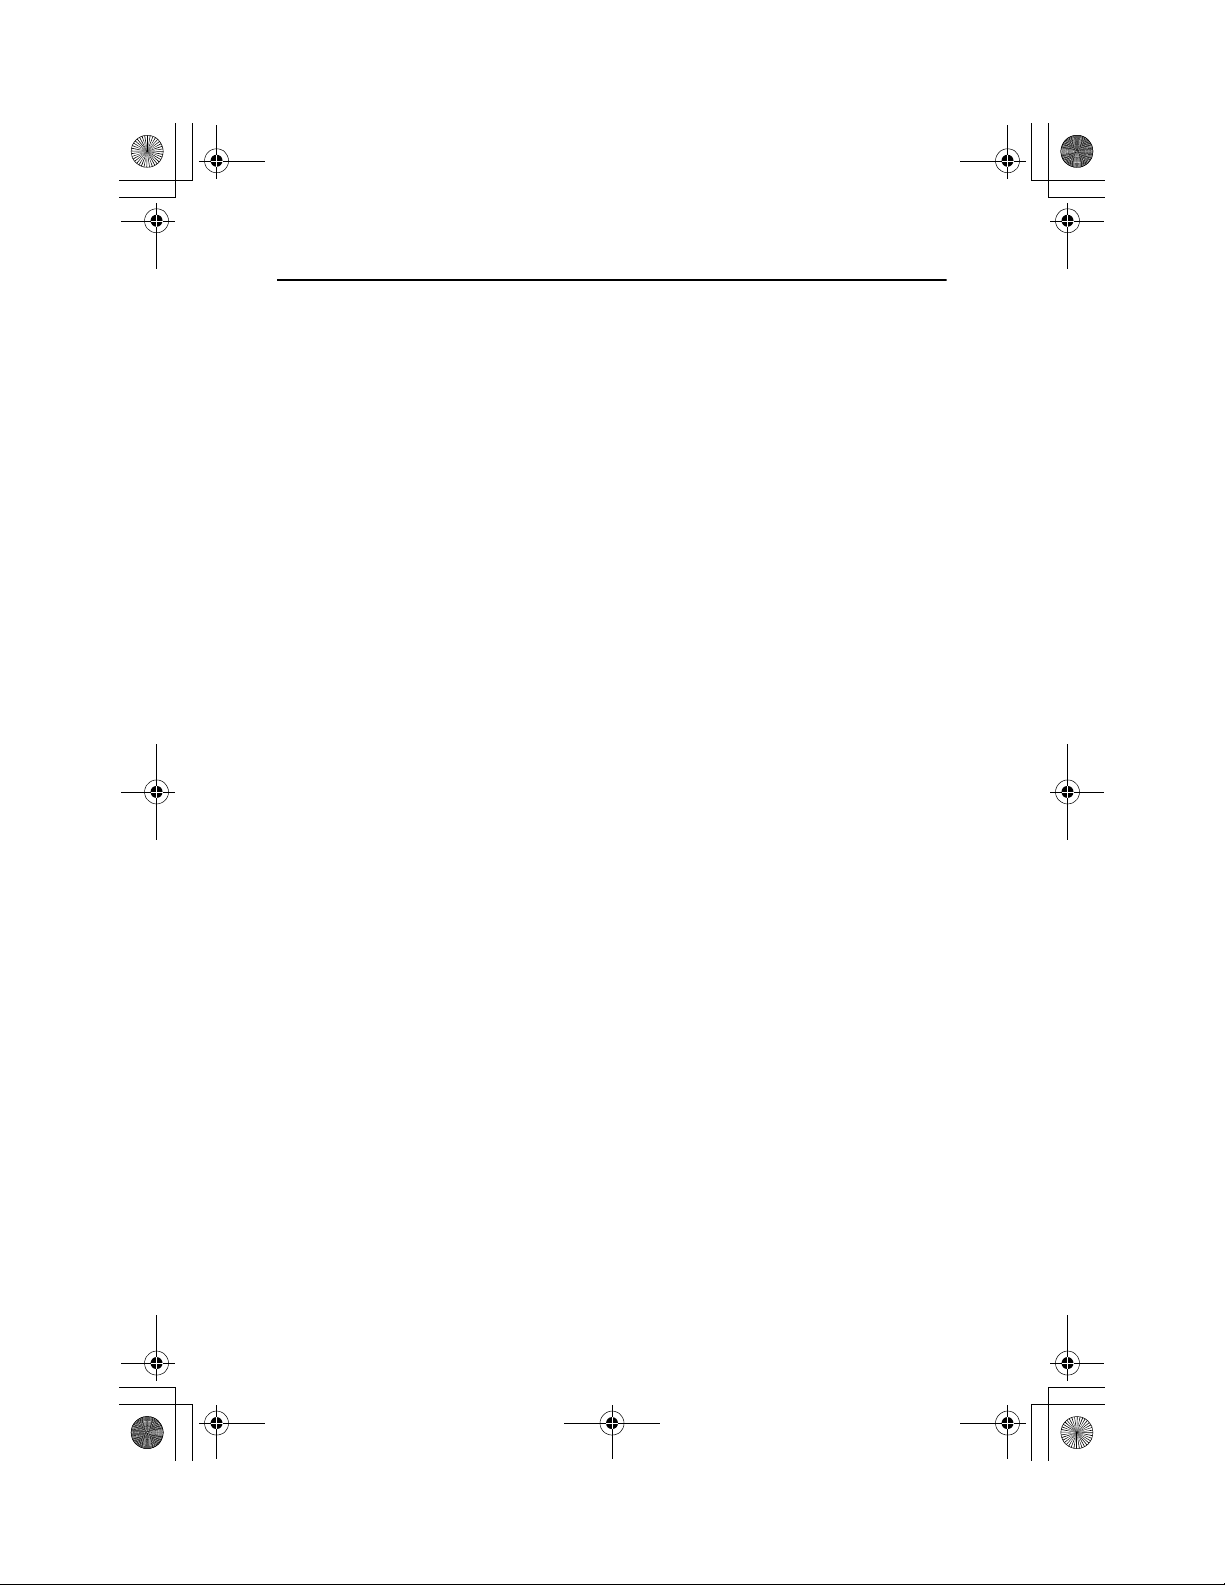
Connecting Your Monitor
3
Turn off your computer and unplug the
1
power cord.
Signal cable
2
Connect the end of the signal cable to
your computer’s video port (Video board,
video card, or graphics card).
Power port
3
Connect the power cord for your monitor
to the power port on the bac k of the
monitor.
Power cords
4
Plug the power cord for the monitor and
2
the power cord for your computer into a
nearby outlet.
Turn on your computer and monitor.
5
If your monitor displays an image,
installation is complete.
Install monitor driver
6
•
Insert the provided diskette into the A:
drive, when prompted by the operating
system.
4
English - 2
Page 4
Kerr15_main_1.fm Page 3 Wednesday, September 5, 2001 6:16 PM
Your New Monitor
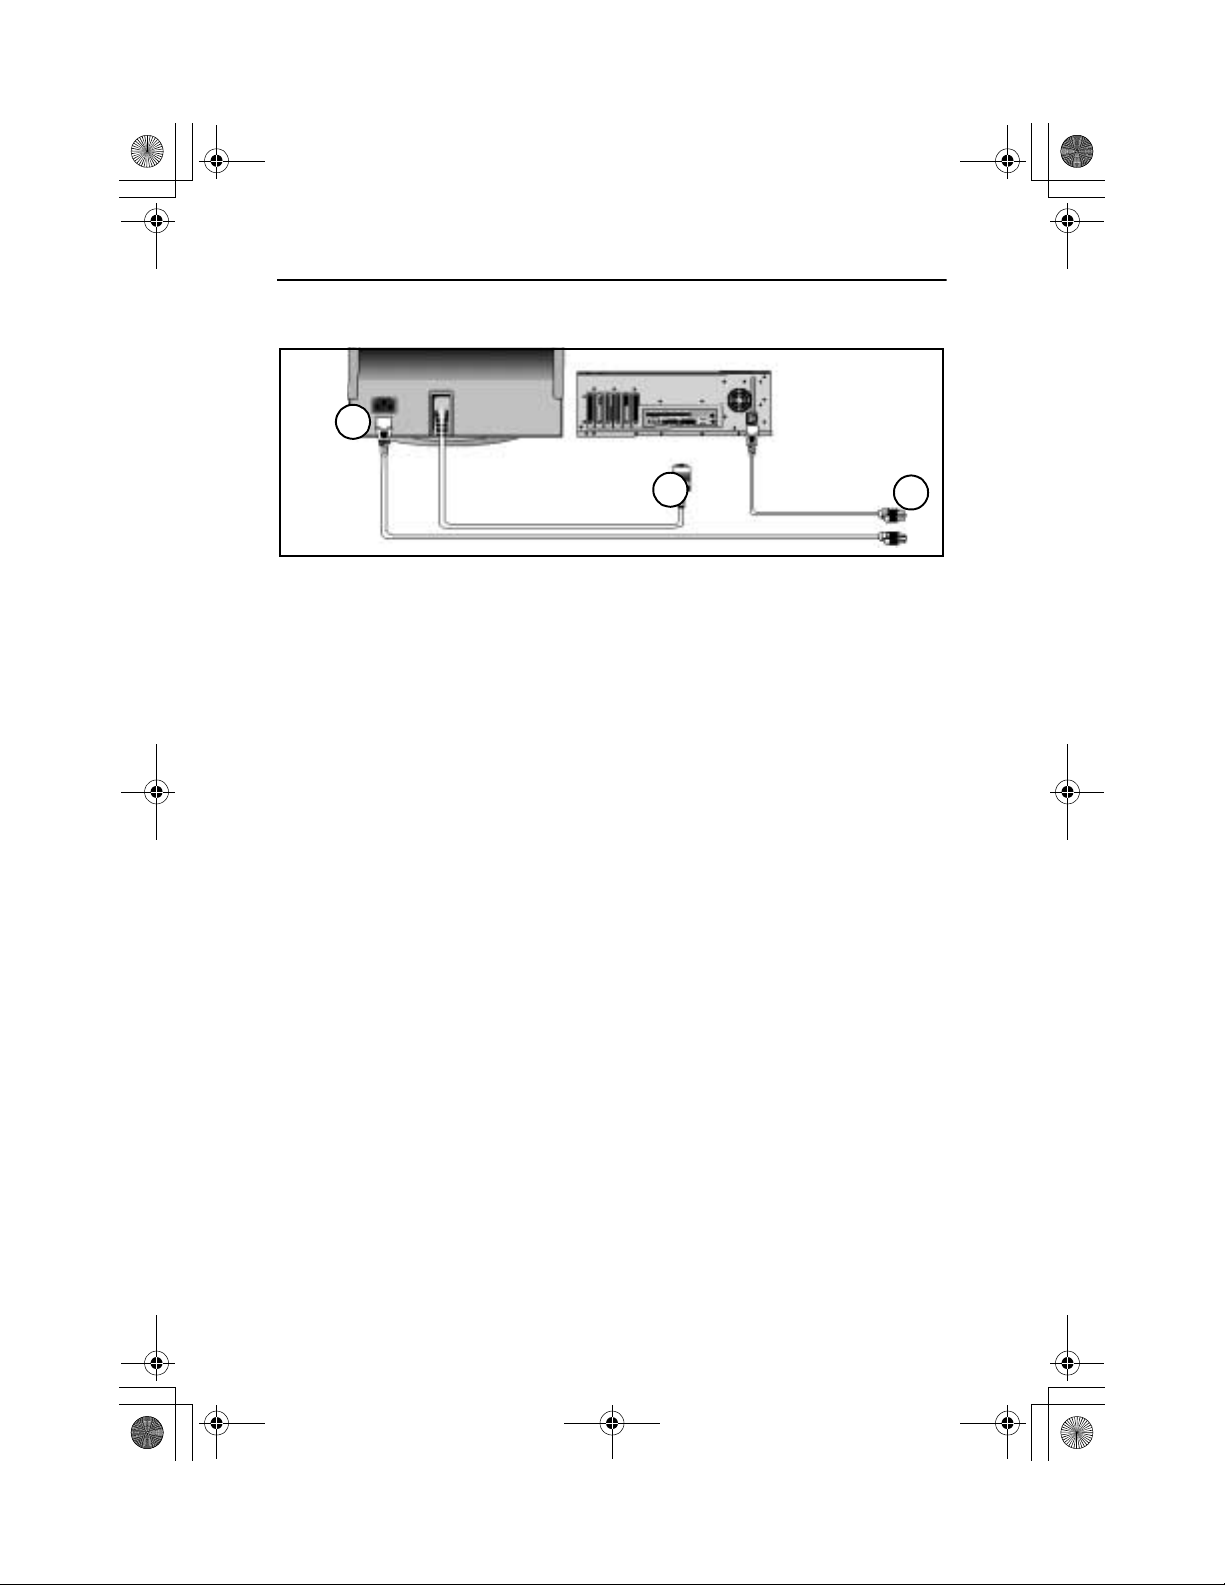
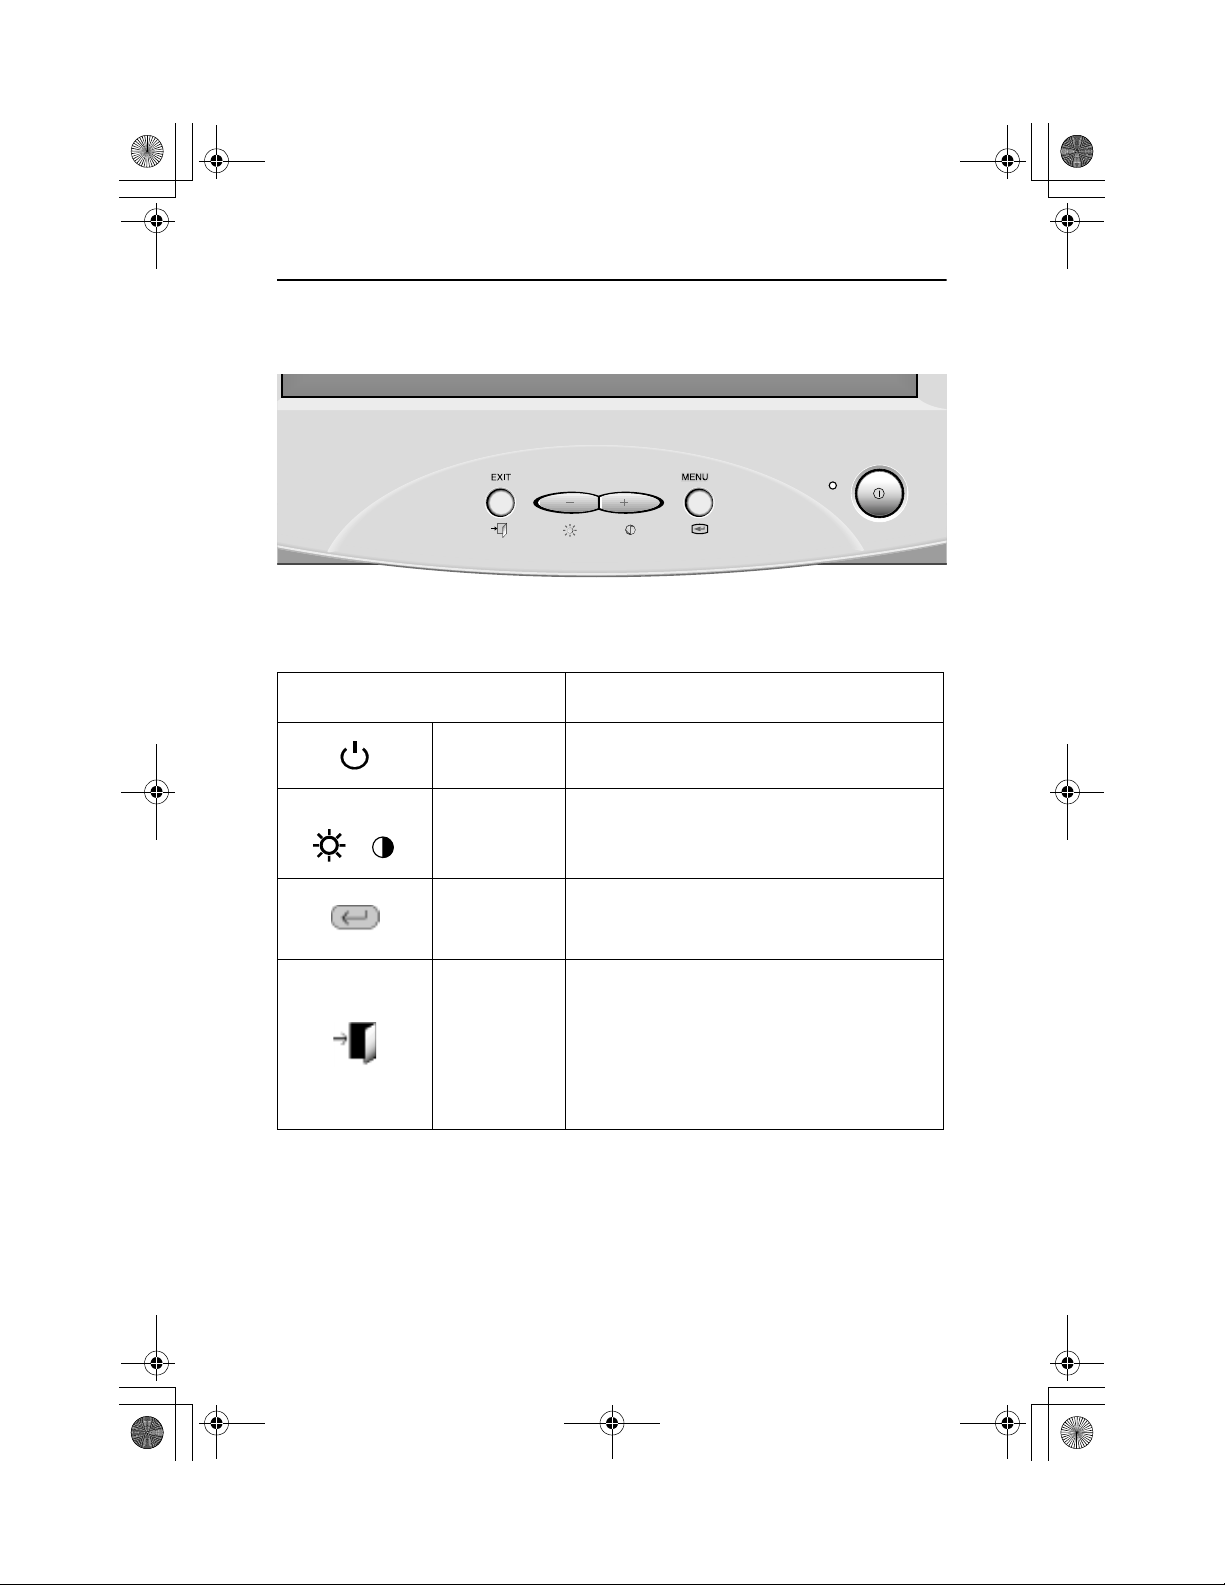
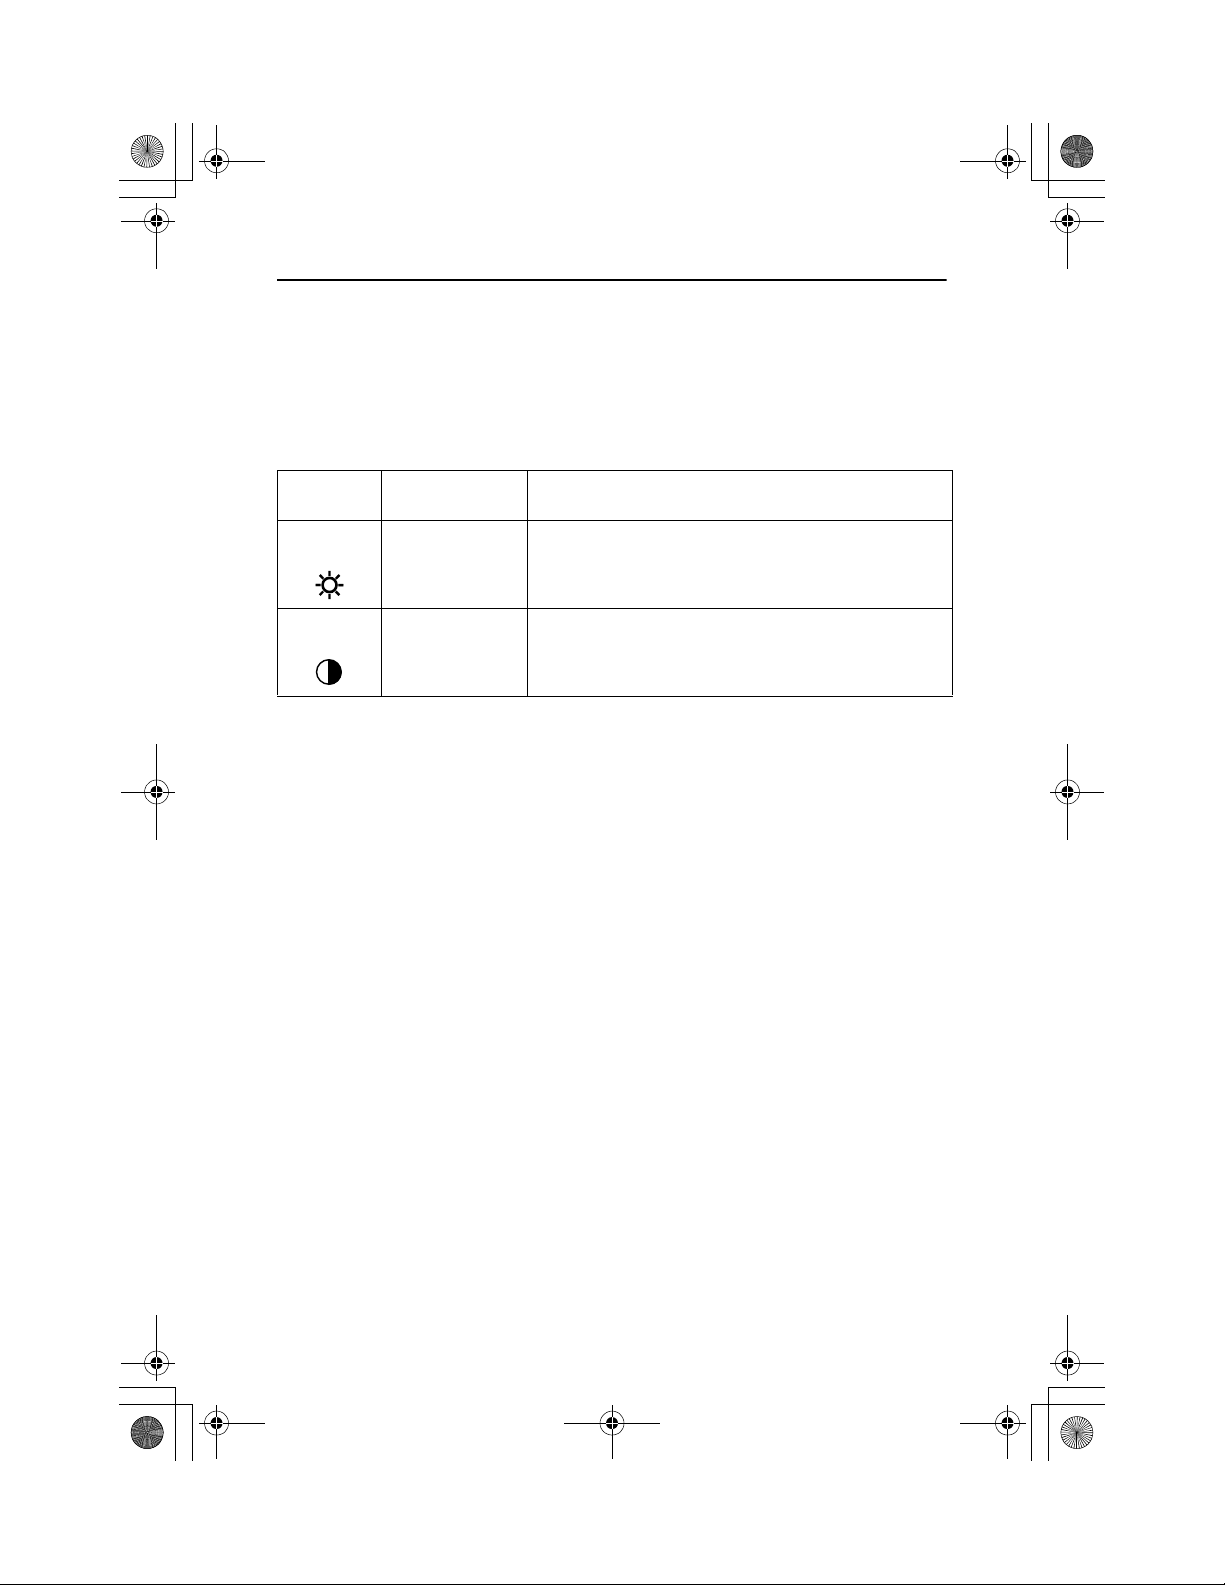
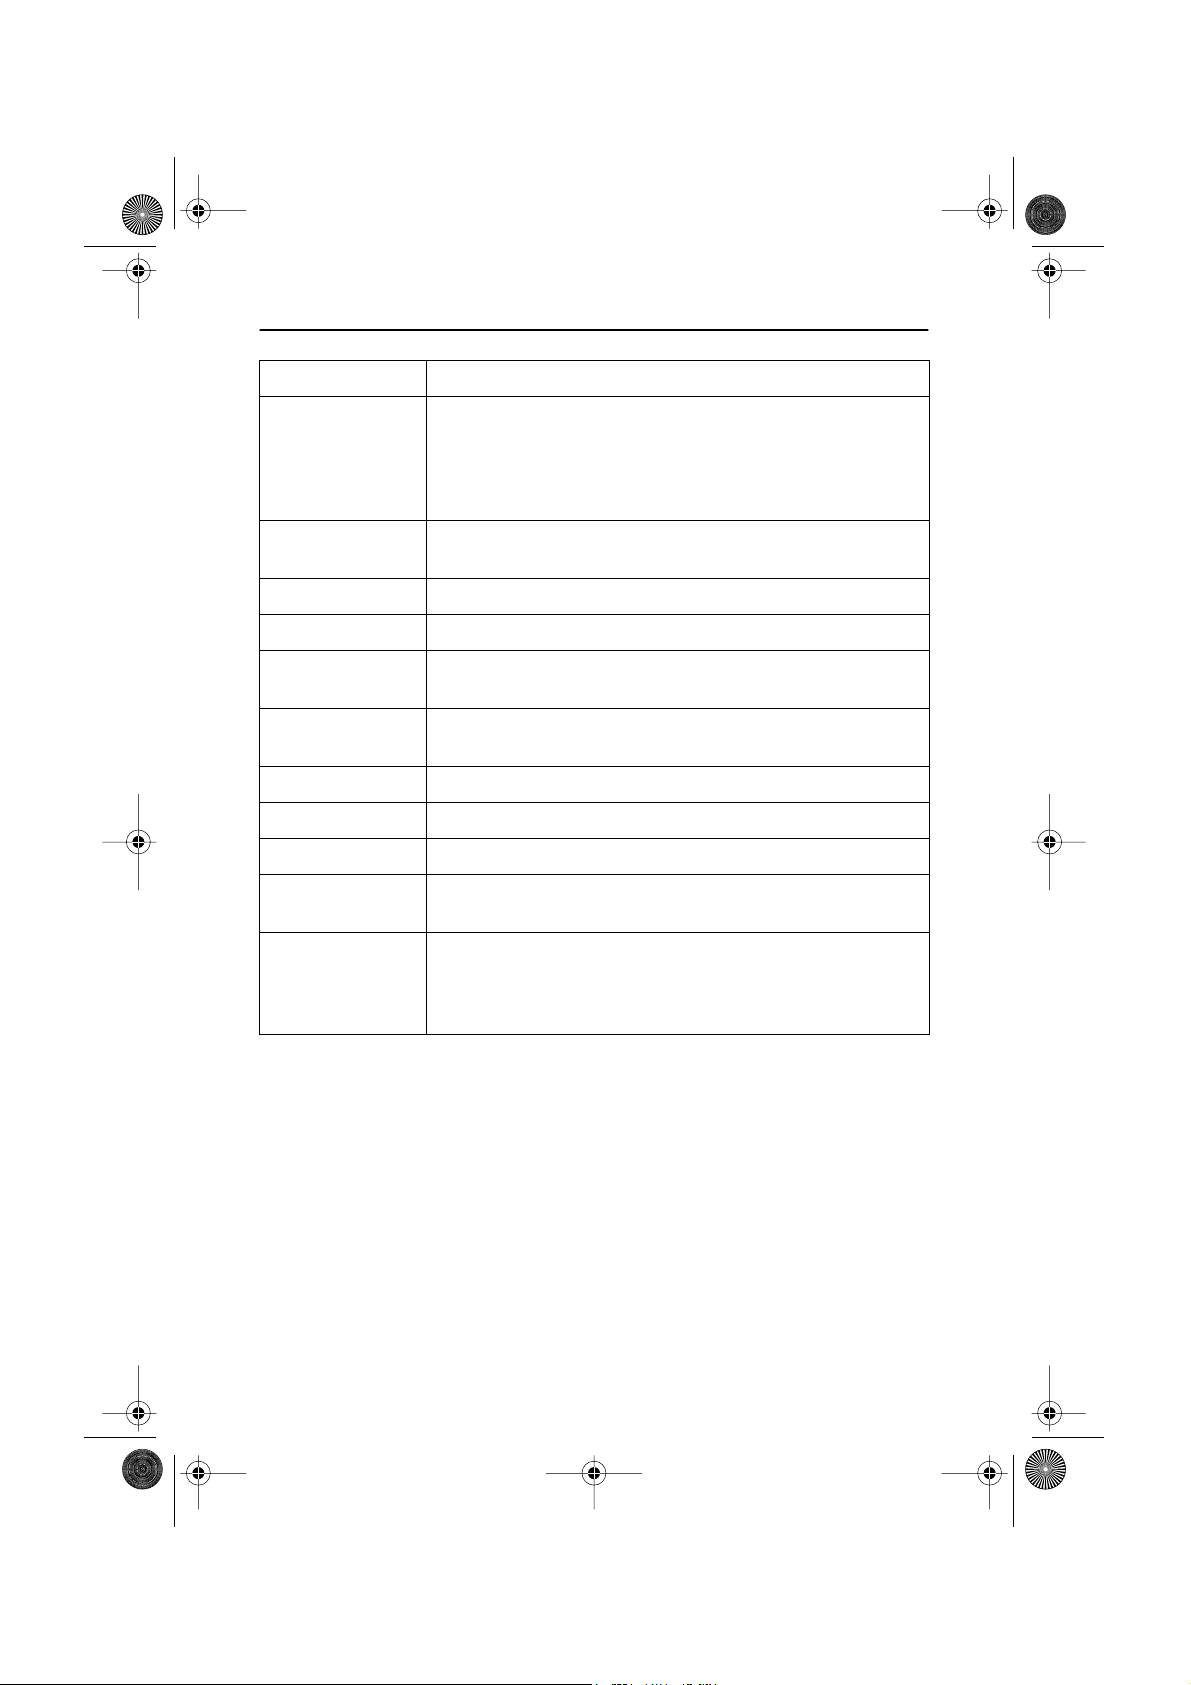
Front Panel
Button Description
FrançaisEspañolDeutschItaliano EnglishPortuguese
- +
Power switch
Adjustment
buttons
OSD/Select
EXIT
Switches the monitor on and off.
Allow you to move around the on-screen
display (OSD) menu and to make adjustments.
Activates the On-Screen-Display / selects
control icons / locks the OSD to prevent
changes.
Closes an active menu window and takes
you to the previous level. If you are in the
main level of the menu, pushing this button
will turn off the menu.
Important: Holding in this button for longer
than 5 seconds erases all data in the User
Settings memory.
English - 3
Page 5
Kerr15_main_1.fm Page 4 Wednesday, September 5, 2001 6:16 PM
Your New Monitor
Direct Button Access
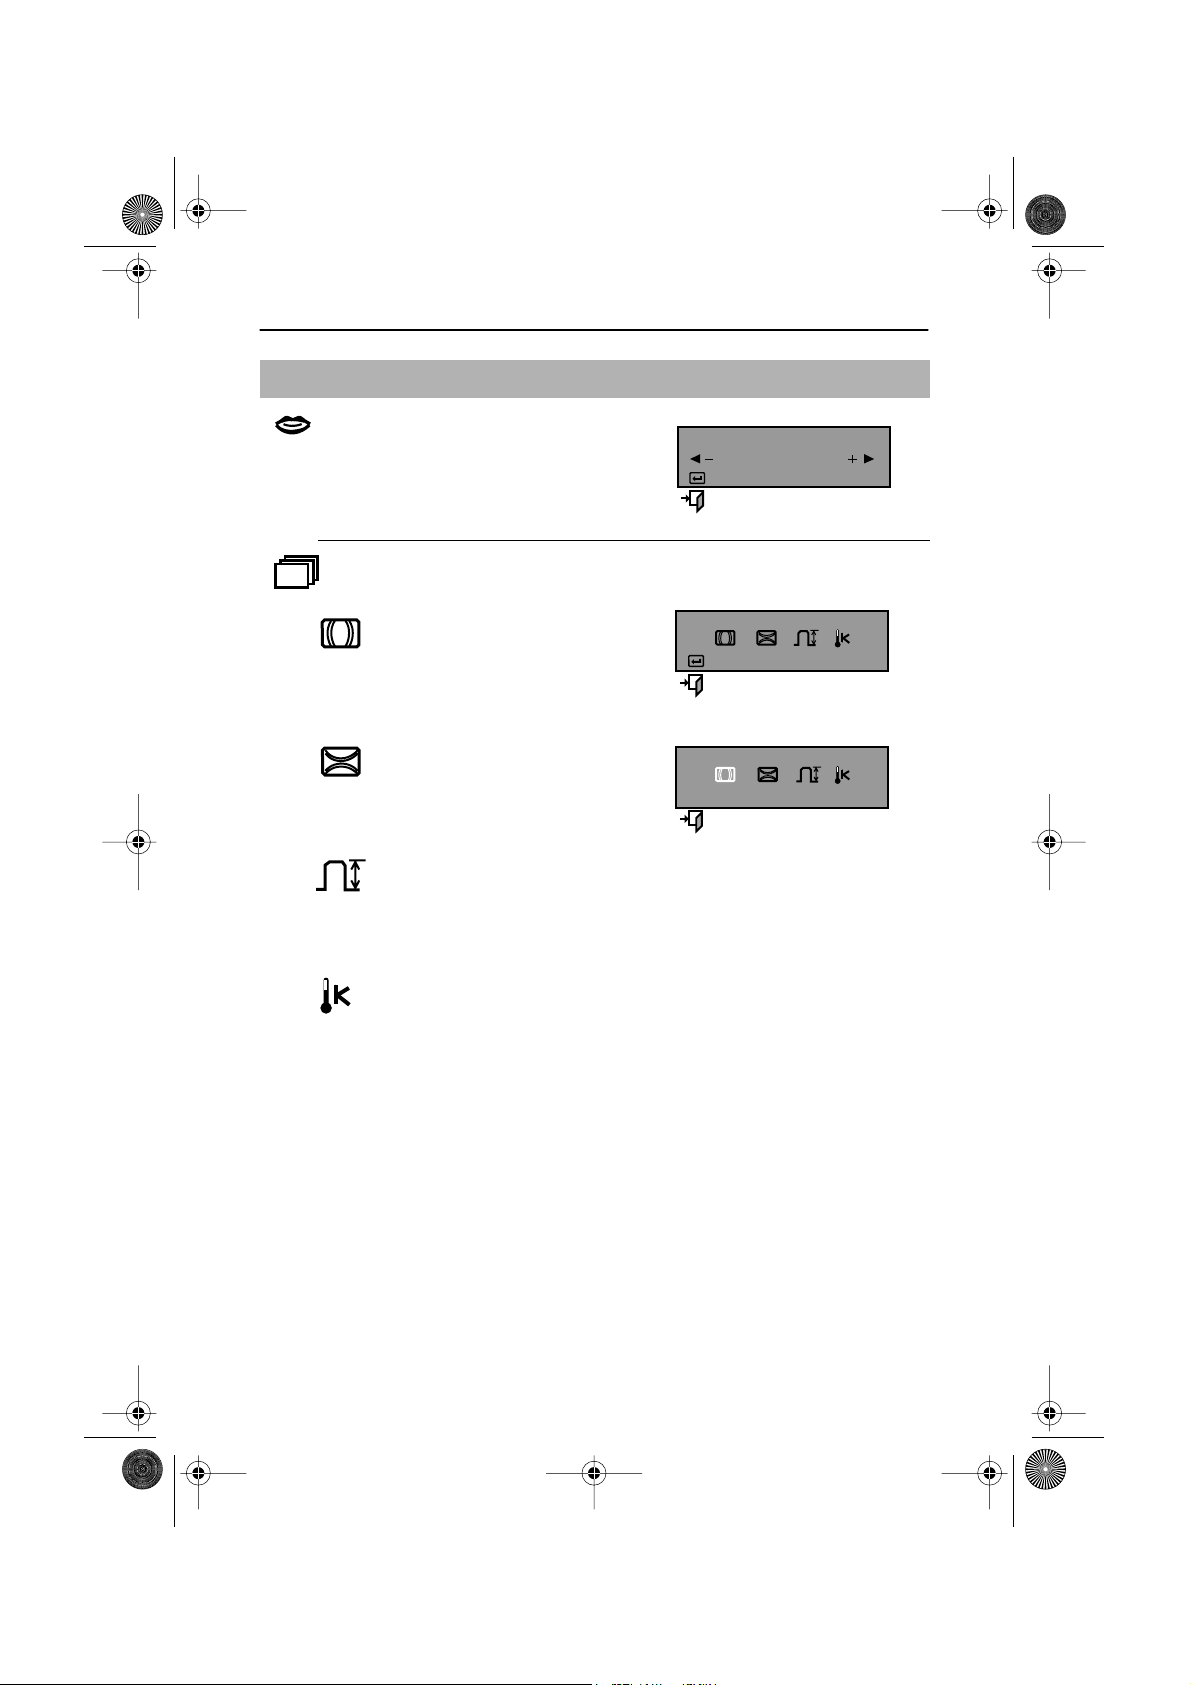
Brightness and contrast can be adjusted as follows, without the need to display the
OSD: Select the functio n an d us e the “
adjustment i s n ot made within 15 seconds, th e c urrent settings will be sa v ed and the
control screen will disappear automat ically.
Icon Control Description
-
“ and “ + “ buttons to adjust. If
-
+
BRIGHTNESS Adjusts the background brightness
CONTRAST
Adjusts the contrast between foreground and
background
English - 4
Page 6
Kerr15_pg4.fm Page 4 Thursday, October 11, 2001 1:14 AM
Operation
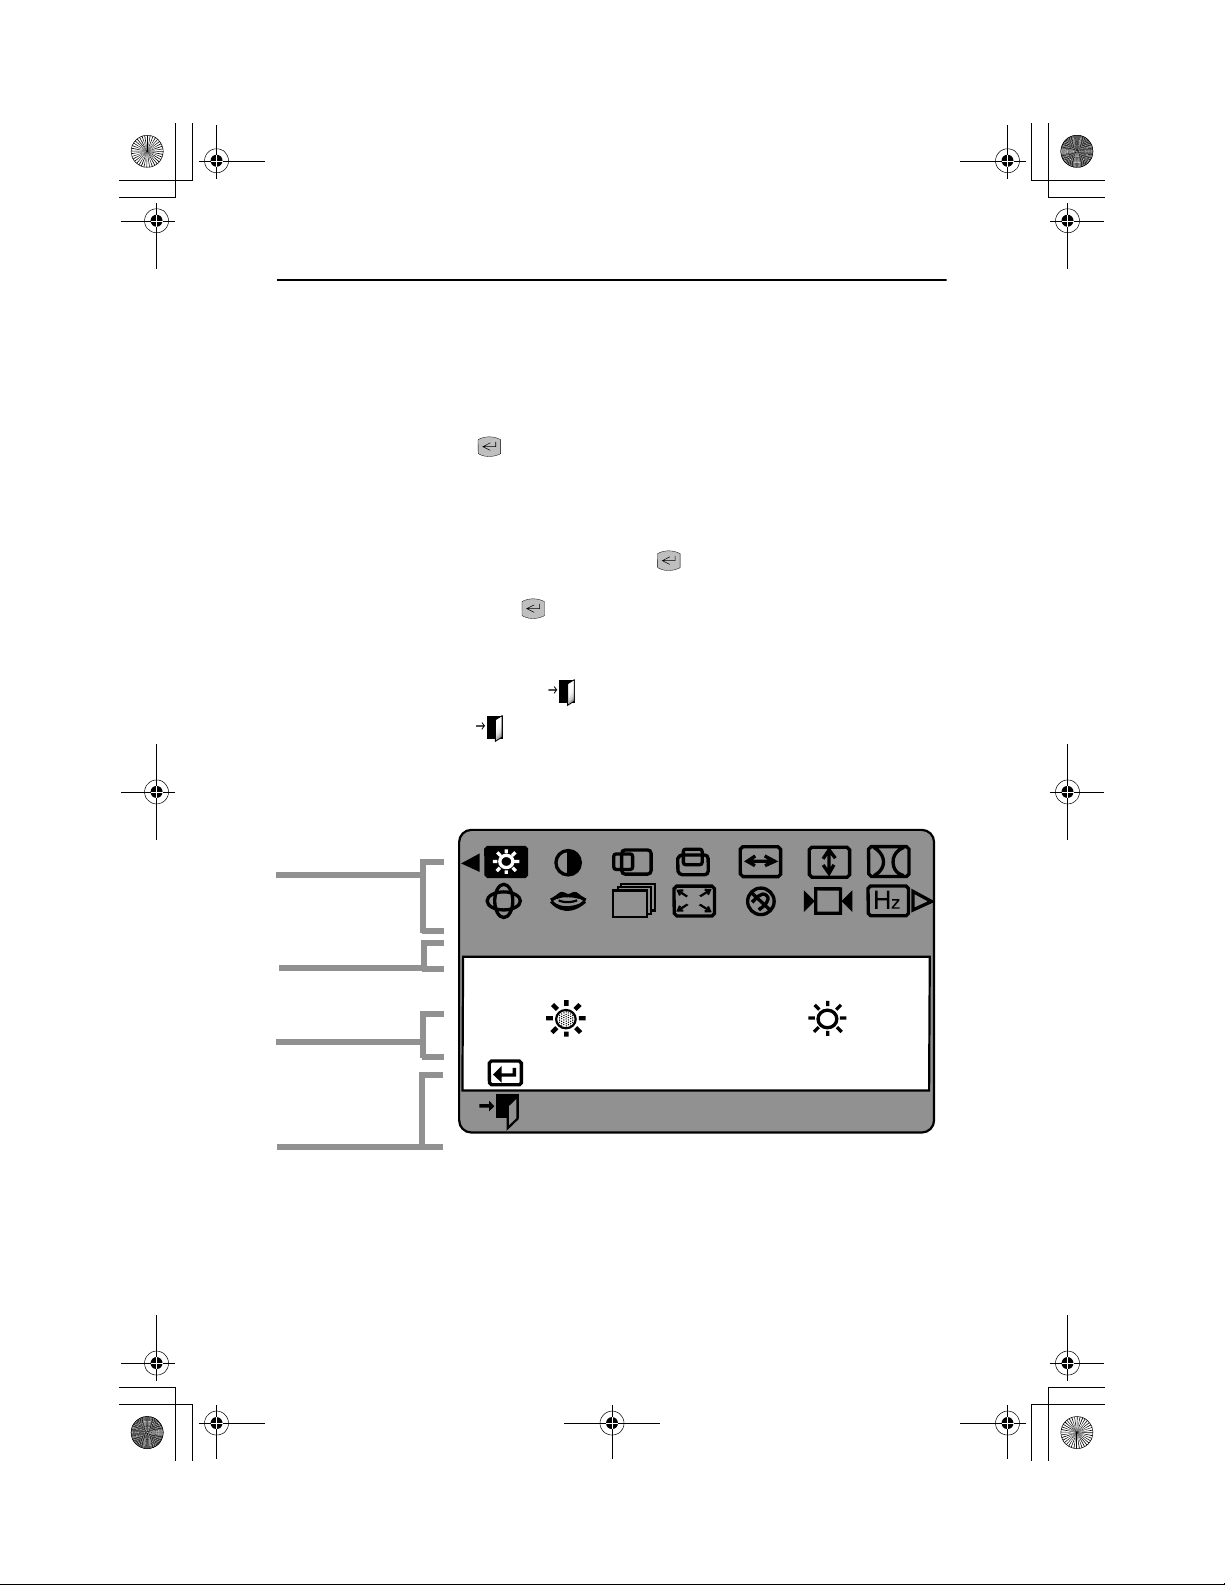
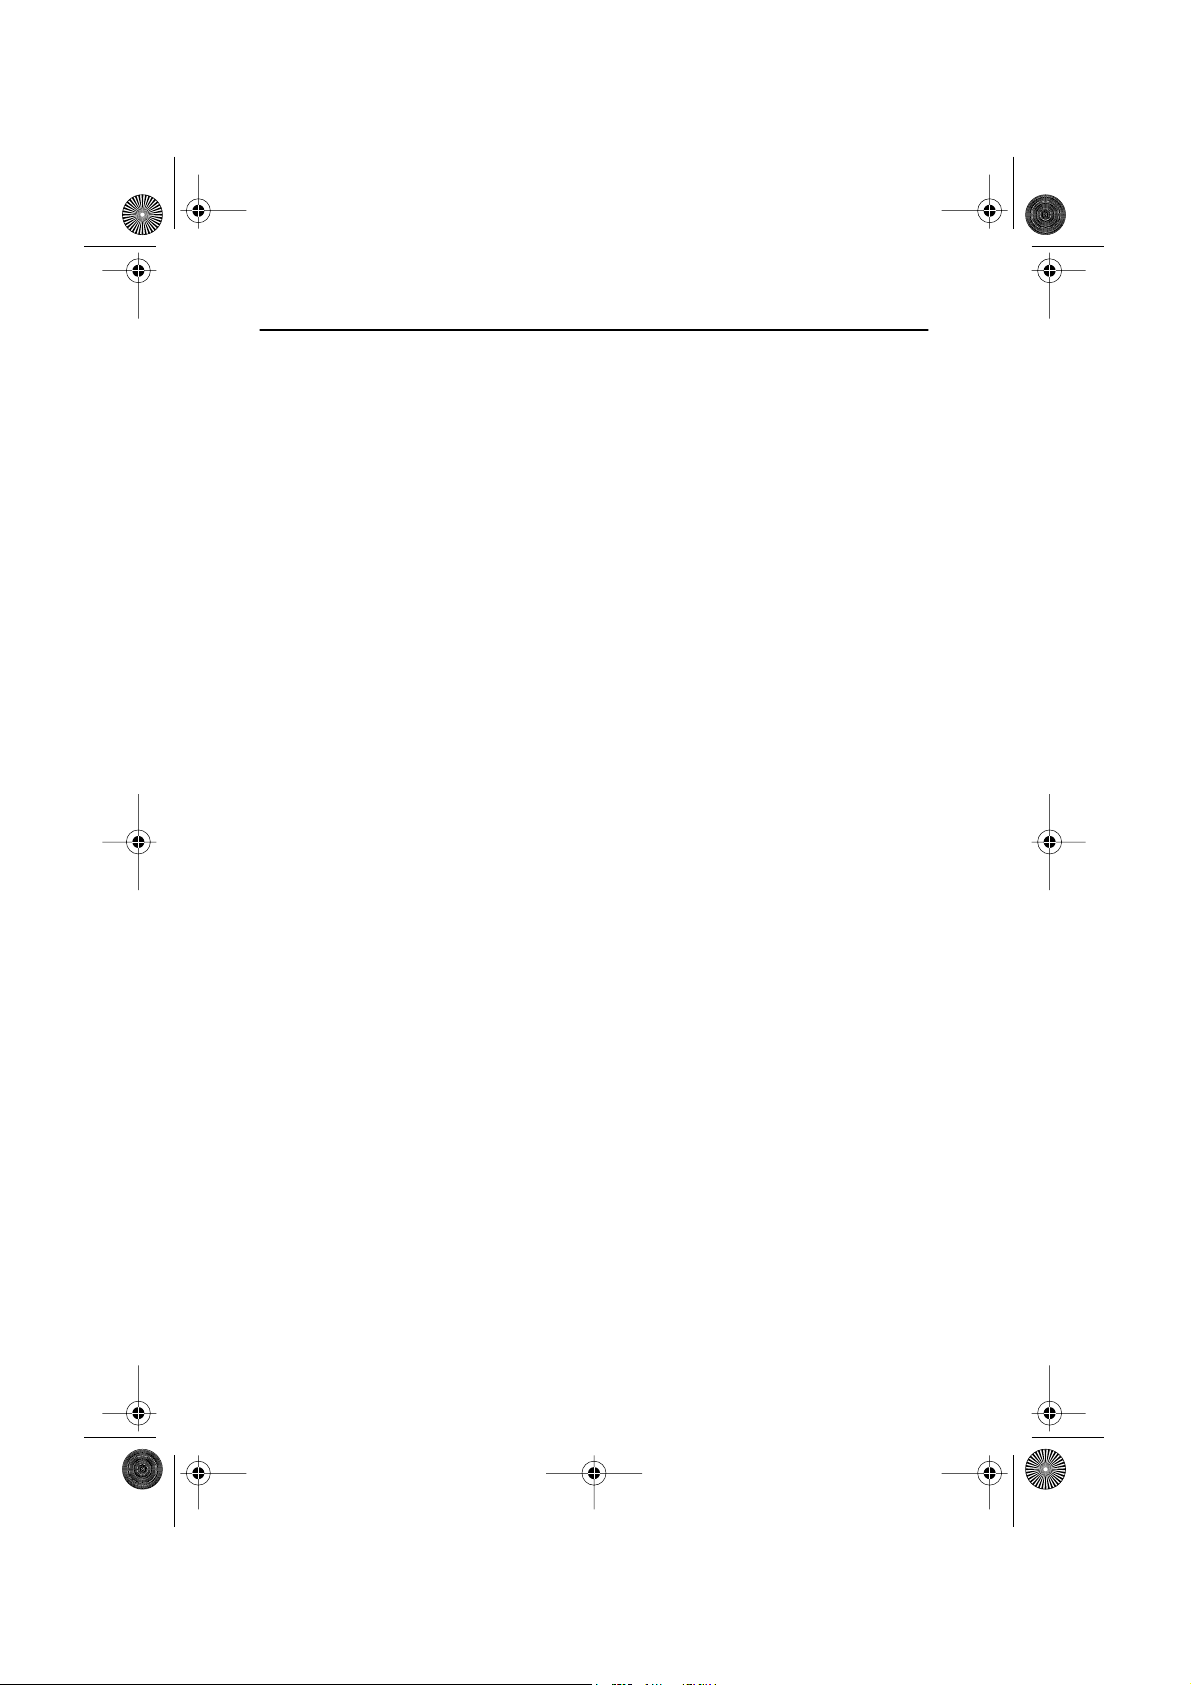
On Screen Display(OSD)
Your monitor has an OSD, accessed by the buttons on the front of your monitor, that a llows you to
adjust characteristics of the screen image. Display changes are indicated by on-screen adjustment icons.
Some functions have sub-menus.
Push the menu button to display the main menu.
1
Function icons are arranged across the top of th e OSD.
Push the
-
2
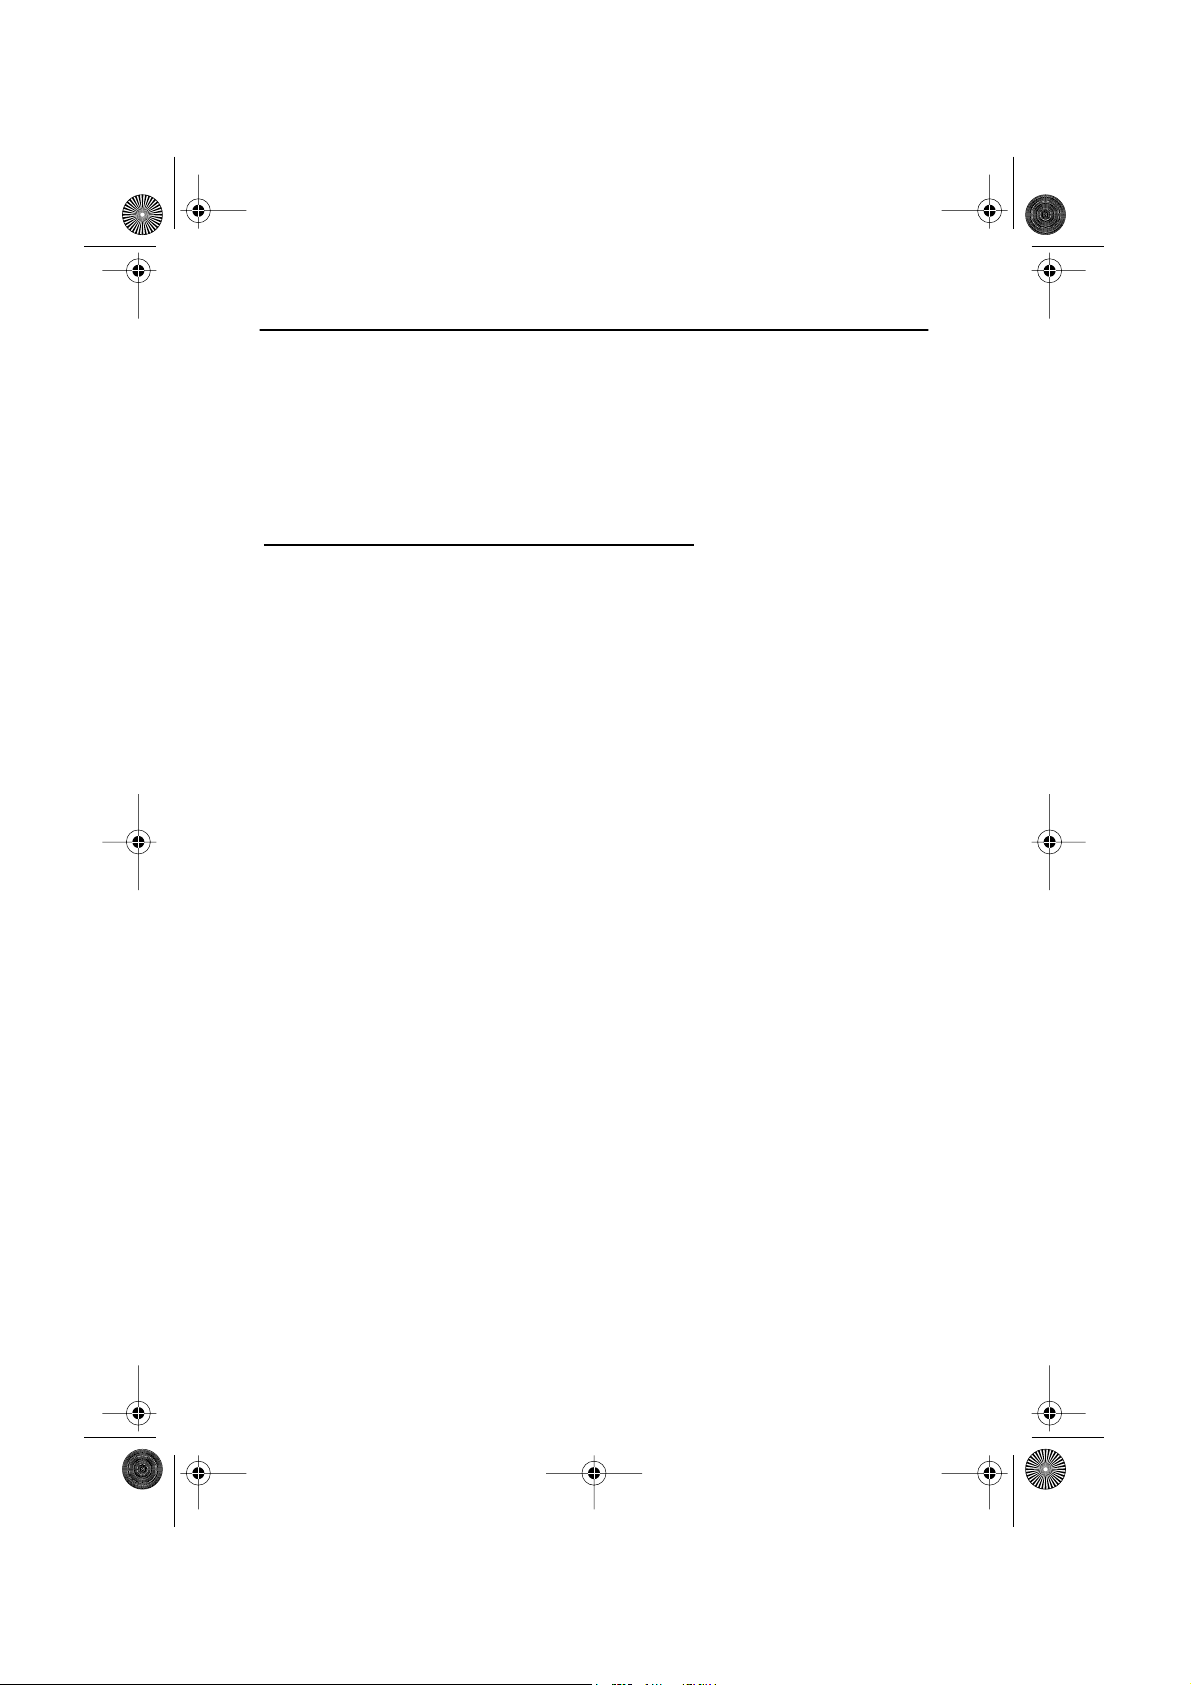
The name of the function will appear below the rows of function icons.
To select a functi on or open a sub-menu, push the button. The scree n will display the
3
options for adjustment. If there is a sub-menu, use th e
want to adjust, then push the button to select it.
Use the
4
decreases values. On-screen calibration numbers show the effect of your adjustment. If you are in
a sub-menu, use the EXIT button to return to the previous menu.
Push the EXIT button to exit and save your changes.
5
or + button to move through the icons.
-
or + button to highlight the feature you
-
and + buttons to make ad justments. The + button increases values and the - button
Function icons
Active function
Adjustment icons
Function selection
and
Menu navigation
Brightness
:
Access Function
:
Exit Menu
English - 4
Page 7
E54-4p.fm Page 5 Friday, January 5, 2001 11:02 AM
Operation
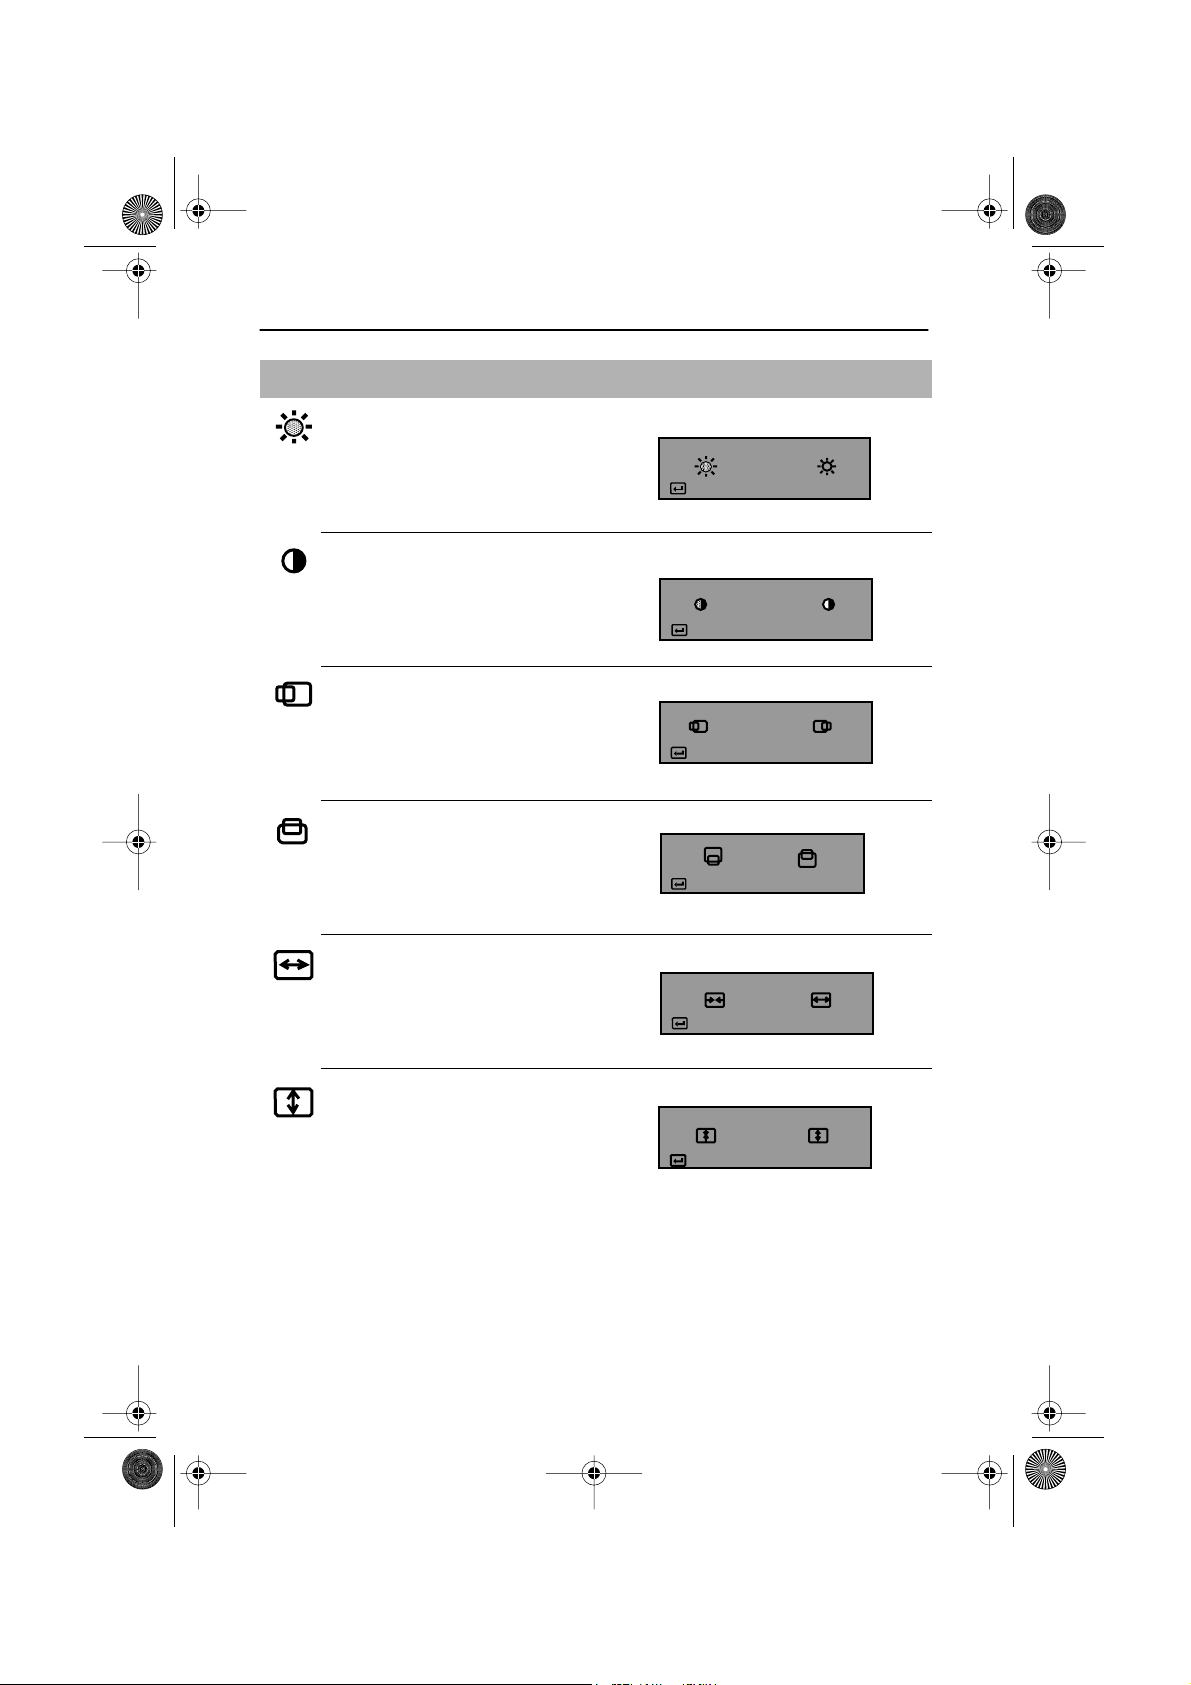
Icon Monitor Function Control
Brightness
Background brightness of screen.
-– Decreases brightness
+ Increases brightness
Contrast
Contrast of screen image.
-– Decreases contrast
+ Increases contrast
Horizontal Position
Horizontal screen position.
-– Moves screen left
+ Moves screen right
Vertical Position
Vertical screen position.
-– Moves screen down
+ Moves screen up
Horizontal Size
Horizontal screen size.
-– Decreases size
+ Increases size
Brightness
:
Access Function
Contrast
:
Access Function
H-Position
:
Access Function
V-Position
:
Access Function
H-Size
:
Access Function
FrançaisEspañolDeutschItaliano EnglishPortuguese
Vertical Size
Vertical screen size.
-– Decreases size
+ Increases size
English - 5
V-Size
Access Function
:
Page 8
E54-4p.fm Page 6 Friday, January 5, 2001 11:02 AM
Operation
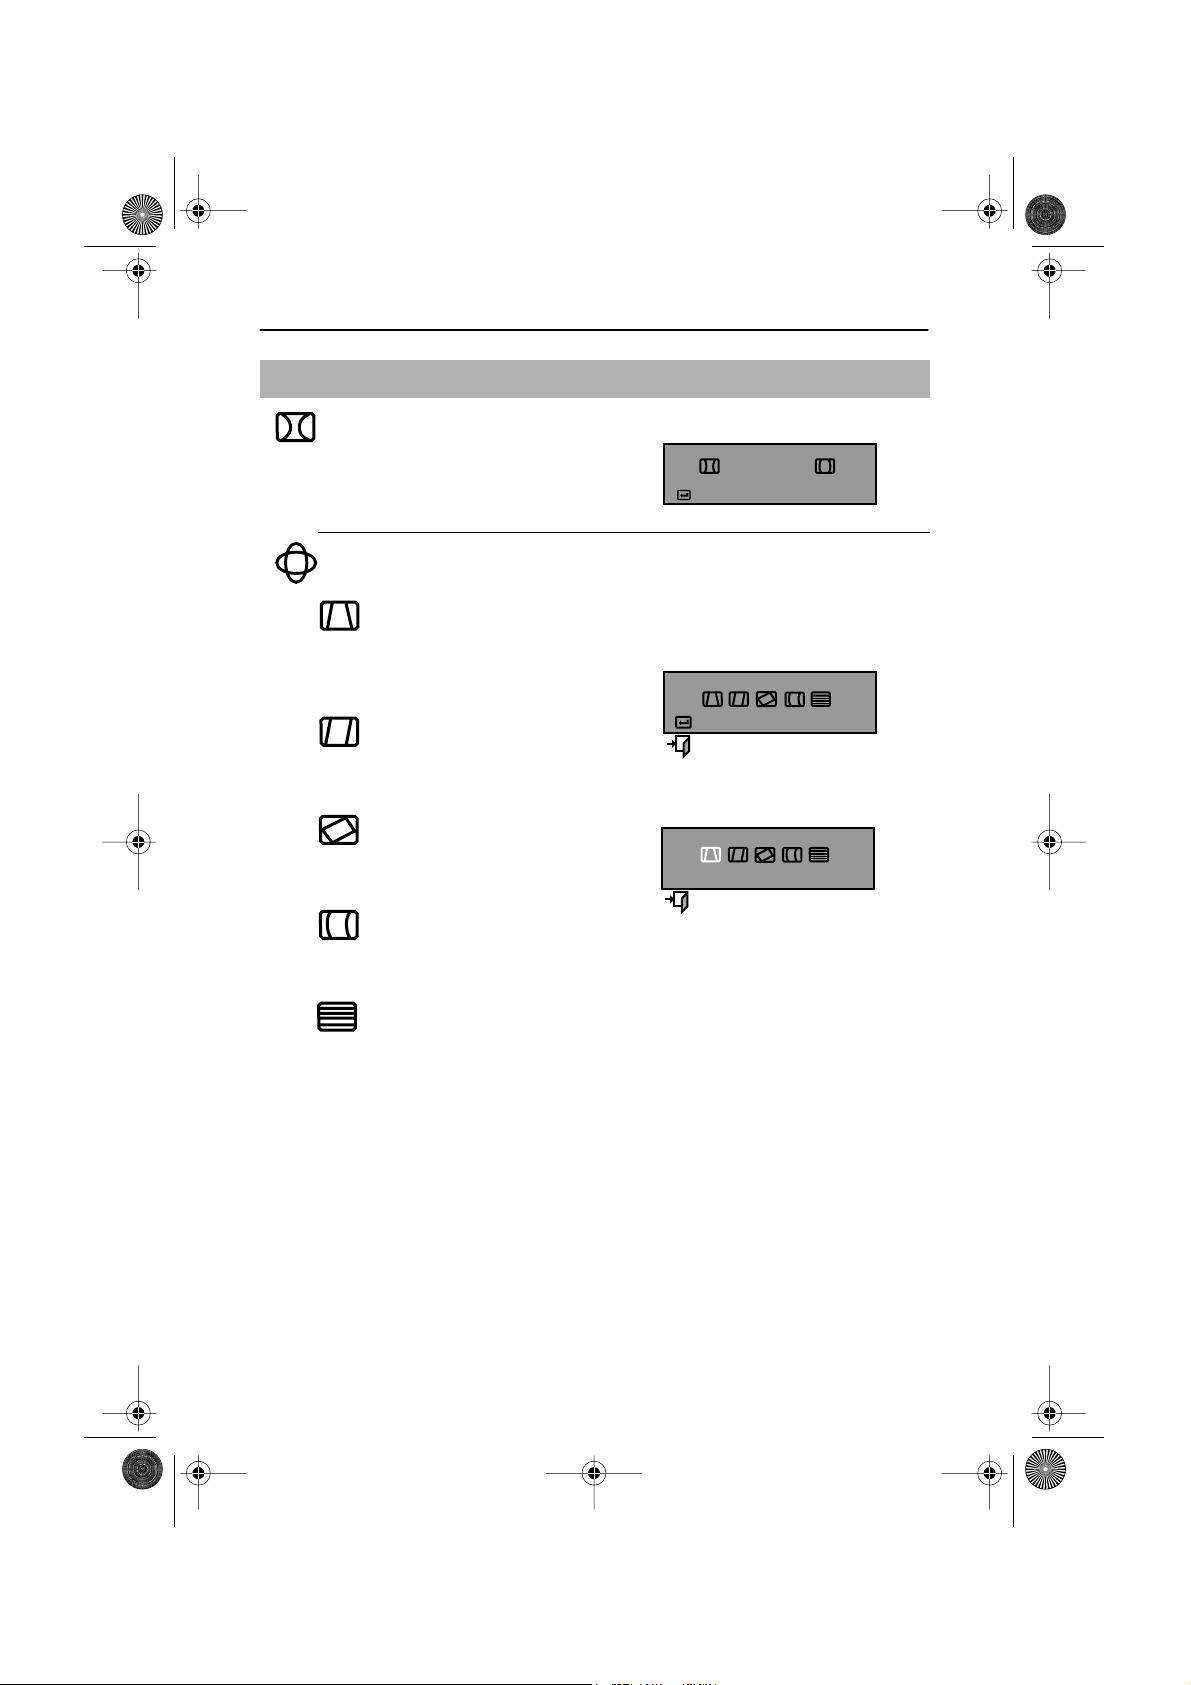
Icon Monitor Function Control
Pincushion
Straightens screen vertical edges.
-– Curves image inward
+ Curves image outward
Geometry
Trapezoid
Width of top and bottom of screen.
-– Widens bottom of screen
+ Widens top of screen
Parallelogram
-– Skews screen image left
+ Skews screen image right
Rotation
-– Rotates entire screen left
+ Rotates entire screen right
Pinbalance
-– Curves vertical lines to left
+ Curves vertical lines to right
1.
2.
Pincushion
:
Access Function
Geometry
:
Access Function
Exit Menu
:
Trapezoid
Select Function
+ - :
Previous Menu
:
V-Linearity
-– Compresses image at top of screen
+ Compresses image at bottom of screen
English - 6
Page 9
E54-4p.fm Page 7 Friday, January 5, 2001 11:02 AM
Operation
Icon Monitor Function Control
Language
-– and + scroll through on-screen
language options.
(English/ Deutsch/ Francais/ Italiano
Brazilian Português/ Español)
Advanced
H- Moiré
Corrects for on-screen moiré
pattern.
-– and + clear Horizontal Moiré
Language
1 2 3 4 5 6
:
Access Function
:
Exit Menu
Advanced
1.
:
Access Function
Exit Menu
:
English
FrançaisEspañolDeutschItaliano EnglishPortuguese
V- Moiré
Corrects for on-screen moiré
pattern.
-– and + clear Vertical Moiré
Video Input Level
Selects the video signal level
-– Select 0.7 V
+ Select 1.0 V
Color Temperature
-– 9300k more blue
+ 6500k more red
2.
Select Function
+ - :
Previous Menu
:
H-MoirŽ
English - 7
Page 10

E54-4p.fm Page 8 Friday, January 5, 2001 11:02 AM
Operation
Icon Monitor Function Control
Zoom
-– Reduces view of display area
+ Enlarges view of display area
Degauss
Removes color distortion caused by
magnetic fields. Do not use more than
once in 30 minutes.
Recall
Returns monitor to original settings.
-– No
+ Yes
Display Timing
Monitor display settings.
-– Factory timing
+ User timing
OSD Lock/Unlock
Allows you to secure the current control
settings so that they cannot be
inadvertently changed. You can unlock
the OSD controls at any time by using
the same procedure.
n
Push and hold the Menu ( )
button for 10 seconds or more to Lock
or to Unlock.
Zoom
:
Access Function
Degauss
:
Access Function
Recall
:
Access Function
Display Timing
:
User Mode
OSD Lock/Unlock
Control Lock
Locked
English - 8
Page 11
E54-4p.fm Page 9 Friday, January 5, 2001 12:58 PM
Troubleshooting
Before calling for service, check the information in this section to see if you can solve the
problem yourself.
There is no screen image
n
Check to see that both the monitor and the computer are plugged in and turned on.
“No Connection, Check Signal Cable” appears
n
Check the signal cable connection between the computer and the monitor.
“Sync. Out of Range” appears
n
The input signal frequency is over or under the synchronization range of the monitor, see
“Specifications” section.
The screen image is too light or too dark
n
Adjust the brightness or contrast settings, see On Screen Display section.
The screen image is too large or too small
n
Adjust the size settings, see H-size and V-Size On Screen Display section.
n
Adjust the Zoom setting, see On Screen Display section.
The colors are distorted with dark or shadowed areas
n
Activate the degauss feature, see On Screen Display section.
n
Adjust the color temperature, see On Screen Display section.
The power indicator light is blinking green
n
The monitor is using its power management system, see “PowerSaver” section.
You need the monitor driver software
n
Download the driver from the internet at http: //www.ibm.com/support
FrançaisEspañolDeutschItaliano EnglishPortuguese
English - 9
Page 12
E54-4p.fm Page 10 Friday, January 5, 2001 11:02 AM
Help & Service
Machine Name - E54 Color Monitor (M/T 6331)
Warranty Period - Three (3) Years
See the IBM Statement of Limited Warranty included in this publication for IBM's warranty
terms and conditions.
The IBM Machine Warranty worldwide Web site at
http://www-1.ibm.com/servers/support/machine_warranties/ provides a worldwide overview
of IBM's Limited Warranty for IBM Machines, a Glossary of IBM definitions, Frequently
Asked Questions (FAQs) and Support by Product (Machine) with links to Product Support
pages.
The IBM Statement of Limited Warranty is also available on this site in 29
languages via pdf files.
Service and support
With the original purchase of an IBM machine, you have access to extensive support
coverage. During the IBM machine warranty period, you may call IBM or your reseller for
problem determination assistance under the terms of the IBM Statement of Limited
Warranty. You may seek help as follows:
Call IBM HelpCenter
In the US call 1-800-772-2227
In Canada (Toronto only) call 416-383-3344
(all others) call 1-800-565-3344
In other countries, contact your dealer, retailer, or other IBM authorized servicer. Before
calling, please have available as much of the following information as possible:
1. Type, model and serial number from the label on the back of your monitor.
2. Purchase receipt.
3. Description of problem.
4. Computer type and model.
5. System configuration (hardware fitted etc.).
6. System BIOS version number.
7. Operating System and version number.
8. Display driver version number.
If possible, stay by your computer system. Your technical support representative might want
to go through the problem with you during the call.
English - 10
Page 13
E54-4p.fm Page 11 Tuesday, January 16, 2001 2:19 PM
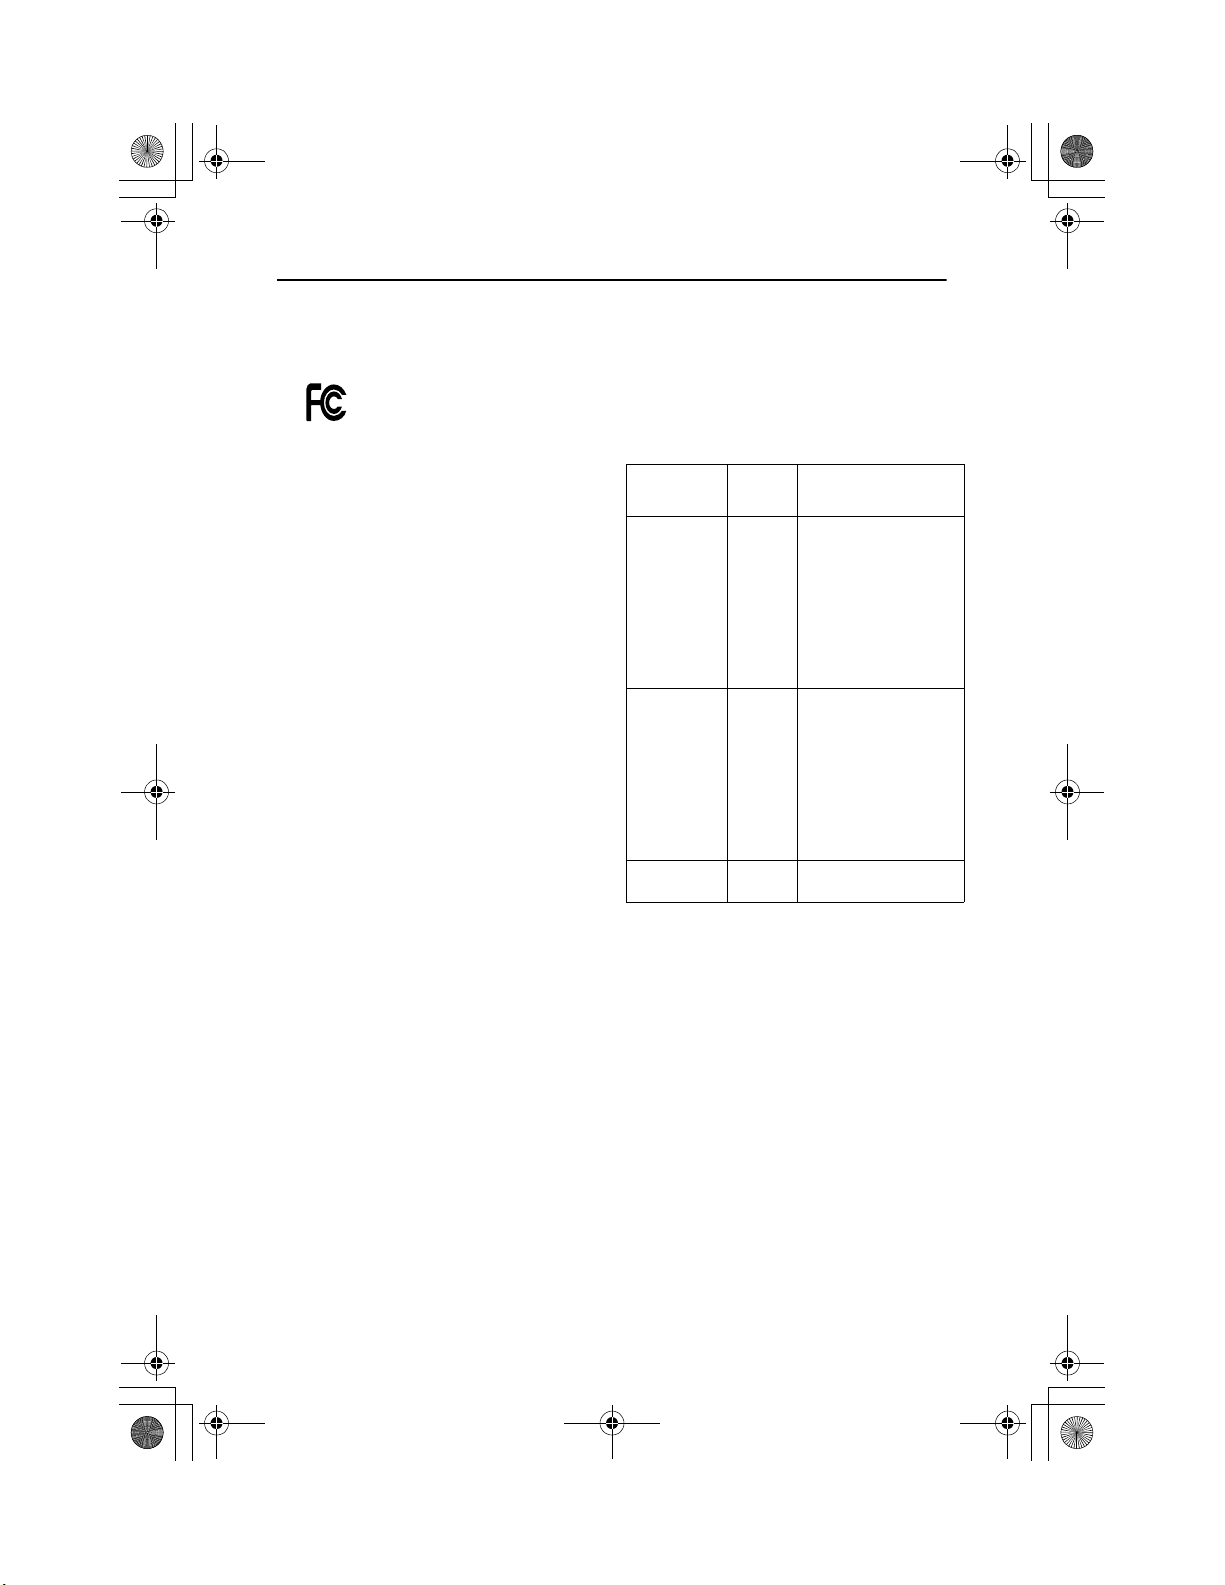
PowerSaver
This monitor has a built-in power management system called PowerSaver. This system saves
energy by switching your monitor into a low-power mode when it has not been used for a
certain amount of time. The monitor automatically returns to normal operation when you
move the computer's mouse or press a key on the keyboard. For energy conservation, turn
your monitor OFF when it is not needed, or when leaving it unattended for long periods.
The PowerSaver system operates with a VESA DPMS compliant video card installed in your
computer. Use a software utility installed on your computer to set up this feature.
State Normal Operation Power-off Mode (EPA/ENERGY 2000)
Power Indicator Green Green, Blinking (1 sec. interval)
Power
Consumption
75 W (Maximum)
61 W (Nominal)
Less than 3 W
FrançaisEspañolDeutschItaliano EnglishPortuguese
NOTE:
This monitor is EPA E
computer equipped with VESA DPMS functionality.
NERGY
S
TAR
® compliant and ENERGY 2000 compliant when used with a
Display Modes
Display Mode Vertical Frequency (Hz)
IBM, VGA2, 720 x 400
IBM, VGA3, 640 x 480
VESA, 640 x 480
VESA, 640 x 480
VESA, 800 x 600
VESA, 800 x 600
VESA, 1024 x 768
VESA, 1024 x 768
70
60
75
85
75
85
75
85
English - 11
Page 14
E54-4p.fm Page 12 Tuesday, January 16, 2001 2:22 PM
Specifications
Specifications Model: IBM E54
Picture Tube • 15” (38 cm) Full square type (35 cm Viewable)
°
Deflection
• 90
• Dot pitch: 0.28 mm
• Aluminized tri-color phosphor dot trio with black matrix.
• Anti-doming invar shadow mask.
Synchronization • Horizontal:
• Vertical:
30 kHz to 70 kHz
50 Hz to 120 Hz
Display Color • Unlimited
Maximum Resolution • 1280 Dots • 1024 Lines
±
Active Display • Horizontal:
• Vertical:
Input Signal,
Terminated
Analog: 0
•
Separate Sync.:
•
0.16 inch (267.0 ± 4 mm)
10.5
7.9 ± 0.16 inch (200.0 ± 4 mm)
.7 Vpp positive at 75 ohms
TTL level, positive or negative
Maximum Pixel Clock • 110 MHz
Power Supply • AC 100-240 V ± 10%, 60 Hz / 50Hz ± 3Hz
Power Consumption • 75 W (maximum)
Dimensions/Weight
(WxDxH)
Environmental
Considerations
• Unit: 362 x 384 x 384 mm /12.9 kg
• Carton: 454 x 497 x 445 mm /15.2 kg
°
• Operating temperature:
Humidity:
• Storage temperature:
Humidity:
F to 104
41
10% to 80%
°
F to 113
-4
20% to 80%
°
F (5
°
F (-20
°
C to 40
°
Design and specifications are subject to change without notice.
°
C)
C to 45
°
C)
English - 12
Page 15
d
Kerr74_54_compliance.fm Page 0 Wednesday, September 5, 2001 6:16 PM
Compliances
Federal Communications
Commision
(FCC) Statement
Tested
To Comply
W ith FCC S
FOR HOME OR OFFICE USE
This equipment has been tested and found to comply with
the limits for a Class B digital device, pursuant to Part 15 of
the FCC Rules. These limits are designed to provide
reasonable protection against harmful interference in a
residential installation. This equipment generates, uses,
and can radiate radio frequency energy and, if not installed
and used in accordance with the instructions, may cause
harmful interference to radio communications. However,
there is no guarantee that interference will not occur in a
particular installation.
If this equipment does cause harmful interference to radio
or television receptions, which can be determined by
turning the equipment off and on, the user is encouraged to
try to correct the interference by one or more of the following
measures:
!
Reorient or relocate the receiving antenna.
!
Increase the separation between the equipment and
receiver.
!
Connect the equipment into an outlet on a circuit
different from that to which the receiver is connected.
!
Consult the dealer or an experienced radio/TV
technician for help.
Properly shielded and grounded cables and connectors
must be used in order to meet FCC emission limits. Proper
cables and connectors are available from IBM authorized
dealers. IBM is not responsible for any radio or television
interference caused by using other than recommended
cables and connectors or by unauthorized changes or
modifications to this equipment. Unauthorized changes or
modifications could void the user's authority to operate the
equipment.
Power Cords
For your safety, IBM provides a power cord with a
grounded attachment plug to use with this IBM product.
To avoid electrical shock, always use the power cord
and plug with a properly grounded power outlet.
IBM power cords used in the United States and Canada
are listed by the Underwriters Laboratories (UL) and
certified by the Canadian Standards Association (CSA).
For units intended to be operated at 115 volts: Use a UL
listed and
CSA-certified cord set consisting of a minimum 18 AWG ,
type SVT or SJT, three conductor cord, a maximum of
4.5 m (15 ft) in length and a parallel blade, grounding
type attachment plug rated 15 amperes, 125 volts.
For units intended to be operated at 230 volts (U.S.
use): Use a UL-listed and CSA-certified cord set
consisting of a minimum 18 AWG, type SVT or SJT,
three conductor cord, a maximum of 4.5 m (15 ft) in
length and a tandem blade, grounding type attachment
plug rated 15 amperes, 250 volts.
tandar
For units intended to be operated at 230 volts (outside
the U.S.): Use a cord set with a grounding type
attachment plug rated 13 amperes (minimum), 250 volts.
Use a cord set with a grounding type attachment plug.
The cord set should have the appropriate safety
approvals for the country in which the equipment will be
installed.
IBM power cords for a specific country or region are usually
available only in that country or region.
IBM Fig. #
(Plug Stnd.)
4
(NEMA 5-15P)
125V
5
(NEMA 6-15P)
250V
6
(AS/NZS C112)
IBM P/N
(1.8M)
6952301
1838576
13F9939 Australia, New Zealand
Using Countries or
Regions
US, Canada, Mexico,
Brazil, Costa Rica, Peru,
Colombia, Ecuador,
Venezuela, Bolivia,
Panama, El Salvador,
Honduras, Nicaragua,
Dominican Republic,
Guatemala, Taiwan, Saudi
Arabia, Thailand,
Phillipines, Japan
US, Canada, Mexico,
Brazil, Costa Rica, Peru,
Colombia, Ecuador,
Venezuela, Bolivia,
Panama, El Salvador,
Honduras, Nicaragua,
Dominican Republic,
Guatemala, Taiwan, Saudi
Arabia, Thailand,
Phillipines, Japan
FrançaisDeutschEspañolPortuguese EnglishItaliano
Page 16

Kerr74_54_compliance.fm Page 1 Wednesday, September 5, 2001 6:16 PM
18
(CEE 7 - VII)
23
(BS 1363/A)
19
(DK2-5a)
France, Germany,
Sweden, Norway, Austria,
Netherlands, Finland,
Belgium, Bosnia, Croatia,
Egypt, Greece, Hungary,
Poland, Portugal, Romania,
Slovenia, Spain, Sweden,
Turkey, Iceland, Estonia,
Lativa, Lithuania,
Luxembourg, Andorra,
Guadeloupe, French
Guyana, Martinique,
Monaco, New Caledonia,
Madagascar, Mauritius,
Greece, Turkey, Portugal,
Albania, Armenia,
Azerbaidjan, Belarus,
Bosnia, Crotia, Czech
Republic, Georgia,
Hungary, Kazakhstan,
Kyrhgistan, Macedonia,
Moldavia, Poland,
13F9978
14F0032
13F9996 Denmark
Romania, Serbia, Slovakia,
Slovenia, Tajikistan,
Turkmenistan, Ukranine,
Uzbekistan, Russia,
Lebanaon, Syria, Egypt,
Iran, Algeria, Benin, Cape
Verde, Burkina Faso,
Cameroon, Central African
Republic, Chad, Congo
(Republic of), Congo
(Democratic Republic of),
Djibouti, Equatorial Guinea,
Gabon, Guinea, Guinea
Bissau, Ivory Coast, Mali,
Mauritania, Morocco, Niger,
Senegal, Togo, Tunisia,
Angola, Burundi, Ethiopia,
Mozambique, Rwanda,
Somalia, Sao Tome,
Eritrea, Mayotte, Comoros,
Reunion, French
Polynesia, Vanuatu, Wallis
and Futuna, Korea,
Vietnam, Indonesia
UK, United Arab Emirate
(Dubai), China (Hong Kong
S.A.R.), Singapore,
Malaysia, Ireland, Cyprus,
Bahrain, Jordan, Kuwait,
Oman, Quatar, Yemen,
Gambia, Malta, Botswana,
Seychelles, Nigeria,
Ghana, Kenya, Liberia,
Malawi, Sierra Leone,
Sudan, Tanzania, Zambia,
Zimbabwe
25
(CEI 23-16)
2
(IRSM 2073)
62
(GB 2099.1)
32
(SI 32)
22
(SABS 164)
24
(1011-S24507)
14F0068 Italy, Chile
36L8879
02K0545 China
14F0086 Israel
14F0014
14F0050 Switzerland, Lichtenstein
Argentina, Uruguay,
Paraguay
South Africa, India, Sri
Lanka, Pakistan, Uganda,
Lesotho, Nambia,
Swaziland
Industry Canada Class B emission
compliance statement
This Class B digital apparatus complies with Canadian
ICES-003.
Cet appareil numérique de la classe B respecte toutes
les exigences du Réglement sur le matériel brouilleur
du Canada.
Avis de conformité à la régl e m entation
d'Industrie Canada
Cet appareil numérique de classe B est conforme à la
norme
NMB-003 du Canada.
NERGY STAR
As an E
Corporation has determined that
this product meets the E
S
TAR
guidelines for energy
efficiency.
Partner, IBM
NERGY
MPRII
This product complies with Swedish National Council
for Metrology (MPR) standards issued in December
1990 (MPRII) for very low frequency (VLF) and
extremely low frequency (ELF) emissions.
FrançaisDeutschEspañolPortuguese EnglishItaliano
Page 17

Kerr54_svcinfo.fm Page 1 Wednesday, September 5, 2001 6:17 PM
Service Information
The following parts are for use by IBM service, or IBM authorized dealers, to
support the customer warranty. Parts are for service use only.
Model Type 6331
31P6240 6331-H1N Monitor - Pearl White, NH, MPR-II
31P6241 6331-J1N Monitor - Stealth Black, NH, MPR-II
31P6333 Tilt/Swivel-Pearl White
31P6334 Tilt/Swivel-Stealth Black
Page 18

IBM
Monitor Safety and
Warranty Information
OPTIONS
by IBM
Page 19

First Edition (July 2001)
© Copyright International Business Machines Corporation 2001. All rights reserved.
US Government Users Restricted Rights – Use, duplication or disclosure restricted by
GSA ADP Schedule Contract with IBM Corp.
Page 20

Safety Information: Read first
Page 21

DANGER
To avoid shock hazard:
• Do not remove the covers.
• Do not operate this product unless the stand is attached.
• Do not connect or disconnect this product during an electrical storm.
• The power cord plug must be connected to a properly wired and grounded power outlet.
• Any equipment to which this product will be attached must also be connected to properly wired and grounded
power outlets.
• To isolate the monitor from the electrical supply, you must remove the plug from the power outlet. The power
outlet should be easily accessible.
Handling:
• Your colour monitor is heavy, so handle it with care. If heavier than 18 Kg, IBM recommends that the monitor is
moved or lifted by two people.
DANGER
Pour éviter les risques d’électrocution :
• Ne retirez pas les capots du moniteur.
• N’utilisez pas ce produit si le socle n’est pas fixé.
• Ne connectez, ni ne déconnectez ce produit pendant un orage.
• Le câble d’alimentation doit être connecté à une prise électrique correctement mise à la terre et en bon état de
marche.
• Tout équipement auquel ce produit est relié doit être également connecté à une prise correctement mise à la
terre et en bon état de marche.
• Pour isoler le moniteur de la source d’alimentation électrique, vous devez le débrancher de la prise électrique.
Cette prise doit être facile d’accès
Manutention :
• Votre moniteur couleurs est lourd et doit donc être manipulé avec soin. Si son poids dépasse 18 kg, IBM vous
conseille de le déplacer ou de le porter à deux.
GEFAHRENHINWEIS
Um die Gefahr eines elektrischen Schlags zu vermeiden, folgendes beachten:
• Unter keinen Umständen die Abdeckungen abnehmen.
• Das Produkt nicht in Betrieb nehmen, wenn der Sockel nicht montiert ist.
• Das Gerät nicht während eines Gewitters an eine Steckdose anschließen oder von ihr trennen.
• Das Netzkabel ist an eine ordnungsgemäß verdrahtete und geerdete Steckdose anzuschließen.
• Jedes Gerät, mit dem dieses Produkt verbunden wird, muß ebenfalls an eine ordnungsgemäß verdrahtete und
geerdete Steckdose angeschlossen werden.
• Um den Monitor von der Stromversorgung zu trennen, muß der Stecker aus der Steckdose gezogen werden.
Die Steckdose sollte leicht zugänglich sein.
Handhabungshinweis:
• Ihr Farbbildschirm ist schwer, gehen Sie vorsichtig damit um. Wenn er schwerer als 18 kg ist, empfiehlt IBM, daß
der Bildschirm von zwei Personen getragen bzw. gehoben wird.
GEVAAR
Ga als volgt te werk om het gevaar van een elektrische schok te voorkomen:
• Verwijder in geen enkel geval de kap.
• Stel dit produkt alleen in werking als de voet is bevestigd.
• Sluit dit apparaat niet aan op, of verbreek de aansluiting van dit apparaat niet van een contactdoos tijdens
onweer.
• Het netsnoer moet worden aangesloten op een geaarde contactdoos met correcte bedrading.
• Ook alle apparatuur waarop dit produkt wordt aangesloten moet zijn aangesloten op een contactdoos met
correcte bedrading.
• Om het beeldscherm te ontkoppelen van de netvoeding, dient u de stekker uit de contactdoos te trekken. De
contactdoos dient goed toegankelijk te zijn.
Verplaatsing:
• De kleurenmonitor is zwaar. Doe dus voorzichtig. Indien de monitor zwaarder is dan 18 kilo, raadt IBM aan de
monitor door twee mensen te laten tillen.
Page 22

PELIGRO
Para evitar riesgos de descargas eléctricas:
• No retire bajo ningún concepto las cubiertas.
• No maneje el monitor sin antes acoplar el soporte.
• No conecte ni desconecte el equipo de una toma de alimentación durante una tormenta eléctrica.
• El cable de alimentación debe estar conectado a un enchufe debidamente cableado y con toma de tierra.
• Cualquier equipo al que se vaya a conectar este producto también debe estar conectado a tomas de
alimentación cableadas y conectadas a tierra correctamente.
• Para aislar el monitor del suministro eléctrico, debe retirar el enchufe de la toma de alimentación. Esta toma
deberá ser de fácil acceso.
Movimentazione del monitor:
• Il monitor a colori è pesante, si consiglia quindi di maneggiarlo con attenzione. Se il monitor pesa oltre 18 kg,
IBM raccomanda che il monitor venga mosso o sollevato da due persone.
PERICOLO
Per evitare il rischio di scariche elettriche:
• Non rimuovere nessuna parte del telaio.
• Non accendere il prodotto se il piedistallo non è stato montato.
• Non collegare o scollegare il prodotto nel corso di un temporale.
• La spina del cavo di alimentazione deve essere collegata ad una presa di corrente con messa a terra, installata
in maniera appropriata.
• Le apparecchiature a cui il prodotto viene attaccato devono essere collegate a prese di corrente con messa a
terra, installate in maniera appropriata.
• Per isolare il monitor dalla corrente elettrica, staccare la spina dalla presa di alimentazione, che deve essere
facilmente accessibile.
Manipulación:
• El monitor de color es pesado, por lo que debe manipularlo con cuidado. Si pesa más de 18 kg, IBM recomienda
moverlo con la ayuda de dos personas.
PERIGO
Para evitar o perigo de choques eléctricos:
• Não retire as coberturas.
• Não utilize este produto antes de montar a base.
• Não ligue nem desligue este produto durante uma tempestade eléctrica.
• O cabo de alimentação deve ser ligado a uma tomada eléctrica devidamente ligada à terra.
• Qualquer equipamento ligado a este produto deve estar ligado a tomadas eléctricas devidamente ligadas à
terra.
• Para isolar o monitor da fonte de alimentação, retire a ficha do cabo de alimentação da tomada eléctrica. A
tomada eléctrica deve ser de fácil acesso.
Manuseio:
• Seu monitor colorido é pesado, então manuseie-o com cuidado. Se o peso for superior a 18 (dezoito) Kg., a IBM
recomenda que o monitor seja movido ou carregado por duas pessoas.
FARE
Sådan undgår du elektrisk stød:
• Kabinettet må under ingen omstændigheder fjernes.
• Undgå at anvende dette produkt, uden at vippe/drejefoden er monteret.
• Undgå at tilslutte eller frakoble dette produkt i tordenvejr.
• Netledningen skal være tilsluttet en korrekt jordet stikkontakt med korrekt ledningsføring.
• Alt udstyr, som tilsluttes dette produkt, skal også være tilsluttet korrekt jordede stikkontakter med korrekt
ledningsføring.
• For at isolere skærmen fra strømforsyningen, skal stikket tages ud af stikkontakten. Stikkontakten bør være let
tilgængelig.
Håndtering:
• Deres farveskærm er tung, så vær forsigtig, når De løfter den. Hvis skærmen vejer mere end 18 kg, anbefaler
IBM, at den flyttes og løftes af to personer.
Page 23

FARE
Slik unngår du fare for elektrisk støt:
• Ikke ta av dekslene.
• Ikke bruk produktet dersom sokkelen ikke er
montert.
• Ikke koble produktet til eller fra under tordenvær.
• Pluggen på strømledningen må kobles til korrekt montert og jordet strømuttak.
• Utstyr som dette produktet eventuelt blir koblet til, må også kobles til korrekt montert og jordet strømuttak.
• For å isolere skjermen fra strømkilden må du ta ut pluggen fra strømuttaket. Strømuttaket bør være lett
tilgjengelig.
Käsittely:
• Värinäyttö on painava, joten käsittele sitä varoen. Jos näyttö painaa enemmän kuin 18 kg, IBM suosittelee, että
kaksi henkilöä siirtää tai nostaa sitä.
Varning - livsfara
För att undvika risk för elektriska stötar måste du tänka på följande:
• Ta inte bort några skyddskåpor.
• Använd inte den här produkten innan du har satt fast stativet.
• Anslut inte produkten till ett eluttag under åskväder. Koppla inte heller ur produkten från ett eluttag under
åskväder.
• Strömkabeln måste anslutas till ett felfritt och jordat uttag.
• All utrustning som den här produkten kopplas till måste också anslutas till felfria och jordade uttag.
• För att bryta strömmen till bildskärmen måste du dra ut kontakten. Vägguttaget bör vara lätt att komma åt.
Hantering:
• Hantera din färgmonitor med försiktighet, den är tung. Ni bör vara två personer för att lyfta och flytta monitorn om
den är tyngre än 18 kg.
VAARA
Sähköiskun vaaran välttämiseksi:
• Älä avaa laitteen kansia missään tilanteessa.
• Älä käytä laitetta, ellei jalustaa ole kiinnitetty.
• Älä kytke laitetta pistorasiaan tai irrota sitä pistorasiasta ukonilman aikana.
• Virtajohto on kytkettävä asianmukaisesti johdotettuun ja maadoitettuun pistorasiaan.
• Kaikki muutkin laitteet, joihin tämä tuote on liitetty, on kytkettävä asianmukaisesti johdotettuihin pistorasioihin.
• Kun haluat erottaa näyttimen sähköverkosta, sinun pitää irrottaa sen verkkojohto pistorasiasta. Pistorasian
pitäisi olla mahdollisimman lähellä näytintä ja vaivattomasti käsillä.
Håndtering:
• Fargeskjermen din er tung, og må håndteres med varsomhet. Hvis den veier mer enn 18 kilo, anbefaler IBM at
skjermen flyttes eller løftes av to personer.
Page 24

TEHLIKE
Elektrik çarpmasý tehlikesinden kaçýnmak için:
• Kapaklarý çýkarmayýnýz.
• Bu cihazý kaidesine takýlý durumda deðilken çalýþtýrmayýnýz.
• Bu cihazý elektriksel fýrtýna sýrasýnda prize takmayýnýz veya prizden çýkarmayýnýz.
• Elektrik kablosunun fiþi, elektrik ve toprak baðlantýlarý usulüne uygun olarak yapýlmýþ bir prize takýlmalýdýr.
• Bu cihazýn baðlanacaðý diðer tüm cihazlar da elektrik ve toprak baðlantýlarý usulüne uygun olarak yapýlmýþ prize
takýlmýþ olmalýdýr.
• Monitörün elektrikle baðlantýsýný kesmek için fiþini prizden çekmeniz gereklidir. Priz, kolayca eriþilebilecek bir yerde
olmalýdýr.
Kaldýrma
• Renklý monitörünüz aðýr olduðu icin kaldýrýrken dikkatli olunuz. IBM‚ monitörün aðýrlýðýnýn 18 kilogramdan fazla
olmasý halinde iki kiþi tarafýndan taþýnmasýný veya kaldýrýlmasýný tavsiye etmektedir
OPREZ
Da biste izbjegli opasnost od strujnog udara:
• Nemojte otvarati kucište uredaja.
• Nemojte upotrebljavati ovaj uredaj dok ne postavite postolje.
• Nemojte spajati i odspajati uredaj za vrijeme oluje.
• Naponski kabel mora biti prikljucen u odgovarajuce uzemljenu uticnicu.
• Bilo koja oprema na koju ce ovaj uredaj biti spojen takoder mora biti prikljucena u odgovarajuce uzemljenu
uticnicu.
• Da biste iskljucili uredaj iz struje, iskopcajte utikac iz uticnice. Uticnica treba biti lako dostupna.
Rukovanje:
• Vaš monitor je te ak, zato rukujte njime pa ljivo. IBM preporuca da ovaj monitor podi u ili pomicu dvije osobe.
.
Page 25

Page 26

Page 27

Page 28

Page 29

º¥¬®¹§º¤
º°«± ²¥°®¬ ©£«
«¥¨ ´ ²£«¦ ©£
¤°«±
•
¦ «£« ²£¡ ²¡¦ ¦ ° ´ ¦£¬®¦ ©£
§£±² ´®« ´¬ ¦¨³¡ ´³²¦ ° ´ ±´ª¦ ²¡¦ ©£
±² £°¨ £ª±´ £¦¨³¡ ¬±³¦ ¡¥ ¦¥ ´ ²¡¦ ³£
±² £°¨ £ª±´ £¦¨³¡ ¬±³¦ ²¡¨ ££ ²°¨¦ ²¡¨³ ²£³¥¨
¬±³³ ¦ ³£ £¦¨³¡ ¬±³¨ ¬±´ ´ ±´ª¦ ³£ ¡¥ ²±¨¨ ° ´ ¦ £¥
´¦± ³£ª ££ £¦¨³¡
¥®¥·®® ¢¶¤ º¸¡²¤
²£¬¦ ¯¦¨¨ ± ¦¬ ¦¬ ° ¦±³¨ § ´²£ ¦®¢¦ ³£ ©¥¦ ¥ £ª¬° °
§£³ª £ª³ ´²¬ ¨£²¦
•
•
•
•
•
•
Page 30
Warranty Information
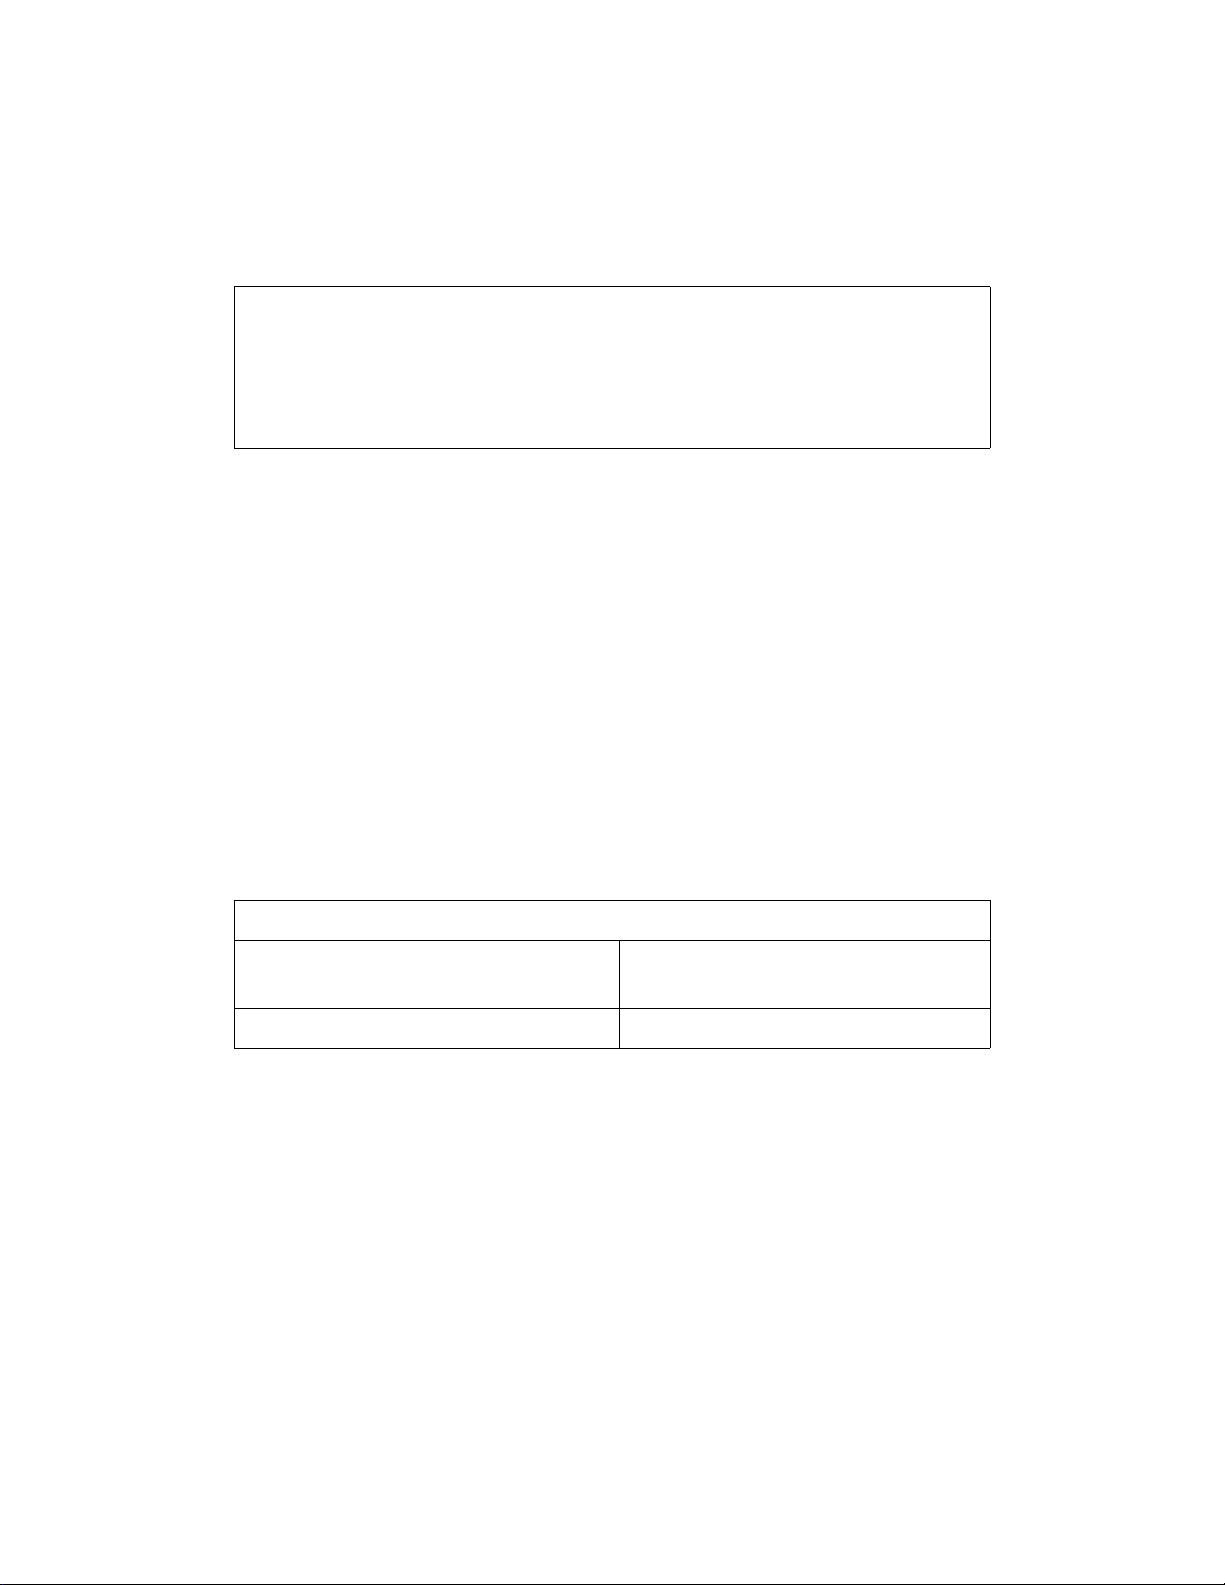
This contains the warranty period, warranty service information, and the IBM Statement of Limited Warranty.
Warranty period
Machine - IBM Color Monitors (E Series, G Series, P Series, and T Series models)
Warranty period* - Three (3) years
* Contact your place of purchase for warranty service information. Some IBM Machines are eligible
for on-site warranty service depending on the country where service is performed.
Help and Service Information
The IBM Machine Warranties Web site at http://www.ibm.com/servers/support/machine_warranties/ contains a
worldwide overview of the IBM Limited Warranty for IBM Machines, a glossary of terms used in the Statement
of Limited Warranty, Frequently Asked Questions (FAQ), and links to Product Support Web pages. The IBM
Statement of Limited Warranty is available from this Web site in 29 languages in Portable Document Format
(PDF).
Online technical support
Online technical support is available during the life of your product. Online assistance can be obtained through
the Personal Computing Support Web site and the IBM Automated Fax System.
Online technical support
IBM Personal Computing Support
http://www.ibm.com/pc/support
Web site
IBM Automated Fax System 1-800-426-3395 (U.S. and Canada)
During the warranty period, assistance for replacement or exchange of defective components is available. In
addition, if your IBM option is installed in an IBM computer, you might be entitled to service at your location.
Your technical support representative can help you determine the best alternative.
Telephone technical support
Installation and configuration support through the HelpCenter will be withdrawn or made available for a fee, at
IBM’s discretion, 90 days after the option has been withdrawn from marketing. Additional support offerings,
including step-by-step installation assistance, are available for a nominal fee.
To assist the technical support representative, have available as much of the following information as possible:
• Option name
• Option number
• Proof of purchase
• Computer manufacturer, model, serial number (if IBM), and manual
Page 31

• Exact wording of the error message (if any)
• Description of the problem
• Hardware and software configuration information for your system
If possible, be at your computer. Your technical support representative might want to walk you through the problem during the call.
For the support telephone number and support hours by country, refer to the following table. If the number for
your country or region is not listed, contact your IBM reseller or IBM marketing representative. Response time
may vary depending on the number and nature of the calls received.
Support 24 hours a day, 7 days a week
Canada (Toronto only) 416-383-3344
Canada (all other) 1-800-565-3344
U.S.A. and Puerto Rico 1-800-772-2227
All other countries and regions Go to http://www.ibm.com/pc/sup-
port/, and click Support Phone List.
IBM Statement of Limited Warranty
Z125-4753-06 8/2000
Part 1 - General Terms
This Statement of Limited Warranty includes Part 1 - General Terms and Part 2 - Country-unique Terms. The
terms of Part 2 replace or modify those of Part 1. The warranties provided by IBM in this Statement of Limited
Warranty apply only to Machines you purchase for your use, and not for resale, from IBM or your reseller. The
term "Machine" means an IBM machine, its features, conversions, upgrades, elements, or accessories, or any
combination of them. The term "Machine" does not include any software programs, whether pre-loaded with the
Machine, installed subsequently or otherwise. Unless IBM specifies otherwise, the following warranties apply
only in the country where you acquire the Machine. Nothing in this Statement of Limited Warranty affects any
statutory rights of consumers that cannot be waived or limited by contract. If you have any questions, contact
IBM or your reseller.
The IBM Warranty for Machines
IBM warrants that each Machine 1) is free from defects in materials and workmanship and 2) conforms to IBM's
Official Published Specifications ("Specifications"). The warranty period for a Machine is a specified, fixed
period commencing on its Date of Installation. The date on your sales receipt is the Date of Installation unless
IBM or your reseller informs you otherwise.
If a Machine does not function as warranted during the warranty period, and IBM or your reseller are unable to
either 1) make it do so or 2) replace it with one that is at least functionally equivalent, you may return it to your
place of purchase and your money will be refunded.
Page 32

Extent of Warranty
The warranty does not cover the repair or exchange of a Machine resulting from misuse, accident, modification,
unsuitable physical or operating environment, improper maintenance by you, or failure caused by a product for
which IBM is not responsible. The warranty is voided by removal or alteration of Machine or parts identification
labels.
THESE WARRANTIES ARE YOUR EXCLUSIVE WARRANTIES AND REPLACE ALL OTHER
WARRANTIES OR CONDITIONS, EXPRESS OR IMPLIED, INCLUDING, BUT NOT LIMITED TO,
THE IMPLIED WARRANTIES OR CONDITIONS OF MERCHANTABILITY AND FITNESS FOR A
PARTICULAR PURPOSE. THESE WARRANTIES GIVE YOU SPECIFIC LEGAL RIGHTS AND
YOU MAY ALSO HAVE OTHER RIGHTS WHICH VARY FROM JURISDICTION TO JURISDICTION. SOME JURISDICTIONS DO NOT ALLOW THE EXCLUSION OR LIMITATION OF
EXPRESS OR IMPLIED WARRANTIES, SO THE ABOVE EXCLUSION OR LIMITATION MAY
NOT APPLY TO YOU. IN THAT EVENT, SUCH WARRANTIES ARE LIMITED IN DURATION TO
THE WARRANTY PERIOD. NO WARRANTIES APPLY AFTER THAT PERIOD.
Items Not Covered by Warranty
IBM does not warrant uninterrupted or error-free operation of a Machine.
Any technical or other support provided for a Machine under warranty, such as assistance via telephone with
"how-to" questions and those regarding Machine set-up and installation, will be provided WITHOUT WAR-
RANTIES OF ANY KIND.
Warranty Service
To obtain warranty service for a Machine, contact IBM or your reseller. If you do not register your Machine with
IBM, you may be required to present proof of purchase.
During the warranty period, IBM or your reseller, if approved by IBM to provide warranty service, provides
without charge certain types of repair and exchange service to keep Machines in, or restore them to, conformance with their Specifications. IBM or your reseller will inform you of the available types of service for a
Machine based on its country of installation. At its discretion, IBM or your reseller will 1) either repair or
exchange the failing Machine and 2) provide the service either at your location or a service center. IBM or your
reseller will also manage and install selected engineering changes that apply to the Machine.
Some parts of IBM Machines are designated as Customer Replaceable Units (called "CRUs"), e.g., keyboards,
memory, or hard disk drives. IBM ships CRUs to you for replacement by you. You must return all defective
CRUs to IBM within 30 days of your receipt of the replacement CRU. You are responsible for downloading designated Machine Code and Licensed Internal Code updates from an IBM Internet Web site or from other electronic media, and following the instructions that IBM provides.
When warranty service involves the exchange of a Machine or part, the item IBM or your reseller replaces
becomes its property and the replacement becomes yours. You represent that all removed items are genuine and
unaltered. The replacement may not be new, but will be in good working order and at least functionally equivalent to the item replaced. The replacement assumes the warranty service status of the replaced item. Many features, conversions, or upgrades involve the removal of parts and their return to IBM. A part that replaces a
removed part will assume the warranty service status of the removed part.
Before IBM or your reseller exchanges a Machine or part, you agree to remove all features, parts, options, alterations, and attachments not under warranty service.
Page 33

You also agree to
1. ensure that the Machine is free of any legal obligations or restrictions that prevent its exchange;
2. obtain authorization from the owner to have IBM or your reseller service a Machine that you do not own; and
3. where applicable, before service is provided:
a) follow the problem determination, problem analysis, and service request procedures that IBM or your
reseller provides;
b) secure all programs, data, and funds contained in a Machine;
c)provide IBM or your reseller with sufficient, free, and safe access to your facilities to permit them to fulfill
their obligations; and
d) inform IBM or your reseller of changes in a Machine's location.
IBM is responsible for loss of, or damage to, your Machine while it is 1) in IBM's possession or 2) in transit in
those cases where IBM is responsible for the transportation charges.
Neither IBM nor your reseller is responsible for any of your confidential, proprietary or personal information
contained in a Machine which you return to IBM or your reseller for any reason. You should remove all such
information from the Machine prior to its return.
Limitation of Liability
Circumstances may arise where, because of a default on IBM's part or other liability, you are entitled to recover
damages from IBM. In each such instance, regardless of the basis on which you are entitled to claim damages
from IBM (including fundamental breach, negligence, misrepresentation, or other contract or tort claim), except
for any liability that cannot be waived or limited by applicable laws, IBM is liable for no more than
1. damages for bodily injury (including death) and damage to real property and tangible personal property; and
2. the amount of any other actual direct damages, up to the charges (if recurring, 12 months' charges apply) for
the Machine that is subject of the claim. For purposes of this item, the term "Machine" includes Machine
Code and Licensed Internal Code.
This limit also applies to IBM's suppliers and your reseller. It is the maximum for which IBM, its suppliers,
and your reseller are collectively responsible.
UNDER NO CIRCUMSTANCES IS IBM LIABLE FOR ANY OF THE FOLLOWING: 1) THIRDPARTY CLAIMS AGAINST YOU FOR DAMAGES (OTHER THAN THOSE UNDER THE FIRST
ITEM LISTED ABOVE); 2) LOSS OF, OR DAMAGE TO, YOUR RECORDS OR DATA; OR 3) SPECIAL, INCIDENTAL, OR INDIRECT DAMAGES OR FOR ANY ECONOMIC CONSEQUENTIAL
DAMAGES, LOST PROFITS OR LOST SAVINGS, EVEN IF IBM, ITS SUPPLIERS OR YOUR
RESELLER IS INFORMED OF THEIR POSSIBILITY. SOME JURISDICTIONS DO NOT ALLOW
THE EXCLUSION OR LIMITATION OF INCIDENTAL OR CONSEQUENTIAL DAMAGES, SO
THE ABOVE LIMITATION OR EXCLUSION MAY NOT APPLY TO YOU.
Governing Law
Both you and IBM consent to the application of the laws of the country in which you acquired the Machine to
govern, interpret, and enforce all of your and IBM’s rights, duties, and obligations arising from, or relating in any
manner to, the subject matter of this Agreement, without regard to conflict of law principles.
Page 34

Part 2 - Country-unique Terms
AMERICAS
BRAZIL
Governing Law: The following is added after the first sentence:
Any litigation arising from this Agreement will be settled exclusively by the court of Rio de Janeiro.
NORTH AMERICA
Warranty Service: The following is added to this Section:
To obtain warranty service from IBM in Canada or the United States, call 1-800-IBM-SERV (426-7378).
CANADA
Governing Law: The following replaces "laws of the country in which you acquired the Machine" in the first
sentence:
laws in the Province of Ontario.
UNITED STATES
Governing Law: The following replaces "laws of the country in which you acquired the Machine" in the first
sentence:
laws of the State of New York.
ASIA PACIFIC
AUSTRALIA
The IBM Warranty for Machines: The following paragraph is added to this Section:
The warranties specified in this Section are in addition to any rights you may have under the Trade Practices Act
1974 or other similar legislation and are only limited to the extent permitted by the applicable legislation.
Limitation of Liability: The following is added to this Section:
Where IBM is in breach of a condition or warranty implied by the Trade Practices Act 1974 or other similar legislation, IBM's liability is limited to the repair or replacement of the goods or the supply of equivalent goods.
Where that condition or warranty relates to right to sell, quiet possession or clear title, or the goods are of a kind
ordinarily acquired for personal, domestic or household use or consumption, then none of the limitations in this
paragraph apply.
Governing Law: The following replaces "laws of the country in which you acquired the Machine" in the first
sentence:
laws of the State or Territory.
CAMBODIA, LAOS, AND VIETNAM
Page 35

Governing Law: The following replaces "laws of the country in which you acquired the Machine" in the first
sentence:
laws of the State of New York.
The following is added to this Section:
Disputes and differences arising out of or in connection with this Agreement shall be finally settled by arbitration
which shall be held in Singapore in accordance with the rules of the International Chamber of Commerce (ICC).
The arbitrator or arbitrators designated in conformity with those rules shall have the power to rule on their own
competence and on the validity of the Agreement to submit to arbitration. The arbitration award shall be final
and binding for the parties without appeal and the arbitral award shall be in writing and set forth the findings of
fact and the conclusions of law.
All proceedings shall be conducted, including all documents presented in such proceedings, in the English language. The number of arbitrators shall be three, with each side to the dispute being entitled to appoint one arbitrator.
The two arbitrators appointed by the parties shall appoint a third arbitrator before proceeding upon the reference.
The third arbitrator shall act as chairman of the proceedings. Vacancies in the post of chairman shall be filled by
the president of the ICC. Other vacancies shall be filled by the respective nominating party. Proceedings shall
continue from the stage they were at when the vacancy occurred.
If one of the parties refuses or otherwise fails to appoint an arbitrator within 30 days of the date the other party
appoints its, the first appointed arbitrator shall be the sole arbitrator, provided that the arbitrator was validly and
properly appointed.
The English language version of this Agreement prevails over any other language version.
HONG KONG AND MACAU
Governing Law: The following replaces "laws of the country in which you acquired the Machine" in the first
sentence:
laws of Hong Kong Special Administrative Region.
INDIA
Limitation of Liability: The following replaces items 1 and 2 of this Section:
1. liability for bodily injury (including death) or damage to real property and tangible personal property will be
limited to that caused by IBM's negligence;
2. as to any other actual damage arising in any situation involving nonperformance by IBM pursuant to, or in
any way related to the subject of this Statement of Limited Warranty, IBM's liability will be limited to the
charge paid by you for the individual Machine that is the subject of the claim.
JAPAN
Governing Law: The following sentence is added to this Section:
Any doubts concerning this Agreement will be initially resolved between us in good faith and in accordance with
the principle of mutual trust.
NEW ZEALAND
Page 36

The IBM Warranty for Machines: The following paragraph is added to this Section:
The warranties specified in this Section are in addition to any rights you may have under the Consumer Guarantees Act 1993 or other legislation which cannot be excluded or limited. The Consumer Guarantees Act 1993 will
not apply in respect of any goods which IBM provides, if you require the goods for the purposes of a business as
defined in that Act.
Limitation of Liability: The following is added to this Section:
Where Machines are not acquired for the purposes of a business as defined in the Consumer Guarantees Act
1993, the limitations in this Section are subject to the limitations in that Act.
PEOPLE'S REPUBLIC OF CHINA (PRC)
Governing Law: The following replaces this Section:
Both you and IBM consent to the application of the laws of the State of New York (except when local law
requires otherwise) to govern, interpret, and enforce all your and IBM’s rights, duties, and obligations arising
from, or relating in any manner to, the subject matter of this Agreement, without regard to conflict of law principles.
Any disputes arising from or in connection with this Agreement will first be resolved by friendly negotiations,
failing which either of us has the right to submit the dispute to the China International Economic and Trade Arbitration Commission in Beijing, the PRC, for arbitration in accordance with its arbitration rules in force at the
time. The arbitration tribunal will consist of three arbitrators. The language to be used therein will be English and
Chinese. An arbitral award will be final and binding on all the parties, and will be enforceable under the Convention on the Recognition and Enforcement of Foreign Arbitral Awards (1958).
The arbitration fee will be borne by the losing party unless otherwise determined by the arbitral award.
During the course of arbitration, this Agreement will continue to be performed except for the part which the par
ties are disputing and which is undergoing arbitration.
EUROPE, MIDDLE EAST, AFRICA (EMEA)
THE FOLLOWING TERMS APPLY TO ALL EMEA COUNTRIES:
The terms of this Statement of Limited Warranty apply to Machines purchased from IBM or an IBM reseller.
Warranty Service:
If you purchase an IBM Machine in Austria, Belgium, Denmark, Estonia, Finland, France, Germany, Greece,
Iceland, Ireland, Italy, Latvia, Lithuania, Luxembourg, Netherlands, Norway, Portugal, Spain, Sweden, Switzerland or United Kingdom, you may obtain warranty service for that Machine in any of those countries from either
(1) an IBM reseller approved to perform warranty service or (2) from IBM. If you purchase an IBM Personal
Computer Machine in Albania, Armenia, Belarus, Bosnia and Herzegovina, Bulgaria, Croatia, Czech Republic,
Georgia, Hungary, Kazakhstan, Kirghizia, Federal Republic of Yugoslavia, Former Yugoslav Republic of Macedonia (FYROM), Moldova, Poland, Romania, Russia, Slovak Republic, Slovenia, or Ukraine, you may obtain
warranty service for that Machine in any of those countries from either (1) an IBM reseller approved to perform
warranty service or (2) from IBM.
If you purchase an IBM Machine in a Middle Eastern or African country, you may obtain warranty service for
that Machine from the IBM entity within the country of purchase, if that IBM entity provides warranty service in
that country, or from an IBM reseller, approved by IBM to perform warranty service on that Machine in that
Page 37

country. Warranty service in Africa is available within 50 kilometers of an IBM authorized service provider.
You are responsible for transportation costs for Machines located outside 50 kilometers of an IBM authorized
service provider.
Governing Law:
The applicable laws that govern, interpret and enforce rights, duties, and obligations of each of us arising from,
or relating in any manner to, the subject matter of this Statement, without regard to conflict of laws principles, as
well as Country-unique terms and competent court for this Statement are those of the country in which the warranty service is being provided, except that in 1) Albania, Bosnia-Herzegovina, Bulgaria, Croatia, Hungary,
Former Yugoslav Republic of Macedonia, Romania, Slovakia, Slovenia, Armenia, Azerbaijan, Belarus, Georgia,
Kazakhstan, Kyrgyzstan, Moldova, Russia, Tajikistan, Turkmenistan, Ukraine, and Uzbekistan, the laws of Austria apply; 2) Estonia, Latvia, and Lithuania, the laws of Finland apply; 3) Algeria, Benin, Burkina Faso, Cameroon, Cape Verde, Central African Republic, Chad, Congo, Djibouti, Democratic Republic of Congo, Equatorial
Guinea, France, Gabon, Gambia, Guinea, Guinea-Bissau, Ivory Coast, Lebanon, Mali, Mauritania, Morocco,
Niger, Senegal, Togo, and Tunisia, this Agreement will be construed and the legal relations between the parties
will be determined in accordance with the French laws and all disputes arising out of this Agreement or related to
its violation or execution, including summary proceedings, will be settled exclusively by the Commercial Court
of Paris; 4) Angola, Bahrain, Botswana, Burundi, Egypt, Eritrea, Ethiopia, Ghana, Jordan, Kenya, Kuwait,
Liberia, Malawi, Malta, Mozambique, Nigeria, Oman, Pakistan, Qatar, Rwanda, Sao Tome, Saudi Arabia, Sierra
Leone, Somalia, Tanzania, Uganda, United Arab Emirates, United Kingdom, West Bank/Gaza, Yemen, Zambia,
and Zimbabwe, this Agreement will be governed by English Law and disputes relating to it will be submitted to
the exclusive jurisdiction of the English courts; and 5) in Greece, Israel, Italy, Portugal, and Spain any legal
claim arising out of this Statement will be brought before, and finally settled by, the competent court of Athens,
Tel Aviv, Milan, Lisbon, and Madrid, respectively.
THE FOLLOWING TERMS APPLY TO THE COUNTRY SPECIFIED:
AUSTRIA AND GERMANY
The IBM Warranty for Machines: The following replaces the first sentence of the first paragraph of this Sec-
tion:
The warranty for an IBM Machine covers the functionality of the Machine for its normal use and the Machine's
conformity to its Specifications.
The following paragraphs are added to this Section:
The minimum warranty period for Machines is six months. In case IBM or your reseller is unable to repair an
IBM Machine, you can alternatively ask for a partial refund as far as justified by the reduced value of the unrepaired Machine or ask for a cancellation of the respective agreement for such Machine and get your money
refunded.
Extent of Warranty: The second paragraph does not apply.
Warranty Service: The following is added to this Section:
During the warranty period, transportation for delivery of the failing Machine to IBM will be at IBM's expense.
Limitation of Liability: The following paragraph is added to this Section:
The limitations and exclusions specified in the Statement of Limited Warranty will not apply to damages caused
by IBM with fraud or gross negligence and for express warranty.
Page 38

The following sentence is added to the end of item 2:
IBM’s liability under this item is limited to the violation of essential contractual terms in cases of ordinary negligence.
EGYPT
Limitation of Liability: The following replaces item 2 in this Section:
as to any other actual direct damages, IBM's liability will be limited to the total amount you paid for the Machine
that is the subject of the claim. For purposes of this item, the term "Machine" includes Machine Code and
Licensed Internal Code.
Applicability of suppliers and resellers (unchanged).
FRANCE
Limitation of Liability: The following replaces the second sentence of the first paragraph of this Section:
In such instances, regardless of the basis on which you are entitled to claim damages from IBM, IBM is liable for
no more than: (items 1 and 2 unchanged).
IRELAND
Extent of Warranty: The following is added to this Section:
Except as expressly provided in these terms and conditions, all statutory conditions, including all warranties
implied, but without prejudice to the generality of the foregoing all warranties implied by the Sale of Goods Act
1893 or the Sale of Goods and Supply of Services Act 1980 are hereby excluded.
Limitation of Liability: The following replaces items one and two of the first paragraph of this Section:
1. death or personal injury or physical damage to your real property solely caused by IBM's negligence; and
2. the amount of any other actual direct damages, up to 125 percent of the charges (if recurring, the 12 months'
charges apply) for the Machine that is the subject of the claim or which otherwise gives rise to the claim.
Applicability of suppliers and resellers (unchanged).
The following paragraph is added at the end of this Section:
IBM's entire liability and your sole remedy, whether in contract or in tort, in respect of any default shall be limited to damages.
ITALY
Limitation of Liability: The following replaces the second sentence in the first paragraph:
In each such instance unless otherwise provided by mandatory law, IBM is liable for no more than:
1. (unchanged)
2. as to any other actual damage arising in all situations involving nonperformance by IBM pursuant to, or in any
way related to the subject matter of this Statement of Warranty, IBM's liability, will be limited to the total
amount you paid for the Machine that is the subject of the claim.
Applicability of suppliers and resellers (unchanged).
The following replaces the third paragraph of this Section:
Unless otherwise provided by mandatory law, IBM and your reseller are not liable for any of the following:
(items 1 and 2 unchanged) 3) indirect damages, even if IBM or your reseller is informed of their possibility.
Page 39

SOUTH AFRICA, NAMIBIA, BOTSWANA, LESOTHO AND SWAZILAND
Limitation of Liability: The following is added to this Section:
IBM's entire liability to you for actual damages arising in all situations involving nonperformance by IBM in
respect of the subject matter of this Statement of Warranty will be limited to the charge paid by you for the individual Machine that is the subject of your claim from IBM.
UNITED KINGDOM
Limitation of Liability: The following replaces items 1 and 2 of the first paragraph of this Section:
1. death or personal injury or physical damage to your real property solely caused by IBM's negligence;
2. the amount of any other actual direct damages or loss, up to 125 percent of the charges (if recurring, the 12
months' charges apply) for the Machine that is the subject of the claim or which otherwise gives rise to the
claim;
The following item is added to this paragraph:
3. breach of IBM's obligations implied by Section 12 of the Sale of Goods Act 1979 or Section 2 of the Supply
of Goods and Services Act 1982.
Applicability of suppliers and resellers (unchanged).
The following is added to the end of this Section:
IBM's entire liability and your sole remedy, whether in contract or in tort, in respect of any default shall be limited to damages.
Page 40

Page 41

Part Number: 22P4803
Printed in the USA
22P4803
0422P4803
 Loading...