

Page 1

IBM Data Migration
Kit
User’s Guide
OPTIONS
by IBM
Page 2

Note: Before using this information and the product it supports, read the information
in the Appendixes.
Second Edition (February 2002)
© Copyright International Business Machines Corporation 2002. All rights reserved.
US Government Users Restricted Rights – Use, duplication or disclosure restricted by
GSA ADP Schedule Contract with IBM Corp.
Page 3

Safety
Before installing this product, read the Safety Information.
Antes de instalar este produto, leia as Informações de Segurança.
Pred instalací tohoto produktu si prectete prírucku bezpecnostních instrukcí.
Læs sikkerhedsforskrifterne, før du installerer dette produkt.
Ennen kuin asennat tämän tuotteen, lue turvaohjeet kohdasta Safety
Information.
Avant d’installer ce produit, lisez les consignes de sécurité.
Vor der Installation dieses Produkts die Sicherheitshinweise lesen.
Prima di installare questo prodotto, leggere le Informazioni sulla Sicurezza.
Lees voordat u dit product installeert eerst de veiligheidsvoorschriften.
Les sikkerhetsinformasjonen (Safety Information) før du installerer dette
produktet.
© Copyright IBM Corp. 2002 iii
Page 4

Antes de instalar este produto, leia as Informações sobre Segurança.
Pred inštaláciou tohto zariadenia si pečítaje Bezpečnostné predpisy.
Antes de instalar este producto lea la información de seguridad.
Lässäkerhetsinformationen innan du installerar den här produkten.
iv IBM Data Migration Kit: User ’s Guide
Page 5

Contents
Safety........................iii
About this book ....................vii
Registering your option ..................vii
Installation and user’s guide................1-1
Product description ...................1-1
Supported operating-system combinations ............1-2
System requirements ...................1-2
The data migration process .................1-3
Installing the hardware ..................1-4
Installing the Ethernet adapter in a desktop computer (PCI Kit) . . . 1-4
Installing the Ethernet adapter in device drivers in a desktop computer 1-5
Installing the Ethernet adapter in a mobile computer (PC Card Kit) 1-9
Installing the Ethernet PC Card adapter device drivers in a mobile
computer.....................1-10
Connecting the computers .................1-11
Migratingdata.....................1-12
Migrating data to a computer running Windows 2000, Windows Me,
Windows 98, or Windows 95 ..............1-12
Migrating data to a computer running Windows XP .......1-49
Suggestions after migration ...............1-70
Appendix A. Troubleshooting, hints, and tips..........A-1
Troubleshooting....................A-1
Supplemental instructions .................A-3
Logging on to your Windows computer with a user name and
password.....................A-3
Changing a user name password on your Windows computer ....A-5
Changing the name of a Windows computer ...........A-6
Windows XP ....................A-6
Windows 2000 ....................A-7
Windows Me, Windows 98, and Windows 95 .........A-7
Disabling file and print sharing ...............A-7
Windows XP ....................A-7
Windows 2000 ....................A-7
Windows Me, Windows 98, and Windows 95 .........A-8
Disabling a computer to log on to a Windows NT Domain .....A-8
Appendix B. Warranty information .............B-1
Warranty period ....................B-1
Service and support ...................B-1
WarrantyinformationontheWorldWideWeb.........B-1
© Copyright IBM Corp. 2002 v
Page 6

Online technical support.................B-1
Telephone technical support ...............B-2
IBM Statement of Limited Warranty Z125-4753-06 8/2000.......B-3
Part1-GeneralTerms.................B-3
Part 2 - Country-unique Terms ..............B-6
Appendix C. Notices ..................C-1
Processing date data ...................C-1
Trademarks......................C-1
Electronic emission notices .................C-2
Federal Communications Commission (FCC) statement ......C-3
vi IBM Data Migration Kit: User ’s Guide
Page 7

About this book
This guide contains information about the IBM«Data Migration Kit. The guide
is divided into two parts:
Part 1: Installation and user’s guide
This section contains the product description, installation, and operating
instructions and is translated into the following languages:
v French
v German
v Spanish
v Italian
v Brazilian Portuguese
v Traditional Chinese
v Japanese
Part 2: Appendixes
This section contains help and service, warranty, and notice information. Be
sure to retain your proof of purchase. It might be required for warranty
service.
Registering your option
Thank you for purchasing OPTIONS by IBM. Please take a few moments to
register your product and provide us with information that will help IBM to
better serve you in the future. Your feedback is valuable to us in developing
products and services that are important to you, as well as in developing better
ways to communicate with you. Register your option on the IBM Web site at
http://www.ibm.com/pc/register
IBM will send you information and updates on your registered product unless
you indicate on the Web site questionnaire that you do not want to receive
further information.
© Copyright IBM Corp. 2002 vii
Page 8

viii IBM Data Migration Kit: User ’s Guide
Page 9

Installation and user’s guide
This guide contains the product description, hardware and software installation
instructions, and product use information.
Note: Check the IBM Support Web site for additional tips on using this option
at: http://www.ibm.com/pc/support.
Product description
The IBM Data Migration Kit provides an easy way to copy Microsoft
Windows«desktop settings, network settings, Internet bookmarks, and data
files from a previous computer to a new computer. For migrating to Microsoft
Windows 95, Windows 98, Microsoft Windows Millennium Edition (Me), or
Microsoft Windows 2000 Professional, the migration process is managed by the
IBM Data Transfer Software program. This program is available on the CD that
comes with your kit.
For migrating to Windows XP, the migration is managed by the Files and
Settings Transfer Wizard, which comes with the Windows XP operating system.
The data and settings will be transferred from the previous computer using an
Ethernet connection between the two computers.
In addition to the IBM Data Migration User’s Guide and Software CD, the option
package includes:
v IBM Data Migration Kit User’s Guide
v Safety Information book
v Crossover cable
v PCI Ethernet adapter for desktop computers (PCI Kit only)
v Ethernet PC Card and converter cable for mobile computers (PC Card Kit
only)
«
To use the data migration kit, the previous computer and new computer must
have an Ethernet adapter installed. The PCI Kit (for desktop computers) and
the PC Card Kit (for mobile computers) each include an Ethernet adapter that
must be installed in the previous computer, if that computer does not already
have an Ethernet adapter. The Basic Kit does not include an Ethernet adapter.
Contact your place of purchase if an item is missing or damaged. Be sure to
retain your proof of purchase and packing material. They might be required to
receive warranty service.
© Copyright IBM Corp. 2002 1-1
Page 10

You can perform the data-migration process between two computers with
Windows operating systems. The computers can have different operating
systems; however, not all Windows operating-system combinations are
supported. See “Supported operating-system combinations”.
Supported operating-system combinations
You can migrate to these operating systems on your new computer.
If the previous computer operating system is: The following operating systems are
Windows XP Home Edition or Windows XP
Professional
Windows 2000 Professional Windows XP Home Edition, Windows
Windows Millennium Edition (Me) Windows XP Home Edition, Windows
Windows 98 Second Edition (SE) Windows XP Home Edition, Windows
Windows 98 Windows XP Home Edition, Windows
Windows 95 Windows XP Home Edition, Windows
supported for the new computer:
Windows XP Home Edition, Windows
XP Professional
XP Professional, Windows 2000
XP Professional, Windows Me
XP Professional, Windows 2000,
Windows Me, Windows 98 SE,
Windows 98
XP Professional, Windows 2000,
Windows Me, Windows 98 SE,
Windows 98
XP Professional, Windows 2000,
Windows Me, Windows 98 SE,
Windows 98, Windows 95
System requirements
The computers that you are transferring data between do not have to be the
same type. For example, you can transfer data from a desktop computer to a
mobile computer and vice versa. The following are requirements for the new
and previous computer.
New computer:
v Pentium-class microprocessor or later
v Windows XP Professional, Windows XP Home Edition, Windows 2000,
Windows Me, Windows 98 SE, Windows 98, Windows 95
v For migration to Windows XP only, a diskette drive in or that can be
connected to the new computer or a Windows XP CD and a CD-ROM or
DVD-ROM drive in the old computer
v 32 MB memory
v Free space on the hard disk equal to the amount of data to be transferred
1-2 IBM Data Migration Kit: User ’s Guide
Page 11

v Ethernet adapter
Previous computer:
v Pentium-class microprocessor or later
v Windows XP Professional, Windows XP Home Edition, Windows 2000,
Windows Me, Windows 98 SE, Windows 98, Windows 95
v For migration to Windows XP only, a diskette drive in or that can be
connected to the old computer or a Windows XP CD or a CD-ROM or
DVD-ROM drive in the old computer
v 32 MB memory
v Free space on the hard disk equal to the amount of data to be transferred
(for Windows 2000, Windows Me, Windows 98, and Windows 95 only)
v Available PCI slot (PCI Kit only)
v Available PC Card slot (PC Card Kit only)
The data migration process
To use the IBM Data Migration Kit, your new IBM computer must already
have an Ethernet adapter. Your previous computer also must have an Ethernet
adapter. If your previous computer does not already have an Ethernet adapter,
you should have purchased the PCI Kit for desktop computers or the PC Card
for mobile computers.
Each of these kits contains an Ethernet adapter that you can install in your
previous computer. If your previous computer already has an Ethernet adapter,
you should have purchased the Basic Kit.
The data migration consists of these basic steps for migrating to a computer
running Windows 2000, Windows Me, Windows 98, or Windows 95:
1. If your previous computer does not have an Ethernet adapter, install the
Ethernet adapter and device drivers in your previous computer.
2. Connect the Ethernet ports on your new computer and previous computer,
using the crossover cable included in the kit.
3. Install and run the IBM Data Transfer on the new computer.
4. Install and run the IBM Data Transfer on the previous computer. (In this
step you will choose which files and settings you want to transfer).
5. Continue the migration process on the new computer.
6. Follow the instructions in “Suggestions after migration” on page 1-70.
For migrating to a computer running Windows XP Professional or Windows
XP Home Edition, the data migration consists of these basic steps:
1. Install the Ethernet adapter and device drivers in your previous computer.
Skip this step if your previous computer already has an Ethernet adapter.
2. Connect the Ethernet ports on your new computer and previous computer
using the crossover cable included in the kit.
3. Configure the IP and DNS settings on your new and previous computer.
Installation and user’s guide 1-3
Page 12

4. Start the Files and Transfer Settings wizard on the new computer.
5. Create a wizard diskette (if not using a Windows XP CD).
6. Install the Files and Settings Transfer wizard on your previous computer
using the Wizard diskette or a Windows XP CD.
7. Run the Files and settings Transfer wizard on your previous computer.
8. Continue the migration process on the new computer.
9. Follow the instructions in “Suggestions after migration” on page 1-70.
Installing the hardware
This section contains instructions for installing the Ethernet adapter and device
drivers in your previous computer.
v If you already have an Ethernet adapter in your previous computer, go to
“Connecting the computers” on page 1-11.
v If you are installing the Ethernet adapter in a desktop computer, follow the
instructions beginning in the next section, “Installing the Ethernet adapter in
a desktop computer (PCI Kit)”.
v If you are installing the Ethernet adapter in a mobile computer, proceed to
“Installing the Ethernet adapter in a mobile computer (PC Card Kit)” on
page 1-9.
Installing the Ethernet adapter in a desktop computer (PCI Kit)
Follow these steps to install the PCI adapter (from the PCI Kit only) in your
previous computer:
1. Shut down Windows (if it is running) by clicking the Start button and then
click Shut Down.
2. Turn off and unplug the computer from the electrical outlet before
removing the computer cover.
Note: Follow the instructions provided in your computer manual for
removing the cover or otherwise accessing the PCI adapter slots and
installing a PCI adapter. Be sure to follow any safety instructions in
that manual.
1-4 IBM Data Migration Kit: User ’s Guide
Page 13

3. Remove the cover bracket from a PCI slot by removing the screw that
secures it.
4. Insert the PCI Ethernet adapter into a PCI slot as shown in the illustration,
and push it into the slot until it is firmly seated. Secure the adapter bracket
with the screw that you removed in step 3. Your adapter slots or PCI
connector might differ from the illustration.
5. Replace the computer cover.
6. Plug in the power cord.
7. Turn on the power.
8. Follow the instructions in the next section to install the device drivers.
Installing the Ethernet adapter in device drivers in a desktop computer
Follow the instructions for the operating system on your previous computer to
install the device drivers for the PCI Ethernet adapter. Device drivers are
necessary for the PCI Ethernet adapter to function. Windows might prompt for
the device driver installation disk on restart.
Windows XP
Windows XP will automatically install the device drivers for your PCI Ethernet
adapter. A New Network Device Installed window opens. Close this window.
Windows 2000
Follow this procedure to install the Ethernet device drivers in Windows 2000:
1. After you install the Ethernet adapter in the computer, plug in the power
cord and start the computer. The Found New Hardware window opens,
and the Found New Hardware wizard starts.
Installation and user’s guide 1-5
Page 14

2. Insert the IBM Data Migration User’s Guide and Software CD into the
CD-ROM drive, if it is not already inserted. If a browser window
automatically opens, close the window.
3. In the New Hardware Wizard Welcome window, click Next.
4. In the next window, click Search, then click Next.
5. Select the CD-ROM check box in the Locate Driver window, and click
Next.
6. When the Search Results indicates a device driver was found on the CD,
click Next to continue.
7. If a Digital Signature message is displayed, click Ye s to continue.
8. When a completion message is displayed, click Finish.
9. Proceed to “Connecting the computers” on page 1-11.
Windows Me
Follow this procedure to install the Ethernet device drivers in Windows Me:
1. After you install the adapter in the computer, start the computer. Windows
Me detects the adapter, and the Add New Hardware wizard starts.
2. Click Next.
Note: If the Add New Hardware window does not open and Windows Me
starts normally, you might need to manually add the device drivers
using instructions given in ″Manually adding the Ethernet device
drivers with Windows Me″ on page 1-6.
3. Click Removable Media and insert the IBM Data Migration User’s Guide and
Software CD into the CD-ROM drive, if it is not already inserted. If the CD
browser window opens after you insert the CD, close that window.
4. Click Updated Driver, and then click Next.
5. When the files have been copied, click Finish, and restart your computer
when prompted.
6. Proceed to “Connecting the computers” on page 1-11.
Manually adding the Ethernet device drivers with Windows Me
If the Add New Hardware Wizard window does not open in step 1 of the
previous procedure, check the Device Manager list to see if the new adapter is
present. If it is not, follow these instructions to manually add the adapter:
1. Click Start -> Settings -> Control Panel.
2. From the Control Panel, double-click the Add New hardware icon.
3. Click Specify the location of the driver, then click Next.
4. Click Display a list of all drivers in a specific location, then click Next.
5. Select Network Adapter from the list, then click Next.
1-6 IBM Data Migration Kit: User ’s Guide
Page 15

6. Insert the IBM Data Migration User’s Guide and Software CD into the
CD-ROM drive if it is not already inserted. If the CD browser window
opens after you insert the CD, close that window.
7. Click Have Disk.
8. In the Copy manufacturer’s files from field, type e:\Drivers\Intel\w9x,
where e represents the drive letter of the CD-ROM drive.
9. Follow the instructions to install the device drivers. When the adapter is
added, it appears in the Network adapters list.
10. Click OK in the Select Device window.
11. When the Update Wizard displays the message that the device driver has
been found, click Next.
12. Click Finish.
13. Restart your computer when prompted.
14. Proceed to “Connecting the computers” on page 1-11.
Windows 98
Follow this procedure to install the Ethernet device drivers in Windows 98:
1. After you install the Ethernet adapter in the computer, start the computer.
The New Hardware Found window opens.
Note: If this window does not open and Windows 98 starts normally, you
might need to manually add the device drivers using instructions in
″Manually adding the Ethernet adapter device drivers with Windows
98″ on page 1-7.
2. When prompted, insert the IBM Data Migration User’s Guide and Software
CD into the CD-ROM drive if it is not already inserted. If the CD browser
window opens, close that window.
3. Type the path e:\Drivers\Intel\w9xto the device drivers, where e
represents the drive letter of the CD-ROM drive, and click OK.
4. Restart the computer when prompted.
5. Proceed to “Connecting the computers” on page 1-11.
If the Add New Hardware Wizard window does not open in step 1 of the
previous procedure, check the Device Manager list to see if the new adapter is
present. If it is not, follow these instructions to manually add the adapter:
Manually adding the Ethernet adapter device drivers with Windows 98:
1. Click Start -> Settings -> Control Panel.
2. From the Control Panel, double-click the System icon.
3. Click the Device Manager tab.
4. Double-click Other Devices or Network Adapters in the list area.
Installation and user’s guide 1-7
Page 16

5. Double-click PCI Ethernet Controller.
6. Click the Driver tab and then click Update Driver.
7. Click Display a list of all the drivers, and click Next. Insert the IBM Data
Migration User’s Guide and Software CD into the CD-ROM drive if it is not
already inserted and click Have Disk. If a browser window automatically
opens, close that window.
8. In the Copy manufacture’s files from field, type e:\Drivers\Intel\w9x
where e represents the drive letter of the CD-ROM drive.
9. Follow the instructions to install the device drivers. When the adapter is
added, it is shown in the Network Adapters list.
10. Click OK in the Select Device window.
11. The Update Wizard displays the message that the device driver has been
found. Click Next.
12. Click Finish.
13. Restart your computer when prompted.
14. Proceed to “Connecting the computers” on page 1-11.
Windows 95
Have your Windows 95 installation CD or diskettes available; you will be
prompted for them when you install the new adapter. Follow this procedure to
install the Ethernet device drivers in Windows 95:
1. After you install the Ethernet adapter in the computer, start the computer.
Windows 95 detects the adapter as a PCI Ethernet device, and the New
Hardware Found window opens. Depending on your version of Windows
95 either the Update Device Driver wizard or the New Hardware wizard
window opens.
Note: If the New Hardware Found window does not open and Windows
95 starts normally, you might need to manually add the device
drivers. Follow the instructions for ″Manually adding the Ethernet
device drivers with Windows 95″ on page 1-9.
2. Insert the IBM Data Migration User’s Guide and Software CD into the
CD-ROM drive, if it is not already inserted. If the CD browser window
opens after you insert the CD, close that window.
3. Follow the on-screen instructions to install the device drivers. When the
adapter is added, it is shown in the Network Adapters list.
4. Follow the prompts for any Windows 95 installation disks, and restart the
computer when prompted.
5. Proceed to “Connecting the computers” on page 1-11.
1-8 IBM Data Migration Kit: User ’s Guide
Page 17

If the Add New Hardware Wizard window does not open in step 1 of the
previous procedure, check the Device Manager list to see if the new adapter is
present. If it is not, follow these instructions to manually add the adapter:
Manually adding the Ethernet adapter device drivers with Windows 95:
1. Click Start -> Settings -> Control Panel.
2. From the Control Panel, double-click the System icon.
3. Click the Device Manager tab.
4. Double-click Other Drives (question mark icon) in the list area.
5. Double-click PCI Ethernet Controller.
6. Click the Driver tab, and then click Update Driver.
7. Insert the IBM Data Migration User’s Guide and Software CD into the
CD-ROM drive, if it is not already inserted. If the CD browser window
opens after you insert the CD, close that window.
8. At the Update Device Driver wizard, click No and click Next.
9. Click Have Disk.
10. In the Select Device window, type e:\Drivers\Intel\w9x where e
represents the drive letter of the CD-ROM drive. Click OK.
11. Follow the instructions to install the device drivers. When the adapter is
added, it is shown in the Network adapters list.
12. Follow any prompts for Windows 95 Installation disks and restart when
prompted.
13. Proceed to “Connecting the computers” on page 1-11.
Installing the Ethernet adapter in a mobile computer (PC Card Kit)
If your previous computer is a mobile computer without an Ethernet adapter,
follow this procedure to install the Ethernet PC Card adapter that comes with
the PC Card Kit.
1. Connect the converter cable to the Ethernet PC card adapter as shown in
the following illustration.
2. Turn on your computer if it is not already on, and wait for Windows to
start.
Installation and user’s guide 1-9
Page 18

3. Insert the Ethernet PC Card into an available PC Card slot in your mobile
computer, as shown in the following illustration.
If you are unsure about the location of the PC Card slot, refer to your
mobile computer documentation.
Installing the Ethernet PC Card adapter device drivers in a mobile computer
If your previous computer is running Windows XP, Windows 2000, Windows
Me, or Windows 98 SE, the Ethernet PC Card will automatically be recognized,
and the device drivers will be installed when you start the operating system. If
prompted, restart the computer. Proceed to “Connecting the computers” on
page 1-11.
Note: The New Network Device Installed window might open (Windows XP
only). Close this window.
If your previous computer is running Windows 98 or Windows 95, follow the
instructions for your operating system.
Windows 98
Follow this procedure to install the Ethernet PC Card adapter device drivers in
Windows 98:
1. If it is not already running, start Windows 98. The Add New Hardware
wizard window opens.
2. Insert the IBM Data Migration User’s Guide and Software CD in the CD-ROM
drive if it is not already inserted. If a browser window automatically opens,
close the window.
3. Click Next.
4. Click Search for the best driver, then click Next.
5. Click CD-ROM drive, then click Next.
1-10 IBM Data Migration Kit: User ’s Guide
Page 19

6. Click Next again to install the device driver that is displayed.
7. Click Finish.
8. Restart the computer.
9. Proceed to “Connecting the computers”.
Windows 95
Follow this procedure to install the Ethernet PC Card adapter device drivers in
Windows 95:
1. If it is not already running, start Windows 95. The Update Device Driver
wizard opens.
2. Insert the IBM Data Migration User’s Guide and Software CD in the CD-ROM
drive if it is not already inserted. If a browser window automatically opens,
close that window.
3. Click Next.
4. Accept the detected device driver and click Finish. If prompted for
additional files, click OK.
5. Type the path e:\Drivers\Xircom where e represents the drive letter of your
CD-ROM drive.
6. Click Yes if prompted to restart the computer.
7. Proceed to “Connecting the computers”.
Connecting the computers
Before performing the data migration, you must connect the Ethernet ports on
the two computers using the crossover cable included in the kit. Follow these
steps to connect the two computers.
1. Insert the connector from one end of the crossover cable into the Ethernet
port of your previous computer.
Note: If you installed the Ethernet PC Card adapter in your mobile
computer, you must insert the connector on the crossover cable to
the free end of the converter cable, connected to PC Card. See the
following illustration.
2. Insert the connector on the opposite end of the cable to the Ethernet port of
your new computer.
Installation and user’s guide 1-11
Page 20

The following illustration provides an example of two computers connected.
Note: This illustration represents a unique configuration. Your configuration
might vary. For example, you might have two mobile computers or two
desktop computers. The PCI or PC Card slots and Ethernet ports might
be in different locations.
Migrating data
Depending on the operating system on your new computer the migration
process varies.
v If you will be migrating to a computer running Windows 2000, Windows
Me, Windows 98, or Windows 95, see “Migrating data to a computer
running Windows 2000, Windows Me, Windows 98, or Windows 95”.
v If you are migrating to a computer running Windows XP, see “Migrating
data to a computer running Windows XP” on page 1-49.
Migrating data to a computer running Windows 2000, Windows Me, Windows 98, or Windows 95
Before performing the migration, read the suggestions in the section below.
Suggestions before migration
1. Many documents are saved to the My Documents folder by default. If you
have created more than one user on your previous computer, there may be
more than one folder called My Documents. The IBM Data Transfer
program prompts you to choose the data that will be migrated by selecting
folders. If there is more than one user on your previous machine and you
want to transfer the My Documents folder for each user, make sure to
check the following locations and select the My Documents folder if it
exists (the username will vary depending on the user accounts available on
the machine).
1-12 IBM Data Migration Kit: User ’s Guide
Page 21

Windows 2000
c:\Documents and settings\username\My Documents
c:\WINNT40\Profiles\username\personal
Windows Me, Windows 98, or Windows 95
c:\Windows\Profiles\username\My Documents
2. If you are migrating the My Documents folder from a computer that has
multiple users and you will want to use the same user names on the new
computer, you should create the user names on the new computer before
beginning the migration. Creating the user name on the new computer
before the migration will cause the My Documents folder for that user to be
created before the migration. Then when the data files from the My
Documents folder for that user on the old machine are migrated, they will
be placed properly in the My Documents folder on the new machine.
Creating a user name on the new machine after migrating the My
Documents folder for that user from the previous machine may change the
location of the files in My Documents. You will be creating a My
Documents folder for that user during the migration as well as when
setting up the new user name.
Follow these instructions to perform the data migration:
Note: You might need the original diskettes or CD that came with your
operating system.
1. If your new computer is running Windows 2000, log on to your new
computer with a user name that is part of the Administrators group.
Note: For information on logging on to Windows and checking whether a
user name is part of the Administrators group, see Appendix A,
“Troubleshooting, hints, and tips” on page A-1
2. Insert the IBM Data Migration User’s Guide and Software CD into the
CD-ROM or DVD drive in your new computer.
3. If your browser window does not automatically open, click Start -> Run
and type e:\launch.htm where e is the CD-ROM or DVD drive. Select or
click your language on the language browser page.
4. On the left side of the browser page, click Install IBM Data Transfer
Application to start the automated InstallShield program for IBM Data
Transfer.
Installation and user’s guide 1-13
Page 22
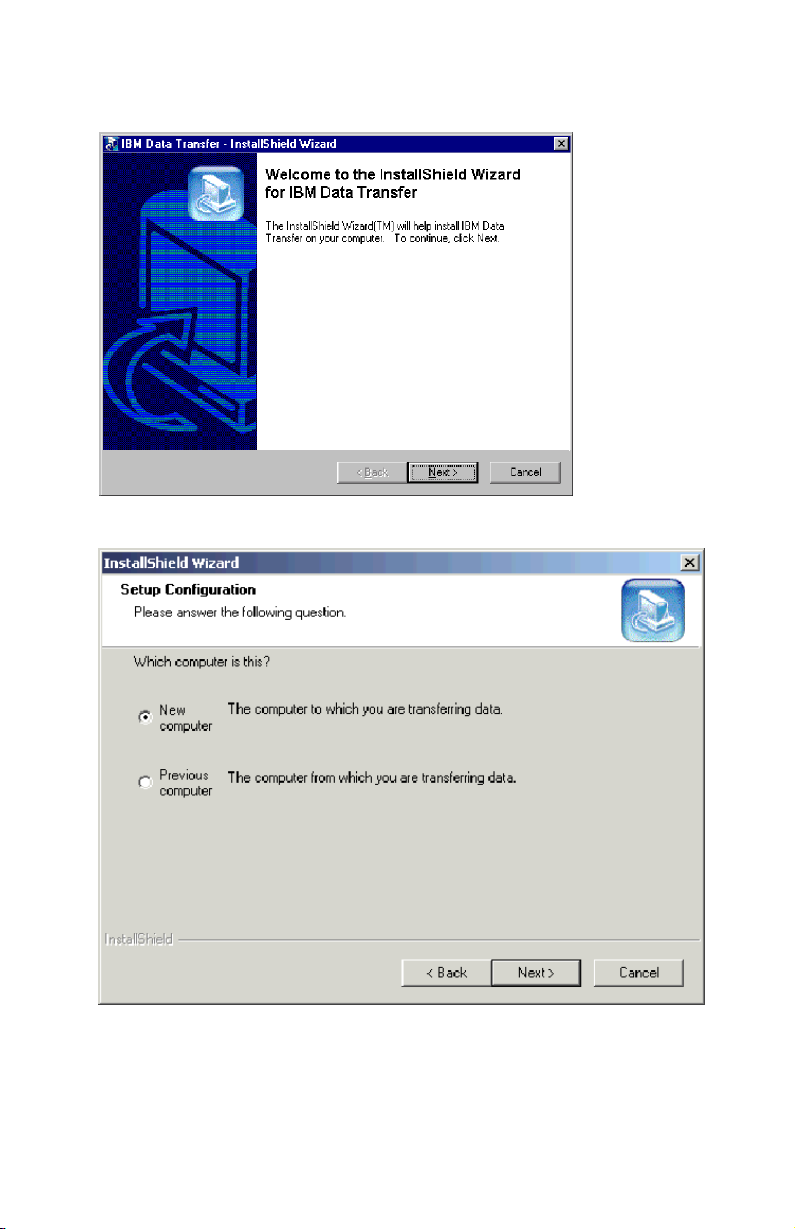
5. The InstallShield Wizard window opens. Click Next.
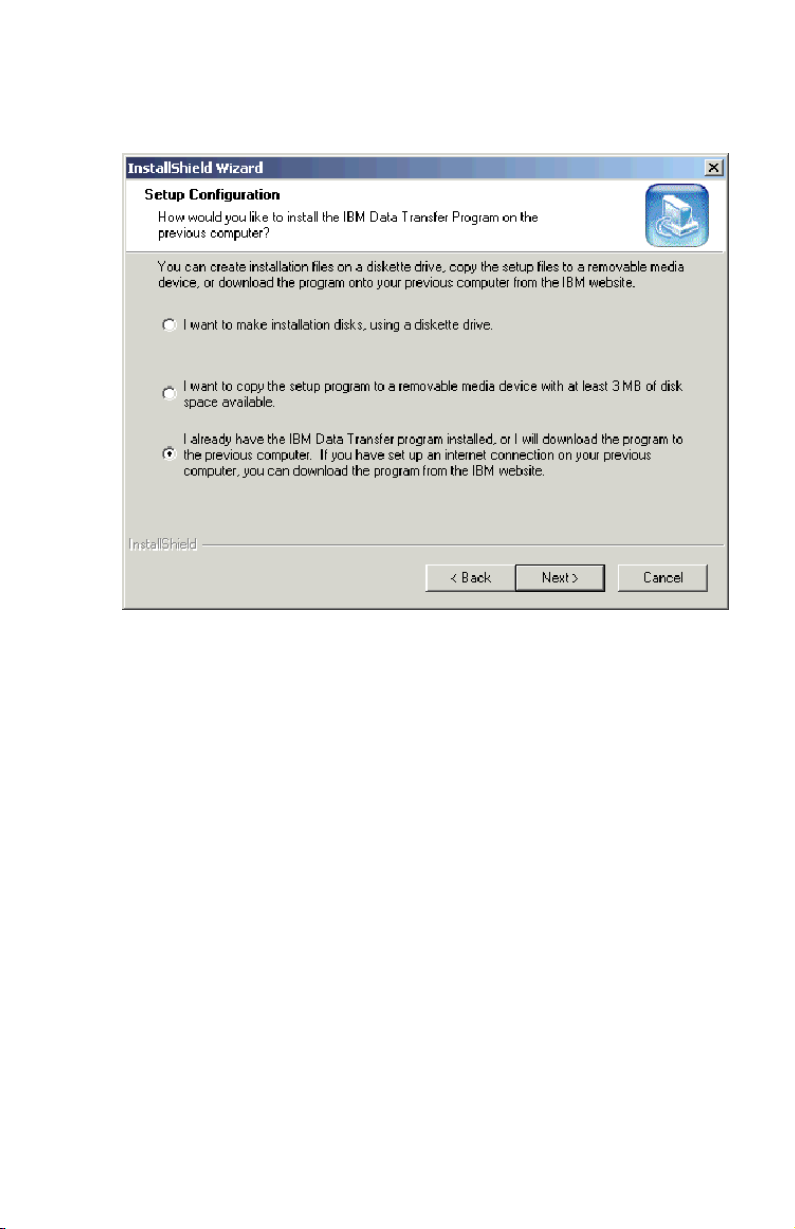
6. In the Setup Configuration window, select New Computer, and click Next.
1-14 IBM Data Migration Kit: User ’s Guide
Page 23
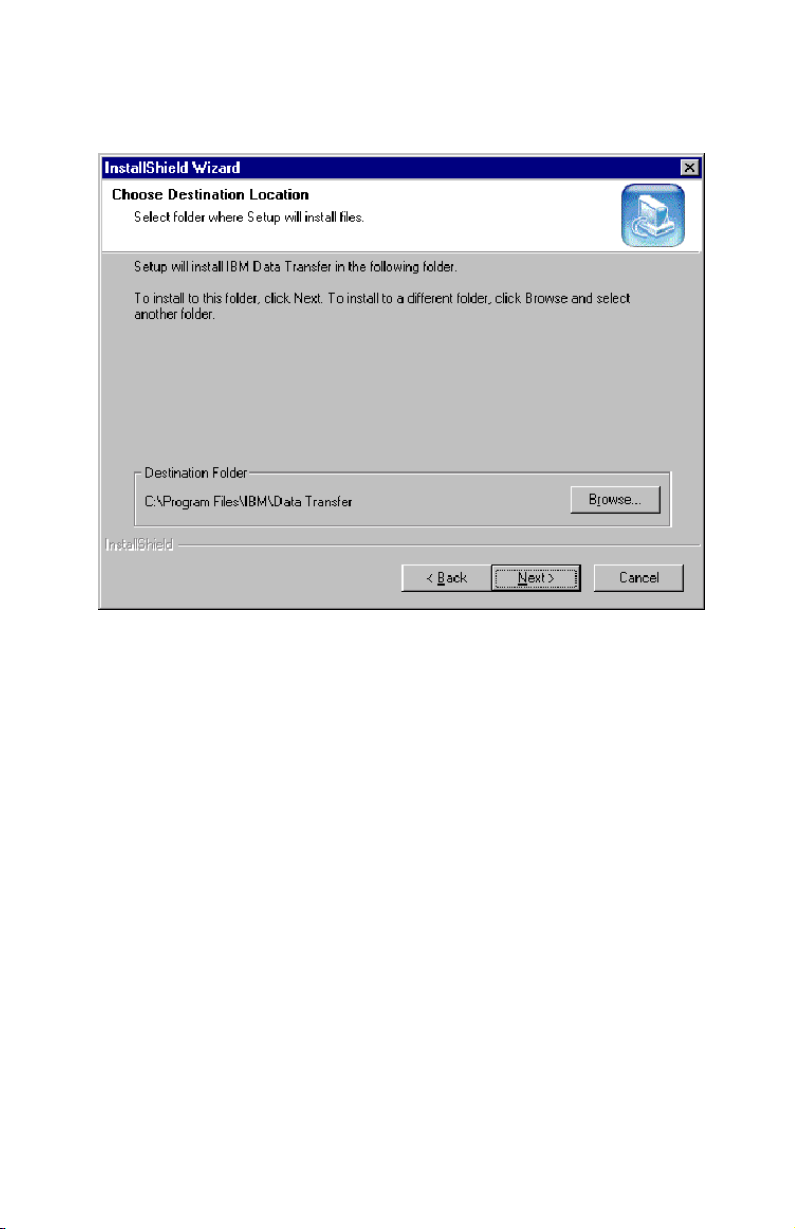
7. In the Setup Configuration window, select I already have the IBM Data
Transfer program installed, and click Next.
Installation and user’s guide 1-15
Page 24
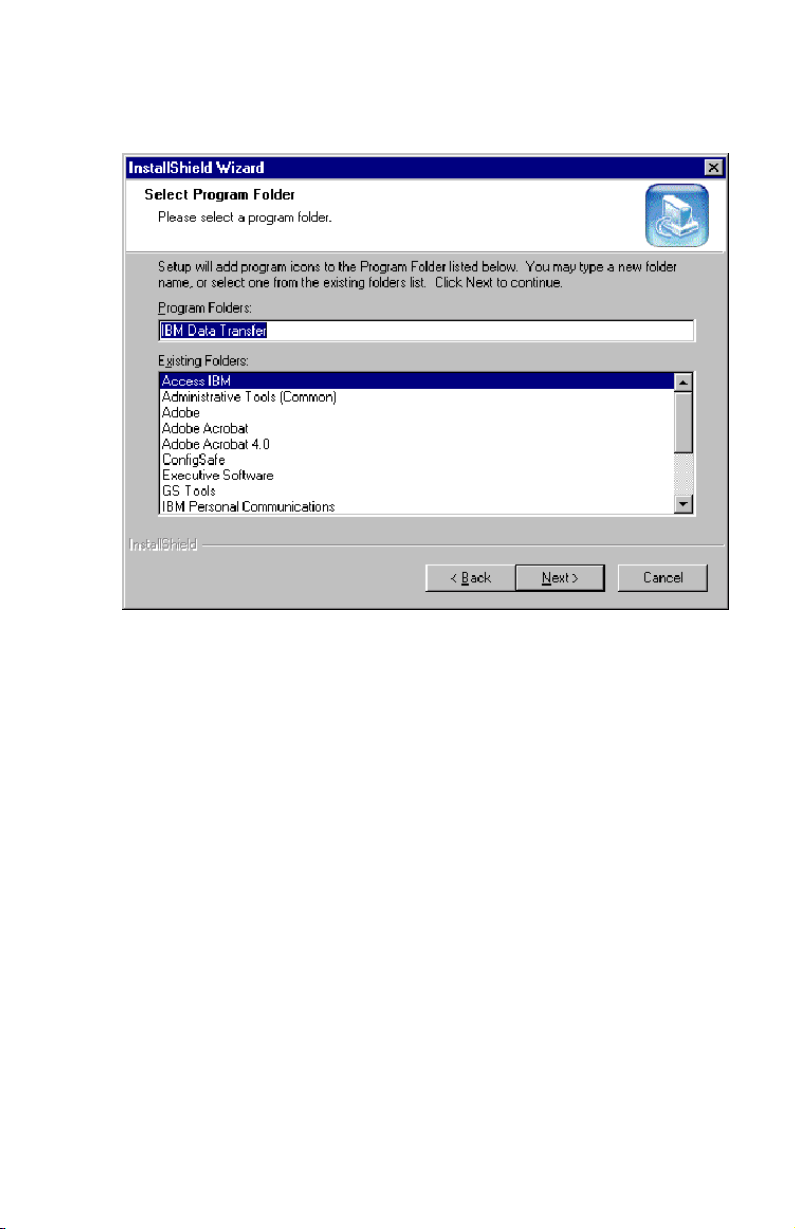
8. In the Choose Destination Location window, accept the default folder, and
click Next.
1-16 IBM Data Migration Kit: User ’s Guide
Page 25
9. In the Select Program Folder window, accept the default folder and click
Next. The program is then installed on your computer.
10. In the InstallShield Wizard Complete window, ensure that the Start IBM
Data Transfer now check box is selected; then click Finish.
v The IBM Data Transfer software starts automatically.
Installation and user’s guide 1-17
Page 26
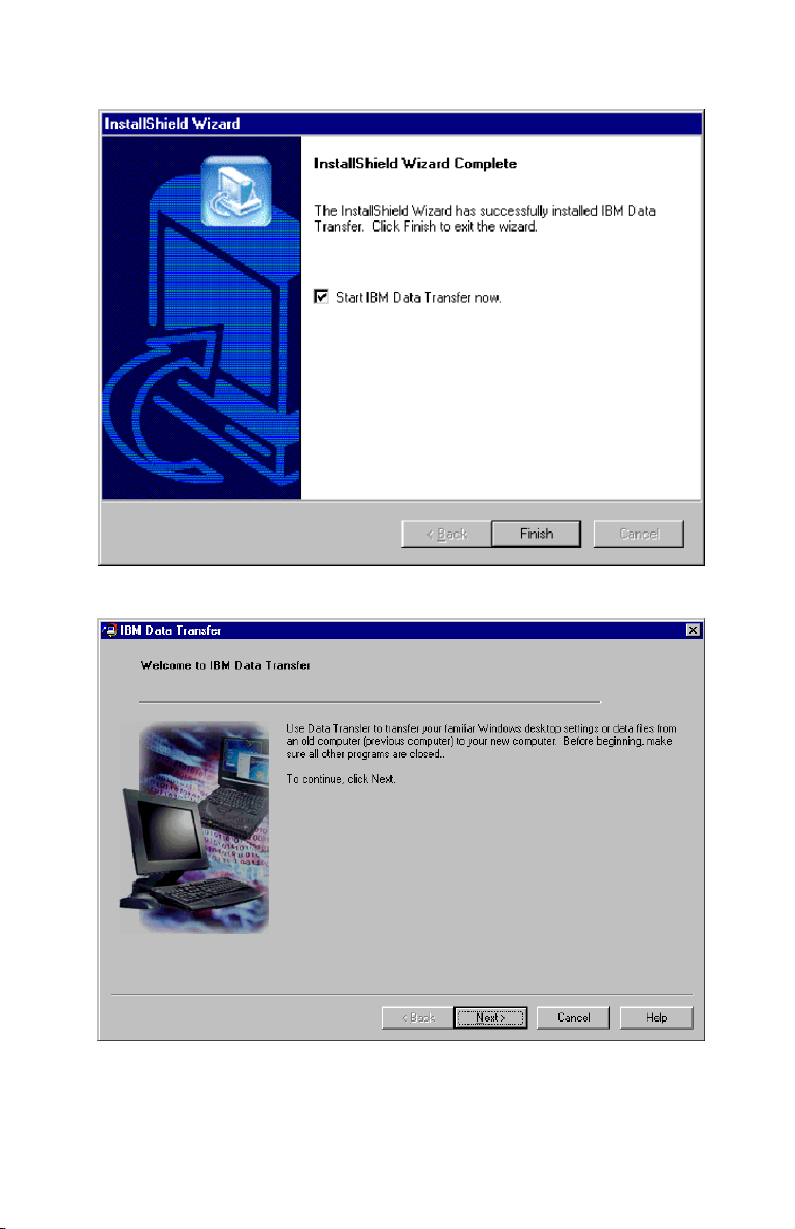
11. In the following window, on the new computer, click Next.
1-18 IBM Data Migration Kit: User ’s Guide
Page 27

12. On the next window, select New computer and click Next..
13. On the next window, choose your transfer options, selecting the settings
you want to transfer. Read the description below each selection for
information on what will be transferred. For each item selected, a window
will open with additional information about transferring that selection.
v If Windows desktop settings is selected, the following window will
open. Please note that Internet bookmarks will only be copied if both
computers have Active Desktop support. Click OK.
Note: To check whether you have Active Desktop installed, right-click
on your computer desktop. If Active Desktop is installed, it is
displayed in the right-click menu.
v If Network settings is selected, the following window will open. Please
note that if network settings are transferred, any static IP addresses
from your previous computer will be migrated to your new computer.
If you will have your new and previous computer on the same network
after the migration, they cannot have the same static IP address.
Therefore you might need to change the IP address of one of the
Installation and user’s guide 1-19
Page 28
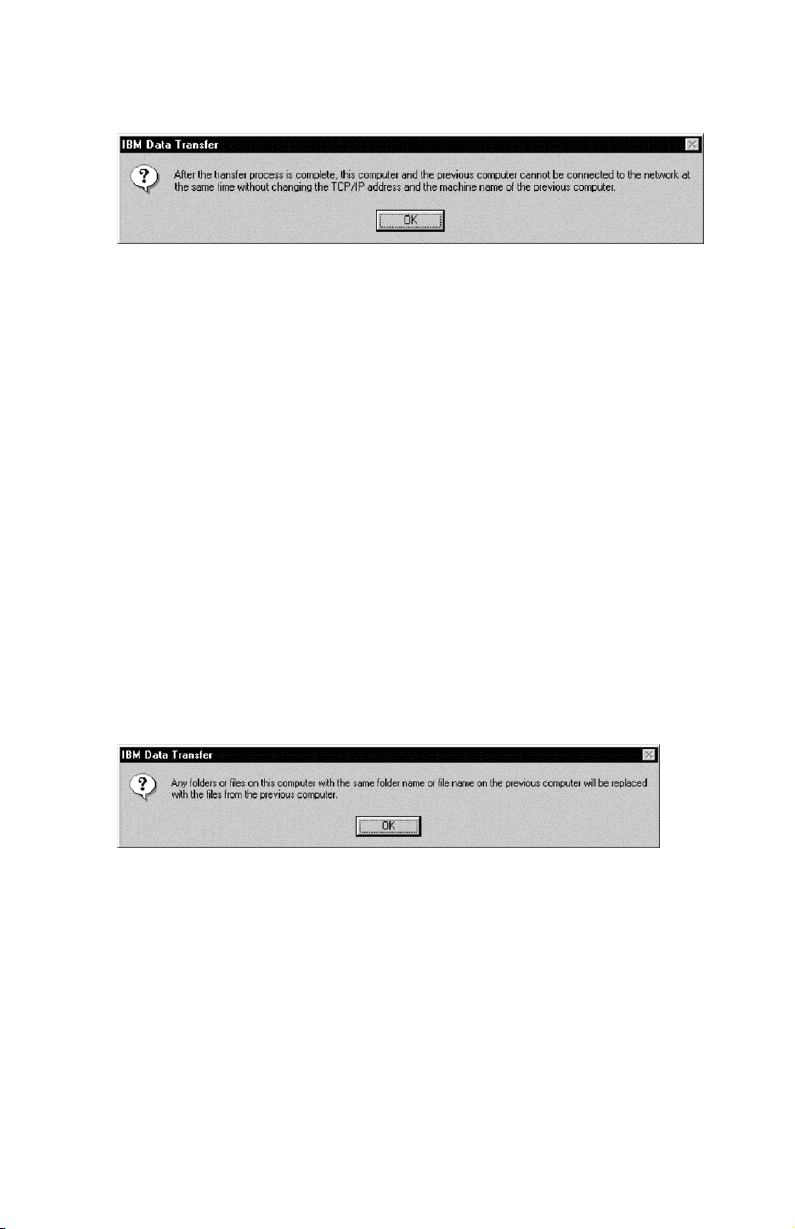
computers. Click OK.
v If Folder contents is selected, the following window will open. Please
note that any files that are transferred from the old computer will
replace any files on the new computer that have the same name and
same path. For example, if you transfer a folder with the path
C:\Pictures that contains the file, picture1.bmp, on your previous
computer and your new computer already has a file with the path
C:\Pictures\picture1.bmp, then the picture1.bmp file on your new
computer will be replaced by the picture1.bmp file from your previous
computer.
If you transfer the folder C:\Picture from your previous machine and
you already have a folder C:\Pictures on your new machine, the
contents of the Pictures folder from your previous machine will be
added to the contents of the Pictures folders on your new machine.
Since this kit is meant to be used to transfer data to a brand new IBM
computer, you should not have any data files already on the new
computer that would be overwritten by data files from your previous
machine.
Note: You will be prompted to choose which folders you want to
transfer later in step 17 in ″Installing and running the IBM data
transfer software on the previous computer″.
1-20 IBM Data Migration Kit: User ’s Guide
Page 29
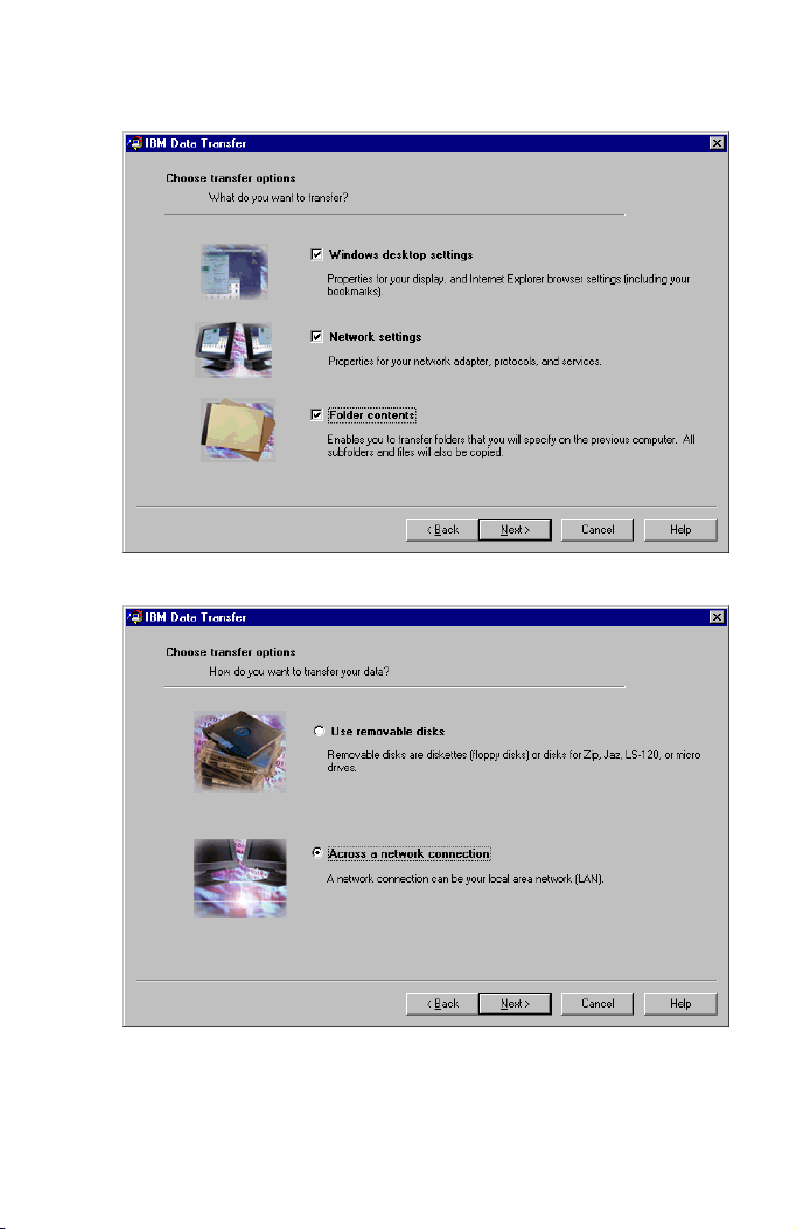
14. Click Next after you have made your selections.
15. In the next window, select Across a network connection. Click Next.
Installation and user’s guide 1-21
Page 30
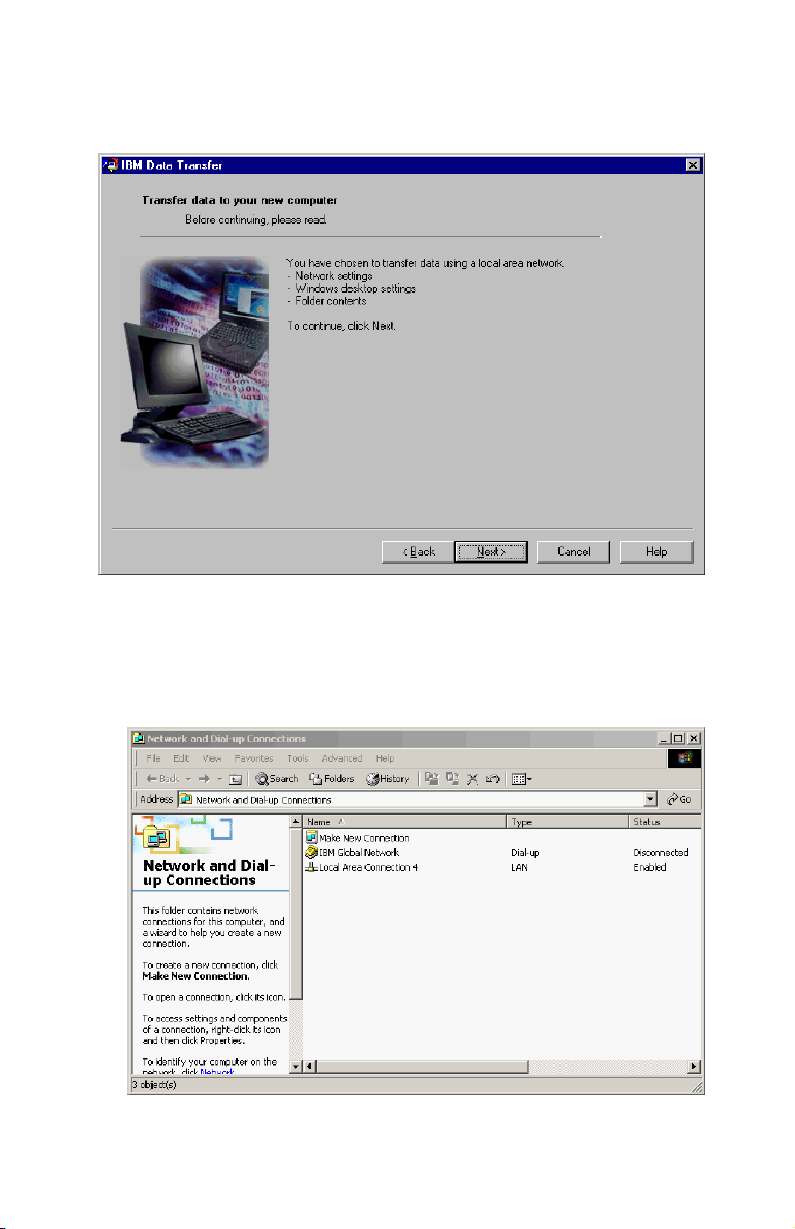
16. The following window displays the items you have selected to transfer.
Click Next.
17. If not already installed, network support will need to be added to your
new computer. Use the following instructions for the operating system on
your new computer, to check and add network support.
Windows 2000
a. The Network and Dial-up Connection window opens.
1-22 IBM Data Migration Kit: User ’s Guide
Page 31

b. Depending on your current network settings, one of the following
three Configure settings windows will open. Follow the instructions in
the Configure Settings window to set up NetBEUI and File and Print
Sharing for Microsoft Networks on your new computer. Proceed to
step 18.
Installation and user’s guide 1-23
Page 32

1-24 IBM Data Migration Kit: User ’s Guide
Page 33

Windows 95, Windows 98 and Windows Me
a. If network support needs to be installed on your new computer, you
will see the following window open.
Note: If you do not see this window, proceed to step 18. Network
support is already installed.
b. Click Yes and network support will be installed. Click Yes to restart
the computer when prompted.
Installation and user’s guide 1-25
Page 34

Note: When Windows is installing network support, you might be
prompted to insert your operating system disk. If so, insert the
operating system disk and click OK.
Note: When Windows is installing network support, you might see
several version conflict windows. If any of these windows open,
click OK on each window to keep the existing file.
c. When Windows restarts, this window opens. Click Next. Proceed to
step 18.
18. A window will open that displays the name of the new computer. Write
down the name exactly as shown. You will be prompted for it on the
1-26 IBM Data Migration Kit: User ’s Guide
Page 35

previous computer setup. Click OK.
19. The following window will display instructing you to go to your previous
computer. Do not click Next at this time. Proceed to your previous
Installation and user’s guide 1-27
Page 36

computer to continue the process.
20. Proceed to “Installing and running the IBM data transfer software on the
previous computer”.
Installing and running the IBM data transfer software on the previous computer
Follow this procedure to install and run the IBM Data Transfer software on the
previous computer.
Note: You might need the original diskettes or CD that came with your
operating system.
1. If your new computer is running Windows 2000, log on to your previous
computer using the same user name and password as you are logged on
to your new computer with. If your previous computer is running
Windows 2000, that user name must be part of the Administrator’s group
on your previous computer.
Note: For more information about logging on to Windows, changing user
passwords, or verifying whether a user is part of the
Administrators group, see “Supplemental instructions” on page A-3
2. Insert the IBM Data Migration User’s Guide and Software CD into the CD or
DVD drive in your previous computer.
1-28 IBM Data Migration Kit: User ’s Guide
Page 37

3. If your browser window does not automatically open, click Start -> Run
and type e:\launch.htm where e represents the CD-ROM or DVD drive.
Select or click your language on the language browser page.
4. On the left side of the browser page, click Install IBM Data Transfer
Application to start the automated InstallShield program for IBM Data
Transfer.
5. The InstallShield Wizard window opens. Click Next.
Installation and user’s guide 1-29
Page 38

6. In the Setup Configuration window, select Previous Computer and then
click Next.
7. In the Setup Configuration window, select I already have the IBM Data
Transfer program installed, and then click Next.
1-30 IBM Data Migration Kit: User ’s Guide
Page 39

8. In the Choose Destination Location window, accept the default folder, and
then click Next.
Installation and user’s guide 1-31
Page 40

9. In the Select Program Folder window click Next. The program is then
installed to your previous computer.
10. In the InstallShield Wizard Complete window ensure the Start IBM Data
Transfer now check box is selected, and then click Finish.
v The IBM Data Transfer Software should start automatically.
1-32 IBM Data Migration Kit: User ’s Guide
Page 41

11. In the following window on the previous computer, click Next.
12. In the Choose Transfer options window select previous computer and
then select Transfer using a network connection. Type in the computer
name of the new computer (you should have written this down from the
Installation and user’s guide 1-33
Page 42

new computer), and click Next.
13. If not already installed, network support will need to be added to your
previous computer. To check and add network support, follow the
instructions below, underneath the operating system on your previous
computer.
Windows 2000
a. The Network and Dial-up Connections window opens.
1-34 IBM Data Migration Kit: User ’s Guide
Page 43

b. Depending on your current network settings, one of the following
three Configure settings windows will open. Follow the instructions in
the Configure settings window to set up NetBEUI and File and Print
Sharing for Microsoft Networks on your previous computer. When
finished, proceed to step 16.
Installation and user’s guide 1-35
Page 44

1-36 IBM Data Migration Kit: User ’s Guide
Page 45

Windows 95, Windows 98 and Windows Me
a. If network support needs to be installed on your previous computer,
you will see the following window open.
Note: If you do not see this window, proceed to step 16. Network
support is already installed.
b. Click Yes and network support will be installed. Click OK to restart
the computer when prompted. Proceed to step 14.
Note: When Windows is installing Network support, you may be
prompted to insert your operating system disk. If so, insert the
operating system disk and click OK.
Installation and user’s guide 1-37
Page 46

Note: When Windows is installing Network support, you may see several
Version Conflict windows. If any of these windows open, click Yes
on each one to keep the existing file.
14. When Windows restarts the application takes you back to this window.
Click Next.
Note: If this window does not display when Windows restarts and you
see the window asking for the name of the computer, skip to step
15.
15. In the Choose Transfer Options window, ensure Previous computer and
Transfer using a network connection is selected. Type in the name of the
new computer (you should have written this down from the new
1-38 IBM Data Migration Kit: User ’s Guide
Page 47

computer) and then click Next.
16. A window will display the items that you have selected to transfer. Click
Next.
Note: If the following window does not open and an error window
opens, your previous computer cannot connect to your new
computer. Follow the instructions in the error window to correct the
connection problem. For more information on specific error
Installation and user’s guide 1-39
Page 48

troubleshooting tips, see “Troubleshooting” on page A-1.
17. The next window allows you to select the folders that will be transferred.
Type a folder path in the first box and click Add or click Browse to look
for the folders.
18. If you clicked browse, a window will display to allow you to select a
folder to be transferred. Select a folder and click OK. Repeat for additional
1-40 IBM Data Migration Kit: User ’s Guide
Page 49

folders you want to transfer. For each folder selected, all files and
subfolders under that folder will be transferred.
19. The program will add each folder to the bottom box. When finished
selecting all folders to transfer click Next.
Installation and user’s guide 1-41
Page 50

Note: The IBM Data Transfer software cannot be used to migrate software
applications, only data files.
20. On the next window click Next.
21. The program will begin the transfer. This process could take a while
depending on how much data is being transferred. Let the process run
and do not run other programs while it is processing.
1-42 IBM Data Migration Kit: User ’s Guide
Page 51

Note: Your previous computer must have free hard space equal to the
amount of data that will be transferred at one time. If you want to
transfer larger quantities of data, you could perform several
transfers. To check hard drive free space, double-click the My
Computer icon, right-click on the hard drive and select Properties.
The hard drive Properties window displays the amount of free
space.
22. Once this part of the transfer process is complete, a new window will
display on the previous computer. Click Finish. This will restart your
previous computer. When the computer restarts, disconnect the crossover
Installation and user’s guide 1-43
Page 52

cable from the Ethernet port on the previous computer.
23. Move back to the new computer and see “Continuing the data migration
process on the new computer” on page 1-45.
1-44 IBM Data Migration Kit: User ’s Guide
Page 53

Continuing the data migration process on the new computer
1. On your new computer the following window should still be open. Click
Next to proceed with the transfer process.
Installation and user’s guide 1-45
Page 54

2. Click Next on the following window.
3. A window with a box will display copying data. Please wait. The program
will finish the transfer. This process could take a while depending on how
much data is being transferred. Do not run other programs while it is
1-46 IBM Data Migration Kit: User ’s Guide
Page 55

processing.
Installation and user’s guide 1-47
Page 56

4. When the transfer is complete, the following window displays. Click
Finish. The new computer will restart.
5. Check to make sure that file and print sharing are disabled. Disable them if
they are not. For more information on how to check and disable file and
print sharing see Appendix A. Troubleshooting “Disabling file and print
sharing” on page A-7.
All of your data and settings should be transferred. Any folders that were
selected to be transferred on the previous computer have been placed in the
same path on the new computer.
For example, if you transferred the folder C:\My Documents\Pictures from
your previous computer, the contents of Pictures will be placed in the
C:\My Documents\Pictures folder on the new computer.
If the Pictures folder did not already exist on the new computer, it would
have been created during the transfer. If you transfer a folder from any
drive on the previous computer, the folder will be placed in the same path
on the C: drive on the previous computer. For example, if you transferred
the folder “D:\Temp\Apps” from your previous computer, the contents of
the ″Apps″ folder would have been placed in the ″C:\Temp\Apps″ folder
on the new computer.
6. Refer to“Suggestions after migration” on page 1-70.
1-48 IBM Data Migration Kit: User ’s Guide
Page 57

Migrating data to a computer running Windows XP
At this point your new and old computer should have an Ethernet adapter
installed and they should be connected with the crossover cable included in
the kit. Follow the instructions in this section to perform the data migration to
Windows XP.
To migrate to Windows XP, you will use the File and Settings Transfer Wizard
built into the Windows XP operating system. Refer to the list below for a list of
the settings that are transferred.
v Internet Explorer settings
v Outlook Express settings and store
v Outlook settings and store
v Dial-up connections
v Phone and modem options
v Accessibility
v Screen saver selection
v Fonts
v Folder options
v Taskbar settings
v Mouse and keyboard settings
v Sounds settings Regional options
v Office settings
v Network drives and printers
v Desktop folder
v My Documents folder
v My Pictures folder
v Favorites folder
v Cookies folder
Note: To perform the data migration to Windows XP you will need one of the
following:
v A diskette drive in or that can be connected to your new and previous
computer and a blank formatted diskette
v A CD-ROM drive in your previous computer and the Windows XP
operating system CD
Before beginning the data migration follow these logon steps:
v Logon to your new computer with a name that is part of the Administrators
group.
Installation and user’s guide 1-49
Page 58

v If the previous computer is running Windows XP or Windows 2000, logon to
your previous computer with a user name that is part of the Administrators
group.
v For more information on logging on to your computer, see “Supplemental
instructions” on page A-3.
To perform the migration to Windows XP, you will first need to setup your IP
and DNS settings on your previous and new computer to enable a connection
between the two computers. Refer to the instructions below in ″IP and DNS
Configuration Setup″.
IP and DNS configuration setup
If you are migrating from Windows 95 to Windows XP, proceed to “IP and
DNS configuration setup for migrating from Windows 95” on page 1-51.
Before beginning the migration from Windows XP, Windows 2000, Windows
Me, or Windows 98 you must enable automatic IP and DNS configuration on
both your previous and new computers. Refer to the appropriate operating
system to configure your IP and DNS settings for both computers. Then
proceed to “Beginning the data migration to Windows XP (from all supported
operating systems)” on page 1-54.
Note: If your current IP and DNS settings are different than what you will set
them to in the instructions below, write down the current settings so
that you can replace them after the migration.
Windows XP
1. Click Start -> Control Panel -> Network and Internet Connections.
2. Select Network Connections under pick a Control panel icon.
3. Double-click Local Area Connection and select Internet Protocol (TCP/IP)
Properties.
4. Ensure a Obtain an IP address automatically and Obtain DNS server
automatically are selected.
Windows 2000
1. Click Start -> Settings -> Control Panel.
2. Double-click Network and Dial Up Connections.
3. Double-click Local Area Connection.
4. Select Internet Protocol (TCP/IP); then click Properties.
5. Select Obtain an IP Address automatically if not already selected.
6. Select Obtain a DNS address automatically if not already selected.
7. Click OK; then restart our computer.
1-50 IBM Data Migration Kit: User ’s Guide
Page 59

Windows Me and Windows 98
1. Click Start -> Settings -> Control Panel.
2. Double-click Network.
3. The Network window opens. On the Configuration tab in the Network
window a box will display the installed network components. Select
TCP/IP - Intel pro/100 S Desktop Adapter if you installed the PCI Ethernet
adapter or TCP/IP - Xircom Ethernet Adapter 10/100 if you installed the
PC card Ethernet adapter.
Note: If you already have an Ethernet adapter installed in your old
computer select the TCP/IP component that corresponds to the
existing Ethernet adapter.
4. Click Properties then select the IP Address tab.
5. Select Obtain an IP Address automatically if not already selected.
6. Select Disable DNS.
7. Click OK and restart your computer.
IP and DNS configuration setup for migrating from Windows 95
Before beginning the migration from Windows 95 to Windows XP you must
specify an IP address and set the DNS settings for both your previous and new
computer. Follow the instructions in the section below for Windows XP (new
computer) and Windows 95 (previous computer).
Windows XP
1. Click Start then select Control Panel.
2. Select Network and Internet Connections.
3. Under the Pick a Control Panel Icon, select Network Connections.
4. Double-click Local Area Connection and then select Internet protocol
(TCP/IP) Properties.
Installation and user’s guide 1-51
Page 60

5. Select Use the following IP address. For the IP address type 192.168.1.1
and then type 255.255.255.0 for the Subnet mask.
6. Ensure the DNS address settings are blank.
7. Click OK and restart your computer.
Note: If your current IP and DNS settings are different than what you will set
them to in the instructions below, copy down the current settings so you
can replace them after the migration.
Windows 95
1. Click Start -> Settings -> Control Panel.
2. Double-click Network.
3. The Network window opens. On the Configuration tab in the Network
window a box will display the installed network components. Select
TCP/IP - Intel pro/100 S Desktop Adapter if you installed the PCI Ethernet
adapter or TCP/IP - Xircom Ethernet Adapter 10/100 if you installed the
PC card Ethernet adapter.
1-52 IBM Data Migration Kit: User ’s Guide
Page 61

Note: If you already have an Ethernet adapter installed in your old
computer select the TCP/IP component that corresponds to the
existing Ethernet adapter.
4. Click Properties then select the IP address tab.
5. Select Specify an IP Address. For the IP Address box type 192.168.1.2
then type 255.255.255.0 for the subnet mask.
Installation and user’s guide 1-53
Page 62

6. Select the DNS configuration tab, select disable DNS and then click OK.
7. Restart your computer.
Beginning the data migration to Windows XP (from all supported operating systems)
Before performing the migration, read the suggestions in the section below.
Suggestions before migration
If you are migrating the My Documents folder from a computer that has
multiple users and you will want to use the same user names on the new
computer, you should create the user names on the new computer before
beginning the migration. Creating the user name on the new computer before
the migration will cause the My Documents folder for that user to be created
before the migration. Then, when the data files from the My Documents folder
for that user on the old machine are migrated, they will be placed properly in
the My Documents folder on the new machine. Creating a user name on the
new machine after migrating the My Documents folder for that user from the
previous machine may change the location of the files in My Document.s You
will be creating a My Documents folder for that user during the migration as
well as when setting up the new user name.
1-54 IBM Data Migration Kit: User ’s Guide
Page 63

Follow the instructions below to begin the data migration to Windows XP.
These instructions should be used if your previous computer’s operating
system is Windows XP, Windows 2000, Windows Me, Windows 98, or
Windows 95. You should have already configured your IP and DNS settings in
the above section.
1. On the new computer, click Start -> Files and Settings Transfer Wizard.
Note: If the Files and Settings Transfer Wizard is not available directly
from the Start menu, click Start -> All Programs -> Accessories ->
System Tools -> Files and Settings Transfer Wizard to start the
program.
2. The Files and Settings Transfer window opens. Click Next.
Note: Windows XP screen shots reprinted by permission from Microsoft
Corporation.
Installation and user’s guide 1-55
Page 64

3. At the next window select New computer and click Next.
4. The Files and Settings Transfer Wizard window continues. At this point
you will need to either create a Wizard disk using a diskette and the
diskette drive on your new computer or select to use the Windows XP
CD.
v If you will be using a diskette to create a Wizard disk, select I want to
create a Wizard disk in the following drive and select 3
1/2
Floppy (A:)
as shown below. Proceed to step 5.
Note: If A: is not the drive letter of the diskette drive in your new
computer, select the appropriate drive.
v If you will be using the Windows XP CD select I will use the Wizard
from the Windows XP CD and proceed to “Migrating to Windows XP
using a Windows XP CD” on page 1-63.
1-56 IBM Data Migration Kit: User ’s Guide
Page 65

5. Insert a blank formatted diskette into the diskette drive on your new
computer and click Next. The Wizard disk is created.
6. The Now go to your old computer window opens. Do not click Next.
Move to the previous computer and insert the Wizard disk into the
Installation and user’s guide 1-57
Page 66

diskette drive.
7. On your previous computer click Start and select Run. Type a:\fastwiz
and then click OK.
8. The Files and Settings Transfer Wizard opens. (Files from your Wizard
disk are now being copied to your computer).
1-58 IBM Data Migration Kit: User ’s Guide
Page 67

9. On your previous computer, the Welcome to the Files and Settings
Transfer Wizard window opens. Click Next.
10. At the next window select Home or small office network and then click
Next.
Note: If the Home or small office network selection is not available as an
option, then your computers cannot connect. Refer to
Installation and user’s guide 1-59
Page 68

“Troubleshooting” on page A-1 for ideas on how to fix the problem.
11. At the next window select the items you want to transfer. Click Next. (In
this illustration, the transfer Both files and settings option is selected).
Note: If you select Settings only, then all default settings will be
migrated. If you select Files only, then all files of the default file
types will be transferred. If you select Both Files and Settings,then
all default settings and default file types will be transferred. To
customize which settings and files are transferred select Let me
select a custom list of files and settings when I click Next. This
1-60 IBM Data Migration Kit: User ’s Guide
Page 69

option is for advanced users.
12. The Files and Settings Transfer Wizard begins collecting the files and
settings on your old computer.
13. On your new computer a password is displayed. You will be prompted to
enter that password on your old computer. Go to your old computer and
type in the password that is displayed on your new computer. Click OK.
14. The Files and Settings Transfer Wizard finishes collecting the data. When
this is complete the Completing the Collection Phase window opens on
your old computer. Click Finish.
15. The files and settings you selected to transfer will now be transferred from
your old computer to your new computer.
Installation and user’s guide 1-61
Page 70

16. On your new computer the Completing the Files and Settings Transfer
Wizard window opens. Click Finish.
17. On your new computer, you will be prompted to log off for changes to
take effect. Click Yes.
18. The Files and Settings Transfer Wizard is complete. Proceed to
“Suggestions after migration” on page 1-70.
1-62 IBM Data Migration Kit: User ’s Guide
Page 71

Migrating to Windows XP using a Windows XP CD
1. On your new computer at this window ensure I will use the wizard from
the Windows XP CD is selected. Click Next.
Installation and user’s guide 1-63
Page 72

2. The Now go to your old computer window opens. Move to the previous
computer and insert the Windows XP CD into the CD-ROM or DVD drive.
3. On the previous computer the following menu will appear from the CD.
Click Perform additional tasks.
Note: If this menu does not automatically run when the CD is inserted,
click Start and then run. Type e:\setup where e represents the
drive letter of the CD-ROM or DVD drive in the previous
1-64 IBM Data Migration Kit: User ’s Guide
Page 73

computer. Click OK.
4. At the next window click Transfer files and settings.
Installation and user’s guide 1-65
Page 74

5. On the previous computer, the Files and Transfer Wizard starts.
6. At the next window select Home or small office network and then click
Next.
Note: If the Home or small office network is network is not available as
an option then your computers cannot connect. Refer to Appendix
1-66 IBM Data Migration Kit: User ’s Guide
Page 75

A. “Troubleshooting” on page A-1
7. At the next window select the items you want to transfer. Click Next. (In
this illustration, the transfer Both files and settings option is selected).
Note: If you select the Settings only, then all default settings will be
migrated. If you select Files only, then all files of default file types
will be transferred. If you select Both files and settings,thenall
default settings and default file types will be transferred. To
customize which settings and files are transferred select Let me
select a custom list of files and settings when I click Next. This
Installation and user’s guide 1-67
Page 76

option is for advanced users.
8. The Files and Settings Transfer Wizard begins collecting the files and
settings on your old computer.
9. On your new computer a password is displayed. You will be prompted to
enter that password on your old computer. Go to your old computer and
type in the password that is displayed on your new computer. Click OK.
10. The Files and Settings Transfer Wizard finishes collecting the data. When
this is complete the Completing the Collection Phase window opens. Click
Finish.
11. The files and settings you selected to transfer will now be transferred from
your old computer to your new computer.
1-68 IBM Data Migration Kit: User ’s Guide
Page 77

12. On your old computer, click Exit in the Welcome to Microsoft Windows
XP window.
Installation and user’s guide 1-69
Page 78

13. On your new computer the Completing the Files and Settings Transfer
Wizard window opens. Click Finish.
14. On your new computer you will be prompted to log off for changes to
take effect. Click Yes.
15. The Files and Settings Transfer Wizard is complete. Proceed to
“Suggestions after migration” for tips after the migration is completed.
Suggestions after migration
Read through the suggestions in this section for some tips to follow after the
data migration process is complete.
1. If you purchased the PCI kit for a desktop computer or PC Card Kit for a
mobile computer, you may want to reuse the Ethernet card contained in the
kit to set up a network between your old computer and the new computer.
If you transferred the network settings from your old computer to your
1-70 IBM Data Migration Kit: User ’s Guide
Page 79

new computer, and want to connect both computers to the same network,
you may need to change the computer name of one of the computers (they
cannot have the same name if you want them to connect to each other). For
additional information on changing a computer name on a Windows
machine, refer to “Supplemental instructions” on page A-3.
2. Many documents are saved to the My Documents folder by default. If you
have created more than one user on your previous computer, there may be
more than one folder called My Documents. Check the following directories
to make sure that all of your files are transferred (items in italics may vary):
c:\Documents and settings\username\My Documents
c:\WINNT40\Profiles\username\personal
c:\Windows\Profiles\username\My Documents
If you are unable to locate a file on the new computer, perform a search for
the location of the file. To do this click on Start and then select Search or
Find (depending on the operating system the option will be search or
Find).
3. If your system will be connected to the internet, you may want to disable
File and Print Sharing to avoid letting other computers access your files.
For information on disabling File and Print Sharing, see “Supplemental
instructions” on page A-3.
4. After the migration, it is a good idea to keep the old machine available for
a time period, in case files were missed during the transfer process. During
the migration, you may not have captured every file you meant to migrate.
Having these available on the old machine will allow you to perform the
migration process again in case you discover files that were intended to be
transferred but were not selected in the process.
5. After the migration, you may want to change the screen resolution on your
new computer. A higher screen resolution reduces the size of items on your
screen and makes the image sharper. To change the screen resolution follow
these instructions:
Windows 2000, Windows Me, Windows 98, Windows 95
a. Click Start -> Settings -> Control Panel.
b. The Control Panel window opens. Double-click the Display icon.
c. The Display Properties windows opens. Click the Settings tab.
d. In the Screen area or Display area section move the slider to the desired
resolution and then click Apply. If you are unable to move it to the
right, the resolution can not be set any higher.
e. You will be prompted to click OK to change the settings. Click OK and
the resolution will be changed.
f. When prompted if you want to keep the setting, click Yes and the
resolution will be changed.
Windows XP
Installation and user’s guide 1-71
Page 80

a. Click Start -> Control Panel -> Appearance and Themes -> Display.
b. On the Settings tab, under Screen resolution, drag the slider to the
desired resolution, and then click Apply.
c. When prompted to apply the settings, click OK.
d. You will be prompted to click Ye s to change the settings. Click Yes and
the resolution will be changed.
6. To make data migration easier in the future you should save all your
documents into a single folder or path. A good place to store your
documents is in the My Documents folder, (you can create subfolders
within this directory). The next time you perform data migration you will
know where all your data files are located.
1-72 IBM Data Migration Kit: User ’s Guide
Page 81

Appendix A. Troubleshooting, hints, and tips
The following section describes troubleshooting assistance.
Troubleshooting
If you have problems performing the data migration, refer to the following
troubleshooting instructions for assistance. If you receive an error message and
have problems performing the data migration refer to the possible causes
below:
1. Make sure you are logged on properly to both computers. Refer to this
table for logon requirements:
New Computer Operating
System
Windows XP Windows XP, Windows
Windows XP Windows Me, Windows 98,
Windows 2000 Windows 2000 You must logon to your
Windows 2000 Windows 95, 98 or Me You must logon to your
Windows 95, 98 or Me Windows 95, 98 or Me You do not have to logon to
Previous Computer
Operating System
2000
Windows 95
Logon Requirements
You must log on to both
machines with a user name
that is part of the
Administrators group.
You must log on to the new
machine with a user name
that is part of the
Administrators group. You
do not have to log on to the
previous computer.
new and previous computer
with the same user name
and password to perform
the transfer process. That
user name must be part of
the Administrators group
on both machines.
new and previous computer
with the same user name
and password to perform
the transfer process. That
user name must be part of
the Administrators group
on the new machine
Windows on either machine
to perform the transfer
process
© Copyright IBM Corp. 2002 A-1
Page 82

For information on logging on to Windows, changing user passwords, and
verifying whether a user name is part of the Administrators group, see
“Supplemental instructions” on page A-3.
Note: Not all operating system combinations are supported. See the
″Supported operating system combinations″ section at the beginning
of this manual to verify that your combination is supported
2. Check to make sure your new and previous computers don’t have the same
computer name. If they do, change the name of one of them. See
“Supplemental instructions” on page A-3 for information on how to check
and change a computer name in Windows.
3. If you are using the IBM Data transfer software to migrate to Windows 95,
Windows 98, or Windows Me, or Windows 2000 make sure you have
enough free space on your previous computer. To transfer data successfully
using the IBM Data Transfer software, your previous computer must have
free space equal to the amount of data you are transferring at one time.
Check the free space on your C drive to make sure you have enough. If
not, you can perform the migration several times transferring smaller
amounts of data each time.
Note: To check hard drive free space, double-click the My Computer icon,
right-click on the hard drive and select Properties. The hard drive
Properties window displays the amount of free space.
4. When migrating to Windows XP, if the Home or small office network is
grayed out, your computers cannot connect to each other. Try one or more
of the following actions to correct the problem:
a. Check that the crossover cable is connected securely to the Ethernet
ports on both computers. Check to make sure you are using the correct
cable, a standard Ethernet cable will not work.
b. Ensure the IP and DNS settings are configured correctly according to
the instructions in “Migrating data to a computer running Windows
XP” on page 1-49.
c. Make sure you are logged on to the Windows XP machine with a user
name that is part of the Administrators group. See ″Supplemental
Instructions″ for more information.
d. Make sure neither computer is set up to log on to a Windows NT
Domain. For instructions on how to check and fix this refer to
″Supplemental Instructions″ in the following section.
e. If your previous computer is running the original Windows 98 edition,
try setting static IP addresses for your Windows 98 and Windows XP
machines by following the instructions under ″IP and DNS
configuration setup for migrating from Windows 95″. Follow the
instructions under Windows 95 for your Windows 98 machine and the
A-2 IBM Data Migration Kit: User ’s Guide
Page 83

instructions under Windows XP for your Windows XP machine to set
the IP addresses and DNS configuration. Try the migration process
again.
f. Reboot both computers and try the migration again.
Supplemental instructions
Refer to the contents of this section for additional instructions related to
performing the data migration.
Logging on to your Windows computer with a user name and password
Depending on your operating system configuration, you may need to log on to
one or both of your computers. Make sure to follow the logon instructions
underneath the appropriate section in “Migrating data” on page 1-12. If you
have additional questions about the log on requirements, see the table in item
under ″Troubleshooting″. For information on how to logon to your Windows
machine, refer to the instructions below.
Windows XP
You must log on to your Windows XP machine with a user name that is part
of the Administrators group. If you know the user name and password of a
user that is part of the administrator’s group (this could be the built-in
administrator account or an account you created as part of the Administrators
group), follow the procedure under “Logging on to Windows XP with a user
name that is part of the Administrators group”. If you don’t know the
password of the administrator account and are unsure whether a user name is
part of the Administrator’s group, follow the procedure under “Checking
whether a user name is part of the Administrators group in Windows XP” on
page A-4
Logging on to Windows XP with a user name that is part of the Administrators group
1. If you are already logged on as user that is not part of the Administrators
group, close all programs, click Start -> Logoff.
2. Select a user name that has Administrator privileges.
3. Log on with the correct user name and password. If you are not already
logged on as that user, follow the instructions above under “Checking
whether a user name is part of the Administrators group in Windows XP”
on page A-4. If there are no user names that you know the password for
and that are part of the Administrators group, contact your administrator to
either get the Administrator user name password or to have your user
name added to the Administrators group.
Appendix A. Troubleshooting, hints, and tips A-3
Page 84

Checking whether a user name is part of the Administrators group in Windows XP
1. Click Start, point to Settings, and then click Control Panel.
2. In the Control Panel, double-click User Accounts.
3. If only user names with Limited Access then the current user logged on
does not have Administrator privileges. Log off and select another user
name.
Note: If you are not able to determine which user accounts have administrator
privileges, contact the person who first setup your XP system for
account and password information.
Windows 2000
You must log on to your Windows 2000 machine with a user name that is part
of the Administrators group. If you know the user name and password of a
user that is part of the administrator’s group (this could be the built-in
administrator account or an account you created as part of the Administrators
group), follow the procedure under “Logging on to Windows 2000 with a user
name that is part of the Administrators group”. If you don’t know the
password of the administrator account and are unsure whether a user name is
part of the Administrator’s group, follow the procedure under “Checking
whether a user name is part of the Administrators group in Windows 2000”.
Logging on to Windows 2000 with a user name that is part of the Administrators group
1. If you are already logged on as a user that is not part of the Administrators
group, close all programs, click Start and point to Shut Down.
2. In the Shut Down Windows window, choose Log Off User where User is
the user name you are currently logged on as. Click OK.
3. The Log On Windows box will open requesting a user name and password.
In the User name box enter a user name that is part of the Administrators
group and the password of that user in the password box. Click OK.
4. Windows will log you on as that user name.
Checking whether a user name is part of the Administrators group in Windows 2000
1. Click Start, point to Settings, and then click Control Panel.
2. In the Control Panel, double-click Users and Passwords.
3. On the Users tab, under ″Users for this computer″, locate your user name
that you know the password for. Check whether Administrators is listed
under the Group section for that user name. If so, that user is part of the
Administrators group. If you are not already logged on as that user, follow
the instructions above under “Logging on to Windows 2000 with a user
name that is part of the Administrators group”. If there are no user names
A-4 IBM Data Migration Kit: User ’s Guide
Page 85

that you know the password for and that are part of the Administrators
group, contact your administrator to either get the Administrator user name
password or to have your user name added to the Administrators group.
Windows Me and Windows 98
1. Click Start, then Log Off user, where user is the user name you are
currently logged in with (you may not be logged on as any user).
2. The Log Off Windows dialog box displays the message, Are you sure you
want to log off? Click Yes.
3. If you will be logging on to Windows with an existing user name and
password, enter them in the Enter Windows Password window. Click OK
and you will be logged on.
4. If you will be creating a new user name, type the new user name into the
User name: box and enter a password for that user name. Click OK.
5. The Set Windows Password window will open. In the Confirm new
password: box, enter in the new password. Click OK and you will be
logged on.
Windows 95
1. Click Start,thenShut Down.
2. On the Shut Down Windows window, choose Close all programs and log
on as a different user?
3. If you will be logging on to Windows with an existing user name and
password, enter them in the Enter Windows Password window. Click OK
and you will be logged on.
4. If you will be creating a new user name, type the new user name into the
User name: box and enter a password for that user name. Click OK.
5. The Set Windows Password window will open. In the Confirm new
password: box, enter in the new password. Click OK and you will be
logged on.
Changing a user name password on your Windows computer
Depending on your operating system configuration, you may need to log on to
both computers with the same username and password. Make sure to follow
the logon instructions underneath the appropriate section in “Migrating data”
on page 1-12. If you have additional questions about the log on requirements,
see the table in item 1 under ″Troubleshooting″. If you need to change a
password for a username to match the password for that user name on the
other computer, see the instructions below.
Windows 2000
1. Log on to Windows 2000 with the user name you want to change to
password for.
Appendix A. Troubleshooting, hints, and tips A-5
Page 86

2. Press Control+Alt+Delete on the keyboard.
3. In the Windows Security window, click the Change Password... button.
4. In the Change Password window, enter the current password for that user
in the Old Password box.
5. Enter the new password in the New password box and then enter the new
password again into the Confirm New Password box. Click OK.
6. The Change Password window indicates that the password was changed.
Click OK.
7. In the Windows Security window, click Cancel.
8. Log off of Windows 2000 and log back on using the new password. (For
more information, see instructions under “Logging on to Windows 2000
with a user name that is part of the Administrators group” on page A-4)
Windows Me, Windows 98, Windows 95
1. Log on to Windows with the user name you want to change the password
for.
2. Click Start, point to Settings, and then click Control Panel.
3. In the Control Panel, double-click Passwords.
4. In the Passwords Properties window, click the Change Password tab.
5. On the Change Passwords tab, click Change Windows Password....
6. If the Change Windows Password window is displayed with the message
You may also change other passwords at the same time as your Windows
password, click OK.
7. In the Change Windows Password window, enter in the old password and
the new password and confirm the new password. Click OK.
8. A window will open indicating the password was successfully changed.
Click OK.
9. Click Close on the Password Properties window.
Changing the name of a Windows computer
To perform the data migration successfully, your new and previous computers
cannot have the same computer name. To change the name of a computer, see
the following instructions.
Windows XP
1. Click Start then select My Computer.
2. Select View System Info under System Tasks.
3. Select the Computer Name tab.
4. Click Change then type in a different name.
5. Click OK.
A-6 IBM Data Migration Kit: User ’s Guide
Page 87

Windows 2000
1. Click Start, point to Settings, and then click Control Panel.
2. On the Control Panel window, double-click on the System icon.
3. In the System Properties window, click on the Network Identification tab.
4. On the Network Identification tab, click the Properties button.
5. In Computer Name box type a new name for the computer. Click OK.
6. The Network Identification window opens and indicates the computer
must be restarted. Click OK and the computer will restart.
Windows Me, Windows 98, and Windows 95
1. Click Start, point to Settings, and then click Control Panel.
2. On the Control Panel window, double-click on the Network icon.
3. In the Network window, click the Identification tab.
4. In the Computer name box on the Identification tab, type in a new name
for the computer. Click OK.
5. The System Settings Change window opens and prompts you to restart
your computer. Click Yes and the computer will restart.
Disabling file and print sharing
The File and Printer Sharing for Microsoft Networks component allows other
computers on a network to access resources on your computer by using a
Microsoft network. When you complete the data migration process, it is a good
idea to disable file and print sharing on both computers. To do this, follow the
procedures below.
Windows XP
1. Click Start then select Control Panel.
2. Select Network and Internet Connections.
3. Select Network Connections under Pick a Control Panel icon.
4. Double-click Local Area Connection.
5. Click Properties and de-select File and Print Sharing for Microsoft
Networks.
6. Click OK.
Windows 2000
1. Click Start, point to Settings, and then click Network and Dial-up
Connections.The Network and Dial-up Connections window will open.
2. Right-click the connection for the Local Area Connection for the ethernet
adapter you are using and then click Properties.
Appendix A. Troubleshooting, hints, and tips A-7
Page 88

3. In the box underneath ″Components checked are used by this connection″
on the connection properties window, de-select File and Printer Sharing
for Microsoft Networks if not already unchecked.
4. Click OK and the connection properties window will close.
Windows Me, Windows 98, and Windows 95
1. Click Start, point to Settings, and then click Control Panel.
2. Double-click Network.
3. On the Configuration tab, click File and Print Sharing.
4. In the File and Print Sharing window de-select I want to be able to give
others access to my files and I want to be able to allow others to print to
my printer(s) if they are not already unchecked.
Disabling a computer to log on to a Windows NT Domain
If you are having trouble performing the data migration to Windows XP, one
or both of your computers may be set up to log on to a Windows NT domain.
Use the instructions below to check and correct this setting if necessary.
Windows Me, Windows 98, and Windows 95
1. On the desktop, right click on either Network Neighborhood (Windows 95)
or My Network Places (Windows 98 or Windows Me).
2. On the menu, click Properties.
3. In the top box of the Network window, select Client for Microsoft
Networks.
4. Click Properties.
5. Under Logon validation, deselect Log on to Windows NT Domain if
selected. Click OK.
6. Click OK on the Network window. Restart the computer if prompted.
Windows 2000
1. Click Start, point to Settings, and then click Control Panel.
2. On the Control Panel window, double-click on the System icon.
3. On the System Properties window, select the Network identification tab.
4. Click Properties.
5. In the Member Of section on the Identification Changes window, ensure
Workgroup is selected. Add a workgroup name if necessary.
6. If changes were made, click OK on the Identification Changes window and
you will be instructed to restart the computer. Click OK and then restart
the computer.
7. If no changes were made, click Cancel on the Identification Changes
window. Click OK on the System Properties window to exit.
A-8 IBM Data Migration Kit: User ’s Guide
Page 89

Windows XP
1. Click Start and then select My Computer.
2. Under System Tasks select View System Information.
3. Select the Computer Name tab and click Change.
4. Under Member Of, ensure Workgroup is selected. Add a workgroup name
if needed. Click OK.
5. Restart the computer if prompted or instructed.
Appendix A. Troubleshooting, hints, and tips A-9
Page 90

A-10 IBM Data Migration Kit: User ’s Guide
Page 91

Appendix B. Warranty information
This section contains the warranty period for your product, information about
obtaining warranty service and support, and the IBM Statement of Limited
Warranty.
Warranty period
Contact your place of purchase for warranty service information. Some IBM
Machines are eligible for on-site warranty service depending on the country or
region where service is performed.
Machine - IBM Data Migration Kit
Warranty period - One year
Service and support
The following information describes the technical support that is available for
your product, during the warranty period or throughout the life of the
product. Refer to your IBM Statement of Limited Warranty for a full
explanation of IBM warranty terms.
Warranty information on the World Wide Web
The IBM Machine Warranties Web site at
http://www.ibm.com/servers/support/machine_warranties/ contains a
worldwide overview of the IBM Limited Warranty for IBM Machines, a
glossary of terms used in the Statement of Limited Warranty, Frequently Asked
Questions (FAQ), and links to Product Support Web pages. The IBM Statement
of Limited Warranty is available from this Web site in 29 languages in Portable
Document Format (PDF).
Online technical support
Online technical support is available during the life of your product. Online
assistance can be obtained through the Personal Computing Support Web site
and the IBM Automated Fax System.
Online technical support
IBM Personal Computing Support Web site http://www.ibm.com/pc/support/
IBM Automated Fax System 1-800-426-3395 (U.S. and Canada)
© Copyright IBM Corp. 2002 B-1
Page 92

During the warranty period, assistance for replacement or exchange of
defective components is available. In addition, if your IBM option is installed
in an IBM computer, you might be entitled to service at your location. Your
technical support representative can help you determine the best alternative.
Telephone technical support
Installation and configuration support through the IBM HelpCenter« will be
withdrawn or made available for a fee, at IBM’s discretion, 90 days after the
option has been withdrawn from marketing. Additional support offerings,
including step-by-step installation assistance, are available for a nominal fee.
To assist the technical support representative, have available as much of the
following information as possible:
v Option name
v Option number
v Proof of purchase
v Computer manufacturer, model, serial number (if IBM), and manual
v Exact wording of the error message (if any)
v Description of the problem
v Hardware and software configuration information for your system
If possible, be at your computer. Your technical support representative might
want to walk you through the problem during the call.
For the support telephone number and support hours by country, refer to the
following table. If the number for your country or region is not listed, contact
your IBM reseller or IBM marketing representative. Response time may vary
depending on the number and nature of the calls received.
Support 24 hours a day, 7 days a week
Canada (Toronto only) 416-383-3344
Canada (all other) 1-800-565-3344
U.S.A. and Puerto Rico 1-800-772-2227
All other countries and regions Go to http://www.ibm.com/pc/support/,
and click Support Phone List.
B-2 IBM Data Migration Kit: User ’s Guide
Page 93

IBM Statement of Limited Warranty Z125-4753-06 8/2000
This warranty statement consists of two parts: Part 1 and Part 2. Be sure to
read Part 1 and the country-unique terms in Part 2 that apply to your country
or region.
Part1-General Terms
This Statement of Limited Warranty includes Part 1 - General Terms and Part 2
- Country-unique Terms. The terms of Part 2 replace or modify those of Part 1.
The warranties provided by IBM in this Statement of Limited Warranty apply
only to Machines you purchase for your use, and not for resale, from IBM or
your reseller. The term “Machine” means an IBM machine, its features,
conversions, upgrades, elements, or accessories, or any combination of them.
The term “Machine” does not include any software programs, whether
pre-loaded with the Machine, installed subsequently or otherwise. Unless IBM
specifies otherwise, the following warranties apply only in the country where
you acquire the Machine. Nothing in this Statement of Limited Warranty
affects any statutory rights of consumers that cannot be waived or limited by
contract. If you have any questions, contact IBM or your reseller.
The IBM Warranty for Machines
IBM warrants that each Machine 1) is free from defects in materials and
workmanship and 2) conforms to IBM’s Official Published Specifications
(“Specifications”). The warranty period for a Machine is a specified, fixed
period commencing on its Date of Installation. The date on your sales receipt is
the Date of Installation unless IBM or your reseller informs you otherwise.
If a Machine does not function as warranted during the warranty period, and
IBM or your reseller are unable to either 1) make it do so or 2) replace it with
one that is at least functionally equivalent, you may return it to your place of
purchase and your money will be refunded.
Extent of Warranty
The warranty does not cover the repair or exchange of a Machine resulting
from misuse, accident, modification, unsuitable physical or operating
environment, improper maintenance by you, or failure caused by a product for
which IBM is not responsible. The warranty is voided by removal or alteration
of Machine or parts identification labels.
THESE WARRANTIES ARE YOUR EXCLUSIVE WARRANTIES AND
REPLACE ALL OTHER WARRANTIES OR CONDITIONS, EXPRESS OR
IMPLIED, INCLUDING, BUT NOT LIMITED TO, THE IMPLIED
WARRANTIES OR CONDITIONS OF MERCHANTABILITY AND FITNESS
FOR A PARTICULAR PURPOSE. THESE WARRANTIES GIVE YOU
Appendix B. Warranty information B-3
Page 94

SPECIFIC LEGAL RIGHTS AND YOU MAY ALSO HAVE OTHER RIGHTS
WHICH VARY FROM JURISDICTION TO JURISDICTION. SOME
JURISDICTIONS DO NOT ALLOW THE EXCLUSION OR LIMITATION
OF EXPRESS OR IMPLIED WARRANTIES, SO THE ABOVE EXCLUSION
OR LIMITATION MAY NOT APPLY TO YOU. IN THAT EVENT, SUCH
WARRANTIES ARE LIMITED IN DURATION TO THE WARRANTY
PERIOD. NO WARRANTIES APPLY AFTER THAT PERIOD.
Items Not Covered by Warranty
IBM does not warrant uninterrupted or error-free operation of a Machine.
Any technical or other support provided for a Machine under warranty, such
as assistance via telephone with “how-to” questions and those regarding
Machine set-up and installation, will be provided WITHOUT WARRANTIES
OF ANY KIND.
Warranty Service
To obtain warranty service for a Machine, contact IBM or your reseller. If you
do not register your Machine with IBM, you may be required to present proof
of purchase.
During the warranty period, IBM or your reseller, if approved by IBM to
provide warranty service, provides without charge certain types of repair and
exchange service to keep Machines in, or restore them to, conformance with
their Specifications. IBM or your reseller will inform you of the available types
of service for a Machine based on its country of installation. At its discretion,
IBM or your reseller will 1) either repair or exchange the failing Machine and
2) provide the service either at your location or a service center. IBM or your
reseller will also manage and install selected engineering changes that apply to
the Machine.
Some parts of IBM Machines are designated as Customer Replaceable Units
(called “CRUs”), e.g., keyboards, memory, or hard disk drives. IBM ships CRUs
to you for replacement by you. You must return all defective CRUs to IBM
within 30 days of your receipt of the replacement CRU. You are responsible for
downloading designated Machine Code and Licensed Internal Code updates
from an IBM Internet Web site or from other electronic media, and following
the instructions that IBM provides.
When warranty service involves the exchange of a Machine or part, the item
IBM or your reseller replaces becomes its property and the replacement
becomes yours. You represent that all removed items are genuine and
unaltered. The replacement may not be new, but will be in good working order
and at least functionally equivalent to the item replaced. The replacement
B-4 IBM Data Migration Kit: User ’s Guide
Page 95

assumes the warranty service status of the replaced item. Many features,
conversions, or upgrades involve the removal of parts and their return to IBM.
A part that replaces a removed part will assume the warranty service status of
the removed part.
Before IBM or your reseller exchanges a Machine or part, you agree to remove
all features, parts, options, alterations, and attachments not under warranty
service.
You also agree to
1. ensure that the Machine is free of any legal obligations or restrictions that
prevent its exchange;
2. obtain authorization from the owner to have IBM or your reseller service a
Machine that you do not own; and
3. where applicable, before service is provided:
a. follow the problem determination, problem analysis, and service request
procedures that IBM or your reseller provides;
b. secure all programs, data, and funds contained in a Machine;
c. provide IBM or your reseller with sufficient, free, and safe access to
your facilities to permit them to fulfill their obligations; and
d. inform IBM or your reseller of changes in a Machine’s location.
IBM is responsible for loss of, or damage to, your Machine while it is 1) in
IBM’s possession or 2) in transit in those cases where IBM is responsible for
the transportation charges.
Neither IBM nor your reseller is responsible for any of your confidential,
proprietary or personal information contained in a Machine which you return
to IBM or your reseller for any reason. You should remove all such information
from the Machine prior to its return.
Limitation of Liability
Circumstances may arise where, because of a default on IBM’spartorother
liability, you are entitled to recover damages from IBM. In each such instance,
regardless of the basis on which you are entitled to claim damages from IBM
(including fundamental breach, negligence, misrepresentation, or other contract
or tort claim), except for any liability that cannot be waived or limited by
applicable laws, IBM is liable for no more than
1. damages for bodily injury (including death) and damage to real property
and tangible personal property; and
2. the amount of any other actual direct damages, up to the charges (if
recurring, 12 months’ charges apply) for the Machine that is subject of the
claim. For purposes of this item, the term “Machine” includes Machine
Code and Licensed Internal Code.
Appendix B. Warranty information B-5
Page 96

This limit also applies to IBM’s suppliers and your reseller. It is the
maximum for which IBM, its suppliers, and your reseller are collectively
responsible.
UNDER NO CIRCUMSTANCES IS IBM LIABLE FOR ANY OF THE
FOLLOWING: 1) THIRD-PARTY CLAIMS AGAINST YOU FOR DAMAGES
(OTHER THAN THOSE UNDER THE FIRST ITEM LISTED ABOVE); 2)
LOSS OF, OR DAMAGE TO, YOUR RECORDS OR DATA; OR 3) SPECIAL,
INCIDENTAL, OR INDIRECT DAMAGES OR FOR ANY ECONOMIC
CONSEQUENTIAL DAMAGES, LOST PROFITS OR LOST SAVINGS,
EVEN IF IBM, ITS SUPPLIERS OR YOUR RESELLER IS INFORMED OF
THEIR POSSIBILITY. SOME JURISDICTIONS DO NOT ALLOW THE
EXCLUSION OR LIMITATION OF INCIDENTAL OR CONSEQUENTIAL
DAMAGES, SO THE ABOVE LIMITATION OR EXCLUSION MAY NOT
APPLY TO YOU.
Governing Law
Both you and IBM consent to the application of the laws of the country in
which you acquired the Machine to govern, interpret, and enforce all of your
and IBM’s rights, duties, and obligations arising from, or relating in any
manner to, the subject matter of this Agreement, without regard to conflict of
law principles.
Part2-Country-unique Terms
AMERICAS
BRAZIL
Governing Law: The following is added after the first sentence:Any litigation
arising from this Agreement will be settled exclusively by the court of Rio de
Janeiro.
NORTH AMERICA
Warranty Service: The following is added to this Section: To obtain warranty
service from IBM in Canada or the United States, call 1-800-IBM-SERV
(426-7378).
CANADA
Governing Law: The following replaces “laws of the country in which you acquired
the Machine” in the first sentence: laws in the Province of Ontario.
UNITED STATES
B-6 IBM Data Migration Kit: User ’s Guide
Page 97

Governing Law: The following replaces “laws of the country in which you acquired
the Machine” in the first sentence: laws of the State of New York.
ASIA PACIFIC
AUSTRALIA
The IBM Warranty for Machines: The following paragraph is added to this Section:
The warranties specified in this Section are in addition to any rights you may
have under the Trade Practices Act 1974 or other similar legislation and are
only limited to the extent permitted by the applicable legislation.
Limitation of Liability: The following is added to this Section: Where IBM is in
breach of a condition or warranty implied by the Trade Practices Act 1974 or
other similar legislation, IBM’s liability is limited to the repair or replacement
of the goods or the supply of equivalent goods. Where that condition or
warranty relates to right to sell, quiet possession or clear title, or the goods are
of a kind ordinarily acquired for personal, domestic or household use or
consumption, then none of the limitations in this paragraph apply.
Governing Law: The following replaces “laws of the country in which you acquired
the Machine” in the first sentence: laws of the State or Territory.
CAMBODIA, LAOS, AND VIETNAM
Governing Law: The following replaces “laws of the country in which you acquired
the Machine” in the first sentence:laws of the State of New York.
The following is added to this Section: Disputes and differences arising out of or
in connection with this Agreement shall be finally settled by arbitration which
shall be held in Singapore in accordance with the rules of the International
Chamber of Commerce (ICC). The arbitrator or arbitrators designated in
conformity with those rules shall have the power to rule on their own
competence and on the validity of the Agreement to submit to arbitration. The
arbitration award shall be final and binding for the parties without appeal and
the arbitral award shall be in writing and set forth the findings of fact and the
conclusions of law.
All proceedings shall be conducted, including all documents presented in such
proceedings, in the English language. The number of arbitrators shall be three,
with each side to the dispute being entitled to appoint one arbitrator.
The two arbitrators appointed by the parties shall appoint a third arbitrator
before proceeding upon the reference. The third arbitrator shall act as chairman
of the proceedings. Vacancies in the post of chairman shall be filled by the
Appendix B. Warranty information B-7
Page 98

president of the ICC. Other vacancies shall be filled by the respective
nominating party. Proceedings shall continue from the stage they were at when
the vacancy occurred.
If one of the parties refuses or otherwise fails to appoint an arbitrator within 30
days of the date the other party appoints its, the first appointed arbitrator shall
be the sole arbitrator, provided that the arbitrator was validly and properly
appointed.
The English language version of this Agreement prevails over any other
language version.
HONG KONG AND MACAU
Governing Law: The following replaces “laws of the country in which you acquired
the Machine” in the first sentence: laws of Hong Kong Special Administrative
Region.
INDIA
Limitation of Liability: The following replaces items 1 and 2 of this Section:
1. liability for bodily injury (including death) or damage to real property and
tangible personal property will be limited to that caused by IBM’s
negligence;
2. as to any other actual damage arising in any situation involving
nonperformance by IBM pursuant to, or in any way related to the subject
of this Statement of Limited Warranty, IBM’s liability will be limited to the
charge paid by you for the individual Machine that is the subject of the
claim.
JAPAN
Governing Law: The following sentence is added to this Section:Any doubts
concerning this Agreement will be initially resolved between us in good faith
and in accordance with the principle of mutual trust.
NEW ZEALAND
The IBM Warranty for Machines: The following paragraph is added to this Section:
The warranties specified in this Section are in addition to any rights you may
have under the Consumer Guarantees Act 1993 or other legislation which
cannot be excluded or limited. The Consumer Guarantees Act 1993 will not
apply in respect of any goods which IBM provides, if you require the goods
for the purposes of a business as defined in that Act.
B-8 IBM Data Migration Kit: User ’s Guide
Page 99

Limitation of Liability: The following is added to this Section: Where Machines
are not acquired for the purposes of a business as defined in the Consumer
Guarantees Act 1993, the limitations in this Section are subject to the
limitations in that Act.
PEOPLE’S REPUBLIC OF CHINA (PRC)
Governing Law: The following replaces this Section: Both you and IBM consent to
the application of the laws of the State of New York (except when local law
requires otherwise) to govern, interpret, and enforce all your and IBM’s rights,
duties, and obligations arising from, or relating in any manner to, the subject
matter of this Agreement, without regard to conflict of law principles.
Any disputes arising from or in connection with this Agreement will first be
resolved by friendly negotiations, failing which either of us has the right to
submit the dispute to the China International Economic and Trade Arbitration
Commission in Beijing, the PRC, for arbitration in accordance with its
arbitration rules in force at the time. The arbitration tribunal will consist of
three arbitrators. The language to be used therein will be English and Chinese.
An arbitral award will be final and binding on all the parties, and will be
enforceable under the Convention on the Recognition and Enforcement of
Foreign Arbitral Awards (1958).
The arbitration fee will be borne by the losing party unless otherwise
determined by the arbitral award.
During the course of arbitration, this Agreement will continue to be performed
except for the part which the parties are disputing and which is undergoing
arbitration.
EUROPE, MIDDLE EAST, AFRICA (EMEA)
THE FOLLOWING TERMS APPLY TO ALL EMEA COUNTRIES: The terms of
this Statement of Limited Warranty apply to Machines purchased from IBM or
an IBM reseller.
Warranty Service:
If you purchase an IBM Machine in Austria, Belgium, Denmark, Estonia,
Finland, France, Germany, Greece, Iceland, Ireland, Italy, Latvia, Lithuania,
Luxembourg, Netherlands, Norway, Portugal, Spain, Sweden, Switzerland or
United Kingdom, you may obtain warranty service for that Machine in any of
those countries from either (1) an IBM reseller approved to perform warranty
service or (2) from IBM. If you purchase an IBM Personal Computer Machine
in Albania, Armenia, Belarus, Bosnia and Herzegovina, Bulgaria, Croatia,
Czech Republic, Georgia, Hungary, Kazakhstan, Kirghizia, Federal Republic of
Appendix B. Warranty information B-9
Page 100

Yugoslavia, Former Yugoslav Republic of Macedonia (FYROM), Moldova,
Poland, Romania, Russia, Slovak Republic, Slovenia, or Ukraine, you may
obtain warranty service for that Machine in any of those countries from either
(1) an IBM reseller approved to perform warranty service or (2) from IBM.
If you purchase an IBM Machine in a Middle Eastern or African country, you
may obtain warranty service for that Machine from the IBM entity within the
country of purchase, if that IBM entity provides warranty service in that
country, or from an IBM reseller, approved by IBM to perform warranty service
on that Machine in that country. Warranty service in Africa is available within
50 kilometers of an IBM authorized service provider. You are responsible for
transportation costs for Machines located outside 50 kilometers of an IBM
authorized service provider.
Governing Law:
The applicable laws that govern, interpret and enforce rights, duties, and
obligations of each of us arising from, or relating in any manner to, the subject
matter of this Statement, without regard to conflict of laws principles, as well
as Country-unique terms and competent court for this Statement are those of
the country in which the warranty service is being provided, except that in 1)
Albania, Bosnia-Herzegovina, Bulgaria, Croatia, Hungary, Former Yugoslav
Republic of Macedonia, Romania, Slovakia, Slovenia, Armenia, Azerbaijan,
Belarus, Georgia, Kazakhstan, Kyrgyzstan, Moldova, Russia, Tajikistan,
Turkmenistan, Ukraine, and Uzbekistan, the laws of Austria apply; 2) Estonia,
Latvia, and Lithuania, the laws of Finland apply; 3) Algeria, Benin, Burkina
Faso, Cameroon, Cape Verde, Central African Republic, Chad, Congo, Djibouti,
Democratic Republic of Congo, Equatorial Guinea, France, Gabon, Gambia,
Guinea, Guinea-Bissau, Ivory Coast, Lebanon, Mali, Mauritania, Morocco,
Niger, Senegal, Togo, and Tunisia, this Agreement will be construed and the
legal relations between the parties will be determined in accordance with the
French laws and all disputes arising out of this Agreement or related to its
violation or execution, including summary proceedings, will be settled
exclusively by the Commercial Court of Paris; 4) Angola, Bahrain, Botswana,
Burundi, Egypt, Eritrea, Ethiopia, Ghana, Jordan, Kenya, Kuwait, Liberia,
Malawi, Malta, Mozambique, Nigeria, Oman, Pakistan, Qatar, Rwanda, Sao
Tome, Saudi Arabia, Sierra Leone, Somalia, Tanzania, Uganda, United Arab
Emirates, United Kingdom, West Bank/Gaza, Yemen, Zambia, and Zimbabwe,
this Agreement will be governed by English Law and disputes relating to it
will be submitted to the exclusive jurisdiction of the English courts; and 5) in
Greece, Israel, Italy, Portugal, and Spain any legal claim arising out of this
Statement will be brought before, and finally settled by, the competent court of
Athens, Tel Aviv, Milan, Lisbon, and Madrid, respectively.
THE FOLLOWING TERMS APPLY TO THE COUNTRY SPECIFIED:
B-10 IBM Data Migration Kit: User ’s Guide
 Loading...