

Page 1
n
.1 Vf..
GA23-0119-2
File
No.
36/38/370/4300/8100-09
Please
Return
To
Rocm
305
3270 Information Display System
Entry
Assist
User's
Guide
Page 2
GA23-0119-2
File
No.
36/38/370/4300/8100-09
3270 Information Display System
Entry
Assist
User's
Guide
Page 3

Third
Edition
(September
1987)
This
revision
obsoletes
GA23-0119-1.
Referencesinthis
pubiicationtoibm
products,
programs,orservices
do
not
imply
that
IBM
intendstomake
these
available
in all
countriesinwhich
ibm
operates.
Any
referencetoan
ibm
program
productinthis
publicationisnot
intendedtostateorimply
that
only
ibm's
program
product
maybeused.
Any
functionally
equivalent
program
maybeused
instead.
Publications
are
not
stockedatthe
address
given
below;
requests
for
ibm
publications
shouldbemade
to
your
IBM
representative
ortothe
ibm
branch
office
serving
your
locality.
A
form
for
readers'
commentsisprovidedatthe
backofthis
publication.Ifthe
form
has
been
removed,
address
commentstoibm
Corporation,
Department
E02, P.O.
Box
12195,
Research
Triangle
Park,
North
Carolina,
U.S.A. 27709. ibm
may
useordistribute
whatever
information
you
supplyinany
wayitbelieves
appropriate
without
incurring
any
obligationtoyou.
©
Copyright
International
Business
Machines
Corporation
1983,1984,1987
Page 4
Preface
This
publication
explains
the
Entry
Assist
functionofthe
3174
and
3274
Control
Units. Entry
Assist
provides
conveniences
and
productivity
improvements
for
display
operators
who
enter
and
edit
text
material.
This
book
teiis
you
what
the
Entry
Assist
function
candoand
explains
howtouse
it.
Who
Should
Read
This
Book
Anyone
using
3270
displays
for
text-related
activity
should
read
this
book.
This
includes
secretaries,
administrative
personnel,
clerical
personnel,
executives,
managers,
planners,
engineers,
writers,
and
programmers.
How
This
Book
is
Organized
Chapter
1,
"Overview,"
gives
youageneral
descriptionofthe
Entry
Assist
function.
Chapter
2, "Getting
Started,"
tells
you
how to
make
Entry
Assist
workonyour
control
unit. It
also
explains
howtocustomize
your
keyboard.
Chapter
3, "Using
the
Entry Assist Capabilities," lists
the
capabilities of Entry
Assist
and
tells you how to
use
them.
The
Entry Assistfunctions
are
divided into
two
groups:
• Using
the
Formatting
Controls
• Using
the
Cursor
and
Editing Keys.
Chapter 4, "Using Entry Assist with
IBM
Host Editors and Other Applications,"
explains how to
use
Entry Assist with
some
of the
IBM
host editor programs. You
can
also
find
other
application
hintsonthose
pages.
Chapter
5, "Entry Assist Tutorial," contains an Entry Assist tutorial for self-
teaching.
A
listofabbreviations
usedinthis
publication
follows
Chapter
5.
Preface
iii
Page 5
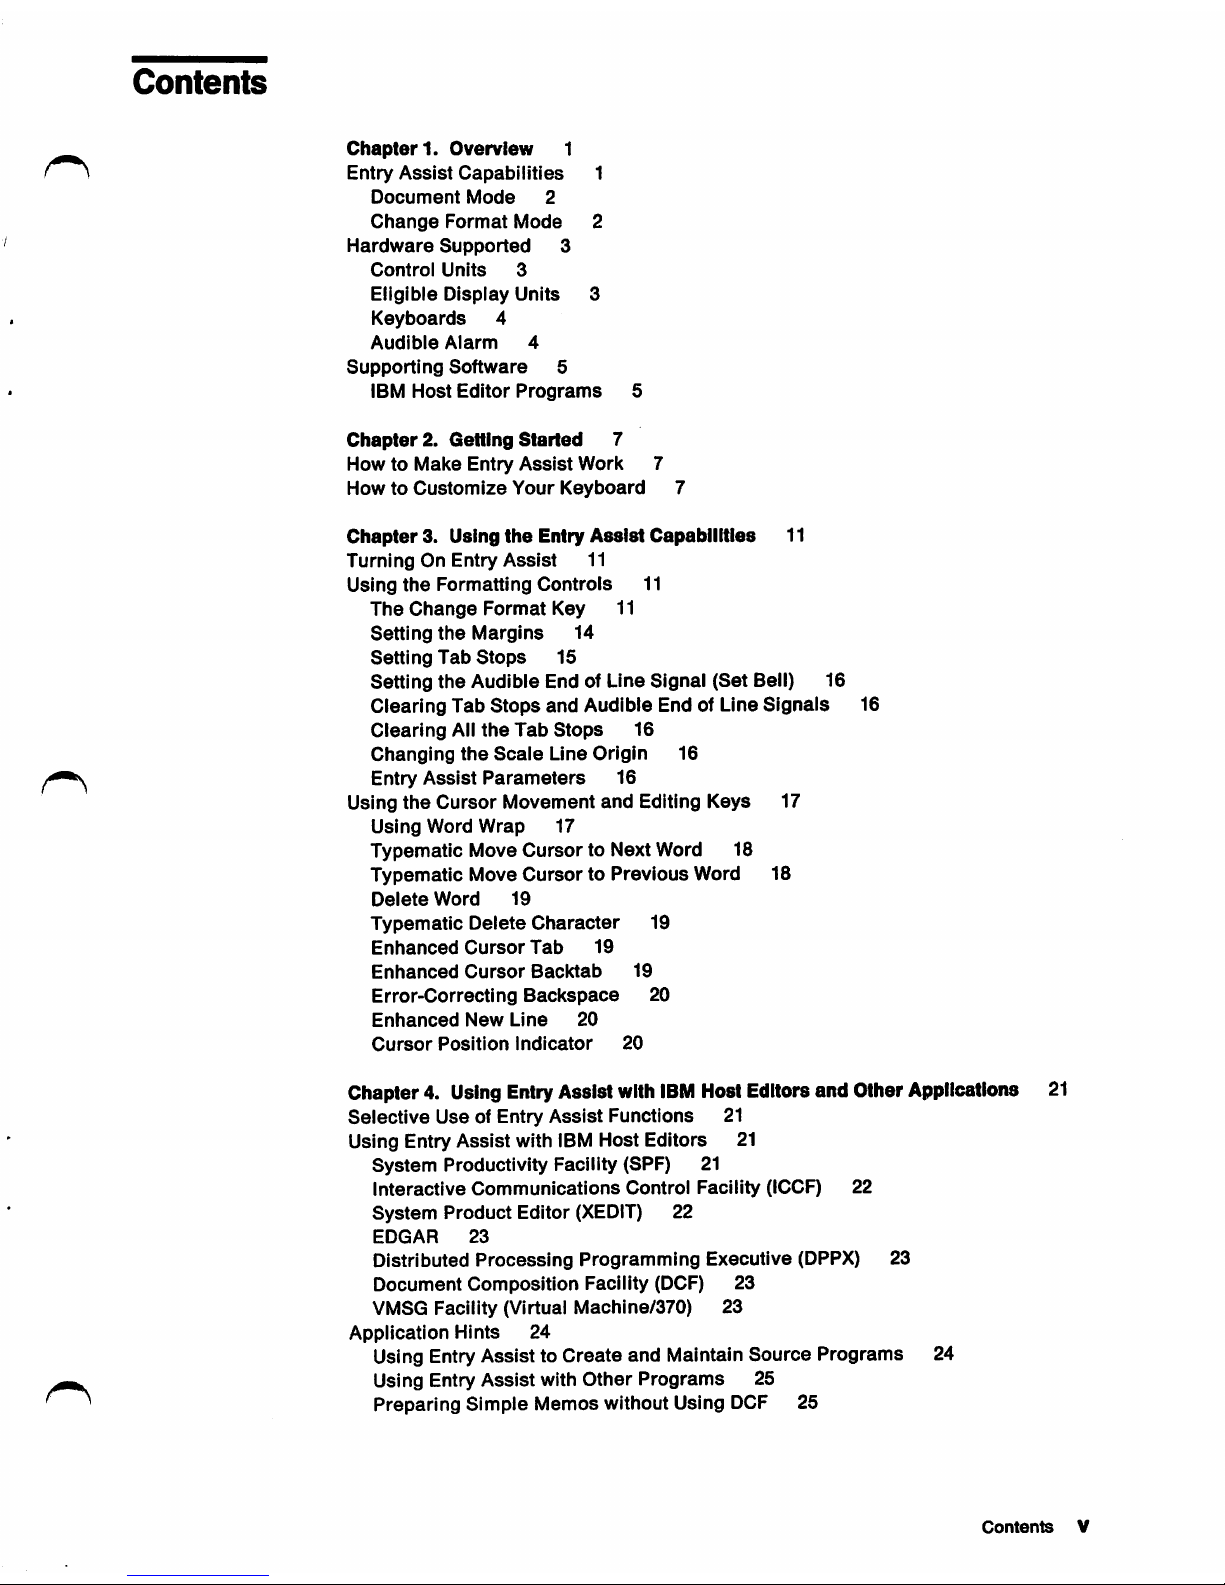
Contents
Chapter1.Overview
1
f}
Entry
Assist
Capabilities
1
Document
Mode
2
Change
Format
Mode
2
Hardware
Supported
3
Control
Units
3
Eligible
Display
Units
3
Keyboards
4
Audible
Alarm
4
Supporting
Software
5
IBM
Host
Editor
Programs
5
Chapter2.Getting
Started
7
How
to
Make
Entry
Assist
Work
7
HowtoCustomize
Your
Keyboard
7
Chapter
3. Using
the
Entry
Assist
Capabiiities
11
TurningOnEntry
Assist
11
Using
the
Formatting
Controls
11
The
Change
Format
Key 11
Setting
the
Margins
14
Setti
ng TabStops
15
Setting
the
Audible
End of Line
Signal
(Set
Bell) 16
Clearing
Tab
Stops
and
Audible End of Line
Signals
16
Clearing
Ail
the
Tab
Stops
16
Changing
the
Scale
Line
Origin
16
Entry
Assist
Parameters
16
Using
the
Cursor
Movement
and
Editing Keys 17
Using
Word
Wrap
17
Typematic
Move
Cursor
to Next Word 18
Typematic
Move
CursortoPrevious
Word 18
Delete
Word
19
Typematic
Delete
Character
19
Enhanced
Cursor
Tab
19
Enhanced
Cursor
Backtab
19
Error-Correcting
Backspace
20
Enhanced
New
Line
20
Cursor
Position
Indicator
20
Chapter 4. UsingEntryAssist with
IBM
HostEditors and OtherApplications
21
Selective
Use
of Entry
Assist
Functions
21
Using Entry
Assist
with IBM Host Editors 21
System
Productivity Facility (SPF) 21
interactive
Communications
Control
Facility
(ICCF) 22
System
Product
Editor
(XEDIT)
22
EDGAR
23
Distributed
Processing
Programming
Executive (DPPX) 23
Document
Composition
Facility (DCF) 23
VMSG Facility (Virtual
Machine/370)
23
Application Hints 24
Using Entry Assist to Create and Maintain Source Programs 24
Using Entry
Assist
with
Other
Programs
25
^
Preparing
Simple
Memos
without
Using
DCF
25
Contents
V
Page 6
Chapters.
Entry Assist Tutorial 27
HowtoCreate
the
Tutorl
al
27
ListofAbbreviations
37
VI
Entry
Assist
User's
Guide
Page 7

Figures
1.
Keyboard
Layoutfor 3178, 3278, 3279
Typewriter
and
APL,
and
RPQ
8K1038
8
2.
Keyboard
Layoutfor 3179
and
3180 Typewriter,
Emulate
Mode
8
3.
Keyboard
Layout
for
3179
and
3180,
Native
Mode
9
4.
Change
Format
Active
Keys
for
3178, 3278, 3279,
and
RPQ 8K1038
Keyboards
12
5.
Change
Format
Active
Keys
for 3179
and
3180
Keyboards,
Emuiate
Mode
12
6.
Change
Format
Active
Keys
for
3179
and
3180
Keyboards,
Native
Mode
13
7.
Entry
Assist
Scale
Line
13
Figures
Vil
Page 8
Chapter
1.
Overview
The
Entry
Assist
function
provides
display
units
with
new
capabilities
for
limited
local
format,
entry,
and
edit
control
when
operating
with
oneofthe
supported
IBM
host
editors.
These
editors
are
listed
under
"IBM
Host
Editor
Programs"
on
page
5.
The
Entry
Assist
function
provides
conveniences
and
productivity
improvements
for
3270
operatorsinapplications
involving
the
entry
and
editing
of
text
material.
For
example,
you
might
wanttouse
Entry
Assisttoeditorenter
someofthe
following
material:
•
Office
correspondence,
suchasletters,
memos,
reports,
lists,
and
schedules
•
Formal
publications,
suchasbooks,
magazines,
and
brochures
•
Source
program
material,
suchasCOBOL, FORTRAN,
and
assembler
lan
guage
source
program
statements
•
Job
control
language
(JOL)
statements
•
Other
text
material
normally
handled
by
the
listed
host
editors.
Entry
Assist
Capabilities
The
Entry
Assist
function
provides
the
following
capabilities
for
the
operator:
• Display ofan"on-demand
scale"
line for
establishing
margins,
tab
stops,
and
an
"endofline"
signal
position
Establishes
line
format
parameters,
providing a visual indication of
the
position
of
the
parameter
on
the
line. (You
can
view
the
scale
line
onlyinchange
format
mode.)
•
Screen
margins
Automatically
confines
the
body of
the
input
material
within
the
margins.
•
Tabbing
Moves
the
cursortothe
next
tab
stop
and
replaces
unprotected
null
characters^ with
space
characters
allowing for rapid entry of tabular material.
•
Audible
"endofline"
signal
Warns
you of
the
need
to perform a new-line
operation.
•
Word
wrap
(automatic
new
line)
Providesanautomatic
new-line
operation,
automatically
moving
partially
typed
wordstothe
next
line.
The
word
wrap
facility
allows
youtotype
without
con
sidering
the
need
for
using
new-line
operations.
•
Word
delete
Deletesaword
from
the
current
cursor
positiontothe
endofthe
word.
•
Typematic
character
delete2
Supplements
the
nontypematic
single-character
delete.
l^\
1 A null
character
Is a control
character
that may be Inserted Into or
removed
from a
sequenceofcharacters
without
affecting the meaning ofthe sequence: however, the control of equipment or the format may be affected by this
character.
2 A
typematic
key
repeats
Its function
when
pressed
and
held down.
Chapter 1. Overview 1
Page 9
Document
Mode
Typematic
character
delete^
Supplements
the
nontypematic
single-character
delete.
Typematic
error-correcting
backspace
whenininsert
mode
Deletes
while
in
insert
mode.
On-demand
cursor
position
display
Displays
the
current
cursor
positioninthe
operator
information
areainrr/cc
form. (The
letters
"rr"
represent
the
row
numbers
and
the
letters
"cc"
repre
sent
the
column
numbers.)
Rapid
cursor
positioning
Provides
rapid
cursor
positioning,
which
allows
you
to:
—
Move
the
cursortothe
nextorprevious
word
withasingle
keystroke.
-
Move
the
cursortothe
nextorprevious
tab
stop
withasingle
keystroke.
Both
capabilities
are
typematic,
allowing
rapid
positioningofthe
cursor
any
where
on
the
screen.
To
use
the
Entry
Assist
functions,
press
the
Document
On/Off (DOC ON OFF) key on
the
attached
keyboard.^
This
action
establishes
"document
mode."
Change
Format
Mode
To
establish
change
format mode,
press
the
Change
Format (CHG
FMT)
key.
(Press
the
key
againtoturn
off
change
format
mode.)
When
the
terminal
is in
change
format
mode,
you
can:
•
Check
the
statusofmargins,
tab
stops,
and
audible
"end
of line"
signal
positions.
•
Set
margins,
tab
stops,
and
audible
"end
of line" signal.
2 A typematic key
repeats
Its function when
pressed
and
held down.
3 Forthe
3179
and
3180
Display
Stations in "native mode," you mustfirstplacethe unitinextended-select modeby
pressing
theEXSEL
key.
2 EntryAssist User's Guide
Page 10

Hardware
Supported
Control
Units
You
can
use
this
versionofthe
Entry
Assist
function with
the
following
hardware:
•
All
models
of
the
3174
Control
Unit
•
The
3274
Control
Unit,
Models41and
61
•
The
3274 Control Unit,
Models31and51(mustbecapableofusing
Configura
tion
Support
D).
Eligible
Display
Units
The
Entry
Assist
functionIsavailableonthe
display
units
listed
below.
These
dis
plays
mustbeattachedtoIBM
3174or3274
(mustbecapableofusing
Configura
tion
SupportD)Control
Units
and
customized
for
Entry
Assist.
IBM
3178
Display
Station
Models
2C, C10, C20, C30,
and
C40
IBM
3278
Display
Station
Models
2, 3,
and4,and
Model
5 In
Model2mode
IBM
3279
Color
Display
Station
Models
2A, 2B, 2X, 3A, 3B, 3X, S2A,
S2B,
and
S3G
IBM
3179
Color
Display
Station
{emulate
and
native
modes)
IBM
3180
Display
Station
Model1{emulate
and
native
modes)
All IBM
3270
Personal
ComputersInControl
Unit
Terminal
(CUT)
mode
3191 Display
Station
Models
A1X, B1X, A2X, B2X, A3X,
and
B3X
3192
Color
Display
Station
Models
C1X, C2X,
and
C3X
3192
Display
Station
Models
D1X, D2X,
and
D3X
3192
Color
Graphics
Display
Station
Models
G10, G20, G30,
and
G40
3194
Display
Terminal
Models
H20
and
H50
3279
Color
Display
Station
Models
S2A, S2B, S3G, 2X,
and
3X
The
following IBM
Personal
ComputersInemulation
modeorControl Unit
Ter
minal
(CUT)
mode:
- All IBM
5150
Personal
Computers
- IBM
5160
Personal
Computer
Models
068, 078, 086, 087, 088, 089, 267, 268,
277,
and
278
(Personal
Computer
XT)
- IBM 5170
Personal
Computer
Models
068, 099, 239, 319,
and
339
(Personal
Computer
AT)
- IBM 5170
Personal
Computer
Models
599, 739, 919, 939
(Personal
Com
puter
AT/370)
The
following
devices
have
their
own
versions
of Entry Assist:
- 3179-G1, G2
Color
Display
Station
(Refertothe
IBM 3179G/3192G
Color
Graphic
Display
Station
Description
GA18-2589)
- 3193 Display Station Models 1
and
2 (Refer to
the
IBM3193 Display Station
Description GA18-2364
and
the
IBM3193 Display Station
Operator's
Guide
GA18-3265)
- IBM
3290
Information
Panel
Models
220,
230,
and
T30
(Refertothe
IBM
3290
Information
Panel
Operator's
Guide
GA23-0143)
Chapter 1. Overview 3
Page 11
Keyboards
The
Entry
Assist
function is
supported
on typewriter, APL,
and
RPQ 8K1038 key
board
layouts
only.
Some
keyboard
keytops
needtobe
replaced
with
new
keytops
or
relabeled
with
stick-on
labels
to identify
the
unique
Entry
Assist
capabilities.
(See
Chapter
2,
"Getting
Started,"
for
installation
instructions.)
You
can
purchaseanEntry
Assist
Keytop
Replacement
Accessory
Kit
for
3278
and
3279
keyboards
(IBM
part
number
1742774).
The
Accessory
Kit
contains
eight
sets
of
five
replacement
keytops
andakeytop
extractor
tool.
Ask
your
IBM
Sales
Rep
resentative
for
information
about
howtoorder
the
Accessory
Kit.
Audible
Alarm
The
"audible
alarm"
featureisrequiredonthe
3278
and
3279
displaystoimple
ment
the
audible
"endofline"
signal
function.
4 Entry Assist User's Guide
Page 12
Supporting
Software
IBM
Host
Editor
Programs
You
can
use
the
Entry
Assist
function
aloneorwith
the
full-screen
IBM
host
editor
programs
listed
below.
Refertothe
ListofAbbreviations
at
the
endofthis
book
for
an
explanation
of
the
abbreviations.
Interactive
Systems
Editor
Programs
•
Under
VM/SP (5749-010 VM/370,
Release6and
beyond)
-
PROFS
PRPQ
Editor
-
XEDIT
-
SPF,
ISPF/PDF
(edit
functions)
•
Under
VM/370 (5749-010 VM/370)
-
SPF,
ISPF/PDF
(edit
functions)
-
Display
Editing
System
(IUP
5796-PJP)
•
Under
DOS
VSE/ICCF
-
ICCF
Editor
•
Under
ISO
-
SPF,
ISPF/PDF
(edit
functions)
DBDC
Systems
Editor
Programs
•
Under
CICS/VS
- IPDT VSE
(edit
functions)
- IPDT
OS/VS
(edit
functions)
•
Under
IMS/VS
- IPDT
OS/VS
(edit
functions)
8100
Systems
Editor
Programs
•
DPPX
Editor
Chapter 1. Overview 5
Page 13
Chapter
2. Getting
Started
This
chapter
explains
how to
make
Entry Assist work on your control unit. It
also
explains
howtocustomize
your
keyboard.
How
to
Make
Entry
Assist
Work
Ona3174
Control
Unit
You do not
need
to do anything special to make Entry Assist work. The Entry
Assist function works automatically
and
requires no control unit customizing.
Ona3274
Control
Unit
You
can
find
the
procedure
for
making
the
Entry
Assist
function
work
on a 3274
Control
Unit in
the
IBM
3270
Information
Display
System:
3274
Control
Unit
Cus
tomizing
Guide.
How
to
Customize
Your
Keyboard
To
customize
your
keyboard
for
the
Entry
Assist
function,dothe
following:
1.
Apply
the
stick-on
labels
(32
setsofsix
labels,
which
are
shipped
with
the
control
unit)tothe
keyboards.
Use
replacement
keytops
(which
can
be
ordered)
on
the
3278
and
3279
keyboards.
2.
RefertoFigure1on
page8,Figure2on
page8,and
Figure
3 on
page
9.
Choose
the
figure
that
matches
the
keyboard
you
have
and
lookatthe
bold-
outlined
blockstosee
howtoapply
the
stick-on
labels.
Stick-on
labels
are
supplied
with all
3174
and
3274
units
that
use
Configuration
Support
0.
3.
Wash
each
keytop
with
soap
and
water
and
allow
it to
dry
thoroughly
before
you
apply
the
labels.
4. Pick
each
keytop label off
the
label
form with a
sharp-pointed
knife (or a
similar
device),
then
position
the
labelonthe
keytop.
5.
Press
the
label
down
withafingertip.
If
you want permanent keyboard installations on 3278 and 3279 display units, you
can purchase an Accessory
Kit,
which contains eight
sets
offive replacement
keytops engraved for use with Entry Assist, a keytopextractor tool, and Keytop
Replacement Instructions. (See "Keyboards" on page 4.)
If
you use the
RPQ
8K1038
keyboard, install
RPQ
8K1230or8K1231.
Chapter2.
Getting
Started 7
Page 14

CHGIRPQ
OKI038
Keyboord
Only
(See
Note
3.)
ON
OFF
Notes:
„„i„r
1. Boxed
items,
for
example,
,
are
stick-on
labels.
2. RPQ6K103a keyboard. The
CHG
FMT
function moves to the key indicated. The
other
Entry Assist functions
remainasshown.
Figure1.Keyboard
Layout
for 3178, 3278, 3279
Typewriter
and
APL,
and
RPQ 8K1038
ooc
ON
OFF
SSSSSQBQSQSQ
SBQaaBBBBBBB
00
CRPOS
BB
BBBBBBBBBBBBBB
BBffl
BBBB
BB
BBBBBBBBBBBBBn
BBSBBBB
B
QBBBBBBBBBBBBt
B—BBBB-
_
/BB
BBBBBBBBBBBBB
BBB BBB
tir
BB
^
B 3B
Note: Boxed
items,
for
example,
, are
stick-on
labels;
unboxed
items,
for
example,
oaf, are
engravedonkey.
Figure 2. Keyboard Layout for 3179
and
3180 Typewriter, Emulate Mode
8 Entry Assist User's Guide
Page 15

DOC
ON
OFF
CKG
FMT
QQQQSaBQQQQB
BBBBBBBBBBBB
Overlay
/
00
HOHnnnnnHHH0Hi=i
nnn
rrpr
00
B000000000000n
HHH HHHR
00
Q000000000000U
0 RRRH
00
HHHHHRRRRHHHR=I
000 000
BB
Q
Q B
BB
Note: Boxed
items,
for
example,
, are
stick-on
labels;
unboxed
items,
for
example,
aa^
are
engravedonkey.
Figure3.Keyboard
Layout
for
3179
and
3180,
Native
Mode
fta/'
Chapter 2. Getting Started 9
Page 16

Chapter
3.
Using
the
Entry
Assist
Capabiiities
This
chapter
lists
the
Entry
Assist
capabilities
and
tells
you
howtouse
them.
Turning
On
Entry
Assist
The
DOC ON
OFF
key
turns
ail
the
Entry
Assist
functionsonand
off.*
When
you
first
powerona
display
unit,
the
Entry
Assist
functions
are
turned
off.
To
turnonthe
Entry
Assist
functions,
press
the
DOC ON
OFF
key.
This
puts
the
displayin"document
mode"
and
causes
the
DOC
symboltobe
displayedinthe
operator
information
area
(column
positions
66-68).
To
turn
off
the
Entry
Assist
functions,
press
the
DOC ON
OFF
key
whileindocument
mode.
This
also
clears
the
DOC
symbol.
Using
the
Formatting
Controis
This
section
lists
the
formatting
controls
and
explains
howtouse
them.
The
Change
Format
Key
To
put
your
displayinchange
format
mode;
1. If
you
have
not
entered
your
display
into
"document
mode,"dosoatthis
time.
2.
Then
press
the
Change
Format
(CHG FMT) key.
This
action
places
the
displayin"change
format"
mode.
You
can
use
the
keyboard
controlstoset
and
clear
margins,
tabs,
and
the
audible
"endofline"
signal
only
when
the
display
is in
change
format
mode.
Use
the
change
format
active
keys
showninFigure4on
page
12,
Figure
5 on
page
12,
and
Figure6on
page
13.
* When you
are
working with 3179
and
3180 units in native mode, first
piace
the
unit in
extended-seiect
mode.
Chapter3.
Using
the
Entry
AssistCapabiiities 11
Page 17

RPQ
BK1038
Koyboard Only (See Nots 2.)
ON
OFF
00
Kofos:
1. Keytops end faces shown in bold outline ore active; all
others
ore ignored.
2. Onthe
RPQ
8K1038 Keyboard,
CLEAR
becomes o keytop function, and
CHG
FMT,a
keyfocefunction.
Figure 4.
Change
Format Active Keys for 3178, 3278, 3279,
and
RPQ 8K1038 Keyboards
ON
OFF
BBQBasBasBa&-<
BBBBBBBBBBBB
BBBBBBRnBRBBI
<
ALT ALT
_
Noto;
Keytops
ond faces shownin bold outline are octive; all others are ignored.
Figure 6.
Change
Format Active Keys for 3179
and
3180 Keyboards, Emulate Mode
12
EntryAssist User's Guide
BBi
BBBB
BBB
BBBB
B
BBBB
BBR
BBB
B
BB
Page 18

EXSEL
OOC CKQ
ON.OFF
FMT
BaBflsmgaBHa
aaaaaaaaaasB-
QSQBQSasaQI
fii
1®
-ALT
CURSR
aaa aaa
o
Noto:
Keytops
and
faces
showninbold
outline
are
active;
oil
others
are
ignored.
Figure 6. Change Format ActiveKeysfor 3179and 3180 Keyboards, Native Mode
The
Scale
Line
Placing your display in change format mode causes the scaie line to appear inthe
operator
information
area.
The
operator
information
areaisthe
bottom
rowonthe
screen.
A
scale
line
cursor
column Indicates
the
current
cursor
position. The normai
cursorinthe
entry
areaisreplaced
with a
reverse-image
cursor.
LookatFigure
7 foraniiiustrationofthe
Entry
Assist
scaie
line.
First
Screen
Column
Left
Margin
_ Tab
r
stop
1 L
Lost
Screen
Column
i
End-of-Line
Signal
—>,
p
Position
I I
UL
Right
Margin
•+
1
-<-+—2
—+
3—+
4—+
5—+
6-«'->
7—+
i
Left
i
W Margin-»^
Area
|
Figure7.Entry
Assist
Scale
Line
Entry
Area
Right
Margin
Area
!
Chapter3.Using
the
Entry
Assist
Capabilities
13
Page 19

The
Scale
Line
Cursor
The scale line cursor is either a reverse-image cursor or an opaque box,
dependingonthe
typeofdisplay
unit
you
have.
When
you
set
margins,
tab
stops,
or audible "end of line" signal, the scale line cursor disappears and you imme
diately
see thecharacterthat
you
entered.
Any
cursor
movement
or pressing the
AlternateCursor
(ALT
CURSR)
key
will
cause the cursor scale to be displayed.
The
Normal
Cursor
The
normal
cursor
and
the
scale
line
cursor
move
togetherinthe
horizontal
direc
tion. The normal cursor moves Independently inthe vertical direction.Ifyou look
at
the
normal
cursor
and
the
scale
line
cursor,
you
can
see
the
relationship of a
position on the
scale
line with a position on
the
page.
Note: You
can
use
the
"Move
CursortoNext Word"
and
"Move
CursortoPrevious
Word"
keys for rapid positioning of the cursor while in change format mode. (See
"Typematic MoveCursor to Next
Word"
on page 18,and "Typematic MoveCursor
to
Previous
Word"onpage
18.)
Reset
Change
Format
Mode
Press
the
Change
Format key
againtoreset
the
change
format mode,
erase
the
scale
line,
and
return
the
operator
information
area
to its
previous
function.
The
cursor
returnstothe
cursor
display
mode
andtothe
screen
positionitoccu
pied
before
you
entered
the
change
format
mode.
The
new
margins,
tabs,
and
audible
"endofline"
signal
are
now
operational
and
remainineffect
until
they
are
changedoruntil
the
powertothe
controlleristurned
off.
Setting
the
Margins
Standard
Margin
Type
To
set
margins:
1. Move
the
cursor
(using
the
Cursor
Left
and
Cursor
Right keys) to
the
desired
locations
on
the
column.
2.
Press
the
Less
Than
(<)
key for
the
left
margin.
The
column definedasthe
left
margin
is included in
the
entry
area.
3.
Press
the
Greater
Than
(>)
key for
the
right margin.
The column definedasthe
right margin is NOTincluded in
the
entry
area.
These
actions define the
area
for
data
entry.
You
can set onlyone left and one right margin for a display. Whenyou press the
Less Than key, the previous left margin is replaced by the new one.
Press the Greater
Than
key
to replacethe
right
margin
with
the newone.
Any
tab
stop or audible "end of line" signal setting to the rightofthe new right margin is
retained
and
remains
operational.
Any
tabstopor
audible
"endof
line"
signal
setting tothe
left
ofthe
new
left
margin
is
retained
and
remains
operational.
Ifaright
margin
existed
tothe
left
of,orin
the
same
place
as,the
new
left
margin,
the
right
margin
is resettothe
default
position.
The
default
position
isthe last
column. The scale line is updated accordingly
14
EntryAssist User's Guide
Page 20

If
a left
margin
existedto the
right
of,
or inthe same place as, the new
right
-
margin,the leftmarginis reset tothe default position
(first
scale line position).
If
you try to enter a right margin in the left margin default position, the input is
ignored. Likewise, ifyou try to enter a left margin in the right margin position, that
inputisalso
ignored.
Note: On a 3180 Model 1 with extended function (suchasscrolling), if
the
window
width is
less
than
the
80-column maximum width for Entry Assist, left
and
right
square
brackets
([ ])
indicate
the
window
edges.
Alternative
Right
Margin
Type
The
Greater
Than
symbol
(>)
indicates
the
standard
right
margin.
When
your
display
is in
document
mode
with
word
wrap
off,
the
standard
right
margin
causes
inputtobe
inhibited
when
you
trytoenteracharacteratthe
right
margin
position.
The
alternative
right
margin
symbol
signifies
thatanautomatic
margin
release
occursatthe
right
margin
when
word
wrapisoff.
Thisisusefulincertain
power
typing
situations.
To
establish
an
alternative
right
margin:
1.
Position
the
cursor
on
the
right
margin
symbol.
2.
Press
the
Cursor
Select
key.
Press
the
Cursor
Select
key
againtoestablish
the
standard
margin
symbol
and
operation.
The
standard
right
margin
symbolisreplaced
with a
broken
vertical
bar
(I).
Setting
Tab
Stops
^
To
settab
stops:
1.
Position
the
cursorinthe
desired
column
on
the
scale
line.
2.
Press
the
Forward
Tab
key.
The
scale
line is
updatedtoshow
the
new
tab
stops.
Note: A tab stop is indicated by the underscore symbol appearing inthe scale
line; however, the underscore symbol is not displayed ifeither a margin or the
"end
of line" signal is
also
setatthat
location.
You
can
set
a maximum of 20
tab
stops. Ifyou try to
set
more than 20 tabs, the
inputisignored.
Chapters.
Using
the
Entry
Assist
Capabilities
15
Page 21

Setting
the
Audible End of Line Signal (Set Bell)
To
set
the
"endofline"
signal:
1.
Position
the
cursorinthe
desired
column.
2.
Press
the
asterisk
(*) key.
An
asterisk
symbol is
displayedinthe
column
position
that
you
chose.
You
can
set
the
"end
of line"
signalatany
column, including margin
and
tab
stop
positions.
This
causes
the
audible
alarmtosoundasthe
cursor
enters
that
column
position.
Note: To
use
the
"endofline"
signal,
you
must
have
the
audible
alarm
feature.
Clearing
Tab
Stops
and
Audible
End
of
Line
Signals
To
clearatab
stoporthe
audible
"endofline"
signal
setting:
1.
Position
the
cursoratthe tab
stoporat
the
"endofline"
signal
setting.
2.
Press
the
Delete
Character
key.
If
bothatab
stop
and
the
"endofline"
signal
are
setinthe
same
position,
both
are
cleared.
Clearing
All
the
Tab
Stops
To
clear
all
the tab
stops:
Press
the
CLEAR key.
The
scale
lineisupdated
accordingly.
Changing
the
Scale
Line Origin
To
change
the
scale
line
origin:
1.
Place
the
cursoratthe
first
scale
line position.
2.
Press
the
Cursor
Select
key.
The
origin
changes
from
0to 1,or
from
1to 0.
Only
the scale lines
numbering
will
change; the
margins,
tabs, and "endof
line"
signal
position
will
notchange.
Entry
Assist
Parameters
The
following
Entry
Assist
parameters
remainineffect
during
entrytoand exit
from
document
mode
unlesstheyare
changedbytheoperatororthe
power
is
turned
off:
• Margin
settings
and
types
•
Tab
stop
settings
• Audible line-ending signal position
•
Word
wrap
status
•
Scale
line
origin.
In
addition,
APL
mode
and insert
mode
states
remainIneffect
during
entry
toand
exit
from
change
format
mode.
16
Entry
Assist User's Guide
Page 22

Using
the
Cursor Movement
and
Editing Keys
This section expiains how to move the cursor and use the editing keys.
The following functions, which provide fiexibiilty during text entry and edit oper
ations,
are
availableindocument
mode.
Using
Word
Wrap
To
turn
word
wraponor
off,
press
the
WRAP key.
Word
wrap is a functionthat automaticaliy moves the iast word on a rowto the next
rowifthe
word
would
otherwise
overrun
the
right
margin.
Wordwrap is automatically turned on when document mode Is established. A
word wrap symbol
(^)
appears in column 70 ofthe operator information
area
when
word
wrapisoperational.
Word
Wrap
with
Insert
Mode
Off
When a display has insert mode offand word wrap on, a wrap can occur only ifthe
entire
entry
areaofthe
next row
contains
nulls
and
spaces.
Youcan wrap a word of any length less than the total
space
between the margins
(exclusive of the margins). Space characters are placed inthe position formerly
occupiedbythe
wrapped
word.
Word wrap obeys margin boundaries.Ifyou enter any character, other than
DUP
or space, into the column position immediately left of the right margin on the
current
row,
the
entire
word is
placedonthe
next row, beginningatthe
left margin.
If
the word occupies that entire row, ifthe current row is the bottom row, or ifthe
field in
the
next line is protected, then input is inhibited and
the
Too Much symbol
(X X >) is
displayedinthe
operator
information
area.
If
the
left margin is within an unprotected field on the screen, nulls to the left of the
left margin within that field
are
changed to spaces. This makes the document look
just like you
see
it on the screen after you send itto the host in a read-modified
operation.
If
you
enteraspace
character into the column position immediately left of the right
margin position, word wrap
does
not occur. The cursor moves to the left margin of
the
next
row.
If
the
cursor
is in
the
column position
immediatelytothe
left of
the
right margin
and you
press
the
DUPkey, the DUP
character
is placed in
the
right margin, and
the
DUP function is
performedasdefined
when
not in
document
mode.
Note: When you
use
word
wrap
with
the
3180 Model 1
extended
functions,
the
window is automatically
scrolled
when
the
last
line in
the
window is filled.
Chapters.
Using
the
Entry
AssistCapabilities
17
Page 23

Word
Wrap
with
Insert
Mode
On
Tomake an insert
with
insert mode on and wordwrap on, you must have an ending
space®
or a null character between the cursor and the right margin.
If
an ending space does not Immediately
follow
the last wordInthe entry area a
nullcharacter
will
automatically be added, the last word
will
be wrapped, and the
insert
operation
will
continue.
If
an ending space does immediately
follow
a word,the last wordInthe rowwraps
to the next row. That next row must contain ending spaces or nulls
(within
the
margins) to
accommodate
the
wrap.
If
there Is not enough room for the wrap to occur. Input Is Inhibited and the Too
Muchsymbol (X X >) Is displayed Inthe operator Information area.
Typematic
Move
Cursor
to
Next
Word
Tomovethe cursor tothe first character ofthe next
word,
press the Cursor
Right
key
In ALT
Shift.
If
the cursor Is within the last word on a line within margins, the cursor moves to
the first
null
or blankafter that word. The
final
cursor location must beInan unpro
tected
field.
Margin limits
are
not
observedInthe
following circumstances:
• Ifa word Is outside the current margin settings,
the
cursor
moves
under
that
word.
•Ifthe cursor Is outside the margins, the cursor moves to the beginning of the
next word, whether that word Is within the margins or outside the margins.
•Ifthere
are
no more words on the existing row, the cursor moves to the begin
ningofthe
first
wordonthe
next
row.
The Typematic Move Cursorto Next Word function wraps the
cursor
from the lower
righttothe
upper
left of
the
screen.
Typematic
Move
Cursor
to
Previous
Word
To move the
cursortothe
previous word,
press
the Cursor Left key In
ALT
Shift.
•
The
cursor
movestothe
first
character
of
the
current
word.
• If
the
cursor
Is at
the
first position of the current word, or If It Is not positioned
under
a word, the
cursor
moves to
the
first location of
the
previous word.
The
Typematic Move
Cursor
to Previous Word function
wraps
the
cursor
from
the
upper
left to
the
lower
rightofthe
screen.
5 An ending
space
Is an
unseen
character
that follows the last word In the entry
area
on a particular row.
18
EntryAssist User's Guide
Page 24

Delete
Word
Press
the Delete Word key to delete a word. This deletes the remainder of
the
word
from
and
Including
the
cursor
position.
• The words following (to the end ofthe row or to the first attribute character®)
^ ^ shiftleftto close the gap.
• This deletion Includes the punctuation and the
space
or the null
(If
any) fol
lowing
the
word.
• For a partial word delete, the following null or
space
Is not deleted.
•
The
cursorIsleftatIts
current
location.
•
Attributes
and
the
characterstothe
right of
themdonot
shift.
•
Subsequent
rowsdonot
shift.
• If
the
cursorIslocated
under
a nullora
space,
the
nullorthe
spaceIsdeleted.
• If
the
cursorIsunderanattribute,orIf
the
cursor
Is In a
protected
field, Input Is
Inhibited
and
theGoElsewhere
(X<-J{^)
symbolIsdisplayedInthe
operator
Information
area.
Typematic
Delete
Character
The
Typematic
Delete
Character
key (Left
and
Right
Brackets
key In ALTShift for
U.S.
keyboards)
causesadelete
function Identical to
the
delete
key
except
that
this
keyIstypematic.
Note:
The
Typematic
Delete
Character
function Is not
availableondevices
attachedtoa
3174
unit
thatIscustomized
for
the
New
Spanish
language.
Enhanced
Cursor
Tab
When
you
press
the
Tab
key,
the
cursor
movestothe
next
unprotected
tab
stop,
replacing
unprotected
null
characters
with
space
characters.Ifthere
are
no Inter
vening
tab
stops,
the
cursor
movestothe
next
unprotected
field. Null
characters
are
not
changedtospace
charactersInthis
operation.
The
Enhanced
Cursor
Tab
function
does
not
wrap
the
cursor
from
the
lower
right
to
the
upper
leftofthe
screen.
Note:
The
Tab
key
operates
differently
when
document
modeIson
and
tab
stops
are
set
than
when
document
modeIsoff.
• In
document
mode
with
tab
stops
set,
the
Tab
key
Inserts
data
(space
charac
ters)
Into
the
data
stream
senttothe
host
program.
This
InsertionIsnecessary
to
preserve
the
tabular
formatting
that
appears
on
the
screen.
• If no
tab
stops
are
set,
the
Tab
key
operatesInthe
same
manner
regardless
of
whether
document
modeIsonoroff,
except
thatItdoes
not
wrap
the
screen.
Enhanced
Cursor
Backtab
The
"Enhanced
Cursor
Backtab"
function
moves
the
cursortothe
previous
tab
stop
ortothe
first
unprotected
character
locationofthe
currentorprevious
field,
which
everIscloser.
Nulls
are
not
changedtospaces
during
the
move.
The
"Enhanced
Cursor
Backtab"
function
does
not
wrap
the
cursor
from
the
upper
lefttothe
lower
rightofthe
screen.
6 An
attribute
character,
associated
with a field
in,a
display
file,
defines
how
the
field is
displayed;
for
example,
whether
it is
underlined,
blinking,orintensified.
Chapters. Usingthe EntryAssist Capabilities
19
Page 25

Error-Correcting
Backspace
Press the Backspace key to delete the character to the leftofthe cursor position.
Your
display
mustbein
insert
mode.
If
the cursor is at the left margin position, you cannot backspace.
All
characterstothe
right of
the
deleted
characteronthe
same
row within
the
same
field
are
shifted to close the gap, regardless of the right margin setting.
Attributes
and
characterstothe
right of
the
shifted
characters
are
not affected.
If
the cursor is at the left margin when you press the Backspace key, input is inhib
ited and the Input Inhibited and Go Elsewhere
(X<-symbols
are
displayed in
the
operator
information
area.
The "Error-Correcting Backspace" function
does
not wrap the cursor from the
upper
left to
the
lower
rightofthe
screen.
Enhanced
New
Line
Press
the
New Line key to move
the
cursor
to a new line. The New Line key
observes
the
left margin
and
moves
the
cursortothe
left margin of
the
next row.
If
the
left margin is protected, the
cursor
moves to
the
first unprotected position to
the
right of
the
left
margin
within
the
entry
areas.
Unprotected null
charactersonthe
new
line (from
the
position to
the
left of
the
left
margin,
and
within
the
same
fieldasthe
cursor)
are
changedtospaces.
The
cursor
wraps
the
screen.
Ifthe
cursor
is on the last row of
the
display, it
movestothe
first
unprotected
location of
the
first row (within
the
margins).
If
the
entire
screen
within
the
marginsisprotected,
the
cursor
movestothe
left
marginofthe
first
screen
row.
Cursor
Position
Indicator
Press
the
Cursor
Position Indicator key (OR PCS) to
seeanexact
cursor
location.
The
current
position of
the
cursorisdisplayedincolumns
75 through 80 of
the
operator
information
areaasrow
and
column
(rr/cc)
data.
Row
data
hasavalue
between1and
43,
and
column
data
hasavalue
between1and
80.
The
indicatorisreset
when
you
press
another
key (or
release
the
ALT key)
or
when
the
keyboardislocked
becauseofhost
transaction.
Note:
The
Cursor
Position
Indicator
key
hasnoeffectondevices
that
always
have
a
cursor
position.
20
EntryAssist User's Guide
Page 26

Chapter 4. Using Entry Assist
with
iBiM
Host Editors and Other
Appiications
The Entry Assist function is easy to enter and to exit. Ifyou
are
an occasional user,
remember that you need only
press
the Document Mode key to turn Entry Assist on
and
off.
Selective
Use
of
Entry
Assist
Functions
You
can
use
the Entry Assist capabilities selectively. Even ifyou
are
not working
with
oneofthe
IBM
host
editors, you may still find it useful to
operate
with docu
ment
modeonand
use
someofthe
Entry
Assist
capabilities.
Operating in document mode is similar to operating in non-document mode ifthe
parameters
are
set
in a certain way. For example, ifdefault margins
are
set
at
columns 1 and 80, word wrap is off, and no tab
stops
are
set, thefollowing func
tions
are
still
available;
•
Move
cursorbyword
•
Cursor
position
indicator
•
Delete
word
•
Typematic
delete
character
•
Line
ending
warning
signal
•
Backspace
delete
whileininsert
mode.
Using Entry
Assist
with
IBM
Host Editors
When using a full-screen editorthat has a line command field,
set
the margins to
prevent inadvertent entry of
data
into
the
line command field.
• If
the
line
command
field is to
the
left,
set
the
left
margininthe
first
entry
posi
tiontothe
right of
the
command
field.
• If
the
line
command
field is to
the
right,
set
the
right margin
justtothe
left of
the
command
field.
Mostofthe
time,
the
editor
you
are
using
indicates
the
data
entry
area.
When
document
mode
is on
and
tab
stops
are
set,
the
tab
key
causes
space
char
acters to replace null charactersasthe cursor moves to a tab stop. This action
preserves formatting informationinthe data stream. Set tab stops only in those
situations
where
the
host
program
can
handle
the
space
characters.
System
Productivity Facility (SPF)
When using SPF edit functions,
set
the left margin to correspond to the entry
area.
To
set
the
left margin,
press
the
Change
Format key and move
the
cursortothe
beginning of the typing
area.
The
scale
line cursor is automatically in the
same
column position, and you can immediately
set
the left margin at this position.
Set
the
right margin in
the
right column position.
With
the
margins
set
this way, you can avoid the SPF line command columns
during normal entry and edit of text material. Use the Backtab key or the previous
word key to move the
cursor
rapidly to
the
line command field.
Chapter4.Using
Entry
Assist
with
IBM
Host
Editors
and
Other
Applications
21
Page 27

Entry
AssistIsnot
Intended
for
use
with
the
SPF
text
entry
mode.
However,Ifyou
use
SPF,
you
may
find It
convenienttouse
Entry
Assist
document
mode
rather
than
the
SPF
text
entry
mode.
Entry
Assist
document
mode,
with
word
wrap
on,
allows
youtoenter
data
while
providing
additional
entry
and
editing
conveniences.
Also,
with
Entry
Asslst's
word
wrap
function,
you
can
get
faster
host
response.
To
use
the
SPF
text
entry
mode,
turn
off
Entry
Assist
document
mode
whileInSPF
text
entry
mode.
To
editadocument
enteredIntext
entry
mode,
turnondocument
mode.
Interactive
Communications
Controi
Facility
(iCCF)
When
using
ICCF,
set
the
left
marginatcolumn2.The
ICCF
editor
positions
the
cursortothis
column.
When
you
press
the
Change
Format
key,
the
cursor
appears
on
the
scale
lineInthe
same
column.
Now
you
can
set
the
left
margin
imme
diately.
WhenIndocument
mode,
the
Tab
key
causes
space
characterstobe
entered
from
the
current
cursor
positiontothe
next
tab
stoponthe
line.Iftab
stops
are
set
and
you
use
the
Tab
keytomove
the
cursor
from
the
ICCF
command
linetothe
Input
area,
spaces
maybeplacedInthe
command
field.
The
ICCF
editor
interprets
spacesInthe
command
fieldasan
Illegal
command.
You
can
avoid
this
situation
by
using
the
New
Line
keyorby
setting
tab
stops
only
when
needed.
System
Product
Editor
(XEDiT)
The
XEDIT
entry
areaIsclearly
Indicatedonthe
screen.
Position
the
cursoratthe
first
entry
column
and
press
the
Change
Format
key.
The
cursor
appears
on
the
scale
lineInthe
same
column.
You
can
now
set
the
left
margin
Immediately.
Entry
AssistIsnot
Intended
for
use
with
the
XEDIT
power
typing
mode.Ifyou
use
power
typing
mode,
you
must
turn
off
document
mode
while
entering
original
text.
You
can
still
use
Entry
Assisttoeditadocument
later.
You
may
find It
convenienttouse
Entry
Assist
document
mode
rather
than
the
XEDIT
power
typing
mode
for
the
following
reasons:
•
Entry
Assist
provides
the
same
entry
capabilityaspower
typing.
•
Entry
Assist
allows
youtoview
the
documentInthe
same
formInwhich
It will
be
formatted.
•
Entry
Asslst's
tabbing
capabilities
are
superiortothe
Program
Function
keys'
tabbing
capabilities.
You
can
also
make
your
Input
screen
look
like
your
edit
screen:
1.
Set
the
XEDIT
scale
lineonIf It Is
not
displayed.
2.
Set
the
left
marginatposition0on
the
scale
line.
3.
Set
the
right
marginatposition73or
less.
4.
Use
the
INPUT
command
to
enter
your
text.
22
EntryAssist User's Guide
Page 28

EDGAR
If
you
use
EDGAR,
and
are
entering files to be formatted by
DCF,
set
the left
margin to column 1. Setting the left margin to column 1 makes
DCF
formatting
commands
appearinthe
expected
positions.
Set
the right margin just before the command field so you can avoid the command
field when you input data. Use
the
Tab key to move
the
cursortothe
command
field.
Distributed
Processing
Programming
Executive (DPPX)
When
using
Entry
Assist
with
the
DPPX
editor:
•
Do
not
use
the
Format
subcommand.
Use
the
default
format.
• Do
not
use
the
tab
local-line
function.
Use
the
Entry
Assist
tab
function.
Document
Composition
Faciiity (DCF)
The
document
composition facility
(DCF)
program
operatesonan
input
data
set
that
contains
both
subject
matter
and
formatting controls. A DCF run
produces
a
document
with
the
subject
matter
formattedasspecified by
the
formatting controls.
You
can
change
the
formatting controls in
the
data
set
without changing
the
subject
matter,
and
another
DCF
run
resultsinthe
same
subject
matter
formatted
accordingtothe
new
format
controls.
When you format a
document
using Entry
Assist
formatting controls, you
cannot
reformat
it at a
later
timebychanginganEntry
Assist
format
control.
From
the
DCF
viewpoint.
Entry
Assist:
•
Helps
you
create
and
edit
the
input
data
set
•
Provides
limited
formatting
for
margins
and
tabbing.
DCF
requires
that
formatting
commands
appear
in specific
column
locations.
When you
enter
a DCF
document,
you
must
set
the
left margin for Entry
Assist
appropriately.
For
example:
•
When
using
EDGAR,
set
the
left
marginincolumn
1.
•
When
using
SPF,
set
the
left
marginincolumn
9.
Ifyou want your printed
memostoappearasthey do on
the
screen,
set
the
DCF
line
lengthsothat
it is
equaltothe
space
between
margins.
VMSG Facility (Virtual
Machine/370)
When using VMSG,
set
the
left margin at column 2.
Since
the
VMSGeditor initially
sets
the
cursoratcolumn2,press
the
Change
Format
keytoset
the
left
margin
immediately.
Chapter 4.
Using
Entry
Assist
with
IBM
Host
Editors
andOther
Applications
23
Page 29

Application
Hints
Using Entry Assist to Create and Maintain Source Programs
Source programs are typicallymaintained infixedcolumnformat. For example:
NAME
OPERATION
OPERANDS
COMMENTS
To
use
Entry
Assisttocreate
this
format:
1.
Set
the
left
marginatthe
NAME
column.
2.
Set
tab
stopsatthe
OPERATION, OPERAND,
and
COMMENTS
columns.
Nowyou can
enter
source
statements
without thinking about column locations.
If
you need to continue to another line,
set
the "end of line" signal to provide a
warning
of a
line
ending.
To
create
program prologue sections or other
areas
of continuous comments, the
following
techniqueisuseful:
1. Create a group of lines withthe *character in the first and last positions of the
line. (Todo this fast,
use
the duplicate line command [" n] with
XEDiT,
and the
Repeat LineCommand [Rn] with the SPF editor.)
The
formonyour
screen
should
look
like
this:
2.
Set
margins
within
the
pair
of *
characters
as
illustrated
below.
The
Less
Than
character
(<)
represents
a left margin. The
Greater
Than
character
(>)
represents
the
right margin. (Youdo not actually
see
the<and
> symbols
exceptonthe
scale
line
wheninChange
Format
mode.)
Withword wrap on, you
can
enter
comments
into the lines you
created
without
thinking
about
marginsornew-line
decisions.
24
EntryAssist User's Guide
Page 30

Using
Entry
Assist
with
Other
Programs
You
can
use
selected
Individual functions of Entry
Assist
with
many
other
pro
grams.
Such
functions include:
•
Next
Word
•
Previous
Word
•
Cursor
Position
Indicator
•
Word
Delete
•
Character
Delete.
When you use Entry Assist functions with other programs, do not use tab stops,
because tabbing to a tab stop introduces
space
characters into the data stream and
may
change
your
output.
Preparing
Simpie
Memos
without Using DCF
The
DCF
program provides very powerful document-formatting functions; however,
DCFmay not always be available. Entry Assist
makes
it possible to
create
for
matted
one-page
memos.
Useaneditortoformat
the
screen
the
way
you
think
the
memo
should
look.
Use
blank
lines
for
paragraph
separators.
Print the file using a utility program. For example, under
VM,
use
the CMS
PRINT
command. In
other
programming environments,
use
whatever
system
utilities
are
available.
Ifyou wish,
and
ifyou
areaprogrammer,
you
can
write
your
own
program
to print
multipage
documents.
Chapter4.Using
Entry
Assist
with
IBM
Host
Editors
and
Other
Applications
25
Page 31

Chapter
5. Entry Assist Tutorial
Inthis Chapter is the text of an online, self-teaching tutorial for Entry Assist opera
tors.
Once
this
tutorial
has
been
entered
into a file, it
maybeusedbyanyone
wanting to
learn
about
Entry Assist.
How
to
Create
the
Tutorial
1.
Enter
the
textofthe
tutorial
once
for
each
installation
using
the
normal
editor
text
entry
capabilities.
2. Key in the textsothat when an operator reads it at the screen, it
appears
exactlyasit
doesinthis
printed copy.
3.
Where
there
are
blank
linesinthe
printed
text,
put
blank
linesinthe
screen
copy; the operator will work with
those
blank lines.
4. Make
the
tutorial
availableateach
operator
station
where
Entry
Assist
is
tobeused.
To
use
the
tutorial,
the
operator
needs
only to call up
the
file with his own editor,
then
follow
the
instructions provided by
the
tutorial.
The
rest
of this
chapteristhe
textofthe
tutorial.
Chapter 5.
Entry
AssistTutorial
27
Page 32

Thisisa
short
tutorial
explaining
how
to use Entry
Assist.
Don't dwell long on
the
words
here.
The
important thing
is
to follow
the
examples and
try
the
new
functions
yourself.
In using
this
tutorial
you
will
be modifying
this
file.
Since you
may
want to useitagain
later,
you should begin
by
makingacopyofthis
tutorial
and
working
with the copy.
Entry
Assist
provides
functions
that
makeiteasier
to
enter
and
edit
text
material.
You
can
enter
the
same
things
you
enter
now
with
your
editor
program.
Entry
Assist
has
margins,
tabs,
and an
audible
"end
of
line"
signal.
Each
of
these
functions
acts
just
like
the
corresponding
functions
on a
typewriter.
Entry
Assist
has a word wrap
facility,
which
allows
youtotype
without
havingtouse
the
New
Line key.
Word
wrap
automatically
does a new-line
function
for
you
when
you need a
new
line.
Word
wrap picks up any
partially
typed word
and placesiton
the
next
line.
(The next
line
must be empty.)
Entry
Assist
has
functions
that
allow
you
to
delete
a word,
delete
individual
characters
typematically,
move
the
cursor
to
the
next
or
previous
word,
display
the
row and column numberofthe
current
cursor
position,
and
backspace-delete
whenininsert
mode.
Let's
discuss
the
functions
individually,
and you can
learn
about
them by
using
them.
Make
sure
that
the
Entry
Assist
function
is
available
at
your
display.
To do
this,
press
and hold
the
ALT
key while
pressing
the
DOCONOFF
key.
If
your
display
unit
must beinthe
extended
select
state
(3179 and 3180
units
in
native
mode), press
theExSel key before you press
the
DOCONOFF
key.
If
Entry
Assist
is
available,
DOC
and
an arrow
that
points
down
appear
near
the
right
side
of
the
operator
information
area.
If
Entry
Assist
is
not
available,
do
not
proceed
with
this
tutorial.
Make
sure
your
keyboard
is
labeled
properly.
Five keys
(six
key surfaces) on your keyboard should be labeled
for
Entry
Assist.
If
this
labeling
has not been done, doitnow
before
you proceed.
If
you have made
sure
that
Entry
Assist
is
available
at
your
terminal,
and
the
keyboard has been
labeled,
proceed
with
this
tutorial.
Press
the
DOCONOFF
key
several
times.
It
turns
document
mode
on
or
off.
28
EntryAssist User's Guide
Page 33

When
document modeison,
the
characters
DOC
appearinthe
operator
information
area
and
the
Entry
Assist
functions
are
available.
r-k
When
document
modeisoff,
the
Entry
Assist
functions
are
^ ^ not available
and
your terminal operates exactly as
it
did
before.
Let's
try
setting
margins and
also
see
how
word wrap
works.
Do
the
following:
Turn on document mode. The
DOC
symbol and an
arrow
that
points
down
appearinthe
operator
information
area.
Thisisthe
word wrap symbol and means
that
word wrapison.
Position
this
line
of
text
at
the
top
of
the
screen.
(This
is
to
avoid a procedural problem
later.)
Press
the
CHG
FMT
key.
This
puts
the
display
into
change format mode, so you can
observe
and change
line
formats.
A
scale
line
appears
in
the
operator
information
area
(instead
of
the
normal symbols), and an
additional
cursor
appearsonthe
scale
line.
The
scale
line
shows
the
current
settings
of
the
margins,
tab
stops,
and
the
"end
of
line"
signal
position.
The symbols used on
the
scale
line
are
as
follows:
margins < and > symbols
tab
stops
_ symbol
end
of
line
signal
position
* symbol
Move
the
cursor
so
that
it
lines
up
with
the
number
starting
this
sentence.
Type
the<symbol
on
the
scale
line.
The previous <
symbol
disappears
and only
the
one you typed remains on
the
scale
line.
This
is
the
new
left
margin.
The
scale
line
cursor
also
disappears,
but
reappears
when
you
press
the
Cursor
Move
key.
Move
the
cursor
until
it
lines
up
with
the
last
character
on
this
line,
and
type
the>symbol.
This
sets
your
right
marginatthat
position.
Press
the
CHG
FMT
key
again.
This
takes
you
out
of
change
format
mode.
The
scale
line
disappears,
and
the
cursor
returns
to
the
position
it
wasinwhen you
entered
change format mode.
Use
the
margins
you
just
set.
Hold down
the
New
Line
key.
The
cursor
stays
at
the
new
left
margin
you
just
set
as
it
goes
down
the
screen.
Chapters. EntryAssist Tutorial
29
Page 34

Type a line
of
words
in
the
space
provided
below.
For
example:
anything anything
anything anything
Try
to
type a word
into
the
right
margin.
As
you
type
a
character
into
the
right
margin,
the
partially
typed
word
moves
to
the
following
blank
line.
That
is
word
wrap
in
operation.
Try
it
now.
Experiment
with
word
wrap
some
more
in
the
space
provided
below
to
get a good
feel
for
how
it
works.
Word
wrap
requires a blank
line
following
the
line
being
typed
on.
If
you
try
to
wrap
when
the
next
line
is
not
blank,
the
keyboard
locks.
Try
that
too.
The
RESET
key
clears
keyboard
lockups.
To
turn
word
wrap
on
or
off,
press
the
WRAP
key.
If
word
wrap
is
on
(the
arrow
pointing
down
is
visible),
press
the
WRAP
key
to
turn
it
off.
If
word
wrap
is
off
(no
arrow),
press
the
WRAP
key
to
turn
it
on.
Try
it a few
times.
If
you
type a character
into
the
right
margin
when
word
wrap
is
off,
the
keyboard
locks.
Turn
off
word
wrap
and
type a word
into
the
right
margin
to
see
how
the
keyboard
locks.
Unlock
the
keyboard
and
turn
word
wrap
on
again
before
proceeding.
Let's
set
some
tab
stops
and
the
audible
"end
of
line"
signal
and
see
how
they
work.
30
Entry
Assist
User's
Guide
Page 35

If
you
don't
have
an
audible-alarm
feature
on
your
display,
ignore
the
part
that
discusses
the
"end
of
line"
signal.
Press
CHG
FMT
again
to
get
back
into
change
format
mode.
(The
scale
line
appears.)
Press
the
CLEAR
key.
(This
clears
all
existing
tab
stops.)
Refer
to
the
line
below
with
three
Xs
on
it.
Move
the
cursor
along
the
scale
line
until
it
lines
up
with
the
first
X.
Press
the
Tab
key.
The
tab
key
is
the
key
above
the
shift
lock
key
with
the
arrow
that
points
to
the
right.
The
underscore
symbol
(_)
appears
on
the
scale
line.
This
indicates
that a tab
stop
is
set
at
this
position
on
the
line.
X
X X
Set
tab
stops
at
the
other
two X positions.
If
you
accidentally
set a tab
stop
at
an
incorrect
position,
place
the
cursor
under
it
and
press
the
Delete
Character
key
to
clear
the
tab
stop.
We
will
use
these
tab
stops
in a minute.
Move
the
cursor
along
the
scale
line
until
it
lines
up
about
five
positions
to
the
left
of
the
right
margin
and
type
the * symbol.
This
sets
the
"end
of
line"
signal
at
that
position
on
the
line.
We
will
use
the
signal
in a minute.
To
clear
the
"end
of
line"
signal,
place
the
cursor
under
it
and
press
the
Delete
Character
key.
Press
the
CHG
FMT
key
to
turn
off
change
format
mode.
The
scale
line
disappears.
Now
you
have
margins,
tab
stops,
and
an
"end
of
line"
signal
set.
Let's
try
them.
Use
the
spacebar
to
move
the
cursor
along
the
following
blank
line.
The
"end
of
line"
signal
sounds
as
the
cursor
passes
through
the
signal
position
on
the
line.
Return
the
cursor
to
the
left
margin
and
press
the
Tab
key.
The
cursor
moves
to
the
next
tab
stop.
Press
the
Tab
key a few
times
and
see
how
the
cursor
moves
from
tab
stop
to
tab
stop.
Chapter
5.
Entry
Assist
Tutorial
31
Page 36

Hold
the
Tab
key
down.
The
cursor
stops
not
only
at
tab
stops,
but
also
at
other
positions
on
the
line.
These
other
positions
are
unprotected
fields,
and
the
cursor
stops
at
them
just
as
it
always
did
when
you
used
the
Tab
key.
_
Press
the
New
Line
key.
The
cursor
stops
at
the
same
positions
as
it
moves
in
the
reverse
direction.
Use
these
keys
to
move
the
cursor
around
to
get a feel
for
how
they
operate.
The
following
is
an
example
of
some
columns
of
numbers.
You
can
enter
such
columns
by
using
the
Tab
key
to
rapidly
position
the
cursor
to
the
column
positions:
0808
0808
97979
0808
8080
98088
0808
0808
80800
8008
9797
77575
In
the
blank
area
below,
enter
some
columns
of
numbers
of
your
own
choosing.
Use
the
Tab
key
to
position
the
cursor
to
the
column
positions.
Remember
the
following
things
about
using
the
Tab
key:
In
some
situations,
the
Tab
key
inserts
space
characters
that
can
change
the
way
your
printed
document
looks.
When
document
mode
is
off,
the
Tab
key
moves
the
cursor
to
the
next
unprotected
field.
When
document
mode
is
on,
the
Tab
key
moves
the
cursor
to
the
next
unprotected
field
or
to
the
next
tab
stop,
whichever
comes
first.
If
the
move
is
to a tab
stop,
it
also
replaces
null
characters
with
space
characters
in
the
unprotected
positions
that
the
cursor
passes
over.
This
preserves
the
spacing
between
the
columns
of
data
when
the
data
is
sent
to
the
host.
The
space
characters
could
be a problem
for a program
not
expecting
it.
Clear
all
tab
stops
first
to
avoid
entering
space
characters
during
tabbing
operations.
Now
let's
try
some
other
things.
32
Entry
Assist
User's
Guide
Page 37

First,
let's
do
cursor
movement
by
word:
Position
the
cursor
at
this
line.
Use
the
ALT
Shift
of
the
Cursor
Left
key
(double
left
arrow)
to
move
the
cursor
to
the
previous
word.
Use
the
ALT
Shift
of
the
Cursor
Right
key
(double
right
arrow)
to
move
the
cursor
to
the
next
word.
Try
holding
these
keys
down
to
see
how
they
operate
typematically.
Experiment
with
these
keys
to
get a feel
for
how
they
work.
Now
let's
see
how
the
new
delete
functions
operate.
Do a typematic
character
delete.
On
some
keyboards,
the
Character
Delete
key
is
not
typematic.
For
these
keyboards.
Entry
Assist
duplicates
the
character
delete
capability
on
another
key.
Press
the
ALT
Shift
of
the
key
labeled
with
braces, { },
on
U.S.
English
keyboards.
To
try
the
Character
Delete
key,
position
the
cursor
under
the
first
character
of
the
following
sample
sentence,
and
hold
down
the
typematic
delete
key
to
delete
multiple
characters.
Sample
Sentence:
This
is a sample
sentence.
Do a word
delete.
This
deletes
from
the
current
cursor
position
to
the
end
of
the
word.
Place
the
cursor
under
any
character
of
the
sample
word
below
and
use
the
Word
Delete
key
to
see
how
it
operates.
Sample
Word:
Supercalifragilisticexpialidocious
The
word
delete
function
deletes
from
the
current
cursor
position
to
the
end
of
the
word
and
moves
following
words
on
the
same
line
to
the
left
to
fill
in
the
vacated
positions.
Type
some
more
words
in
the
space
below
and
then
delete
them
to
get a feel
for
the
word
delete
capability.
Next,
let's
try
some
things
that
work
only
when
your
display
is
in
insert
mode.
Do
the
following:
Try
the
backspace
delete
while
in
insert
mode.
This
function
undoes
what a character
insertion
does.
Chapters.
Entry
Assist
Tutorial
33
Page 38
Use
the
Insert
key
(which
you
are
already
familiar
with)
to
insert
the
word
"last"
into
the
following
sample
sentence.
Insert
it
just
in
front
of
the
word
"time".
After
you
type
the
word
"last",
press
the
Backspace
Delete
key
to
undo
the
insertion.
Every
time
you
press
the
key,
you
delete
the
previous
character
and
back
up
the
cursor
by
one
position.
The
Backspace
Delete
key
has
the
arrow
that
points
left.
You
can
find
it
on
the
top
row
of
the
keyboard
just
above
the
backtab
key.
Remember,
this
function
operates
only
while
insert
mode
is
set.
Sample
Sentence:
This
is
the
time.
We
also
need
to
understand
how
word
wrap
works
when
insert
mode
is
set.
Do
the
following
for
practice:
Turn
on
insert
mode
and
make
sure
that
word
wrap
is
on.
Insert
enough
words
into
the
first
sample
sentence
below
to
force a word
into
the
right
margin
and
see
how
word
wrap
works
in
insert
mode.
The
words
wrap
out
of
the
first
line
into
the
second
line
as
long
as
there
are
sufficient
spaces
or
nulls
on
the
second
line
to
accommodate
them.
When
the
next
line
cannot
accommodate
the
word,
the
keyboard
locks.
Sample
Sentence:
This
is a sentence.
This
is a sample
sentence.
Now
let's
try
the
cursor
position
indicator
function.
Press
the
CURS
PCS
key.
The
current
position
of
the
cursor
is
displayed
in
the
bottom
row
of
the
screen
in
the
form
rr/cc.
The
letters
"rr"
mean
the
number
of
the
row.
The
letters
"cc"
mean
the
number
of
the
column.
The
rr/cc
value
remains displayed
as
long
as
you
hold
down
the
ALT
Shift
key.
Remember
that
line
formats
(margins,
tab
settings,
and
an
"end
of
line"
signal
setting)
are
remembered
as
long
as
power
remains
on
at
the
control
unit,
34
Entry
Assist
User's
Guide
Page 39

Turn
document
mode
off
and
back
on
again.
Your
line
formats
will
not
change.
This
is
useful
because,
at
times,
you
may
need
to
turn
off
document
mode
for a short
period
of
time.
This
is
the
end
of
the
tutorial.
If
you
have
questions
about
Entry
Assist,
consult
the
"Entry
Assist
User's
Guide."
Chapters.
Entry
Assist
Tutorial
35
Page 40

List
of
Abbreviations
APL
A
Programming
Language
CICS/VS
Customer
information
Control
System/Virtual
Storage
COBOL
Common
Business-Oriented
Language
DCF
Document
Composition
Facility
DOS/VS
Disk
Operating
System/Virtuai
Storage
DOS/VSE
Disk
Operating
SystemA/irtual
Storage
Extended
DPPX
Distributed
Processing
Programming
Executive
EDGAR
Edit
Graphically
and
Recurrently.
Display
Editing
System
for
CMS
Program
Number
5796-PJP
FORTRAN
Formula
Translation
ICCF
interactive
Communications
Control
Facility
IMS/VS
information
Management
SystemA/irtual
Storage
IPDT
integrated
Processing
of
Data
and
Text
Program
ISPF/PDF
interactive
System
Productivity
Facility/Program
Development
Facility
lUP
interactive
User
Program
JCL
Job
Control
Language
Kb
1024
bytes
OSAfS
Operating
System/Virtual
Storage
PROFS
PRPQ
Editor
Professional
Office
System
Program
Request
for
Price
Quotation
Editor
SPF
System
Productivity
Facility
TSO
Time-Sharing
Option
VM/SP
Virtual
Machine/System
Product
VM/370
Virtual
Machine/370
XEDIT
System
Product
Editor
List
of
Abbreviations
37
Page 41

IBM
3270
information
Display
System
Entry
Assist
User's
Guide
Publication
No.
GA23-0119-2
READER'S
COMMENT
FORM
This
manual
is
part
of a library
that
serves
as a reference
source
for
systems
analysts,
programmers,
and
operators
of
IBM
systems.
You
may
use
this
form
to
communicate
your
comments
about
this
publication.
Its
organization,
or
subject
matter,
with
the
understanding
that
IBM
may
use
or
distribute
whatever
Information
you
supply
In
any
way
it
believes
appropriate
without
Incurring
any
obligation
to
you.
Note:
Copies
of
IBM
publications
are
not
stocked
at
the
location
to
which
this
form
Is
addressed.
Please
direct
any
requests
for
copies
of
publications,
or
for
assistance
In
using
your
IBM
system,
to
your
IBM
representative
or
to
the
IBM
branch
office
serving
your
locality.
Possible
topics
for
comment
are:
Clarity
Accuracy
Completeness
Organization
Coding
Retrieval
Legibility
If
you
wish a reply,
give
your
name,
company,
mailing
address,
and
date:
What
Is
your
occupation?
Number
of
latest
Newsletter
associated
with
this
publication:
Thank
you
for
your
cooperation.
No
postage
stamp
necessary
If
mailed
In
the
U.S.A.
(Elsewhere,
an
IBM
office
or
representative
will
be
happy
to
forward
your
comments
or
you
may
mall
directly
to
the
address
In
the
Edition
Notice
on
the
back
of
the
title
page.)
Page 42

GA23-0119-2
Reader's
Comment
Form
Fold
and
tape
Please
Do
Not
Staple
Fold
and
tape
BUSINESS
REPLY
MAIL
FIRST
CLASS
PERMIT
NO.
40
ARMONK,
N.Y.
POSTAGE
WILL
BE
PAID
BY
ADDRESSEE
international
Business
Machines
Corporation
Dept.
E02
P.O.
Box
12195
Research
Triangle
Park,
N.C.
27709-9990
NO
POSTAGE
NECESSARY
IF
MAILED
IN
THE
UNITED
STATES
Fold
and
tape
Please
Do
Not
Staple
Fold
and
tape
Page 43

*
«
f
%
.♦•v
o
Printed
in
U.S.A.
File
Number
36/38/370/4300/8100-09
r\
GA23-0119-2
 Loading...