

iBeam TE-3BMC Owner's Manual

TE-3BMC User Manual
iBeamUSA.com
MetraDealer.com
techsupport@metra-autosound.com
� TECH SUPPORT
l ::: J
800-253-8324
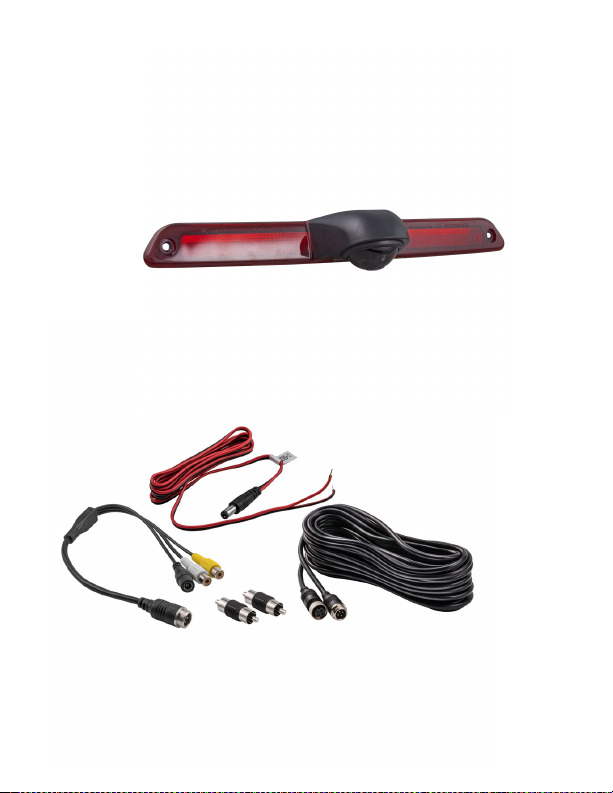
1. Brake light camera
2. Accessories
3
2
1. 10m extension cable
2. 4-pin to RCA adapter
3. DC power cable
4. Two male to male adapters
5. Gasket (not shown)
1
4
1
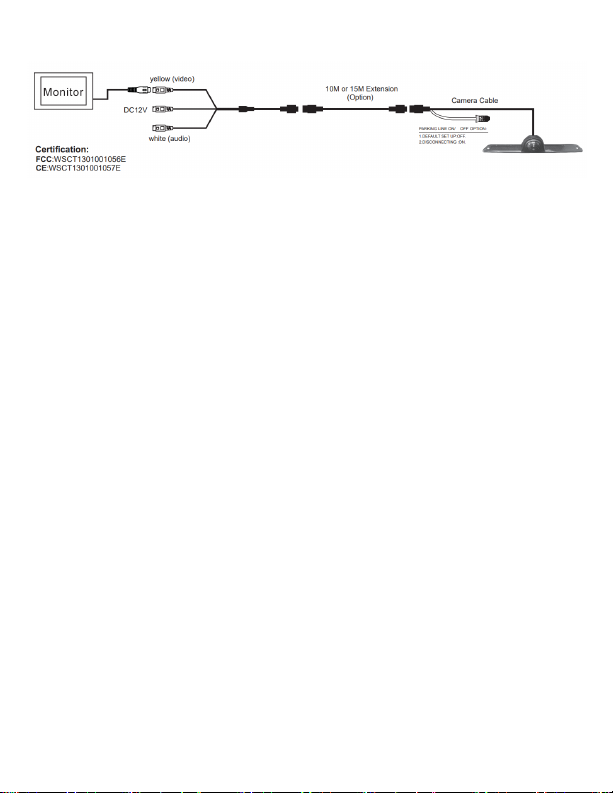
3. Connections
1. Remove factory 3rd brake light.
2. Connect red wire off new brake light to +12v and black to ground at factory
3rd brake light connector. This connection will power the brake light when
the brake is pressed.
3. Run extension cable though vehicle, up to monitor. Make sure to run cable in
the correct orientation (female end to monitor and male end to camera).
Avoid placing video cable where it can get pinched or damaged. Connect to
monitor's reverse AV input.
4. If using a RCA monitor, attach the adapter cable to monitor end of the
extension cable. Connect yellow video rca to the reverse camera input of the
radio or video display. Connect the DC power cable, with the red wire to a
switched +12v power source and black to ground (a metal, non-painted
surface).
5. Connect brake light camera to the extension cable, and after verifying
functionality mount the brake light to the vehicle using the factory hardware.
4. Maintenance
Although this Rear View Camera requires little care, you can still maintain its
condition and performance by occasionally clean the camera lens with damp soft
cloth.
2
 Loading...