

iBall Slide 3G7271-HD70, SLIDE 3G 7803Q-900 User Manual

1
Legal Information
All rights are reserved. Reproduction, transfer, distribution of the contents herein in any manner without the prior written
permission of Best IT World (India) Pvt. Ltd. is prohibited. Best IT World (India) Pvt. Ltd. reserves the right t o add, modify or
delete, any of the contents herein or withdraw this document at any time without prior notice and without assigning any reasons
thereof. For detailed terms and conditions refer www.iBall.co.in
Safety Precautions
Operate Safely
• Please do not use Slide while charging. Disconnect Slide from charger before use.
• Make sure to charge the battery full for the first time usage.
• Keep the Slide at least an inch away from your body while dialing / answering calls.
• Do not use the Slide if the screen is cracked or broken. Cracked and / or broken screens could cause injury to hands and / or
face.
• To reduce the risk of motion injuries:
- While using your Slide, hold it with a relaxed grip and press the keys lightly.
- Do not handle the Slide with wet hands.
- Use of special keys / features reduce the number of keys pressed
- Take regular breaks in between calls.
- Use hands-free accessories.
- Switch off the Slide before cleaning it.
- Switch off the Slide and external power sources before any attempt to change SIM Cards or any other
accessories.
- Keep your Slide and all accessories out of reach of small children and animals.
When using the device, mind the following
• Hold the device upright, as you would with a traditional phone.
• Speak directly into the microphone.
• Do not cover the antenna area with your hands or other objects. This may cause connectivity problems or drain the battery.
Careful handling
• Avoid potential damage to your Slides under:
- Keep away from liquids.
2
- Avoid using and / or storing in dusty and / or dirty places / environments.
- Do not drop, knock, throw or otherwise handle the Slide roughly.
- Avoid exposing your Slide to extreme temperatures. Extreme temperatures reduce the charging capacity and life
of batteries and Slide.
- Never use damaged chargers.
- Do not use chemicals or other cleaning solutions to clean the Slide.
- Use moist or anti-static cloth.
- Avoid using Slide with camera flash or light close to the eyes.
- Do not dismantle the Slide and accessories without permission.
- Avoid handling by unauthorized personnel.
-Do not use damaged power cords or plugs, or loose electrical sockets
-Do not use your device outdoor during a thunderstorm
-Do not use your device near devices or apparatuses that emit radio frequencies, such as sound systems or radio
towers
Turn Off your Slide in Restricted Areas
Use of Slide in certain areas / places / conditions can be hazardous.
• Switch off your Slide:
- Inside aircrafts;
- In Medical hospitals / clinics;
- Areas where chemicals are used or stored;
- Fuel and gas stations;
- In and around areas having electrical / electronic equipment;
- Areas where any kind of blasting activity is being carried out.
-Turn off the device in potentially explosive environments
• Charging batteries in such areas is hazardous as potential sparks may result in explosion and / or fire and may cause damage
to property and / or life and can also prove fatal.
Keep your device dry
• Humidity and liquids may damage the parts or electronic circuits in your device.
• Do not turn on your device if it is wet. If your device is already on, turn it off (if the device will not turn off and since you
cannot remove the battery, leave it as-is). Then, dry the device with a towel and take it to a -service center.
• Liquids will change the colour of the label that indicates water damage inside the device. Water damage to your device can
void your manufacturer‟s warranty.
3
Drive Safety
Avoid using your Slide while driving and respect and obey all regulations that restrict the use of mobile phones or similar
devices while driving. Primary consideration while driving should be safety.
Vehicles
RF signals may affect improperly installed or inadequately shielded electronic systems in motor vehicles such as electronic fuel
injection, electronic speed control, and air bag systems. Only qualified personnel should service the device or install the device
in a vehicle. Faulty installation or service may be dangerous and may invalidate your warranty. The use of wireless tele devices
in an aircraft may be dangerous to the operation of the aircraft and may be illegal.
Interference with Electronic Devices
Mobile phones/Slide emit Radio Frequency (RF) signals that may interfere with unshielded or improperly
Shielded electronic equipment, such as pace makers, hearing aids, other medical devices and other electronic devices in
homes and / or vehicles and may prove to be hazardous.
Protect Your Hearing
Excessive exposure to high volumes may cause hearing problems. Maintain proper volume levels for conversations and / or
music.
Precautions
In order to use Slide correctly, please read the following statement of the user manual carefully before using the device.
• Do not store your device with metal objects, such as coins, keys, and necklaces
-Your device may be scratched or may malfunction.
-If the battery terminals come into contact with metal objects, this may cause fire.
• Do not store your device near magnetic fields
-Your device may malfunction or the battery may discharge from exposure to magnetic fields.
-Magnetic stripe cards, including credit cards, phone cards, passbooks, and boarding passes, may be damaged by
magnetic fields.
• Do not use your device or applications for a while if the device is overheated
-Prolonged exposure of your skin to an overheated device may cause low temperature burn symptoms, such as red
spots and pigmentation.
• If your device has a camera flash or light, do not use it close to the eyes of people or pets
-Using a flash close to the eyes may cause temporary loss of vision or damage to the eyes.
• Use caution when exposed to flashing lights
-While using your device, leave some lights on in the room and do not hold the screen too close to your eyes.
4
-Seizures or blackouts can occur when you are exposed to flashing lights while watching videos or playing Flash-
based -games for extended periods. If you feel any discomfort, stop using the device immediately.
-If anyone related to you has experienced seizures or blackouts while using a similar device, consult a physician
before using the device.
-If you feel discomfort, such as a muscle spasm, or disoriented, stop using the device immediately and consult a
physician.
-To prevent eye strain, take frequent breaks while using the device.
Protect your personal data and prevent leakage or misuse of
sensitive information
While using your device, be sure to back up important data. iBall is not responsible for the loss of any data.
When disposing of your device, back up all data and then reset your device to prevent misuse of your personal information.
Carefully read the permissions screen when downloading applications. Be particularly cautious with applications that have
access to many functions or to a significant amount of your personal information.
Check your accounts regularly for unapproved or suspicious use. If you find any sign of misuse of your personal information,
contact your service provider to delete or change your account information.
In the event your device is lost or stolen, change the passwords on your accounts to protect your personal information.
Avoid using applications from unknown sources and lock your device with a pattern, password, or PIN.
Malware and viruses
To protect your device from malware and viruses, follow these usage tips. Failure to do so may result in damages or loss of
data that may not be covered by the warranty service
-Do not download unknown applications.
-Do not visit un-trusted websites.
-Delete suspicious messages or email from unknown senders.
-Set a password and change it regularly.
-Deactivate wireless features, such as Bluetooth, when not in use.
-If the device behaves abnormally, run an antivirus program to check for infection.
-Run an antivirus program on your device before you launch newly downloaded applications and files.
-Install antivirus programs on your computer and run them regularly to check for infection.

5
-Do not edit registry settings or modify the device‟s operating system.
Using this Guide
This guide has been specially designed to guide you through the basics of your device, such as getting started with the device.
Please read this guide carefully before using your device to ensure safe and correct use.
The descriptions in this guide are based on the default settings of your device.
Please keep this guide for future reference.
Installing the SIM card and Storage card
You need to remove the back cover on the side of the device before you can install the SIM card and storage card. Also, make
sure to always turn off the power before installing or replacing the SIM card and storage card.
To remove the back cover
1. Make sure your device is turned off.
2. Firmly hold the device with both hands and the front panel facing down.
3. Pull cover from the corner at bottom until it disengages from the device and then pull it up to remove.
To install the SIM card
The SIM card contains your phone number, service details, and phonebook/ message memory. Your device supports both 3G
and 2G SIM cards.
1. Remove the side panel on the back side.
2. Locate the SIM card slot, and then insert the SIM card with its gold contacts facing down and its cut-off corner facing out the
card slot.
3. Push the SIM card completely into the slot.
Note:
• The phone supports dual SIM cards, SIM slot 1 & SIM slot 2 both supports 3G networks.
• Some legacy SIM cards may not function with your device. You should consult with your service provider for a replacement of
SIM card. There may be some fees for this service.
To install the memory card
6
To have additional storage for your images, videos, music, and files, you can purchase a memory card and install it into your
device.
1. Make sure that your device is turned off, and then remove the back cover.
2. Locate the memory card slot on the upper part of the exposed right panel.
3. Insert the memory card into the slot with its gold contacts facing down until it clicks into place.
Note: To remove the memory card, pull it to eject it from the slot.
Which class of SD card is supported on my device?
The word class is another term for speed. Different type of flash memory is used for different SD cards. This suggests that the
read/write speed of the SD card differs in different classes.
Class 2 SD card2 MB/sSD card recording
Class 4 SD card 4 MB/sHD recording including full HD (from 720p to 1080p/1080i)
Class 6 SD card 6 MB/s HD recording including full HD (from 720p to 1080p/1080i)
Class 10 SD card 10 MB/sFull HD (1080p) video recording and consecutive recording of HD stills
For HD video recording a SD card of class 6 or higher is suggested because of the constant stream of data that needs to be
written. If you will use a class 2 SD card for HD video recording, the video will sufferer dropouts and you will get a corrupted
video.
Charging the Battery
New batteries are shipped partially charged. Before you start using your device, it is recommended that you charge the battery.
Some batteries perform best after several full charge/discharge cycles.
The battery can be charged and discharged many times, but it will eventually wear out. When the talk and standby times are
noticeably shorter than normal, get the battery replaced. Use only iBall approved batteries, and recharge your battery only with
iBall approved chargers designated for this device. If a battery is being used for the first time or if the battery has not been used
for a prolonged period, it may be necessary to connect the charger, then disconnect and reconnect it to begin charging the
battery. If the battery is completely discharged, it may take several minutes before the charging indicator appears on the display
or before any calls can be made.
Note: Only the AC adapter provided with your device must be used to charge the device.
Connect the USB connector of the AC adapter to the sync connector on your device, and then plug in the AC adapter to an
electrical outlet to start charging the battery.
As the battery is being charged while the device is on, a charging icon appears in the title bar of the Home screen. After the
battery has been fully charged, a full battery icon appears on the title bar of the Home screen.
Warning!
• As a safety precaution, the battery stops charging before it overheats.
Protect environment save energy
You do not need to charge your Slide battery so often if you do the following:
Close applications and data connections, for example, your Bluetooth connection, when not in use.
7
Deactivate unnecessary sounds, such as touch screen and key tones.
SAR
This device is SAR accredited adheres to international quality benchmarks and safety measures concerning the harmful impact
of radiations. It complies with applicable safety requirements for exposure to radio waves. The radio waves exposure guidelines
employ a unit of measurement called Specific Absorption Rate (SAR). SAR is a measure of the rate at which energy is
absorbed by the body when exposed to a radio frequency (RF). SAR is usually averaged either over the whole body, or over a
small sample volume (typically 1g or 10g of tissue). The recommended SAR limit for a mobile handset/similar device is 1.6
W/Kg averaged over a volume containing a mass 1g of human tissue.
SAR Value
• Your Slide is designed not to exceed the limits of emission of radio waves recommended by international guidelines.
• SAR (Specific Absorption Rate) is the measurement of body-absorbed RF quantity when the phone is in use. SAR value is
ascertained according to the highest RF level generated during laboratory tests.
• The SAR value of the phone may depend on factors such as proximity to the network tower, use of accessories.
SAR Recommendations
• Use a wireless hands free system (headphone, headset) with lower Bluetooth emitter.
• Make sure the device has a low SAR.
• Please keep your calls short and use SMS whenever more convenient. This advice applies especially to children and
pregnant women.
• Prefer to use your Slide when the signal quality is good.
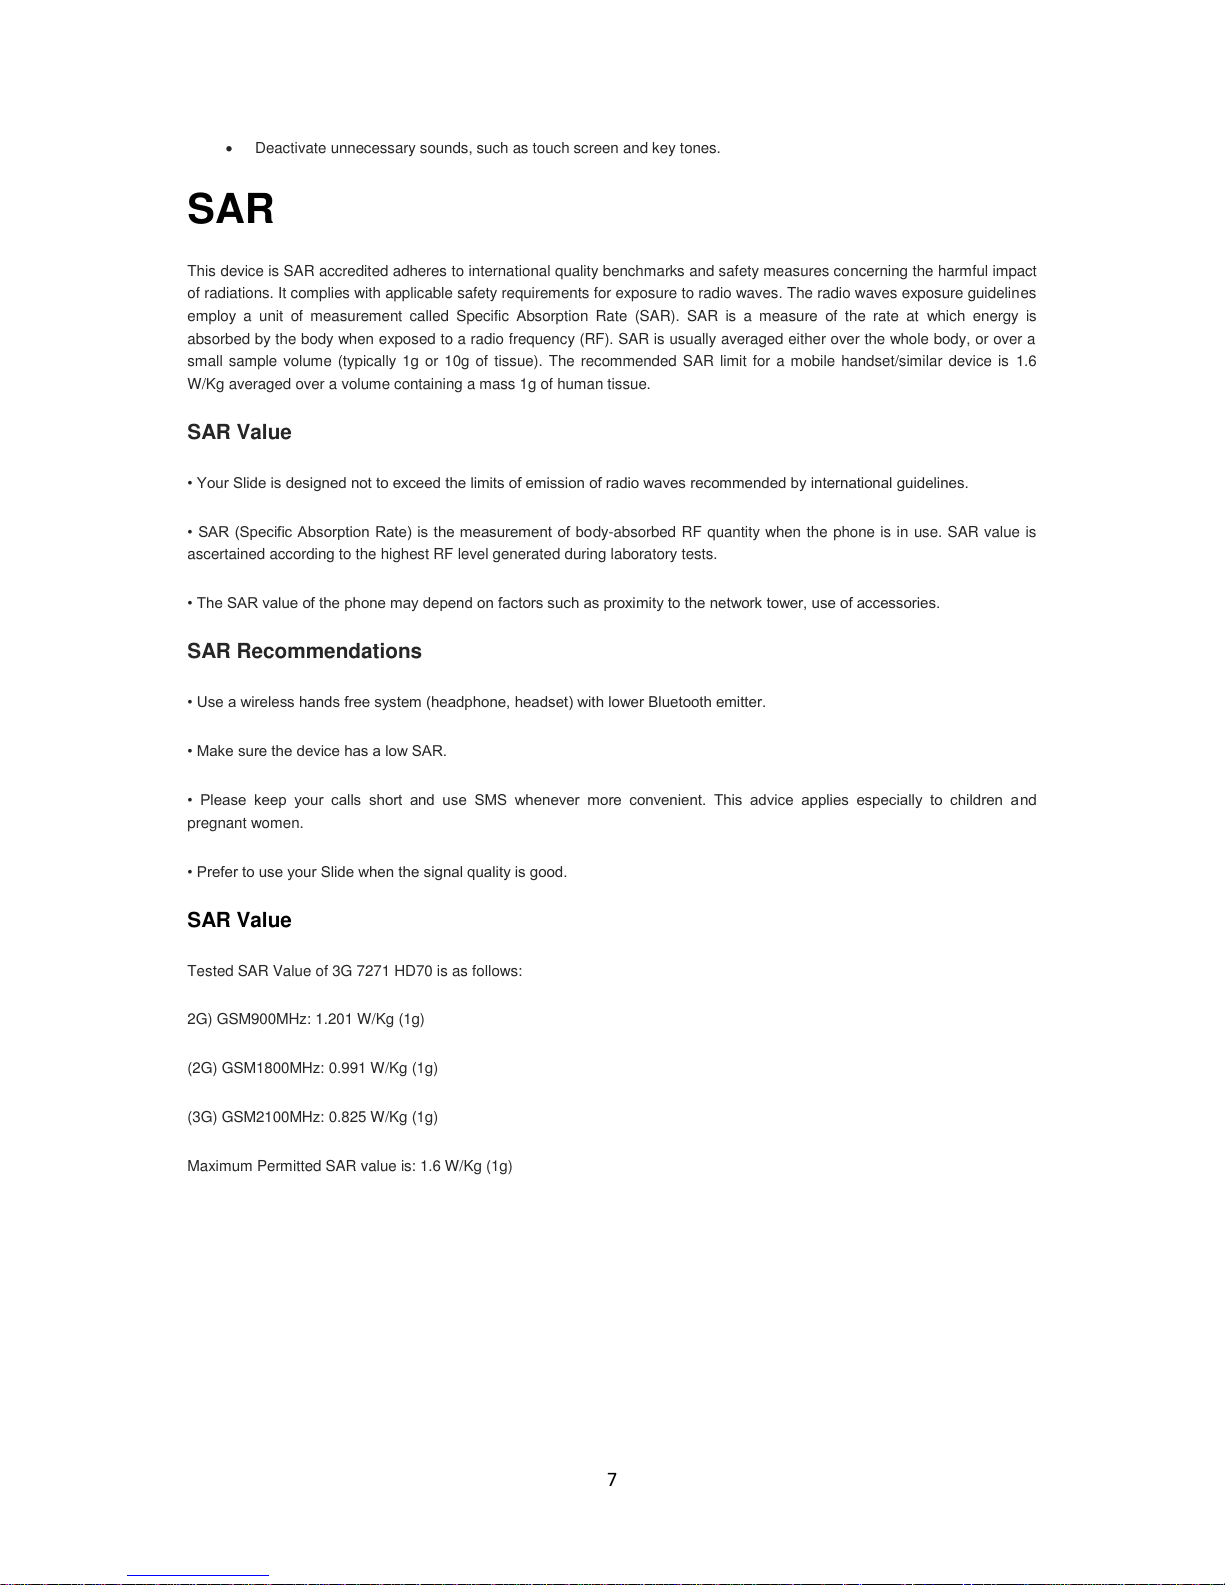
SAR Value
Tested SAR Value of 3G 7271 HD70 is as follows:
2G) GSM900MHz: 1.201 W/Kg (1g)
(2G) GSM1800MHz: 0.991 W/Kg (1g)
(3G) GSM2100MHz: 0.825 W/Kg (1g)
Maximum Permitted SAR value is: 1.6 W/Kg (1g)
8
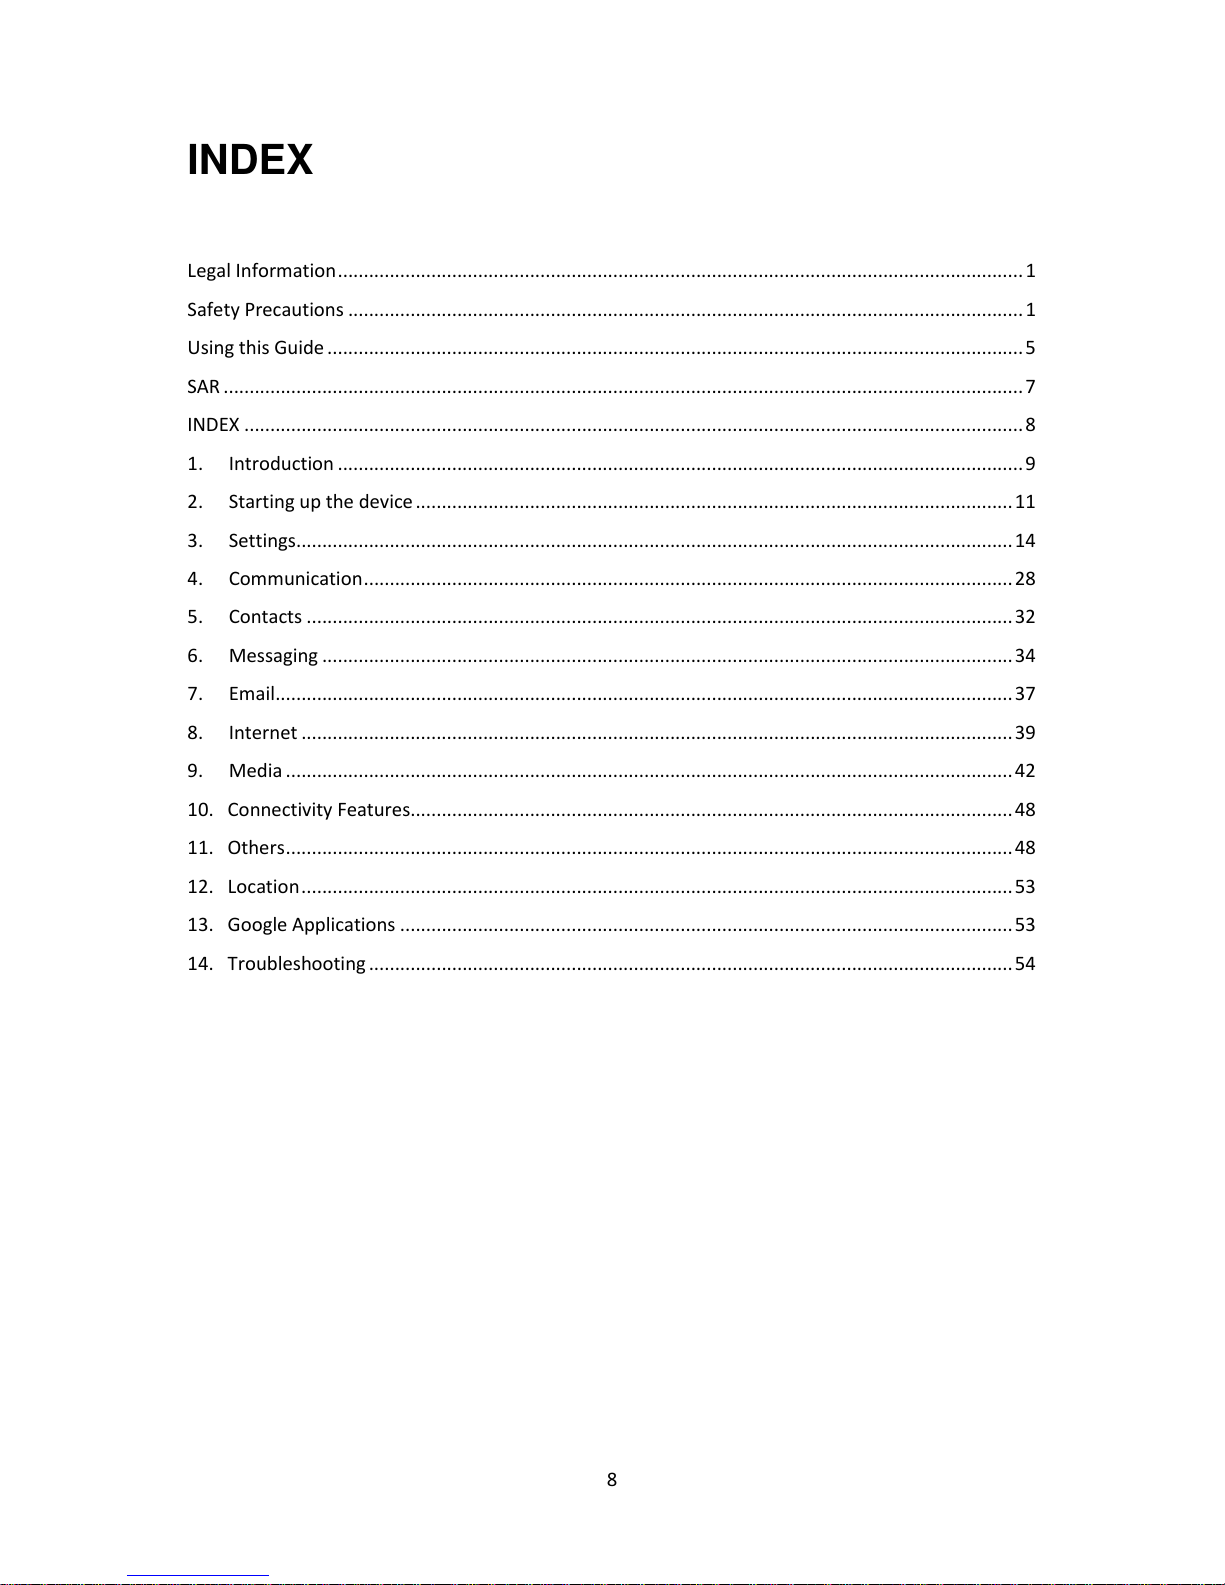
INDEX
Legal Information .................................................................................................................................... 1
Safety Precautions .................................................................................................................................. 1
Using this Guide ...................................................................................................................................... 5
SAR .......................................................................................................................................................... 7
INDEX ...................................................................................................................................................... 8
1. Introduction .................................................................................................................................... 9
2. Starting up the device ................................................................................................................... 11
3. Settings .......................................................................................................................................... 14
4. Communication ............................................................................................................................. 28
5. Contacts ........................................................................................................................................ 32
6. Messaging ..................................................................................................................................... 34
7. Email .............................................................................................................................................. 37
8. Internet ......................................................................................................................................... 39
9. Media ............................................................................................................................................ 42
10. Connectivity Features.................................................................................................................... 48
11. Others ............................................................................................................................................ 48
12. Location ......................................................................................................................................... 53
13. Google Applications ...................................................................................................................... 53
14. Troubleshooting ............................................................................................................................ 54
9
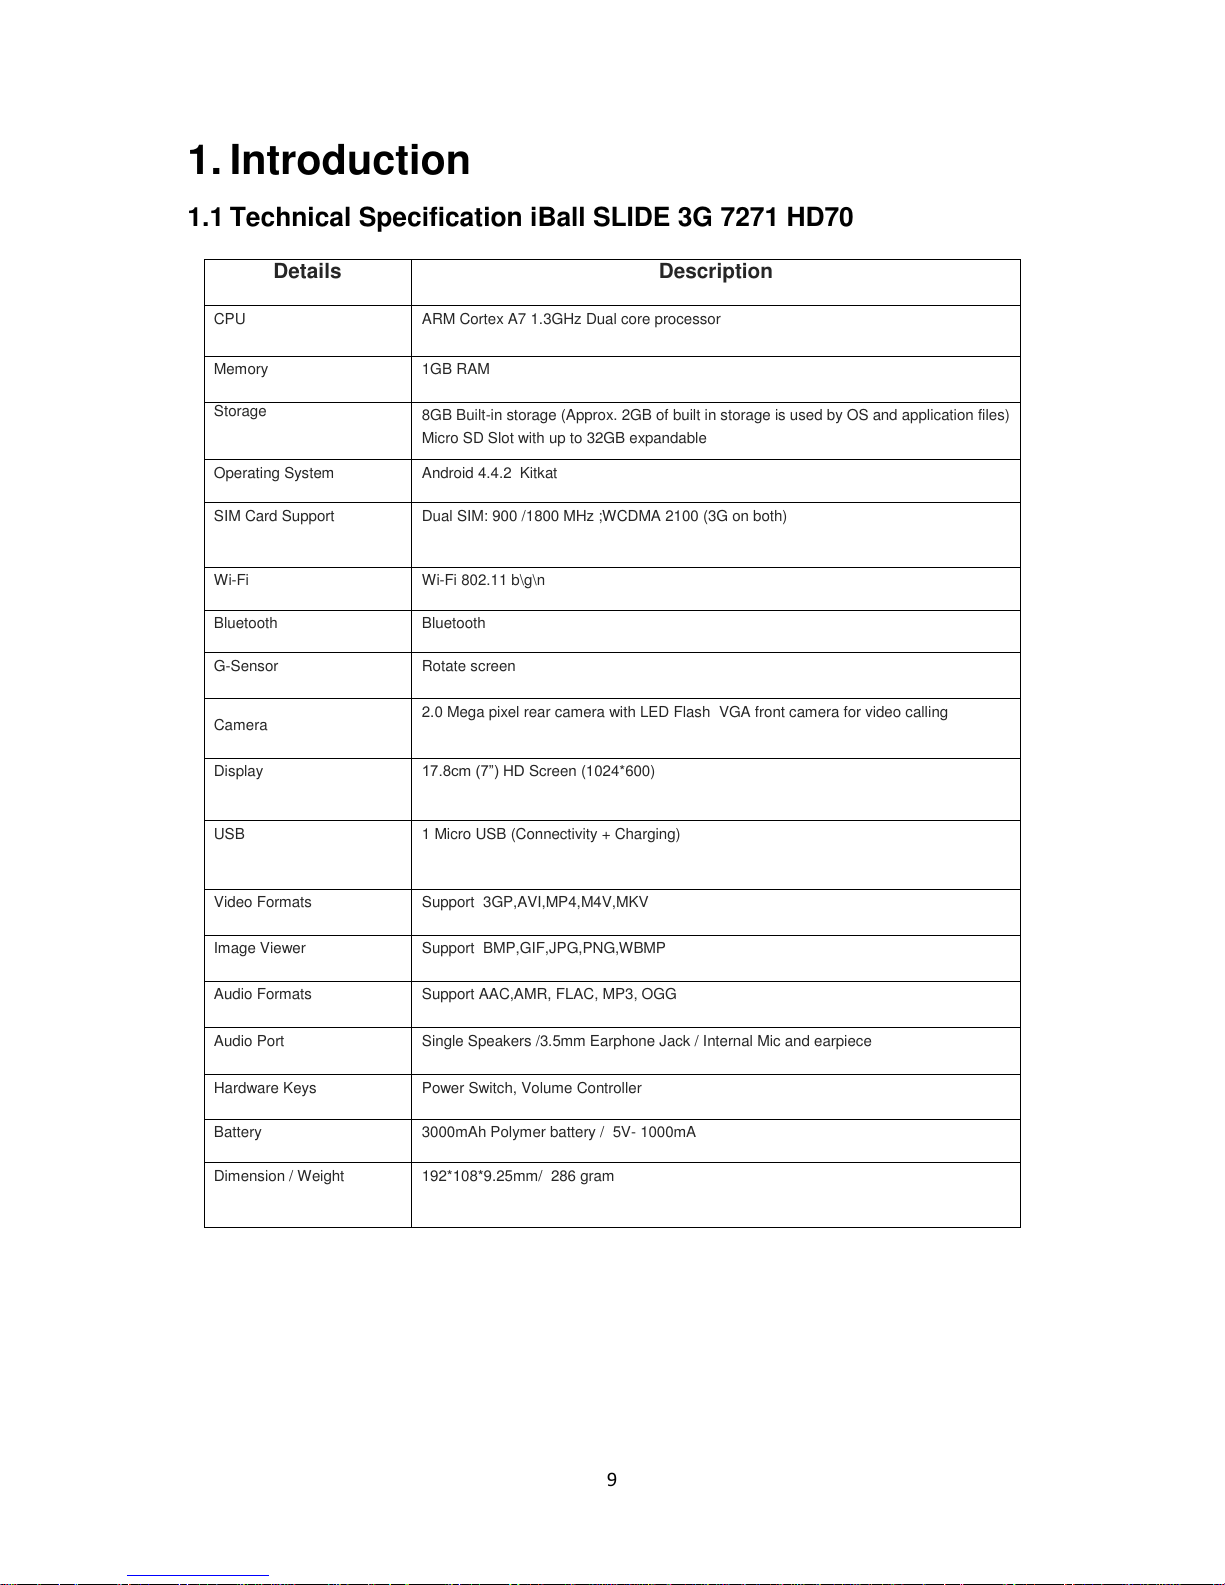
1. Introduction
1.1 Technical Specification iBall SLIDE 3G 7271 HD70
Details
Description
CPU
ARM Cortex A7 1.3GHz Dual core processor
Memory
1GB RAM
Storage
8GB Built-in storage (Approx. 2GB of built in storage is used by OS and application files)
Micro SD Slot with up to 32GB expandable
Operating System
Android 4.4.2 Kitkat
SIM Card Support
Dual SIM: 900 /1800 MHz ;WCDMA 2100 (3G on both)
Wi-Fi
Wi-Fi 802.11 b\g\n
Bluetooth
Bluetooth
G-Sensor
Rotate screen
Camera
2.0 Mega pixel rear camera with LED Flash VGA front camera for video calling
Display
17.8cm (7”) HD Screen (1024*600)
USB
1 Micro USB (Connectivity + Charging)
Video Formats
Support 3GP,AVI,MP4,M4V,MKV
Image Viewer
Support BMP,GIF,JPG,PNG,WBMP
Audio Formats
Support AAC,AMR, FLAC, MP3, OGG
Audio Port
Single Speakers /3.5mm Earphone Jack / Internal Mic and earpiece
Hardware Keys
Power Switch, Volume Controller
Battery
3000mAh Polymer battery / 5V- 1000mA
Dimension / Weight
192*108*9.25mm/ 286 gram
10
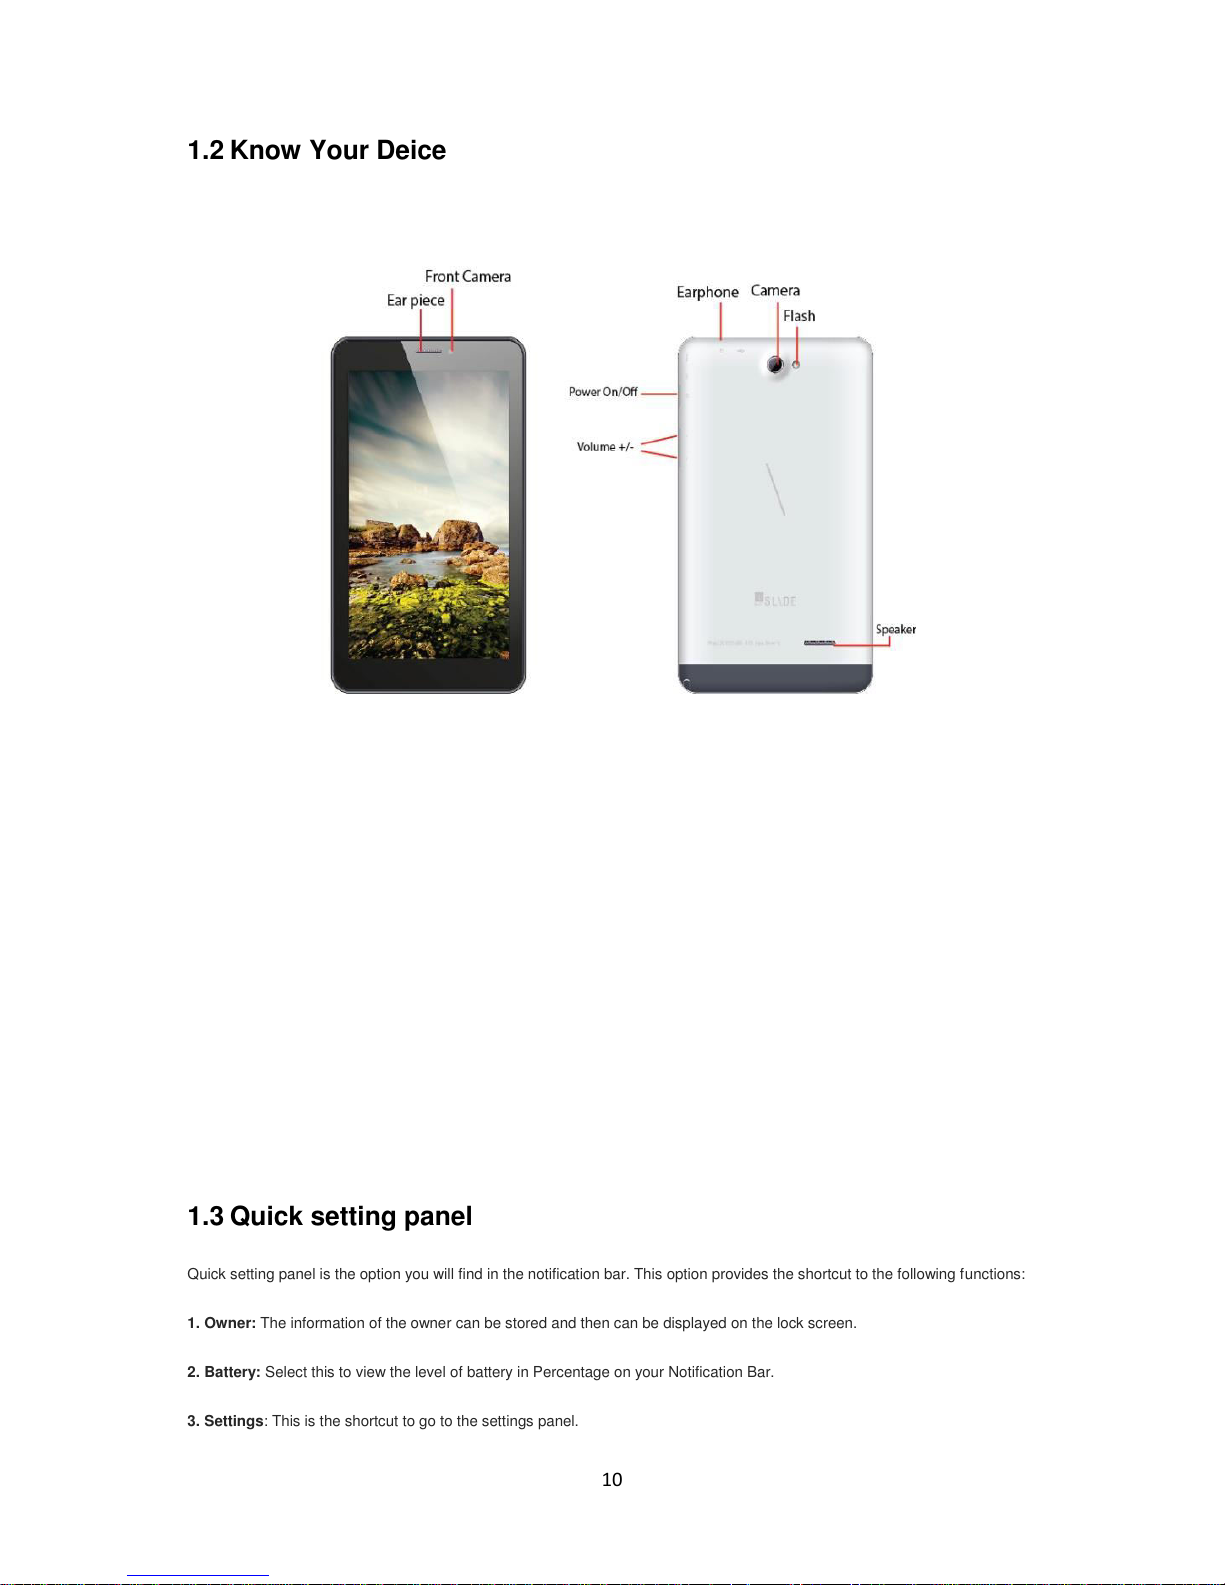
1.2 Know Your Deice
1.3 Quick setting panel
Quick setting panel is the option you will find in the notification bar. This option provides the shortcut to the following functions:
1. Owner: The information of the owner can be stored and then can be displayed on the lock screen.
2. Battery: Select this to view the level of battery in Percentage on your Notification Bar.
3. Settings: This is the shortcut to go to the settings panel.

11
4. Wi-Fi: Using this you can turn Wi-Fi On/Off.
5. Bluetooth: Using this you can turn Bluetooth On/Off.
6. Location: Using this you can turn On/Off location access and by long pressing you can go for location setting directly.
7. Airplane Mode: Selecting this option activates the airplane mode, which means it cuts you off from all kind of network
connectivity including your SIM network, Bluetooth, Wi-Fi network or any other network your handset supports.
8. Data connection: Using this you can turn the data connection On/Off. Data connection helps you access internet using your
SIM network.
9. Data Usage: It provides a graphical representation of the data usage for a specified Data Usage cycle through SIM Internet
or Wi-Fi.
10. Audio Profiles: This option allows you to select the audio profiles out of the 4 predefined profiles, general, silent, meeting
and outdoor.
11. Brightness: Using this option you can change the brightness level of the display screen according to your needs and
usage.
12. Auto Rotation: Using this option you can select whether or not you want to use the auto rotation option.
13. Cast screen: For connecting to wireless display supported devices.
All the functions have been explained in details in their respective sections.
Note: On long pressing on these options you will be directed into settings option from there you can operate further if you want
to use more related functions.
2. Starting up the device
Power on/off
To power off your Slide, press & hold the POWER key. On release, the options menu opens. Select „Power off‟ from the given
options and confirm. This will turn off the device.
To power on again, press & hold the POWER key. The iBall power start up animation will appear on the screen indicating that
the device is starting. It takes around 40 seconds to completely reboot the device.
Silent mode
To put your device on silent mode quickly, press & hold the – volume down button to zero volume. Just before the silent mode,
on volume level 1 is the vibration mode. Or on the Home screen, touch and select Settings Audio profiles. Select „Silent‟
check box. You can only activate silent profile but cannot customize it. You can also long press the power key and you will g et
the option to change user profile.
Screen sleep
After a period of inactivity, your screen will go to sleep (display will turn black). In sleep, your phone uses less battery power.
You can control this behavior by following the below mentioned steps:
Set screen timeout period
12
1. On the Home screen, touch and select Settings.
2. Select Display option.
3. Select “Screen Time out”, to set the time period of sleep mode.
Press POWER key once to off display immediately. While not on a call, to lock your control buttons and screen from accidental
touch activation, press POWER key.
You can increase the security of your phone by setting Screen unlock pattern. Once set, in order to unlock your screen, you‟ll
have to draw the correct unlock pattern. You can set your screen unlock pattern as follows:
1. On the Home screen, touch and select Settings.
2. Select Security and then scroll down to Screen lock pattern section.
3. Set or change your unlock pattern by selecting Screen lock pattern, as applicable.
4. Follow the prompts to define your pattern.
Note: You must swipe your finger along the screen to create the pattern, do not select individual dots. Connect at least four
dots in order to create a lock pattern.
If you want your pattern to be hidden as you draw it, clear „Make pattern visible‟ check box.
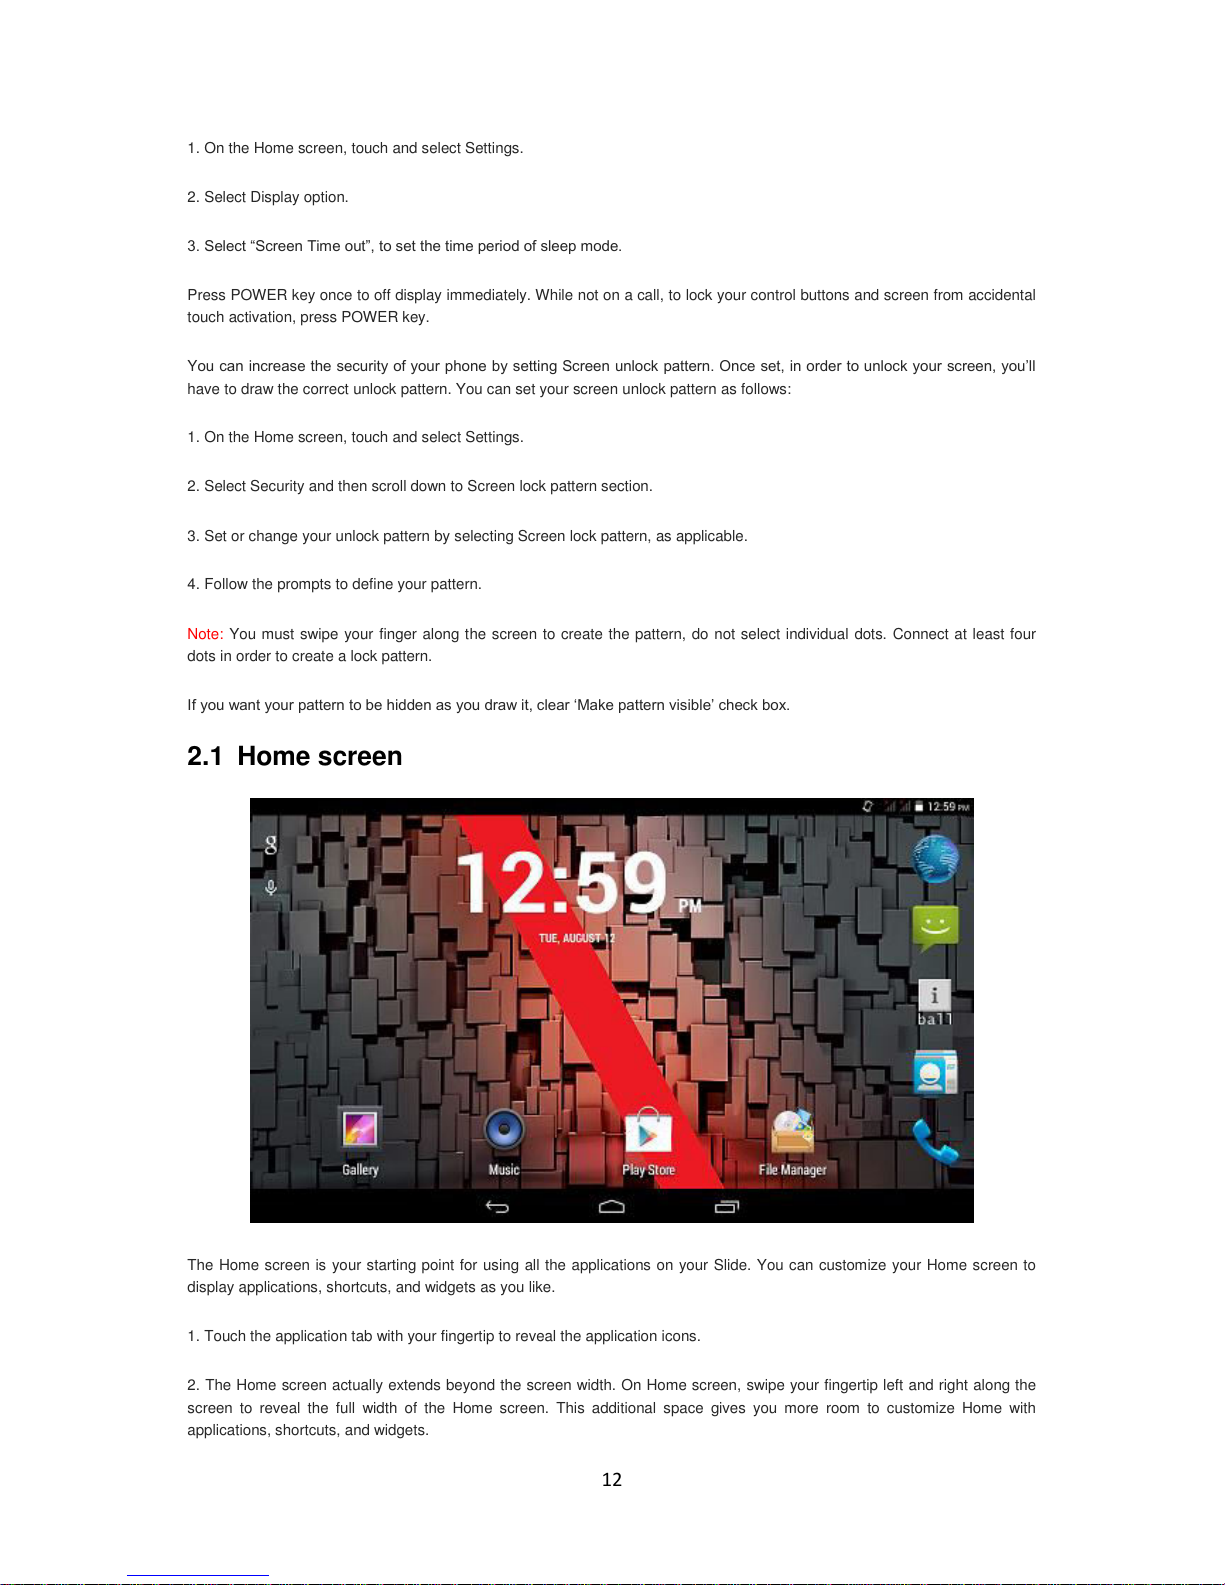
2.1 Home screen
The Home screen is your starting point for using all the applications on your Slide. You can customize your Home screen to
display applications, shortcuts, and widgets as you like.
1. Touch the application tab with your fingertip to reveal the application icons.
2. The Home screen actually extends beyond the screen width. On Home screen, swipe your fingertip left and right along the
screen to reveal the full width of the Home screen. This additional space gives you more room to customize Home with
applications, shortcuts, and widgets.
13
3. Create Home screen shortcuts and widgets:
• Touch the Apps tab with your fingertip to reveal the application icons, swipe your fingertip right to show the shortcuts and
widgets.
• Select an Application shortcut, a Shortcut to some of your saved information (such as a play list), a Widget (a clock or picture
frame) for your Home screen.
• The application, shortcut, folder, or widget appears on Home screen.
Tip: To create an application shortcut quickly, touch the application tab to reveal all the application icons, then touch & hold an
application icon. Its shortcut is added to the Home screen; close the application tab to see it.
4. To remove a shortcut or widget from your Home screen, touch & hold the item to enter “move mode”. The application tab
turns into a Trash button. Drag the item to the Trash button and release. You will know when your item is in the Trash because
the item and the tab will turn red.
5. Move objects on the Home screen
• To move an icon or other item on the Home screen, you must first touch & hold it to enter move mode. The object will magnify
when it‟s ready to be moved.
• Without lifting your finger (or you‟ll drop out of move mode), drag the object to the new position. To move an item to a section
of the Home screen not in view, move it to the edge of the screen and hold it there for a moment. The screen view will shift;
position the object and release.
2.2 Connection status icons
On the top of your phone screen is the status bar. On the left side, icons will appear, notifying you of a new message, upcoming
calendar event, or something else you should notice. On the right side of the status bar, you‟ll see connection status icons.
14
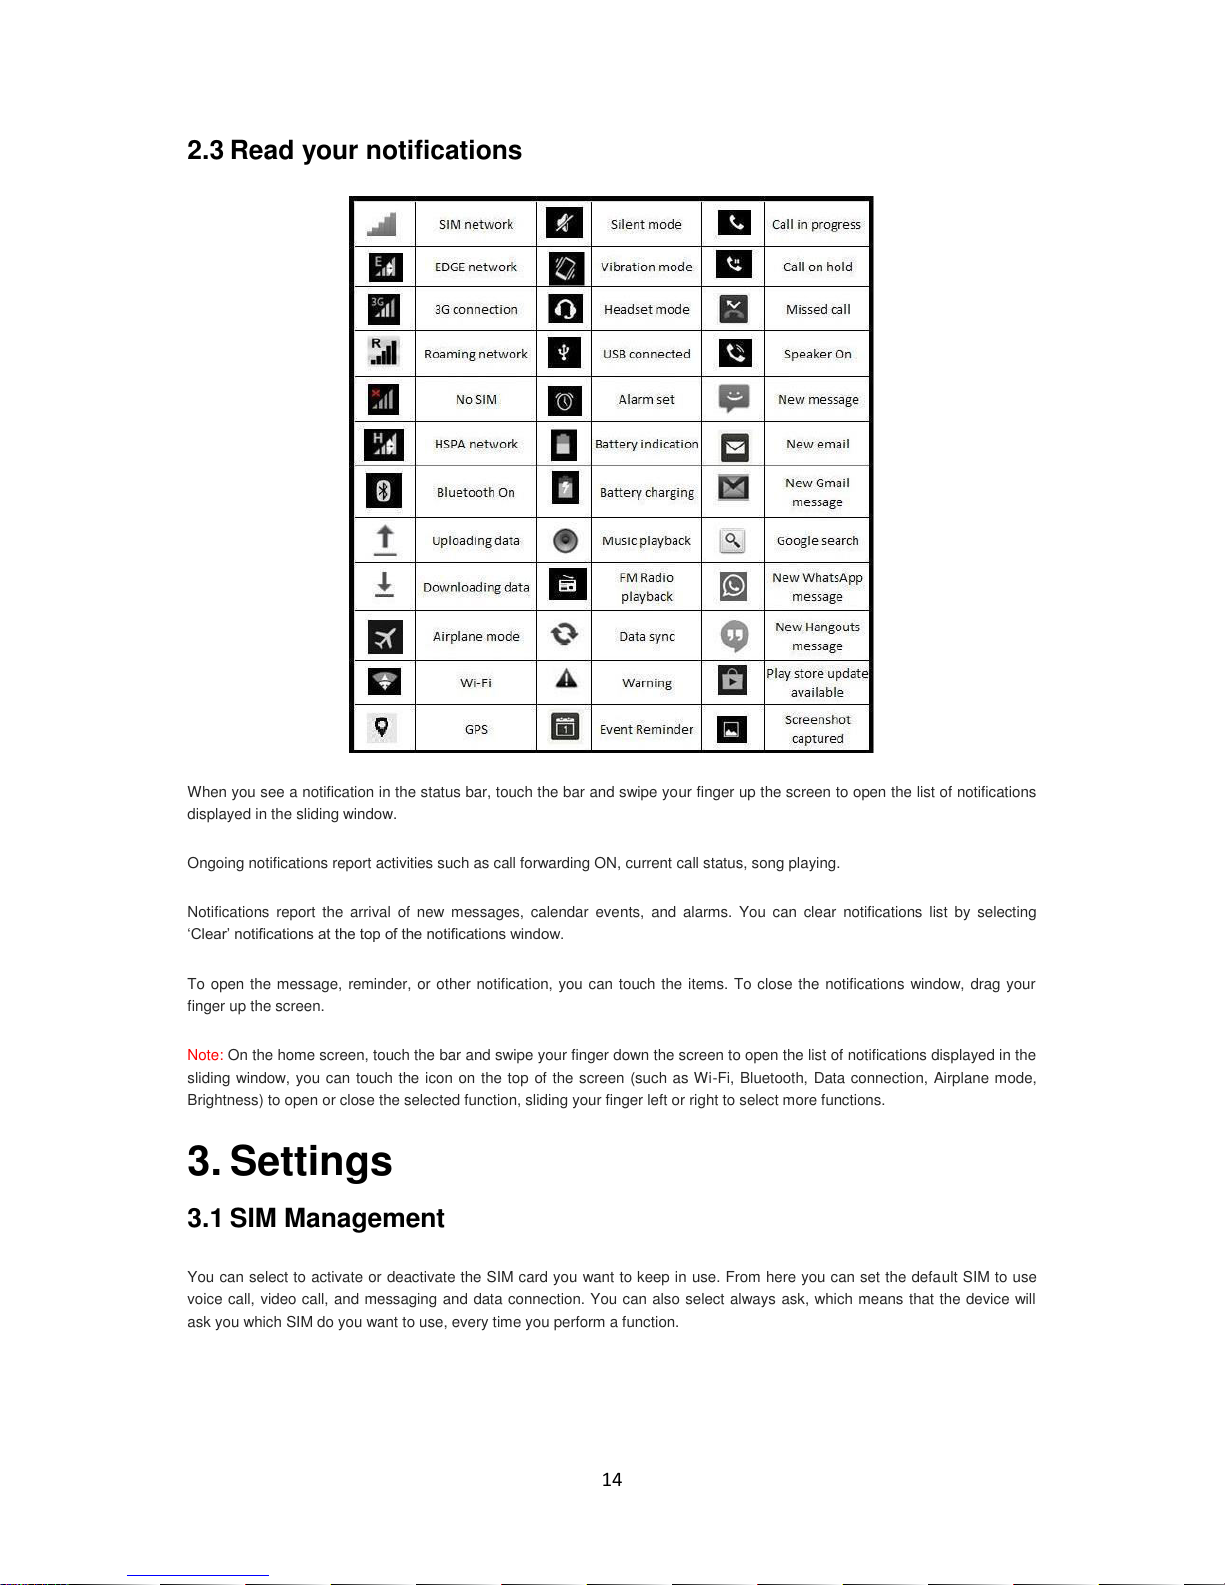
2.3 Read your notifications
When you see a notification in the status bar, touch the bar and swipe your finger up the screen to open the list of notifications
displayed in the sliding window.
Ongoing notifications report activities such as call forwarding ON, current call status, song playing.
Notifications report the arrival of new messages, calendar events, and alarms. You can clear notifications list by selecting
„Clear‟ notifications at the top of the notifications window.
To open the message, reminder, or other notification, you can touch the items. To close the notifications window, drag your
finger up the screen.
Note: On the home screen, touch the bar and swipe your finger down the screen to open the list of notifications displayed in the
sliding window, you can touch the icon on the top of the screen (such as Wi -Fi, Bluetooth, Data connection, Airplane mode,
Brightness) to open or close the selected function, sliding your finger left or right to select more functions.
3. Settings
3.1 SIM Management
You can select to activate or deactivate the SIM card you want to keep in use. From here you can set the defa ult SIM to use
voice call, video call, and messaging and data connection. You can also select always ask, which means that the device will
ask you which SIM do you want to use, every time you perform a function.
15
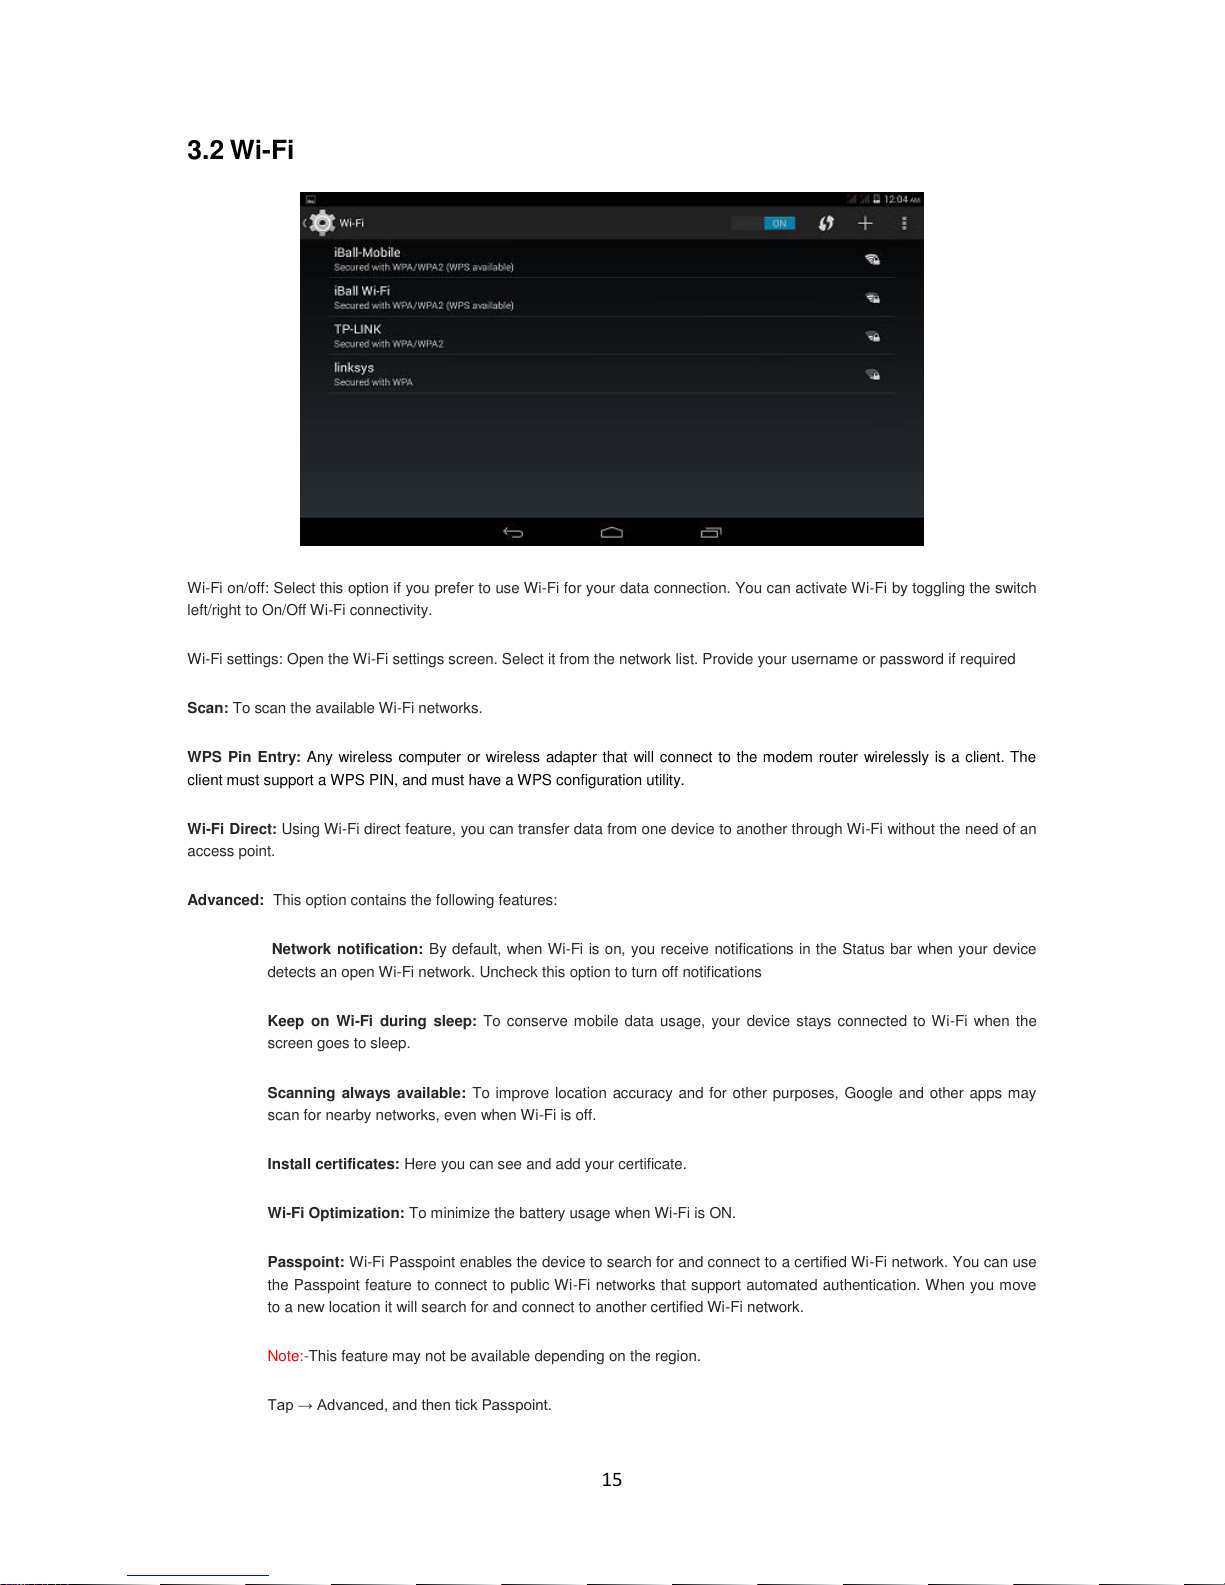
3.2 Wi-Fi
Wi-Fi on/off: Select this option if you prefer to use Wi-Fi for your data connection. You can activate Wi-Fi by toggling the switch
left/right to On/Off Wi-Fi connectivity.
Wi-Fi settings: Open the Wi-Fi settings screen. Select it from the network list. Provide your username or password if required
Scan: To scan the available Wi-Fi networks.
WPS Pin Entry: Any wireless computer or wireless adapter that will connect to the modem router wirelessly is a client. The
client must support a WPS PIN, and must have a WPS configuration utility.
Wi-Fi Direct: Using Wi-Fi direct feature, you can transfer data from one device to another through Wi -Fi without the need of an
access point.
Advanced: This option contains the following features:
Network notification: By default, when Wi-Fi is on, you receive notifications in the Status bar when your device
detects an open Wi-Fi network. Uncheck this option to turn off notifications
Keep on Wi-Fi during sleep: To conserve mobile data usage, your device stays connected to Wi-Fi when the
screen goes to sleep.
Scanning always available: To improve location accuracy and for other purposes, Google and other apps may
scan for nearby networks, even when Wi-Fi is off.
Install certificates: Here you can see and add your certificate.
Wi-Fi Optimization: To minimize the battery usage when Wi-Fi is ON.
Passpoint: Wi-Fi Passpoint enables the device to search for and connect to a certified Wi-Fi network. You can use
the Passpoint feature to connect to public Wi-Fi networks that support automated authentication. When you move
to a new location it will search for and connect to another certified Wi-Fi network.
Note:-This feature may not be available depending on the region.
Tap → Advanced, and then tick Passpoint.
16
MAC address: The Media Access Control (MAC) address of your device when connected to a Wi-Fi network
IPv4 address: The Internet Protocol (IP) address assigned to the device by the Wi-Fi network you are
connected to (unless you used the IP settings to assign it a static IP address).
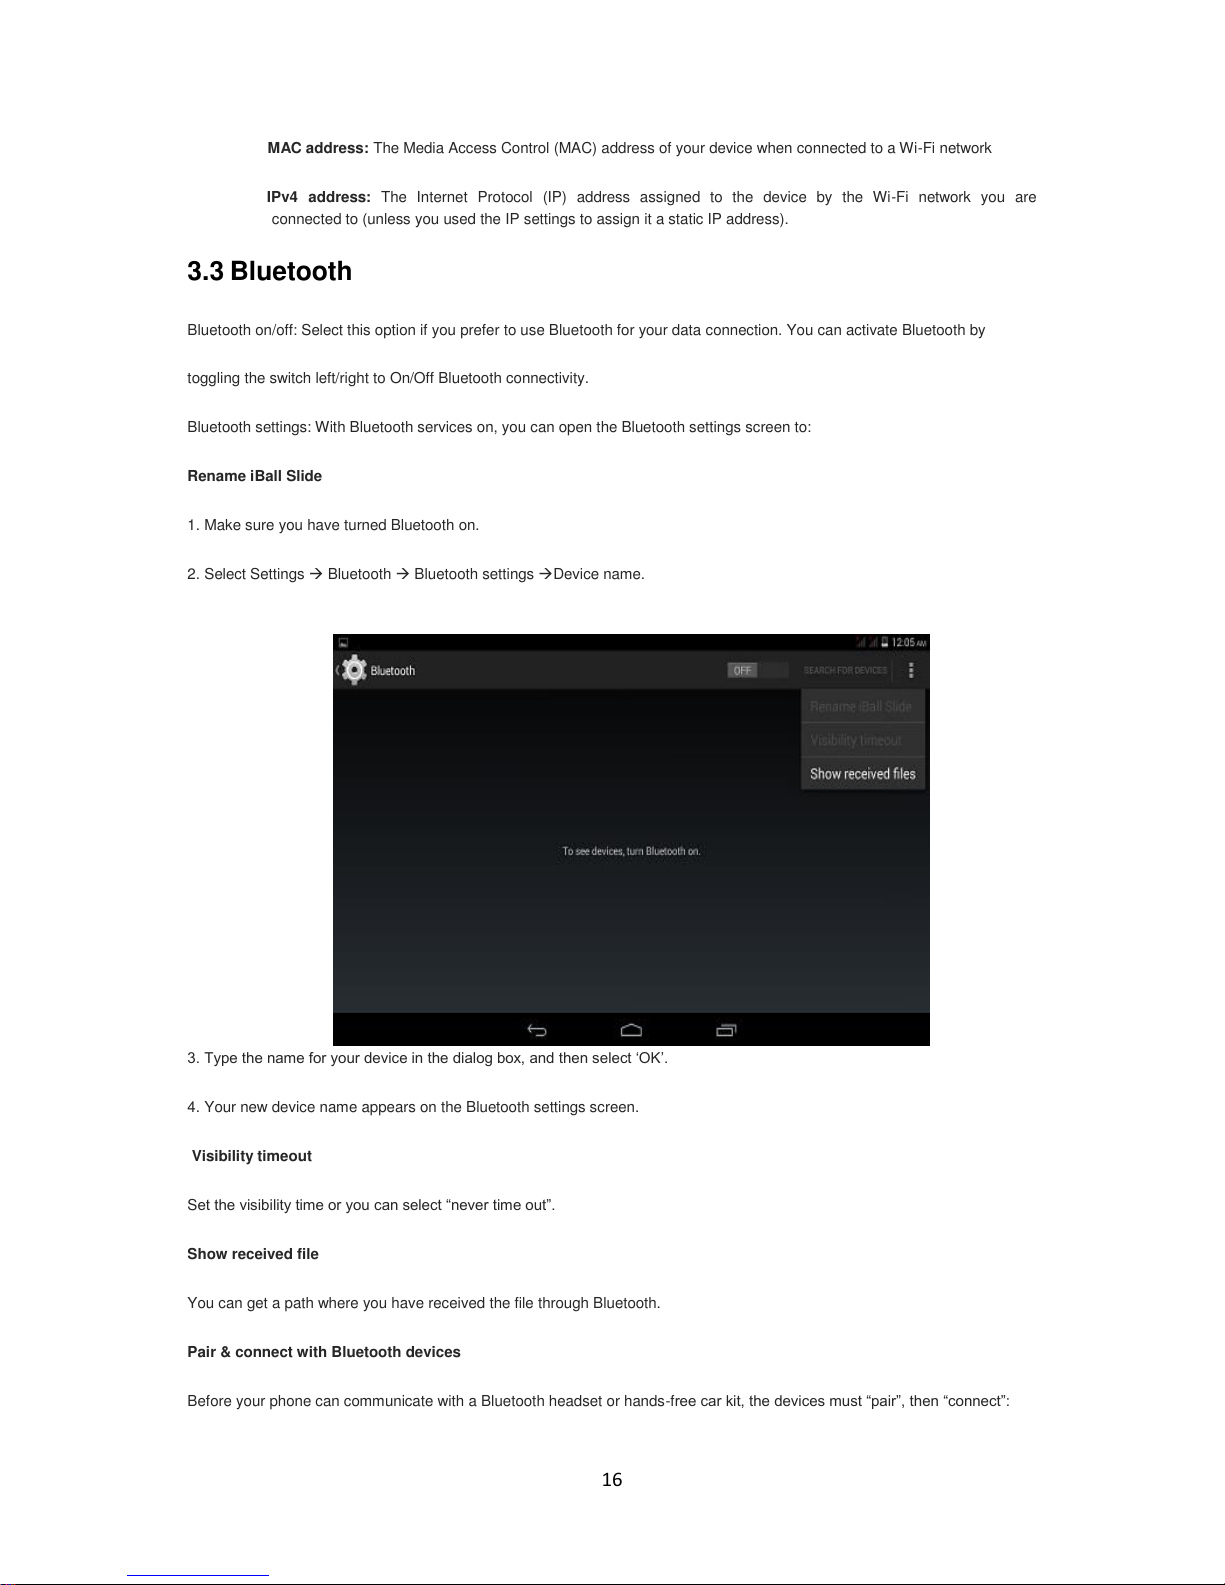
3.3 Bluetooth
Bluetooth on/off: Select this option if you prefer to use Bluetooth for your data connection. You can activate Bluetooth by
toggling the switch left/right to On/Off Bluetooth connectivity.
Bluetooth settings: With Bluetooth services on, you can open the Bluetooth settings screen to:
Rename iBall Slide
1. Make sure you have turned Bluetooth on.
2. Select Settings Bluetooth Bluetooth settings Device name.
3. Type the name for your device in the dialog box, and then select „OK‟.
4. Your new device name appears on the Bluetooth settings screen.
Visibility timeout
Set the visibility time or you can select “never time out”.
Show received file
You can get a path where you have received the file through Bluetooth.
Pair & connect with Bluetooth devices
Before your phone can communicate with a Bluetooth headset or hands-free car kit, the devices must “pair”, then “connect”:
17
1. Make sure you have turned Bluetooth on.
2. Select SettingsBluetoothBluetooth settings.
3. Your phone starts scanning for Bluetooth devices within range. As they are found, the devices appear in the list of Bluetooth
devices.
4. To pair with a device in the list, select it.
5. Type the device‟s PIN and then select as „OK‟.
6. Once paired, select the device name to connect. You can also touch & hold the name to open the context menu, and then
select Connect.
7. Pairing and connection status appear under the device name.
8. Once the other Bluetooth device shows “connected” status, you can start using it to make and receive phone calls.
9. To disconnect or to unpair with a device, touch & hold the device to open the context menu. Select Disconnect or Unpaired,
as appropriate. If you select „Unpaired‟ when connected, you will be disconnected as well.
Note: The phone supports only the headset and hands-free Bluetooth profiles, so if you try to connect to a device that is not a
headset or hands-free car kit, then you will receive an “unable to connect” message.
If you pair with a second headset while connected to the first, the first headset will remain connected. To switch connection to
the second headset you must manually select that headset again after pairing.
Rescan for Bluetooth devices
If you want to update the list of Bluetooth devices, select „Scan for devices‟.
3.4 Data Usage
It provides a graphical representation of the data usage for a specified Data Usage cycle through SIM Internet or Wi-Fi.
Data usage refers to the amount of data uploaded or downloaded by your device during a given period. Depending on the
device and your wireless plan, you may be charged additional fees when your data usage exceeds your plan's limit. To monitor
your data usage, adjust your data usage settings. First check your plan and determine what data limits may apply.
Warning! The usage displayed on the data usage settings screen is measured by your handset. Your carrier's data usage
accounting may differ. Usage in excess of your carrier plan's data limits can result in steep overage charges. The feature
described here can help you track your usage, but is not guaranteed to prevent additional charges.
Data usage settings allow you to:
Set the data usage level at which you'll receive a warning.
Set a data usage limit.
View or restrict data usage by app.
To adjust the settings described here:
 Loading...