

iBall Excelance, Exemplaire, CompBook i360, CompBook i360 FHD, CompBook Excelance-OHD IPS Screen User Manual
...
Specifications
Model
Excelance
Exemplaire
Processor
Intel® Bay Trail, Z3735F up to 1.83 GHz
Operating System
Windows 10
RAM
2GB DDR3
In-built storage
32GB
Micro SD Slot
Expandable up to 64GB
Screen Size
29.46cm (11.6")
35.56cm (14”)
Resolution
1366*768
Screen Type
HD Screen
Touch Pad
Touch Pad with Multi-Touch functionality
Battery
10,000mAh Li-Polymer Battery, 3.7V
Adapter
DC 5V, 2.0A
Camera
0.3MP (640 x 480)
Speaker Dual Speaker
Headphone/Mic Jack
Single 3.5mm Combo Jack for Sound & MIC
Wi-Fi
802.11 b/g/n
Bluetooth
Bluetooth Ver. 4.0
HDMI
MINI HDMI Ver. 1.4a
USB
2 x USB 2.0 ports
Dimensions (WxDxH)
29.1 x 20.3 x 2.4cm
34.7 x 23.2 x 2cm
Weight 1.09kg 1.46kg
Know Your CompBook
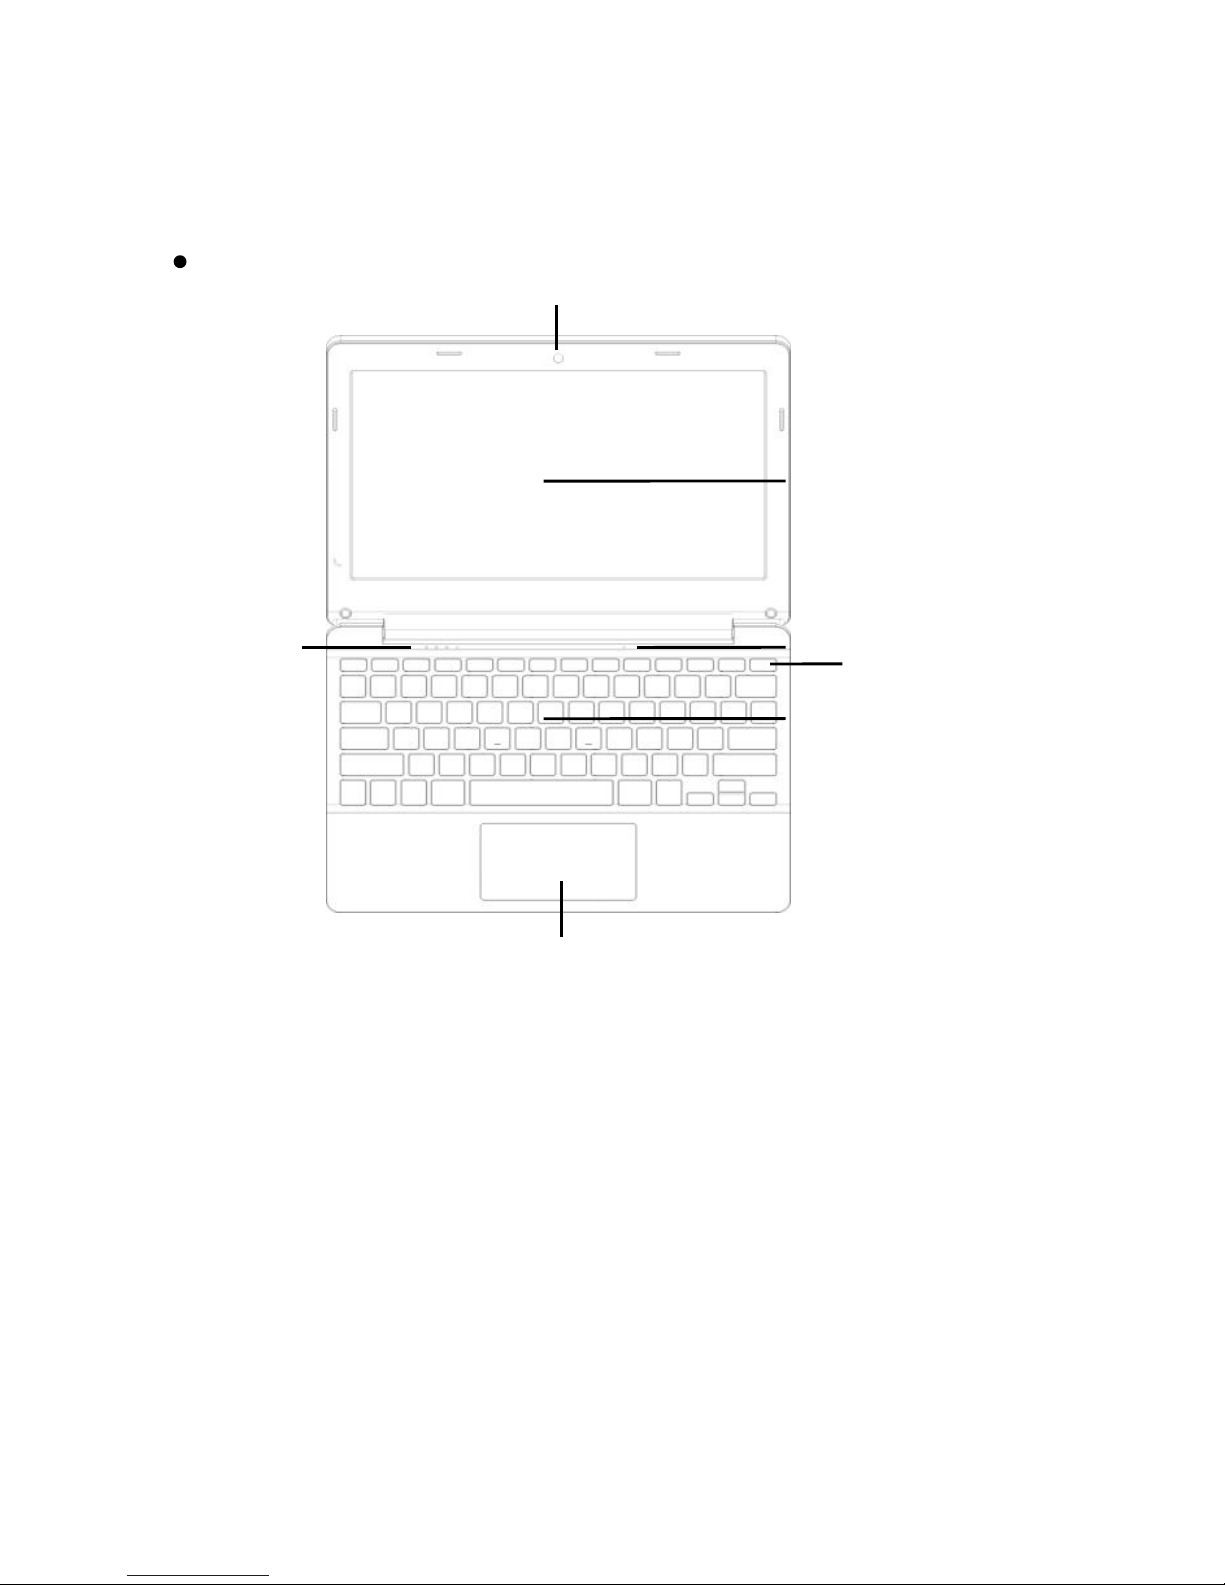
Front View
1. Camera: Built-in webcam that allow you to capture video, chat
Online, and more.
2. LED Indicators: Power on, Caps Lock and Num Lock indicator
3. Microphone: Built-in microphone that help you for Online Audio
/Video calling, and more.
4. Keypad: 78 keys keypad including Internet and MM short keys
5. Touch Pad : Touch Pad with multi touch functionality
6. HD Display: HD Screen @1366 x 768 Resolut
ion allows you t
o watch
HD movies, Play Games and more.
7. Power ON/OFF: Long press to Power ON / OFF your CompBook,
short press to stand-by / wake-up.
HD Display
Microphone
Power ON / OFF
Keypad
Touch Pad
LED Indicator
Camera
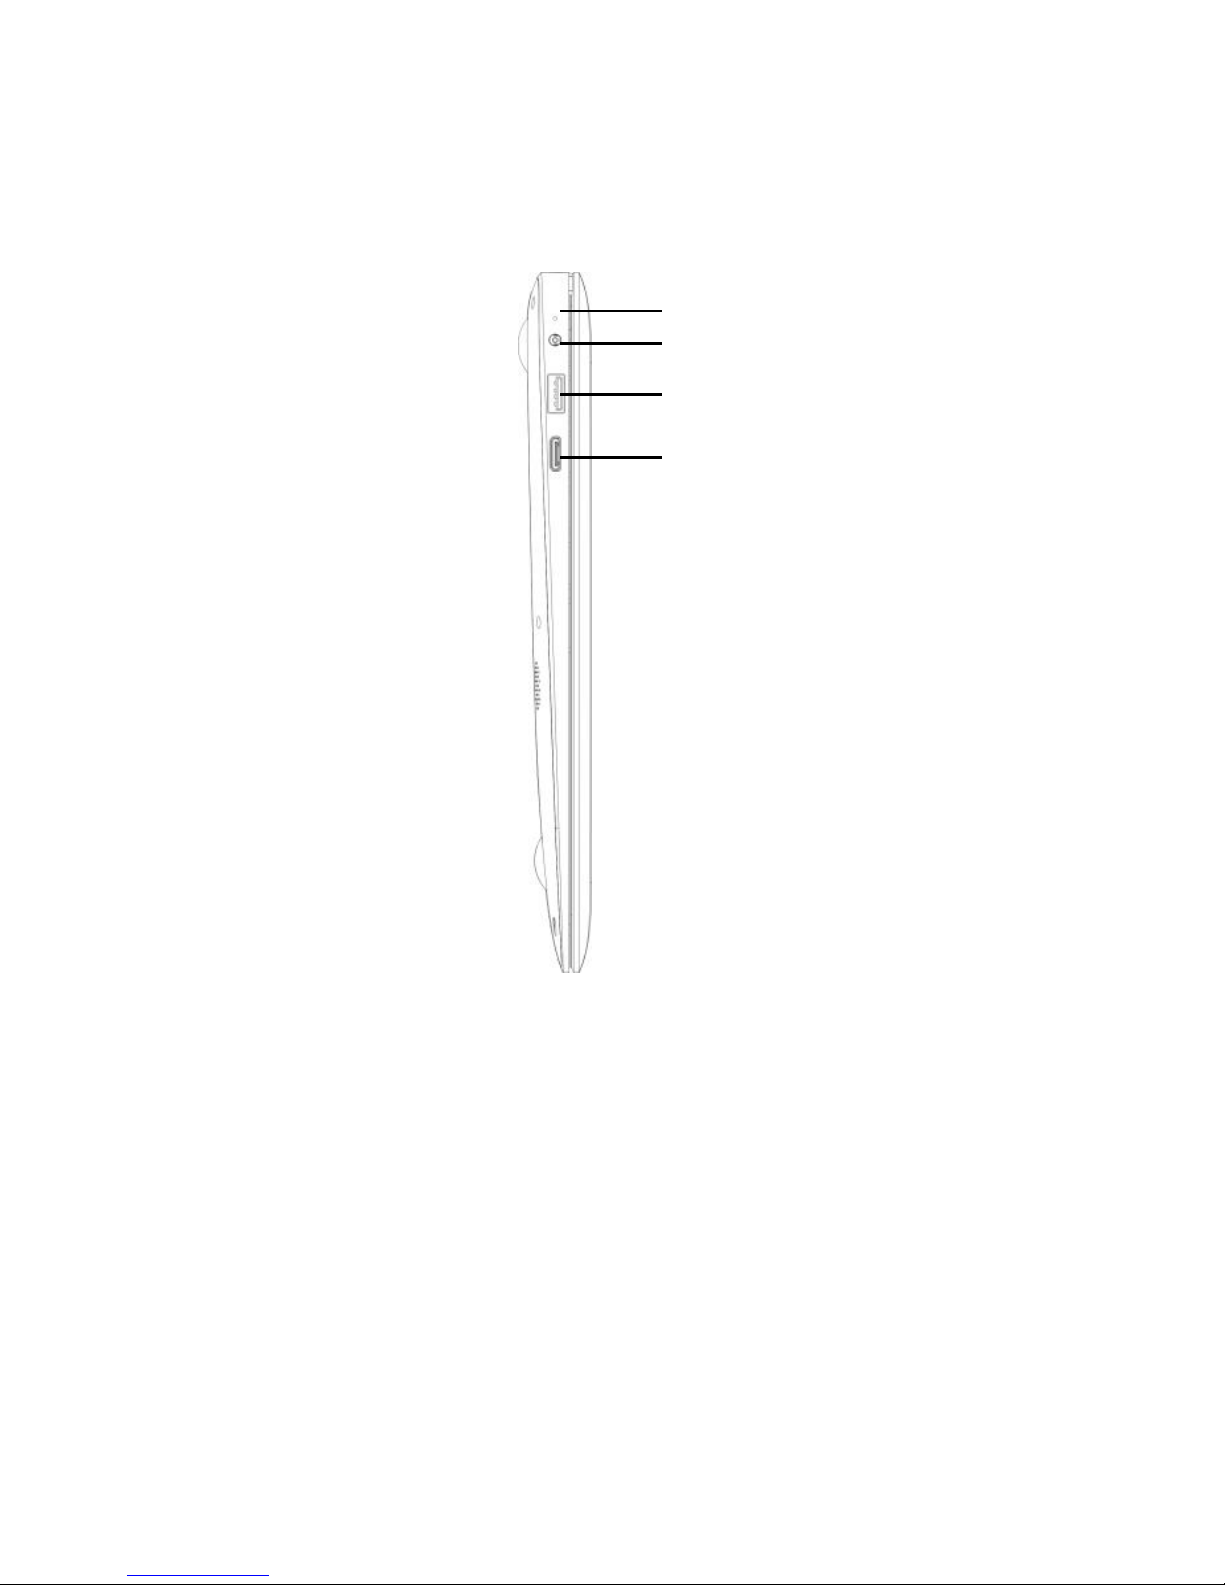
Left Side View
1. LED Indication for Charging: Red LED indication for charging
2. Charging port: 3.5mm power connector to charge your device.
Use only Adapter that is provided along with box.
3. USB Port: you can connect any devices (like Mouse, KB, HDD, etc.)
4. Mini HDMI port: it allow you to connect any external display device,
Like Projector, LCD Monitor, etc. (Cable not included)
Charging Port
USB
Mini HDMI
LED Indication
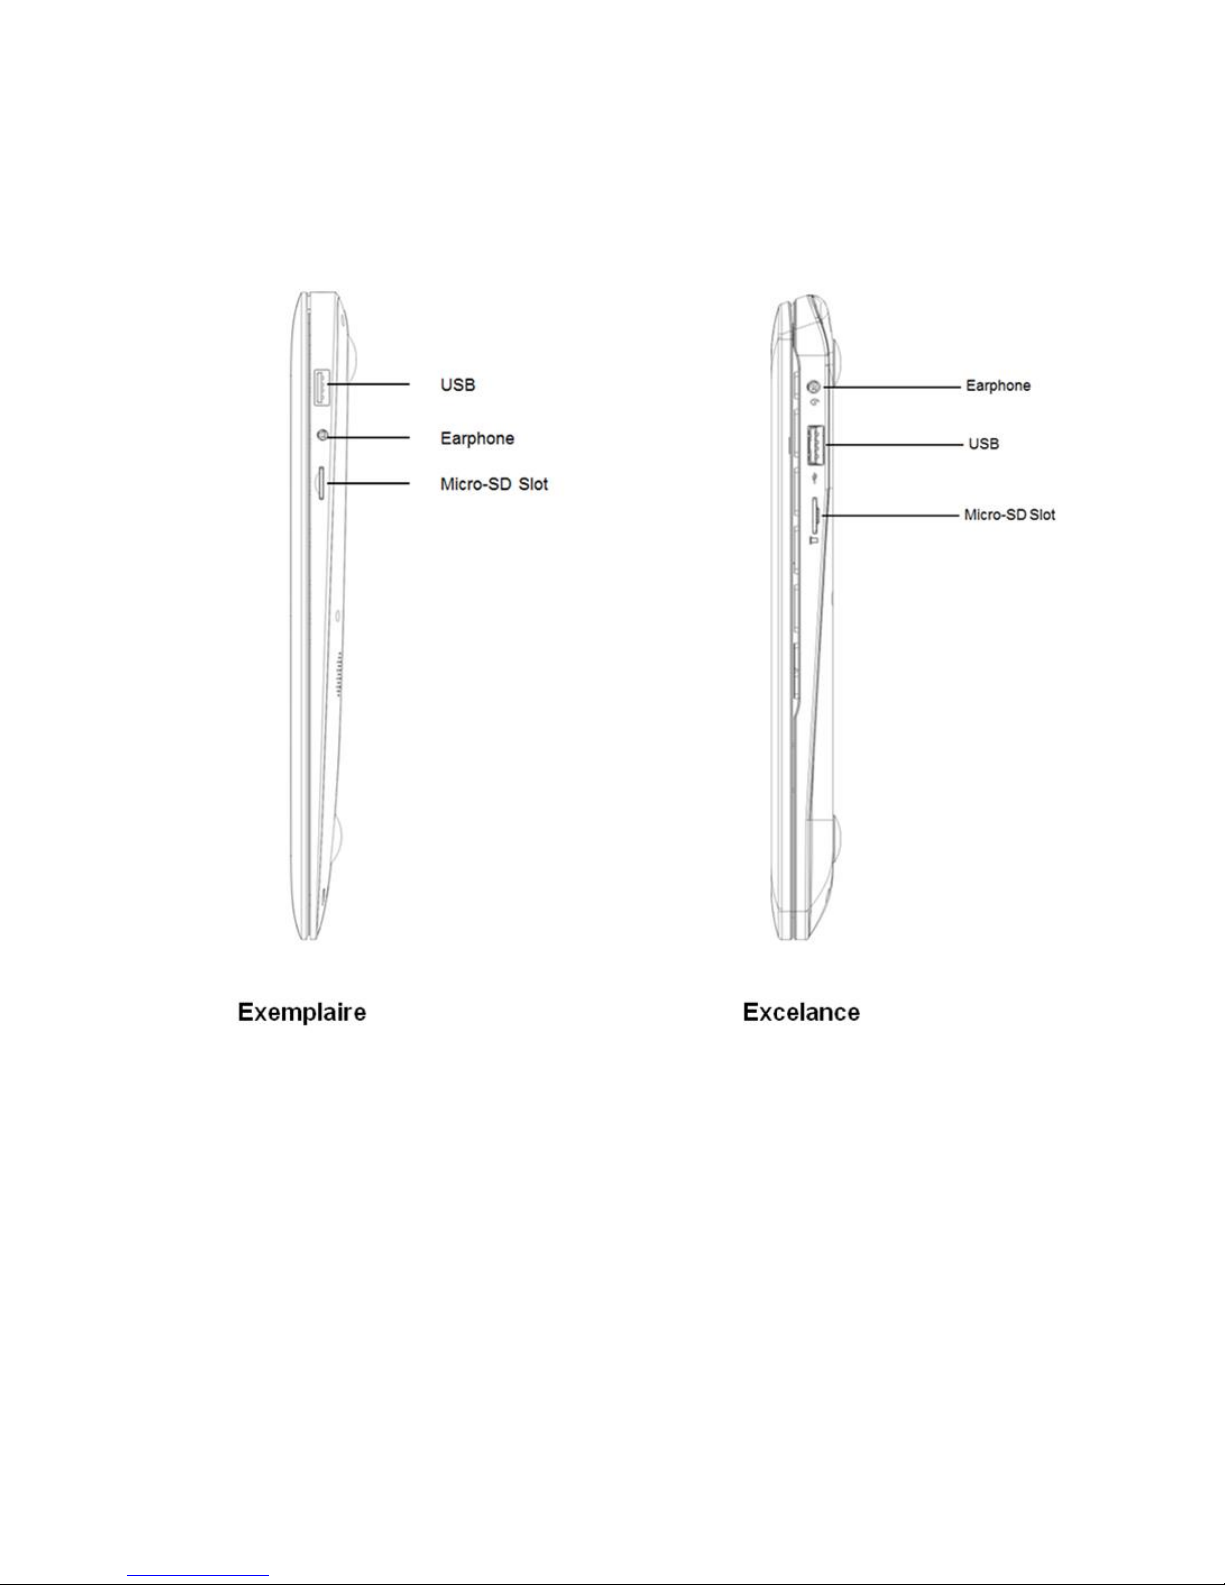
Right Side View
1. USB Port: you can connect any devices (like Mouse, KB, HDD, etc.)
2. Headphone out Jack: Single/Combo jack for Headset & MIC
3. Micro-SD slot: expandable up to 64GB
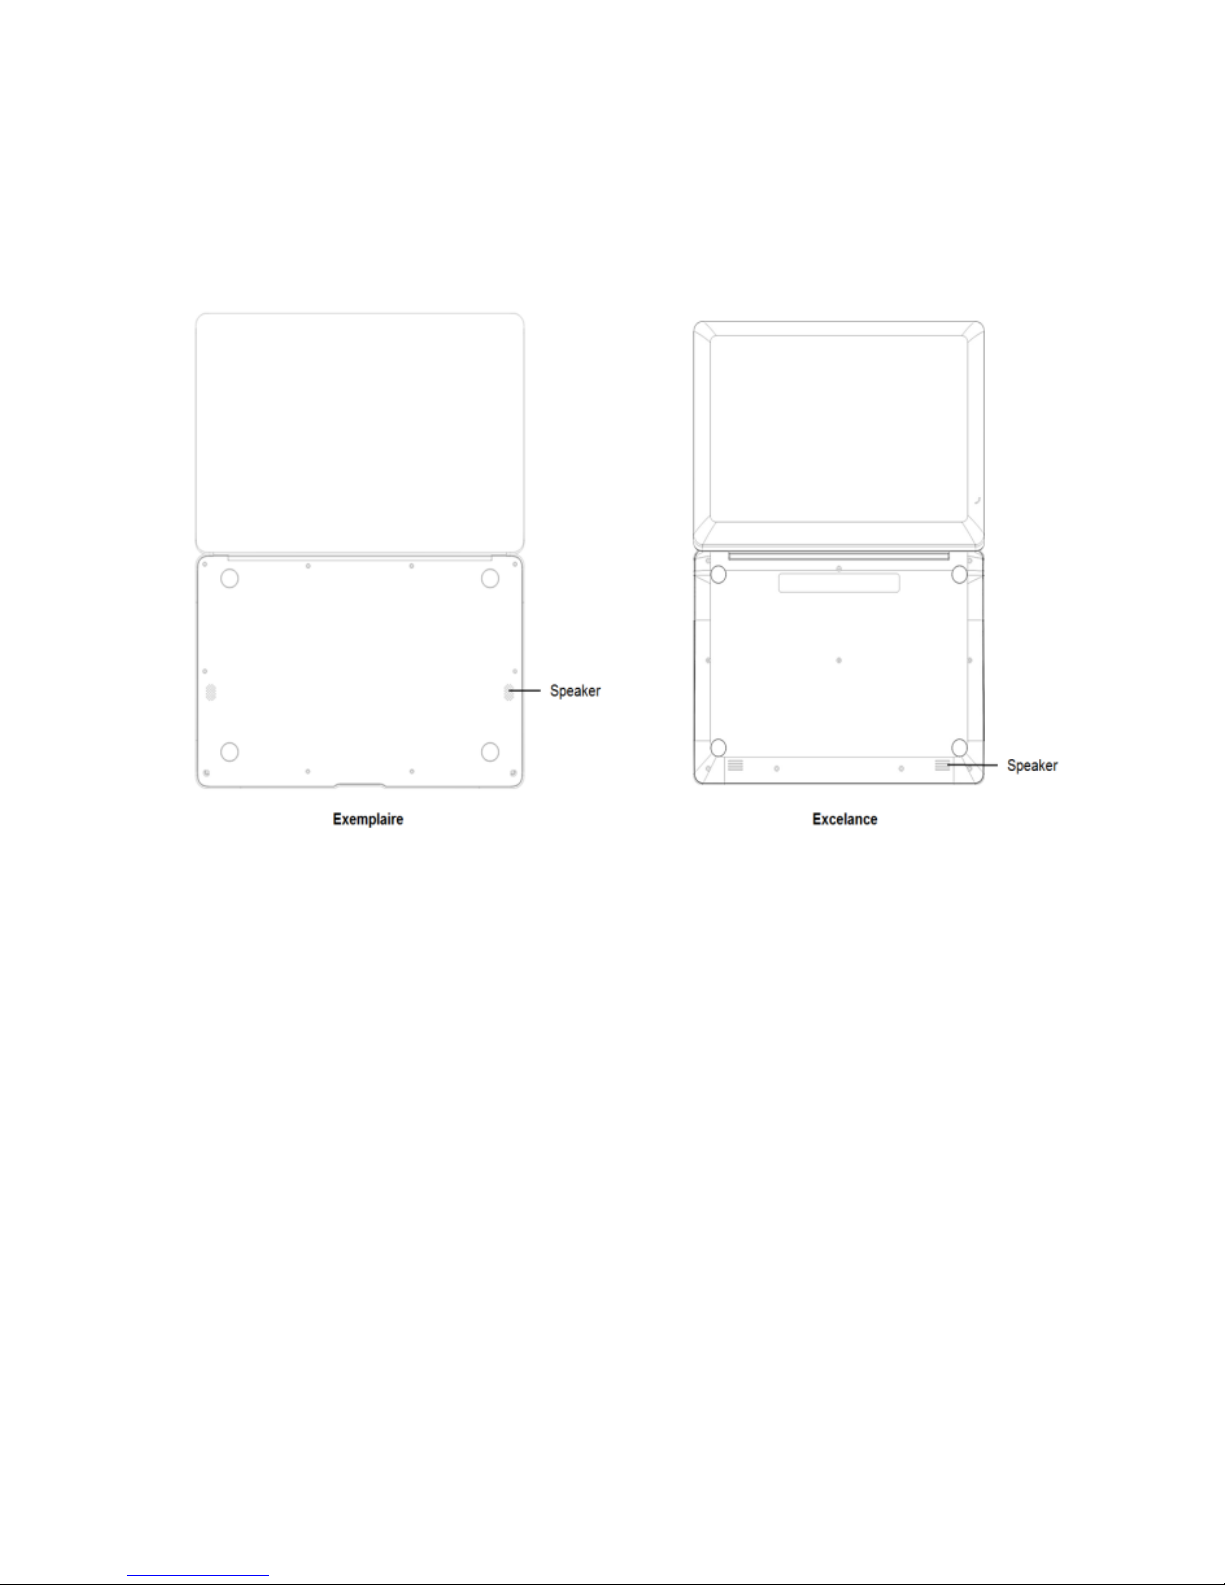
Bottom Side View
1. Speaker: Dual Speaker with high quality sound allow you to listen
music, watch video, play games, and more clearly.
Introduction to Desktop
When you turn on your CompBook for the first time you will be asked for some
basic details to get you started.
Once you have completed the introduction, you’ll see the Windows 10 Start
Screen (shown below). The Start Screen is made up of Tiles for all your
software, including pre‐installed Apps like email, news, etc. as well as your
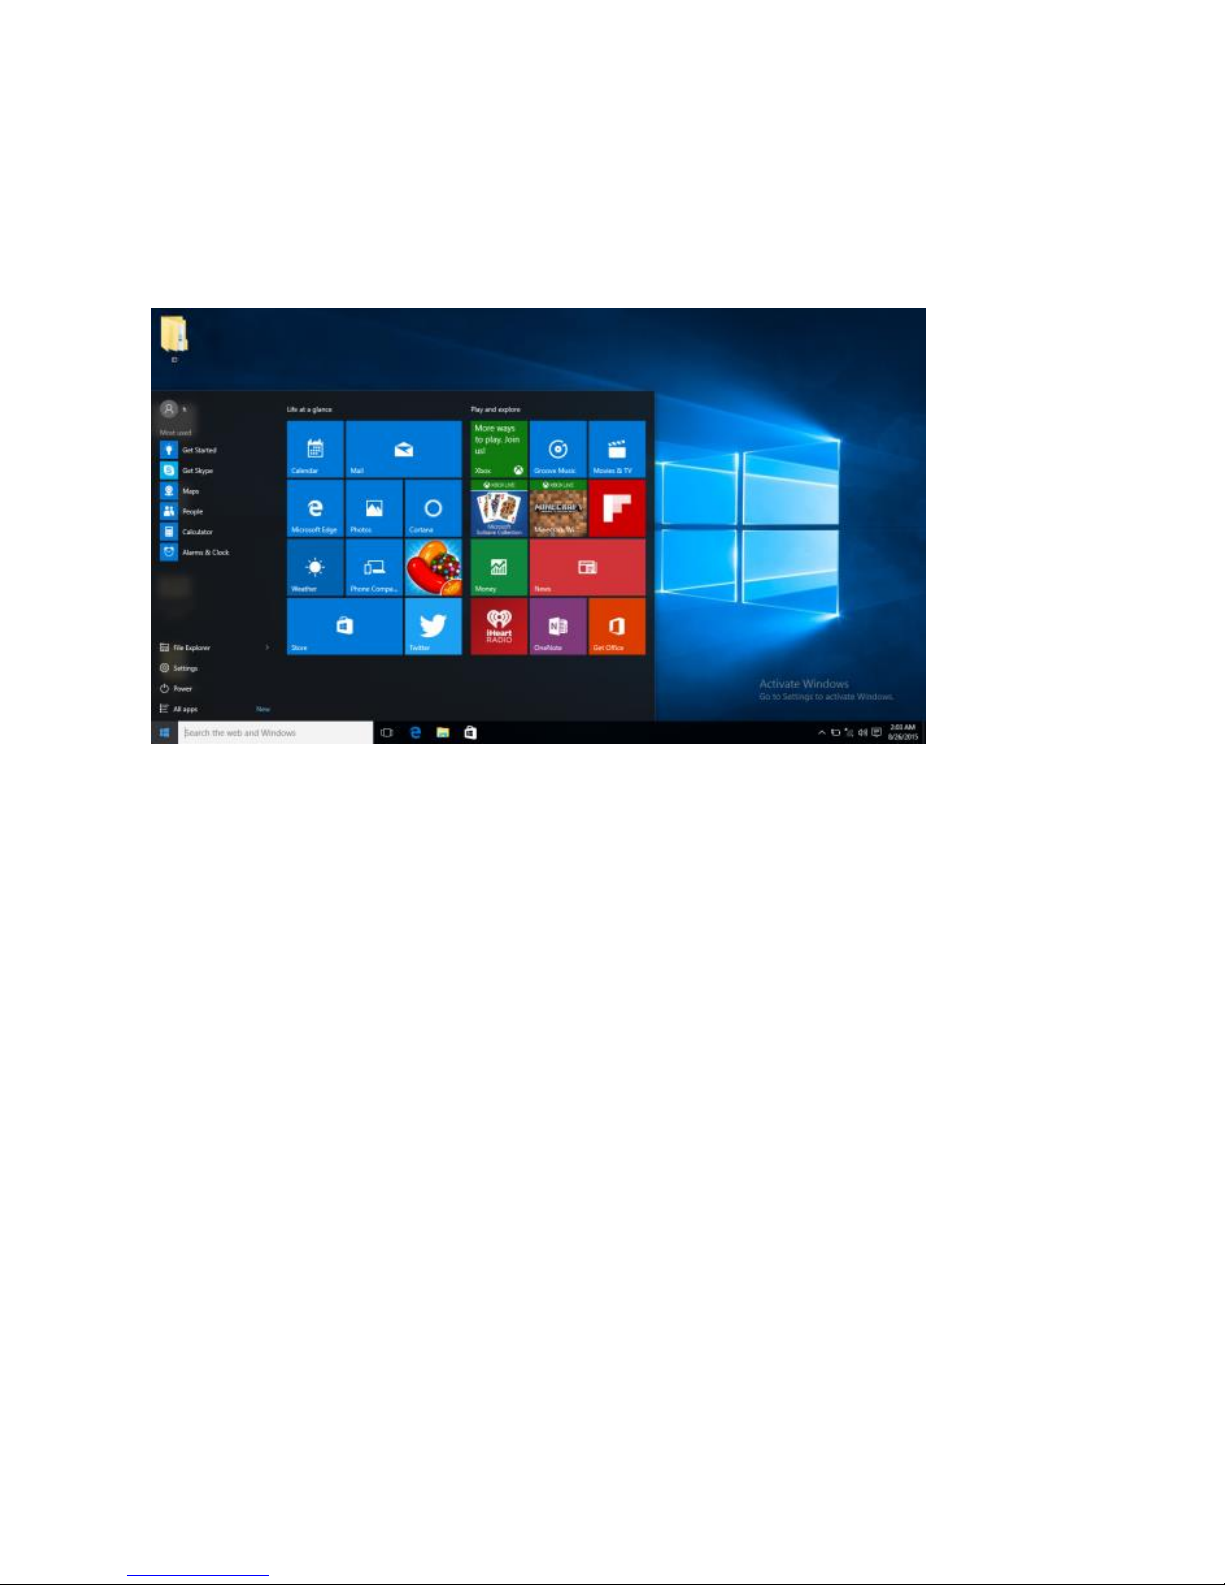
pictures and music library. When you install more Apps, you can add tiles to the
Start Screen so you can open them easily.
Please note that some Microsoft® Apps may require you to create a Microsoft®
ID / Account. Other services or Apps may need their own user credentials.
Introduction to App Screen
Besides the applications already fixed on the App Screen, you can customize
the screen by adding Tiles for other applications installed on your CompBook.
To add more applications to the Start Screen, see the steps in the figure below,
1) Click the properties icon
2) Press and hold the App you wish to add
3) Select Pin to start from the sub menu which appears
 Loading...