

i3-TECHNOLOGIES i3TOUCH E1055 4K, i3TOUCH E1065 4K, i3TOUCH E1075 4K, i3TOUCH E1086 4K User Manual
Interactive Touch Display
User’s Manual
i3TOUCH E1055 4K
i3TOUCH E1065 4K
i3TOUCH E1075 4K
i3TOUCH E1086 4K

11
14
15
Contents
Safety Warning & Statements
Connection and Setting
Menu Operation
Maintenance
Prepare to Install
Simple Troubleshooting
7
2
1

Safety Warning
Placement
Do not place the unit on an unstable cart, stand, tripod, bracket, table, or shelf.
Do not expose the unit to direct sunlight and other sources of heat.
Do not put the unit near appliances that generate magnetic fields.
Do not put any liquid near or on the unit, make sure do not spill any liquid inside the unit.
Do not put heavy objects on top of the unit.
Power Supply
Check that the unit’s operating voltage is identical with your local power supply.
Please unplug power supply and antenna plug when the weather is thunder-storm or lightning.
Please unplug power supply, when there is nobody home or the unit will be in idle for a long time.
Please keep power cable from physical or mechanical damage.
Please use the original power cable from the accessory bag, don't modify or lengthen it.
Please check and ensure AC source is connected with the ground.
This power cable comes with the device exclusively for this device only.
LED Screen
Never use any other hard or sharp object to replace the touch pen.
Unplug the power cable before cleaning.
Clean the screen with a soft, dustless and dry cloth.
Never use water or the spray type detergent to clean the unit.
For deep clean, please contact an authorized service center.
Better for the panel lifetime and the display performance, do not display high brightness image for long time.
Temperature
Do not place the unit near or over a radiator or a heater.
If your unit is suddenly moved from a cold to a warm place, please unplug the power cable and do not turn it on at least 2 hours,
making sure the moisture inside the unit is all evaporated.
Normal operating temperature is 0 ~ 40℃.
Humidity
Do not expose the unit in rain, or place in high humidity area.
Please make sure indoor environment is dry and cool.Normal operating humidity is 10%~90%RH.
Ventilation
Please put the unit in a well ventilated place, so the heating can be released easily.
Ensure that the unit has enough space for ventilation. Space requirement: left, right and back >10cm, top> 20cm.
Earphone
Using the earphone to listen loud sound for a long time might effect the hearing.
Before using earphone, please turn down the volume in advance.
Standby
It will enter standby mode but not turn off the unit after press the standby key.
Battery
Please make sure the battery get proper disposal or recycle after using.
Please keep the battery away from kids and don't throw the battery into fire.
Notes for Cleaning
There are vents on back cover, please do not use any liquid or spray directly during cleaning.
Power Switch Status Signs
“I” means power on, “O” means power off.
Notes for Maintenance
tive only. If there is inconsistency between the image and the actual
product, the actual product shall govern.

1. Control Panel
Prepare to Install
2
Installation Connecting and Setting Menu Operation Tr oubleshoot ing Care Mainten a n c e
HOME button: back to main interface
Return button: return to previous level menu
Menu button: call up function menu
Volume down button: turn down volume
Volume up button: turn up volume
Items Function description
Tap to enter EnergySaving function
Press at least 2 seconds to enter standby mode
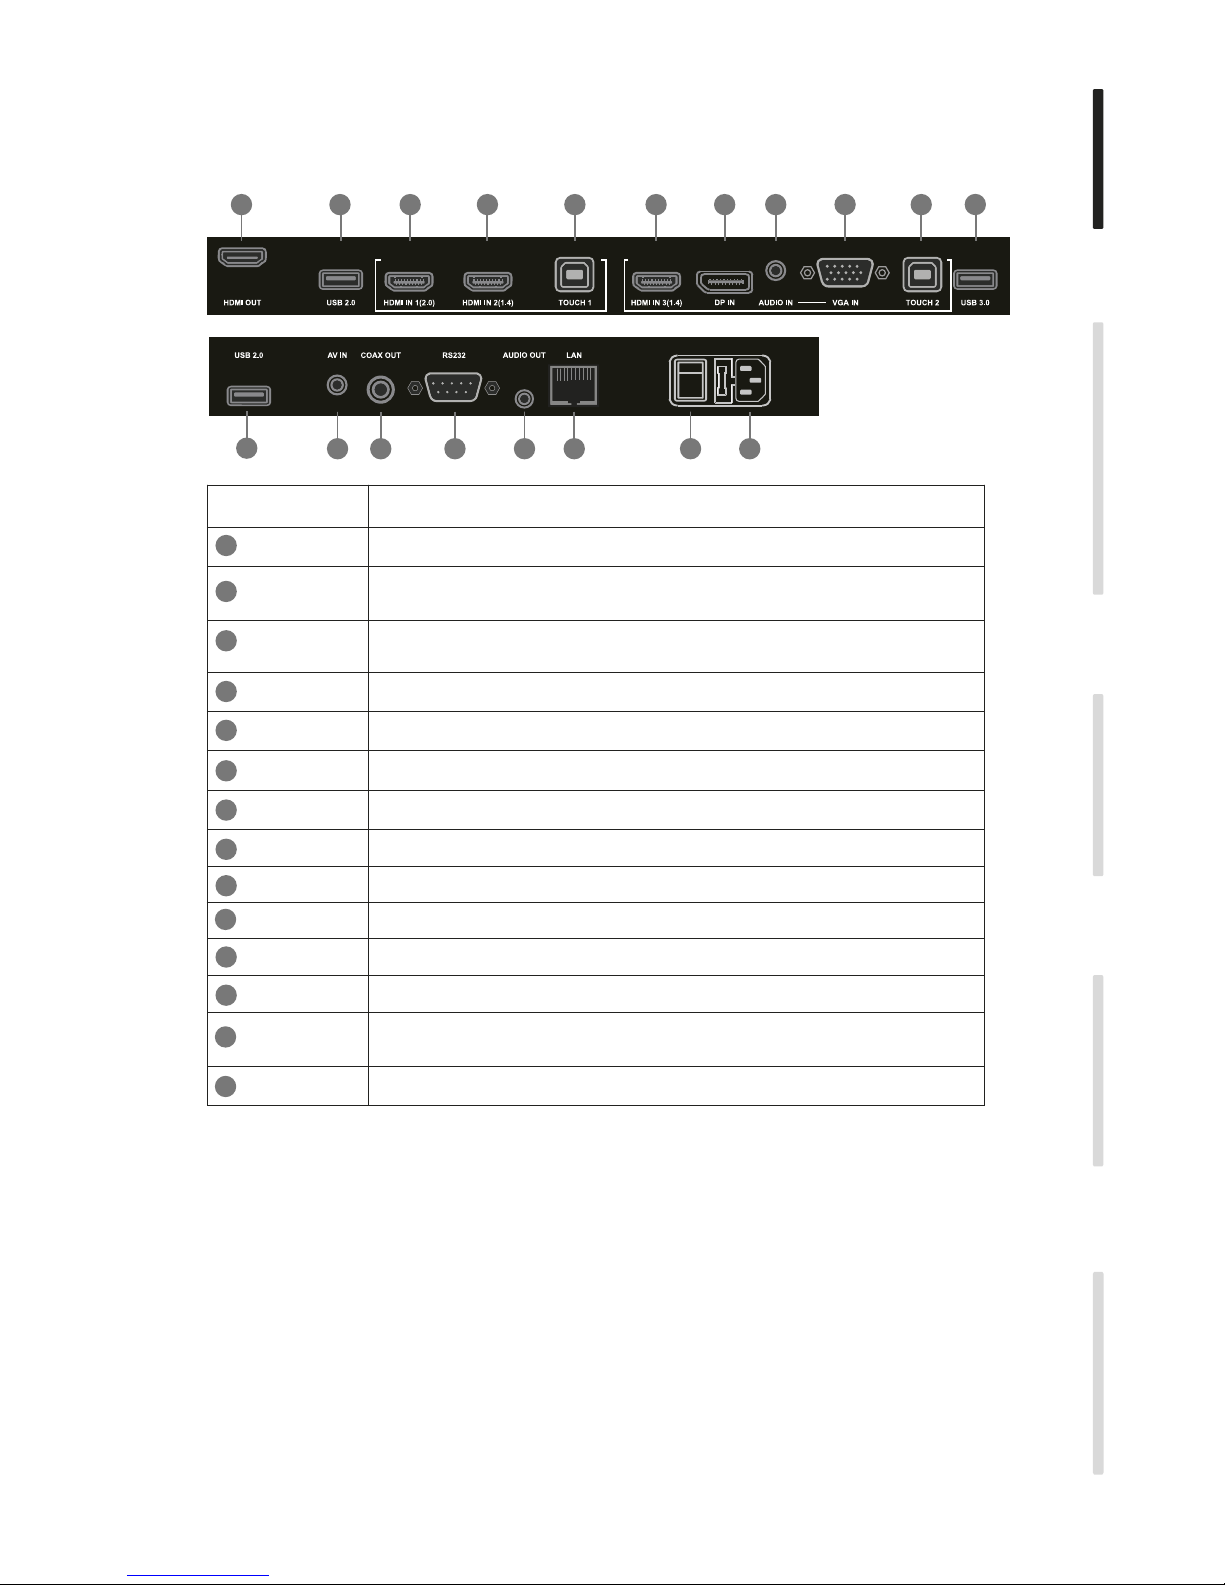
2. Terminal Interface
3
Installation Connecting and Setting Menu Operation Troubleshooting Care Maintenance
Items Function description
Connect USB devices such as mobile hard disk, U disk, USB keyboard
and mouse, USB drives, etc.
External computer audio input
External computer image input
Touch signal output to the external computer
Composite video and audio input
Coaxial output
Connecting RJ45 terminals
Serial interface, used for mutual transfer of data between devices
AC power input, connecting AC power supply
LAN
USB
HDMI IN
AUDIO IN
VGA IN
TOUCH
AV IN
COAX OUT
RS232
To open or shut down AC power supply. “ I ” means power on, “ O ”
means power off
13
12
11
10
9
8
7
6
5
4
3
2
1
AC IN
High-definition multimedia interface signal input, connect to PC with
HDMI output, set-top box, or other video device
LAN
5 63
4
1
2
3
3
7 4
2
2
8 9 10 11 12 13
14
HDMI OUT Connected to the devices with HDMI input function
DP Connected to devices with DisplayPort output function
AUDIO OUT Audio output to the external speaker
14
AC SWITCH
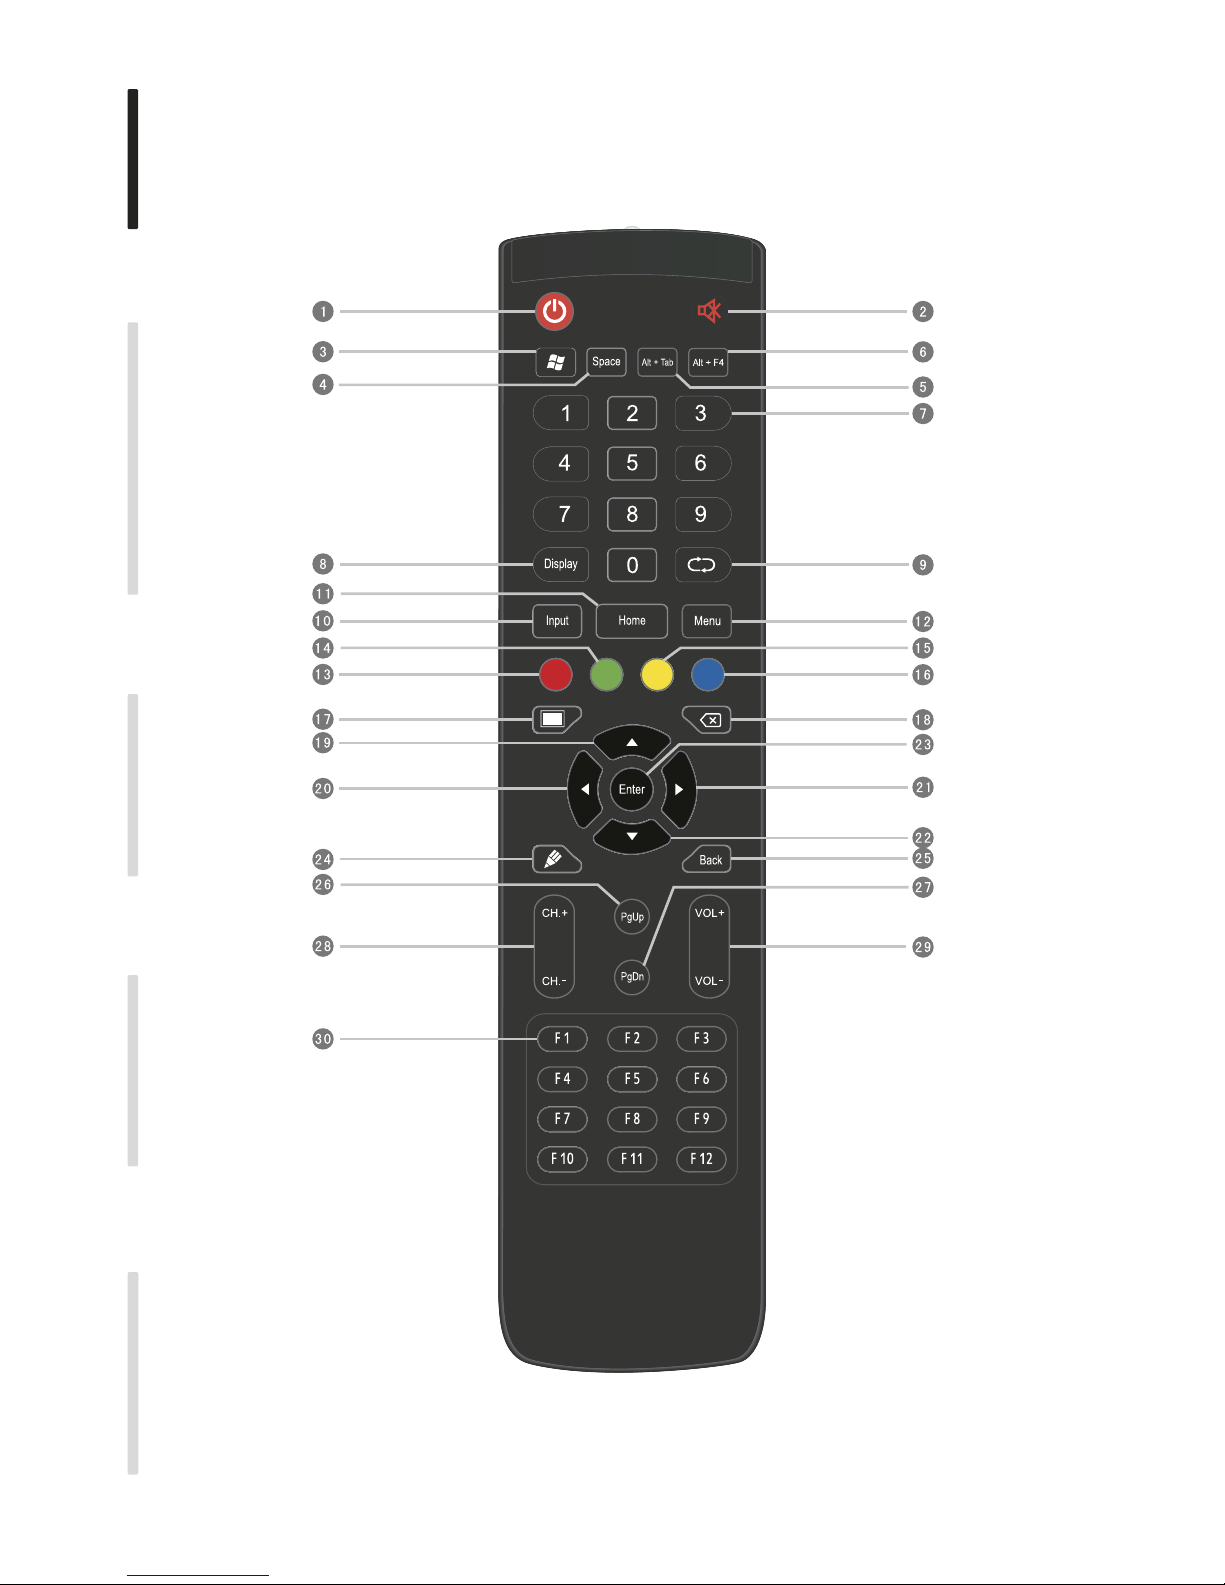
3. Remote Control
4
Installation Connecting and Setting Menu Operation Troubleshooting Care Maintenance
1) Remote control button instruction
 Loading...