How it Works
Log In / Sign Up
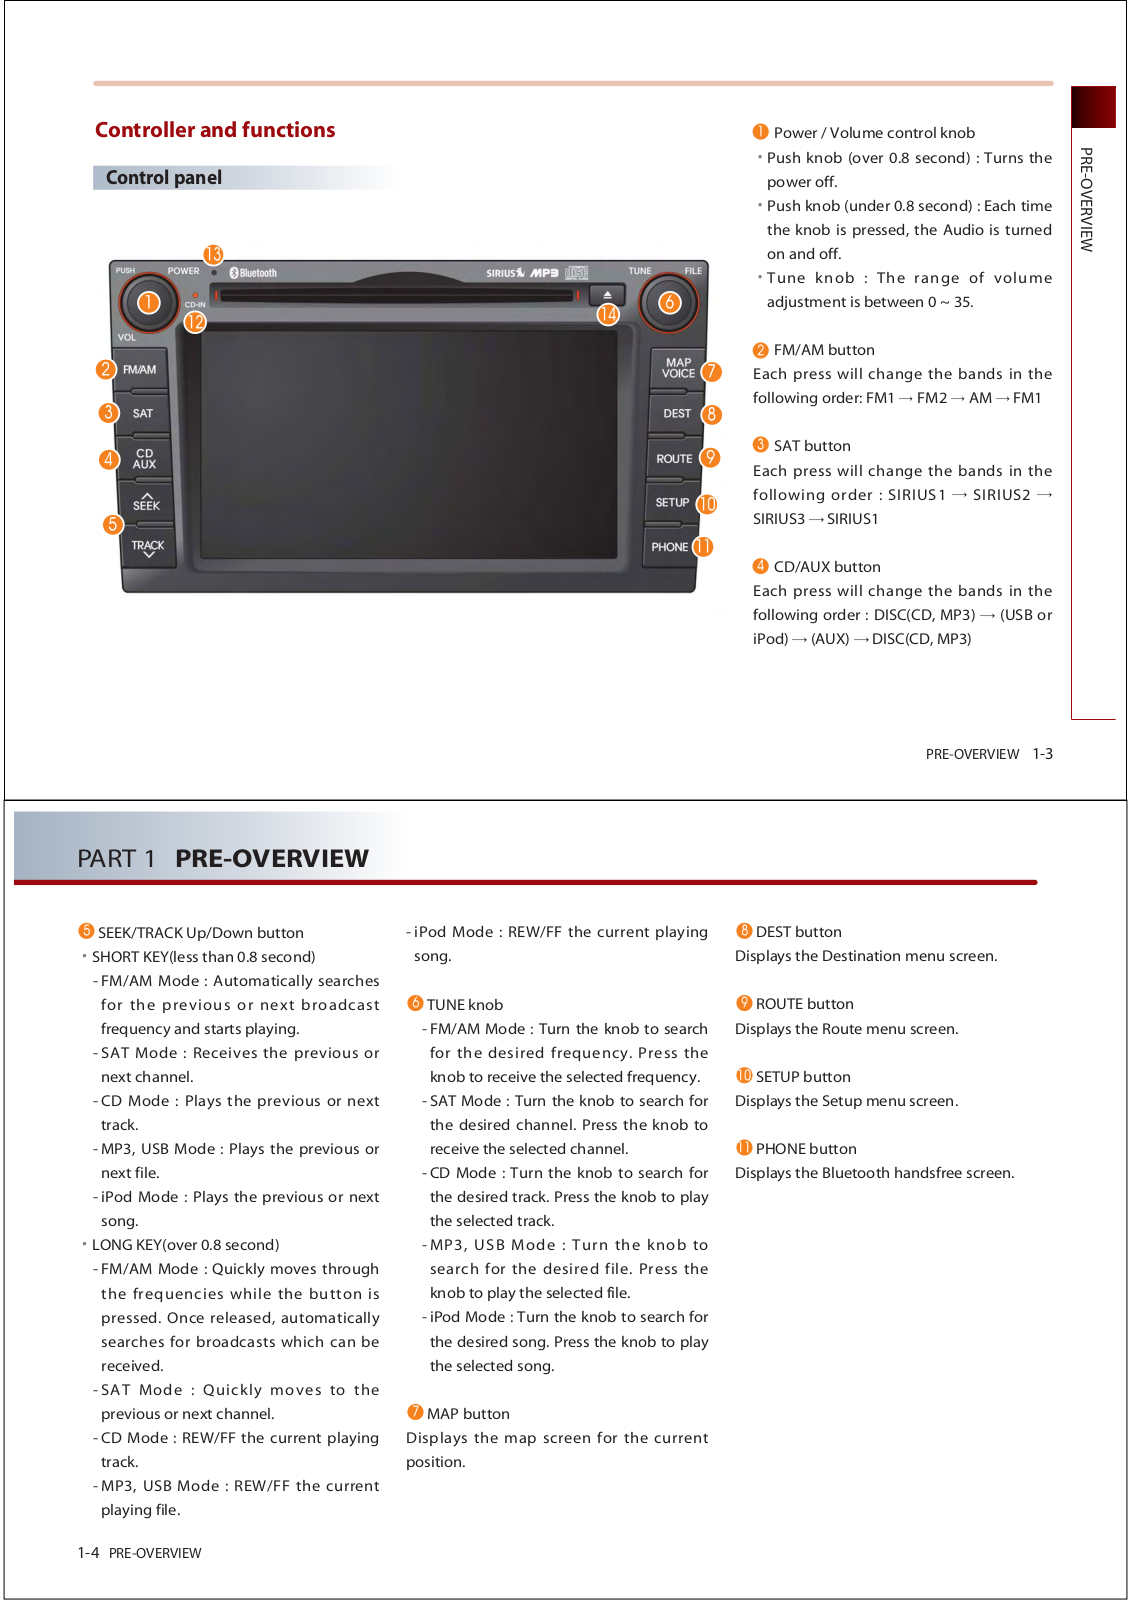
Buy Points
How it Works
FAQ
Contact Us
Questions and Suggestions
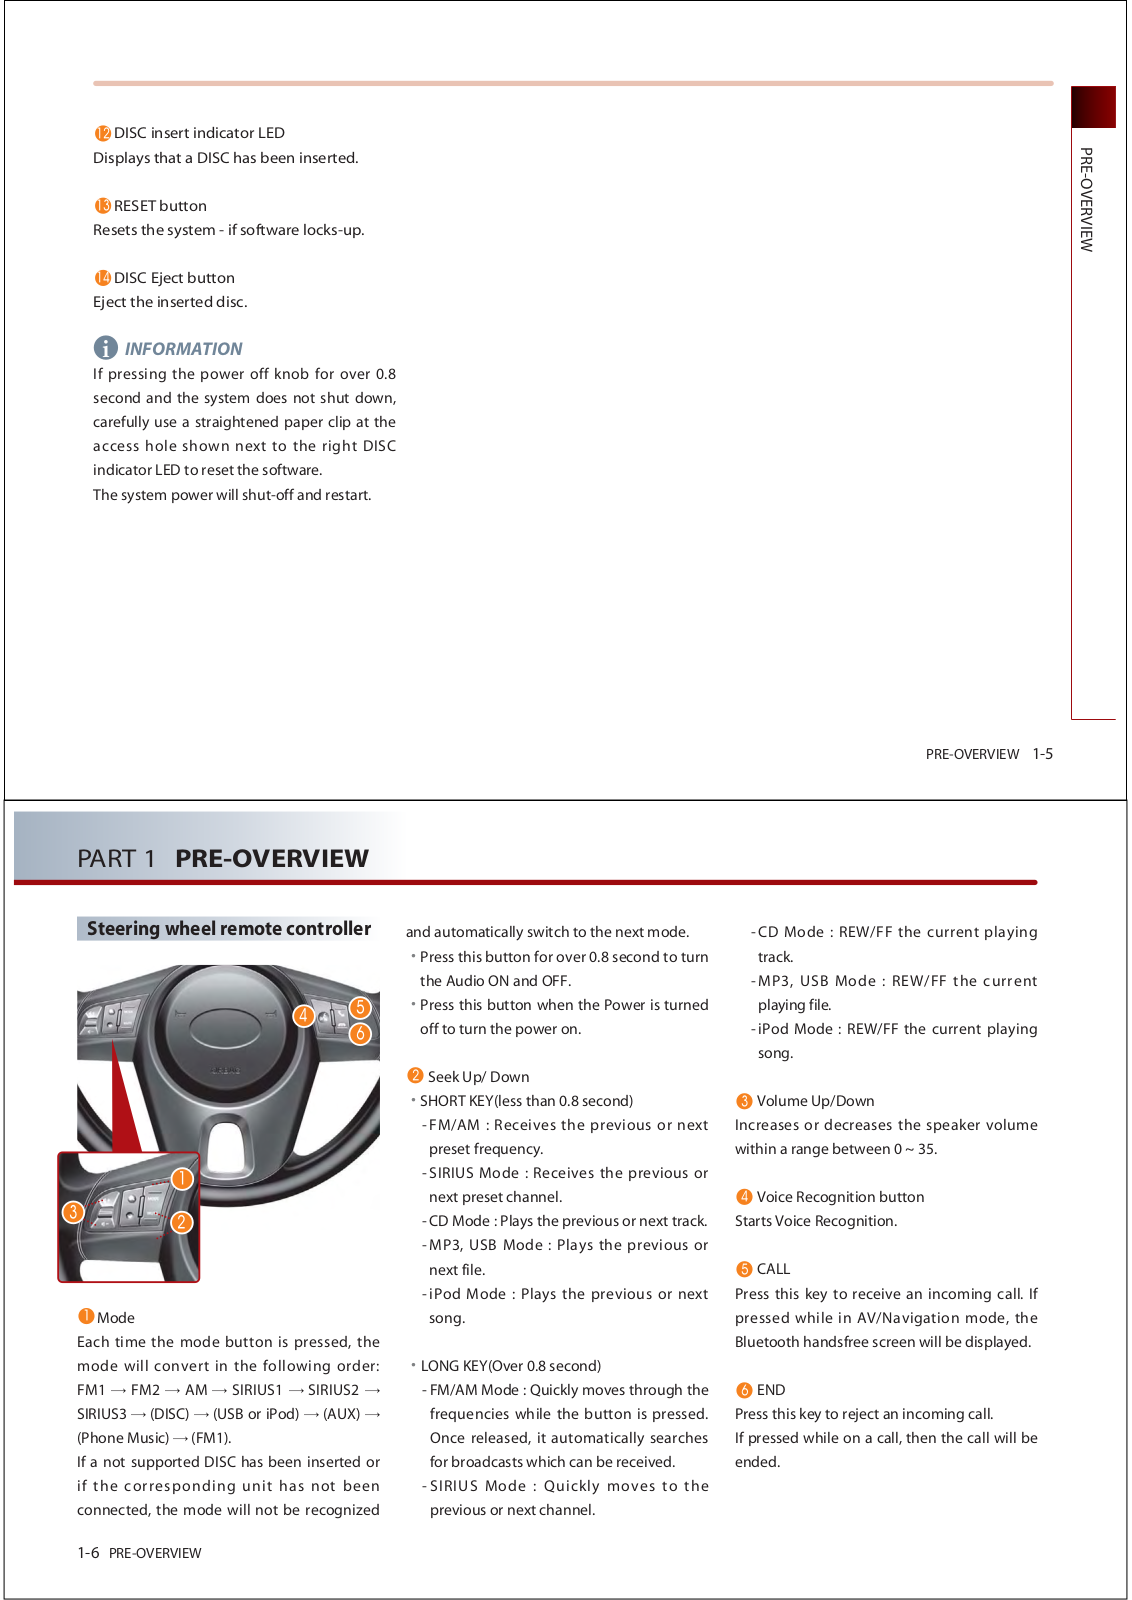
Users
HYUNDAI MOBIS
Loading...
A
ATC40S9AN
ATC41A8AN
6
ATC41F2AN
ATC41GKAN
ATC44F2AN
ATCA0THAN
ATE40C2AN
AV2302TAN
AV230C6AN
AV230D9AN
AV230F6AN
AV230JGAN
AV230SLAN
AV230TBAN
AV230TFAN
AV231JGAN
6
AV240INAN
4
AV241TMAN
AV246INAN
AV2B0CRAN
AV2B4SDAN
AVB30D5AN
2
AVB30D9AN
AVB30F6AN
AVB32E4AN
AVB40B0AN
AVB40D5AN
AVB40DJAN
AVB40F2AN
AVBB0G2AN
AVBB0G2AN1
AVC10B2AN
AVC11A8MG
AVC30D5AN
2
AVC30D9AN
AVC31B2AN
2
AVC40D5AN
AVC40DLAN
AVC40F6AN
AVC40G3AN
AVC40G5AN
2
AVC41D9AN
AVC41G5AN
2
AVC42B2AN
AVC42G5AN
AVCB0GSAN
AVN100BHA
AVN200LML
AVN-200SLA
4
AVN-200TFU
7
AVN200XMA
AVN-215TDL
2
AVN600CMFL
AVN 600YFPL
AVN-700MDA
2
AVN 700YFPL
B
BA010SLA
BA010TFA
BA010XMA
BA015SLA
BA015TFA
BA015XMA
BCM E44
D
D7F76AC000
F
FOB 4F03
FOB 4F04
FOB 4F07
FOB-4F08
FOB 4F10
FOB 4F11
FOB 4F16
FOB-4F19
2
FOB 4F20
FOB 4F21
FOB 4F24
FOB 4F30
FOB 4F32
H
HA FH01
HA T038
HA T041
HM T008
HM T032
HM T034
HSN 1A
I
IBU 4E01
IBU 4E02
IBU 4E03
IBU 4E05
M
MAR320
P
PA710AMAB
PA710AMLSB
PA710BHA
PA710BKLBXD
PA710LMLSB
PA710MDLSB
PA710PAGEBT
PA710RBLSBT
PA710SLUSB
2
PA710TDUSB
PA710TDUSB1
Loading...
Loading...
Nothing found
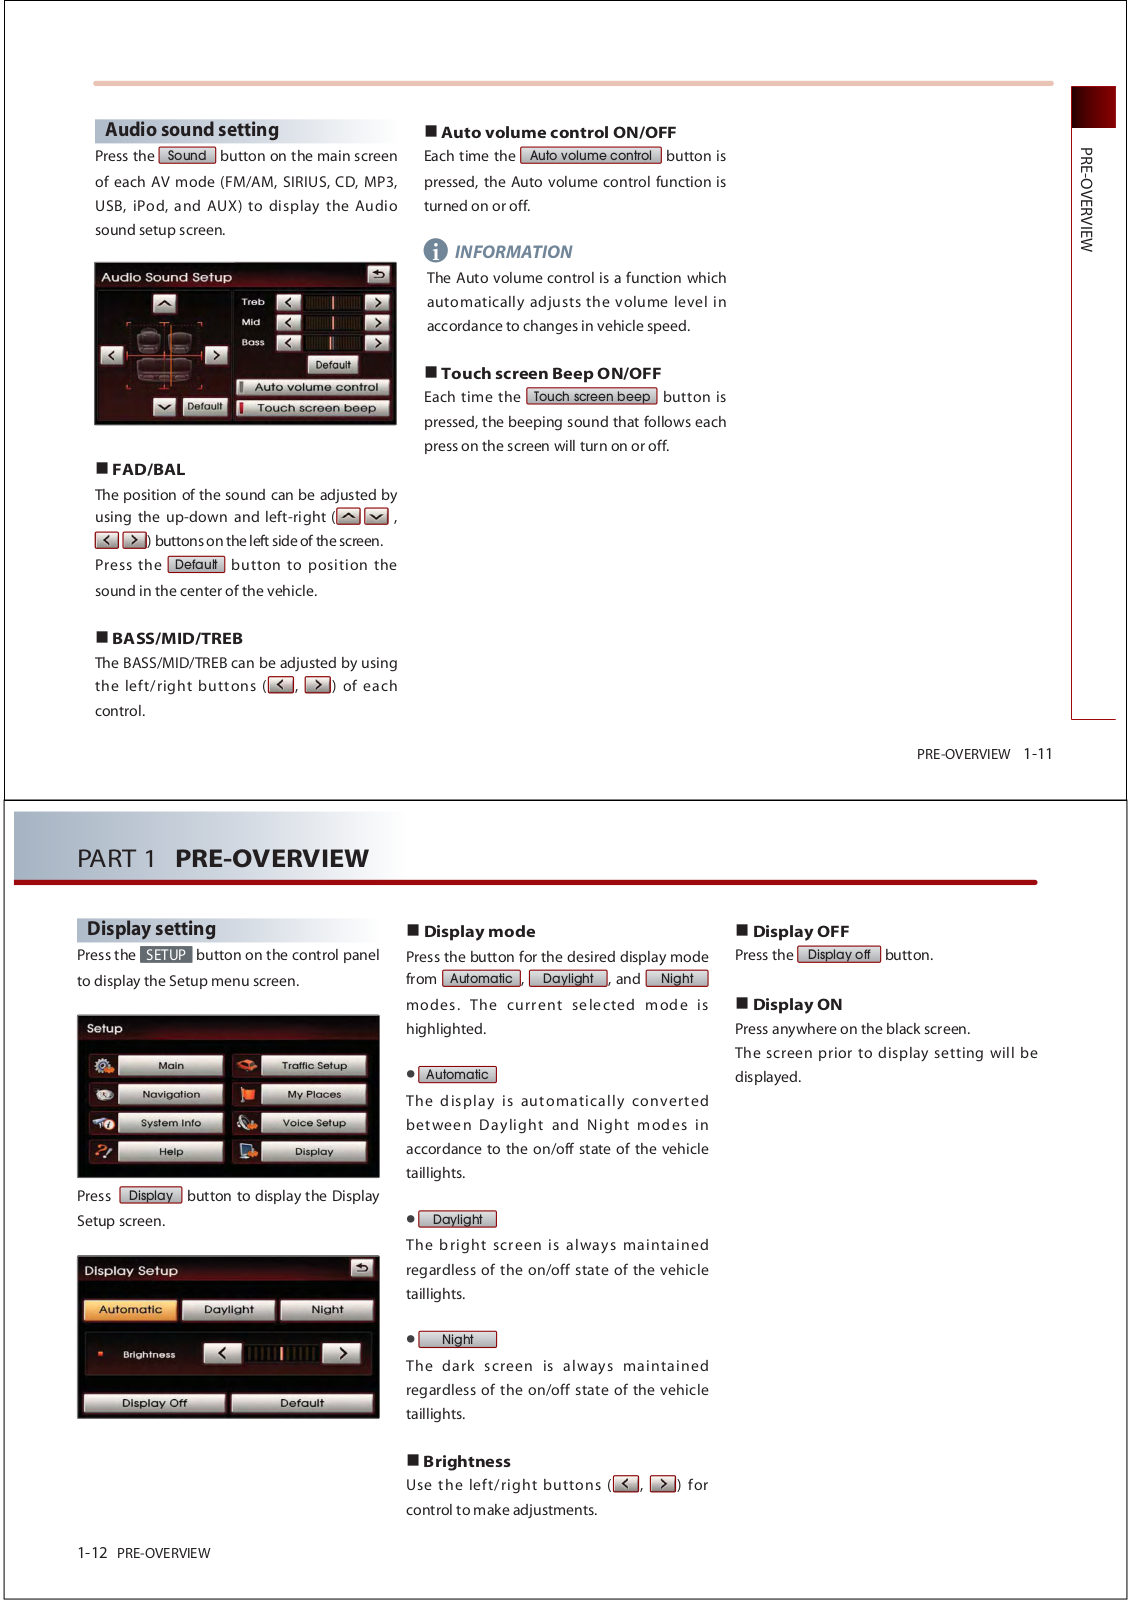
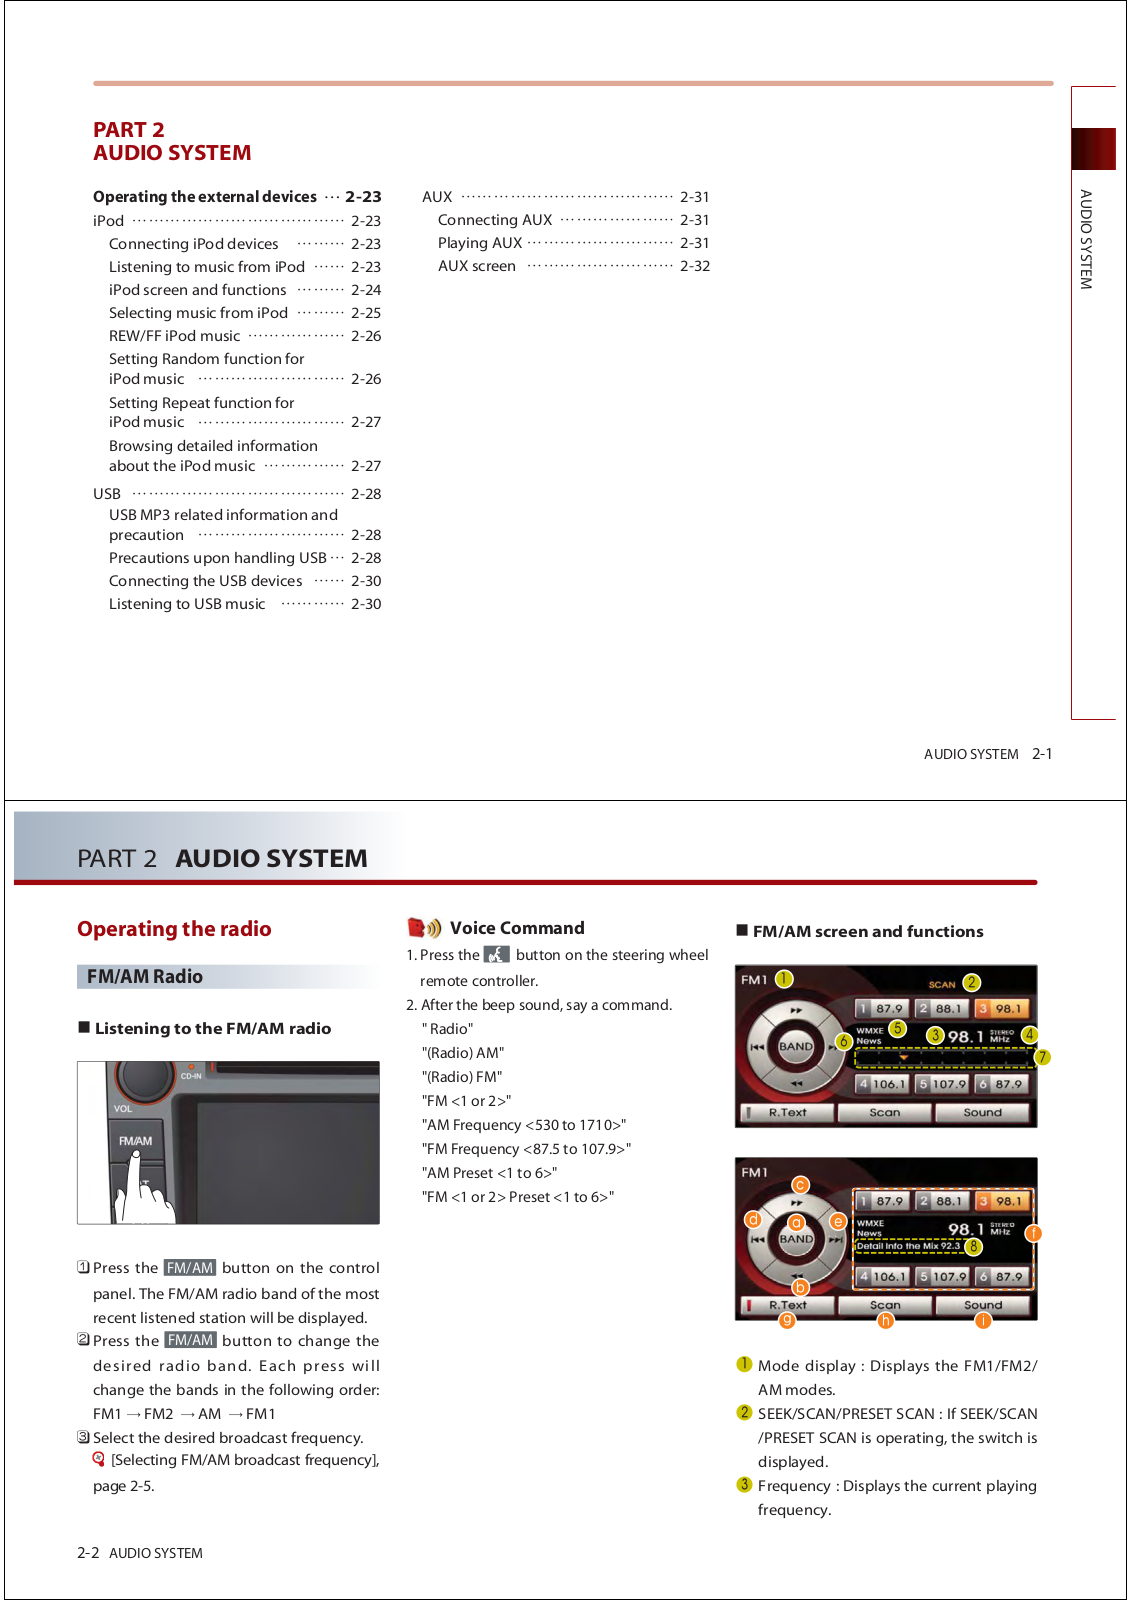
AVN-215TDL
User Manual
68 pgs
4.5 Mb
0
User Manual
67 pgs
4.45 Mb
0
Table of contents
Loading...
HYUNDAI MOBIS AVN-215TDL User Manual
...
HYUNDAI MOBIS User Manual
Download
Specifications and Main Features
Frequently Asked Questions
User Manual
Download
Loading...
+
47
hidden pages
Unhide
You need points to download manuals.
1 point = 1 manual.
You can buy points or you can get point for every manual you upload.
Buy points
Upload your manuals