

Hyundai HYM40P, HYM43P, HYM43SP, HY46SP, HYM51SP Operator's Manual

OPERATOR’S MANUAL
* IMPORTANT SAFETY INSTRUCTIONS
HYM40P - HYM43P - HYM43SP - HY46SP (4-in-1) - HYM51SP (4-in-1)
Licensed by Hyundai Corporation, Korea

Hyundai Power EquipmentHyundai Power Equipment

3
www.hyundaipowerequipment.co.uk
contents
4 Preface
5 safety Messages
6 Hazard syMbols and Meanings
7 sPecification
8 Parts diagraM
9 asseMbly
11 cutting HeigHt adjustMent
12 oPeration
14 MulcHing
16 Warnings
20 Maintenance
22 troublesHooting
24 Warranty
25 declaration of conforMity
26 notes

Hyundai Power Equipment
4
Thank you for choosing this petrol lawnmower engine.
The manual gives information with respect to operation
and maintenance of the HYM40P, HYM43P, HYM43SP,
HY46SP and HYM51SP petrol lawn mowers. Please
read carefully rst before operation. Only operate as
the manual shows. This ensures the users safety and
gets the best results from your lawnmower.
All information and diagrams of this manual are in
accordance with the newest products at time of
publishing time. Our company reserves the right to
make change at any time without notice and without
incurring any obligation. No part of this publication
may be reproduced without written permission.
This manual should be considered a permanent part of
the lawnmower and should remain with the lawnmower
if it is resold.
Preface

5
www.hyundaipowerequipment.co.uk
Your safety and the safety of others is very important.
We have provided important safety messages in this
manual and on the petrol engine. Please read these
messages carefully.
A safety message alerts you to potential hazards that
could hurt you or others. Each safety message is
preceded by a safety alert symbol, as following:
You CAN be KILLED or SERIOUSLY HURT if you
don’t follow instructions.
You CAN be HURT if you don’t follow instructions.
Your machine or other property could be damaged
if you don’t follow instructions.
Gives you helpful information.
safety Messages

Hyundai Power Equipment
6
explosion
kickback
fall
fluid injection
hot surface
fire
moving parts
flying objects
electric shock
read manual
slippery
toxic fumes
Hazard syMbols and Meanings

7
www.hyundaipowerequipment.co.uk
sPecification
Model
HYM40P HYM43P HYM43SP HYM46SP HYM51SP
Dry Weight 22kg 26kg 30kg 32kg 36kg
Engine Type Hyundai
Drive Type Hand-push Self-propelled
Displacement 99cc 139cc 173cc
Engine Power 1.kW 2.5kW 3.8kW
Engine Speed 2800rpm
Height Adjustment 4 Wheel Adjustment Central Adjustment
Cutting Height 25-75mm with 3 heights 25-75mm with 6 heights 25-75mm with 7 heights
Catcher Type Polyester Bag Half Plastic Box
Catcher Volume 40L 55L 70L
Cutting Width 40cm/16” 42cm/17” 46cm/18” 50cm/20”
Deck Material Treated Steel
Hyundai Power Equipment
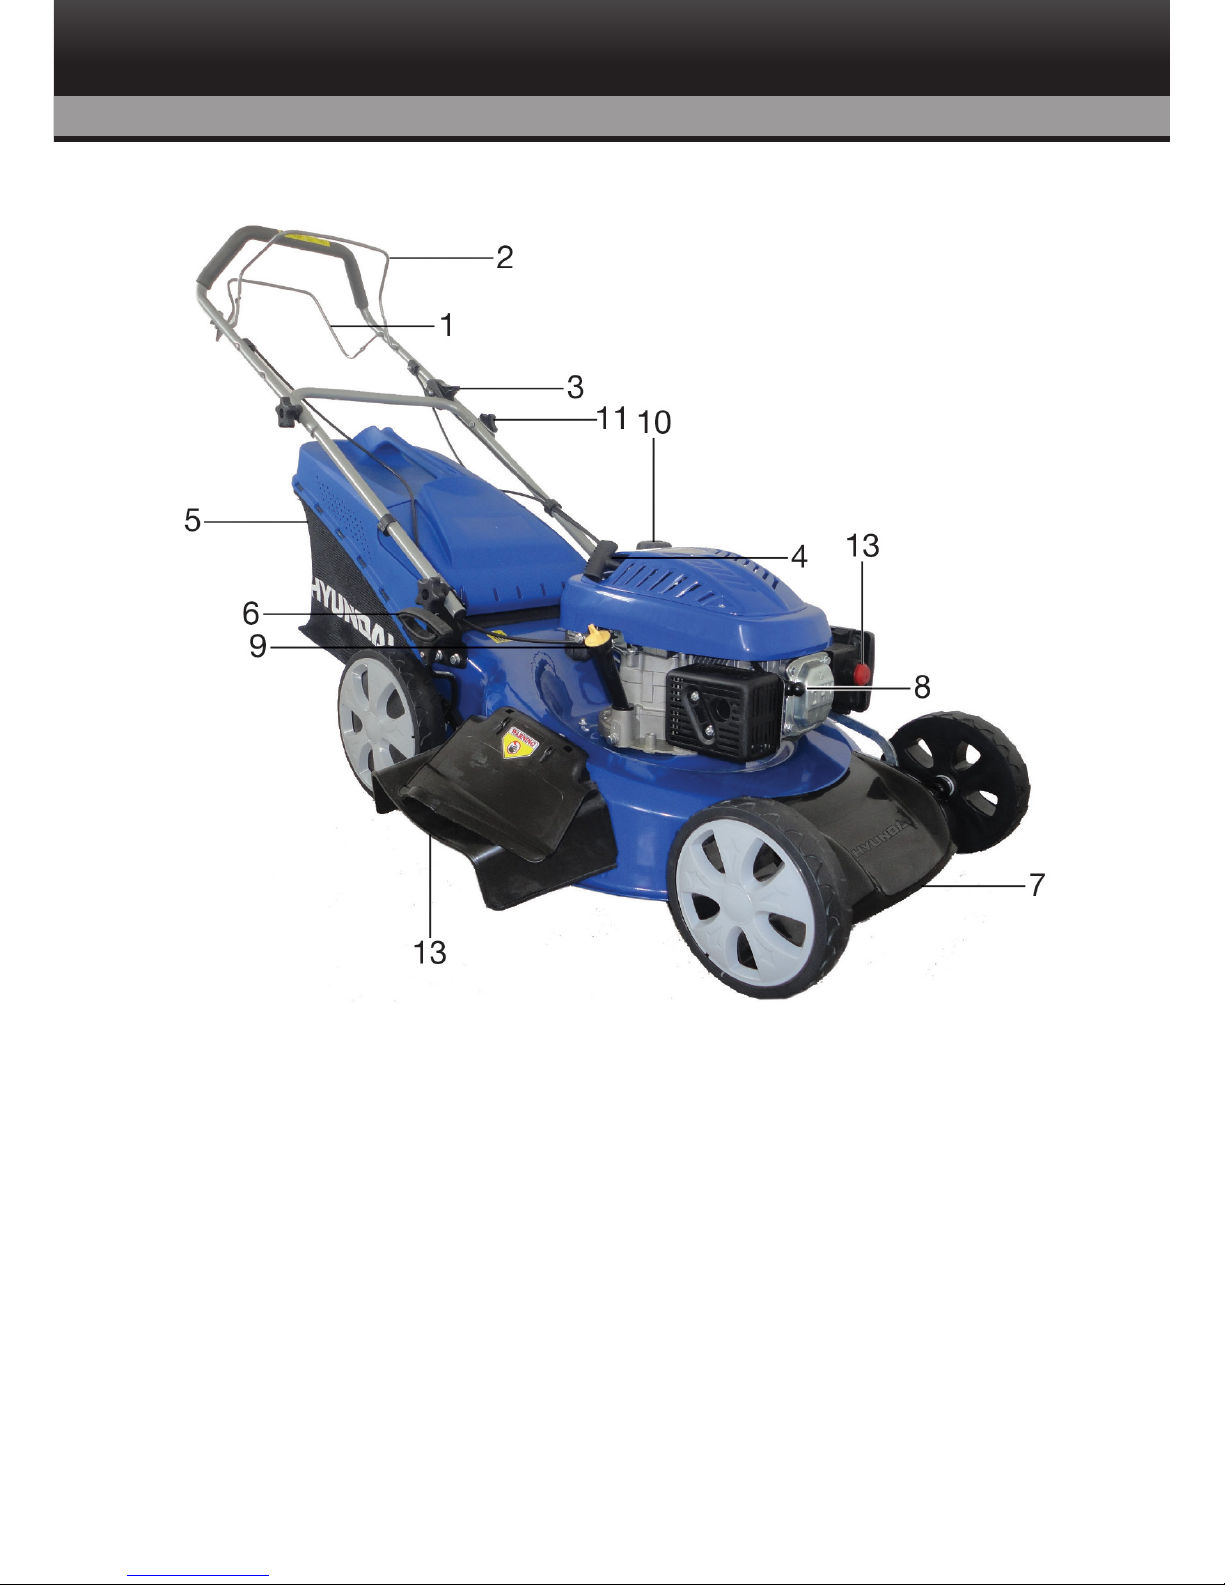
8
1. Drive lever
2. Operator presence
control (OPC) lever
3. Throttle & choke lever
4. Recoil handle
5. Polyester grass catcher
6. Height adjustment lever
7. Cutter deck
8. Spark plug
9. Oil cap & dipstick
10. Fuel cap
11. Folding handle
12. Side discharge deector
13. Primer bulb
Parts diagraM
9
www.hyundaipowerequipment.co.uk
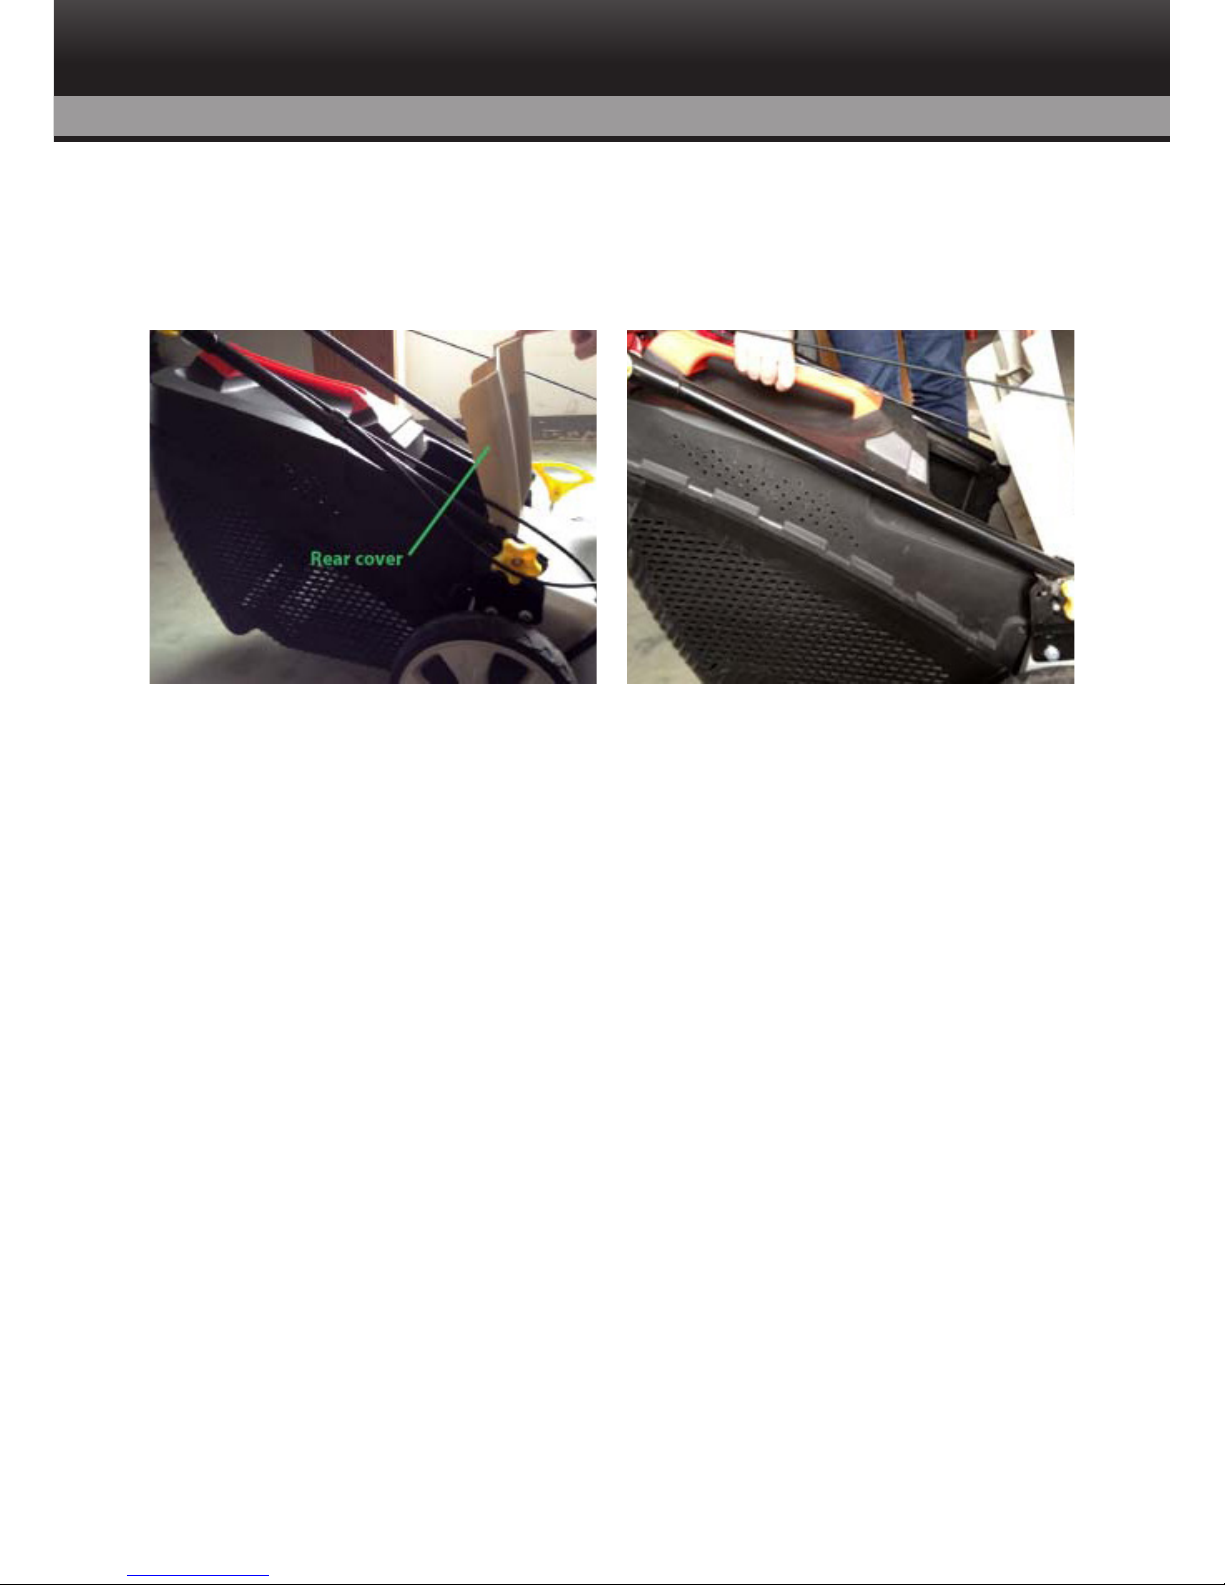
asseMbly
Grass Catcher Assembly
Please do the following:
1. Put the metal frame inside the grass catcher.
2. To t: Raise the rear cover and hitch the grass catcher on
rear of mower. (Fig. 1A, Fig. 1B).
3. To remove: hold and lift rear cover, then remove grass
catcher.
Fig. 1A Fig. 1B
 Loading...