

Hyundai HYBC3000, HYBC4300 User Manual


CONTENTS
Section Description
Page No/N
o’s
1. SAFETY
3 - 6
2. MACHINE PARTS
7
3. ASSEMBLY PROCEDURE
8 - ϭϬ
4. OPERATING PROCEDURES
1ϭ -1Ϯ
5. MAINTENANCE
1Ϯ -1ϰ
6. TROUBLESHOOTING
1ϱ
7. STORAGE
1ϲ
8. SPECIFICATION
1ϲ
9. SPARE PARTS
10. CONTACT DETAILS
11. DECLARATIONS
1ϳ-21
Ϯ2
Ϯ3
Page 2
Ver 4
1. SAFETY.
1.1. The operator of the machine;
1.1.1. Is responsible for and has a duty of care in making sure that the machine is operated safely
and in accordance with the instructions in this user manual.
1.1.2. Should never leave it in a condition which would allow an untrained or unauthorised
person/s to operate this machine.
1.1.2.1. Should take care and show due diligence for the safety of and with regard to those
around whilst using the machine, to include but not limited to;
1.1.2.1.1. Elderly, children, pets, livestock and property.
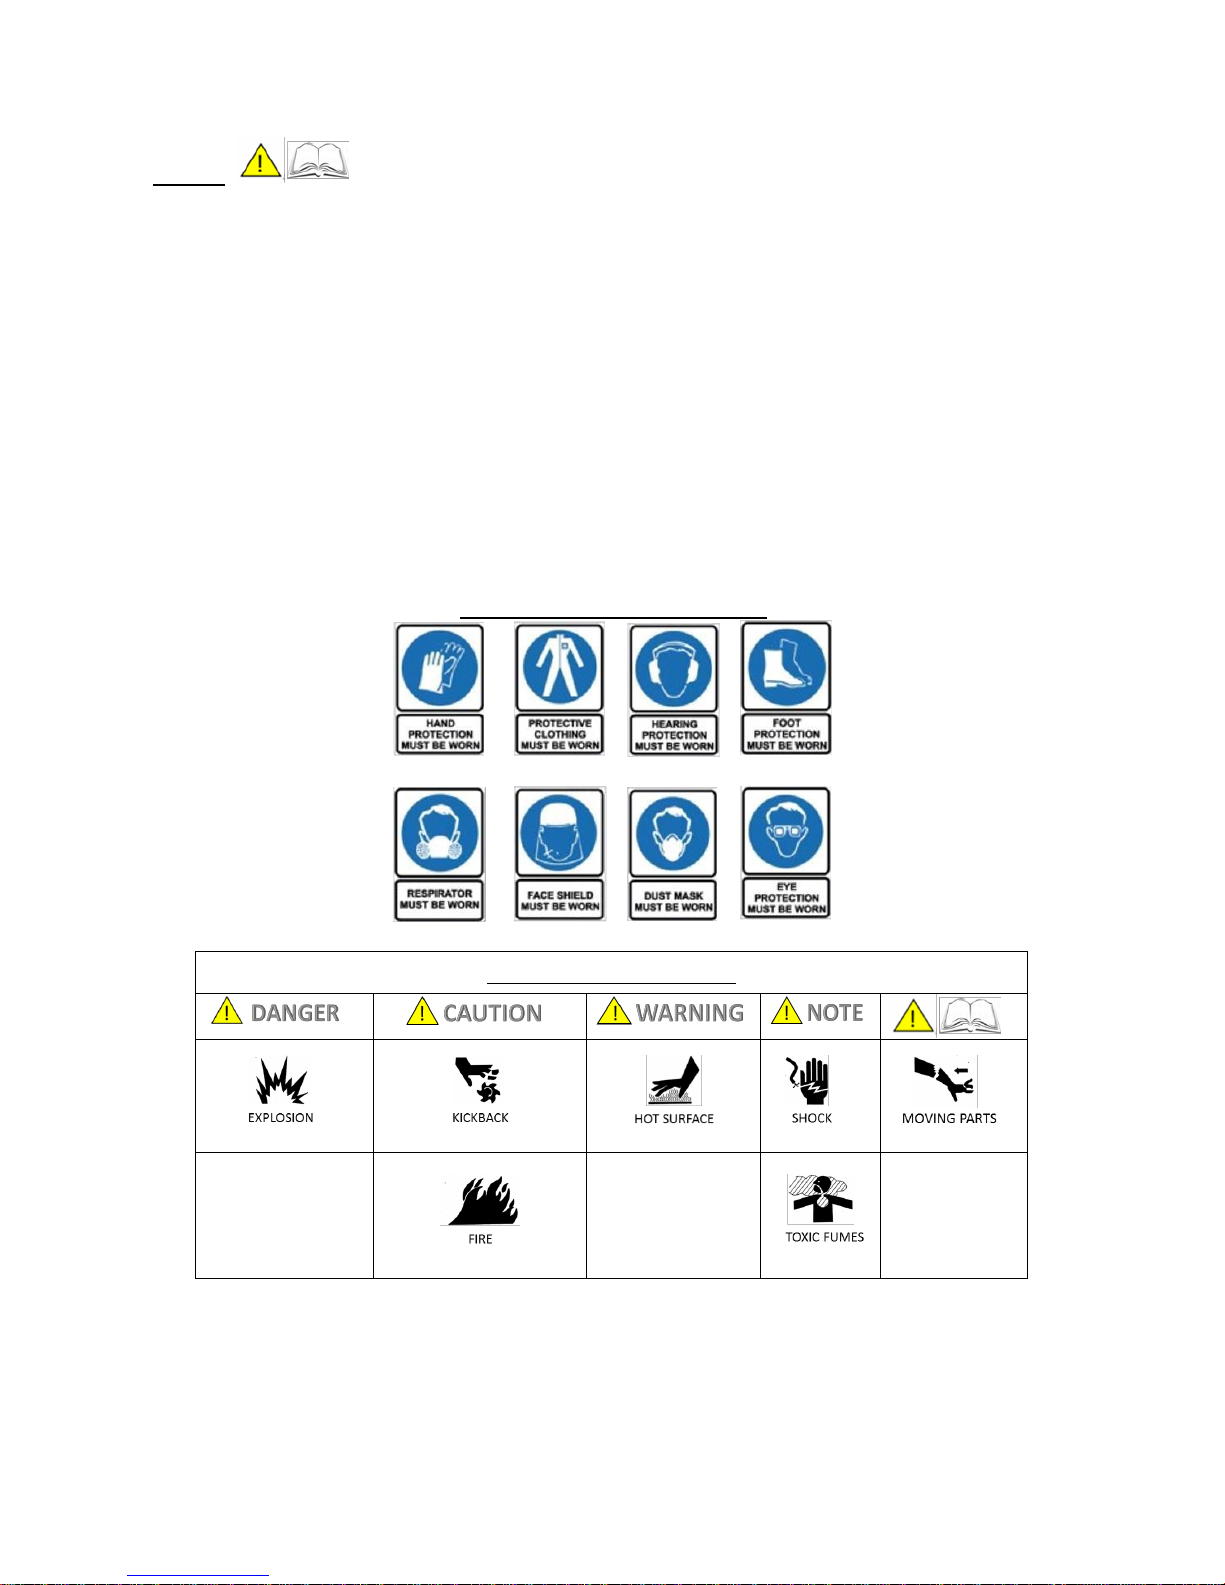
1.2. Some or all of the following PPE, Warning Signs and symbols may appear throughout this manual
and you must adhere to their warning/s. Failure to do so may result in personal injury.
Personal Protective clothing (PPE)
Warning Signs and Symbols
Page 3
Ver 4

1.3. Carbon Monoxide
1.3.1. Carbon monoxide is a colourless and odourless gas. Inhaling this gas can cause death as well
as serious long term health problems such as brain damage.
1.3.2. The symptoms of Carbon monoxide poisoning can include the following;
1.3.2.1. Headaches, Dizziness, Nausea, Breathlessness, Collapsing or Loss of consciousness.
1.3.2.2. Carbon monoxide symptoms are similar to flu, food poisoning, viral infections and
simply tiredness. That’s why it’s quite common for people to mistake this very dangerous
poisoning for something else.
1.3.3. To avoid Carbon monoxide poisoning DO NOT Use Petrol/Diesel powered equipment inside
a home or garage even if doors and windows are open.
1.3.4. If you think you or someone around you has been affected by carbon monoxide poisoning;
1.3.4.1. Get fresh air immediately.
1.3.4.2. Open doors and windows, turn off machine and leave the affected area.
1.3.4.3. See your doctor immediately or go to hospital - let them know that you suspect
carbon monoxide poisoning.
1.3.5. DO NOT use Petrol/Diesel powered equipment outside in a well-ventilated area.
1.4. General fuel safety.
1.4.1. Fuel Safety additional information can be obtained from the Health and Safety Executive
(HSE) document SR16.
1.4.2.
All fuels are Flammable.
1.4.3. Keep away from all ignition sources i.e. Heaters, Lamps, sparks from Grinding or welding.
1.4.4. Hot work on tanks that have contained fuel is extremely dangerous and should not be
carried out.
1.4.5. Keep work area clean and tidy.
Page 4
Ver 4

1.4.6. Clean up all spills promptly using correct methods i.e. absorbent granules and a lidded bin.
1.4.7. Dispose of waste fuels correctly.
1.5. Petrol safety.
1.5.1.1. Always fuel and defuel in well-ventilated area.
1.5.1.2. Always wear correct, suitable and fit for purpose Personal Protective Equipment
(PPE), suggested items are as follows, but are not limited too.
1.5.1.3.
Hand protection.
1.5.1.4.
Protective clothing.
1.5.1.5.
Respiratory protective equipment should be used when in an unventilated
area.
1.5.1.6. When defueling always use a propriety fuel retriever.
1.5.1.7. Always carry fuel in the correct and clearly marked container.
1.6. Tool safety
DO NOT modify the unit in any way.
Only use the tool for the job for which it is intended.
Always remove HT lead from spark plug when checking machine or changing parts.
1.6.1. Inspect tool before each use, and replace any damaged parts before
operation. Check for fuel leaks and make sure all fasteners are secure and in place. Make sure
the safety guard is properly attached.
1.6.2. Replace parts that are cracked, chipped or damaged in any way before using the tool. Make
sure the safety guard is properly attached.
1.6.3. Use only recommended accessories and parts, approved by the manufacturer. Non
approved attachments may cause damage to the machine or harm to the user, and will also
void your machine’s warranty.
1.6.4. When replacing the cutting attachments or any other parts, always use a certified
replacement sourced from the manufacturer. Only use genuine Hyundai spare parts.
Page 5
Ver 4

1.6.5. Under no circumstances should you ever take the product apart or alter it in any way even if
the item is faulty. You may damage or cause further harm by taking the product apart and you
will void your warranty in doing so.
1.6.6. This unit is designed to cut fresh brush with a thickness smaller than 10mm. DO NOT
attempt to cut brush with a thickness greater than 10mm. DO NOT use on trees, etc.
1.6.7. Blunt blades increase the risk of kickback reactions, so check blade carefully before each
use. If blade is blunt, replace.
1.6.8. This brush cutter is designed exclusively for cutting garden areas in a private domestic
setting. Using it for any other purpose other than those intended qualify as improper use. The
operator is solely responsible for assuming all risks.
1.6.9. Do not overload the machine. It will safer and better when operated within its specified
performance range.
Page 6
Ver 4
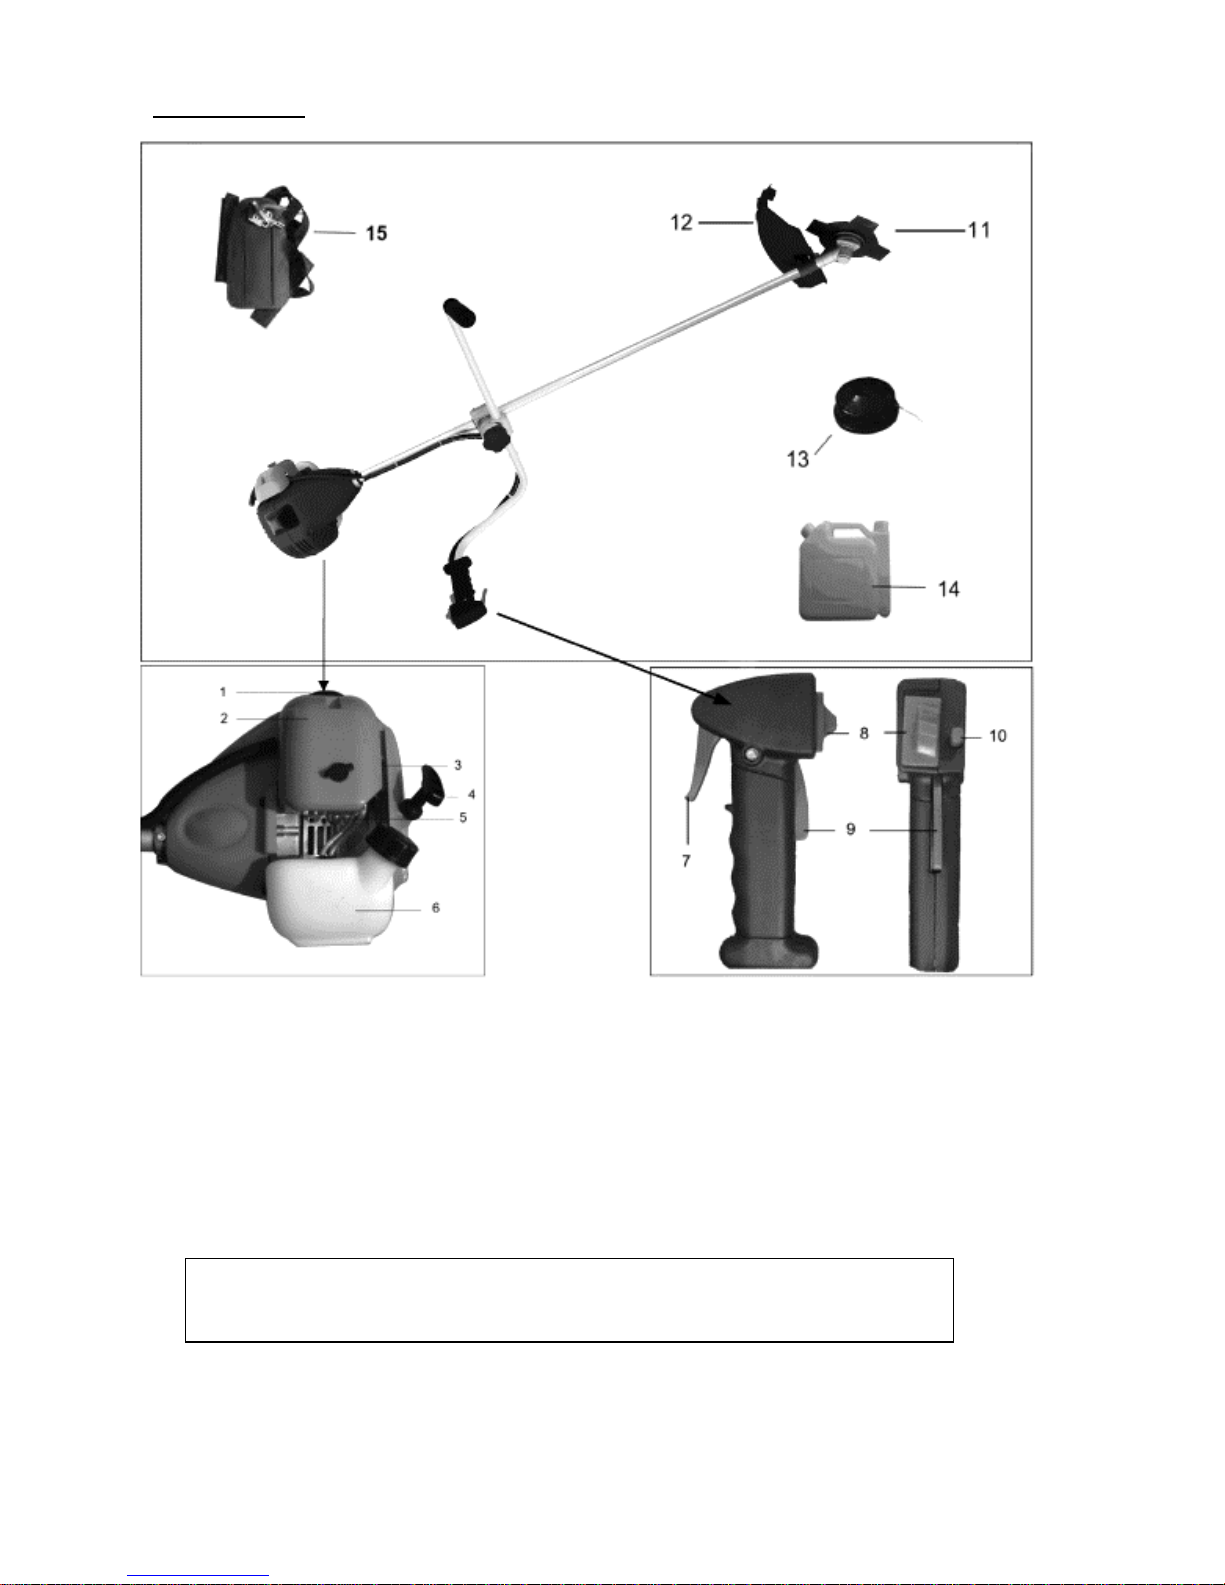
2. MACHINE PARTS
1
Spark Plug 9
Safety Trigger
2
Air Filter 10
Throttle Lock
3
Choke Lever 11
Cutting Blade
4
Starter Pull Cord
12
Blade Guard
5
Primer Bulb 13
Spool
6
Fuel Tank 14
Fuel Mixing Container
7
Throttle Trigger
15
Harness
8
Ignition Switch
Accessories: 1 x Spool; 1 x Harness; 1 x Fuel Mixing Container; 1 x Prevent Rotational
Wrench; 2 x Hexagonal Keys (4mm, 5mm); 1 x Spark Plug Wrench and 1 x Open End
Wrench.
Page 7
Ver 4
3. ASSEMBLY PROCEDURE
Anti-vibration systems do not guarantee that you will not sustain white finger
disease or carpal tunnel syndrome. Therefore, continual and regular users should
monitor closely the condition of their hands and fingers. If any of the above
symptoms appear, seek medical advice immediately.
Remove HT lead from spark plug when assembling the machine or changing parts.
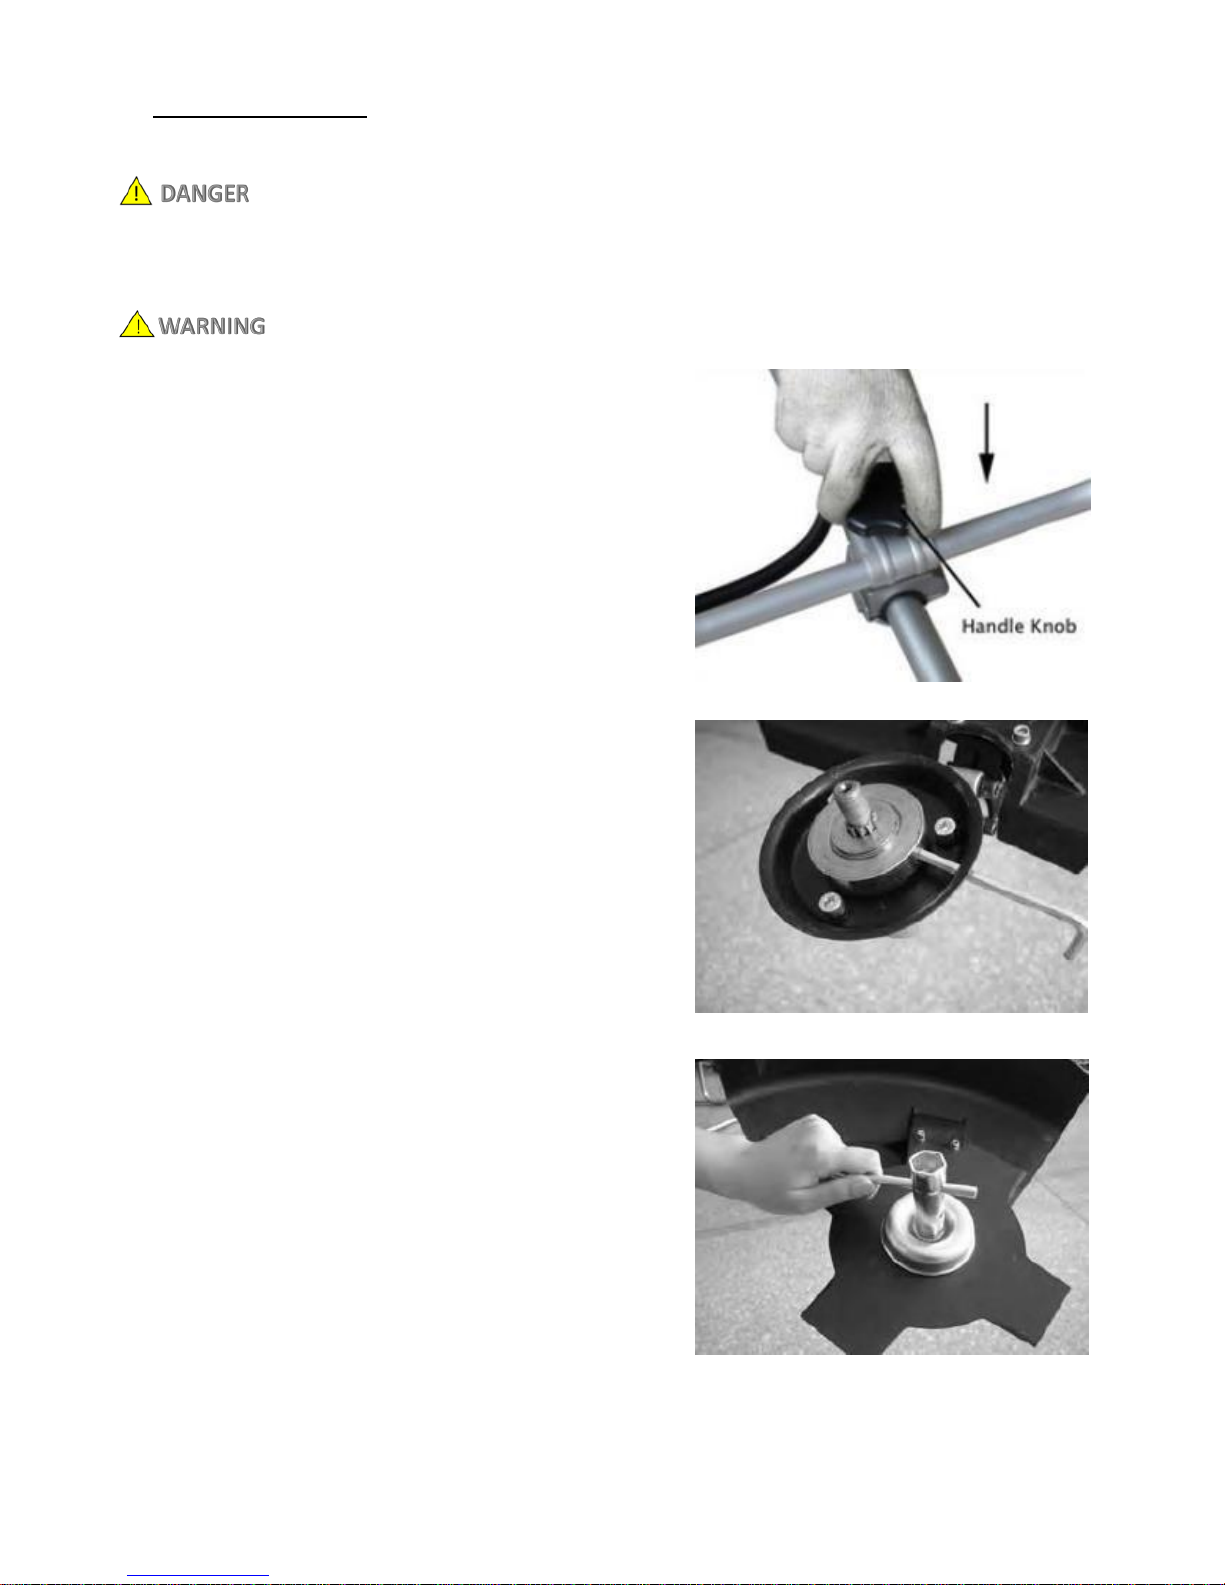
3.1. Handle assembly.
3.1.1. Assemble the handles onto the upper shaft.
3.1.2. Tighten the handle knob.
3.2. Replacing the Cutting Blade.
3.2.1. Make sure the HT lead is removed from the
spark plug.
3.2.2. Make sure the brush cutter is switched off
and the engine is fully stopped.
3.2.3. Insert the ‘prevent rotation’ wrench or
equivalent into the back shield and the adaptor
semicircle hole to prevent the output shaft from
turning.
3.2.4. Loosen the nut with the socket wrench (T-
Wrench) by turning clockwise (view from top),
then remove spring washer, washer, cover cap,
spacer and cutter blade from the output shaft.
3.2.5. Remove the old cutter blade, and install the
new blade.
3.2.6. Install spacer B, the cover cap, the washer
and spring washer, then tight the nut.
3.2.7. Remove the ‘prevent rotational wrench’ or
equivalent from the back shield and adaptor.
3.2.8. Before use remove the transportation guard.
Page 8
Ver 4
 Loading...