

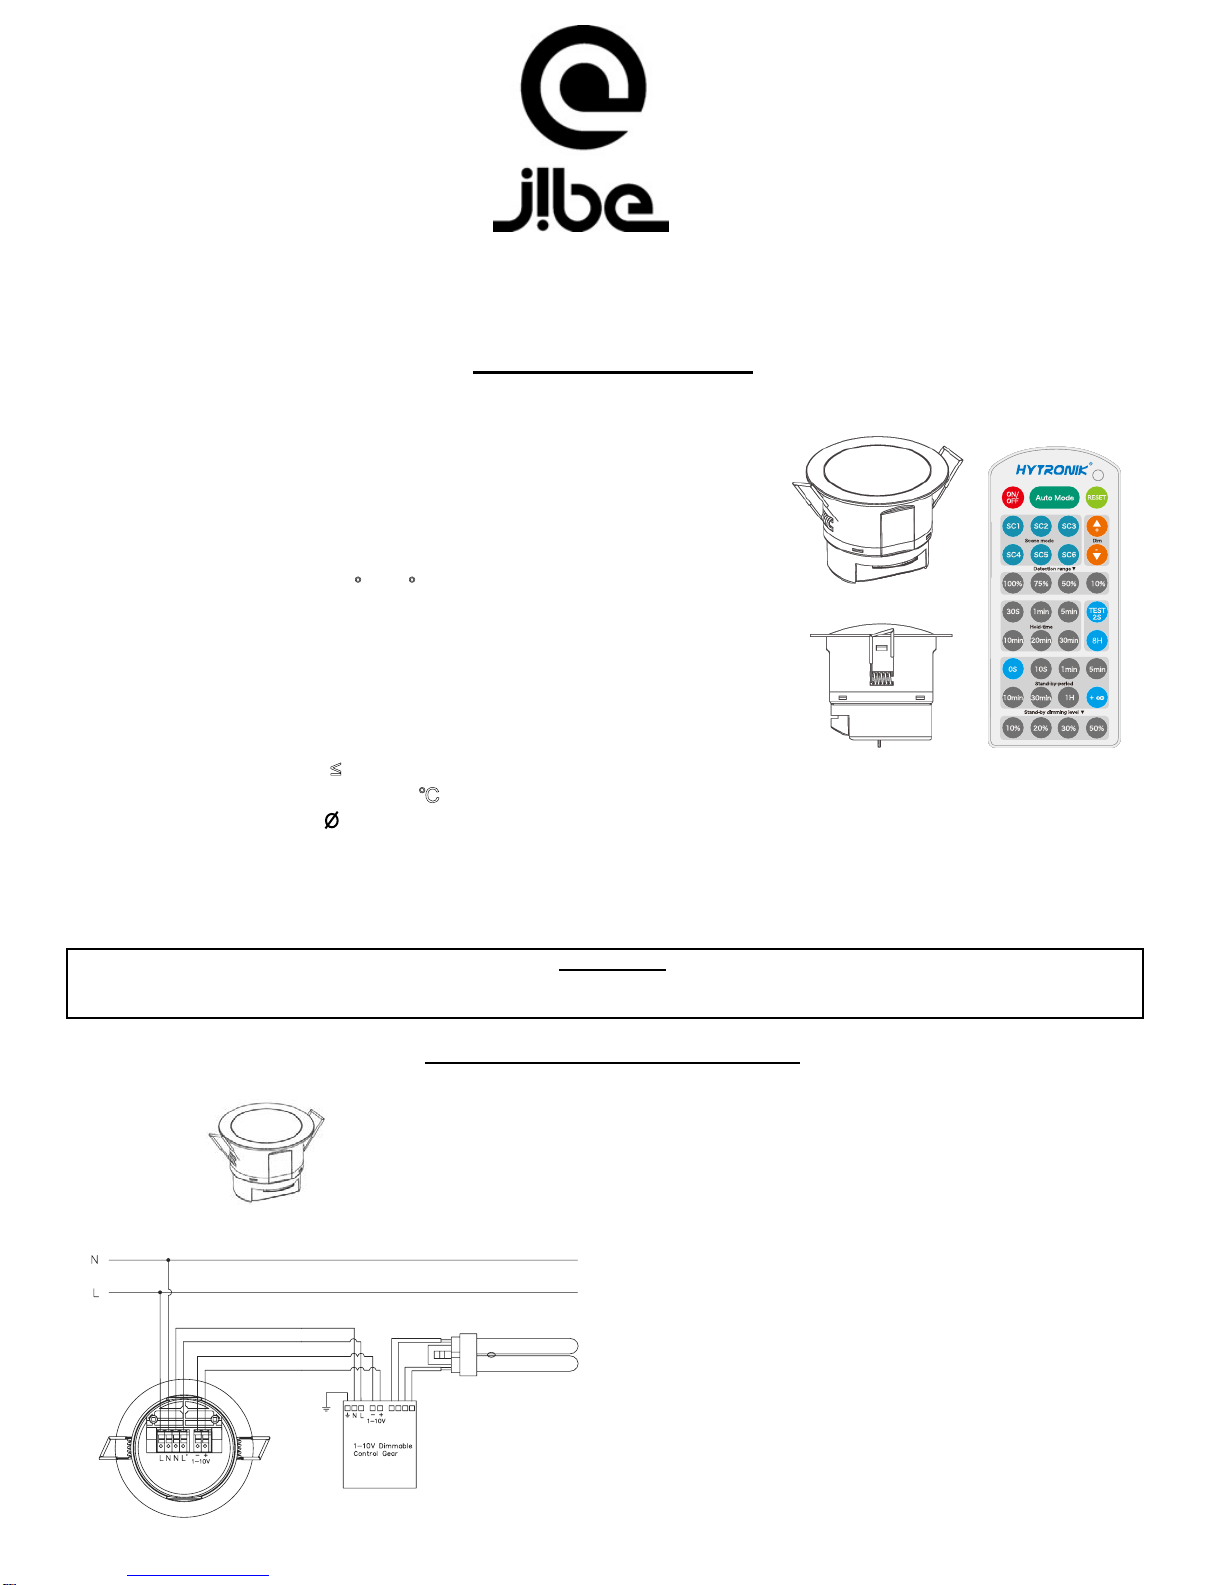
Instruction Manual for Daylight Harvest Microwave Motion Sensor
Flush Mounting Installation Version, Model No.: HC407VDS
Technical Specifications
PRODUCT TYPE: Microwave Motion Sensor
OPERATING VOLTAGE: 120-277VAC 50Hz/60Hz
HF SYSTEM: 5.8GHz CW radar
TRANSMISSION POWER: <0.2mW
RATED LOAD: 120VAC@400W
(capacitive load)
230VAC@800W
277VAC@1000W
°
DETECTION ANGLE: 30 ~150
POWER CONSUMPTION: <1W
DETECTION RANGE: Max. 16 meters in diameter, adjustable
TIME SETTING: 30s ~ 30 min.
STAND-BY PERIOD: 0s, 10s ~ 1h, +
STAND-BY LEVEL: 10% ~ 50%
MOUNTING: Indoors, ceiling & walling mounted
8M
≤INSTALLATION HEIGHT:
WORKING TEMP.: -20 ~ +60℃
INSTALLATION HOLE: 78mm
The sensor is an active motion detector; it emits a high-frequency electro-magnetic wave 5.8GHz and receives its echo. The sensor detects the change
in echo from movement in its detection zone. A microprocessor then triggers the switch light ON command. Detection is possible through doors, panels
of glasses thin walls.
Note: the high-frequency output of this sensor is <0.2mW; approximately just 0.2‰ of the transmissi
microwave oven.
°
∞∞
HC407VDS HRC-01
on power of a mobile telephone or the output of a
IMPORTANT
PLEASE READ THESE INSTRUCTIONS CAREFULLY PRIOR TO INSTALLATION AND RETAIN THIS LEAFLET IN A KNOWN
AND SAFE PLACE FOR FUTURE REFERENCE.
SECTION 1 INSTALLATION & WIRING
1.1 ENSURE THAT THE ELECTRICITY SUPPLY IS SWITCHED OFF COMPLETELY BEFORE INSTALLING OR SERVICING THIS
PRODUCT
The sensor works with a main voltage of 220-240V/AC 50Hz. A 100-120V/AC version is available on request.
The sensor has a 6-wire electrical interface:
Nx2 (neutral / 120-277VAC) + (1-10V “+” interface)
L (phase / 120-277VAC) - (1-10V “-” interface)
L’ (switched phase / output)
1.2 WIRING DIAGRAM
HC407VDS
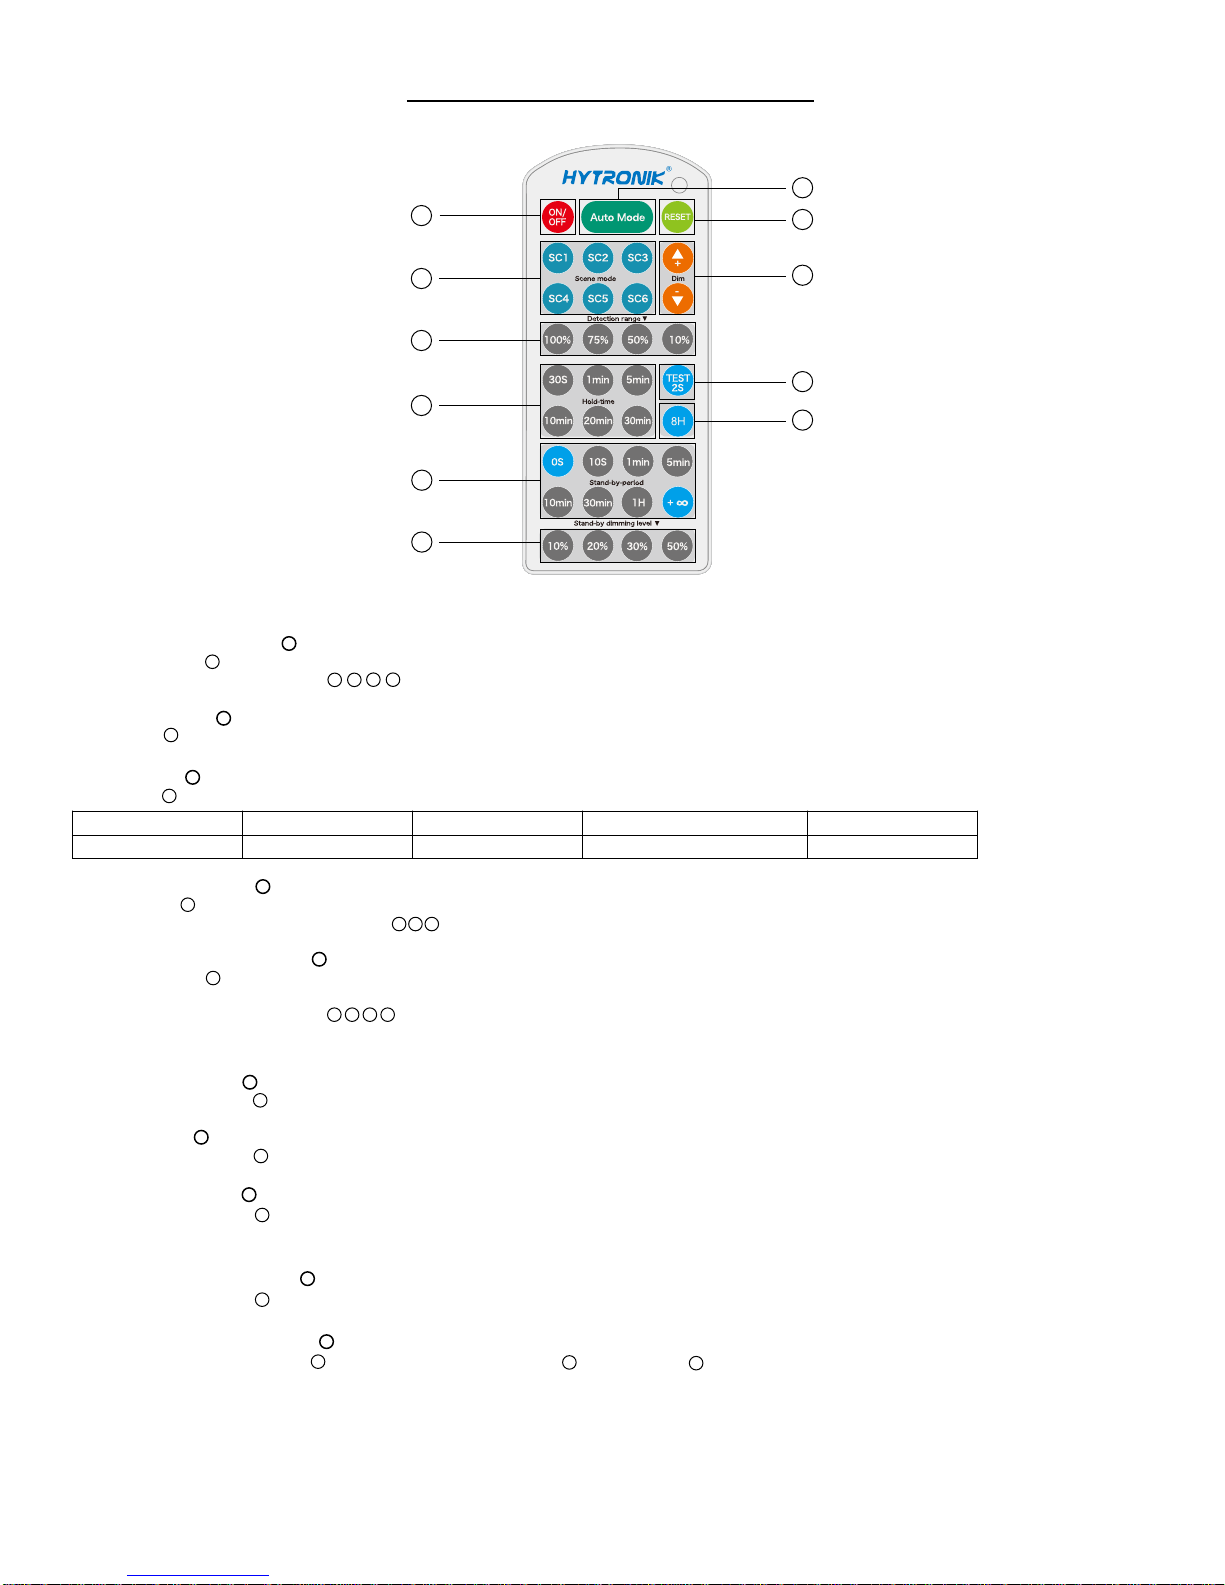
SECTION 2 FUNCTIONS AND SETTINGS
y
g
2.1 Remote control (separate instructions)
1
2
3
4
5
6
8
7
9
10
11
2.2 Functions
Permanent ON/OFF [ ]
1. Press the button , the light goes to permanent ON or permanent OFF mode.
2. Exit this mode b
Auto Mode [ ]
Press button goes to auto mode, the sensor starts working and all settings remain the same as the latest status before the light was switched ON/OFF.
RESET [ ]
button
Press button , all existing settings go back to factory-set value. (See table below)
1
pressingbutton . (Please referto explanation accordingly)
2
button
2
3
3
Detection range Hold time Stand-by period Stand-by dimming level Constant LUX
100% 5min 10min 20% 100Lux
button
1
9
4
3
2
Test 2s function [ ]
1. Press button , the sensor goes to test mode (hold time 2s), stand-by period and daylight sensor are disabled.
2. Exit test mode by pressing buttons in zone , and the sensor setting is changed accordingly.
8H permanent on mode [ ]
1. Press the button , the light will be 100% on for 8 straight hours even there is no motion detected.
8
button
9
button
3
4
7
9
8
2. After 8 hours, the sensor goes to auto mode directly.
3. Exit this mode by pressing button (Please refer to explanation accordingly).
21 3 4
2.3 Settings
Detection range [ ]
Press the buttons in zone to set detection range at 100% / 75% / 50% / 10%.
Hold time [ ]
zone
Press the buttons in zone to set ho
Stand-by period [ ]
Press the buttons in zone to set stand-by period at 0s / 10s / 1min / 5min / 10min / 30min / 1H / + ∞.
Note: “0s” means on/off control; “+∞” means 2 steps of dimming control, light never switches off.
Stand-by dimming level [ ]
Press the buttons in zone to set the stand-by dimming level at 10% / 20% / 30% / 50%.
Constant lux value setting [ ]
press the buttons in zone to adjust the fixture’s brightness. means dim up, means dim down.
1. Lon
2. Stop pressing the button when get the target brightness.
3. The built-in daylight sensor reads the available ambient lux level and adjust electrical brightness to maintain the constant lux value.
zone
7
zone
6
10
6
7
10
zone
11
ld time at 30S / 1min / 5min / 10min / 20min / 30min.
11
5
zone
5
+ -

Scene mode options [ ]
zone
4
There are 6 scene modes for different applications:
Scene options Detection range Hold time Stand-by period Stand-by dimming level Constant Lux
SC1 100% 1min 1min 10% 50Lux
SC2 100% 3min 5min 20% 75Lux
SC3 100% 5min 10min 20%
SC4 100% 10min 30min 30% 150Lux
SC6 100% 30min
Note: end-user can adjust the settings by pressing buttons in zone , the last setting stays in validity.
6 71011
+∞
50% 400Lux
SECTION 4 TROUBLE SHOOTING
gnittestsujdAdetcelesgnitteslortnoc-thgiltcerrocnI
The load does not work
The load is on without any identifiable
movement
The load does not work despite movement
The sensor is not mounted for reliably detecting movement Securely mount enclosure
Movement occurred, but not identified by the sensor
(movement behind wall, movement of small object in
immediate lamp vici
nity etc.)
Rapid movements are being suppressed to minimize
malfunctioning or the detection radius is too small
Check zone setting
Check zone setting
daolecalpeRytluafdaoL
NOhctiwSFFOhctiwssniaM
100Lux
xuL002%03h1nim02%0015CS
YDEMERESUACYDEMERESUACNOITCNUFLAM
gnittesenozkcehCenoznoitcetedehtnitnemevomsuounitnoCnosyawlasidaolehT
 Loading...