

Hytera Communications RD98XSU1H Users Manual

Preface
Thank you for purchasing Hytera RD98XS series DMR digital repeater.
As a product built to the DMR standard, RD98XS is endowed with ergonomic design,
reliable performance and comprehensive digital functions to deliver an advanced
communication solution. With RD98XS, you can make use of digital advantages to top the
competition!
To ensure you get maximum benefit from the product, please read this manual carefully
before use.

Icon Information
The following icons are available through this manual:
Caution: indicates situations that could cause damage to your repeater or bodily
injury.
Note: indicates tips that can help you make better use of your repeater.
*Indicates functions or parts that are not supported by the current version of the repeater,
but will be available to future versions.
Copyright Information
Hytera and HYT are the trademark or registered trademark of Hytera Communications
Co., Ltd in PRC and other countries and/or areas. Hytera retains the ownership of its
trademarks and product names. All other trademarks and/or product names that may be
used in this manual are properties of their respective owners.
The Hytera product described in this manual may include Hytera computer programs
stored in memory or other media. Laws in the PRC and/or other countries or areas
preserve for Hytera exclusive rights for Hytera computer programs. The purchase of this
product shall not be deemed to grant, either directly or by implication, any rights to the
purchaser with respect to Hytera computer programs. Any Hytera computer programs
may not be copied, modified, distributed, decompiled, or reverse-engineered in any
manner without the prior written consent of Hytera.
Disclaimer
Hytera endeavors to achieve the accuracy and completeness of this manual, but no
warranty of accuracy or reliability is given. All the specifications and designs are subject to
change without prior notice due to continuous technology development. No part of this
manual may be copied, modified, translated, or distributed in any manner without the
express written permission of Hytera.
If you have any suggestions or would like to learn more details, please visit us at:
www.hytera.cn.
http://
1

Contents
Checking Items in the
Repeater Overview ........................................................................................................... 4
Front Panel ................................................................................................................4
Rear Panel................................................................................................................. 5
Internal Parts.............................................................................................................. 6
Installation......................................................................................................................... 6
Installation Overview.................................................................................................. 7
Before Installation ...................................................................................................... 7
Installation Requirements........................................................................................... 8
Installation Steps ...................................................................................................... 10
Electrical Connections..................................................................................................... 13
Power Supply Connections...................................................................................... 13
RF Antenna Connections......................................................................................... 14
Post-Installation Checklist ............................................................................................... 15
Status Indications............................................................................................................ 16
LCD Icons ................................................................................................................ 16
LED Indicator ........................................................................................................... 16
Basic Operations............................................................................................................. 17
Turning the Repeater On/Off.................................................................................... 17
Adjusting the Volume ............................................................................................... 17
Adjusting Power Level ............................................................................................. 18
Backlight .................................................................................................................. 18
Locking/Unlocking the Front Panel .......................................................................... 18
Menu Navigation ............................................................................................................. 19
Radio Info ................................................................................................................ 19
Channel Info............................................................................................................. 20
Exit........................................................................................................................... 20
Alarm Information............................................................................................................ 20
Over Temperature Alarm .......................................................................................... 21
Fan Failure Alarm..................................................................................................... 21
VSWR Alarm............................................................................................................ 22
Low Forward Power Alarm....................................................................................... 23
Over/Low Voltage Alarm .......................................................................................... 23
Troubleshooting .............................................................................................................. 25
Care and Cleaning .......................................................................................................... 26
Optional Accessories.......................................................................................................
Package......................................................................................... 3
27
2
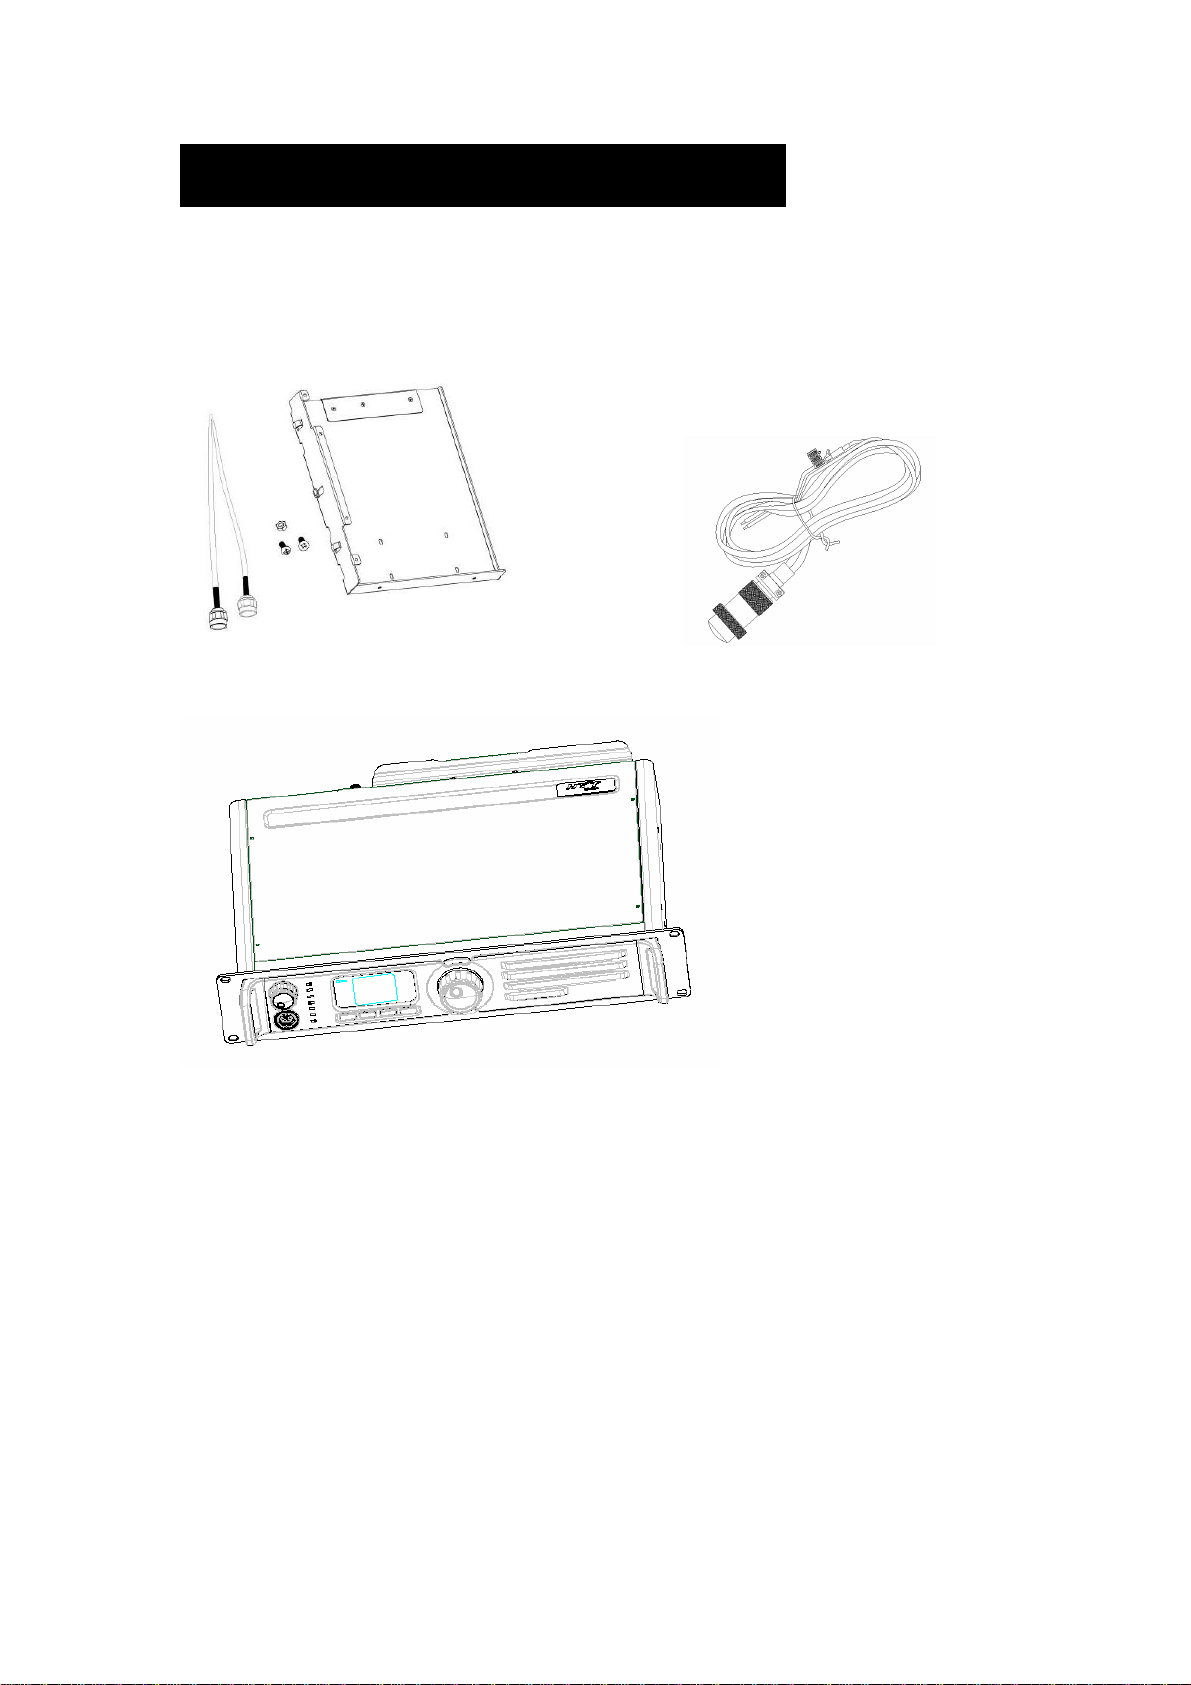
Checking Items in the Package
Please unpack carefully and check that all items listed below are received. If any item is
missing or damaged, please contact your dealer.
Duplexer Installation Kit Power Cord
Owne
Repeater
r’s Manual
3
Repeater Overview
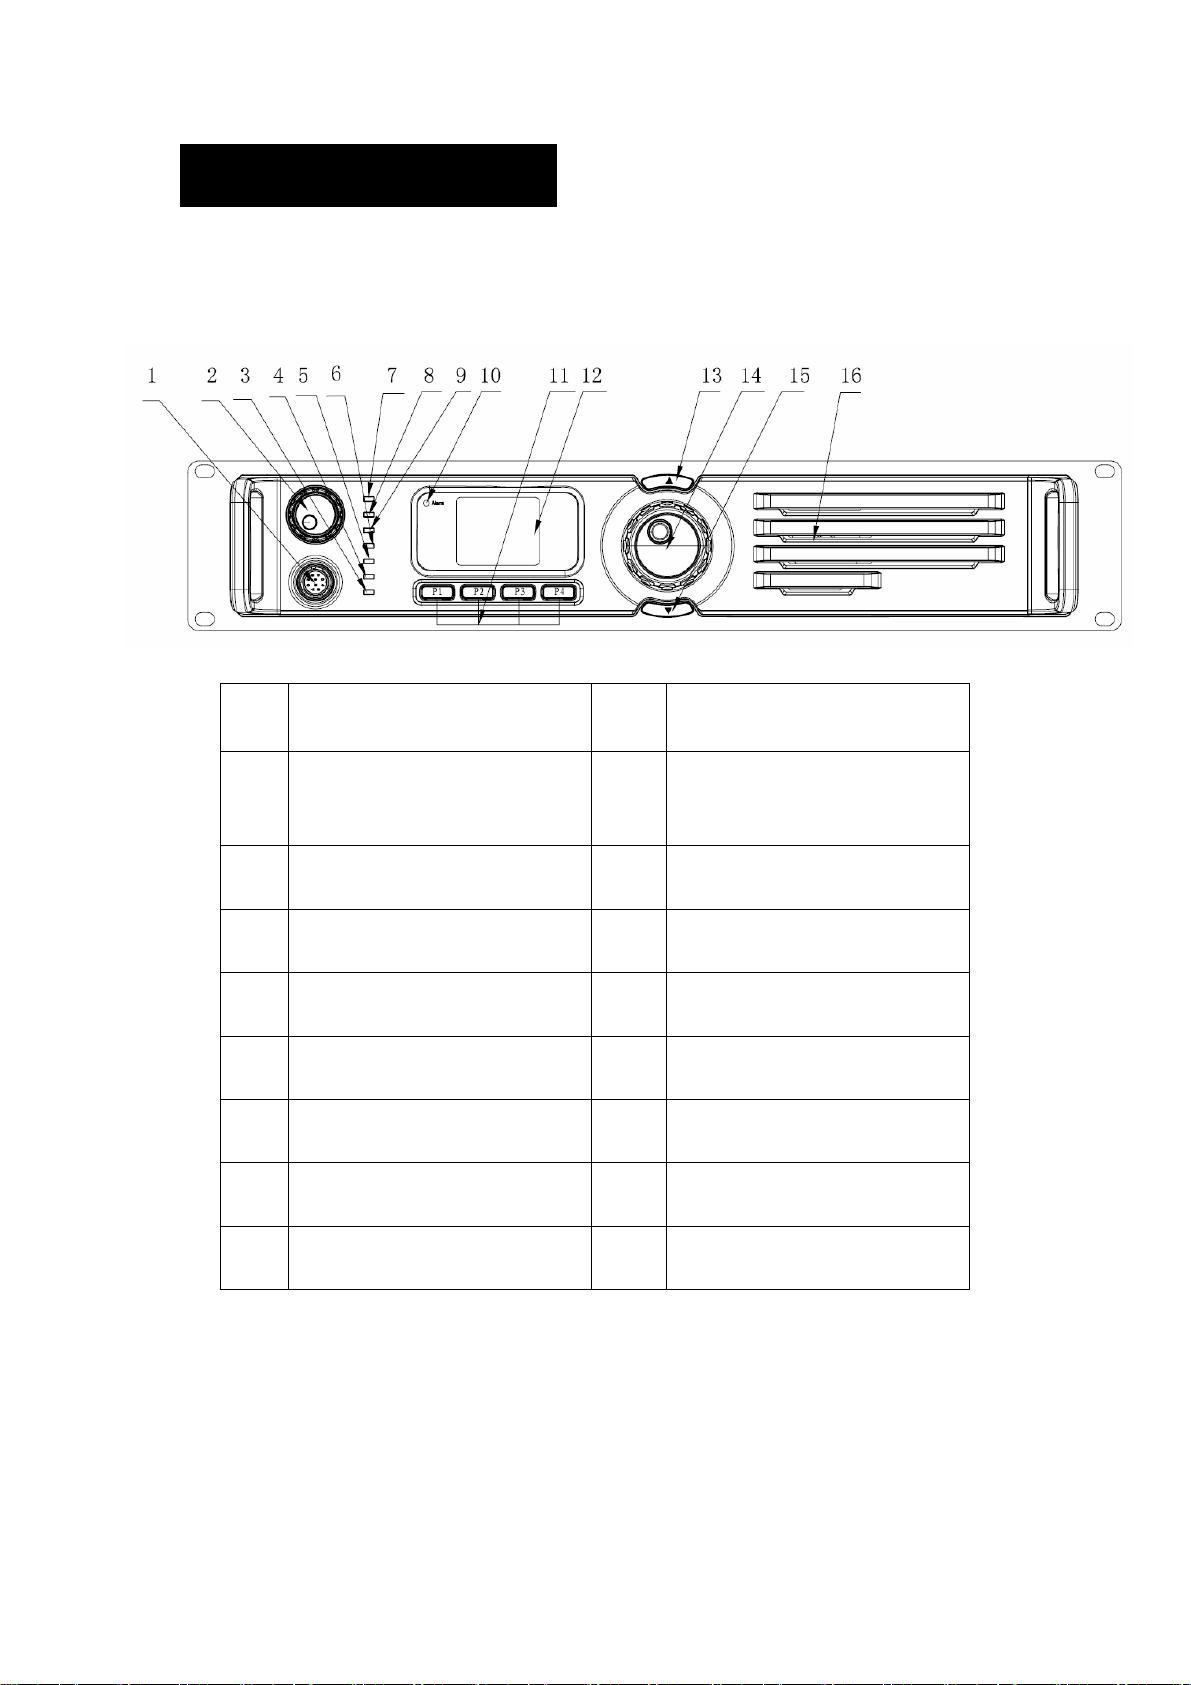
Front Panel
No. Part Name No. Part Name
1
○
3
○
5
○
7
○
9
○
11
○
13
○
15
○
Accessory Jack
Repeater Mode Indicator
Slot 2 RX Indicator
Digital Mode Indicator
Slot 1 RX Indicator
Programmable Keys *
Channel Up Key *
Channel Down Key *
2
○
4
○
6
○
8
○
10
○
12
○
14
○
16
○
Volume Control Knob / Power
Indicator
Analog Mode Indicator
Slot 2 TX Indicator
Slot 1 TX Indicator
Alarm Indicator
LCD Display
Menu Navigation Knob
Speaker
4
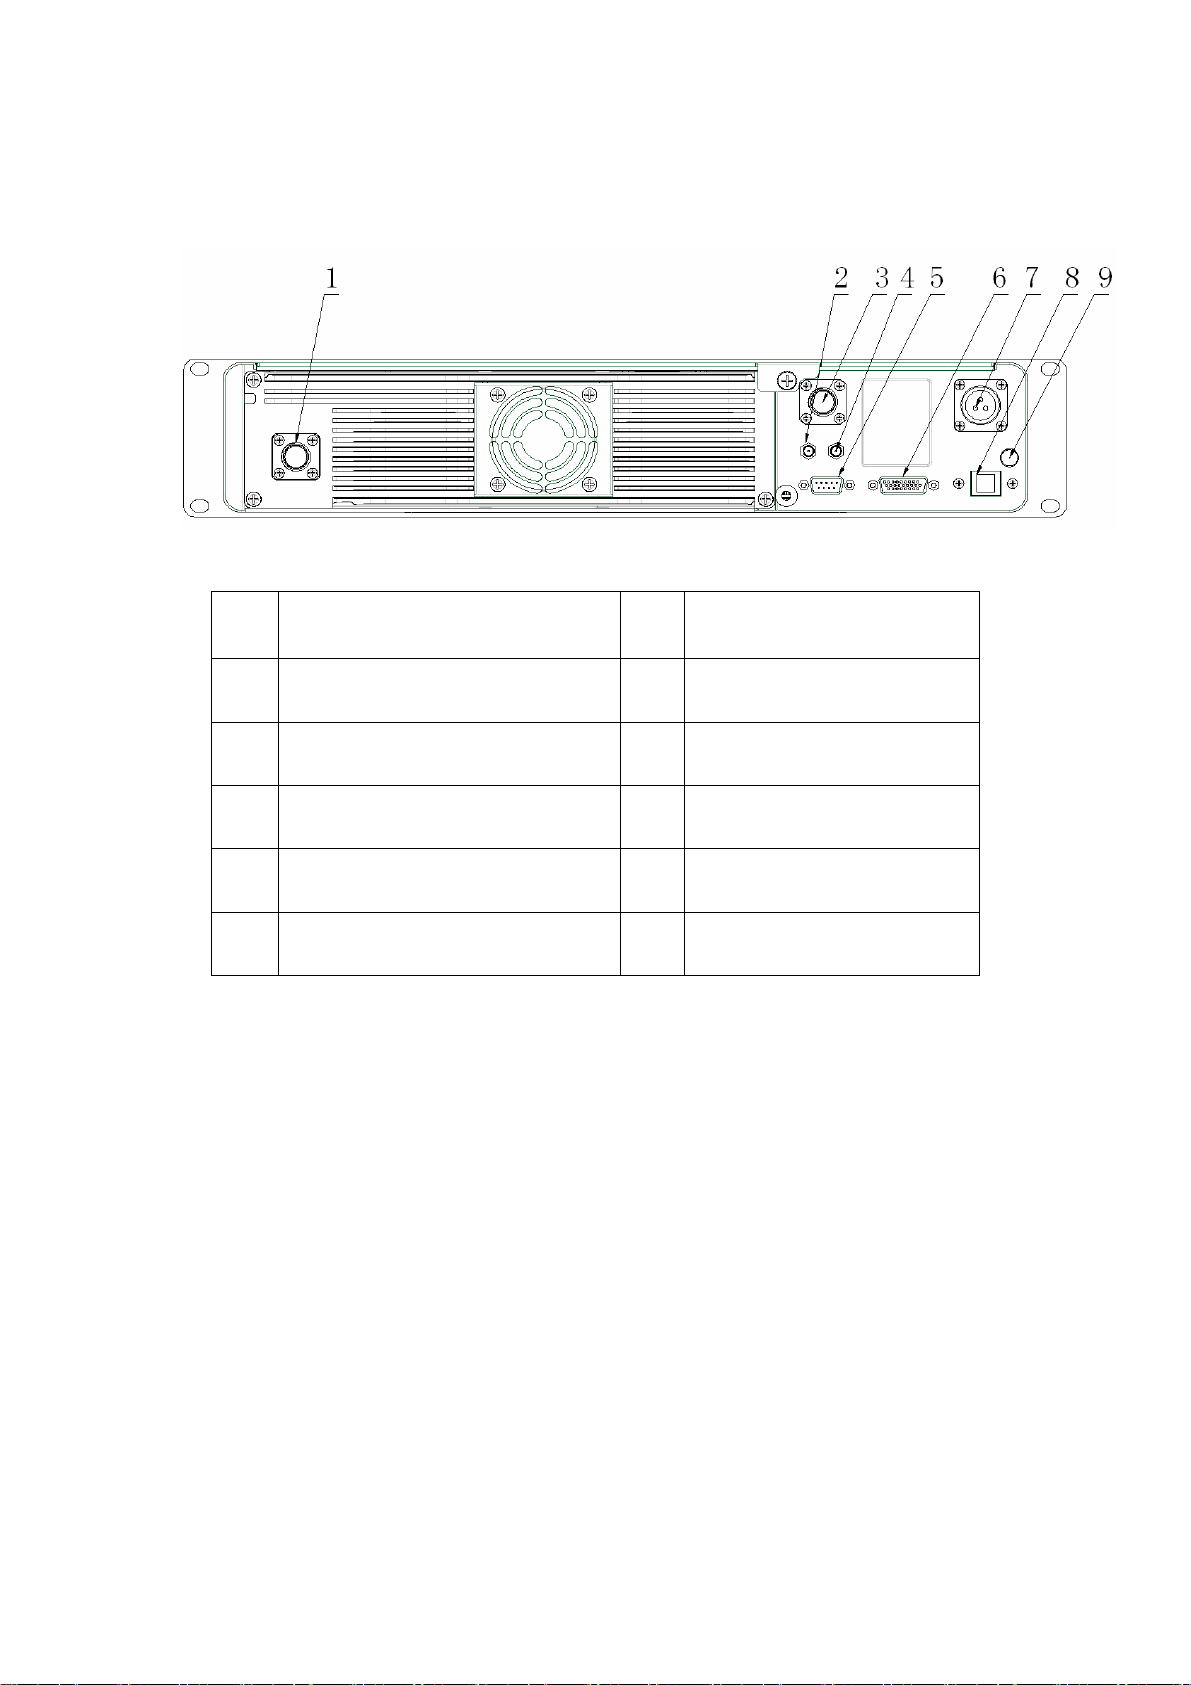
Rear Panel
No. Part Name No. Part Name
1
○
3
○
5
○
7
○
9
○
TX Antenna Connector
RX/Duplex Antenna Connector
Monitor/Test Jack
DC Power Inlet
Ground Screw
2
○
4
○
6
○
8
○
Optional Connector 1
Optional Connector 2
Accessory Jack
Ethernet Port *
5
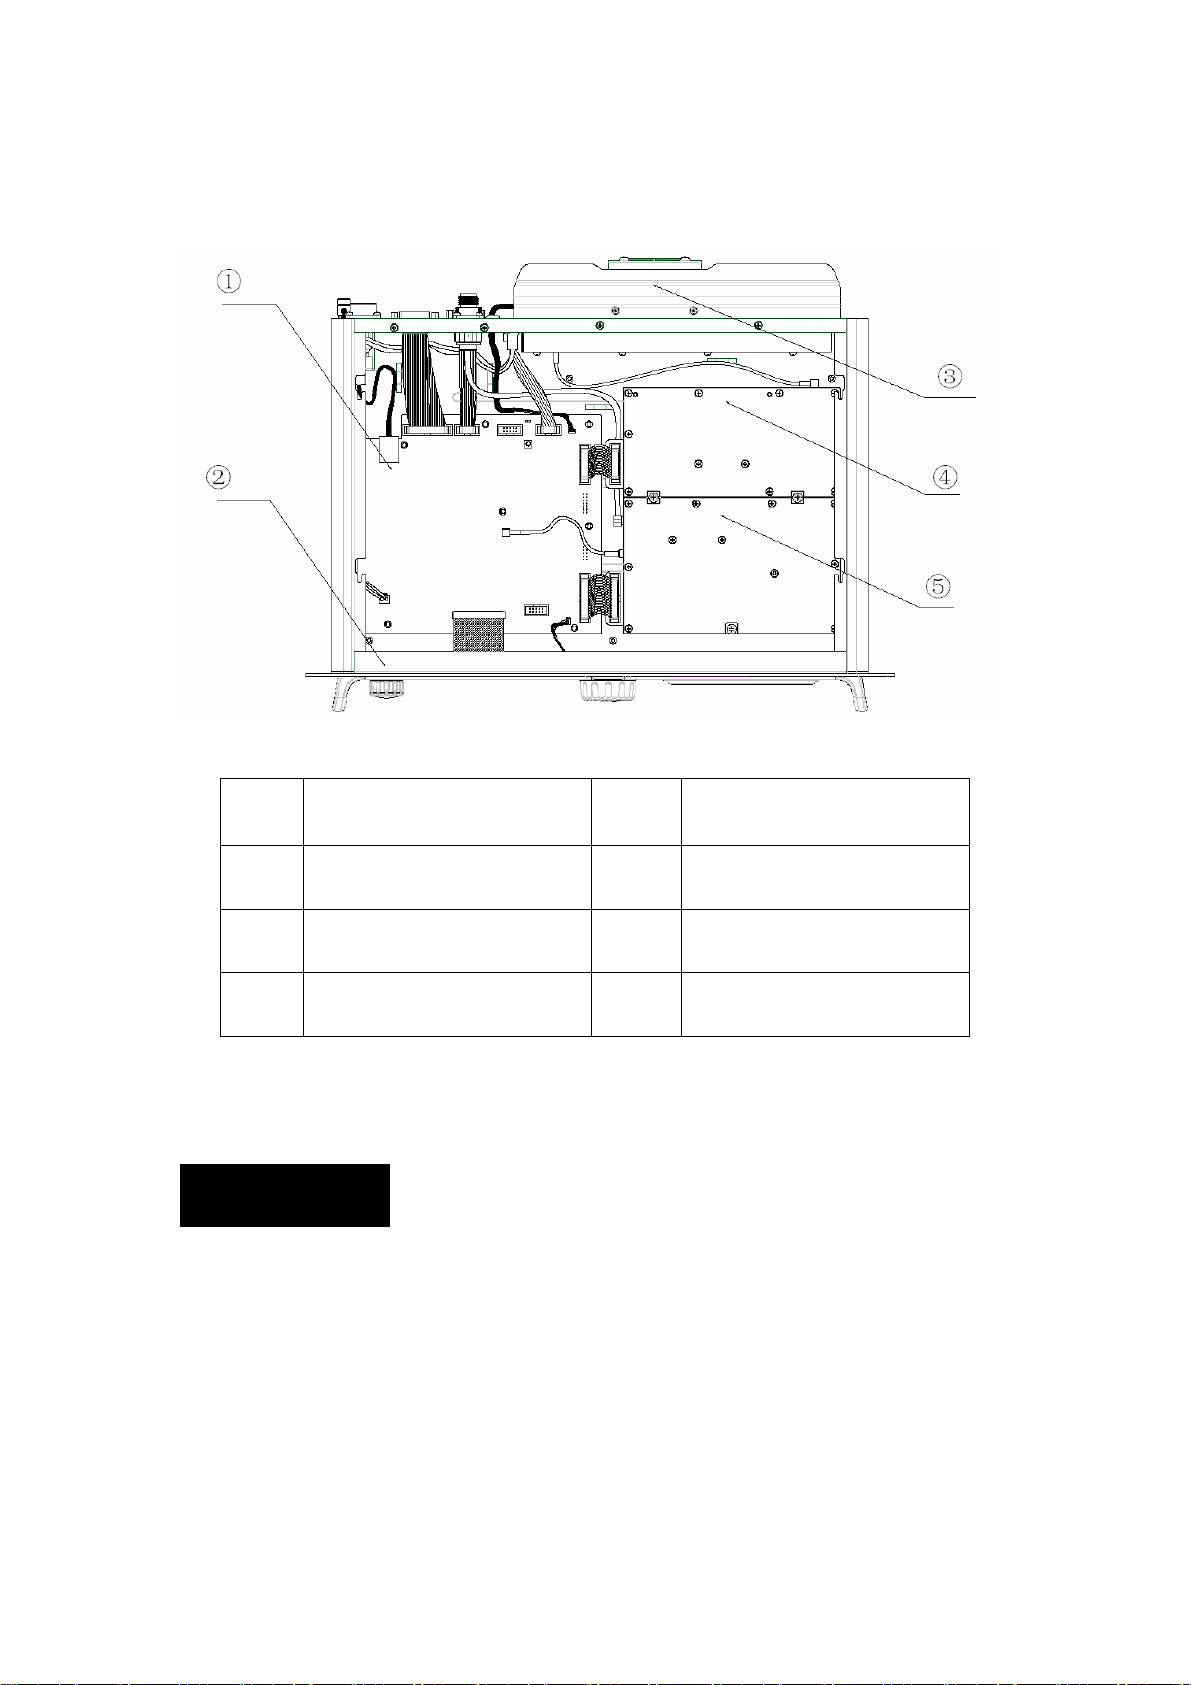
Internal Parts
No. Part Name No. Part Name
1
○
3
○
5
○
Baseband Module
RF PA Module
RX Module
2
○
4
○
Front Panel
Excitor Module
Installation
Proper installation can ensure optimum performance and reliability of the repeater. Be
sure to read the following installation requirements and instructions carefully, before you
install the repeater.
6

7
Installation Overview
The information below is an overview for installing the repeater and auxiliary equipment.
Unpack and inspect the equipment.
Perform a pre-installation function check test of the equipment, and configure
parameters.
Pay particular attention to environmental conditions at the site, ventilation
requirements, and grounding and lightning protection.
Install the equipment at the site.
Make necessary electrical and cabling connections, including the following:
- DC power cord
- Coaxial cables to TX and RX antennas (if you use two antennas)
Perform a post-installation function check test of the equipment, to verify proper
installation.
Before Installation
Before you install the repeater at the site, you are suggested to power on the repeater and
check it for proper operation.
1. Applying Power
Before applying power to the repeater, make sure the voltage of DC power supply or
battery is compliant with the operating voltage range of the repeater. Then connect the DC
power supply or battery to supply power to the repeater.
2. Verifying Proper Operation
Operation of the repeater can be indicated by the 8 LEDs located on the front panel. After
proper operation is verified, you can configure parameters for the repeater.
Caution: Some repeater components can become extremely hot during operation.
Turn off all power and wait until the repeater is sufficiently cool before touching the
repeater.
3. Configuring Parameters

You may customize repeater parameters such as TX/RX frequency, TX power and
signalling, according to user needs. After configuration of parameters is complete, you
may perform site installation.
Installation Requirements
1. Environmental Conditions at Intended Installation Site
The repeater may be installed in any location suitable for electronic communication
equipment, provided that the environmental conditions do not exceed the equipment
specifications for temperature, humidity and air quality.
Operating Temperature
-30℃ to +60℃
This is the temperature measured in close proximity to the repeater. For example, if the
repeater is mounted in a cabinet, the temperature within the cabinet is measured.
Humidity
Humidity conditions should not exceed 95% relative humidity @ 50°C.
Air Quality
For equipment operating in an area which is environmentally controlled and with the
3
repeater rack mounted, the airborne particle level must not exceed 25μg/m
.
And for equipment operating in an area which is not environmentally controlled and with
3
the repeater cabinet mounted, the airborne particle level must not exceed 90μg/m
.
Caution: If the repeater is to be installed in an area which is usually dusty, dirty, or
does not meet the air quality requirements, then the air used to cool the repeater modules
must be treated using appropriate filtering devices. Dust or dirt accumulated on the
internal circuit boards and modules is not easily removed, and can cause malfunctions
such as overheating and intermittent electrical connections.
2. Equipment Ventilation
The PA heatsink is equipped with a cooling fan used to provide forced convection cooling.
When planning the installation, observe the following ventilation guidelines:
Customer supplied cabinets must be equipped with ventilation slots or openings for
8
 Loading...