

Hytera Communications PTC680FXB1 User Manual

1. Product Overview
1.1 Product Layout
1.2 Programmable Keys
For enhanced convenience, the product provides the programmable keys including
SK2, SK3, TK, P1
,
P2
, and P3. The TK is programmed with Emergency feature by default (short press: Emergency On;
long press: Emergency Off).
To set up other shortcuts, tap , and then go to
Settings
>
Programmable keys
.
2. Before Use
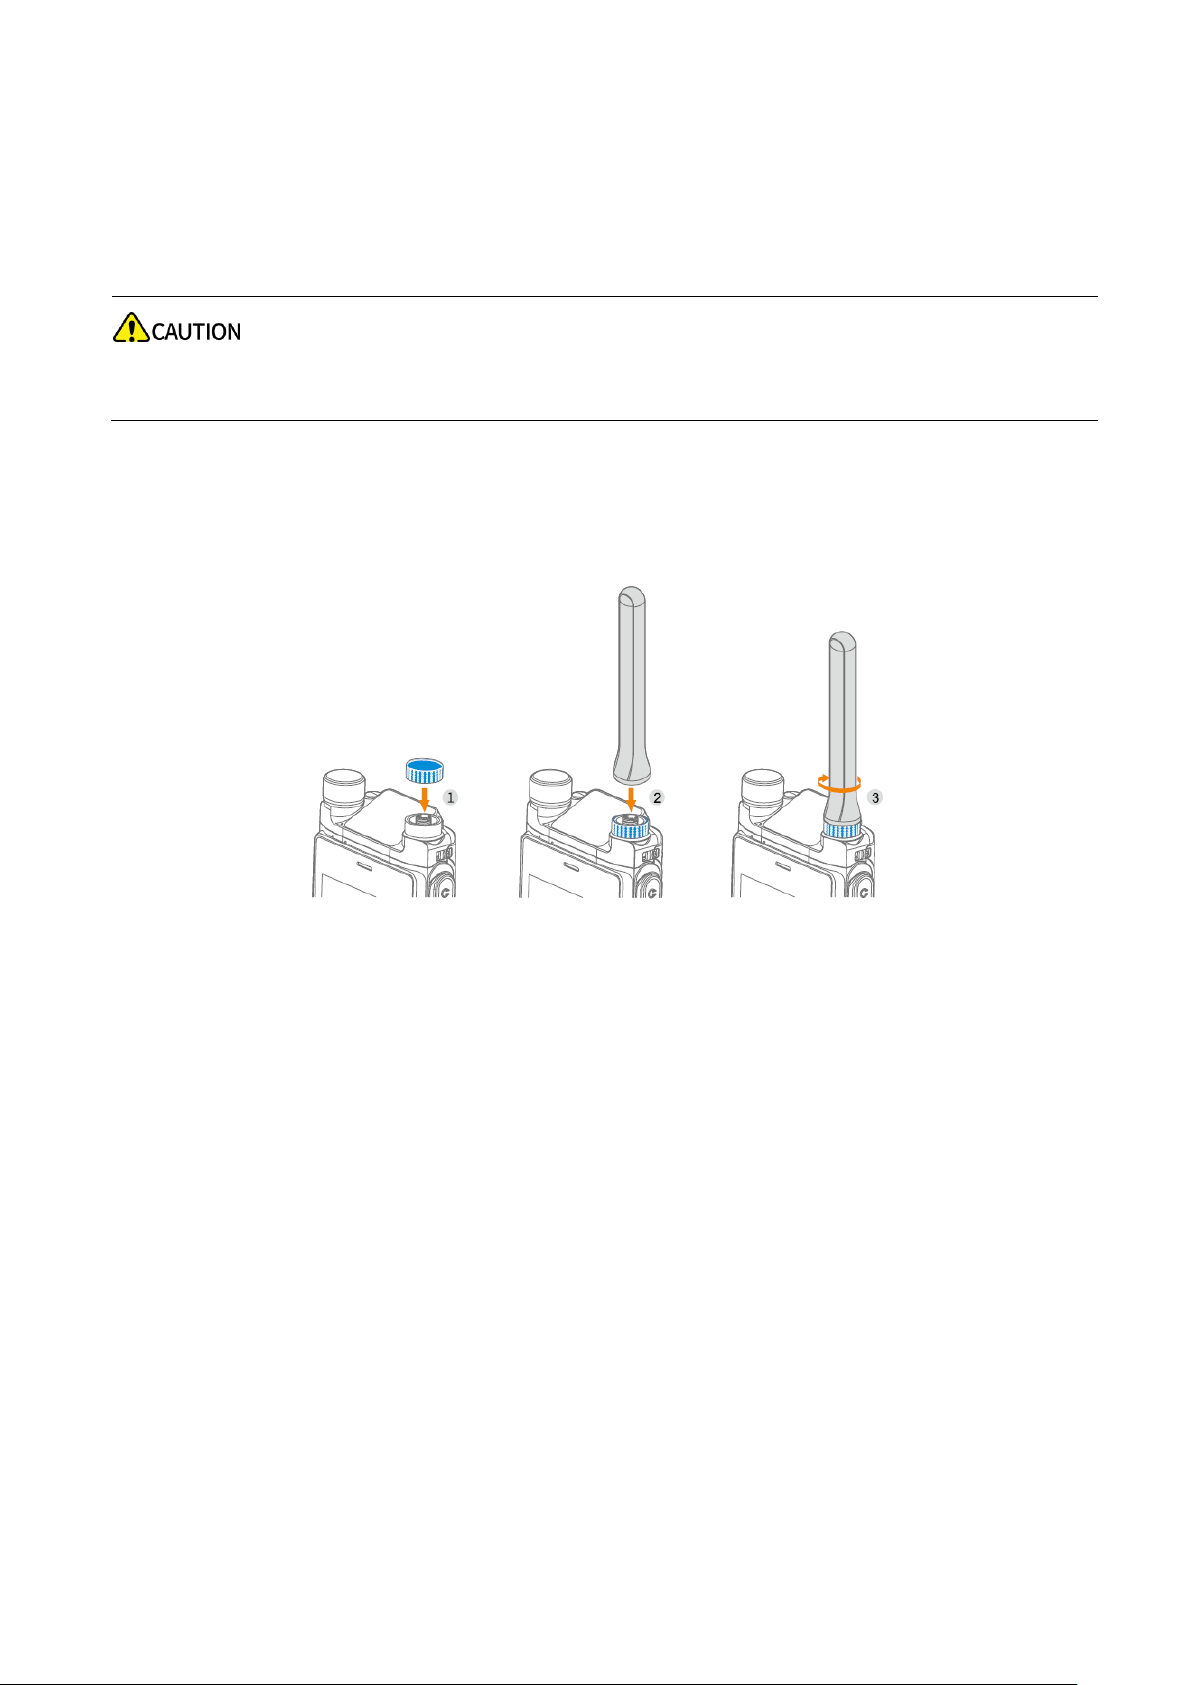
2.1 Attaching the Antenna
Do not hold the terminal by the antenna and swing it. This may affect the antenna performance and
shorten the life span of the antenna.
1. (Optional) Place the color ring (for identification purpose) on the antenna connector.
2. Put the antenna on the antenna connector.
3. Rotate the antenna clockwise till hand tight.
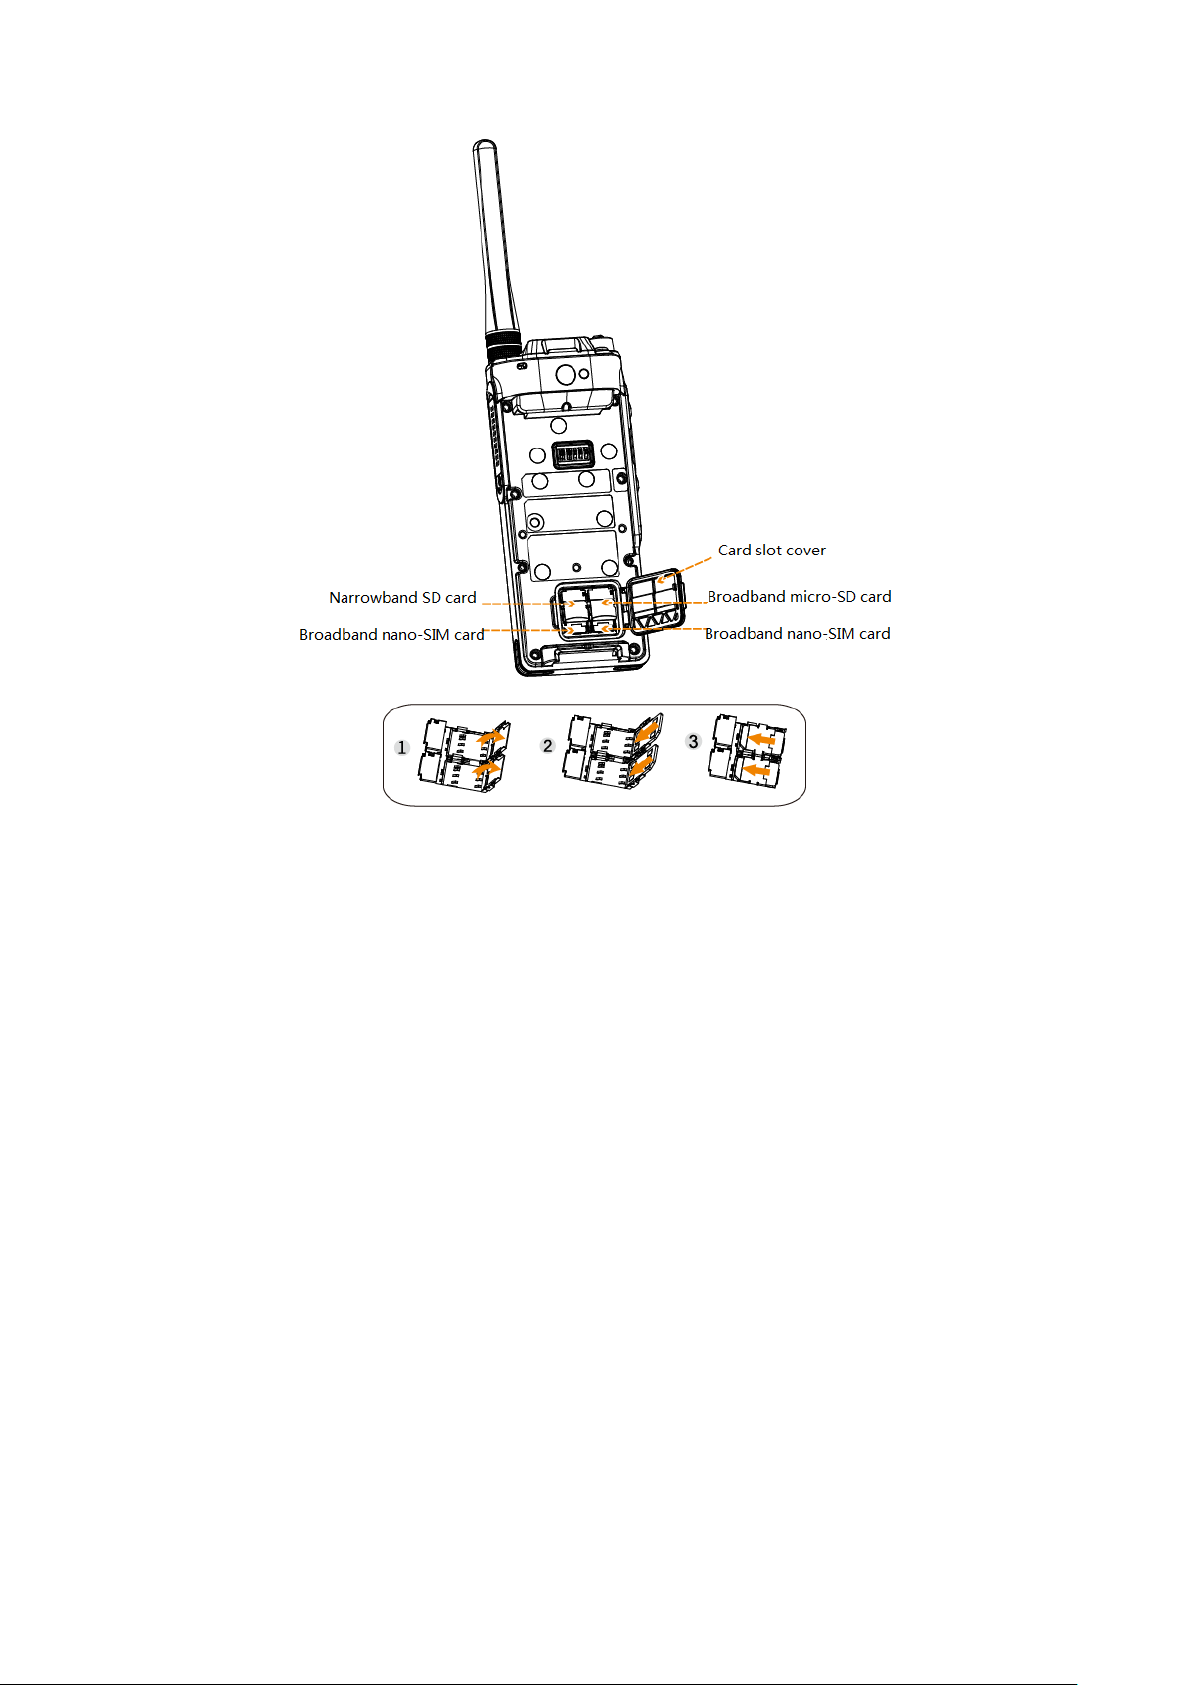
2.2 Installing the Cards
1. Open the card slot cover on the top of the battery compartment.
2. Insert the micro-SD cards and nano-SIM cards into the corresponding slots.
3. Put the card slot cover back in place.
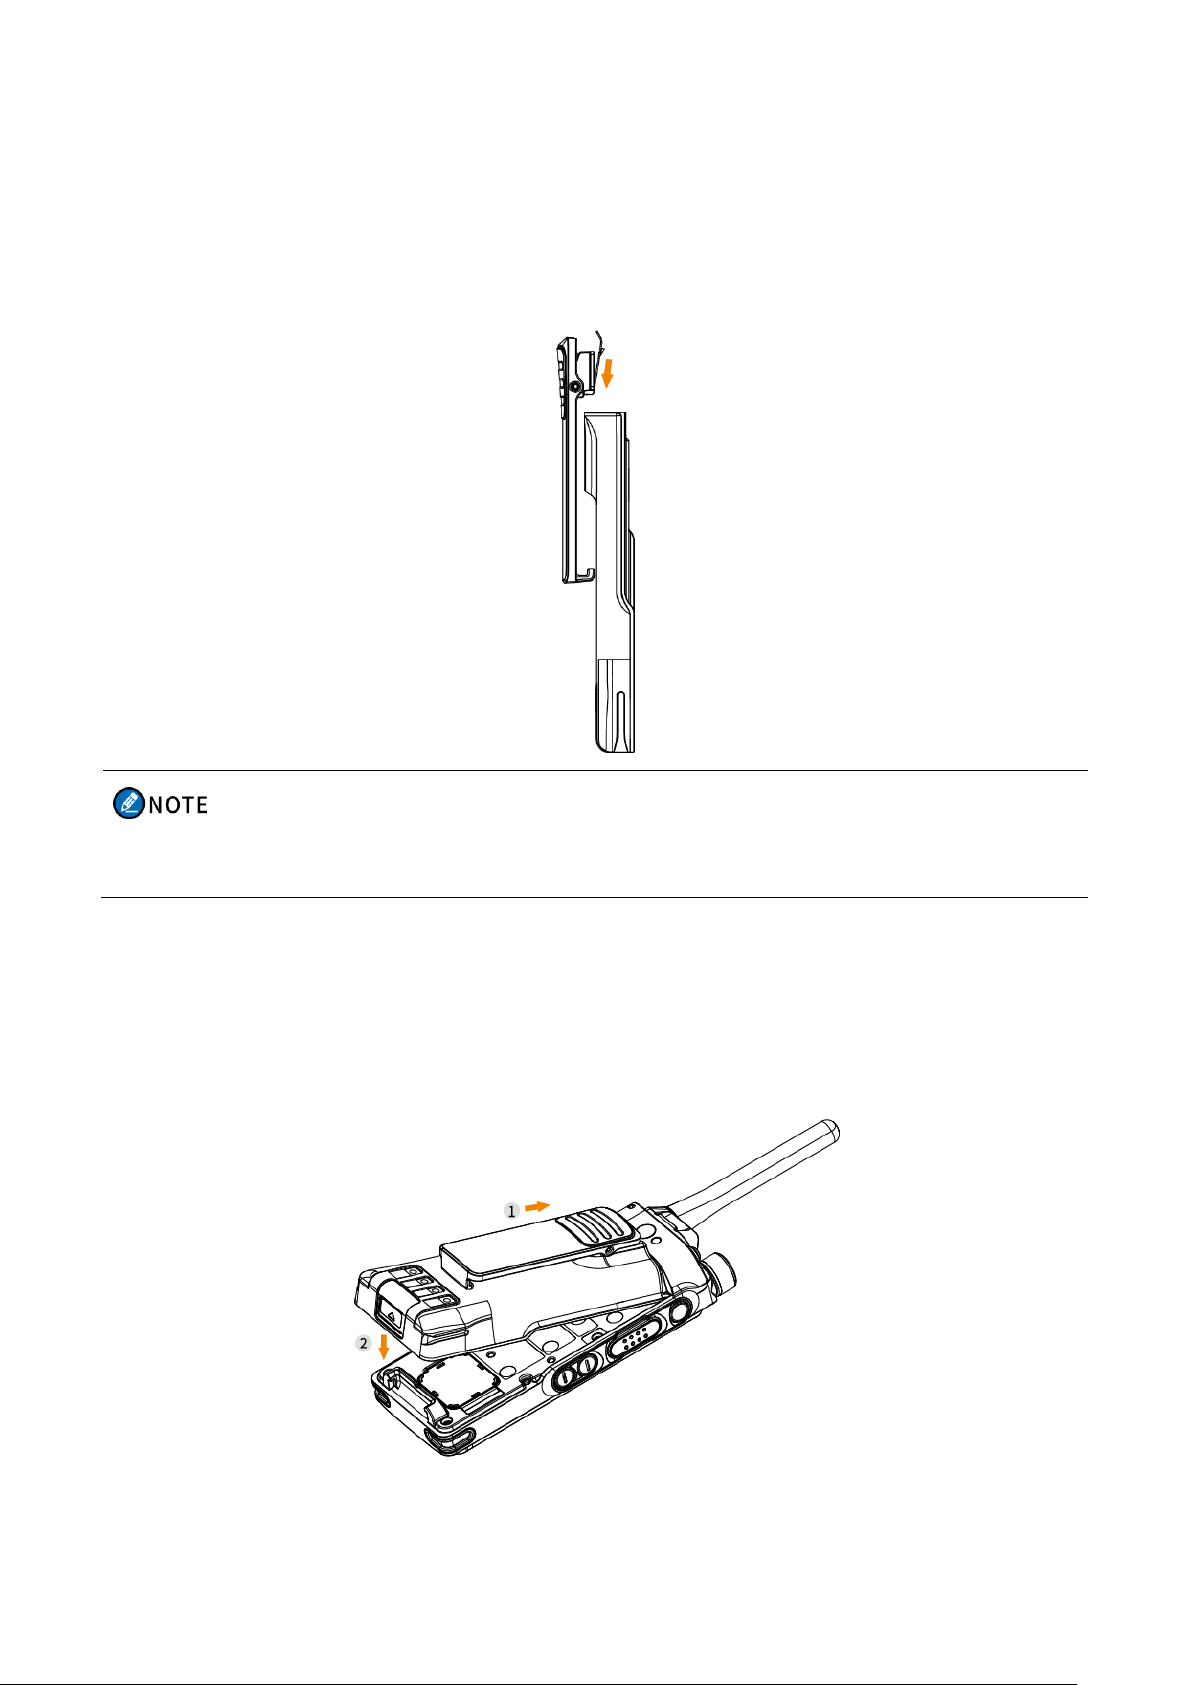
2.3 Attaching the Belt Clip
1. Align the rails on the belt clip with the grooves on the battery.
2. Press the belt clip downwards into place.
To remove the belt clip, press and hold the spring when sliding the belt clip out of the grooves on
the battery.
2.4 Attaching the Battery
1. Slide the battery into the slot.
2. Press the battery latch until it is fully fitted into the terminal.
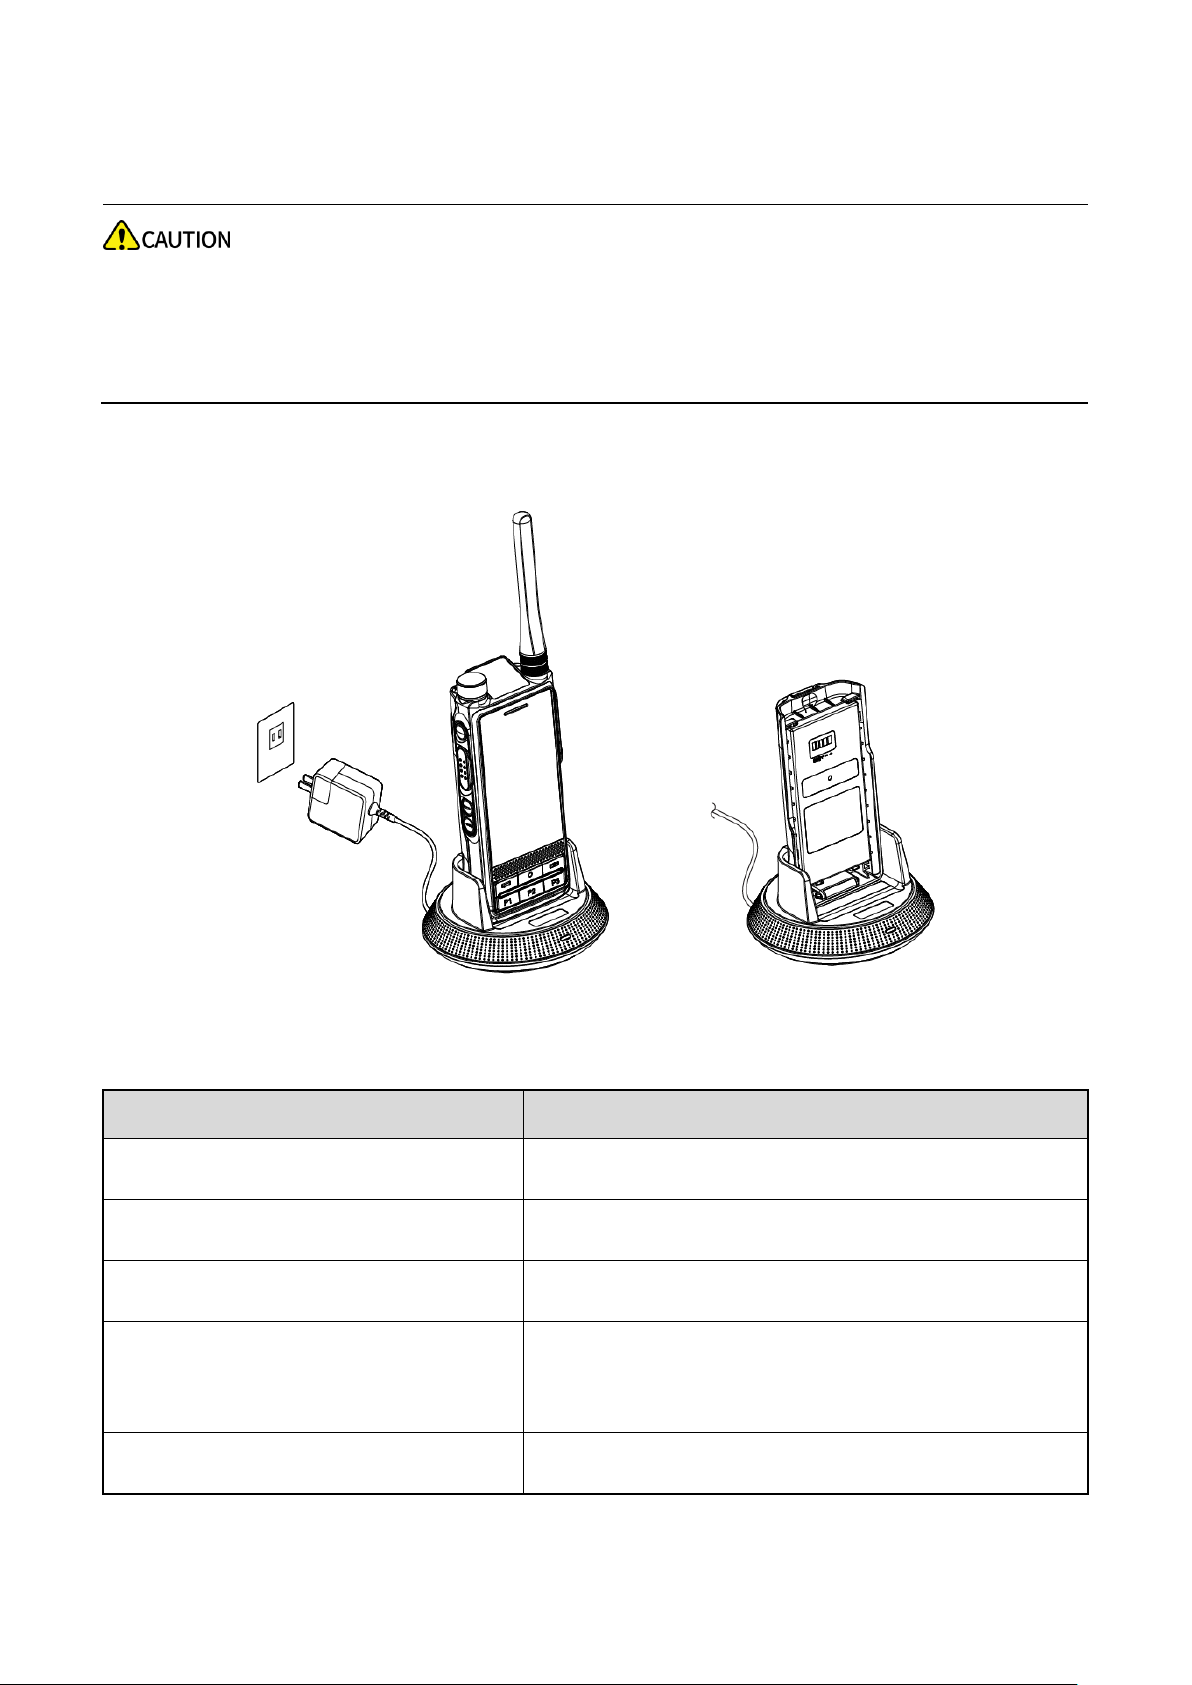
2.5 Charging the Battery
Use the approved charger to charge the battery.
Read the Safety Information Booklet before charging.
The remaining lithium-ion battery power is limited to 30% pursuant to the new lithium battery
shipment regulation approved by International Air Transport Association (IATA).
Before initial use, fully charge the battery to ensure optimum performance. You can charge the terminal
with battery attached or charge the battery alone.
To determine the charging status, check the LED indicator on the charger according to the following
table:
LED Indicator
Charging Status
Flashes red slowly
No battery inserted.
Flashes orange slowly
Waiting to charge.
Glows red
Charging.
Glows green
≥
90% (terminal with battery).
≥
95% (standalone battery).
Flashes red rapidly
Battery fault.

3. Basic Operations
3.1 Turning the Terminal On or Off
To turn the terminal on, press and hold the Power/End Call key until the splash screen appears.
To turn the terminal off, do as follows:
1. Press and hold the Power/End Call key until the power-off selection screen appears.
2. Tap Power Off, and then tap OK.
3.2 Adjusting the Volume
To adjust the volume, directly rotate the
Smart Knob
.
When in a call or enabling an alarm, you can rotate the
Smart Knob
to adjust the call volume or alarm
volume.
When playing music, video or recorded files, you can rotate the
Smart Knob
to adjust the media volume.
3.3 Selecting Talk groups
1. Press the Smart Knob. Then the terminal prompts on the display.
2. Rotate the knob to select the required talk group.
If you do not operate the
Smart Knob
within 5s or if you press it again within 5s, the terminal
returns to the volume control state automatically.
3.4 Understanding the Screens
3.4.1 Main Screen and Top Screen
The screens may be damaged or broken if they are hit or scraped by sharp or hard objects.
All care must be taken to protect the screens.
 Loading...