

Hytera PD78X, PD88X, HD785, PD70X, PD98X Upgrade Manual
...
DMR Radio
Upgrade Guide

Copyright Information
Hytera is the trademark or registered trademark of Hytera Communications Co., Ltd. (the Company) in
PRC and/or other countries or areas. The Company retains the ownership of its trademarks and product
names. All other trademarks and/or product names that may be used in this manual are properties of
their respective owners.
The product described in this manual may include the Company’s computer programs stored in memory
or other media. Laws in PRC and/or other countries or areas protect the exclusive rights of the
Company with respect to its computer programs. The purchase of this product shall not be deemed to
grant, either directly or by implication, any rights to the purchaser regarding the Company’s computer
programs. Any of the Company’s computer programs may not be copied, modified, distributed,
decompiled, or reverse-engineered in any manner without the prior written consent of the Company.
Disclaimer
The Company endeavors to achieve the accuracy and completeness of this manual, but no warranty of
accuracy or reliability is given. All the specifications and designs are subject to change without notice
due to continuous technology development. No part of this manual may be copied, modified, translated,
or distributed in any manner without the express written permission of us.
We do not guarantee, for any particular purpose, the accuracy, validity, timeliness, legitimacy or
completeness of the Third Party products and contents involved in this manual.
If you have any suggestions or would like to learn more details, please visit our website at
http://www.hytera.com.

Upgrade Guide
Contents
i
Contents
Documentation Information ................................................................................................................... 1
1. Important Tips before Upgrade ......................................................................................................... 4
2. Before you Start ................................................................................................................................. 5
2.1 Firmware Version Check ................................................................................................................. 5
2.2 Preparations ................................................................................................................................... 5
3. Upgrade and Check ............................................................................................................................ 7
3.1 Entering the Download Mode .......................................................................................................... 7
3.1.1 PD78X/PD88X/PD98X/HD785/PD79X/PD70X/HD705/PD71X............................................. 7
3.1.2 MD78X/MD65X ..................................................................................................................... 7
3.1.3 X1e/X1p/PD60X/PD66X/PD68X ........................................................................................... 9
3.2 Starting Upgrade ............................................................................................................................. 9
3.3 After-upgrade Check ..................................................................................................................... 13
3.3.1 Radio with Display .............................................................................................................. 13
3.3.2 Radio without Display ......................................................................................................... 13
Applicable Model and Version ............................................................................................................ 15
Upgrade Guide
Documentation Information
1
Documentation Information
This section describes the conventions and revision history of this document.
Documentation Conventions
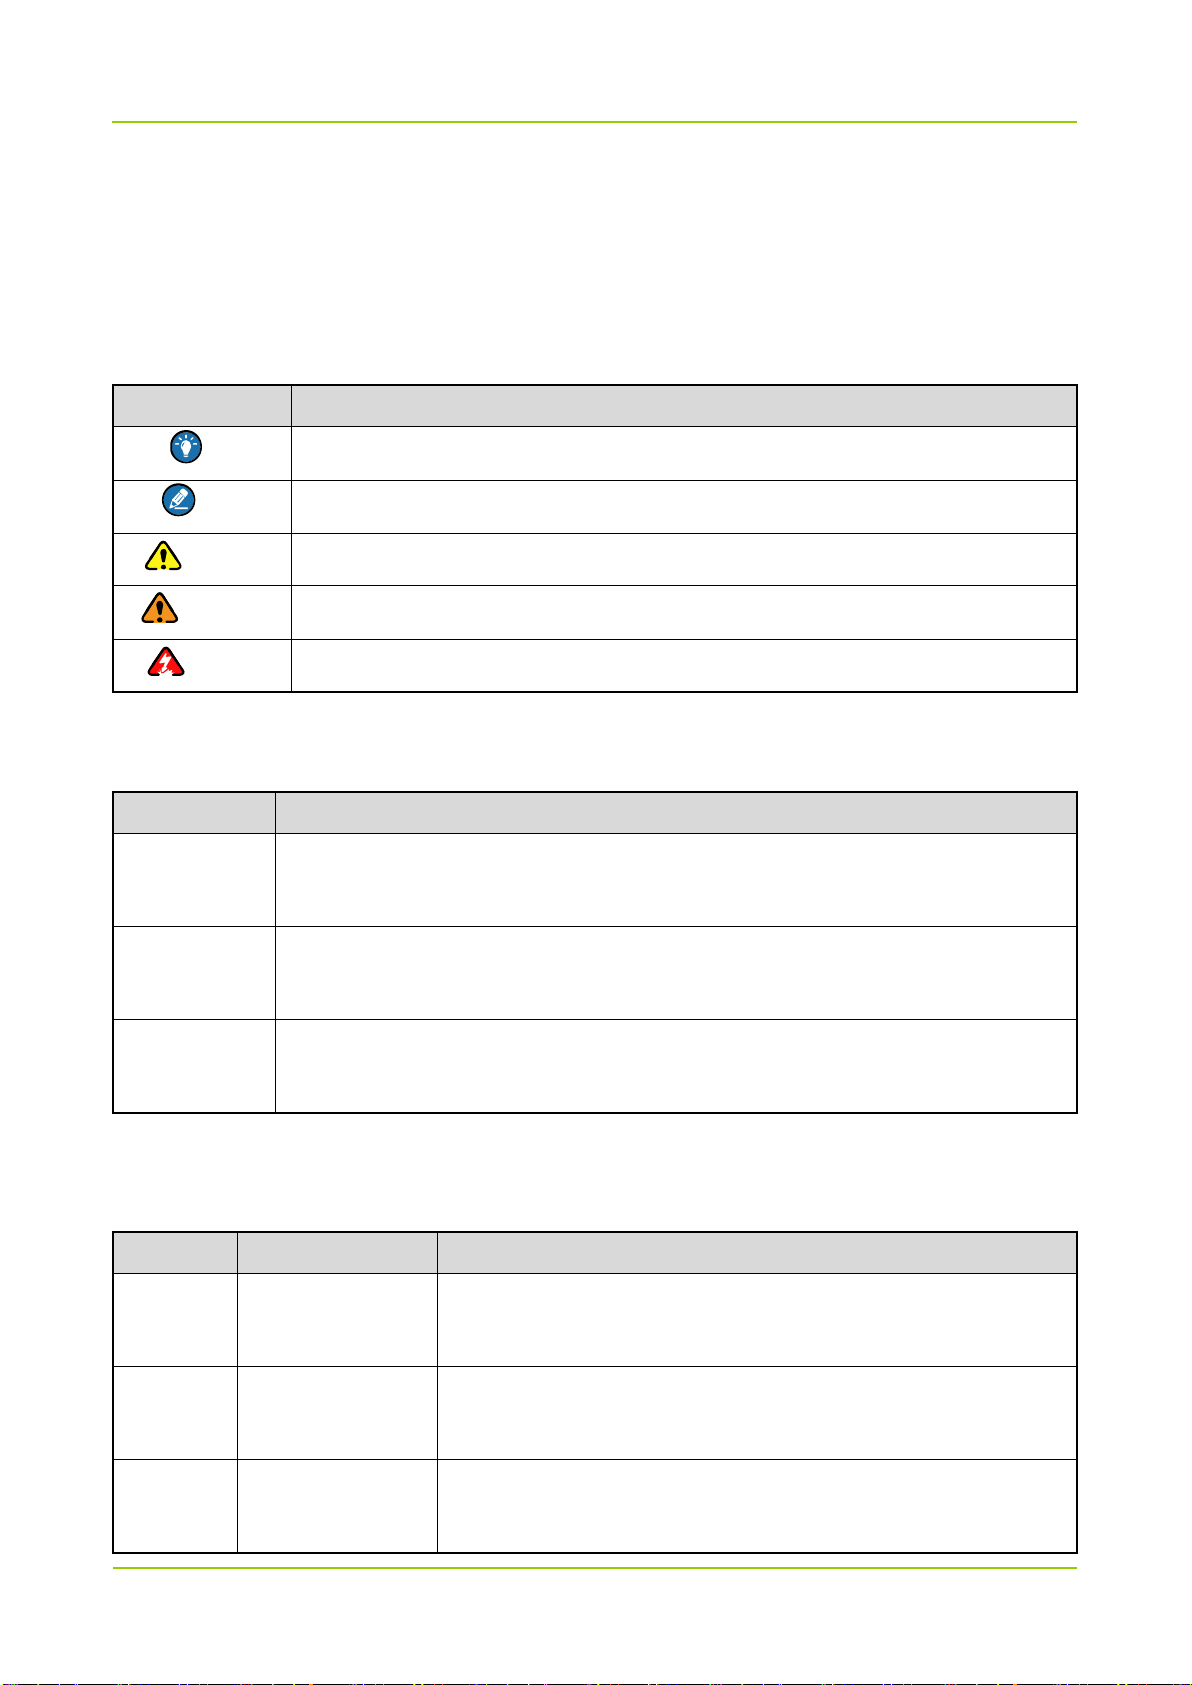
Instructional Icons
Icon Description
Tip Indicates information that can help you make better use of your product.
Note Indicates references that can further describe the related topics.
Caution Indicates situations that could cause data loss or equipment damage.
Warning Indicates situations that could cause minor personal injury.
Danger Indicates situations that could cause major personal injury or even death.
Notational Conventions
Item Description
The quotation marks enclose the name of a software interface element. For
“ ”
example, click “OK”.
The text in boldface denotes the name of a hardware button. For example, press the
Bold
PTT key.
The symbol directs you to access a multi-level menu. For example, to select “New”
->
from the “File” menu, we will describe it as follows: File -> New.
Revision History
Version Date Description
R8.1
02-2017
Twelfth release, instructing you to upgrade the firmware to R8.1
(A8.01.02.003/S8.01.02.003/N8.01.02.003/C8.01.02.003).
R8.0
R7.6
Eleventh release, instructing you to upgrade the firmware to R8.0
11-2016
(A8.00.06.007/S8.00.06.007/N8.00.06.007/C8.00.06.007).
Tenth release, instructing you to upgrade the firmware to R7.6
01-2016
(A7.06.05.002/S7.06.05.002/N7.06.05.002/C7.06.05.002).

Documentation Information
Upgrade Guide
2
Version Date Description
It is applicable to DMR Conventional and Trunking Radio.
Ninth release, instructing you to upgrade the firmware to R7.0
(A7.00.11.010/S7.00.11.010/N7.00.11.010).
R7.0 07-2015
It is applicable to more models, such as DMR Conventional Radio
and Trunking Radio.
Eighth release, instructing you to upgrade the firmware to R6.5
(A6.05.07.005/S6.05.07.005).
R6.5
R6.1
07-2014
It is applicable to more models, such as DMR Conventional Radio
and Trunking Radio.
Seventh release, instructing you to upgrade the firmware to R6.1
(A6.01.05.006/S6.01.05.006).
04-2014
It is applicable to more models, such as DMR Conventional Radio
R6.0 03-2014
R6.0
R5.5
01-2014
08-2013
and Trunking Radio.
Sixth release, instructing you to upgrade the firmware to R6.0
(A6.00.07.005/S6.00.07.005).
It is applicable to more models, such as DMR Conventional Radio
and Trunking Radio.
Fifth release, instructing you to upgrade the firmware to R6.0
(A6.00.07.004/S6.00.07.004).
It is applicable to more models, such as DMR Conventional Radio
and Trunking Radio.
Froth release, instructing you to upgrade the firmware to R5.5
(A5.05.13.005/S5.05.13.005).
It is applicable to more models, such as DMR Conventional Radio
and Trunking Radio.
R5.0
R4.5 06-2012
11-2012
Third release, instructing you to upgrade the firmware to R5.0
(A5.00.15.001/S5.00.15.001).
It is applicable to more models, such as DMR Trunking Radio.
Second release, instructing you to upgrade the firmware to R4.5
(A4.05.16.003/S4.05.16.003).

Upgrade Guide
Documentation Information
3
Version Date Description
Initial release, instructing you to upgrade the firmware to R4.0
R4.0 09-2011
(A4.00.10.001).

Important Tips before Upgrade
Upgrade Guide
4
1. Important Tips before Upgrade
To achieve a successful upgrade, please carefully read the instructions below before operation:
This document instructs you to upgrade the firmware in radios to A8.01.02.003, S8.01.02.003,
N8.01.02.003 or C8.01.02.003. For details, please refer to Appendix: Applicable Model and Version.
Do not disconnect the radio and the PC during upgrade; otherwise, data loss or radio damage may
occur.
Do not run other Hytera applications during upgrade. If the upgrade is interrupted by another
application, please try the upgrade again by restarting the radio and entering the download mode.
Do not disconnect the power of the radio during upgrade. However, if the power is disconnected or
error occurs during upgrade, restart the radio for another try.
This upgrade will change the HD model to PD model, for example,
HD785-000G0000-M00000-V1-0-B will be upgraded to PD785-000G0000-M00000-V1-0-B.
After upgrade, if the LED flashes upon power-on, please try the upgrade again by restarting the radio
and entering the download mode.
After successful upgrade, re-program the radio with a CPS of V8.01.02.002 or above.
Upgrade Guide
Before you Start
5
2. Before you Start
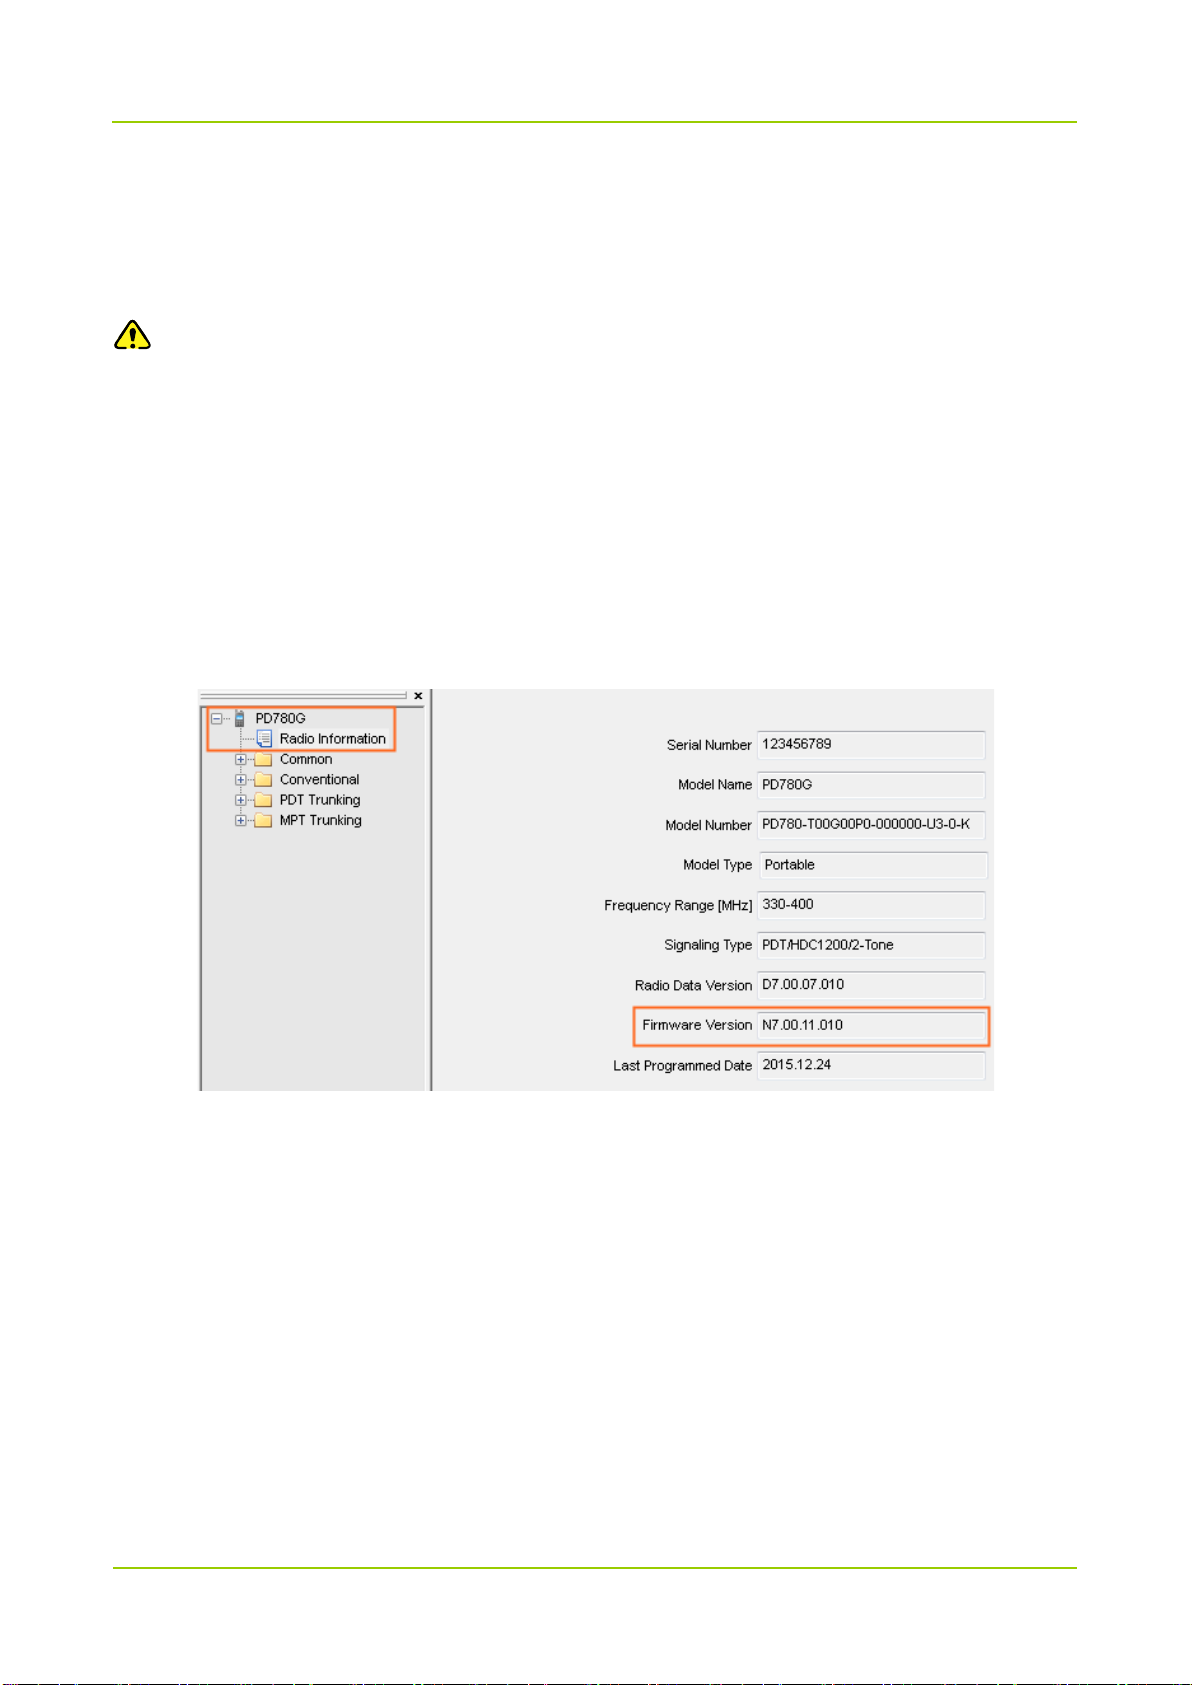
2.1 Firmware Version Check
Caution
Please check whether the firmware version of the radio satisfies the requirements before upgrade. If
not, please do not upgrade; otherwise the radio may get damaged.
Step 1 Connect the radio with the PC.
Step 2 Run the CPS to read data from the target radio.
Step 3 Click “Radio Information” on the left of the CPS to check whether the “Firmware Version”
satisfies the requirements specified in the Appendix: Applicable Model and Version.
PD780G is taken as the example.
Step 4 Disconnect the CPS and radio.
Step 5 Turn off the radio.
2.2 Preparations
Please prepare the following items before you start.
PC with operating system Win 7, Win 8, Win 8.1 or Win 10 of 32/64-bit.
DMR Upgradekit Subscriber: The upgrade software has been successfully installed on PC.
Win7 is taken as the example hereinafter.

Before you Start
Upgrade Guide
6
USB Driver: Ensure the USB driver has been successfully installed on PC; otherwise, the PC will not
be able to recognize the radio. If not installed yet, please refer to Digital USB Driver Installation Guide
R5.0 for the installation.
Radio to be upgraded.
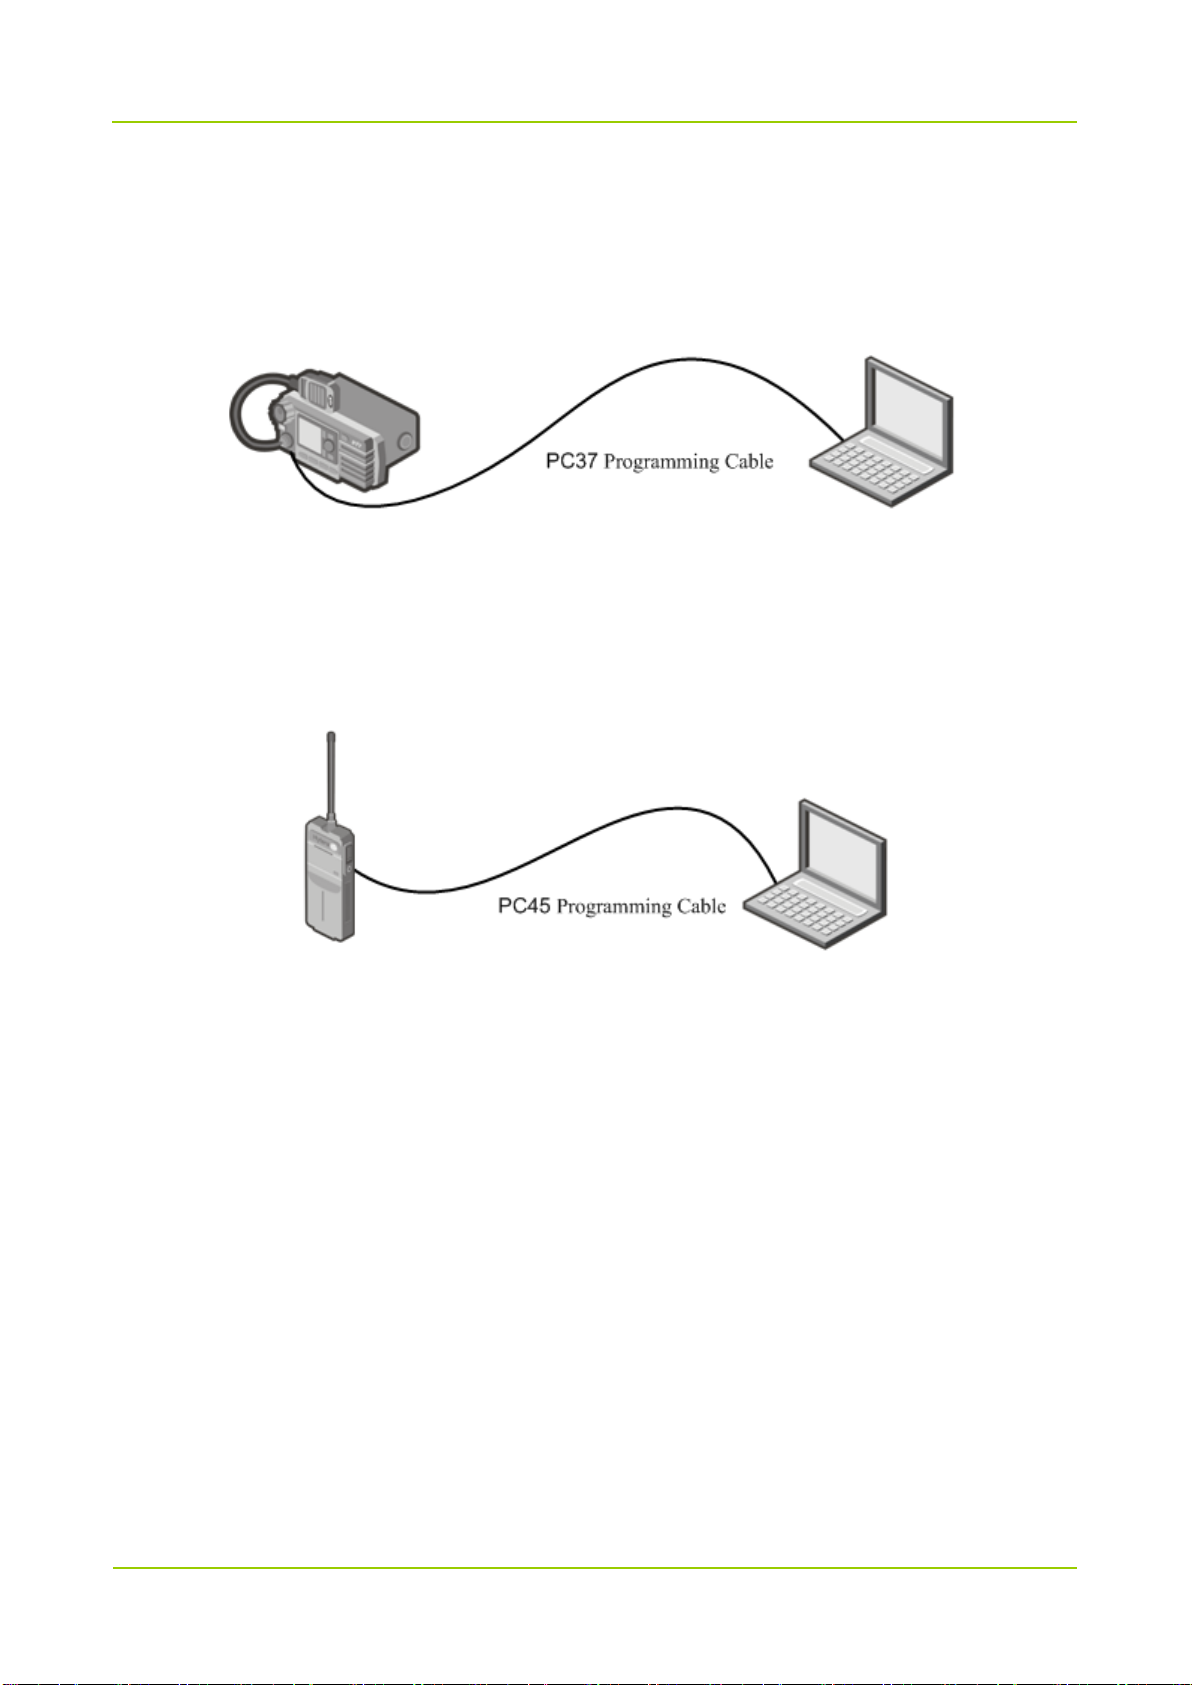
Programming Cable: Programming cables for different models are listed below.
Model Programming Cable
PC47
MD78X/MD65X
PC37
PD78X/PD88X/PD98X/HD785/PD7
PC38
9X/ PD70X/PD75X/HD705/PD71X
X1e/X1p/ PD60X/PD66X/PD68X PC45
Note
When using the PC37 programming cable, palm microphone and the hanger are also needed.
Connect the palm microphone to the 10Pin port on the front panel of the radio, and hook the palm
microphone on the hanger.
Upgrade Guide
Upgrade and Check
7
3. Upgrade and Check
3.1 Entering the Download Mode
Make the radio enter the download mode first before upgrade.
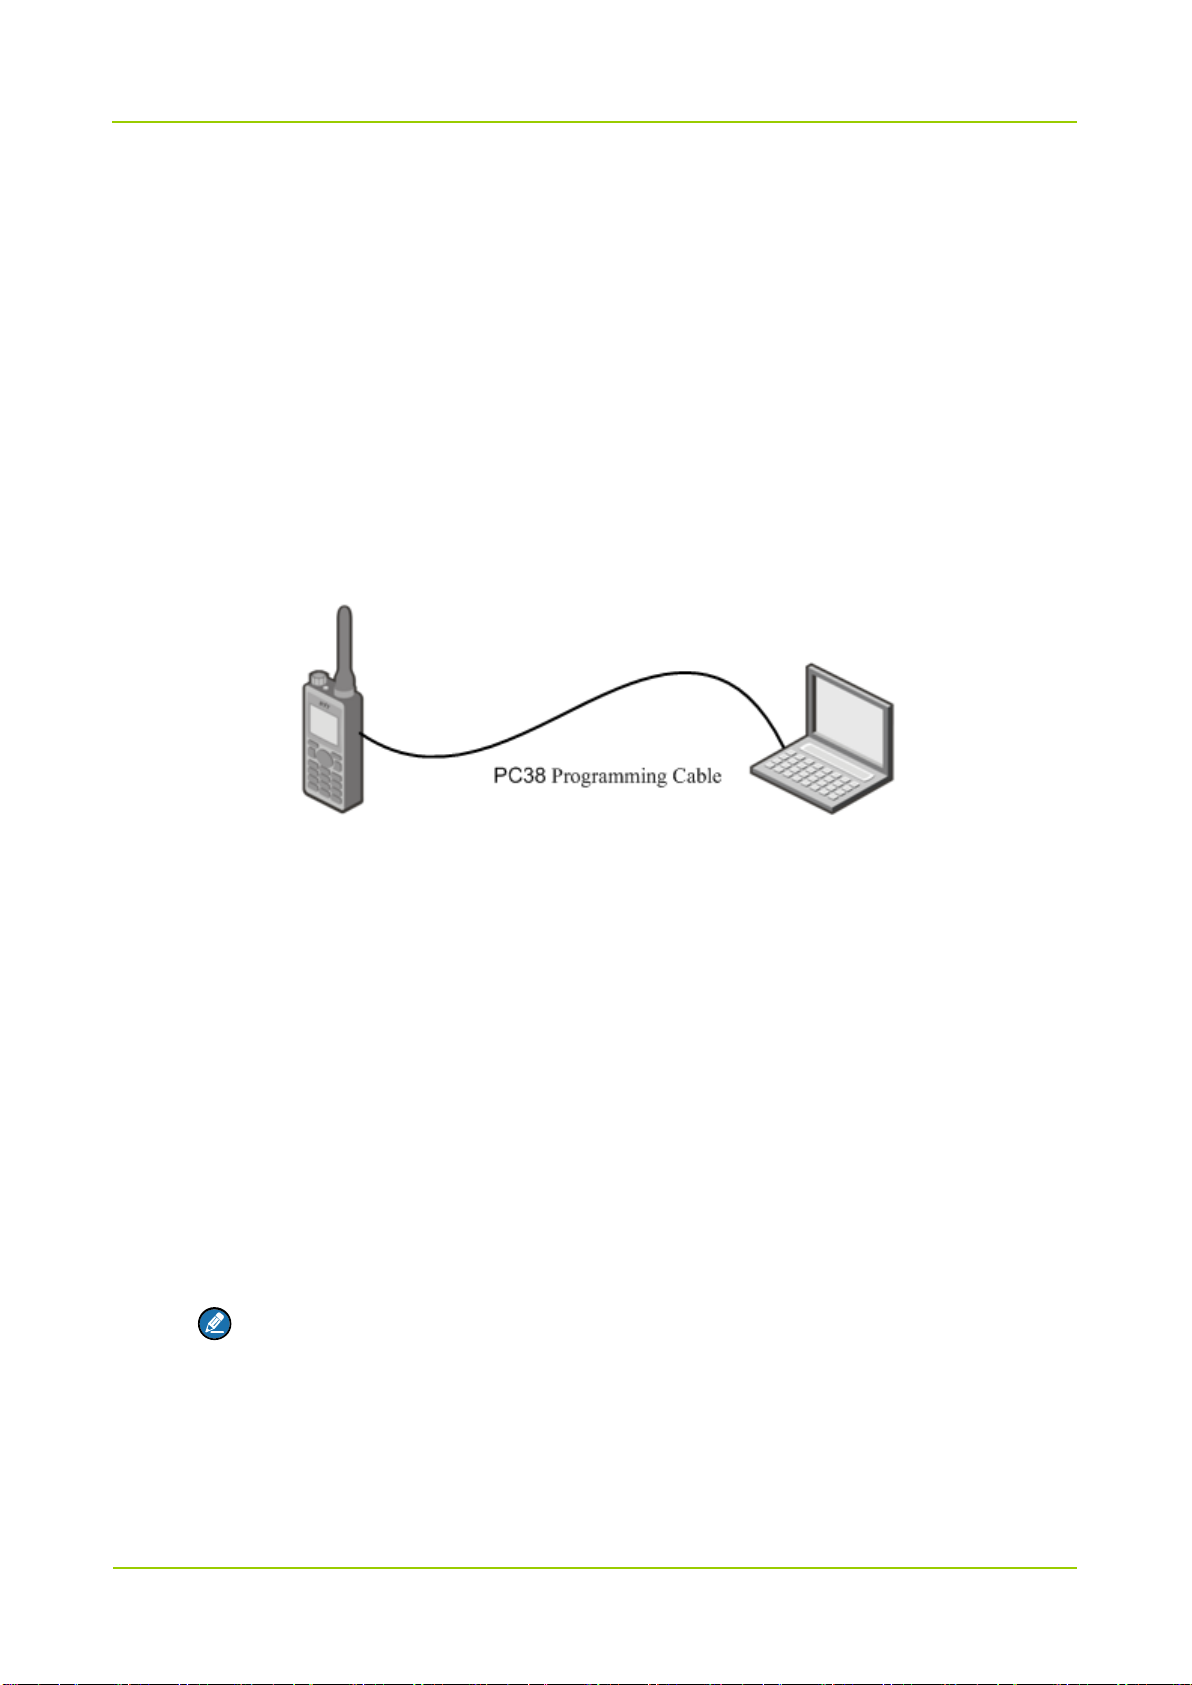
3.1.1 PD78X/PD88X/PD98X/HD785/PD79X/PD70X/HD705/PD71X
Step 1 Turn off the radio.
Step 2 Connect the radio (e.g. PD78X) with the PC.
The connection diagram is shown as below.
Step 3 Hold “PTT” and “TK” keys, and then turn on the radio.
When the radio enters the download mode successfully, its LED indicator flashes red for
seconds and then glows red solidly. Otherwise, it fails. In this case, please turn off the radio and
repeat the above operations.
3.1.2 MD78X/MD65X
Using PC47 Programming Cable
PC47 programming cable can be used to make the radio enter the download mode.
Step 1 Turn off the radio.
Step 2 Toggle the switch on PC47 to the DL end.
Note
Do not toggle to the DL end during programming.
Step 3 Connect the radio (e.g. MD78X) to the PC via PC47.
Upgrade and Check
Upgrade Guide
8
Step 4 Turn on the radio to enter the download mode.
When the radio enters the download mode successfully, its LED indicator flashes red for
seconds and then glows red solidly. Otherwise, it fails. In this case, please turn off the radio and
repeat the above operations.
Note
After upgrade, please toggle the switch on PC47 to the CPS end and then turn off the radio.
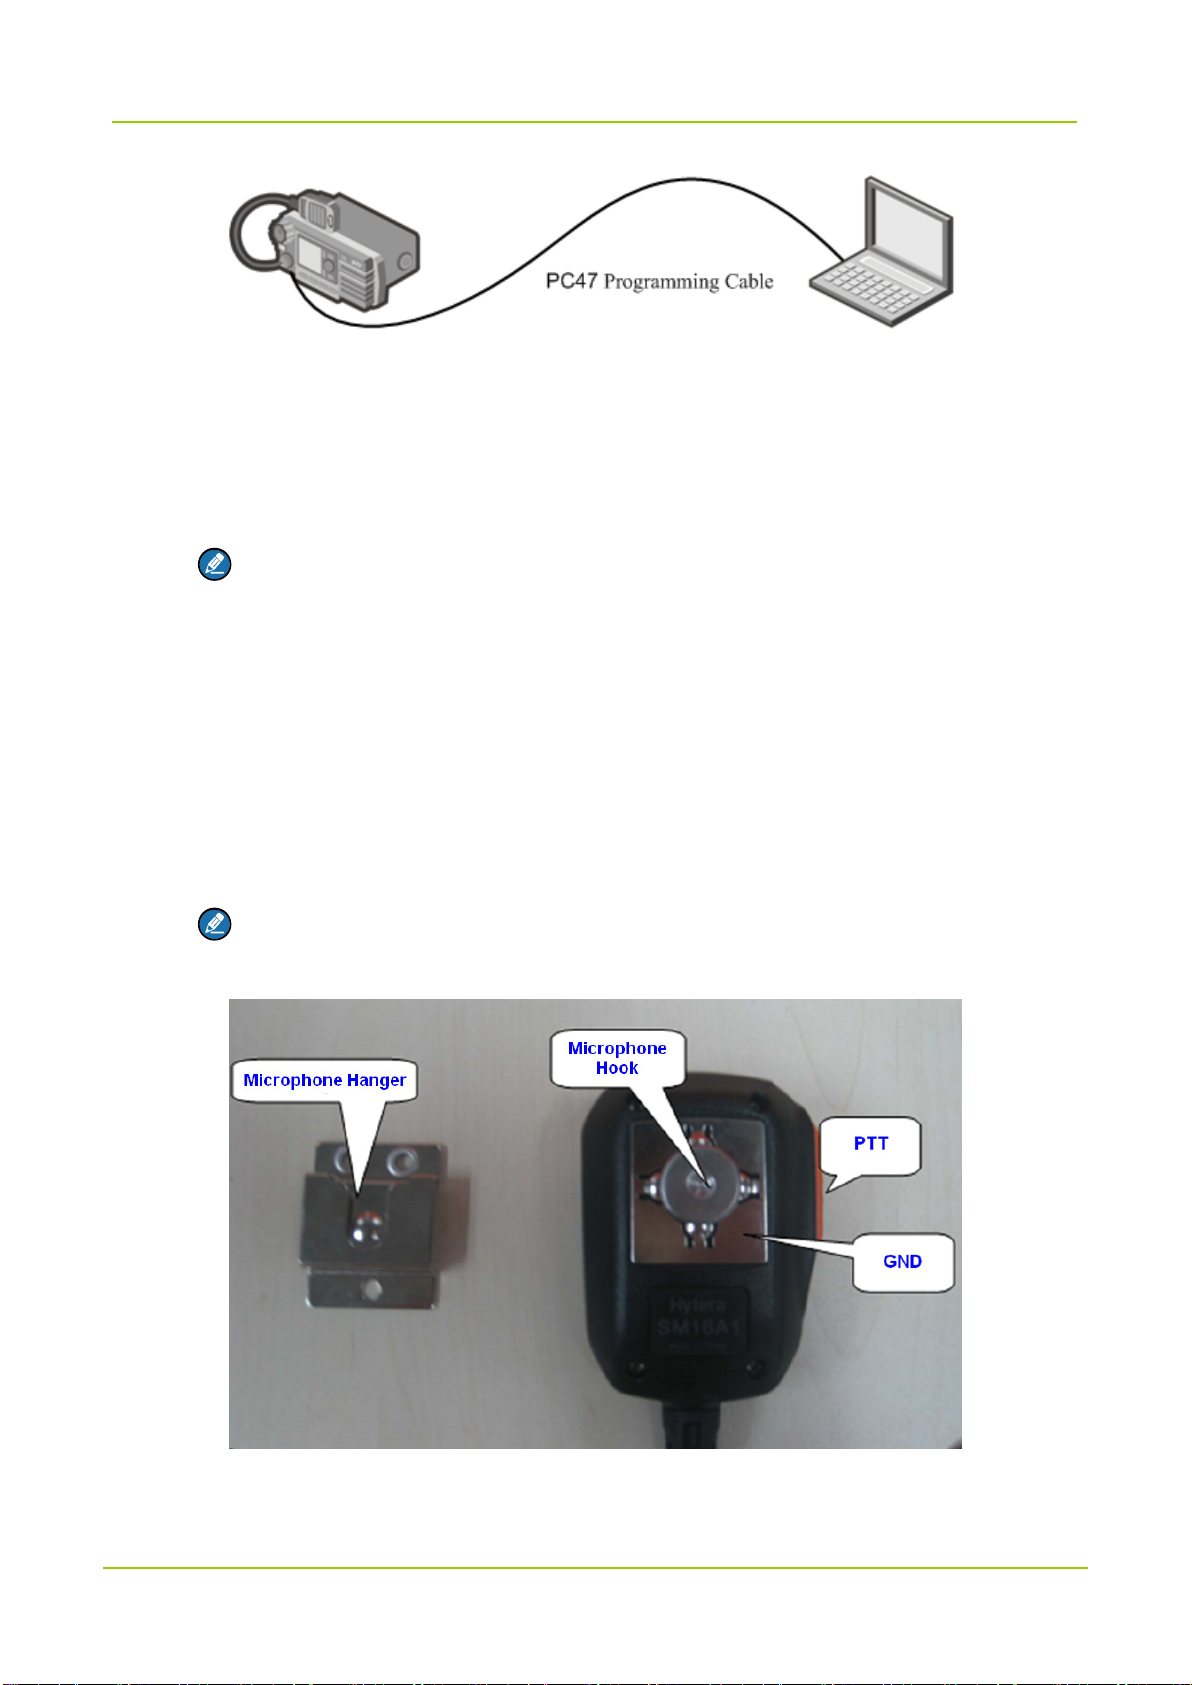
Using PC37 Programming Cable
The palm microphone and its hanger can also be used to make the radio enter the download mode:
Step 1 Turn off the radio.
Step 2 Connect the palm microphone to the 10Pin port on the front panel of the radio, and hook the
palm microphone on the hanger.
Note
If the microphone hanger is not available, you can connect the hook to the GND using a
metal conductor.
Step 3 Hold the PTT on the palm microphone and turn on the radio, so as to let the radio enter the
download mode.
Upgrade Guide
Upgrade and Check
9
When the radio enters the download mode successfully, its LED indicator flashes red for
seconds and then glows red solidly. Otherwise, it fails. In this case, please turn off the radio and
repeat the above operations.
Step 4 Disconnect the palm microphone from the radio, and use PC37 to connect the radio to PC.
3.1.3 X1e/X1p/PD60X/PD66X/PD68X
The operations are the same as that in Using PC47 Programming Cable of 3.1.2 MD78X/MD65X
section.
X1e as the example, the connection diagram is shown as below.
3.2 Starting Upgrade
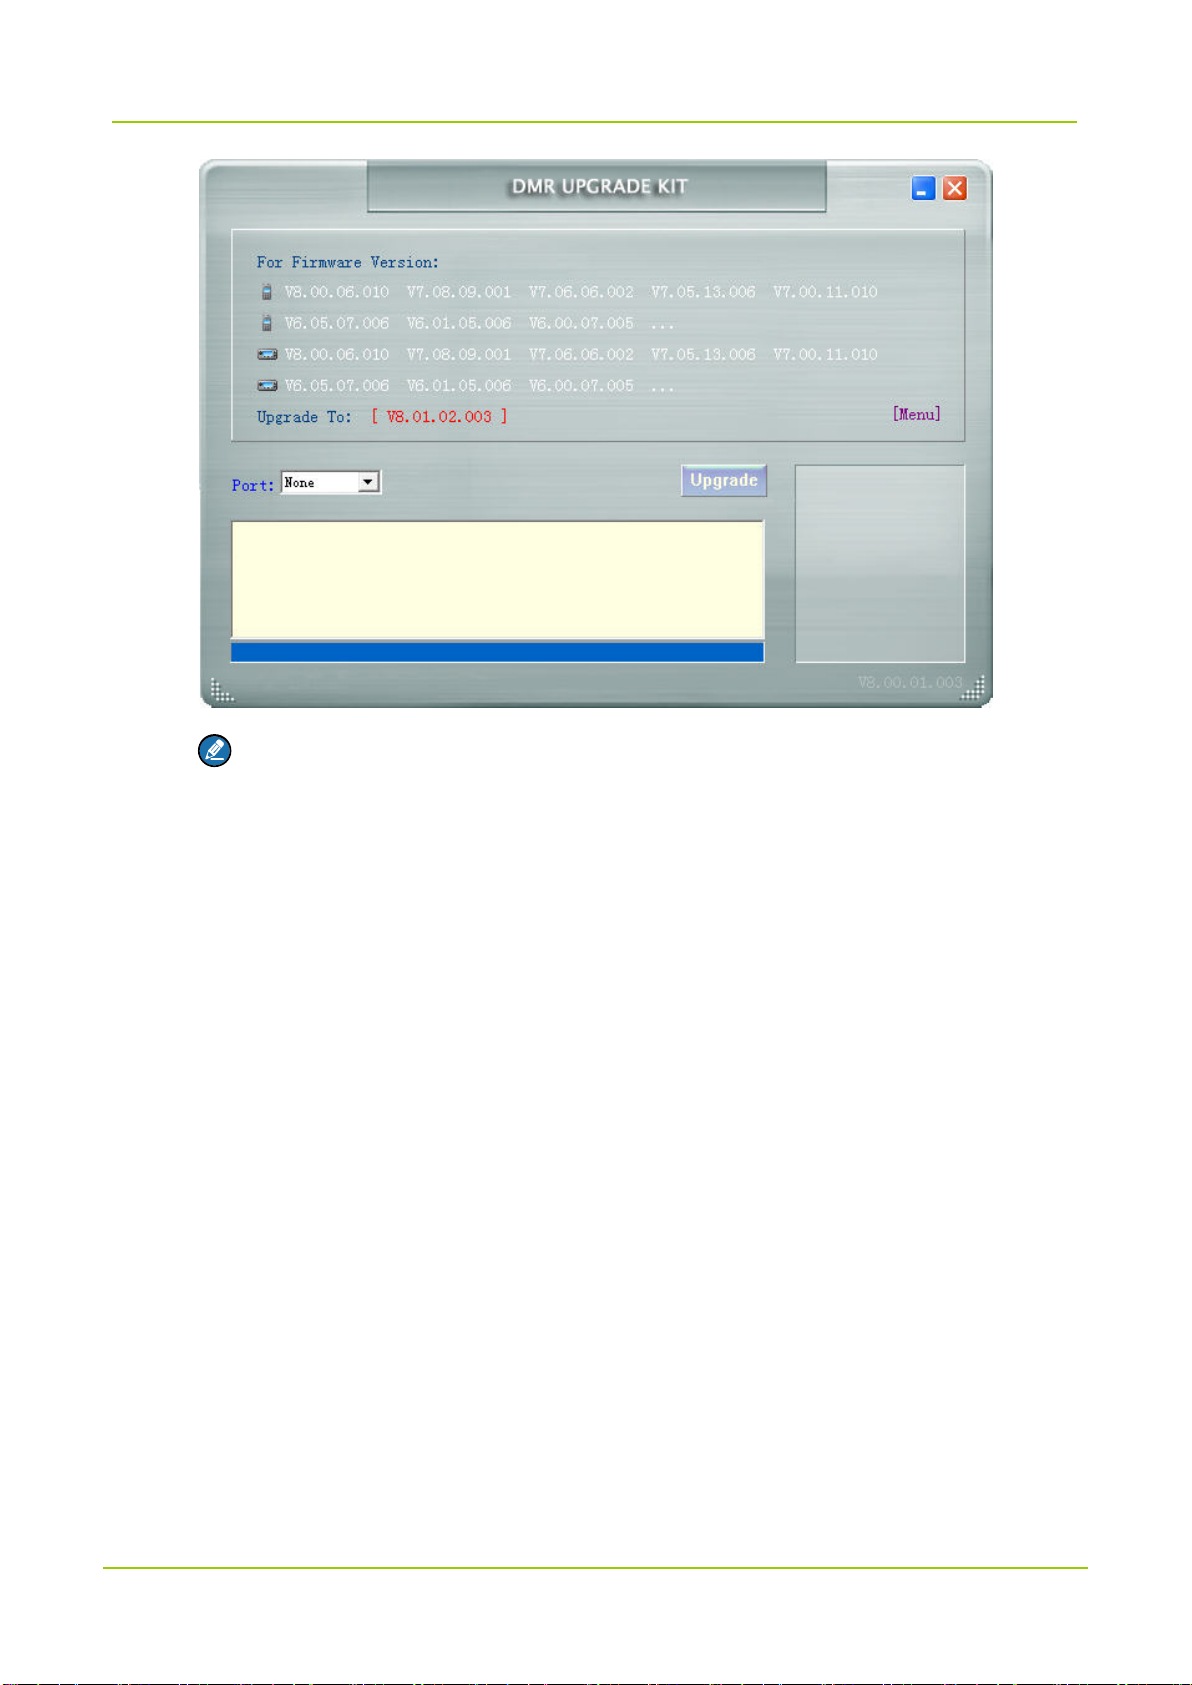
After the radio enters the download mode, please operate as follows:
Step 1 Run the upgrade software to enter the main interface.
Upgrade and Check
Upgrade Guide
10
Note
If a “Restore” button is displayed in the main interface, it indicates an abnormity of RCDB
data during the previous upgrade. In this case, please restore the radio with reference to
Step 4 below.
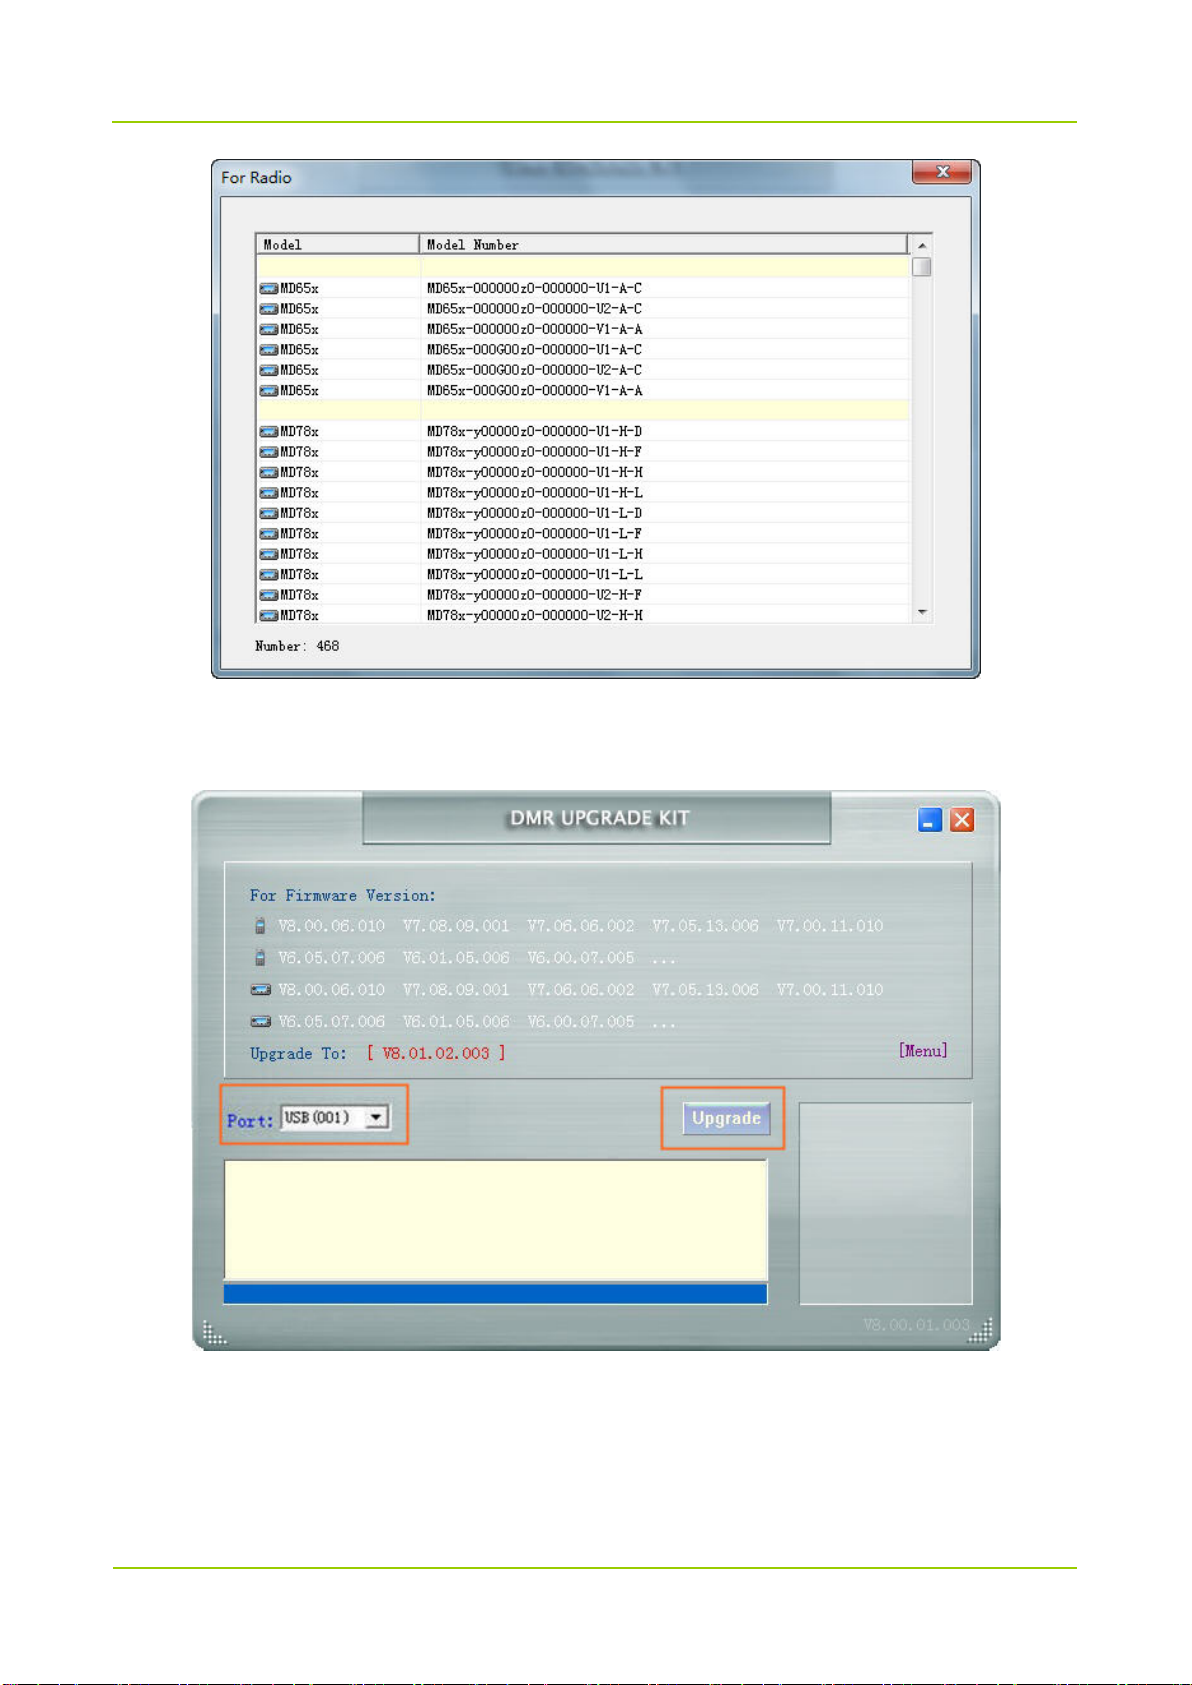
Step 2 (Optional) Select “Menu -> For Radio”.
The “For Radio” window appears. You can check in this window whether the radio to be
upgraded is included. See the figure below.
Otherwise, the upgrade will fail.
Upgrade Guide
Upgrade and Check
11
Step 3 In main interface of the upgrade software, select the corresponding USB port of the radio and
click “Upgrade”.
During the upgrade process,
If the prompt “Open USB failed” appears, check whether the cable is properly connected to
the radio, and whether the USB interface is busy with other software.
 Loading...