

Hytera MD78Xi Quick Reference Manual

QUICK REFERENCE GUIDE
MD78 XL D IGITAL MOBILE RA DIO
Product Overview
Product Layout
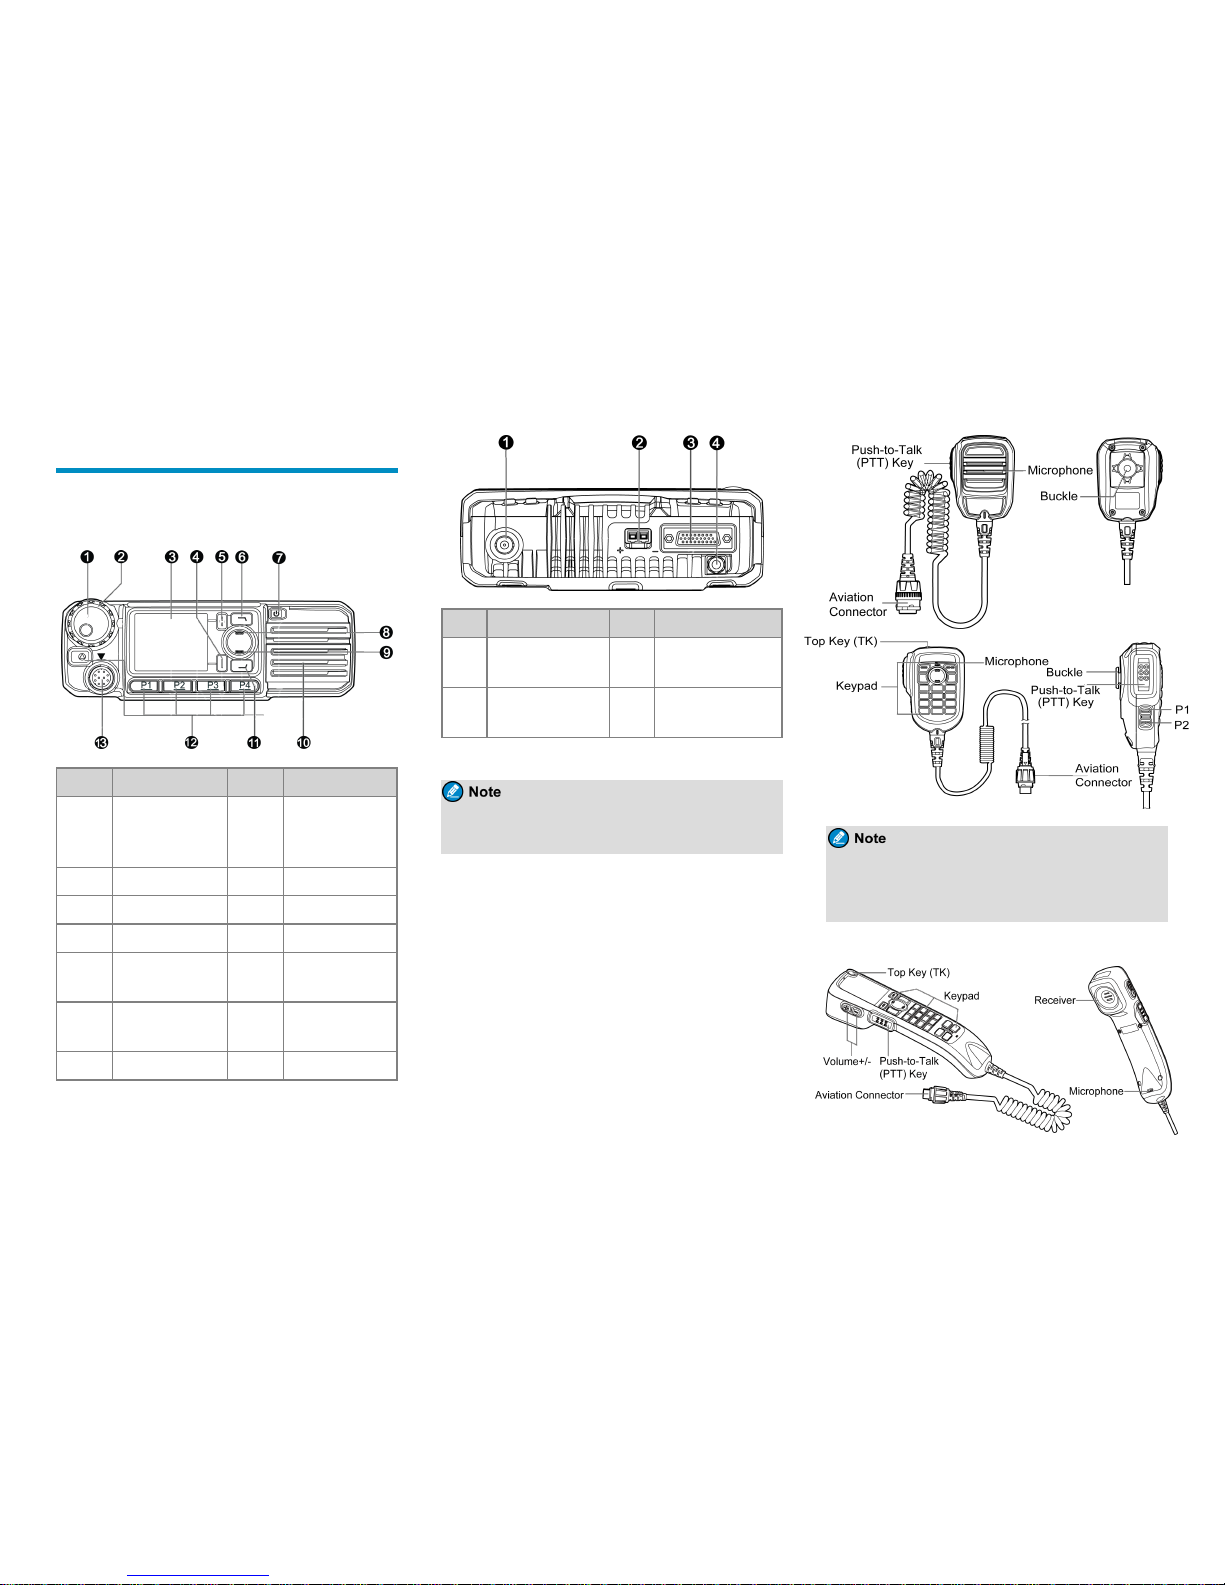
Front Panel
No. Part Name No. Part N ame
1
Volume Control &
Channel/Group
Selector Knob
8 Up Key
2 LED Indicator 9 Down Key
3 LCD D isplay 10 Speake r
4 OK/Menu Key 11 P5/Answer Key
5
Back/Subgroup
Key
12
Programmable
Keys
6 P6/End Key 13
Aviation
Connector
7 On-Off Key / /
Rear Panel
No. Part Name No. Part Name
1
RF Antenna
Connector
3
Acc essory
Connector
2 Power Inlet 4
GPS Antenna
Connector
The GPS antenna c onnector is used only by radios
with the GPS feature.
Palm Microphone
The pa lm microphone without keypad is a vailable
for the digital ra dio and the one with keypad is for
the trunking ra dio.
Handset
1

The handset is ava ilable only for the duplex radio.
Programmable Keys
You ca n r equest your dealer to progra m the f ollowing
keys as shor tcuts to assignable radio f eatures:
l Mobile ra dio: P1 key, P2 key, P3 key, P4 key, TK,
P5/Answer key, P6/End key, Up key, and Down ke y.
l Palm microphone with keypa d: TK, P1 key, a nd P2
key.
l Handse t: Same as the mobile r adio.
Installation
Instructions
Before installing the radio in a ve hicle, rea d the following
instructions carefully:
l The ra dio must work with a 13.6V ± 15% negative
ground electrical system only. Ensure to check the
polarity and voltage of the vehicle power supply.
l Check how long the screws will extend from the
bottom surfac e of the r adio. Drill the mounting hole
ca utiously to a void damage to the vehicle wiring a nd
other parts.
l Connect the antenna and powe r cord to the ra dio
before you install the ra dio in the bracke t. Use the
antenna and powe r cord a uthorized by the Company
only.
l Install the radio with the mounting bracke t supplied by
the Company to a void radio looseness in ca se of
ac cidents. The loose ra dio may cause bodily injury.
l Install the radio in a location where you can rea ch the
front panel conveniently.
l Keep sufficient c learance at the back of the radio for
wiring.
l Be sure to use the fuse with the same specification for
the DC power c ord upon re placement.
l Ensure that the antenna of the radio must be no less
than 10 meter s away from tha t of other RF devices.
Tools
l Electric dr ill
l Cross he ad screwdriver
l T20 torx scre wdriver
Parts
NO. Part Name NO. Part Name
1 Mobile Radio 8 Handse t
2 Locking Knob 9
Screw (4 mm x
16 mm)
3 Mounting Brac ket 10 Handse t Ha nger
4 Screw (4.8 mm x 20 mm) 11 GPS Antenna
5 Palm Microphone 12
Power Cord ( with
2
●
As
the manufacturer dec lare, the install ation of
EUT is for built-in, only front enclosure can be touched, others parts can’t be touched.
NO. Part Name NO. Part Name
fuse)
6 Scre w ( 4 mm x 16 mm) 13 RF Antenna
7 Microphone Hanger / /
l The RF antenna should be purchased separately.
l The GPS a ntenna is ava ilable only for radios
with the GPS feature.
l The palm microphone without keypa d (with ⑥
and ⑦) is ava ilable for the digital radio and the
one with keypad (with ⑥ and ⑦) is for the
trunking radio. The handse t (with ⑨ and ⑩) is
for the duplex radio.
Procedure
1. Select a location, drill holes base d on the sha pe of the
mounting bracket, and then use the scre ws ( 4.8 mm x
20 mm) to secure the bracket.
2. Connect the RF a ntenna, GPS antenna ,and power
cord to the ra dio.
3. Slide the radio into the mounted brac ket a nd se cure it
using the locking knobs.
4. Install the microphone hanger in a loca tion where
you c an reach it e asily, and use the screws (4 mm x
16 mm) to secure it.
5. Align the triangle index on the palm microphone or
the handset with the installation index, plug the
conne ctor into the ra dio, and rotate the connector
clockw ise to secure it.
6. Place the palm microphone or the handset on the
hange r w hen you do not use it.
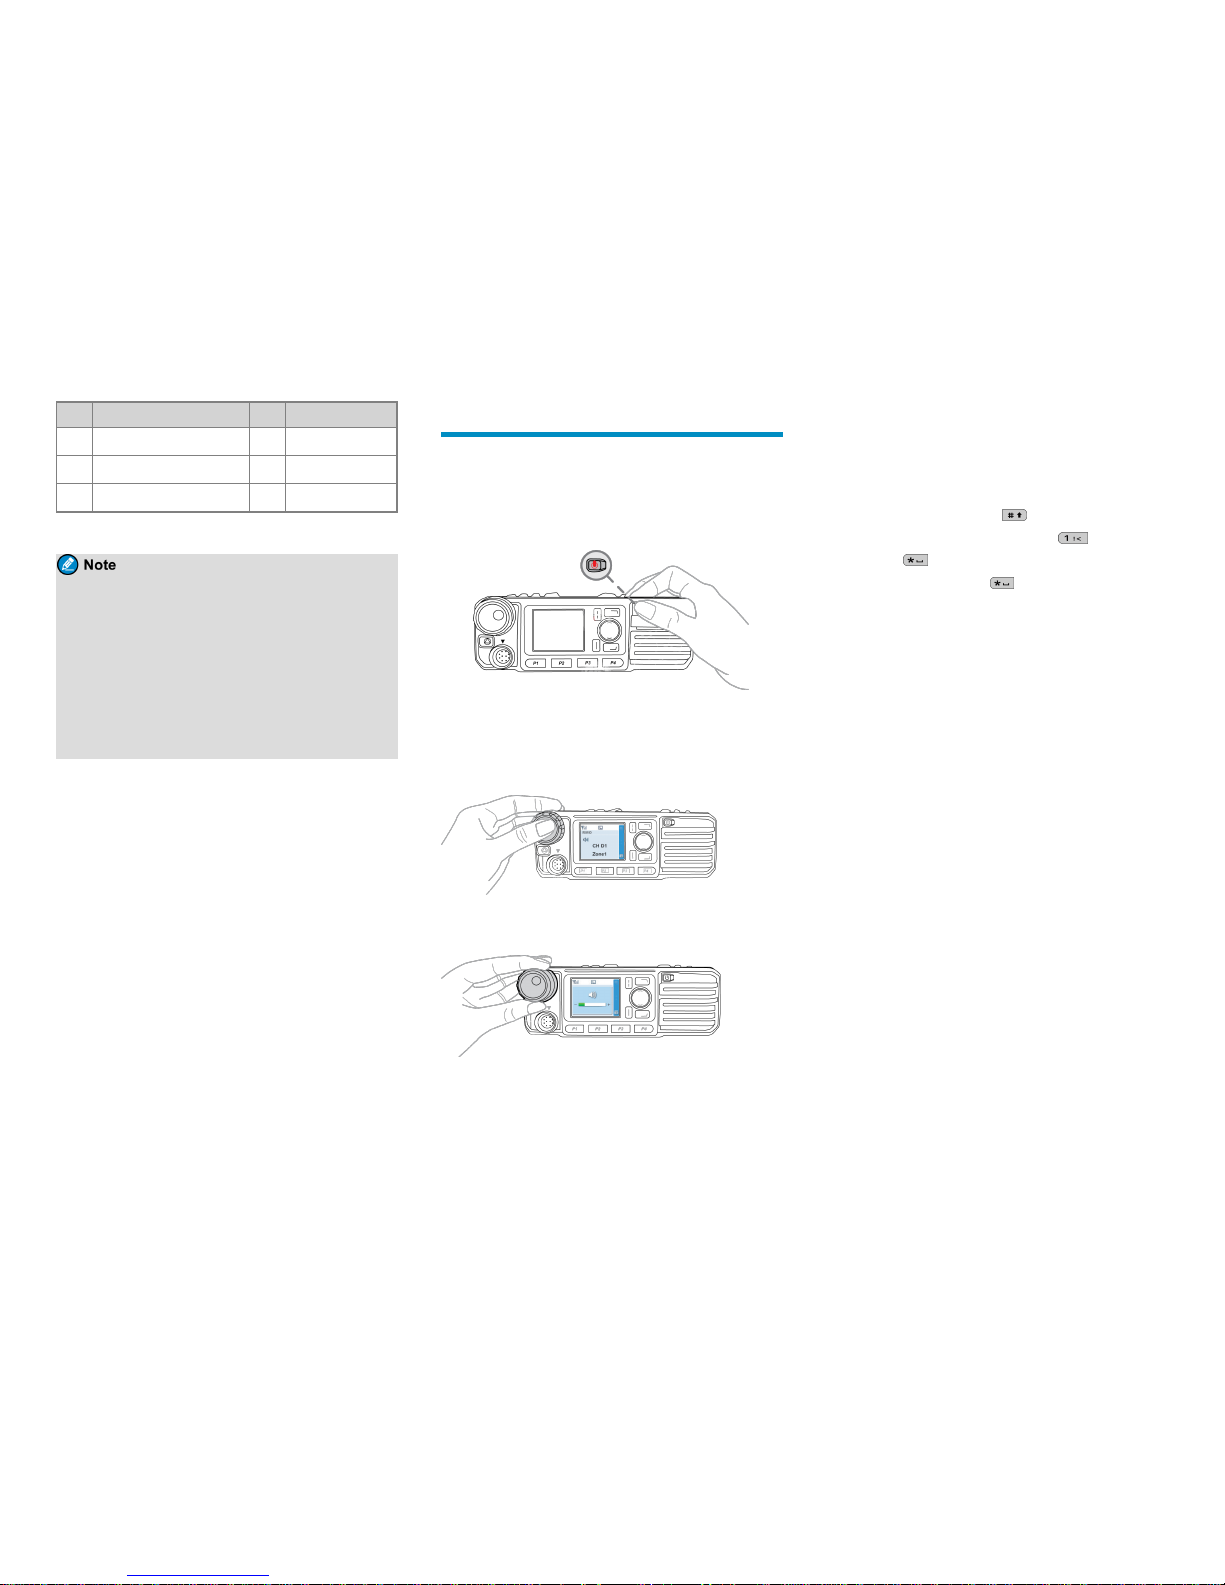
Basic Operations
Turning the Radio On or Off
To turn the r adio on, long press the On-Off key.
To turn the r adio off, pr ess the On-Off key.
Adjusting the Volume
1. Press the Volume Control knob to switch to volume
control mode.
2. Rotate the Volume Control knob to a djust the
volume.
Using the Keypad
You can use the keypa d on the pa lm microphone or the
handset to e dit user aliases or IDs and te xt message s.
l To switch the input method between alphabetic mode
and numeric mode, press .
l To enter special c hara cters, pr ess in alphabetic
mode or in numeric mode.
l To enter a space, pre ss in a lphabetic mode.
Switching the Operation Mode
The radio can ope rate in conventional or trunking mode.
In conventional mode, you can re ceive and transmit voice
and data a fter selecting the r equired channel. In trunking
mode, you can rece ive and transmit voice and da ta after
the radio registers with the base station (BS)successfully.
l To manua lly switch the ope ration mode , go to
Mode> Manual Switch, or press the pr eprogrammed
Operation M ode Switc h key.
l To allow the r adio to automatically switch to
conve ntional mode when the signal dr ops below the
preset leve l in trunking mode, go to Mode>Auto
Switch , or press the prepr ogrammed Mode
Automatic Switch key.
Conventional Mode
In conve ntional mode, the radio r ece ives and transmits
data and voice on the selec ted c hannel.
Selecting Zones and Channels
A channe l is used to r ece ive and transmit da ta and voice.
A zone is a group of c hannels within the same opera tional
area. The ra dio supports up to 64 zones, eac h of which
contains up to 256 cha nnels.
3
 Loading...