

Page 1

数字车载对讲机
DM R MOB ILE R ADI O
811MD78000010
OW NER ’S MANUAL
TM
is the t radem ark of Hy tera Co mmuni catio ns Corp ., Ltd.
2010 H ytera C orp., L td. All Ri ghts Re serve d.
Addr ess: HY T Tower, Hi-Tec h Indus trial P ark Nor th, Bei huan
R D., Nan shan Di stric t, Shen zhen, C hina
Post code: 51805 7
http ://ww w.hyte ra.cn
是海能达通信 股份有 限公司的注册商 标或商 标
2010 H ytera C orp., L td.版权所有
地址:深圳市 高新技术产业园 北区北环路好易 通大厦
邮编:518 057
免费服务热线 :400-830-70 20
http ://www.hyte ra.cn
X050 31
Page 2

Preface
Thank you for purchasing Hytera DMR Digital Mobile Radio. As a product built
to the DMR standard, It is endowed with ergonomic design, all-round digital
functions and remarkable quality to increase your management efciency and
enable you to be responsive to emergent situations.
To derive optimum performance from your product, please read this manual
and the supplied Safety Information Booklet carefully before use.
The manual is applicable to the following model:
MD78X
MD78XG
Page 3
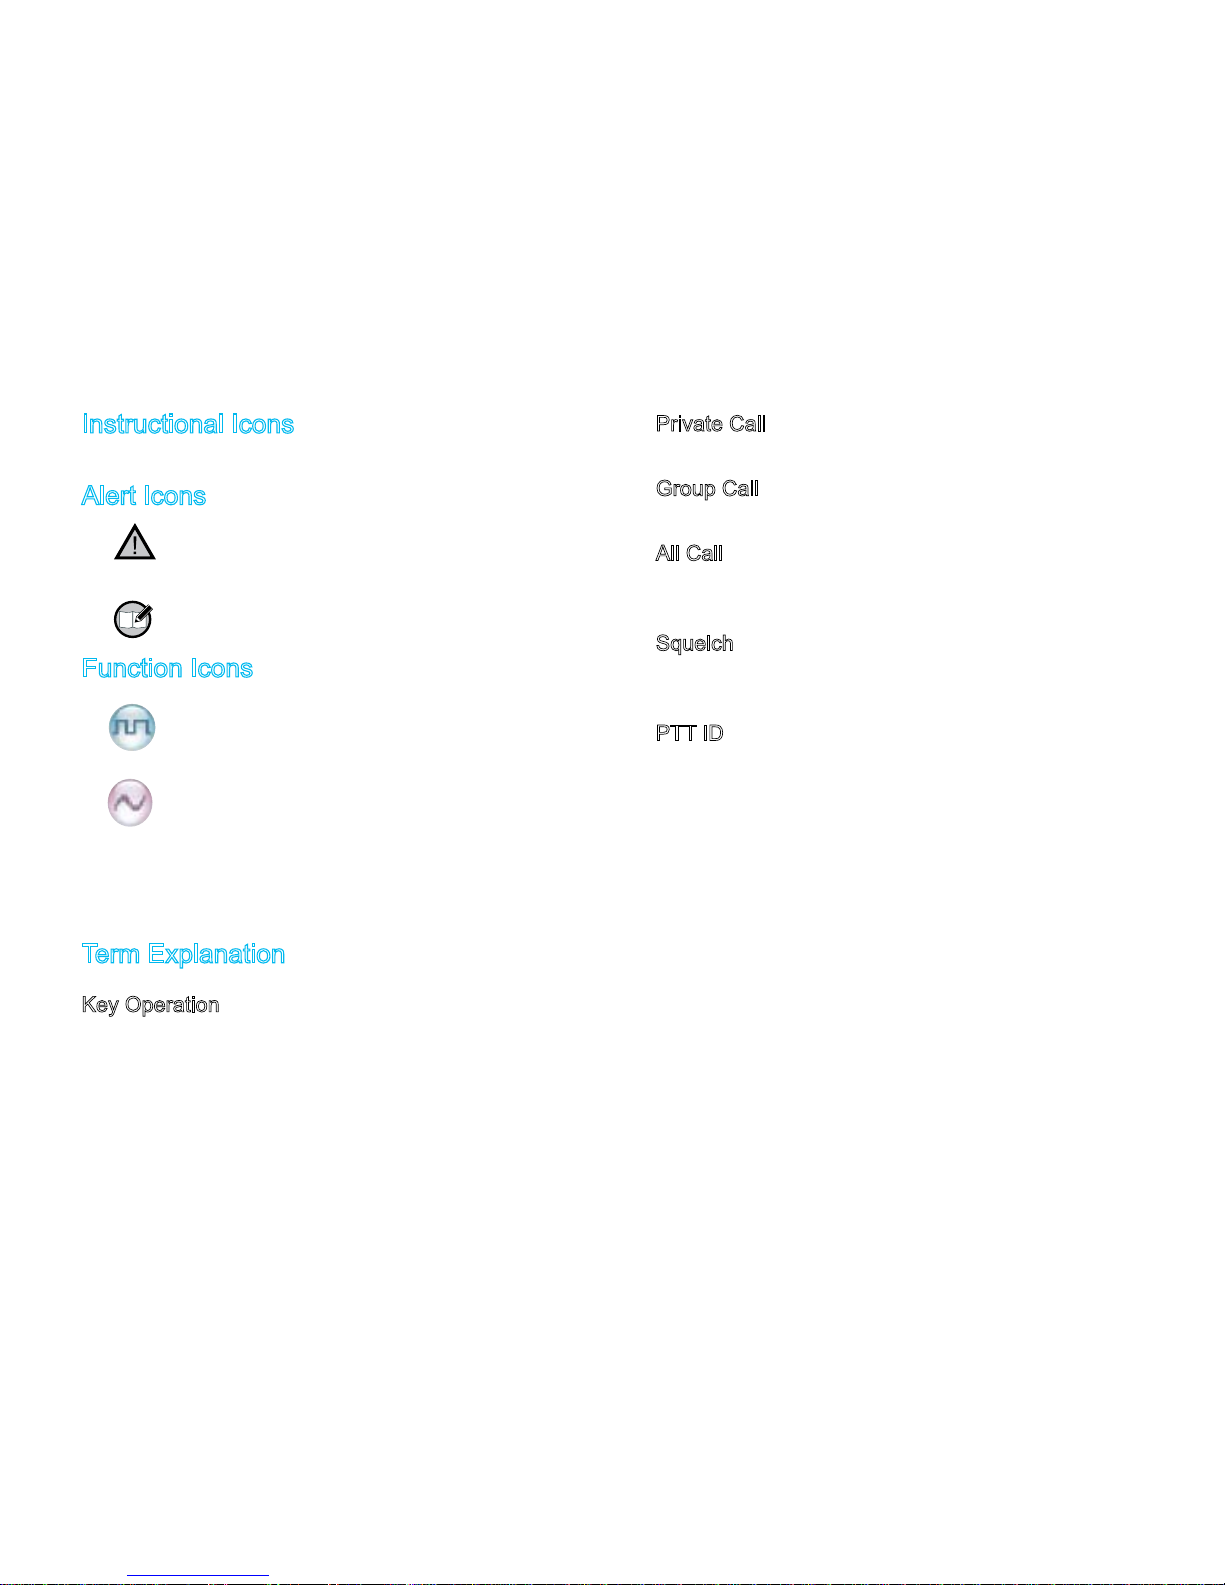
Instructional Icons
The following icons are available through this manual:
Alert Icons
Caution: indicates situations that could cause
damage to your product.
Note: indicates tips that can help you make better use
of your product.
Function Icons
: indicates functions that are available on digital
channel only.
: indicates functions that are available on analog
channel only.
Functions marked with no function icons are available on both
analog and digital channels.
Term Explanation
Key Operation
Short press: to press a key and release it quickly.
Long press: to press a key and remain holding it down for a pre-
dened period (2 seconds by default).
Hold down: to press a key and remain holding it down.
Private Call
Private Cal is a call initiated by a single user to another user.
Group Call
Group Call is a call initiated by a single user to a group.
All Call
All Call is a call initiated by a single user to all the other users on a
channel.
Squelch
This technology can remove excessive background noises, improv-
ing your communication quality.
PTT ID
PTT ID, namely radio identity, allows a radio with display or the
control center to identify the calling party.
Page 4

Copyright Information
Hytera and HYT are tr ademarks o r regis tered trademarks of
Hytera Communications Co., Ltd. (“Hytera”) in PRC and/or other
countries or areas. Hytera retains the ownership of its trademarks
and product names. All other trademarks and/or product names
that may be used in this manual are properties of their respective
owners.
The Hytera product described in this manual may include Hytera
computer programs stored in memory or other media. Laws in
PRC and/or other countries or areas protect the exclusive rights
of Hytera with respect to its computer programs. The purchase
of this product shall not be deemed to grant, either directly or by
implication, any rights to the purchaser with respect to Hytera
computer programs. Any Hytera computer programs may not be
copied, modied, distributed, decompiled, or reverse-engineered in
any manner without the prior written consent of Hytera.
The AMBE+2
TM
voice coding technology embodied in this product
is protected by intellectual property rights including patent rights,
copyrights and trade secrets of Digital Voice Systems, Inc.
This voice coding technology is licensed solely for use within this
product. The user of this technology is explicitly prohibited from
attempting to decompile, reverse engineer, or disassemble the
Object Code or in any other way convert the Object Code into a
human readable form.
U.S . Patent Nos. #6,912,495 B2, #6,199,037 B1, #5,870,405,
#5,826,222, #5,754,974, #5,701,390, #5,715,365, #5,649,050,
#5,630,011, #5,581,656, #5,517,511, #5,491,772, #5,247,579,
#5,226,084 and #5,195,166.
Disclaimer
Hytera endeavors to achieve the accuracy and completeness of
this manual, but no warranty of accuracy or reliability is given. All
the specications and designs are subject to change without prior
notice due to continuous technology development. No part of this
manual may be copied, modied, translated, or distributed in any
manner without the express written permission of Hytera.
If you have any suggestions or would like to learn more details,
please visit our website at:http://www.hytera.cn.
Page 5

occupational health against exposure to RF energy.
As a conscientious company centering on users, Hytera strictly
complies with the foregoing requirements from design, production
and test.
EU Regulatory Conformance
As certied by the qualied laboratory, the product is in compliance
with the essential requirements and other relevant provisions of
the Directive 1999/5/EC. Please note that the above information is
applicable to EU countries only.
RF Radiation Information
RF Radiation Prole
Radio Frequency (RF) is a frequency of electromagnetic radiation
in the range at which radio signals are transmitted. RF technology
is widely used in communication, medicine, food processing and
other elds. It may generate radiation during use.
RF Radiation Safety
In order to ensure user health, experts from relevant industries
including science, engineering, medicine and health work with
international organizations to develop standards for safe exposure
to RF radiation. These standards consist of:
United States Federal Communications Commission, Code of
Federal Regulations; 47CFR part 2 sub-part J;
American National Standards Institute (ANSI)/Institute of Elec-
trical and Electronic Engineers (IEEE) C95. 1-1992;
Institute of Electrical and Electronic Engineers (IEEE) C95. 1 –
1999;
International Commission on Non-Ionizing Radiation Protection
(ICNIRP) 1998.
FCC Regulations
Federal Comm unication Commi ssion (FCC) requires tha t all
radio communication products should meet the requirements set
forth in the above standards before they can be marketed in the
U.S, and the manufacturer shall post a RF label on the product
to inform users of operational instructions, so as to enhance their
Page 6

1
Contents
Checking Items in the Package ------------------------------- 2
Product Overview ------------------------------------------------- 3
Front Panel -----------------------------------------------------------3
Rear Panel---------------------------------------------------------------------3
Programmable Keys ------------------------------------------------4
Installation ---------------------------------------------------------- 5
Instructions ------------------------------------------------------------5
Installation Tools -----------------------------------------------------5
Installation Steps ----------------------------------------------------6
Status Indication -------------------------------------------------- 7
LCD Icon --------------------------------------------------------------7
LED Indicator ---------------------------------------------------------8
Basic Operations -------------------------------------------------- 9
Turning the Radio On/Off ------------------------------------------9
Adjusting the Volume -----------------------------------------------9
Selecting a Zone ----------------------------------------------------9
Selecting a Channel ------------------------------------------------9
Switching the Channel Mode -------------------------------------9
Call ----------------------------------------------------------------- 10
Private Call ------------------------------------------------------10
Group Call -------------------------------------------------------10
All Call ------------------------------------------------------------11
Calls on Analog Channels -----------------------------------11
Menu Navigation -------------------------------------------------- 12
Contact -----------------------------------------------------------12
Message ----------------------------------------------------------12
Call Logs
---------------------------------------------------------13
Scan --------------------------------------------------------------------
14
Zone --------------------------------------------------------------------14
Settings ----------------------------------------------------------------14
Accessories -----------------------------------------------------------16
Functions and Operations -------------------------------------- 17
Home Screen ---------------------------------------------------------17
Scan --------------------------------------------------------------------17
Public Address -------------------------------------------------------17
Talk Around -----------------------------------------------------------18
Monitor
------------------------------------------------------------18
Squelch Off
------------------------------------------------------18
Emergency ------------------------------------------------------------
18
Ignition Sense --------------------------------------------------------21
Scrambler
/Encrypt ---------------------------------------22
Busy Channel Lockout ---------------------------------------------
22
Time-out Timer (TOT) ----------------------------------------------22
Pseudo Trunking
-----------------------------------------------22
MIC AGC --------------------------------------------------------------
23
Emergency Footswitch ---------------------------------------------23
Channel Steering ----------------------------------------------------23
Signaling Introduction -------------------------------------------- 24
HDC1200 --------------------------------------------------------------24
Troubleshooting --------------------------------------------------- 25
Care and Cleaning ----------------------------------------------- 26
Optional Accessories -------------------------------------------- 27
Appendix ------------------------------------------------------------ 28
Input Method ---------------------------------------------------------28
Page 7
2
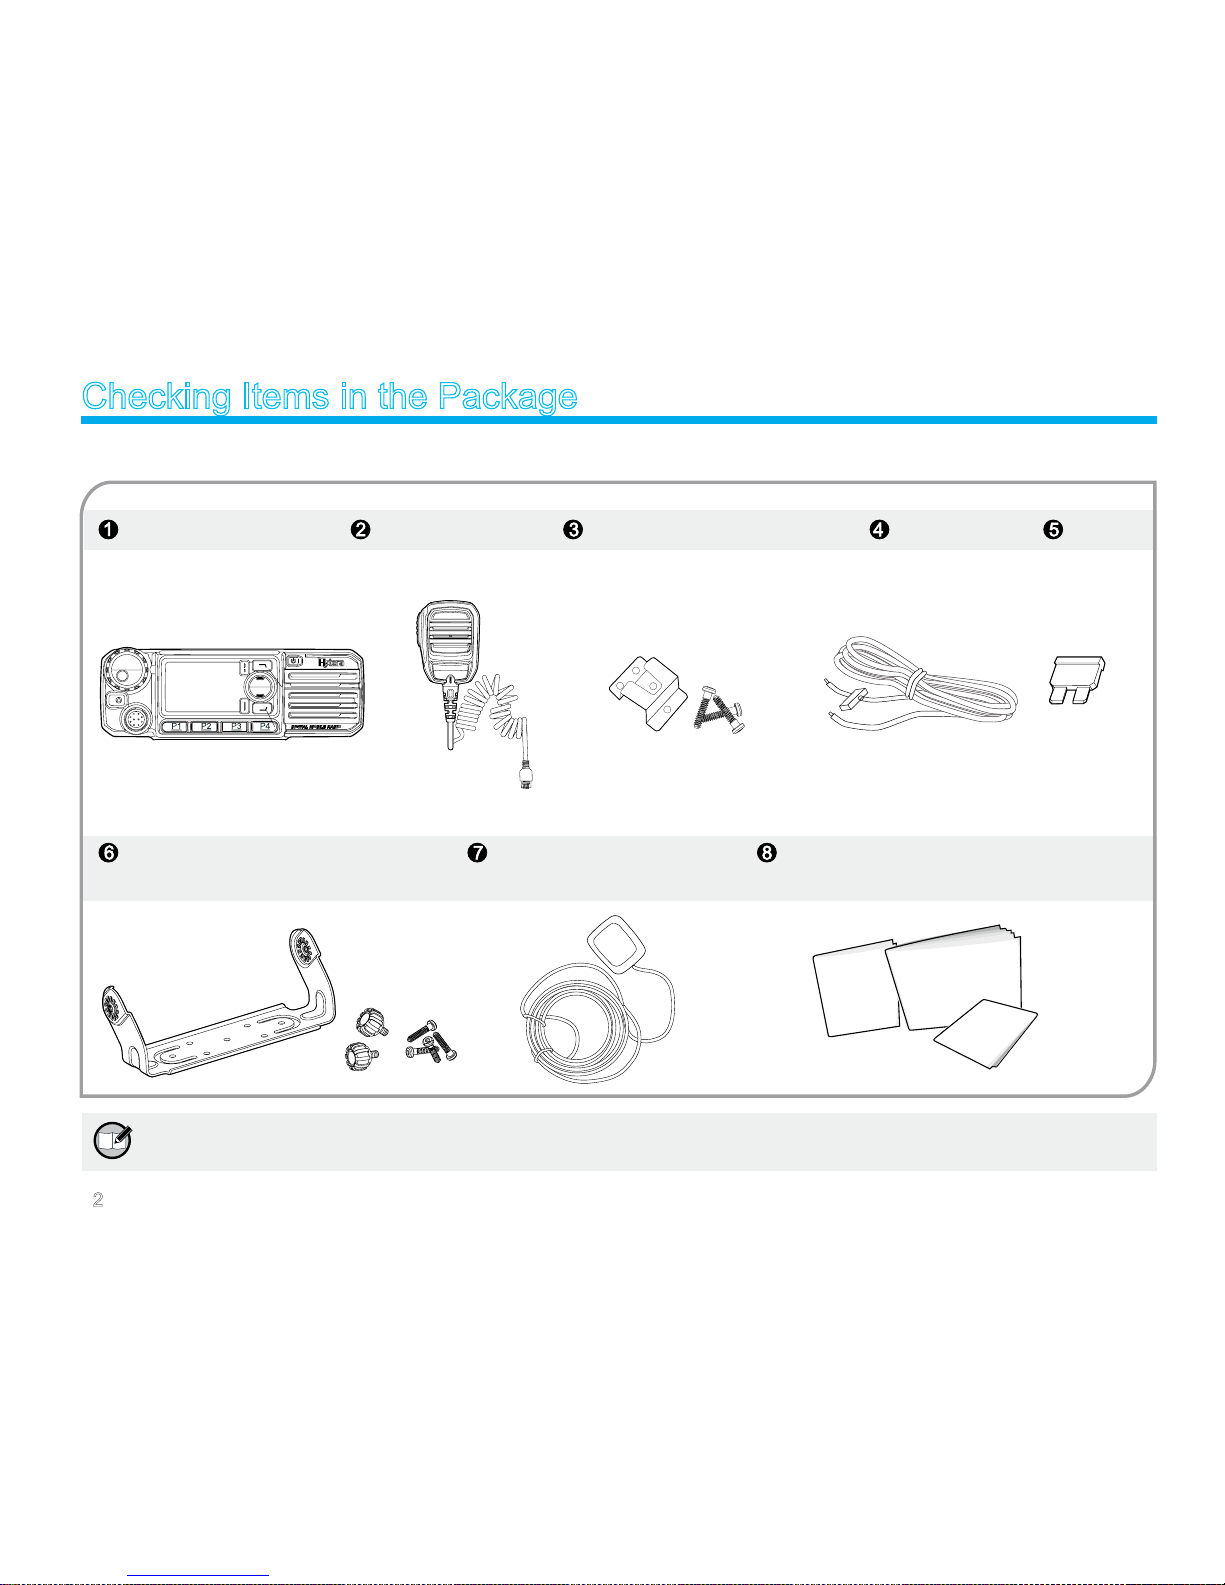
Checking Items in the Package
Please unpack carefully and check that all items listed below are received. If any item is missing or damaged, please contact your dealer.
Note: To realize functions enabled by inputting, please purchase a palm microphone with keypad. Go to Optional
Accessories for more details.
Mounting Bracket Kit GPS Antenna Owner’s Manual /Quick Reference Guide/Safety
Information Booklet
Radio Unit Palm Microphone Microphone Hanger and Screws Power Cord Fuse
Safety Information Booklet
Owner’s Manual
Quick Reference Guide
Page 8
3
Product Overview
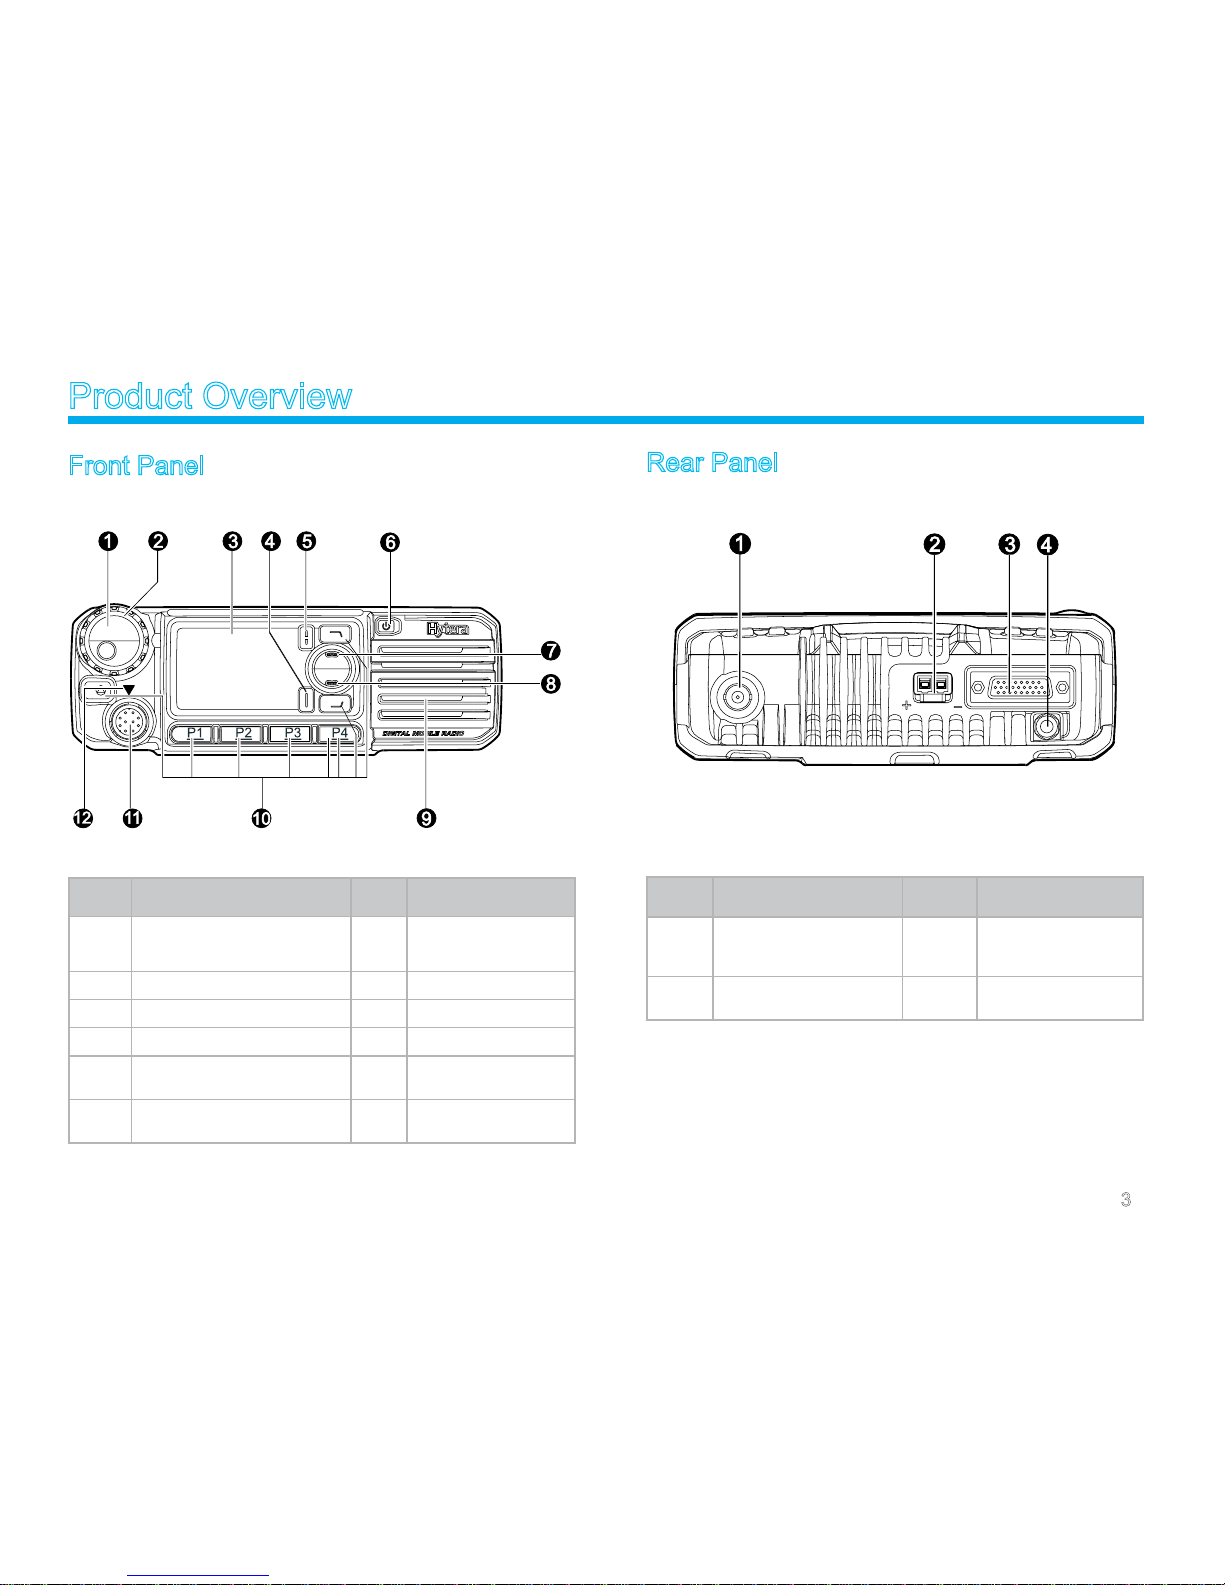
Front Panel
No. Part Name No. Part Name
1
Volume Control / Channel
Selector Knob
2 LED Indicator
3 LCD Display 4 OK/Menu Key
5 Back Key 6 Power On/Off Key
7 Up Key 8 Down Key
9 Speaker 10
P r og r a m ma b l e
Keys
11 Microphone Jack 12
Microphone Instal-
lation Index
Rear Panel
No. Part Name No. Part Name
1
RF Antenna Connec-
tor
2 Power Inlet
3 Accessory Jack 4
G P S A n t e n n a
Connector
Page 9
4
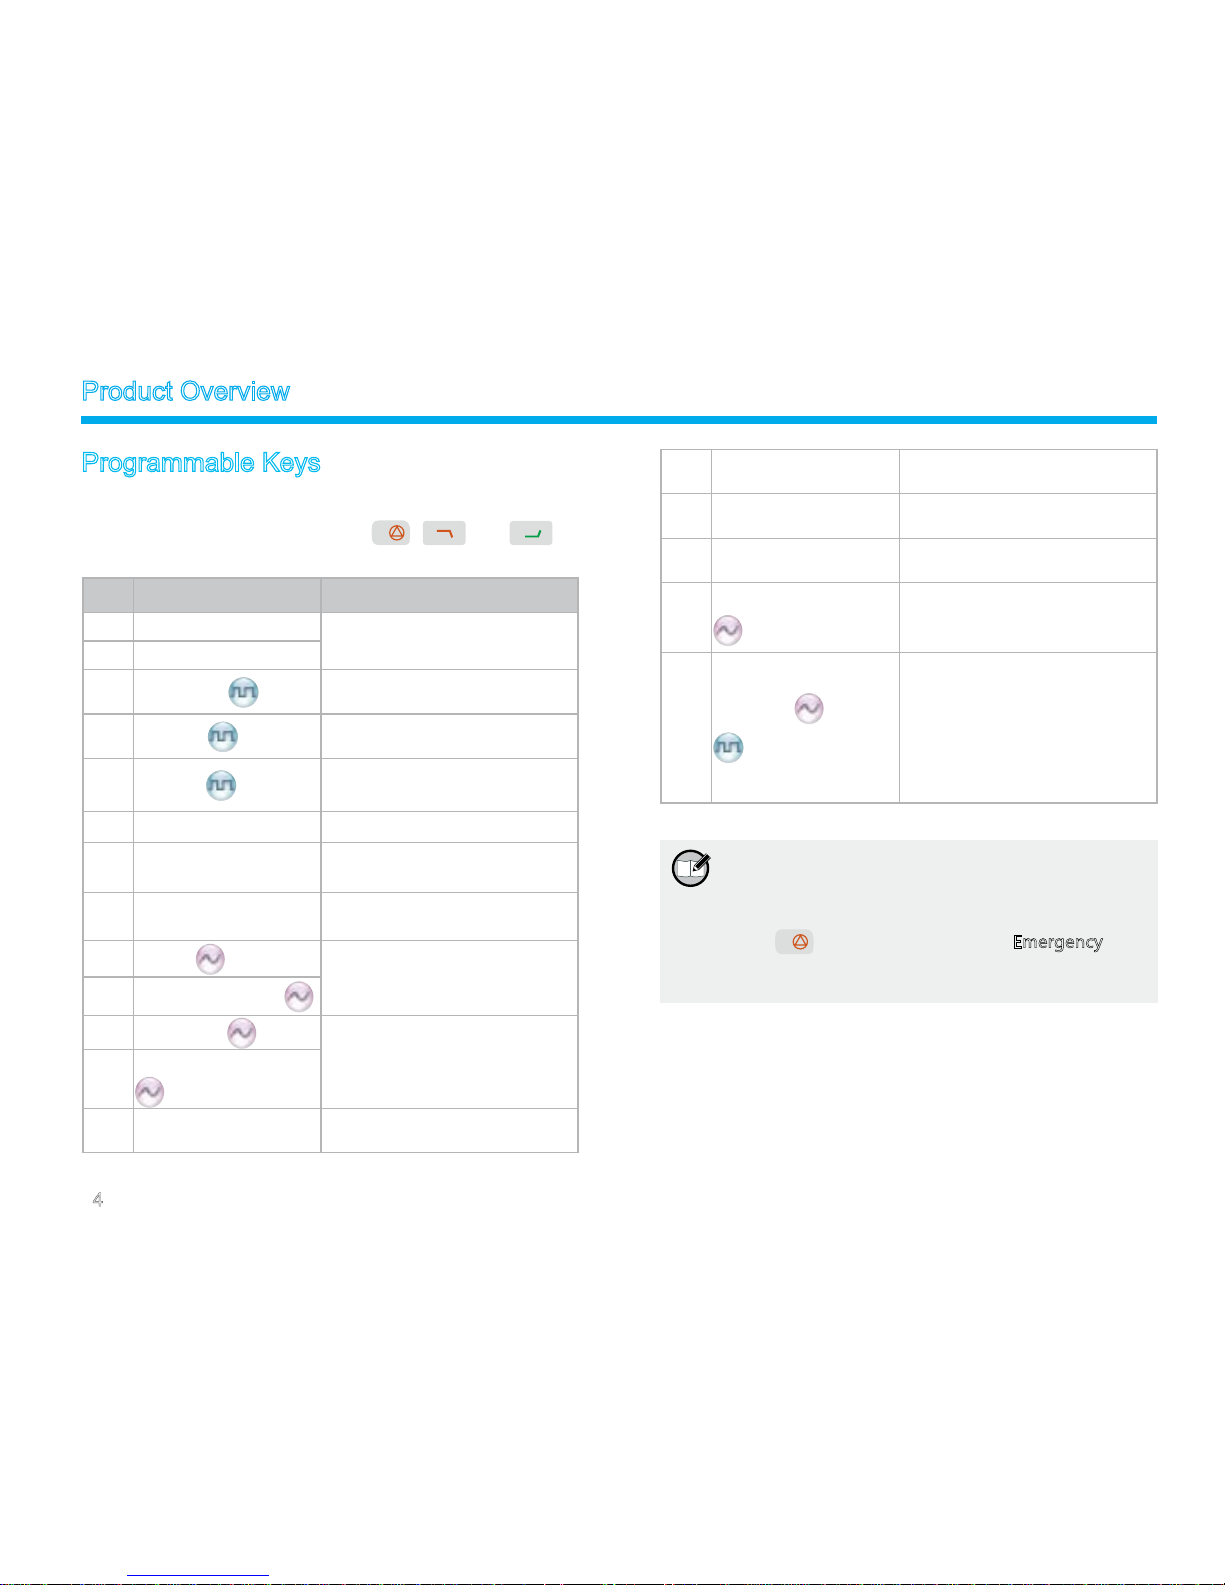
Programmable Keys
For enhanc ed convenienc e, you may request you r dea ler to
pr ogram t he keys P1, P2, P3, P4 , , an d as
shortcuts to the functions listed below:
No. Shortcut Keys Description
1 Zone Up
To select a desired zone quickly
2 Zone Down
3 Contact List
To access the menu “Contact List”
quickly
4 Message
To access the menu “Message”
quickly
5 Call Log
To access the menu “Call Logs”
quickly
6 Adjust Power Level To adjust power level quickly
7 Public Address
To make public address via the
external speaker quickly
8 Talk Around
To directly communicate with
other radios
9 Monitor
To adjust the condition for
incoming signal match
10 Monitor Momentary
11 Squelch Off
To always unmute speaker no
matter whether carrier is present
or not
12
Squelch Off Momentary
13 Home Screen
To quickly return to the previous
menu or home screen
14 Scan
To receive signals on other
channels
15
Nuisance Temporary
Delete
To temporarily ignore unwanted
channel activity
16 Emergency
To summon help in emergent
situations
17
Adjust Squelch Level
To temporarily adjust the squelch
threshold required for the radio to
unmute
18
Scrambler /Encrypt
Scrambler: To encrypt your voice
so as to guarantee privacy of your
communication
Encrypt: To encrypt your voice
and message so as to guarantee
privacy of your communication
Note:
1 L ong and s hor t pre ss of a ke y can be
assigned with different functions by your
dealer.
2
is programmed as the Emergency key
by default, and is programmable by your
dealer.
Product Overview
Page 10

5
Installation
Before you install the radio in a v ehicle, be su re to read t he
following instructions carefully:
Instructions
The radio operates with cathode-grounded power supply of
13.6V ± 15% only. Please check polarity and voltage of the
power supply on the vehicle before you install the radio.
Please check how long the screws will extend from the bot-
tom surface of the radio, before you install the radio. Drill the
mounting hole cautiously to avoid damage to the vehicle wiring
and other parts.
Please connect Hytera supplied antenna and power cord to
the radio, before you install it in the bracket. And make sure
the antenna and power cord is dedicated for Hytera digital
radios.
Install the radio with Hytera supplied mounting bracket, to
avoid radio looseness in case of accidents. The loose radio
may cause bodily injury.
Install the radio in a location where it’s easy to reach the front
panel controls.
Please make sure there’s sufcient space at back of the radio
for wiring.
When the fuse for DC power cord needs replacement, it must
be replaced by a fuse with the same specication.
Installation Tools
Electric drill
Cross head screwdriver
Hex socket sleeve (used for 4.8*20mm self-tapping screws)
Page 11

6
No. Part Name
1 Radio Unit
2 RF Antenna Connector
3 Locking Knobs
4 Mounting Bracket
5 4.8 * 20 mm Self-
tapping Screws
6 Power Inlet
7 Black Power Cord
8 Red Power Cord
9 Fuse
10 Palm Microphone
11 Microphone Hanger
12 4 * 16 mm Self-tapping
Screws
13 GPS Antenna Connector
A Install the bracket in a loc ation
whe re it ’s ea sy to op era te th e
radio.
B Con n ec t ac c ess ori es s uch as
antenna and power cord to the
radio.
C Slide the radio into the mounting
br ac ket and secur e it u sing the
locking knobs.
D Install the microphone hanger
in
a location where it can be reached
easily.
E Plug the p alm micr ophone into
the microphone jack on the front
panel (but at rst align the triangle
index on the palm microphone with
the microphone installation index),
and place it on the hanger when
you do not use it.
Installation Steps
Installation
Page 12
7
Status Indication
LCD Icon
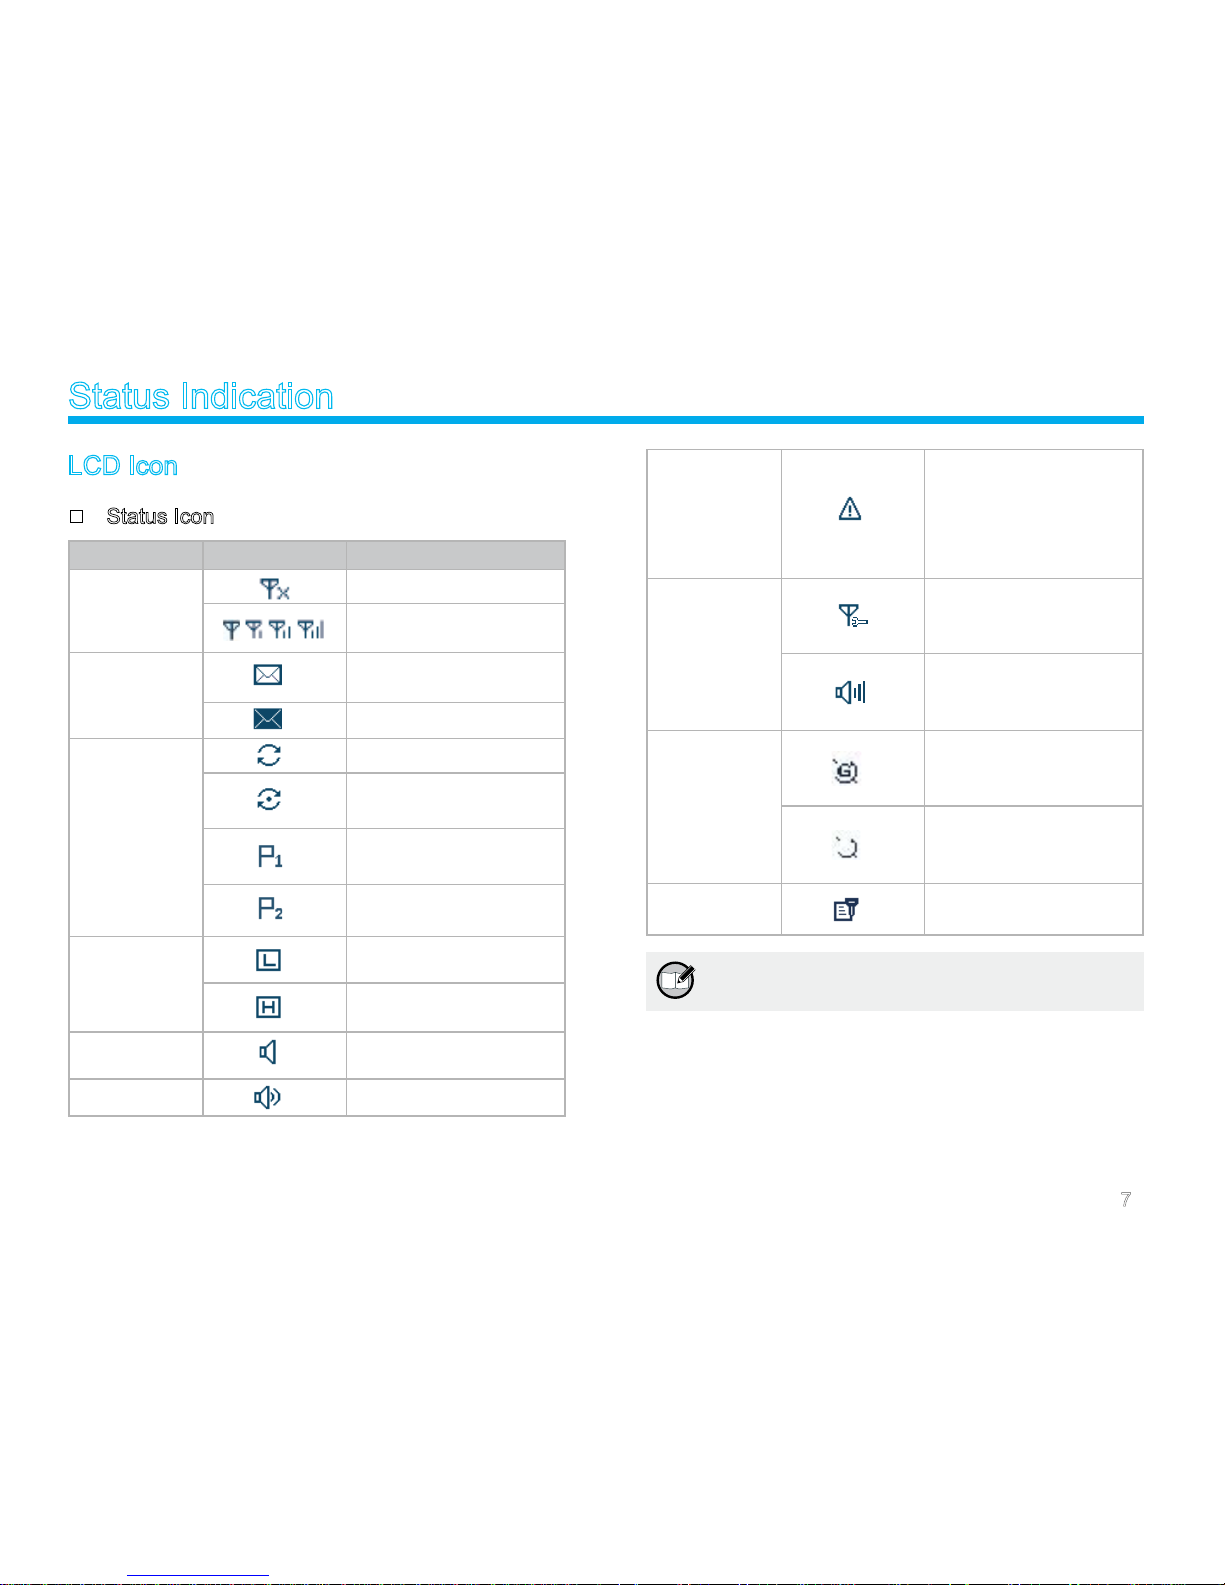
Status Icon
Icon Name Icon Radio Status
RSSI
No signal
More bars indicate better
signal strength
Message Icon
New message/unread
message
InBox is full
Scan Icon
Scanning is in progress
Scanning pauses on a
non-priority channel
Scanning pauses on
Priority Channel 1
Scanning pauses on
Priority Channel 2
TX Power
Icon
Low TX power for the
current channel
High TX power for the
current channel
Monitor Icon
The Monitor feature is
active
Speaker Icon The speaker is unmuted
Emergency
Icon
The Emergency mode
(other than secret
emergency) is active or
an emergency message
is received
Knob
Operation
Mode Icon
The knob currently
operates in channel
selection mode
The knob currently
operates in volume
adjustment mode
GPS Icon
The GPS feature is
active, and valid GPS
data is received
The GPS feature is
active, but no valid GPS
data is received
Scrambler/
Encrypt Icon
The Scrambler/Encrypt
feature is active
Note: The description related to the GPS feature in
this manual is applicable to MD78XG only.
Page 13

8
Operation Mode Icon
Icon Name Icon Operation Mode
Ope r ati o n
Mode Icon
DM
Direct Mode: Under this mode,
radios communicate with each
other directly
RM
Rep e ate r Mo d e: U n der thi s
mode, radios communicate with
each other via a repeater
LED Indicator
The LED indicator will help you easily identify the current radio
status.
LED Indicator Radio Status
LED ashes green. Powering on
LED glows red. Transmitting
LED glows green. Receiving
LED ashes green slowly. Scanning
LED ashes orange rapidly. Emergency
LED glows orange.
Call ended (within the preset
time period)
Status Indication
Page 14
9
Basic Operations
Turning the Radio On/Off
To turn the radio on, long press the Power On/Off key until the
radio shows power-up screen and sounds power-up alert, and the
LED ashes green. To turn the radio off, press the Power On/Off
key.
Adjusting the Volume
When the Volume Control / Channel Selector knob operates
in volume adjustment mode (the radio displays the icon ),
rotate the knob clockwise to increase the call volume, or counter-
clockwise to decrease it.
Selecting a Zone
A zone is a group of channels exhibiting the same property, and is
programmed by your dealer. The radio supports up to 64 zones,
each with a maximum of 16 channels. You may select a zone
through any of the following methods:
1. Through menu selection
Go to the menu “Zone”, and use the Up/Down key to select
your desired zone.
2. Through the function keys
You may quickly toggle to your desired zone by pressing the
programmed Zone Up or Zone Down key.
Note: You dealer may designate the power-up
zone and channel. If not, the radio will enter
the zone and channel last used.
Selecting a Channel
Press the Volume Control / Channel Selector knob to switch it to
channel selection mode (the radio displays the icon ), and then
rotate the knob to select your desired channel. Alias of the current
channel will appear in the home screen.
Note: The knob is in volume adjustment mode
by default, and will return to this mode in 5
seconds after you select a channel.
Switching the Channel Mode
Each channel can be programmed as either analog channel or
digital channel. If the current zone includes both analog and digi-
tal channels, you may quickly switch between digital and analog
channels through the Volume Control / Channel Selector knob.
Page 15
10
Call
To ensure optimal volume of the receiving radio, hold the palm
microphone approximately 2.5 to 5 centimeters away from your
mouth.
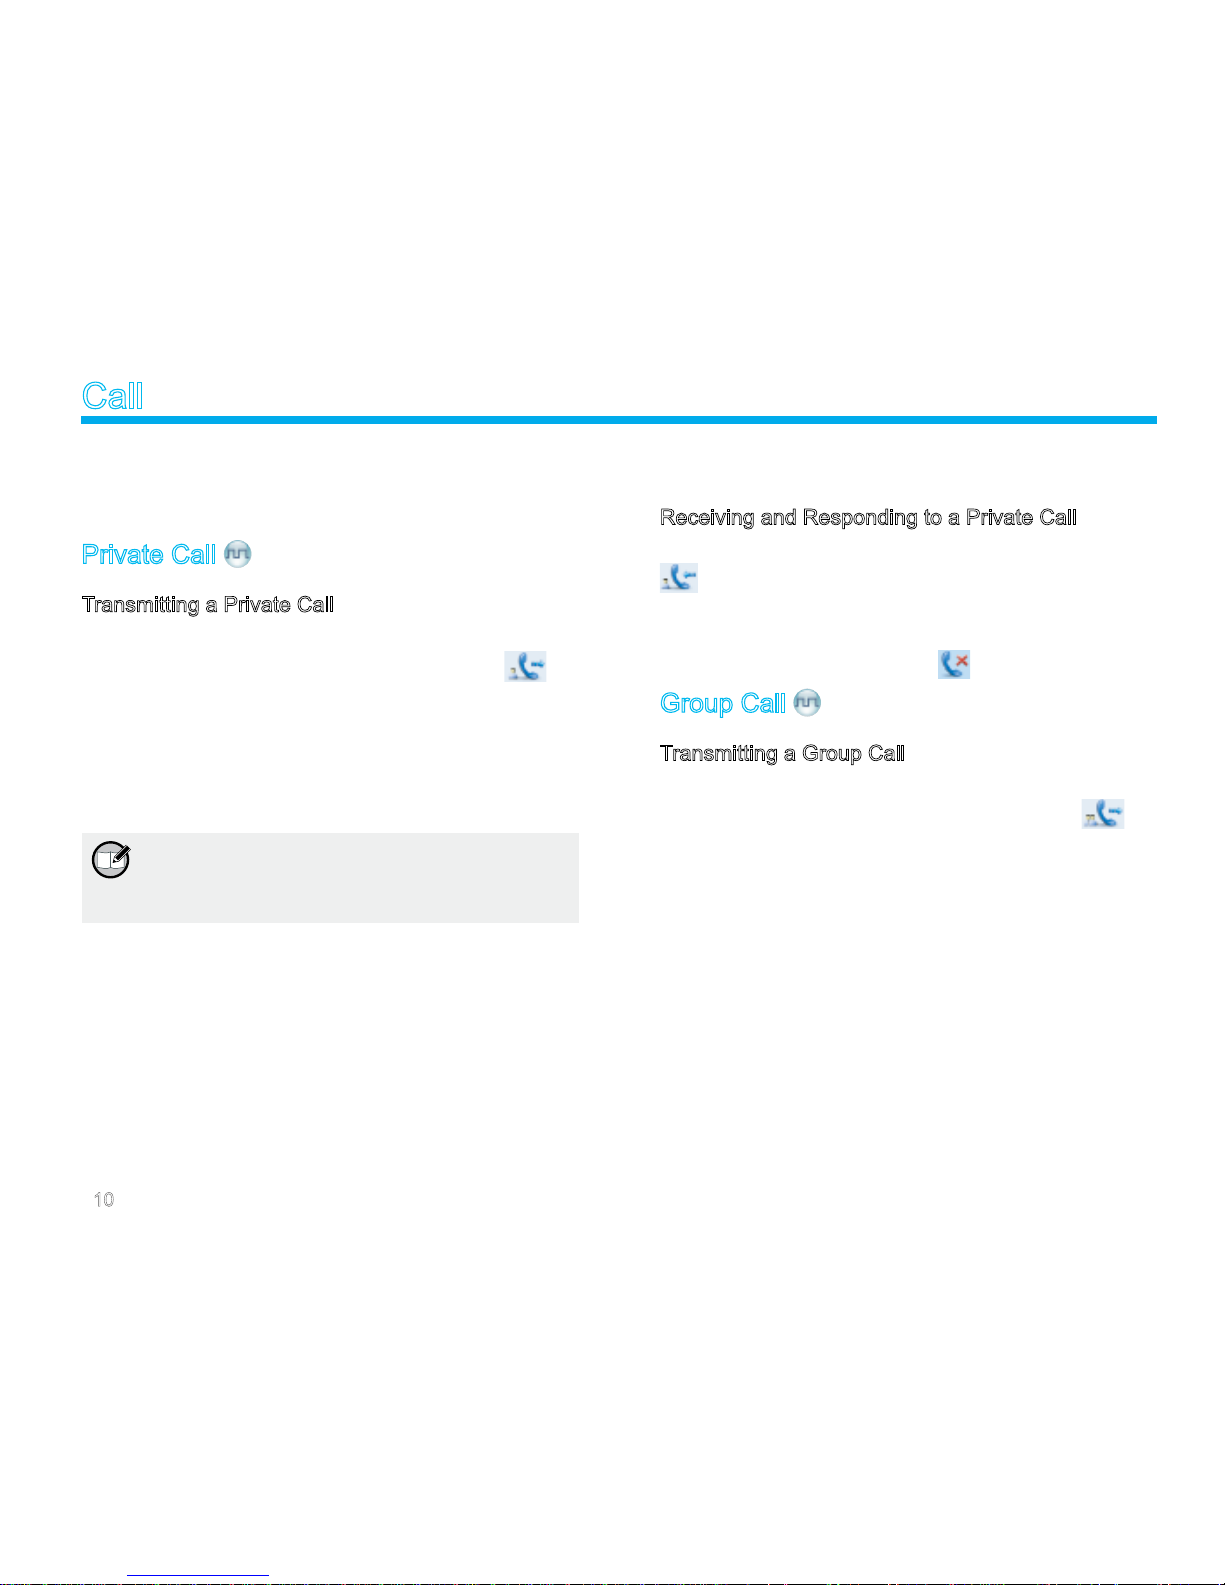
Private Call
Transmitting a Private Call
You may t ransmit a Private Call through any of th e following
methods. When transmitting a Private Call, the icon will
appear.
Transmitting a call to the preset contact
In the home screen, hold down the PTT key on the palm
microphone to tran smi t a Pri vate Call to th e Pri vate Call
contact preset for the current channel.
Note: Your dealer may preset a contact for each
digital channel. The preset contact could be
a Private Call contact, a Group Call contact or
an All Call contact.
Transmitting a call through Contact List or Call Logs
1 Go to “Contact -> Cont act List ”, or go to “Call Logs” and
access the Outgoing/Incoming/Missed list.
2 Use the Up/Down key to select the Private Call contact you
want to call.
3 Hold down the PTT key to transmit the Private Call.
Transmitting a call through Manual Dial
1 Go to “Contact -> Manual Dial”.
2 I np ut a Priv at e Ca ll numb er you want t o ca ll using th e
microphone with a keypad.
3 Hold down the PTT key to transmit the Private Call.
Receiving and Responding to a Private Call
When a Private Call is received, your radio will display the icon
.
You may hold down the PTT key within the preset time period to
call back. If you do not respond to a received Private Call, your
radio will display the missed call icon .
Group Call
Transmitting a Group Call
You ma y transmit a Group Ca ll through a ny of the foll owing
methods. When transmitting a Group Call, the icon will
appear.
Transmitting a call to the preset contact
In the home screen, hold down the PTT key to transmit a
Group Call to the Group Call contact preset for the current
channel.
Transmitting a call through Contact List
1 Go to “Contact -> Contact List”.
2 Use the Up/Down key to select the Group Call contact you
want to call.
3 Hold down the PTT key to transmit the Group Call.
Page 16
11
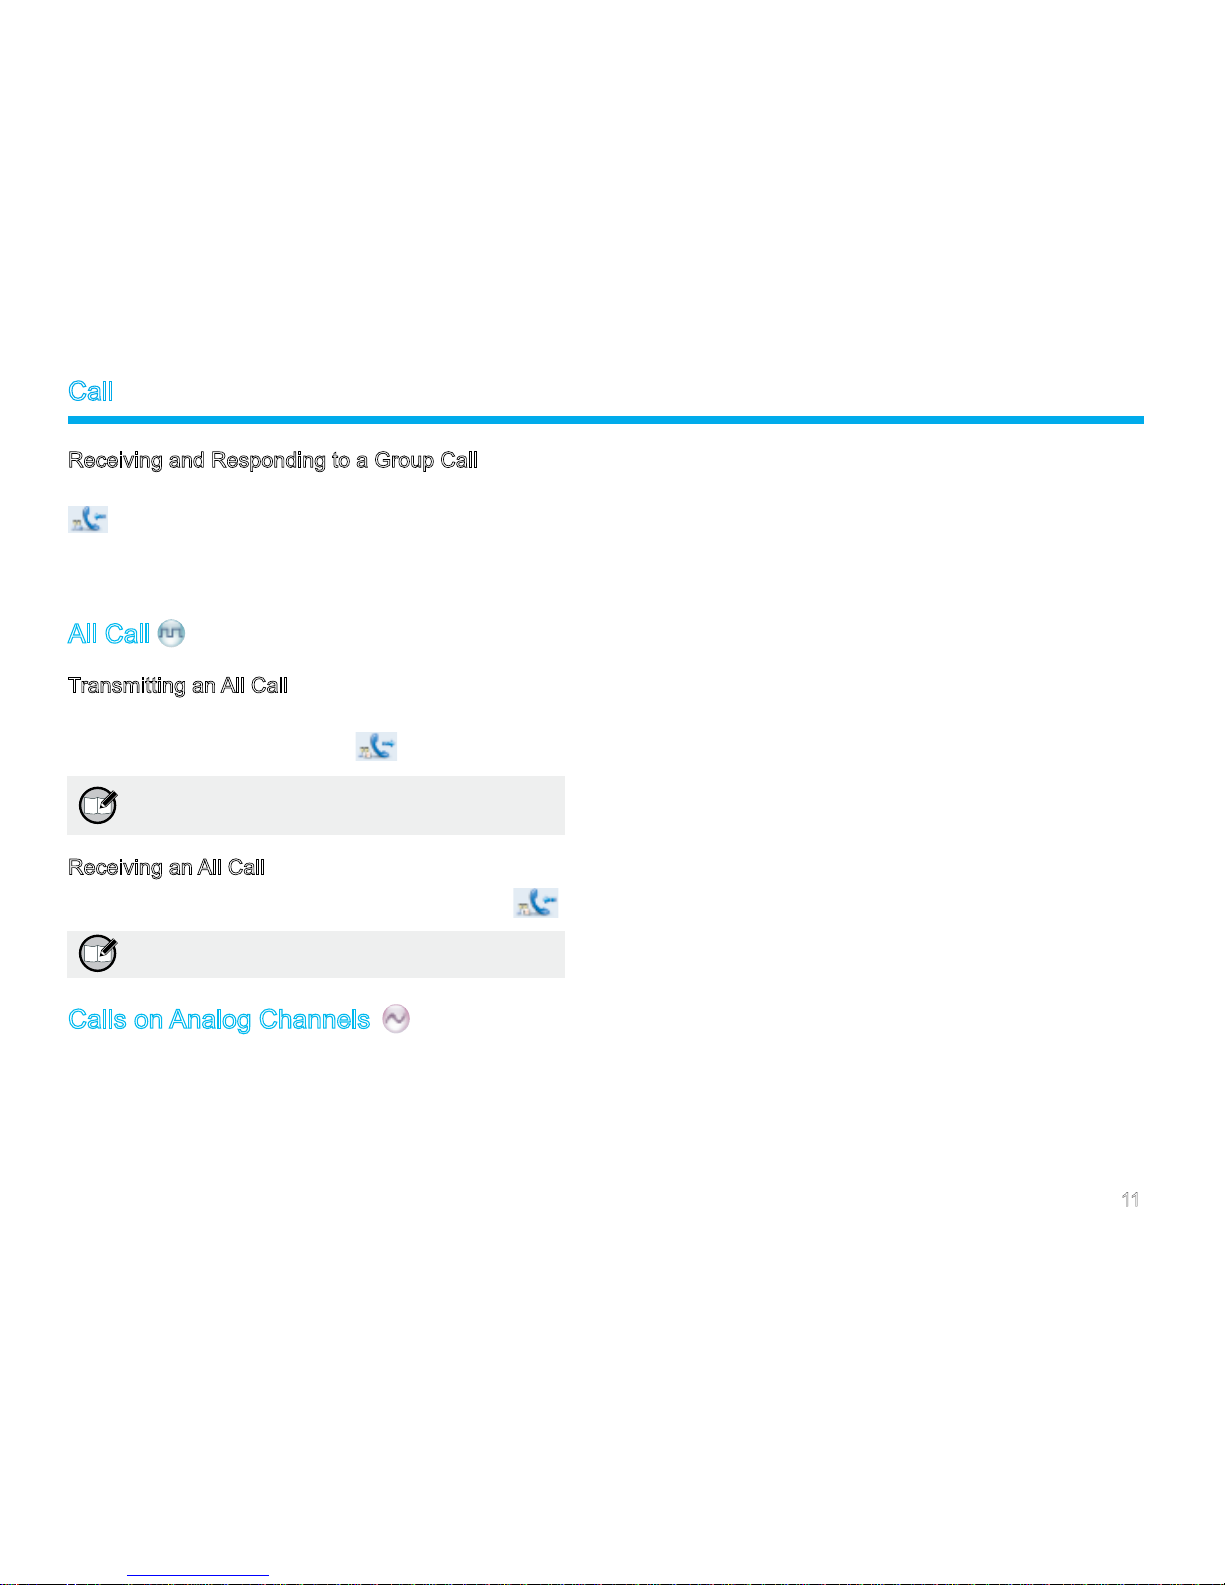
Receiving and Responding to a Group Call
When a Group Call is received, your radio will display the icon
.
You may hold down the PTT key within the preset time period to
call back.
All Call
Transmitting an All Call
Methods are the same as those in Transmitting a Group Call.
When transmitting an All Call, the icon will appear.
Note: You can transmit an All Call only when it is
enabled by your dealer.
Receiving an All Call
When an All Call is received, your radio will display the icon .
Note: You cannot respond to an All Call.
Calls on Analog Channels
To transmit on an analog channel, hold down the PTT key and
speak into the microphone. To receive, release the PTT key.
Call
Page 17
12
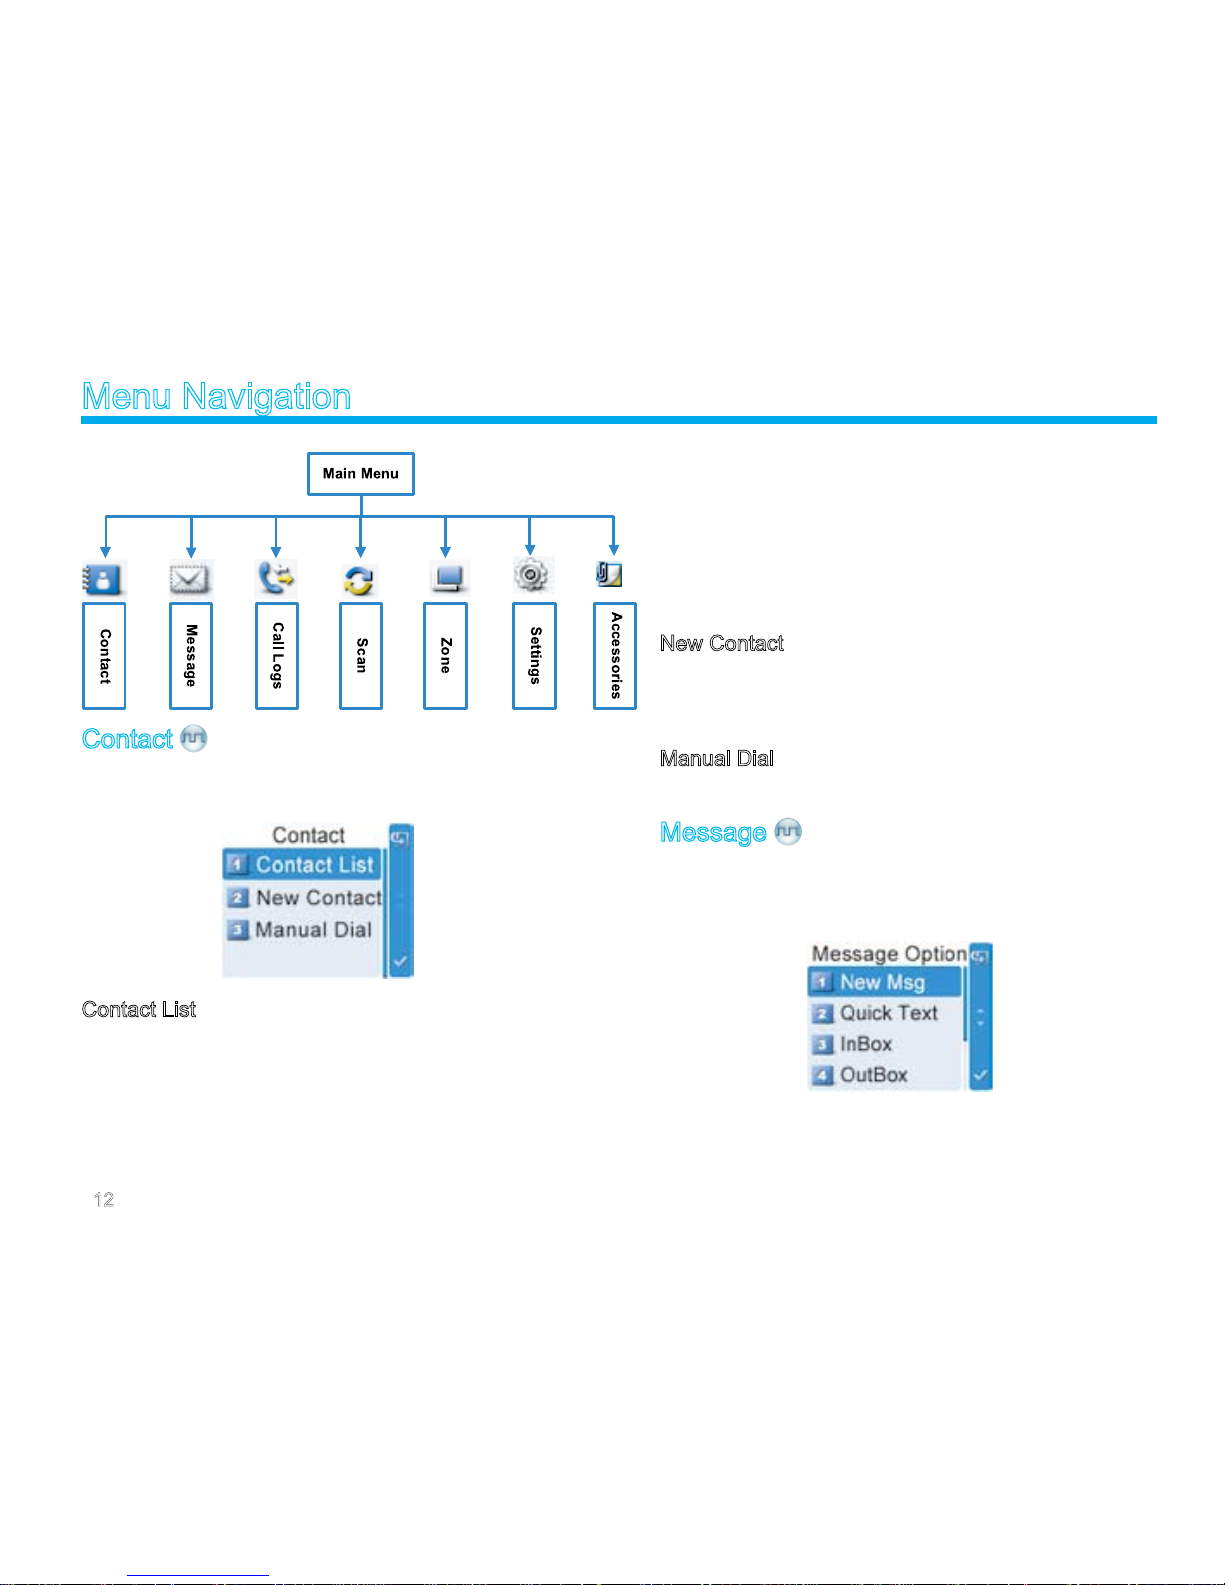
Menu Navigation
Contact
To access this item, press the Menu key in the home screen and
then select “Contact”.
Contact List
You can save up to 200 entries in the list. To access this item,
select “Contact -> Contact List” or press the shortcut key for
Contact List.
Editing a Contact
You can edit the number and alias of each Private Call contact.
Viewing a Contact
You can view details of each contact.
Deleting a Contact
You can delete a Private Call contact. However, please note that
you can not delete the contact when there is only one entry left in
the list. In addition, the Private Call contact preset on the currently
used channel cannot be deleted.
New Contact
You can add a Private Call contact to the contact list. The number
and alias of each contact must be unique, and the available
number range is 1-16776415.
Manual Dial
You can manually input the Private Call number for calling.
Message
To access this item, press the Menu key in the home screen and
then select “Message”, or press the shortcut key for Message
directly.
Page 18
13
New Msg
You can create new text message (256 characters at most) and
send it to an individual user or to a talk group.
Quick Text
Under this option there are some text messages (10 entries at
most) preset by your dealer. You can choose to edit and send any
entry.
InBox
The InBox can save up to 20 received messages. When the InBox
is full, the icon will appear, and the earliest message will be
overwritten by the latest one automatically.
For each message, yo u can choose to perform any of these
operations: Reply, Forward, View Details and Delete.
To delete all messages in the InBox, select “Message -> InBox ->
Delete All”.
OutBox
The OutBox can save up to 20 sent messages. When the OutBox
is full, the earliest message will be overwritten by the latest one
automatically.
For each message, yo u can choose to perform any of these
operations: Resend, Forward, View Details and Delete.
To delete all messages in the OutBox, select “Message -> OutBox
-> Delete All”.
Drafts
The Drafts can save up to 20 draft messages. When the Drafts
is full, the earliest message will be overwritten by the latest one
automatically.
For each message, yo u can choose to perform any of these
operations: Send, Save and Delete.
To delete all messages in the Drafts, select “Message -> Drafts ->
Delete All”.
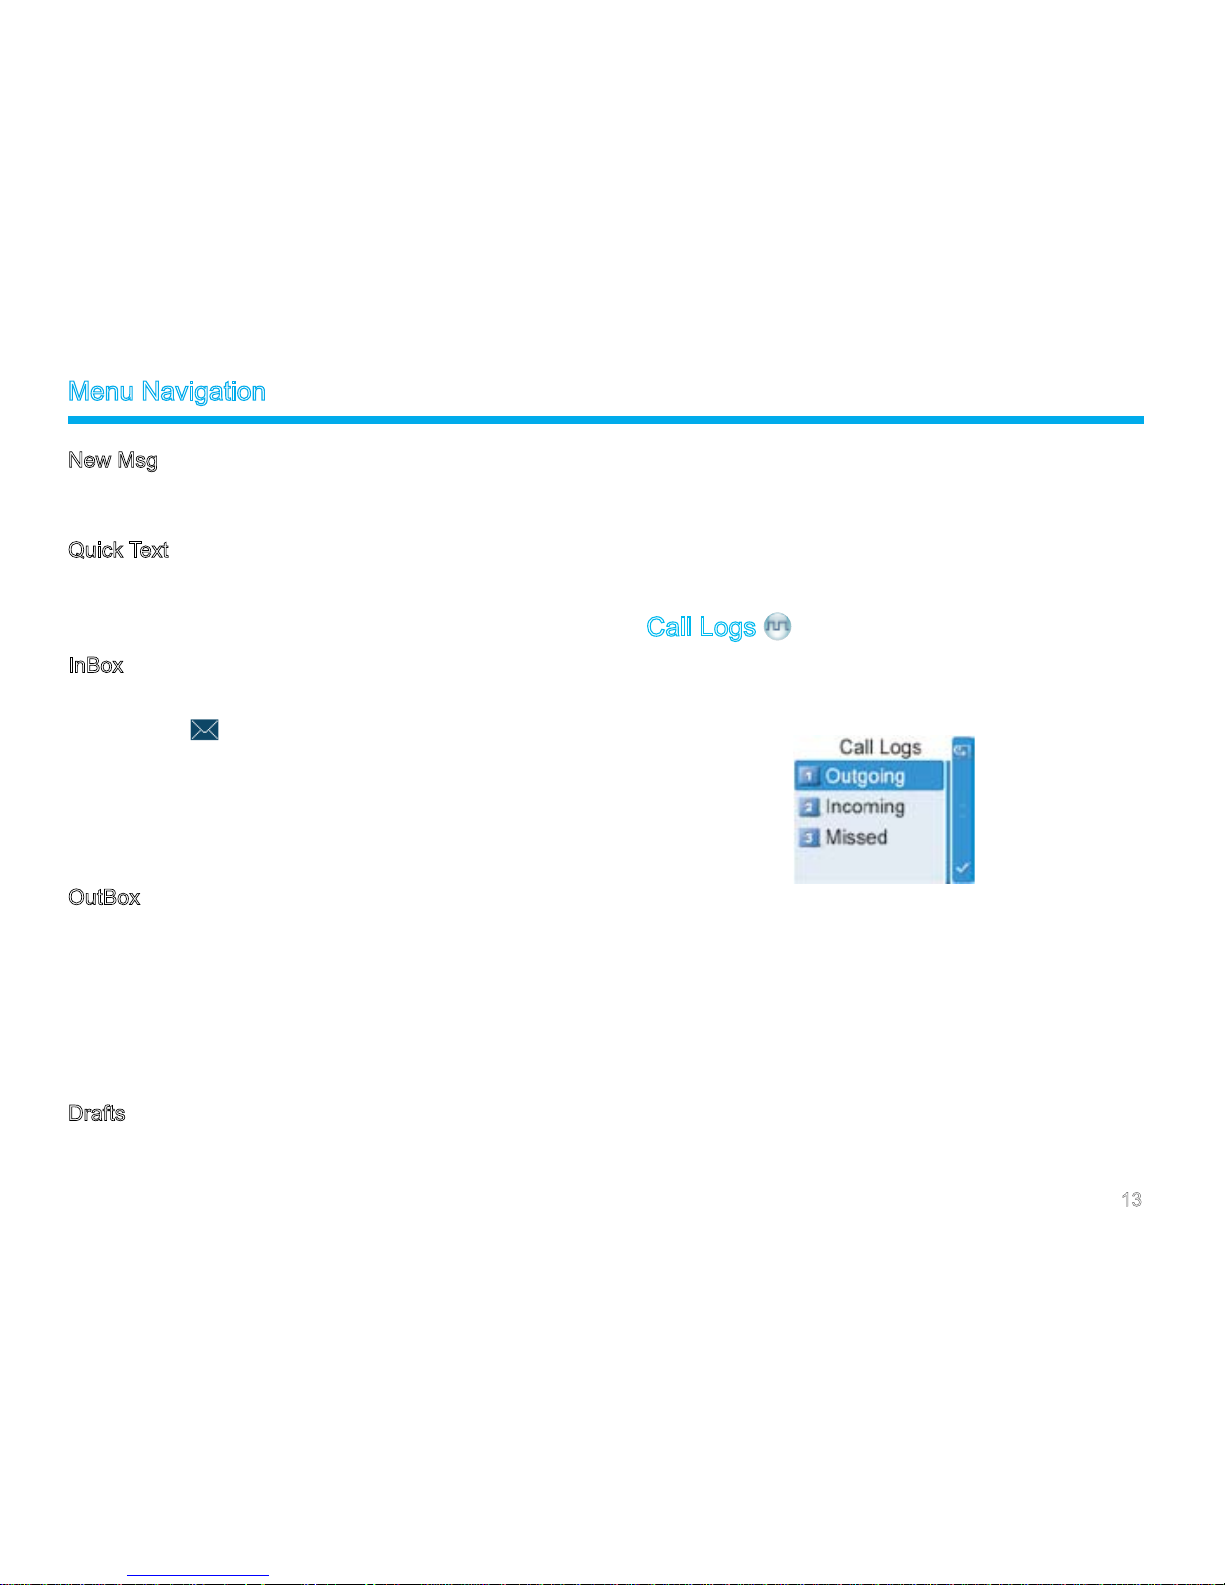
Call Logs
To access this item, press the Menu key in the home screen and
then select “Call Logs”, or press the shortcut key for Call Logs
directly.
This radio can save up to 10 private call entries in the Outgoing/
Incoming/Missed list respectively. When the Outgoing/Incoming/
Missed list is full, the earliest entry will be overwritten by latest one
automatically.
After accessing a list and selecting an entry, you can perform any
of these operations: hold down the PTT key to initiate a call; add it
to Contact List; or delete it.
To delete all entries in the Outgoing/Incoming/Missed list at a time,
select “Call Logs -> Outgoing/Incoming/Missed -> Delete All”.
Menu Navigation
Page 19
14
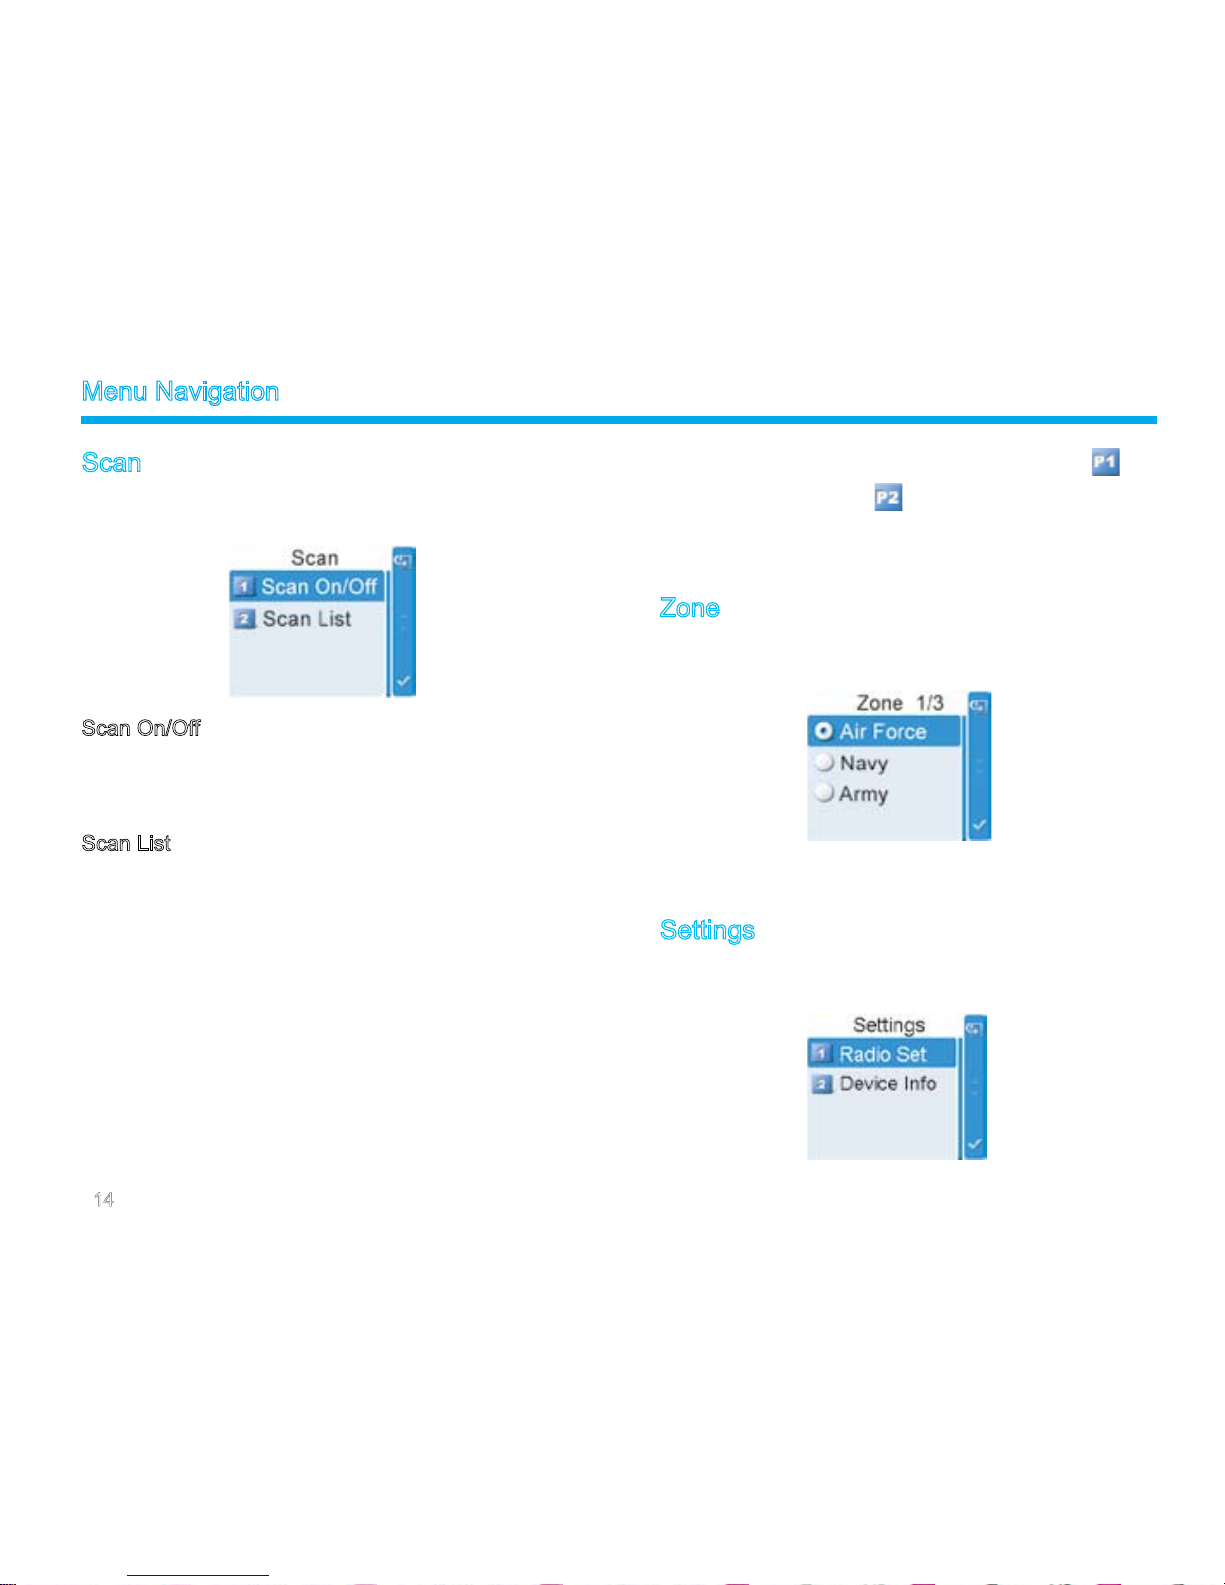
Scan
To access this item, press the Menu key in the home screen and
then select “Scan”.
Scan On/Off
The Scan feature allows you to listen to communication activities
on other channels so that you can keep a close track of your team
members. This option is used to enable or disable the function.
Scan List
You can request your dealer to create a scan list for each channel.
Each list may contain 32 channels at most (either digital channel
or analog channel is OK). After accessing the list, you can perform
any of the following operations:
Adding a Channel
To include a new channel into the active scan list.
Editing Priority Channel
To s et the selected channel as a non-priority or as a p rio rity
channel. If you are interested in activities on a channel, you can
set it as a priority channel, which will be scanned more frequently
than a non-priority channel.
Each scan list may contain two priority channels at most. indi-
cates priority channel 1, and indicates priority channel 2.
Deleting a Channel
To remove a channel from the active scan list. However, the rst
channel in the list can not be deleted.
Zone
To access this item, press the Menu key in the home screen and
then select “Zone”.
This radio supports up to 64 zones. You can use this menu to
select your desired zone.
Settings
To access this item, press the Menu key in the home screen and
then select “Settings”.
Menu Navigation
Page 20

15
Radio Set
You can optimize your radio performance by customizing related
parameters according to actual needs and your preferences.
Power Level
This option allows you to set TX power level. Alternatively, you
can change the power level by pressing the shortcut key for Adjust
Power Level in the home screen.
There are two levels available: High (indicated by ) and Low
(indicated by ). High power level enables you to communicate
with farther team members.
Note: Power level should be set for each channel
individually.
Squelch
This option allows you to select an appropriate squelch level.
Alternativ ely, y ou can chang e the squelch level by pressing
the shortcut key for Adjust Squelch Level in the home screen.
There are three levels available: Tight, Normal and Open. The
default squelch level is “Normal”, and is often used in low noise
environment.
And generally, “Tight” is used in high noise environment. It requires
stronger signal for the radio to unmute. However, if the squelch
level is set to Open, the speaker will keep unmuted irrespective of
the decoding conditions.
Scrambler
/Encrypt
To set whether to enable the Scrambler/Encrypt feature.
Language
To set the language in which all interface information is displayed.
Backlight
To set the backlight parameters. There are three options available:
On, Off and Timer. The timer is programmed by your dealer, with
an available duration of 5-60 seconds.
Brightness
To set the display brightness. You can raise or lower it using the
Up/Down key.
LED
To set whether to enable LED indication.
Tone
To set alert tones for your radio. You can set the following tones:
Radio Silent: to set whether the radio will give tone indication. If
Silent On is selected, all tone indication will be cancelled.
Talk Permit: to set whether the radio will give tone indication for
transmission. The following options are available: Disable (no
tone indication for transmission), Digital Only (tone indication for
transmission on digital channels only), Analog Only (tone indication
for transmission on analog channels only), and Enable (tone
indication for transmission on both analog and digital channels).
Private Ring: to set whether the radio will give tone indication when
it receives a private call.
TextMsg Ring: to set whether the radio will give tone indication
when it receives a message.
Keypad: to set whether the radio will give tone indication when you
are making keypad operations.
Menu Navigation
Page 21

16
Device Info
With this option, you can view basic information of your radio,
in cl ud ing serial nu mb er, rad io mod el , frequency r an ge a nd
rmware version, etc.
Accessories
To access this item, press the Menu key in the home screen and
then select “Accessories”.
GPS
Position
With this option, you can view longitude, latitude, time, date,
speed, altitude and SA (satellite) information of your radio.
GPS Text Msg
If the GPS feature is e nabled via the programming s oftware,
you can send the GPS text message to your desired contact.
Operation:
1. Select “GPS Msg”, and press the OK key to access the menu
“Contact List”.
2. Use the Up/Down key to select a desired contact.
3. Press the OK key to send the GPS message to the selected
contact.
Time Zone
You can choose your time zone to correct the received GPS time.
We recommend you to set the time zone before your initial use of
this feature.
Menu Navigation
Page 22

17
Functions and Operations
Home Screen
The feature allows you to quickly return to the previous menu or
the home screen.
Operation:
In the editing screen, press the programmed Home Screen key,
and the radio exits the screen and returns to the previous menu
immediately; in other screens, press the key, and the radio returns
to the home screen immediately.
Scan
This feature allows you to listen to communication activities on
other channels so that you can keep a close track of your team
members.
Operation:
1. To enable the feature, you can select “On” from the menu
“Scan”; or
Press the programmed Scan key in the home screen; or
Switc h to a ch annel on which th e feature “Auto Scan” is
enabled via the programming software.
2. After the feature is enabled, your radio will scan according to
the scan list set for the channel on which scanning starts. The
scanning process is as follows:
During scanning, the LCD displays the icon , and the LED
ashes orange slowly.
When activities are detected on a channel, the radio will stay
on the channel to receive current activities. If your radio stays
on a non-priority channel, the LCD will display icon ; if on
Priority Channel 1 or Priority Channel 2, the LCD will display
icon or icon respectively.
If you don’t want to hear activities on the channel, press the
programmed Nuisance Temporary Delete key to remove the
channel from the scan list temporarily.
If you want to continue staying on the channel, press the
programmed Monitor or Squelch Off key during scan stay.
3. To exit the scanning process, you can select “Off” from the
menu “Scan”, or press the programmed Scan key again.
Public Address
This feature allows public address via the external speaker. After
the feature is enabled, your voice will not be transmitted, but out-
put via the external speaker (connected to the accessory jack on
the rear panel) if you hold down the PTT key and speak.
Operation:
1. Press the programmed Public Address key to enable the fea-
ture.
2. Hold down the PTT key and speak into the microphone. Then
your voice will be broadcasted clearly via the external speaker.
3. To disable the feature, press the Public Address key again.
Note: When this feature is enabled, you can neither
communicate with other users, nor enter the
menu.
Page 23

18
Talk Around
You can continue to communicate in DM mode by pressing the
programmed Talk Around key, when your repeater malfunctions,
or when your radio is out of the repeater’s range but within talking
range of other radios.
Operation:
Press the programmed Talk Around key to switch between DM
mode and RM mode.
Monitor
To adjust match conditions for signal receiving, you can enable the
feature “Monitor”.
Operation:
Press the programmed Monitor key to enable the feature, and
the radio displays icon . To disable the feature, press this
key again.
Hold down the programmed Monitor Momentary key to en-
able the feature, and the radio displays the icon . To disable
the feature, release this key.
Squelch Off
If th e feature “Squelch Off” is enabled, the speake r will keep
unmuted no matter whether carrier is present.
Operation:
Press the programmed Squelch Off key to enable the feature.
Then the radio displays the icon and sounds background
noise. To disable the feature, press this key again.
Hold down the programmed Squelch Off Momentary key to
enable the feature. Then the radio displays the icon and
sounds background noise. To disable the feature, release this
key.
Emergency
In case of an emergency, you can use the feature to ask for help
from your companion or control center. The Emergency process
has the highest priority. You can make emergency operation even
when your radio is transmitting or receiving.
To enable the feature on a channel, an emergency system must be
assigned to the channel via the programming software. In addition,
the Emergency type, Emergency ID type and Emergency mode
are settable via the programming software.
Emergency Type
For each Emergency mo de, there are four E mer gen cy ty pes
available. You can select one of them via your dealer:
Functions and Operations
Page 24

19
Emergency Type Description
Siren Only
In Emergency mode, the radio will sound
shrill alarm tone and display icon .
Regular
In Emergency mode, the radio will give
audible and visible indication.
Silent
In Emergency mode, the radio won't give
any audible or visible indication.
Silent with Voice
In Emergency mode, the radio won’t give
any audible or visible indication, but will
receive voice ACK from the companion
or control center automatically.
Emergency ID Type
Your radio supports two Emergency ID types. You can select one
of them via your dealer:
Emergency ID Type Description
None
No signaling is used when the radio
sends alarm information.
HDC1200
HDC1200 signaling is used when the
radio sends alarm information.
Emergency Mode
Your radio supports three Emergency modes. You can select one
of them via your dealer (Note: For the following operation methods,
we take the “Regular” type as an example).
Emergency Mode Description
Alarm
In this mode, you can send alarm in-
formation to your companion or control
center by pressing the programmed
Emergency key, but you cannot talk
with them.
Alarm with Call
In this mode, you can send alarm in-
formation by pressing the programmed
Emer g enc y key. W h en t h e ic o n
appears, you can speak into
the microphone, allowing your voice
and background noise to be transmit-
ted automatically (you do not need to
hold down the PTT key).
Call Only
In this mode, press the programmed
Emergency key to go to the Revert
Channel. When the icon
(
) or ( ) ap pe ar s, you c an
speak into the microphone, allowing
your voice and background noise to be
transmitted automatically (you do not
need to hold down the PTT key).
Functions and Operations
Page 25

20
Operation Methods for Analog Emergency
Alarm (None & HDC1200)
Opera tion: Pres s the progra mmed Emerg ency key to send
alarm information. The radio disp lay s the i con and text
information “Sending Alarm”, with red LED glowing. (None: If “Local
Emergency Alarm” is enabled via the programming software, an
alarm tone will sound.)
Two methods are available for you to exit the Emergency mode:
1. Once the emergency cycles expire, t he radio will exit the
Emergency mode automatically.
2. Long press the programmed Emergency key.
Alarm with Call (None & HDC1200)
Operation:
1. Pr ess t he progra mm ed Emer ge nc y key t o se nd alar m
infor ma tio n. The ra dio disp la ys th e ico n an d text
information “Sending Alarm”, with red LED glowing. (None:
If “Local Emergency Alarm” is enabled via the programming
software, an alarm tone will sound.)
2. Wh en the icon
ap pears, you ca n sp ea k into the
microphone to make an emergency call.
3. When the icon
appears, you can receive. And when a call
is received, the icon
appears.
4. If the preset Voice Cycles expire, you can hold down the
PTT
key to make the emergency call again (the radio displays the
icon , with red LED glowing). After the emergency call is
transmitted, release the PTT key to receive (the radio displays
icon , with LED ashing orange rapidly). And when a call
is received, the icon
appears. (HDC1200 only)
Two methods are available for you to exit the Emergency mode:
1. After the preset Alarm Cycles and Voice Cycles expire, the
radio will exit the Emergency mode automatically. (None)
2. Long press the programmed Emergency key.
Call Only (HDC1200)
Operation:
1. Press the programmed Emergency key to go to the Revert
Channel, and the radio displays the icon .
2. If the feature “Alarm with Call to Follow” is enabled, you can
speak into the microphone to make an emergency call when
the radio displays the icon .
3. When the icon
appears, you can receive. And when a call
is received, the icon
appears.
4. If the preset Voice Cycles expire, you can hold down the
PTT
key to make the emergency call again (the radio displays the
icon , with red LED glowing). After the emergency call is
transmitted, release the PTT key to receive (the radio displays
Functions and Operations
Page 26

21
the icon , with LED ashing orange rapidly). And when a
call is received, the icon
appears.
To ex it the Em er ge ncy mod e, long p re ss the pr og rammed
Emergency key.
Note: Your dealer may set the number of alarm
cycles and alarm duration (None), number of
polite retries and impolite retries (HDC1200),
number of voice cycles, duration of each
transmission and TX interval.
Operation Method for Digital Emergency
Call Only
Operation:
1. Press the programmed Emergency key to go to the Revert
Channel, and the radio displays the icon .
2. If the feature “Alarm with Call to Follow” is enabled, you can
speak into the microphone to make an emergency call when
the radio displays the icon .
3. When the icon
appears, you can receive. And when a
call is received, the icon appears.
4. If the preset Voice Cycles expire, you can hold down the
PTT
key to make the emergency call again (the radio displays the
icon , with red LED glowing). After the emergency call is
transmitted, release the PTT key to receive (the radio displays
icon , with LED ashing orange rapidly). And when a call is
received, the icon appears.
To exit the Emergency mode, long press the programmed
Emergency key.
Note: Your dealer may set the number of voice
cycles, duration of each transmission and TX
interval.
Ignition Sense
The following options are available via the vehicle ignition. You
may ask your dealer to assign any one to your radio.
PTT Disable: The PTT key is enabled or disabled by following
the ignition sense.
Operation:
To enable the PTT key, start the engine; to disable the PTT
key, stop the engine.
Ignition or Switch: The radio powers on or off by following
either the ignition sense or the Power On/Off key.
Operation:
To power on the radio, start the engine or long press the
Power On/Off key; to power it off, stop the engine or press the
Power On/Off key.
Functions and Operations
Page 27

22
Ignition Only
: The radio powers on or off by following the
ignition sense only. The Power On/Off key does not work.
Operation:
To turn on the radio, start the engine; to turn it off, stop the
engine (The Power On/Off key does not work).
Scrambler
/Encrypt
The Scrambler/Encrypt feature can encrypt your audio signals to
prevent eavesdropping. Thus privacy of your communication is
guaranteed.
This Encrypt feature can encrypt your audio signals and messages
to prevent eavesdropping. Thus privacy of your communication is
guaranteed.
Operation:
On an analog channel, go to “Main Menu -> Settings -> Radio
Set -> Scrambler” and select “Enable” or “Disable; on a digital
channel, go to “Main Menu -> Settings -> Radio Set -> En-
crypt” and select “Enable” or “Disable.
Press the programmed Scrambler/Encrypt key to enable
Scrambler or Encrypt on the current channel (a high-pitched
tone sounds); press the key again to disable the feature (a
low-pitched tone sounds).
If the Scrambler/Encrypt feature is enabled for a channel via
the programming software, switch to the channel to enable the
feature, or exit the channel to disable the feature.
Busy Channel Lockout
If enabled via the programming software, this feature can prevent
your radio interfering with other transmitting terminals on the same
channel. If you hold down the PTT key while the channel is in use,
your radio will keep beeping and display text information “Channel
Busy!”, alerting you to transmission prohibition. To stop beeping,
please release the PTT key. When the channel is free, you can
press and hold down the PTT key to transmit.
Time-out Timer (TOT)
The purpose of TOT is to prevent any user from occupying a
channel for an extended period. If the preset time expires, the
radio will automatically terminate transmission and keep beeping.
To stop beeping, please release the PTT key. You must wait for
a certain time period (preset by your dealer) to initiate another
transmission.
If the pre-alert function is set by your dealer, your radio will alert
you to the TOT expiration in advance.
Note: This feature is null in Emergency mode.
Pseudo Trunking
If your radio operates on a channel with this feature enabled and
one time slot is already occupied, it can transmit and receive on
the other free time slot, allowing you to communicate timely under
emergent situations.
Functions and Operations
Page 28

23
MIC AGC
If enabled via the programming software, your radio will process
the audio signals during transmission, providing improved audio for
the receiving radio.
Emergency Footswitch
This feature must be realized through further development. After
successfully developed, you should request your dealer to enable it
via programming software. This feature is quite useful in emergent
situations to avoid any unexpected loss.
Note: Emergency footswitch will be unavailable if
the Emergency feature is not enabled on the
current channel.
Channel Steering
This feature must be realized through further development. After
successfully developed, you should request your dealer to enable
it via programming software. You can switch channels accurately
and quickly with this feature.
Note: If this feature is enabled, you cannot switch
channels via front panel operation.
Functions and Operations
Page 29

24
Signaling Introduction
The radio supports the following signaling. You can ask your dealer
to make appropriate settings on your radio. For detailed informa-
tion, please contact your dealer.
HDC1200
The HDC1200 signaling is compatible with the MDC1200 signaling,
and realizes functions such as PTT ID (Encoding & Decoding),
Emergency (Encoding & Decoding) and Selective Call (Encoding
& Decoding).
Encoding:
1. Hold down the PTT key during normal voice communication to
send PTT ID.
2. Go to the menu “Contact List” and select a required contact.
Then hold down the PTT key to send a selective call (Private
Call/Group Call/All Call).
For encoding, the radio will provide the following indications:
PTT ID/Selective Call: Your dealer can program whether the
radio sounds side tone during encoding or sounds beeps after
encoding.
Selective Call: During encoding, the LED glows red, and the
LCD displays the appropriate call icon (Private Call:
; Group Call: ; All Call: ).After encoding, the LED
glows orange.
Decoding:
For decoding, the radio provides the following indications:
PTT ID: After decoding, the LCD displays the icon and ID
or alias of the transmitting party.
Selective Call: After decoding, the radio provides the following
indications:
Alert:The radio will sound default alert.
LED:The LED glows green.
LCD:If your dealer enables the feature “Display Decode ID”, the
radio will display the appropriate call icon (Private Call: ;
Group Call: ; All Call: ) and alias of the transmitting
party (ID of the transmitting party will be displayed if it is not in the
contact list). If your dealer does not enable the feature “Display
Decode ID”, the radio will display the appropriate call icon only.
Page 30

25
Troubleshooting
Phenomena Analysis Solution
The radio can not be powered on. The power cord may be unconnected. Connect the power cord correctly.
During receiving signals, the voice is
weak, discontinuous or totally inac-
tive.
The volume may be set to a low level.
Increase the volume by rotating the Volume Control knob clock-
wise.
The antenna may get loose or may be improperly
installed.
Power off the radio, re-install the antenna and power on the radio
again.
The speaker may be blocked or damaged.
Clean surface of the speaker. If the problem can not be solved,
contact your dealer or our authorized service center for inspec-
tion and repair.
You can not communicate with other
members in Analog mode.
The frequency or signaling may be inconsistent with
that of other members.
Set your TX/RX frequency and signaling to the same as that of
other members.
You may be too far away from the group members.
Move towards other members. And make sure that you are within
the communication range.
You can not communicate with other
members in Digita l m ode although
there is receiving indication.
Your ID may be inconsistent with that of other mem-
bers. Consequently, the digital carrier can be received
but can not be demodulated.
Set your ID to the same as that of other members.
Irrelevant communications or noises
are heard on the analog channel.
You may be inter rupted by radios using the same
frequency.
Adjust the squelch level.
The radio may be set with no signaling.
Set your radio with signaling to avoid interference at the same
frequency, and make sure that all members share the same sig-
naling.
The noise is too loud.
You may be too far away from other members. Move towards other members, and then try again.
You may be at an unfavorable position. For example,
your communication may be blocked by high build-
ings or frustrated in the underground areas.
Move to an open and at area, and try again.
You may suffer from external disturbance (such as
electromagnetic interference).
Stay away from equipment that may cause interference.
You can not use the keys. The keypad may fail to function temporarily. Restart the radio.
There is no display. The LCD may fail to function temporarily. Restart the radio.
The GPS cannot locate your position.
The GPS antenna is improperly connected. Connect the GPS antenna correctly.
No GPS signal is received. Move to an open and at area, and restart the radio.
If the above solutions can not x your problems, or you may have some other queries, please contact us or your local dealer for more technical
support.
Page 31

26
Care and Cleaning
To guarantee optimal performance as well as a long service life of
the product, please follow the tips below.
Product Care
Keep the product at a place with good ventilation and heat
dissipation to facilitate normal work.
Do not place irrelevant articles on top of the product to ensure
optimal heat dissipation.
Do not place the product in corrosive agents, solutions or
water.
Product Cleaning
Clean up the dust and ne particles on the product parts with a
clean and dry lint-free cloth or a brush regularly.
Use a non-woven fabric with neutral cleanser to clean the
keys, control knobs, LCD and jacks after long-time use. Do not
use chemical preparations such as stain removers, alcohol,
sprays or oil preparations. Make sure the product is completely
dry before use.
Caution: Power off the product before cleaning.
Page 32

27
Optional Accessories
The following items are the main optional accessories for the product, and please consult your local dealer for more information.
Caution: Use the accessories specied by Hytera only. If not, Hytera shall not be liable for any losses or damages arising out of use
of unauthorized accessories.
Desktop Microphone SM10A1 External Speaker SM09D1 Programming Cable (USB Port) PC37 Data Cable PC40
Keypad Microphone SM19A1 320W External Power Supply PS22002 Antenna
Page 33

28
Appendix
Input Method
You c an ent e r a lia s es, nu m ber s or me s sag es u sin g th e
microphone with a keypad. The radio supports the following input
methods: Chinese Pinyin (simplied), English and Number.
Chinese Pinyin (Simplied)
Operation:
1. Press to switch to Chinese Pinyin mode;
2. Enter the pinyin through alphanumeric keys; then a list of
possible co mbinations and corre spo nding characters wil l
appear;
3. Use the Up/Down key to choose the right pinyin;
4. Press the OK key to highlight the characters, and choose the
right character using the Up/Down key;
5. Press the OK key to enter the selected character.
You can repeat the above steps to continue.
English
Operation:
1. Press
to swit ch to upperc ase E nglish or lo wercase
English mode;
2. Enter the English letters through alphanumeric keys;
3. Use the Up/Down key to choose the right letter;
4. Press the OK key to enter the selected letter.
You can repeat the above steps to continue.
Number
Operation:
1. Press to switch to Number mode;
2. Enter the numbers through alphanumeric keys to .
Special Character
To enter common punctuations and special characters, press .
To input a space, press
.
Note: You can use the Up/Down key to move the
cursor leftward/rightward in the entered text.
Page 34

致用户
非常感谢您使用海能达设计和生产的P D T数字车载台。本产品是海能达按照
P D T标准精心打造的数字常规车载台。强大的数字功能、人性化的外观设计、
卓越的通信品质,全面提升您的管理效率,为应急通讯提供坚实可靠的保障!
为了确保您最大限度地享用本产品所带来的各项便利,请于使用前详细阅读本
手册和《安全信息手册》。
本手册适用以下机型:
MD780
MD780G
Page 35

图标说明
本手册中会使用以下图标,各图标含义如下:
使用提示图标
注意:表示可能会损坏本产品的事项。
备注:表示有助于您更好地了解和使用本产品的事项。
功能区分图标
:表示数字信道独有的功能,只能在数字信道上使用。
:表示模拟信道独有的功能,只能在模拟信道上使用。
未用图标区分的功能在数字信道和模拟信道上都可使用。
术语说明
按键操作
短按:按下并快速松开。
长按:按下并保持预编程的持续时间(默认为2秒)。
按住:一直按住该按键。
个呼
个呼是对单个用户发起呼叫。
组呼
组呼是单个用户对组内的所有用户发起呼叫。
全呼
全呼是单个用户对信道上所有其他用户发起的呼叫。
静噪
该技术可滤除过度的背景噪声,用于解决通话质量和噪声问题。
PTT ID
即对讲机身份码。带显示屏的对讲机或控制中心可通过接收该身份码
来识别正在通话的机器。
Page 36

版权信息
Hytera 和 HYT 为海能达通信股份有限公司(以下简称“海能达”)
在中华人民共和国和世界其他国家和/或地区的商标或注册商标。我
们仅对我司的商标及产品名称享有所有权,本手册中可能提及的其
他商标和产品名称为各自所有者所有。
本手册介绍的产品中可能包括存储于内存或其他媒介中的计算机程
序。海能达对此等程序享有的专有权利受中华人民共和国或其他国
家及相关国际法的保护。购买本产品并不意味着海能达以明示或暗
示方式向购买者授予有关此等电脑程序的权益。未经海能达事先书
面授权,任何企业、组织或个人不得对计算机程序进行任何形式的
复制、更改、散发、反编译和反向工程。
本产品嵌入的AMBE+2TM语音编解码技术受知识产权保护,包括Digital
Voice Systems, Inc.的专利权、版权和商业秘密。
该语音编解码技术经单独授权供该产品使用。明确禁止该技术使用
者对其进行反编译、逆向工程或反汇编目标代码,或以任何其他方
式将目标代码转换成可读取的格式。
美国专利号 :#6,912, 495 B 2, #6 ,199,037 B1, #5,870,4 05,
#5,826,222, #5,754,974, #5,701,390, #5,715,365, #5,649,050,
#5,630,011, #5,581,656, #5,517,511, #5,491,772, #5,247,579,
#5,226,084 和 #5,195,166。
免责声明
本手册在编制过程中力求内容的准确性与完整性,但对于可能出现
的错误或疏漏,海能达不承担任何责任。由于技术的不断发展,海
能达保留不予通知而更改产品设计与规格的权利。未经海能达事先
书面 授权 ,不 得以 任何形式对本手册进行复制、修改、翻译和散
发。
如需更多 信 息 或对本 手 册 有任何建 议 , 欢迎访 问 我 们的网站 :
http://www.hytera.cn,或拨打海能达免费服务热线400-830-7020。
Page 37

射频辐射信息
射频辐射常识
射频指可以辐射到空间的电磁频率,是通讯、医疗、食品加工等领域
广泛使用的一种技术,在使用过程中会产生一定的射频辐射。
射频辐射安全
为了确保用户的身心健康,来自科学、工程、医药、健康和工业的专
家们与相关组织共同研究制定了射频辐射标准和准则,如下所示:
美国联邦通信委员会联邦政府法规汇编第
47 卷第 2 部分 J
子部
分;
美国国家标准协会
( ANS I )/
电气和电子工程师协会
(IE E E) 标准
C95.1-1992
版;
电气和电子工程师协会标准
C95.1-1999
版;
国际非电离辐射防护委员会
(ICNIRP) 于1998
年颁布的标准;
美国联邦通信委员会监管要求
按照美国联邦通信委员会的监管要求,本产品必须符合美国联邦通信
委员会射频辐射限制规定,否则不能在美国市场上销售。并要求制造
商可通过在产品上张贴标签的方式,告知用户应注意的事项,提高用
户的防辐射意识。
作为一个负责任的企业,海能达时刻秉持“以用户为中心”的理念,
从设计、生产到测试的每一个环节,均严格遵守上述标准及要求。
欧盟指令符合性声明
本产品经独立第三方机构认证,符合欧盟指令“
1999/5/EC
”中的相关
要求。请注意,本声明仅适合欧盟国家。
Page 38

1
目录
检查包装内物品-----------------------------------2
熟悉本机-----------------------------------------3
前面板 --------------------------------------------3
后面板 --------------------------------------------3
可编程键 ------------------------------------------3
车载台安装---------------------------------------4
注意事项 ------------------------------------------4
安装工具 ------------------------------------------4
安装步骤 ------------------------------------------5
状态指示-----------------------------------------6
LCD图标 -------------------------------------------6
LED指示灯 -----------------------------------------6
基本操作-----------------------------------------7
开机与关机 ----------------------------------------7
调节音量 ------------------------------------------7
选择区域 ------------------------------------------7
选择信道 ------------------------------------------7
数模切换 ------------------------------------------7
呼叫 --------------------------------------------8
个呼 ----------------------------------------------8
组呼 ----------------------------------------------8
全呼 ----------------------------------------------8
模拟信道呼叫 --------------------------------------
9
菜单导航-----------------------------------------10
联系人 --------------------------------------------10
短消息 --------------------------------------------10
呼叫记录 ------------------------------------------11
扫描 ----------------------------------------------11
区域 ----------------------------------------------12
设置 ----------------------------------------------12
附件 ----------------------------------------------13
功能与操作---------------------------------------14
待机界面 ------------------------------------------14
扫描 ----------------------------------------------14
演讲扩音 ------------------------------------------14
脱网 ----------------------------------------------14
监听 ----------------------------------------------14
静噪打开 ------------------------------------------15
紧急报警 ------------------------------------------15
点火感应 ------------------------------------------17
扰频/加密 -----------------------------------------18
繁忙信道锁定 --------------------------------------18
超时禁发 ------------------------------------------18
虚拟集群 ------------------------------------------18
麦克风自动增益控制 --------------------------------18
尾针报警 ------------------------------------------18
尾针信道切换 --------------------------------------18
信令介绍-----------------------------------------19
HDC1200 -------------------------------------------19
故障处理指南-------------------------------------20
保养与清洁---------------------------------------21
质量保证和维修条款-------------------------------22
选购配件-----------------------------------------23
附录
--------------------------------------------24
输入法 --------------------------------------------24
Page 39

2
检查包装内物品
包装盒内含有以下物件。如有任何物件丢失或损坏,请与您所购产品的经销商联系。
\
备注:如需实现与输入相关的功能,请购买带键盘的手持麦克风。具体信息请见“选购配件”。
安装支架套件 GPS天线 用户资料(用户手册,安全信息,保修卡,合格证)
主机 手持麦克风 手持麦克风固定座及螺钉 电源线 保险丝
Page 40

3
熟悉本机
前面板
序号 部件名称 序号 部件名称
1 音量控制/信道选择旋钮 2 LED指示灯
3 LCD 显示屏 4 确认/菜单键
5 返回键 6 开/关机键
7 上移键 8 下移键
9 扬声器 10 可编程键
11 手持麦克风接口 12 手持麦克风安装标识
后面板
序号 部件名称 序号 部件名称
1 射频天线座 2 电源接口
3 附件接口 4 GPS天线座
可编程键
为了提 升 操作便 利 性,本机 的7个可 编 程键【 P 1】、 【 P2】 、
【P3】、【P4】、 、 和 ,可由您的经销商编程
为功能快捷键(见下表)。
Page 41

4
熟悉本机
编号 快捷键名称 用途
1 区域上调
快速选择区域
2 区域下调
3 联系人列表 一键进入“联系人列表”菜单
4 短消息 一键进入“短消息”菜单
5 呼叫记录 一键进入“呼叫记录”菜单
6 功率级别调整 快速调整发射功率
7 演讲扩音 用于外接喇叭扩音讲话
8 脱网 与其他终端直接通信
9 监听
调整信号接收匹配条件
10 暂态监听
11 静噪打开
无论是否有载波,始终打开喇叭
12 暂态静噪打开
13 待机界面 快速返回至上一级菜单或待机界面
14 扫描 收听其他信道上的通信活动
15 噪声信道临时删除 暂时删除不感兴趣的活动信道
16 紧急报警 紧急情况下寻求帮助
17 静噪级别调整 调整接收信号时所需的信号强度
18 扰频 /加密
扰频可实现语音加密,保障通信私
密性
加密可实现语音或短消息加密,保
障通信私密性
备注:
1 同一按键的短按和长按可实现不同功能,具体由
经销商设置。
2
键出厂时预设为“紧急报警”快捷键,您可
通过经销商设为其他功能快捷键。
车载台安装
安装本车载台之前,请务必仔细阅读以下安装注意事项。
注意事项
本机只能在 13.6V±15% 负极接地的电源系统下工作。在安装
本机之前,请务必检查汽车电源的极性和电压。
在安装本机之前,请务必检查螺钉伸出车载台表面的长度。在
钻安装孔时,应格外小心,不得损坏汽车的连线或部件。
将车载台装入 安装 支架 之前 ,请将天线和电源线连接至车载
台。注意使用海能达提供的数字产品专用的天线和电源线。
请使用海能达提供的安装支架,以确保车载台在意外事故中不
易松脱。若车载台未完全固定,可能会对乘车人员造成身体伤
害。
请将车载台安装在便于进行前面板操作的位置。
车载台后部应预留足够的空间,以便进行接线。
更换直流电源线的保险丝时,请务必使用相同规格的保险丝,
不得使用更高熔断电流的保险丝进行更换。
安装工具
电钻
十字螺丝批
Page 42

5
内六角套筒(用于安装 4.8 * 20mm 自攻螺钉)
安装步骤
序号 部件名称
1 车载台主机
2 射频天线座
3 固定旋钮
4 安装支架
5 4.8 × 20mm自攻螺钉
6 电源接口
7 黑色电源线
8 红色电源线
9 保险丝
10 手持麦克风
11 手持麦克风固定座
12 4 × 16mm自攻螺钉
13 GPS天线座
熟悉本机
A
B
C
D
E
Page 43

6
状态指示
LCD图标
状态图标
图标名称 图标显示 车载台状态
信号强度图标
无信号
信号条数越多,信号越强
消息图标
接收 到短消息/有未读短
消息
收件箱存储空间已满
扫描图标
车载台处于扫描状态
扫描停留于非优先信道
扫描停留于优先信道1
扫描停留于优先信道2
发射功率图标
当前信道功率为低功率
当前信道功率为高功率
监听图标 已开启监听功能
扬声器图标 已开启扬声器
紧急报警图标
车载台处于紧急报警状态
(秘密报警除外)或接收
到紧急报警
旋 钮 操 作 模 式
图标
旋钮当前处于信道选择模
式
旋钮当前处于音量调节模
式
GPS 图标
已开启G P S功能,且收到
有效GPS数据
已开启G P S功能,但未收
到有效GPS数据
扰频/加密图标 已开启扰频或加密功能
备 注 : 本 手 册 中 与
G P S
功 能 相 关 的 描 述 仅 适 用 于
MD780G
。
工作模式图标
图标名称 图标显示 车载台工作模式
工作模式图标
DM
直通模式: 车载台与其 他终
端之间直接通信
RM
中转模式: 车载台与其 他终
端通过中转 台的转发进 行通
信
LED指示灯
LED
指示灯让您轻松掌握车载台当前的操作状态。
指示灯状态 车载台状态
绿灯闪烁 正在开机
红灯常亮 正在发送
绿灯常亮 正在接收
橙灯慢闪 正在扫描
橙灯快闪 紧急状态
橙灯常亮 呼叫结束后(预设时间内)
Page 44

7
基本操作
开机与关机
如需开机,请长按【开/关机】键;开机过程中,L E D指 示灯闪绿
灯,LCD显示开机动画,车载台响开机提示音。如需关机,请按【开
/关机】键即可。
调节音量
当【音量控制/信道选择】旋钮处于音量调节模式时(屏幕显示
图标),旋转该旋钮即可调节通话音量大小。顺时针旋转该旋钮可
增大音量,逆时针旋转可减小音量。
选择区域
区域是一个信道组,即您可将具有相同属性的信道 列入一个区 域
中,这样便于您对现有信道进行有效管理。本机支持64个区域,每
个区域最多包含16个信道。您可通过以下两种方式选择区域:
1.
通过菜单选择
进入 “区域”菜单后,按【上移】/【下移】键来选择所需 区
域,然后按【确认】键切换至所选区域。
2.
通过编程键选择
按编程的【区域上调】或【区域下调】键,切换至所需区域。
备注: 您可 通过经销商设置 开机后 进入指 定区域 和信
道。若未指定,则进入上次关机时所在的区域和
信道。
选择信道
按【 音量控制/信道选择】旋 钮切 换至 信道 选择 模式(屏幕显示
图标),然后旋转此旋钮即可选择某个信道。待机界面下,
LCD显示当前选择信道的别名。
备注: 旋钮默认处于音量调节模式,进行选择信道操作
5
秒后自动返回音量调节模式。
数模切换
车载台中的每个信道都可由经销商配置为模拟信道或数字信道。若
当前区域包含数字信道和模拟信道,您可使用【音量控制/信道选
择】旋钮切换至模拟或数字信道。
Page 45

8
呼叫
为了保证接收方对讲机的最佳接收音量,发射时请保持麦克风距离
嘴大约
2.5 到 5
厘米。
个呼
发起个呼
您可通过以下方式发起个呼。个呼发起时,车载台显示 图
标。
对预设联系人发起呼叫
在待机界面下,按住【PTT】即可对当前数字信道上预设的个呼联系
人发起个呼。
备注: 您可 通过经销商为每 个数字 信道预 设一个 联系
人,该联系人可以是个呼联系人,也可以是组呼
或全呼联系人。
通过“联系人列表”或“呼叫记录”发起呼叫
1 选择“联系人->联系人列表”,或选择“呼叫记录”进入已拨
/已接/未接呼叫列表;
2 用【上移】/【下移】键选择您想要呼叫的个呼联系人;
3 按住【PTT】即可发起个呼。
通过手动拨号发起呼叫
1 选择“联系人 -> 手动拨号”,进入拨号界面;
2 通过带键盘的手持麦克风输入您想要呼叫的个呼号码;
3 按住【PTT】即可发起个呼。
接收和回复个呼
接收到个呼后,车载台显示 图标。
在预设时间内按住【PTT】可发送回呼。如未进行回呼,则显示未接
呼叫提示图标 以提醒您。
组呼
发起组呼
您可通过以下方式发起组呼。组呼发起时,车载台显示
图
标。
对预设联系人发起呼叫
在待机界面下,按住【PTT】即可对当前数字信道上预设的组呼联系
人发起组呼。
通过“联系人列表”发起呼叫
1 选择“联系人->联系人列表”;
2 用【上移】/【下移】键选择您想要呼叫的组呼联系人;
3 按住【PTT】即可发起组呼。
接收和回复组呼
接收到组呼后,车载台显示 图标。
在预设时间内按住【PTT】可发送回呼。
全呼
发起全呼
发起全呼的方式同上述“发起组呼”。全呼发起时 ,车载台显 示
图标。
备注: 只有当经销商为您开启全呼功能后,您才可发起
全呼。
Page 46

9
接收全呼
接收到全呼后,车载台显示
图标。
备注: 您无法对接收到的全呼进行回复。
模拟信道呼叫
在模拟信道上,如需发射,请按住【
PTT
】键并对着麦克风讲话;
如需接收,请松开【
PTT
】键。
呼叫
Page 47

10
菜单导航
联系人
要进入此菜单,按【菜单】键进入主菜单后选择“联系人”。
联系人列表
联系人列表最多可储存200条记录。您可从“联系人”菜单进入“联
系人列表”,或按编程的【联系人列表】快捷键即可快速进入“联
系人列表”。
编辑联系人
您可对联系人列表中的某个联系人(仅个呼联系人)的号码、别名
进行编辑。
查看联系人
您可查看联系人的详细信息。
删除联系人
您可对联系人列表中的联系人(仅个呼联系人)进行删除。联系人
列表中至少有两条记录才可进行删除操作,且您无法删除当前信道
的预设联系人。
新建联系人
此菜单可使您创建新联系人(仅个呼联系人)至联系人列表。新建
的联系人别名/号码不能与联系人列表中的任一别名/号码相同,输
入联系人号码的范围为1~16776415。
手动拨号
此菜单可使您直接通过输入所需的个呼号码进行呼叫。
短消息
要进入此菜单,按【菜单】键进入主菜单后选择“短消息”,或按
【短消息】快捷键即可快速进入“短消息”菜单。
新建短消息
您可进入此菜单,编辑新的短消息(最多256个字符)进行发送,可
选择发送给个人或群组。
Page 48

11
快捷文本
此菜单中存有经销商为您设置的快捷文本(最多
10
条),您可选择
任一文本直接发送,或对文本进行适当编辑后再发送。
收件箱
本车载台可存储最多20条已接收的短消息。若收件箱已满,则显示
图标,如有新的已收短消息,则最早的短消息将自动被覆盖。
您可对任一短消息进行如下操作:回复、转发、详情、删除。
要删除收件 箱中的所有短消息 ,选择“短消息- >收件箱->删除 全
部”。
发件箱
本车载台可存储最多20条已发送的短消息。当发件箱已满时,若有
新的已发短消息,则最早的短消息将自动被覆盖。
您可对任一短消息进行如下操作:重发、转发、详情、删除。
要删除发件 箱中的所有短消息 ,选择“短消息- >发件箱->删除 全
部”。
草稿箱
本车载台可存储最多 20 条草稿消息。当草稿箱已满时,如有新的
草稿消息,则最早的草稿消息将自动被覆盖。
您可对任一条草稿消息进行如下操作:发送、保存、删除。
要删除草稿箱中的所有草稿消息,选择“短消息->草稿箱->删除全
部”。
呼叫记录
要进入此菜单,按【菜单】键进入主菜单后选择“呼叫记录”,或
按【呼叫记录】快捷键即可快速进入“呼叫记录”菜单。
本车载台可分别存储最多 10 条已拨/已接/未接呼叫记录(仅个呼
记录)。当呼叫记录已满时,若有新的呼叫记录,则最早的记录将
自动被覆盖。
进入呼 叫记录 列表, 选 择一 条 记录后 ,可进 行如下 操作: 按住
【PTT】进行呼叫、添加至联系人列表、删除。
要删除所有已拨/已接/未接呼叫记录,选择“呼叫记录->已拨呼叫
/已接呼叫/未接呼叫->删除全部”。
扫描
要进入此菜单,按【菜单】键进入主菜单后选择“扫描”。
扫描开关
扫描功能可助您收听其他信道上的通信活动,从而了解相关组员当
前的活动状况。您可通过此选项来开启或关闭扫描。
菜单导航
Page 49

12
扫描列表
您可通过经销商为每个信道创建一个扫描列表,每个扫描列表最多
包含32个信道,可以既包含数字信道也包含模拟信道。选择进入某
个扫描列表后,您可以进行以下操作:
添加信道
在当前扫描列表中增加一个新的信道。
设优先信道
您可将当前所选信道设置为优先信道或非优先信道。若需重点关注
某个信道上的活动,可将其设置为优先信道。优先信道的扫描频率
要高于非优先信道。
每个扫描列表中最多可以设置两个优先信道。 表示优先信道1,
表示优先信道2。
删除信道
删除当前扫描列表中的某个信道。但您无法删除扫描列表中的第一
个信道。
区域
要进入此菜单,按【菜单】键进入主菜单后选择“区域”。
本车载台支持 64 个区域,您可通过此菜单选择您所需的区域。
设置
要进入此菜单,按【菜单】键进入主菜单后选择“设置”。
对讲机设置
您可根据自己的喜好和实际需求,来设置车载台的有关参数,使其
发挥最大效能。
功率级别
您可在此菜单选择车载台的发射功率为高或低。或在待机界面下,
按【功率级别调整】快捷键快速在高/低功率之间切换。
LCD显示 图标表示高功率; 图标表示低功率。高功率可以
使您与距离较远的用户通信。
备注:每个信道的功率级别需分别设置。
静噪级别
您可在此菜单选择车载台的静噪级别为加强、正常或常开。或在待
机界面下,按【静噪级别调整】快捷键可快速在各级别之间切换。
默认静噪级别为“正常”。
一般情况下,“加强”要求接收到的信号强度较高。若设置为“常
开”(即静噪级别为0),无论解码条件是否满足,车载台都直接打
开喇叭放出背景音。
菜单导航
Page 50

13
扰频 /加密
选择是否开启扰频或加密功能。
语言设置
选择菜单显示的语言。
背光灯
设置车载台的背光灯。有三个选项可供选择:开启、关闭、延时关
闭。延时关闭时间可由经销商设置,有效范围为
5-60
秒。
亮度设置
调整屏幕显示的亮度。您可以通过【上移】/【下移】键来增加和减
少亮度。
LED 指示
选择是否启用LED 指示。
提示音
设置车载台的提示音。您可对以下提示音进行设置:
对讲机静音:设置车载台是否响提示音。如选择“开启静音”,则
所有提示音都关闭。
呼出提示音:设置车载台在发射时是否响提示音。有如下选项可供
选择:禁止(发射时不响提示音)、仅数字(只有在数字信道上发
射时才响提示音)、仅模拟(只有在模拟信道上发 射时才响提 示
音)、允许(在数字信道和模拟信道上发射时都响提示音)。
个呼提示音:设置车载台接收到个呼时是否响提示音。
消息提示音:设置车载台接收到短消息时是否响提示音。
按键提示音:设置在进行操作按键时是否响提示音。
本机信息
您可通过此选项来查看本机的相关信息,包括序列 号、对讲机 型
号、频率范围和主机版本等信息。
附件
要进入此菜单,按【菜单】键进入主菜单后选择“附件”。
GPS
位置查看
您可通过此项查看本车载台的经度、纬度、时间、日期、速度、海
拔和卫星数。
GPS
文本消息
经销商写频开启 GPS 功能后,您可发送 GPS 文本消息至所需
的联系人。具体操作如下:
1. 选择“GPS 消息”,按【确认】键进入“联系人列表”;
2. 用【上移】/【下移】键滚动至所需的联系人;
3. 按【确认】键即可将 GPS 消息发送至该联系人。
时区
您可选择自己所在的时区来校正所收到的 GPS 时间。我们建议您在
初次使用本功能前,先对该项进行设置。
菜单导航
Page 51

14
功能与操作
待机界面
此功能可使您快速返回至上一级菜单或待机界面。
操作方法:
在编辑界面下,按【待机界面】快捷键,车载台立 即退出编辑 界
面,返回至上一级菜单;在其他界面下按此键,车载台立即返回至
待机界面。
扫描
扫描功能可助您收听其他信道上的通信活动,从而了解相关组员当
前的活动状况。
操作方法:
1. 您可以通过“扫描”菜单选择开启扫描;或
在待机界面下,按【扫描】快捷键即可开启扫描;或
若某个信道已启用“自动扫描”功能,则切换至该信道时,车
载台会自动开启扫描。
2. 开启扫描后,车载台将根据开启扫描时所在信道上设置的扫描
列表进行扫描。扫描过程如下:
扫描时,屏幕上显示
图标,
LED
慢闪橙灯。
扫描到某个信道上有活动时,车载台将停留在该信道
上进行收听。若扫描停留于非优先信道,屏幕上显示
图标;若停留于优先信道1或2,则显示图标
或 。
若您无需收听该信道上的活动,在扫描停留时按【噪
声信道临时删除】快捷键将该信道暂时删除。
若您 想继 续收听该信道上的活动,在扫描停留时按
【监听】/【静噪打开】快捷键。
3. 若要退出扫描,再次按【扫描】键即可,或通过“扫描”菜单
选择关闭扫描。
演讲扩音
此功能用于外接喇叭扩音讲话。在演讲扩音状态下,按住【PTT】键
说话的语音将不被发射,而是通过外接音箱(连接至后面板上的附
件接口)输出。
操作方法:
1. 按【演讲扩音】快捷键启用此功能;
2. 按住【PT T】键并对着麦克风讲话,话音将通过车上的外接音箱
清晰地播放出来;
3. 再次按该快捷键退出此功能。
备注: 当演讲扩音时,您不能与其他用户通信,也不能
进入菜单。
脱网
如遇中转台故障或超出中转台的覆盖范围,但两部终端均处于对方
的通讯范围内,此时,您可按【脱网】快捷键转换至直通模式,实
现两部终端直接通话。
操作方法:
按【脱网】快捷键在直通模式与中转模式之间切换。
监听
开启“监听”功能可调整信号接收匹配条件。
操作方法:
按【监听】快捷键开启此功能,此时车载台显示
图标;再
次按该键即可退出。
Page 52

15
按住【暂态监听】快捷键开启此功能,此时车载台显示
图
标;松开该键即可退出。
静噪打开
开启“静噪打开”功能时,无论是否有载波,车载 台始终打开 喇
叭。
操作方法:
按【静噪打开】快捷键开启此功能,此时车载台显示
图
标,并响“沙沙”的背景噪音;再次按该键即可退出。
按住【暂态静 噪打 开】 快捷 键开启此功能,此时车载台显示
图标,并响“沙沙”的背景噪音;松开该键即可退出。
紧急报警
遇到紧急情况时,您可通过此功能来向同伴或控制中心寻求帮助。
紧急报警有最高优先权,无论车载台处于发射或接收状态,您都可
进行报警。
如需在某个信道上启用报警功能,您必须通过写频软件为此信道关
联一个紧急报警系统。报警类型、报警ID 类型和报警模式也可通过
写频软件设置。
报警类型
在每个报警模式下,有以下 4 种报警类型,您可通过经销商任选其
一:
报警类型 说明
仅鸣笛
报警时,车载台发出尖锐的报警音,同时屏
幕上会显示 图标。
正常 报警时,车载台会给出可听和可视提示。
秘密
报警时,车载台不会给出任何可听或可视提
示。
秘密有语音
报警时,车载台会自动接收来自同伴或控制
中心的语音回复,但不会给出任何可听提示
或可视提示。
报警 ID 类型
本车载台支持以下
2
种报警
ID
类型,您可通过经销商任选其一。
报警 ID 类型 说明
无信令 发送报警时不带任何信令。
HDC1200 发送报警时使用HDC1200信令。
报警模式
本车载台支持以下 3 种报警模式,您可通过经销商任选其一(以下
操作方法以“正常”报警类型为例)。
功能与操作
Page 53

16
报警模式 说明
紧急警报
在此模式下,您只能通过按【紧急报警】
快捷键向同伴或控制中心发送报警信息,
不能与对方进行通话。
警报呼叫
在此模式下,按【紧急报警】快捷键向同
伴或控制中心发送报警信息。当屏幕上显
示 图标时,只需对着麦克风讲话而
无需按住【P T T】键,您的话音和周围的
背景音将被发送至接收方。
紧急呼叫
在此模式下,按【紧急报警】快捷键进入
报警发射信道。当屏幕上显示 图标
( )或 图 标( ) 时,只需
对着麦克风讲话而无需按住【P T T】键,
您的话音和周围的背景音将被发送至接收
方。
模拟模式下的报警操作方法
紧急警报(无信令和HDC1200)
操作方法:按【紧急报警】快捷键发送报警信息。此时红灯常亮,
屏幕上显示 图标及“发送警报”字样(无信令:若通过写频启
用“本地紧急警报”,本车载台将会响报警音)。
退出报警有以下两种方式:
1. 报警循环次数用完后,车载台将自动退出紧急报警模式。
2. 长按【紧急报警】快捷键立即退出报警。
警报呼叫(无信令和HDC1200)
操作方法:
1. 按【紧急报警】快捷键发送报警信息。此时红灯常亮,屏幕上
显示 图标及“发送警报”字样(无信令:若通过写频启用
“本地紧急警报”,本车载台将会响报警音)。
2. 当屏幕上显示
图标时,可对着麦克风讲话,发送紧急呼
叫。
3. 当屏幕上显示
图标时,进行接收;接收到呼叫后,屏幕上
显示 图标。
4. 当所设定的“紧急呼叫次数”用完后,若需要再次发起紧急呼
叫,可按住【PTT】键(红灯常亮,屏幕上显示 图标)。
讲话完毕后松开【P T T】键进行接收(屏幕上显示 图标,
橙灯快闪);接收到呼叫后,屏幕上显示 图标。(仅
HDC1200)
退出报警有以下两种方式:
1. 当所设定的报警音次数和紧急呼叫次数用完后,车载台将自动
退出紧急报警模式。(无信令)
2. 长按【紧急报警】快捷键立即退出报警。
紧急呼叫(HDC1200)
操作方法:
1. 按【紧急报警】快捷键进入报警信道,屏幕上显示
图标。
2. 若设置了“自动呼叫”功能,屏幕上显示
图标时,可对
功能与操作
Page 54

17
着麦克风讲话,发送紧急呼叫。
3. 当屏幕上显示
图标时,进行接收;接收到呼叫后,屏幕上
显示 图标。
4. 当所设定的“紧急呼叫次数”用完后,若需要再次发起紧急呼
叫,可按住【PTT】键(红灯常亮,屏幕上显示 图标)。
讲话完毕后松开【PTT】键进行接收(屏幕上显示 图标,橙
灯快闪);接收到呼叫后,屏幕上显示 图标。
若要退出报警模式,长按【紧急报警】快捷键即可。
备注: 可通过编程设定紧急警报次数和紧急警报音持续
时间(无信令)、礼貌发射次数和非礼貌发射次
数(HDC1200)、紧急呼叫次数、每次发送时
间、发送间隔。
数字模式下的报警操作方法
紧急呼叫
操作方法:
1. 按【紧急报警】快捷键进入报警信道,屏幕上显示
图标。
2. 若设置了“自动呼叫”功能,屏幕上显示
图标时,可对着
麦克风讲话,发送紧急呼叫。
3. 当屏幕上显示
图标时,进行接收;接收到呼叫后,屏幕上
显示 图标。
4. 当所设定的“紧急呼叫次数”用完后,若需要再次发起紧急呼
叫,可按住【P TT】键(红灯常亮,屏幕上显示 图标)。
讲话完毕后松开【P TT】键进行接收(屏幕上显示 图标,橙
灯快闪);接收到呼叫后,屏幕上显示 图标。
若要退出报警模式,长按【紧急报警】快捷键即可。
备注: 可通过编程设定紧急呼叫次数、每次发送时间和
发送间隔。
点火感应
您可通过汽车引擎的起停实现以下任一功能(需经销商设置):
PTT控制:控制【PTT】键是否可用。
操作方法:
汽车引擎发动后,【PT T】键可用;关闭引擎后,【P T T】键不
可用。
点火或电源开关:控制车载台的开启和关闭;【电源开关】键
仍可正常使用。
操作方法:
发动汽车 引擎 即可 开启 车载台,关闭引擎则关闭车载台;或
者,您也可按【电源开关】键开启或关闭车载台。
点火:控制车载台的开启和关闭;【电源开关】键不可用。
操作方法:
发动汽车 引擎 即可 开启 车载台,关闭引擎则关闭车载台;按
【电源开关】键无效。
功能与操作
Page 55

18
扰频 /加密
扰频功能可实现语音加密,使没有此功能的用户无法接收到您的真
实语音,从而使您的通信得到保密。
加密功能可实现语音或短消息加密,使没有此功能或密钥不匹配的
用户无法接收到您的真实语音或短消息,从而使您 的通信得到 保
密。
操作方法:
在 模 拟 信 道 上 , 进 入 “ 主 菜 单 - > 设 置 - > 对 讲
机 设 置 - > 扰 频 ” , 选 择 开 启 或 关 闭 扰 频 ;
在数字信道上,进入“主菜单->设置->对讲机设置->加密”,
选择开启或关闭加密。
按【扰频/加密】快捷键可在当前信道开启扰频或加密(响升调
提示音);再次按该键关闭此功能(响降调提示音)。
若某个信道已通过写频软件启用扰频或加密功能,则切换至该
信道时,车载台会自动开启扰频或加密;退出该信道则关闭此
功能。
繁忙信道锁定
此功能可通过写频软件开启,以防止干扰同一信道上正在发射的其
他用户。当您在其他用户占用该信道时按住【PTT】键,车载台将发
出“嘟”音并显示“信道繁忙”,提示您此时无法发射。若要停止
“嘟”音,请松开【P T T】键。当该信道空闲时,按住【P T T】才能
进行发射。
超时禁发
此功能可防止用户过久地占用信道。如果连续发射时间超过经销商
编程设定的时间,车载台则会停止发射并且响警告音。若要停止警
告音,请松开【PTT】键。如需再次发射,请间隔一段时间后(具体
由经销商设置)再次按住【PTT】键。
若经销商编程设定预警告功能,则在超时禁发所设定时间快到前给
出预告警提示,告诉您发射即将被禁止。
备注:处于紧急报警模式时,本功能无效。
虚拟集群
此功能只能通过写频软件开启。当您的车载台在开启此功能的信道
上工作时,如果某一时隙已被占用,您还可在另一个空闲时隙上进
行发射和接收。在某些紧急情况下,可助您及时传递和接收重要信
息。
麦克风自动增益控制
此功能只能通过写频软件开启。功能开启后,您的车载台发送语音
时,会对语音进行处理,使接收方接收到的语音比较平缓。
尾针报警
此功能需通过二次开发实现,且只能通过写频软件开启。您可在紧
急情况下快速激活该功能,并启动紧急报警,避免造成重大损失。
备注: 当前信道必须支持紧急报警功能,否则本功能将
无效。
尾针信道切换
此功能需通过二次开发实现,且只能通过写频软件开启。您可通过
对相关端口的控制激活该功能,并准确、快速的切换信道。
备注:启用本功能后,您将无法通过面板操作切换信道。
功能与操作
Page 56

19
信令介绍
本车载台支持如下信令,您可通过经销商对其进行设置。具体实现
的功能及操作方法,请咨询经销商。
HDC1200
HDC1200信令可兼容MDC1200,并实现PTT ID(编解码),紧急报警
(编解码),选呼(编解码)等功能。
发码:
1. 发起普通语音呼叫时,按住【PTT】键发送PTT ID。
2. 进入“联系人列表”菜单,选择所需联系人后,按住【PT T】键
发送选呼(个呼/组呼/全呼)。
其中,发码提示如下:
PTT ID/ 选呼:发码时是否响侧音,发完码后是否响短哔音都
由经销商配置。
选呼:发码时,红灯 常亮 ,L C D显示相应选呼图标(个呼:
;组呼: ;全呼: )。发完码后,橙
灯常亮。
解码:
解码提示如下:
PTT ID:解码后,LCD显示
图标,并给出发送方的身份标
识ID或别名。
选呼:解码后,有如下提示信息:
提示音: 给出默认提示音;
LED提示: 绿灯亮;
LCD显示: 若经销商启用了“显示解码I D”,则显示相应选呼图标
(个呼: ;组呼: ;全呼: )和发送方别
名(若I D不在联系列表中,则显示ID);若未启用“显示解码
ID”,则只显示相应选呼图标。
Page 57

20
故障处理指南
故障描述 原因分析 解决方法
无法开机 电源线可能未连接 正确连接电源线。
接收信号时声音小、断续或无
声
音量较小 通过【音量控制】旋钮增大音量。
天线松动或安装不到位 关机后取下天线并重新装上,再开机。
扬声器堵塞或受损
进行简单的外部清洁,如仍不能解决问题,请联系经销商
或海能达指定维修点进行检修。
模拟模式下,无法与组内其他
成员通话
所用频率或信令设置与组内其他成员不同 设置与组内其他成员相同的频率和信令。
距离组内其他成员太远 靠近其他成员,确认位于其有效通讯范围之内。
数字模式下,天线有接收指示
但无法与组内其他成员通话
I D 号与组 内其他 成员不 同,能 接收 到数字 载
波,但不能解调
设置与组内其他成员相同的ID号。
模拟信道中出现其他通话声或
杂音
受到同频用户的干扰 调整静噪级别。
未设置信令
增加信令设置,以防止同频干扰。但必须同时更改组内所
有对讲机的信令设置。
噪声较大
与其他成员之间的通讯距离过远 靠近有效通讯范围后,开机重试。
所处位置不佳,如受高大建筑物阻挡,或 位于
地下室等
移至开阔平坦地后,开机重试。
受外界环境或电磁干扰 避开可能引起频率干扰的设备。
按键无法使用 键盘暂时失灵 重新开关机一次。
屏幕无显示 屏幕暂时失灵 重新开关机一次。
GPS无法定位
GPS天线连接不当 正确连接GPS天线。
所处位置不佳,无法接收GPS信号 移至开阔平坦地后重试。
如上述方法仍未解决您的问题,或您遇到一些其他的故障,请联系当地经销商或海能达以获取更多的技术支持。
Page 58

21
保养与清洁
为了保证本产品发挥其良好性能,并延长其使用寿命,请熟悉以下
内容,以便更好地对本产品进行日常保养与清洁。
保养
请保证本产品处于通风条件较好、易散热的位置,以便各部件
正常地工作;
请勿在本产品台面上摆放无关物品,以保证其有效地散热;
请勿将本产品浸泡于各种腐蚀剂、溶液或积水中。
清洁
请对本产品进行定期的日常清洁,使用洁净干燥的无绒布或小
毛刷拭去车载台各部件附着的粉尘,以保持其清洁并防止接触
不良;
经过长期使用后,如果本产品的按键、控制旋钮、显示屏和接
口变脏,可用沾有中性洗涤剂的无纺布对其进行清洁,切勿用
诸如去污剂、酒精、喷雾剂或石油制剂等。清洁之后,务必保
证本产品彻底干燥,否则请勿使用。
注意:在您进行清洁之前,请关机。
Page 59

22
未经海能达授权的情况下对产品进行软件升级、固件拆动等所
造成的故障或损坏;
5) 非材料或加工问题所造成的天线故障或损坏;
6) 主机上的海能达相关标志或序列号码标贴被撕毁、序列号被抹
除或无法辨认的产品;
7) 购买日期无法鉴定的产品;
8) 不可抗力所造成的缺陷或损坏;
9) 正常及常规磨损。
特别说明:
1. 在法律允许的限度内,海能达在任何情况下都不对超过产品购
买价格的损失承担责任,同时不对任何使用损失、时间损失、
商业损失、利润或收入损失、不能使用产品而导致的附带的、
特殊的或继发性损坏承担负责。
2. 由于采用本产品所使用的环境、系统等各不相同,海能达在本
保修条款下不对整个系统的覆盖范围、覆盖区域或运行状况承
担责任。
3. 本维修条款是根据国家相关保修条例所制定的,由于技术发展
与市场调整等因素,条款内容也将进行相应的修改,具体修改
请以海能达客户服务中心发布的维修条款变动通知为准。其他
未尽事宜请以国家相关条例为准。
质量保证和维修条款
海能达通信股份有限公司承诺,凡海能达生产的产品,自购买之日
起,在正常使用、操作与维护条件下,出现材料或制造工艺方面的
缺陷,可享受以下规定的保修服务。
1. 保修的范围与期限
主机 24 个月
标配附件(手持麦克风) 6 个月
2. 保修的申请
如申请海能达产品保修服务,必须提供有效的海能达产品保修卡或
有效购机发票原件作为凭证;保修期内,海能达产品的相关标志,
包括序列号码标签等,应保持清晰完整且不得撕毁。
1) 产品保修卡是指由海能达或海能达授权的经销商填写并盖章的
完整保修卡。保修卡上填写内容应包含产品名称、产品制造序
列号(编号)、购买产品日期、销售单位等有效信息;
2) 有效购机发票是指财税部门统一监制的发票,是产品售出的重
要凭证。发票上应填写产品名称、产品制造序列号(编号)、
销售日期、购机金额等有效信息。
注意:
1) 车载终端必须寄回海能达客服总部或海能达驻外
维修站进行维修;
2) 请 将 产 品 包 装 好 , 附 上 所 需 凭 证 及 详 细 的 故
障 说 明 寄 至 原 购 点 或 海 能 达 指 定 的 售 后 服 务
点。您 也可以 通过拨 打海能 达的免 费 服务 热 线
400-830-7020或400-8818-368 获得帮助。
3. 本服务保证条款不包括以下内容:
1) 超出保修有效期限;
2) 未按说明书要求使用、维护及保养所造成的故障或损坏;
3) 在非正常和非常规情况下使用本产品所造成的故障或损坏;
4) 未经海能达授权的改造、改动、拆卸或使用非原装的附件,或
Page 60

23
选购配件
本机主要的选购附件已包含在如下列表中,如需更多附件信息,请咨询您当地的经销商或拨打海能达免费服务热线
400-830-7020
。
注意:请使用海能达指定的配件。若擅自使用未经许可的配件,则由此所导致的一切后果,由用户自行负责。
台式麦克风 SM10A1 外置扬声器 SM09D1 编程连接线 (USB口) PC37 数据线 PC40
带按键手持麦克风SM19A1 车台电源(320W,可接备用电源) PS22002 天线
Page 61

24
附录
输入法
您可通过带键盘的手持麦克风输入用户别名、号码和短信。本车载
台支持多种输入法。此处仅介绍英文输入法、中文 简体拼音输 入
法、数字输入法。
中文简体拼音输入法
操作方法:
1. 按
键切换至拼音输入法;
2. 按数字键依次输入拼音字母,LCD显示备选拼音;
3. 按【上移】/【下移】键选择所需拼音;
4. 按【确认】键将高亮条移至中 文汉字区,再按【上移】/【下
移】键选择所需汉字;
5. 按【确认】键输入所选汉字。
重复以上步骤完成输入。
英文输入法
操作方法:
1. 按
键切换至大写或小写英文输入法;
2. 按数字键输入所需英文字母;
3. 再按【上移】/【下移】键选择所需字母;
4. 按【确认】键输入所选字母。
重复以上步骤完成输入。
数字输入法
操作方法:
1. 按
键切换至数字输入法;
2. 按数字键
至 可输入相应的数字。
输入特殊字符
按数字键 ,可输入一些最常用的标点和特殊字符。
要输入空格,请按 键。
备注: 在已输入文本显示区域,按【上移】/【下移】键
可左移/右移光标。
 Loading...