

Page 1

TC2110 User Manual
CONTENTS
Product Inspection
Battery Charging Information
Accessory Information
Battery
Belt Clip
Getting Started
LCD Display
Basic Operations
Features
Monitor
Channel Scan
Priority Channel Scan
Scan Revert Channel
Selectable CTCSS/CDCSS
Selectable Squelch Level
Key lock
Time Out Timer (TOT)
Battery Save
Low Battery Alert
Busy Channel Lockout
Backlight
Troubleshooting Guide
Optional Accessories
Care and Cleaning
CTCSS/CDCSS table
Frequency Chart
1
Page 2

Product Inspection
Please carefully take the radio out of the box. We recommend that you confirm the items listed
in the following table before discarding the box. If any items are missing or have been
damaged during shipment, file a claim with the carrier immediately.
1. Available Accessories
Item Qty.(pcs)
AC Adapter 1
Ni-MH Battery 1
Belt Clip 1
Owner’s Manual 1
Charger 1
Declaration of Conformity
Card
1
Safety Manual 1
2
Page 3
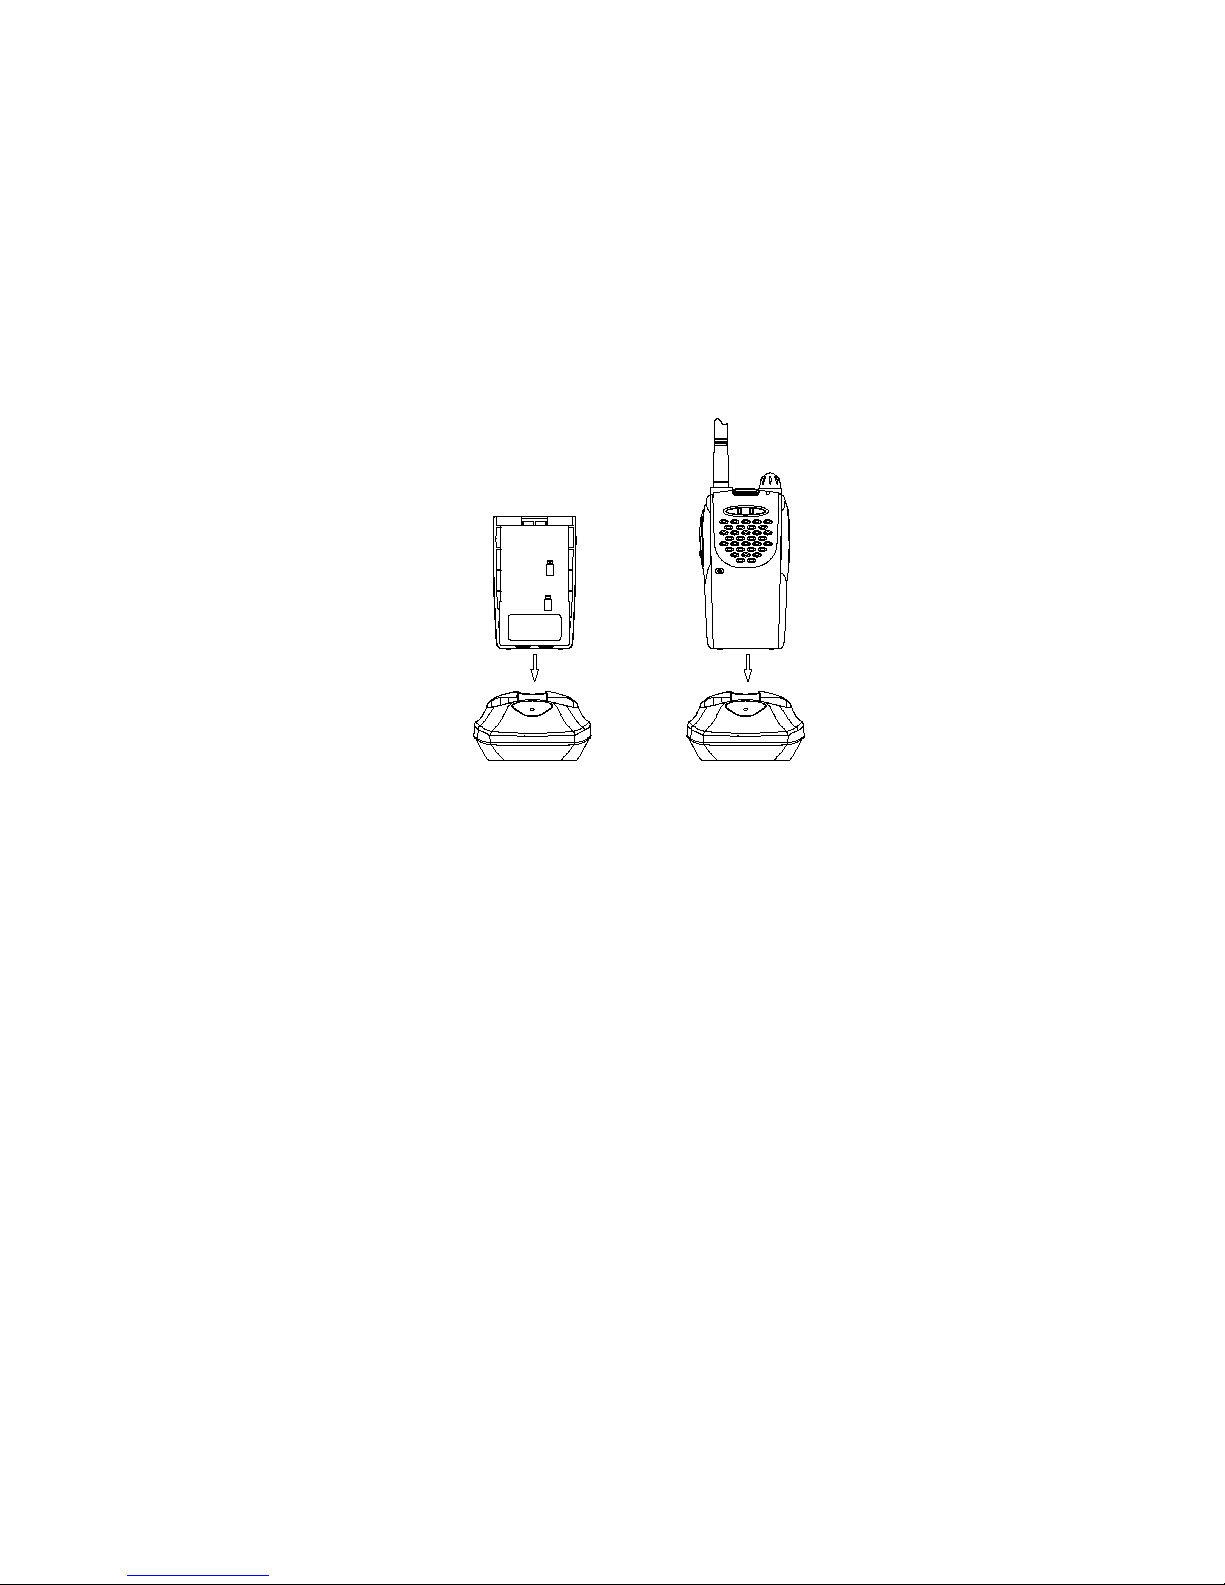
Battery Charging Information
Standard Charger
1. Insert the AC adapter into an AC outlet;
2. Insert output socket of the AC adapter into AC input jack of the charger;
3. Insert the radio with battery or battery alone into the charger. Charging begins and the red
LED will light continuously.
Notes:
Do not short out the battery terminals or dispose of the battery by fire.
Turn off the radio when charging the battery inside the radio.
Remove the radio and the battery from the charger when charging cycle is over.
Overcharging will shorten the battery life.
Do not continue charging the battery if it is already fully charged. Or the battery life will be
shortened.
Store the battery in a 25 place. Charging the battery in less than 10 temperature will
cause the electrolyte leakage and damage the battery.
Charging the battery in over 35 temperature will affect the battery capacity.
Accessory Information
2. Battery
Attaching the Battery (See fig. 1)
1. Insert the tabs, at the bottom of the battery, into the slots at the bottom of the radio chassis.
3
Page 4
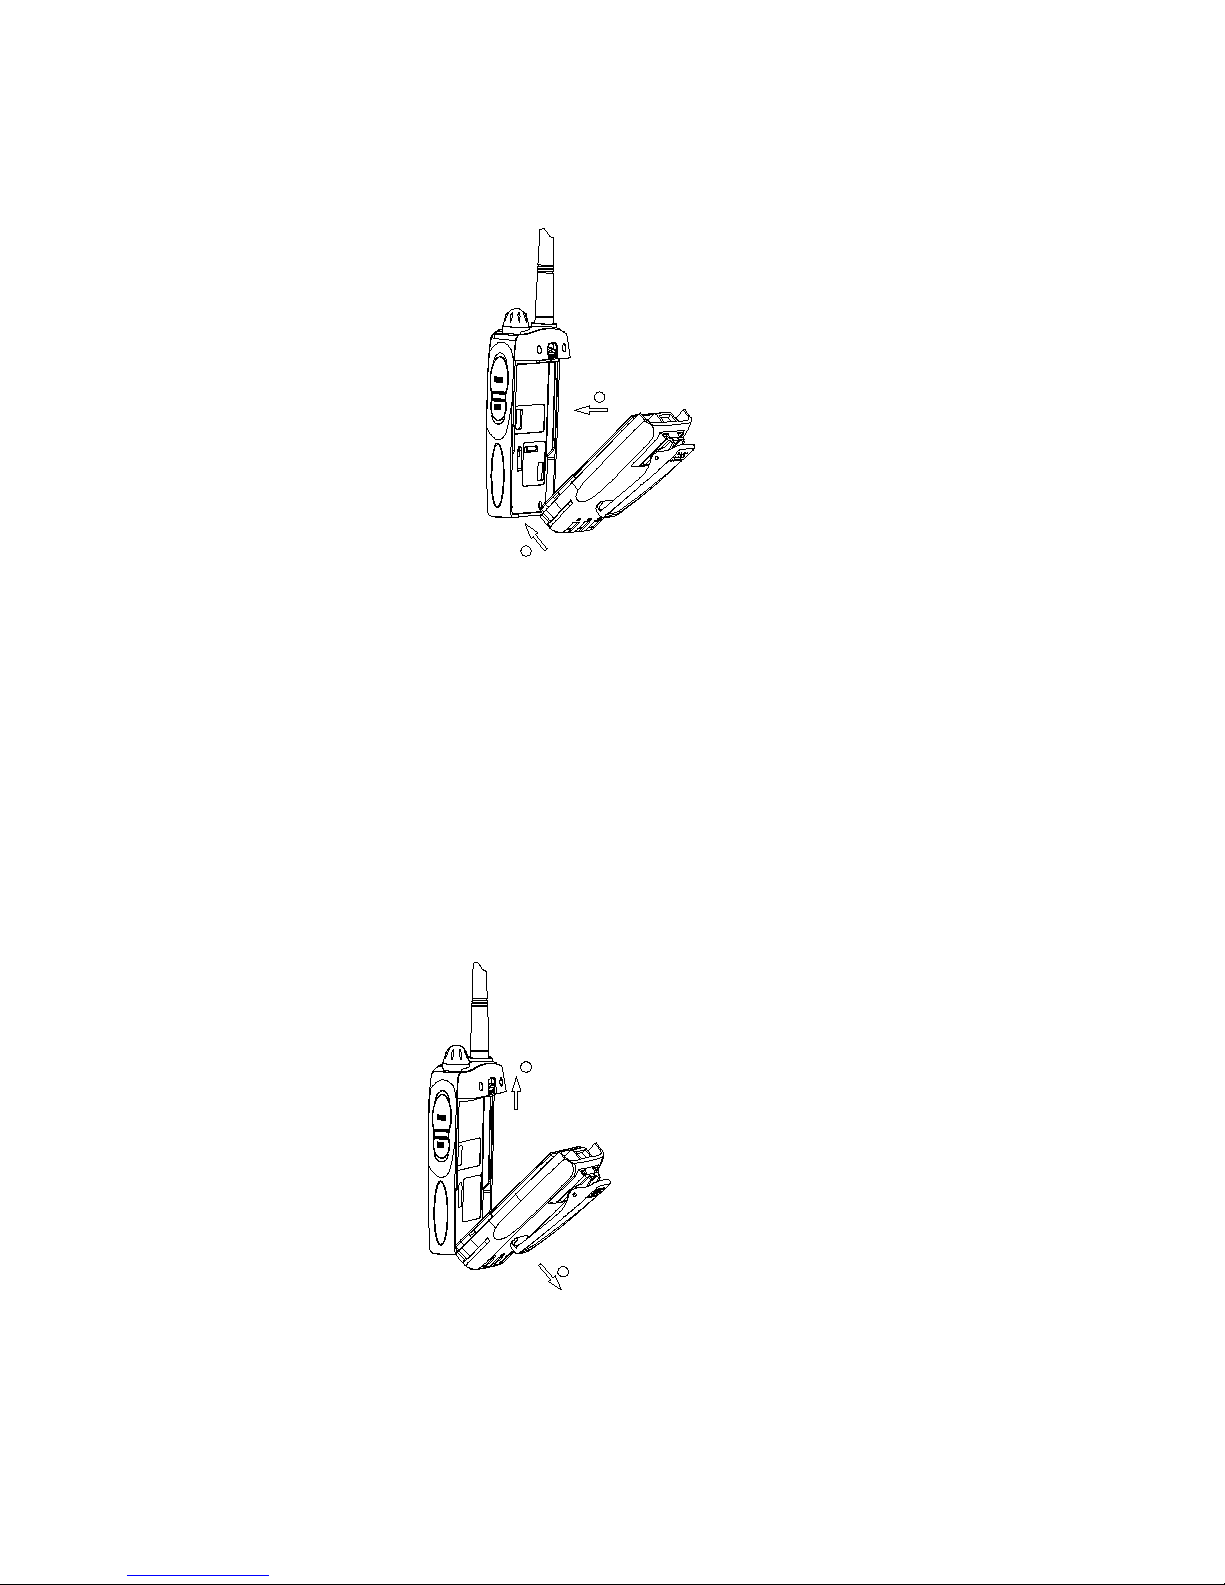
2. Press the top of the battery towards the radio until a click is heard.
1
2
Fig. 1
Removing the Battery (See fig. 2)
1. Turn off the radio.
2. Push the battery latch on the back panel towards the top of the radio.
3. Pull the top of the battery away from the radio chassis, and lift the battery from the radio.
2
1
Fig. 2
3. Belt Clip
Attaching the Belt Clip (See fig. 3)
1. Align the grooves of the belt clip with those of the battery.
4
Page 5

2. Press the belt clip down until a click is heard.
Fig. 3
Removing the Belt Clip (See fig. 4)
1. Remove the belt clip tab away from the battery.
2. Slide the belt clip upwards to remove it.
Tab
Fig. 4
5
Page 6

Getting Started
1. Antenna
Used to transmit or receive signals.
2. LCD
Displays operation status of the radio.
3. LED indicator
In transmit mode, the red LED will turn on. In receive mode, the green LED will turn on. A
flashing red LED indicates that the battery power is low.
4. POWER/VOL Knob
Rotate the POWER/VOL Knob clockwise to turn the unit on, fully counter clockwise to turn
the unit off. Increase or decrease volume by adjusting the knob accordingly.
5. DOWN key
Adjust the channel downwards.
6. SCAN key
Press [SCAN] key to enter channel scan mode. Press again to exit.
7. UP key
Adjust the channel upwards.
8. PTT button
Press and hold [PTT], radio operates in transmit mode. Release [PTT], radio returns to
receive mode.
9. MONI button
Press [MONI] key to monitor the selected channel for activity.
10. Microphone
6
Page 7

11. Jack
Used to connect with external audio accessories.
12. Speaker
13. Battery latch
Used to fasten and remove the battery.
14. Belt clip
Used to clip radio on your belt.
15. Battery pack
LCD Display
1. Not available in this radio.
2. Not available in this radio.
3. Appears when the key lock feature is enabled.
4.
Display the current channel number.
7
Page 8

Basic Operations
4. To Turn On the Radio
Turn the POWER/VOL knob clockwise until a click is heard to turn the radio on.
5. To Receive
1. Press [UP] or [DOWN] key to select your desired channel.
2.
Turn POWER/VOL knob to adjust the volume. In order to adjust the volume more
conveniently, you may press and hold [MONI] key, and then turn the knob to adjust.
3. 3. Now the radio is ready to receive.
6. To Transmit
1. Press [UP] or [DOWN] key to select your desired channel.
2. To avoid interfering with other users, press the [MONI] key to monitor activities on the
selected channel and make sure the channel is idle before transmitting.
3. To transmit, press and hold the [PTT] button and speak into the microphone with the radio 2
to 4 inches away from your mouth. To receive, release the [PTT] button. When the [PTT] button
is pressed, the red LED will light until the [PTT] button is released or until the transmission is
stopped by TOT.
8
Page 9

Features
7. Monitor
Press [MONI] button to monitor activity on the current channel.
8. Channel Scan
Channel scan is set to monitor desired activities on all channels in scan list. When channel
scan is enabled, the radio will automatically scan all channels in scan list until activity is
detected on a channel. The radio will then lock on to that channel for communication.
When scanning stops on an active channel, it will restart in the preset restart mode set by the
dealer. Scan restart mode can be either Time operated scan or Carrier operated scan.
Time Operated Scan
Scan stops on the busy channel for only the preset time (preset by the dealer) before it
resumes scanning. The radio will begin scanning other channels even if the channel is still
busy.
Carrier Operated Scan
Scan stops on the busy channel until there is no activity.
Channel scan operation is shown as following:
1. Press [SCAN] key, scan starts from the current channel and then scrolls all selected
channels in sequence.
2. Press [UP] or [DOWN] key to change channel scan sequence. Press the [UP] key, radio
skips the current channel and scans other selected channels in ascending order; press the
[DOWN] key, radio skips the current channel and scans other selected channels in
descending order.
3. Press [SCAN] key again, scan stops.
4. The dealer can add or delete a channel to/from the scan list. Only channels in the scan list
can be scanned.
9. Priority Channel Scan
If your dealer has set a priority channel, when radio scans non-priority channels, it will
periodically detect the priority channel. If activity is detected on the priority channel, it will
switch to the priority channel for communications.
10.Scan Revert Channel
The scan revert channel feature allows you to transmit on the proper channel while initiating a
call during channel scan. Press [PTT] button, radio stops scanning and transmits on the revert
channel. This feature is set by the dealer.
9
Page 10

11.Selectable CTCSS/CDCSS
CTCSS/CDCSS feature is used to avoid receiving unwanted signals on the same channel.
When CTCSS/CDCSS is enabled, the radio will only receive signals with the same
CTCSS/CDCSS. If CTCSS/CDCSS is disabled, the radio will hear all calls on the same
channel.
When the dealer allows CTCSS/CDCSS to be selectable by the end user, the operations are
as follows:
Press the [UP] key while holding down [MONI] key to enter CTCSS/CDCSS set mode.
In the CTCSS/CDCSS set mode, press [UP] or [DOWN] key to select CTCSS/CDCSS.
Press [SCAN], LCD display toggles among OFF/CTCSS/CDCSS/-CDCSS:
CTCSS/CDCSS OFF: 00
CTCSS: 01-38
CDCSS: 01-83
-CDCSS: -01- -83
OFF
CTCSS
CDCSS
-CDCSS
Please refer to CTCSS/CDCSS table for more details.
Press [UP] while holding down [MONI] key to exit CTCSS/CDCSS set mode.
Note: Though CTCSS/CDCSS feature can prevent you from receiving unwanted signals;
it doesn’t mean your calls are absolutely private.
Selectable squelch level
If this feature is enabled by the dealer, then
Press the [DOWN] key while holding down [MONI] key to enter squelch level set mode. In this
mode, press [UP] or [DOWN] key to select the squelch level from 0-9.
Press [PTT] , [MONI] or [SCAN] key to exit the mode.
Key lock
The key lock feature is designed to avoid accidental pressing of keys. If this feature is enabled
10
Page 11

by your dealer, the operation procedures are as follows:
1. Press [SCAN] while holding down [MONI] key to lock keys. When key lock feature is
enabled, [UP], [DOWN] and [SCAN] keys are invalid, but [PTT] and [MONI] key are still valid.
2. Press [SCAN] while holding down [MONI] to unlock keys.
3. Lock symbol appears on LCD when key lock feature is enabled:
12.Time Out Timer (TOT)
Time Out Timer is used to prevent user from transmitting on the same channel for extended
periods of time. This feature also protects the radio from damage caused by long time
transmission.
If transmission exceeds the preset time, (the TOT time can be preset by the dealer), the radio
will stop transmitting and return to the receive mode automatically. Alert beeps will sound.
Release [PTT] button to stop the beeps.
13.Battery Save
While no activity is on the channel and no operation is performed for 10 seconds, the Battery
Save feature will be enabled automatically to reduce power consumption. When a signal is
received or an operation is performed, the Battery Save feature is automatically disabled.
14.Low Battery Alert
When the battery voltage becomes low, the red LED will flash and beeps sound. You need to
replace or charge the battery.
15.Busy Channel Lockout
If the selected channel is set busy channel lockout by your dealer, you cannot transmit when
there is activity on the channel. If you press the [PTT] button, the radio will sound beeps and
will stay in the receive mode.
16.Backlight
This feature can be set by your dealer.
When this feature is enabled, pressing any key except the [PTT] will illuminate the display. The
display will continue to light for 5 seconds.
11
Page 12

Troubleshooting Guide
Please check the following items before requesting service.
1. Review operation procedures.
2. Replace or recharge the battery.
3. If reception is poor, check the antenna to make sure it is undamaged and operating in a
vertical position.
4. Try another location with fewer obstructions.
5.
If you cannot communicate with your group members, make sure you are using the same
frequency and CTCSS/CDCSS.
6. If you hear other conversations on your channel, change your CTCSS/CDCSS.
Remember to change CTCSS/CDCSS of your group members.
Optional Accessories
158M-S Earphone
158M-G Earphone
SM-03 Speaker Mic
PT-12 Leather Case
PT-13 Leather Case
PDS-264 Adapter
HC2108Li Charger
TC-67 Li-ion Battery
Care and Cleaning
² Do not carry your radio by the antenna or remote microphone;
² Wipe the battery contacts with a lint-free cloth to remove dirt, grease, or other material that
may prevent good electrical connection;
² When not in use, keep the accessory jacks covered with the protective caps;
² Clean the shell, controls and keys of your radio with neutral detergent and warm water
after a long period of usage. Avoid using strong chemicals.
12
Page 13

TC2110 Frequency Chart
No. Frequency (MHz) No. Frequency (MHz)
1 446.00625 5 446.05625
2 446.01875 6 446.06875
3 446.03125 7 446.08125
4 446.04375 8 446.09375
CTCSS/CDCSS Table
CTCSS
NO.
Freq (Hz)
NO.
Freq (Hz)
NO.
Freq (Hz)
00
NO TONE
13
103.5
26
162.2
01
67.0
14
107.2
27
167.9
02
71.9
15
110.9
28
173.8
03
74.4
16
114.8
29
179.9
04
77.0
17
118.8
30
186.2
05
79.7
18
123.0
31
192.8
06
82.5
19
127.3
32
203.5
07
85.4
20
131.8
33
210.7
13
Page 14

08
88.5
21
136.5
34
218.1
09
91.5
22
141.3
35
225.7
10
94.8
23
146.2
36
233.6
11
97.4
24
151.4
37
241.8
12
100.0
25
156.7
38
250.3
CDCSS
NO. CODE NO. CODE NO. CODE
01
023
29
174
57
445
02
025
30
205
58
464
03
026
31
223
59
465
04
031
32
226
60
466
05
032
33
243
61
503
06
043
34
244
62
506
07
047
35
245
63
516
08
051
36
251
64
532
09
054
37
261
65
546
10
065
38
263
66
565
11
071
39
265
67
606
12
072
40
271
68
612
14
Page 15

13
073
41
306
69
624
14
074 42
311
70
627
15
114
43
315
71
631
16
115
44
331
72
632
17
116
45
343
73
654
18
125
46
346
74
662
19
131
47
351
75
664
20
132
48
364
76
703
21 134 49 365 77 712
22 143 50 371 78 723
23 152 51 411 79 731
24 155 52 412 80 732
25 156 53 413 81 734
26 162 54 423 82 743
27 165 55 431 83 754
28 172 56 432
15
Page 16

Frequency Chart
Model:
Serial Number:
16
Channel Frequency CTCSS/CDCSS
1
2
3
4
5
6
7
8
9
10
11
12
13
14
15
16
 Loading...