

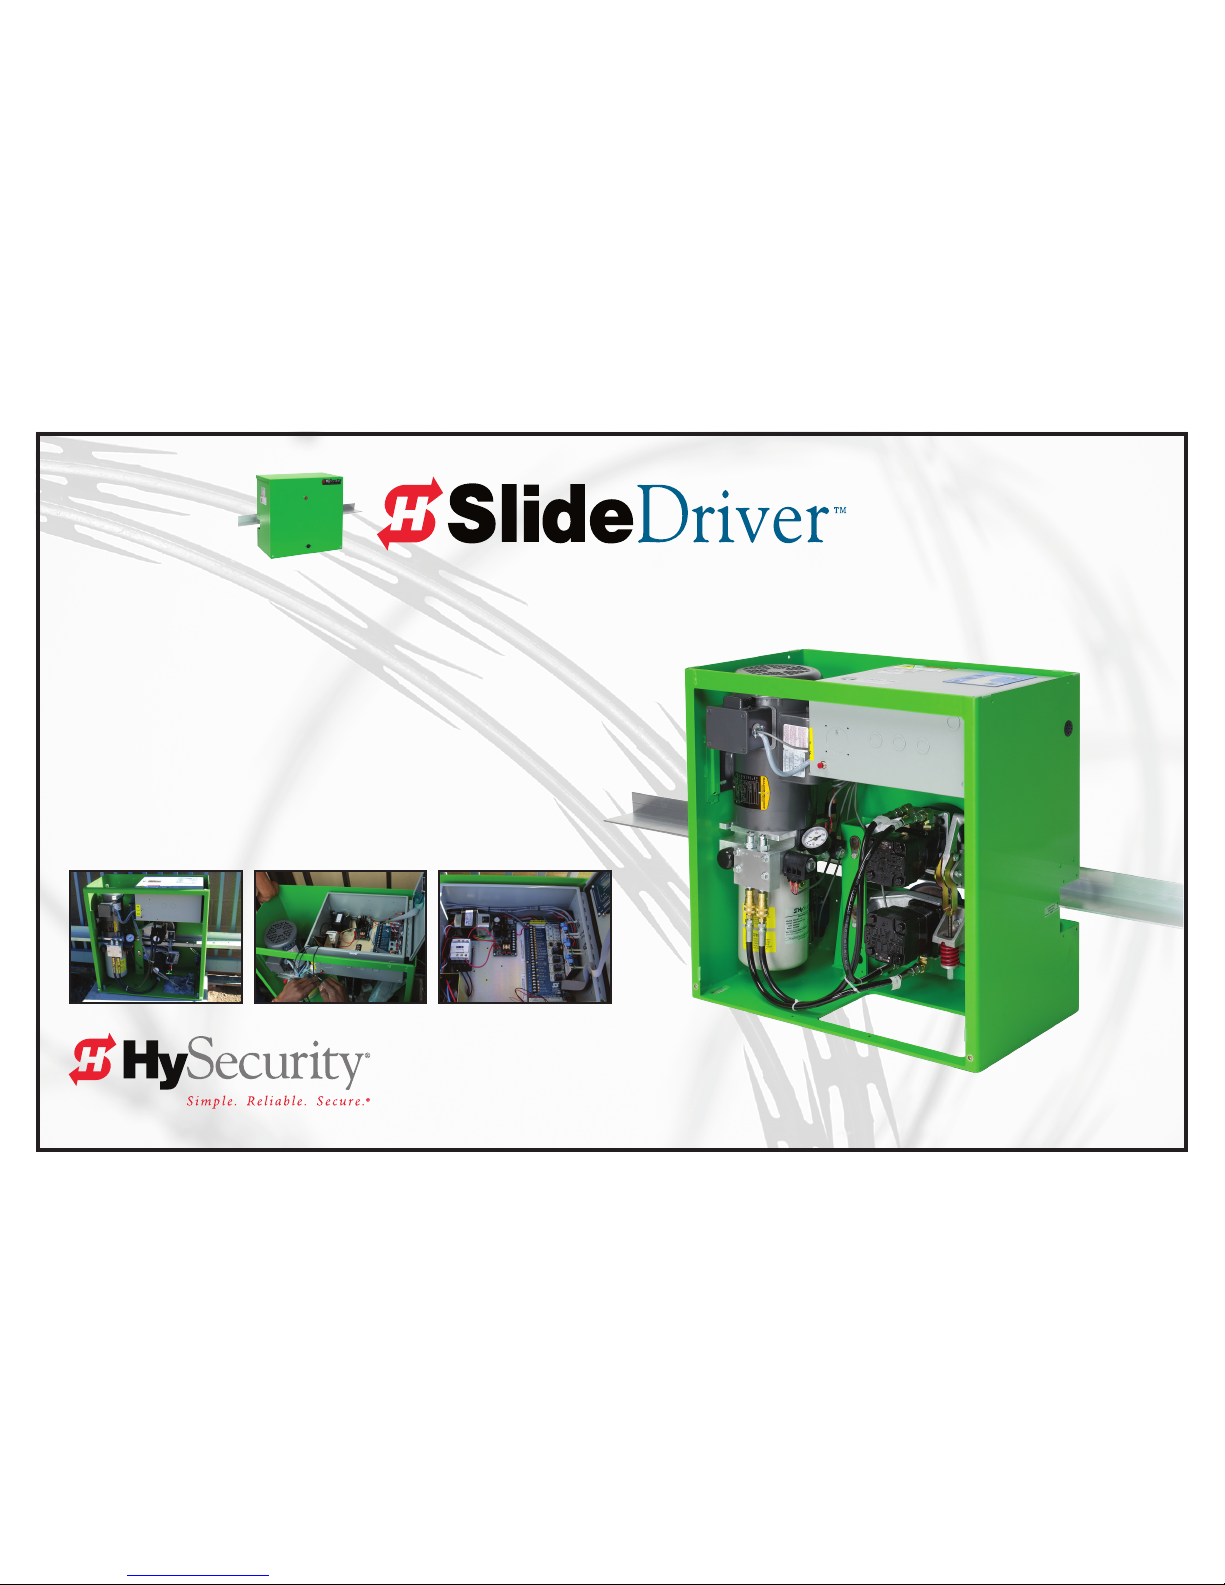
HySecurity SlideDriver 15, SlideDriver 40, SlideDriver 50VF2/3, SlideDriver 30F, SlideDriver 80 Installation Instructions Manual
...Page 1
MX3629-01 Rev. B
Models
SlideDriver 15
222 SS ST 1,500 lb (680 kg) 1 ft/s (30 cm/s)
SlideDriver 30F 222 EX 1.7 ST 3,000 lb (1,361 kg) 1.7 ft/s (50 cm/s)
SlideDriver 40 222 E ST 4,000 lb (1,814 kg) 1 ft/s (30 cm/s)
SlideDriver 50VF2/3 222 X3 ST 5,000 lb (2.268 kg) 2.2 ft/s (70 cm/s) or
3 ft/s (91 cm/s)
SlideDriver 80 222 X1 ST 8,000 lb (3,629 kg) 1 ft/s (30 cm/s)
SlideDriver 200 444 XS ST 20,000 lb (9,072 kg) 1 ft/s (30 cm/s)
800-321-9947 www.hysecurity.com
SlideDriver 30F
Installation Instructions
The World’s Most Rugged and Reliable High Security Slide Gate Operator
Page 2

Page 3

© 2016 www.hysecurity.com SlideDriver Installation and Assembly MX3629-01 Rev. B Page 3
SlideDriver: Plan Site Design
1
Read & Plan
Read and follow the Important Safety Information provided in the Programming and Operations Manual prior
to installing the SlideDriver. Read and follow these installation instructions and make sure to conform to site
specications and all local and federal regulations and codes.
2
Measure and Calculate
Determine site placement. Pay attention to clearance around the gate operator’s location and gate condition
(hardware, ease of travel, and access). Consider right handing and left handing.
Use the illustrations for concrete pad dimensions, gate operator placement and drive rail alignment.
3
Design Vehicle Loops
Inside and Outside obstruction loops (IOLD and OOLD) are recommended to help prevent vehicle hits. IOLD
and OOLD loops are required for tail gating logic.
4
Install conduit for communication and power
For high voltage, low voltage, (loops and peripherals),
ground wire, and dual or interlocked gates.
NOTE: Loop layout is dependent on uni- or bi-directional
trafc and length of gate and width of roadway. Vehicle must
move from one loop to the next without loss of detection. The
site design shown on this page is for illustrative purposes only.
CAUTION
If you cut, drill or alter the chassis,
you will void the Warranty.
DANGER
Know what’s below! Many states subscribe to 811. Call the local utility
number so underground utility lines can be marked before excavating.
NOTE: Design shown for illustrative purposes only.
Drawings are NOT TO SCALE.
Minimum conduit required No. Min. Size cm
AC Main power (incoming) 1 1 inch 2.5
Low voltage comm wires 1 3/4 inch 2
Ground 1 3/4 inch 2
Loop wires 1 3/4 inch 2
Addt’l conduit may be needed for: No. Min. Size cm
DC cables or hydraulic hoses 1 2 inch 5
Dual gate connection for low voltage wiring 1 1 inch 2.5
Emergency release options 1 3/4 inch 2
SLIDEDRIVER
Mounting bolt location
Four (4) ½ x 4-inch anchor bolts
FACE OF GATE
OBSTRUCTED AREA: Area must remain clear.
Hydraulic motor location
MINIMUM CONCRETE DIMENSIONS
20” Wide x 30” Length x 16” Depth minimum*
(51 x 76 x 41 cm) *Or, Frost line whichever is greater.
Refer to local code for appropriate depth.
2" (5 cm)
5" (13 cm)
12½" (32 cm)
7¼"
(18 cm)
1¼"
(3 cm)
1¼" (3 cm)
2" (5 cm)
8"
(20 cm)
13" (33 cm)
26" (66 cm)
1¼" (3 cm)
CONDUIT
AREA
Conduit cutout area for electrical access.
Cut out dimensions: 8 x 7¼" (20 x 18 cm)
Distance between gate face and rear
chassis: 1½ ± ⅛ inch (38 mm ± 3 mm)
WARNING
Be sure the WARNING signs are visible from either side of the
gate in clear view of approaching vehicles. For your records,
take a photograph of the completed installation site.
Key or card reader
Mount access control
devices at least 6 ft
(183 cm) beyond gate.
Photo eye
Photo eye
SlideDriver
Left handing
Outside Obstruction Loop
Photo eye
V track
Pedestrian gate within
25 ft (762 cm) of
vehicular gate opening
Inside Obstruction Loop
or Free Exit
Gate edge
sensor
Gate edge
sensor
Physical travel
stop
Edge sensor
Support posts
External Stop / Reset
Safety Mesh
Gap between vertical bars must be less than (2¼-inch, 57 mm) up
to a minimum height of 6 ft (1.8 m). Refer to ASTM F2200.
14½"
(37 cm)
NOTE: Chassis cover adds ½" (13 mm).
Total depth with cover = 15" (38 cm)
SlideDriver
Left handing shown
High voltage (Incoming AC power)
Low voltage/
communication wires
Dual gates
Vehicle loop wires
For clarity, safety mesh
is not shown
CONCRETE PAD
CONCRETE PAD
Cut away view
Gate
Safety mesh
Per UL 325 and ASTM F2200,
all openings in a sliding gate
up to 72 inch height (6 ft or
183 cm) must be guarded or
screened.
Wheel cover
Grooved drive rail
Gate face*
Use shims as needed
Support post
Wheel cover
Drive rail
Limit ramps
Height from top of drive rail to bottom of
gate operator. All models: 9¼” (23.5 cm)
NOTE: XtremeDrive™ mount drive rail ¼ to ½” (6 to 13 mm) higher.
All models
(except SD 200):
26” (66 cm)
SlideDriver 200:
33½” (85 cm)
Support post
Low voltage/communication wires
Conduit
Distance: 1½" (38 mm) Gap
Cover removal
and access: 15”
minimum (38 cm)
U bolt
Page 4

© 2016 www.hysecurity.com SlideDriver Installation and Assembly MX3629-01 Rev. B Page 4
SlideDriver: Site Prep
OperatOr Handing
tOOls required
Drawings NOT to Scale
slidedriver 200 series
pOst MOunt fOr Hydrasupply Or dC / ups Cabinet
• Standard socket set with extension
• Standard hex key set
• Combination wrench set
• Standard pliers and needle-nose pliers
• Set of Phillips head and at-head screwdrivers
• Wire strippers & wire crimper
• Digital Volt-Ohm meter
• Level and measuring tape
• Electric drill and drill bits (Unibit or Stepdrill)
• Metal cutting saw
For the full recommended list of tools and
hardware, see the SlideDriver Programming and
Operations Manual.
When you rst apply power to the operator, it is locked in
Menu mode and prompts appear on the display. The gate
will not move and the controls will not function until the
prompts have been answered. The prompts include:
• Usage Class setting (UC)
• Gate operator handing (Set Handing: SH)
See page 9 for more information.
MINIMUM CONCRETE DIMENSIONS
20” Wide x 47” Length x 16” Depth minimum*
(51 x 119 x 41 cm)
*Or, Frost line whichever is greater. Refer to
local code for appropriate depth.
6½"
(16.5 cm)
1¼" (3 cm)
2" (5 cm)
Conduit cutout area for electrical access.
Cut out dimensions: 8 x 6½" (20 x 16.5 cm)
10" (25 cm)
Distance between gate face
and rear chassis:
1½ ± ⅛ inch (38 mm ± 3 mm)
43" (109 cm)
47" (119 cm)
minimum
2" (5 cm)
5" (13 cm)
12½" (32 cm)
NOTE: Chassis cover
adds ½" (13 mm).
Total depth with
cover = 15" (38 cm).
1¼" (3 cm)
14½" (37 cm)
Mounting bolt
locations
Nine (9) ½ x 4"
anchor bolts.
Required: A
minimum 2 bolts
fastened per
cross support.
17¾" (45 cm)
22¾" (58 cm)
8" (20 cm)
ClearanCes
Modular and DC / UPS options shown:
Post-mounted.
U-bolts mounted to Unistrut on back of cabinet.
Cabinet may also be wall-mounted with anchor bolts.
SlideDriver:
Side Access: Minimum 24 inches (61 cm)
Front Access: Allow 30 inches (76 cm)
Concrete pad extends 2 inch (5 cm)
minimum beyond side and front of gate operator
chassis’ footprint. Conduit runs between gate
operator and cabinet.
Leave enough space between cabinet and chassis to avoid pinch point
and access issues. Conduit runs below ground between the two units.
Offset 3 inches (7.6 cm) from the
surface of the support posts to
rear of SlideDriver chassis.
Cabinet:
Modular, DC / UPS options
SlideDriver
Gate panel
Fence
Drive rail
ROADWAY
Chassis base cut out for conduit
Cabinet (Modular):
Front Access: Minimum 36 inches (92 cm)
Rear Access: Allow 24 inches (61 cm)
Cabinet (DC / UPS):
Door Swing: Minimum 30 inches (76 cm)
Rear Access: Allow 24 inches (61 cm)
Front access
Door swing clearance:
Minimum
36 inches (91 cm)
Side
access
Left hand gate
OPEN
Right hand gate
OPEN
SlideDriver viewed
from the secure side
SlideDriver viewed
from the secure side
Cabinet option
For DC / UPS or Modular
options, wall or post-mount the
cabinet.
If planning a post mount,
mounting holes need to be
drilled (U-bolts, fasteners, and
unistrut are not provided).
Cabinet may also be wallmounted with anchor bolts.
NOTE: The mounting holes on
the top and bottom anges are
5/16-inch diameter. Mounting
posts and hardware are not
provided by HySecurity.
13½”
(34 cm)
1⅞”
(5 cm)
1¼”
(3 cm)
Door clip
C/L
C/L
Flange
Flange
Unistrut
U-bolt
30¾” (78 cm)
Offset 4¾"
(12 cm)
Face of
Gate panel
and cabinet
Gate panel face
SlideDriver
Cabinet
For more information, refer to the supplemental manuals that accompany the product.
SLIDEDRIVER
Drive rail
Gate post
Gate panel
Concrete pad
Wheel covers required for
cantilevered gates: UL325
FENCE LINE
ROADWAY
Right handing
gate operator
Allow 12 to 16 inches
(30 to 41 cm)
Minimum
clearance for
cover removal:
15 inches (38 cm)
Page 5

© 2016 www.hysecurity.com SlideDriver Installation and Assembly MX3629-01 Rev. B Page 5
Set up and Assembly
unpaCk tHe slidedriver
Phillips head screws
Loosen, DO NOT remove.
Drawings NOT to Scale
1. Loosen two Phillips head screws.
NOTE: Leave sufcient overhead clearance to remove cover and open the
control box.
2. Remove the cover by tilting it slightly toward you while lifting it
up off the top of the operator.
NOTE: Use the supplied keys to release the lock if your model includes that
option.
3. Remove the foam pieces around the motor and the red spring.
4. Remove the ship with kit plastic bag.
replaCe tHe vent plug
WARNING
Obtain help before lifting or moving the
operator. SlideDriver models can weigh over
260 lbs (118 kg). Failure to comply may result
in serious injury to personnel, damage to the
equipment, or both.
1
2
3
1. Align the operator. Locate rear panel
1½-inch from the face of vertical uprights.
2. Install concrete anchors (½ x 4-inch
minimum)
3. Tighten the nuts, but leave room for
adjustments.
4. Level the operator. Shim with plastic or
aluminum to prevent corrosion.
Mark tHe anCHOr bOlt lOCatiOns
CAUTION
Replace the vent plug with the breather cap before operating the SlideDriver.
Air pressure vents through the cap instead of through the pump seal and helps
prevent rust by allowing
condensation to evaporate. If you do not replace the vent
plug with the breather cap, you will void the Limited Warranty.
After you remove the operator, cut out the
anchor bolt template on the side of the
SlideDriver box.
Use the template to mark the location of the
anchor bolts that will secure the SlideDriver to
the concrete pad.
CAUTION
Review the dimensions on page 1. Proper alignment of
the SlideDriver operator and its drive rail is critical.
FACE OF GATE FACE OF GATE
CONDUIT
CUT-OUT
Gate
Side
-Puerta
Lado-
Gate
Side
-Puerta
Lado-
-CONDUCTO
CORTAR-
CAUTION
Do NOT fully tighten the anchor bolts until after the drive rail is installed. See page 4.
4
install tHe CHassis
install tHe eartH grOund
5
DANGER
The potential for lightning discharge exists with all gates, fences and
gate operators. National Electric Code (NEC) - Article 250 requires a
separate earth ground in addition to the required equipment ground.
The gate operator must be grounded per NEC, NFPA 780
and local building standards and codes.
CAUTION
DO NOT pick the operator up by its sides or
tip it. Hydraulic uid can leak or damage to the
chassis may occur and void the Warranty.
26-inches
(66 cm)
14½-inches (37 cm)
1½-inch
(38 mm)
Level
Optional base riser
Side view
Anchor bolts (½ x 4-inch, min.)
Minimum 4 anchor bolts
(6 bolts required for heavy
gates: 80 and 200 operators.)
Lock (optional)
Cover
Breather cap
Quick
disconnects
(QDs)
Option:
SlideDriver Base Riser (most models)
Inches: 26W x 12H x 14½D
Centimeters: 66W x 30H x 37D
Option:
SlideDriver Base Riser (200 series): Same H & D, with 47"W (109 cm)
Ground lug
Limit
switch
Toggle handle
Earth ground
Consult local
codes for
proper depth
Grade level
Cut away view
Conduit
SlideDriver chassis
Control Box
3 ft
(91 cm)
Maximum
distance
Concrete pad
Rear panel
Minimum depth 16" (41 cm)
or frost line. See local codes.
Concrete pad
conduit, not shown
Page 6

© 2016 www.hysecurity.com SlideDriver Installation and Assembly MX3629-01 Rev. B Page 6
Assemble, Align & Install Drive Rail
Drawings NOT to Scale
2
1
Connect sections of the drive rail.
Use roll pins to join the sections of the drive rail. To prevent the pins
from moving during assembly, crimp the pin channels with a pliers.
Secure the toggle handle.
Disengage the drive wheels by pulling on the toggle handle.
Wire the toggle handle clamp open so the wheel doesn't fall closed
when you insert the drive rail through the chassis
WARNING
Be careful where you place your hands and ngers when you disengage the
drive wheels. The compression spring at the base of the clamp causes the
handle to drop suddenly which can cause serious injury.
Standard grooved
drive rail
Optional anged drive rail used for
solenoid lock applications.
AdvanceDrive™
and XtremeDrive™
wheels shown.
Use wire to secure
the toggle handle so
the clamp remains
open and the drive
wheel doesn't fall
closed while you
insert the drive rail.
Drive rail
Limit ramp
Limit switch (interior of chassis)
CAUTION
When sliding the drive rail through the cut out in the
chassis, DO NOT damage the limit switches. Damage
to the limit switches during installation is not covered
by the Warranty.
U bolt securing the
drive rail.
Compression spring controls
drive wheel gripping force
Clamped
Unclamped
Handle Position
3
Clamp Drive Rail to Gate
Identify the gate structure nearest the operator and
temporarily clamp the drive rail onto the gate.
4
Set a String Line, Align Drive Rail and Insert Shims,
if needed.
For reference, run a string line along the entire length of the
drive rail. Compare the edge of the drive rail with the string
line. Place shims between the upright support structure and
drive rail to keep the drive rail straight and level.
String line
Gate edge
Limit ramp
SlideDriver
U bolts fasten drive
rail to support posts
5
Align and Secure Drive Rail
Align the top of the drive rail with the label on each side of the operator's chassis. If necessary, loosen the C-clamps and move the
drive rail up or down along the length of the gate. Drill holes through the drive rail ange and insert U bolts from the far side.
Install U bolts along the upright support structure, as needed. HySecurity recommends that you attach to a minimum of 3 supports per
length of drive rail. Keep drive rail spans straight and level. Distance between attachment points should be less than 10 feet (3 m).
Remove the C clamps when the drive rail is fully secure.
Manually, open and close the gate.
Check and adjust the height of the drive rail.
Label
Drive rail
Triangle tool
rafter square
NOTE: DO NOT use through bolts or selftapping screws because you won't be able to
adjust the drive rail at a later date.
6
Install additional U bolts, as necessary.
NOTE: Make sure the drive wheel will be centered on the drive rail
when placed under load.
With the drive rail secure, tighten the chassis
anchor bolts.
NOTE: Over its entire length, the drive rail must
be level and aligned with the label on the chassis to
within ± ¼-inch (6 mm).
When clamped, the
red spring should
be compressed to
a height of 2-inches
(5 cm). Adjust the
nut at the base of
the spring to set the
proper tension.
Nut adjusts tension
CAUTION
When drive rail and limit
ramps (see page 5) are
installed, the drive rail must
be aligned and the operator's
chassis secure before clamping
the drive wheels and adjusting
the compression spring.
CAUTION
CONCRETE PAD
Grooved drive rail
NOTE: Drill holes to increase
traction where drive wheels
rst engage the drive rail.
Other traction considerations:
HySecurity XtremeDrive™
Wheel System
Gate face*
Use shims as needed.
*NOTE: The best material to
use for shims is non-corrosive
materials, such as aluminum or
heavy-duty plastic.
Support post
Wheel cover
Height from top of drive rail to bottom of
gate operator. All models: 9¼” (23.5 cm)
NOTE: if using XtremeDrive™ wheels
mount drive rail ¼” to ½” (6 to 13 mm)
higher.
All models
(except SD 200):
26” (66 cm)
SlideDriver 200:
33½” (85 cm)
Distance: 1½" (38 mm)
Wheel cover
Roller guide and
bracket support
All models: 9¼” (23.5 cm)
Exceptions: SD 80 & SD 200
using XtremeDrive™ wheels,
9½” to 9¾” (23.5 to 25 cm)
XtremeDrive™
Page 7

© 2016 www.hysecurity.com SlideDriver Installation and Assembly MX3629-01 Rev. B Page 7
Install and Secure Limit Ramps
Drawings NOT to Scale
2
1
Determine Limit Ramp Location.
Position the gate fully-closed and mark the drive rail.
NOTE: The toggle handle needs to be in the "unclamped" position. See page 4.
Move the gate 6-inches (15 cm) from the fully closed position.
Determine where to place the Standard Limit Ramp so it will trip the limit switch
approximately 6-inches (15cm) before the exact spot where you want the gate to
stop (2-inches from the drive wheel).
4
3
Mark mounting holes.
Measure and mark the mounting locations for the truss head screws 1-inch (2.5 cm)
from the edge of the drive rail.
Drill one
⅜-inch (9.5 mm) mounting hole.
Place one nut in the limit ramp channel. Secure the Standard Limit Ramp by
inserting the screw through the drive rail and into nut. Finger-tighten.
6
5
Open and close the gate to check the position of the Standard Limit Ramp.
Make adjustments as necessary and drill the remaining mounting hole about
4-inches (10 cm) from the rst.
Secure the Standard Stop Limit Ramp to the drive rail with the fasteners provided.
NOTE: If you are installing a SlideDriver 50VF-series gate operator, align the angled edge of the Slow Down Limit Ramp
(MX3043 kit) with the edge of the Standard Limit Ramp. Secure it and the remaining limit ramps to the drive rail.
Before installing the limit ramps, review the illustrations on this page.
7
Adjust the limit switches.
To position the limit switch, loosen the height adjusting screw.
Move the limit switch arm up or down so the top of the roller is about ⅜-inch (9.5mm) from the
base of the drive rail.
Secure the limit switch arm by tightening the height adjusting screw. Perform the same steps on
the opposite end of the drive rail.
NOTE: Only the limit ramp should trigger the limit switch.
The Standard Limit Ramp is positioned on the drive rail so it will make contact with the limit switch and stop approximately 2-inches (5 cm)
from the drive wheel.
• Limit ramps are attached to the underside of the drive rail when the gate is fully open and fully closed.
Limit ramps install to both ends of the drive rail.
• Two truss head screws secure each limit ramp to the drive rail. The screws are spaced about 4-inches (10 cm) apart.
Drive Rail
Standard Stop
Limit Ramp
Nut
Truss head ⅜-inch
(9.5 mm) screws.
Must be fully tightened
and ush before
adjusting
Limit Switches.
CAUTION
Be sure to securely fasten all limit
ramps to the underside of the drive rail
at both ends (gate fully open and fully
closed). Failure to do so will void the
Warranty.
Align one angled edge of the Slow Down Limit Ramp with
the edge of the Standard Limit Ramp.
Make sure its opposite angled edge nests against the
remaining limit ramp.
Order 4 Limit Ramp kits for 50VF gate operators: MX3043
Slow down
Limit Ramp
Slow down
Limit Ramp
Standard Stop Limit Ramp
Nuts inside limit ramps
SlideDriver50VF models add Slow Down Limit Ramps
8
Clamp drive wheels.
Refer to page 6 for WARNING. Place toggle
handle in clamped (load) position.
Toggle Handle Assembly
Compression spring set at
2-inches (5 cm) when drive
wheels are clamped on
drive rail.
Truss head
screws ush on
drive rail
Edge of Drive Rail End of Drive Rail
Articulating arm
(Tripped position)
Limit Ramp
enters chassis cutout
Drive Wheel
Drive Wheel
2-inches (5 cm)
Limit ramp stopped position
1-inch (2.5 cm)
Standard Stop
Limit Ramp
Height adjusting screw
Articulating arm
(Normal position)
Roller
4-inches (10 cm)
Spacing between screws (approximate)
U bolt and fasteners
⅜-inch (9.5mm)
Base of drive rail
Limit Switch
inside chassis
Angled edge of
Limit Ramp faces
chassis cutout
and drive wheels
Roller
Chassis
Limit
Ramp
Drive Rail
Toggle handle
Stop Limit Ramp on all SlideDriver and 50VF-series Models
Page 8

© 2016 www.hysecurity.com SlideDriver Installation and Assembly MX3629-01 Rev. B Page 8
Wiring AC Power
Power connections
Size the primary wires, appropriately. Consider the voltage, horsepower,
and length of the wire run from the main power panel. The electrical
wiring must be properly routed through conduit that enters the
gate operator through its base cutout and feeds through one of the
knockouts in the control box.
Verify you have the proper input voltage and conversion of voltage taps
at the motor and transformer. Measure the line voltage with a volt meter
to distinguish between 208V and 240V branch circuits or between 390V
and 480V branch circuits.
Check that the primary tap on the control transformer matches the line
voltage and frequency that you are connecting to the operator. The
site voltage and operator set voltage must be the same and match
the voltage on the operator motor's nameplate. A label on top of the
transformer identies the various voltage taps. See illustration.
1. Connect to Power: Three pig tails and a ground are available
for connection to a 1 Phase (1Ø) and 3 Phase (3Ø) power sources.
2. Connect AC Power: Wire nut the incoming power wires to
their appropriate pig tails on the control transformer. Attach the
ground wire to the chassis.
CAUTION
Wiring of gate operators must conform to NFPA and NEC standards and comply with all local
codes. When the installation is compliant and complete, turn on AC power at the source and at
the control box. For Variable Frequency (VF) operators, make sure the connection wires match
the voltage found on the operator’s nameplate.
DANGER
Turn OFF AC power at the source (circuit breaker panel) before accessing the
wires in the gate operator. Follow facility Lock Out/Tag Out procedures. Make
sure all power switches are in the OFF position. Follow all electrical code standards
and regulations.
Site Considerations for AC Power
HySecurity gate operators are intended for permanent installation. Make sure to
review all the information in this manual and prepare the site with the following
considerations:
• Make sure all electrical wiring is properly routed via conduits.
• Check the distance of the wire run from the main panel to the gate
operator. Make sure the wire size of the branch circuit supplying power
to the gate operator is large enough to avoid excess voltage drop. See
the wire size charts below.
• Make sure the available power source matches the electrical
requirements specied on the voltage nameplate.
WARNING
Each gate operator is built to run on a specic line power voltage and phase.
Failure to ensure that the source voltage, phase and frequency match as specied
on the equipment may result in severe damage to the equipment. See "Changing
Electrical Connections in the Field" on page 9.
• Make sure a 20A circuit (minimum) protected with a 20A Inverse Time
Breaker is provided for all AC power connections.
• Verify that the operator is electrically grounded per NFPA 780 and NEC
Article 250, and local codes. Refer to the illustration on page 3.
NOTE: Refer to the SlideDriver Programming and Operations manual for Safety, programming,
troubleshooting, maintenance and general information. Note that DC operators do not have a
control transformer. For DC gate operators, refer to the DC Power Supply with HyCharger
supplemental manual provided with the DC Power Supply cabinet.
Drawings NOT to Scale
Blue - 480 VAC
Orange - 240 VAC
Red - 208 VAC
Black - Common
White - 120 VAC*
CAUTION
* Variable Frequency (VF) or 2 hp gate operators:
Never connect to the white 120V wire. Make sure the
connection wires match the voltage found on the operator’s nameplate.
Control Transformer
SD50VF - series
Turning the Power Switch ON
The AC power disconnect switch
(ON/OFF switch) is located on the
same enclosure (control box) where
the electrical components, Smart
Touch Controller, transformer, power
module, etc., are found.
When power is turned ON, a green
status light (D4) on the Smart Touch
Controller blinks. The status light
appears below the coin battery
and indicates that the processor is
receiving power.
Green LED ashes indicating
processor is receiving power.
DO NOT USE
PHOTO EYE
OPEN DIRECTION
DO NOT USE
PHOTO EYE
CLOSE DIRECTION
DO NOT USE
CHARGER
AC LOSS
LOCK INTERLOCK
EMERG CLOSE
FIRE DEPT OPEN
16
17
18
19
20
21
22
23
24
Smart Touch Controller
LIMIT DUAL GATE
RADIO OPTIONS
VEHICLE DETECTOR
SHADOW
RESET
WIEGAND
HySecurity
MX000585
VERSION
S/N
RS232
DISPLAY
VEHICLE DETECTOR
COM COMA B
RPM
COMOPEN EDGE+24V +24V
STATUS
LED
Reset switch
ON/OFF switch
Input taps
SlideDriver Wire Size & Distance Run - 115V 1Ø
hp ½ ¾ 1 2
Amps 10 11.6 14.4 27.2
12 90 (27m) 75 (23m) 60 (18m) 30 (9m)
10 140 (43m) 120 (37m) 100 (30m) 50 (15m)
8 220 (67m) 190 (58m) 155 (47m) 80 (24m)
6 350 (107m) 300 (91m) 245 (75m) 130 (40m)
4 555 (169m) 480 (146m) 385 (117m) 205 (62m)
2 890 (271m) 765 (233m) 620 (189m) 330 (101m)
SlideDriver Wire Size & Distance Run – 208V 1Ø
½ ¾ 1 2 3
5.5 6.1 7.6 14.2 16.2
290 (88m) 260 (79m) 205 (62m) 110 (33m) 100 (30m)
460 (140m) 415 (126m) 330 (101m) 175 (53m) 155 (47m)
725 (221m) 650 (198m) 525 (160m) 280 (85m) 245 (74m)
1150 (350m) 1040 (317m) 835 (254m) 445 (135m) 390 (119m)
1825 (556m) 1645 (501m) 1320 (402m) 710 (216m) 620 (189m)
2920 (890m) 2630 (801m) 2110 (643m) 1130 (344m) 1000 (305m)
SlideDriver Wire Size & Distance Run – 230V 1Ø
hp ½ ¾ 1 2 3 5
Amps 5.0 5.8 7.2 13.6 14.8 27.0
12 350 (107m) 300 (91m) 245 (75m) 130 (40m) 120 (37m) 65 (20m)
10 560 (171m) 480 (146m) 385 (117m) 205 (62m) 190 (58m) 105 (32m)
8 880 (268m) 760 (232m) 610 (186m) 325 (99m) 300 (91m) 165 (50m)
6 1400 (427m) 1120 (341m) 975 (297m) 515 (157m) 475 (145m) 260 (79m)
4 2220 (670m) 1915 (584m) 1550 (472m) 815 (248m) 750 (229m) 410 (125m)
2 3550 (1082m) 3080 (939m) 2465 (751m) 1305 (398m) 1200 (366m) 650 (198m)
Wire Gauge
Wire Gauge
Wire Size Charts
The maximum distance shown for
each wire gauge run is from the
operator to the AC power source
panel box that has adequate capacity
to support the motor load. The
values are for one operator, with no
other loads applied to the branch
circuit. Always, avoid placing more
than one operator to a circuit. If,
for any reason, more than one operator is connected, reduce the
maximum allowed wire run distance by half.
Make sure the proper wire gauge is being used. The charts here list
the maximum allowable wire run from the power source to a single
phase SlideDriver gate operator.
Wiring charts for 3Ø and the SlideDriver 50VF-series are found in the
SlideDriver Programming and Operations Manual, D0559.
NOTE: Distance shown in U.S. Standard “feet.” Metric equivalents are shown in
parentheses.
Distance
Distance
All (Excluding SD50VF)
Page 9

© 2016 www.hysecurity.com SlideDriver Installation and Assembly MX3629-01 Rev. B Page 9
Complete the Installation
Left Handing: Swapping Hydraulic Hose Positions
Initial Setup: Menu Mode
Drawings NOT to Scale
Changing Electrical Connections in the Field
CAUTION
For in-eld conversions, the NEC requires that the voltage label on the motor be changed to match the new
conguration. Contact HySecurity for a replacement label.
To reconnect the electric motor and the 24V control transformer, refer to the motor connection
diagram found either on the motor's nameplate or inside the motor connection box. Be sure to
read the WARNINGS below if planning to convert from 1Ø to 3Ø, or vice versa. The electric motor
will need to be replaced.
WARNING
In-Field, Variable Frequency Drive Connections: SlideDriver operators are eld re-congurable for 1Ø or 3Ø,
208/230VAC input power without changing the VFD. However, if reconguring from 208/230VAC to 460/480VAC
the VFD Motor Controller in a 208/230VAC unit must be replaced with a VFD Motor Controller manufactured for
the higher (460/480VAC) voltage input. Any electrical damage occurring to the operator will not be covered by
the Warranty.
WARNING
SlideDriver 50VF-series and all 2 hp operators CANNOT be connected to 115/120VAC, 1Ø power or 575V, 3Ø
power. If any attempts are made to do so, serious injury and possible electrical shock may result. Any electrical
damage occurring to the operator will not be covered by the Warranty.
UC 2
USAGE CLASS
HYSECURITY
GATE STOPPED
SH R (RIGHT)
GATE HANDING
When the SlideDriver is installed, power connections made, and the operator turned ON, a setup
menu appears. The gate will not move and the controls will not function until the prompts have
been answered. The prompts include:
• Usage Class. Set the usage class to I, II, III, IV depending on the site.
Four different vehicular usage classes are dened by UL 325.
Information about the classes can be found in the safety section of the SlideDriver
Programming and Operations Manual, online through DASMA Technical Data Sheets
www.dasma.com or UL 325 gate safety standards www.ul.com
• Set Handing. SH 0 = gate disabled, SH L = Left hand, SH R = Right hand
Gate handing is determined by viewing the gate opening from the secure side. If the gate
opens to the left, the gate must be set for left handing.
NOTE: All SlideDrivers are set at the factory for right handing. If the gate has left handing, you
must swap the position of the hydraulic hoses. See the illustration this page.
Keypad Navigation
To navigate within Menu mode, use the following chart:
Menu Mode Navigational Buttons
To edit the Menu To navigate through
the selections
To choose what is
on the display
To navigate between
menus
Press Select
Two left characters blink
indicating the display is
ready to accept a menu
change.
Press Next or Previous
Continue pressing Next to
view all selections
Press Select
Blinking characters
become static
Press Next or Previous
Advance = press Next
Previous = press Previous
For More Information
Brake valve adjustment is described on the yellow tag (MX001853) wire tied to the gate operator.
Review the SlideDriver Programming and Operations Manual, D0559 for information regarding
gate operator programming congurations, user relays, troubleshooting, safety considerations,
maintenance, and other requirements.
Replace red vent plug
with breather cap
Concrete pad
Ground rod
Consult local codes for
proper depth
Cut-away view
Grade level
SlideDriver
3 ft
(91.4cm)
Maximum
distance
Operator is shipped
hydraulically congured for
“right hand” operation.
Swap hydraulic hoses for left
handing operators.
Left hand gate
OPEN
Right hand gate
OPEN
SlideDriver viewed
from the secure side
Page 10

800-321-9947 www.hysecurity.com
MX3629-01 Rev. B
SlideDriver 50VF2/3
 Loading...