

Page 1
1
USE,CARE & INSTALLATION MANUAL
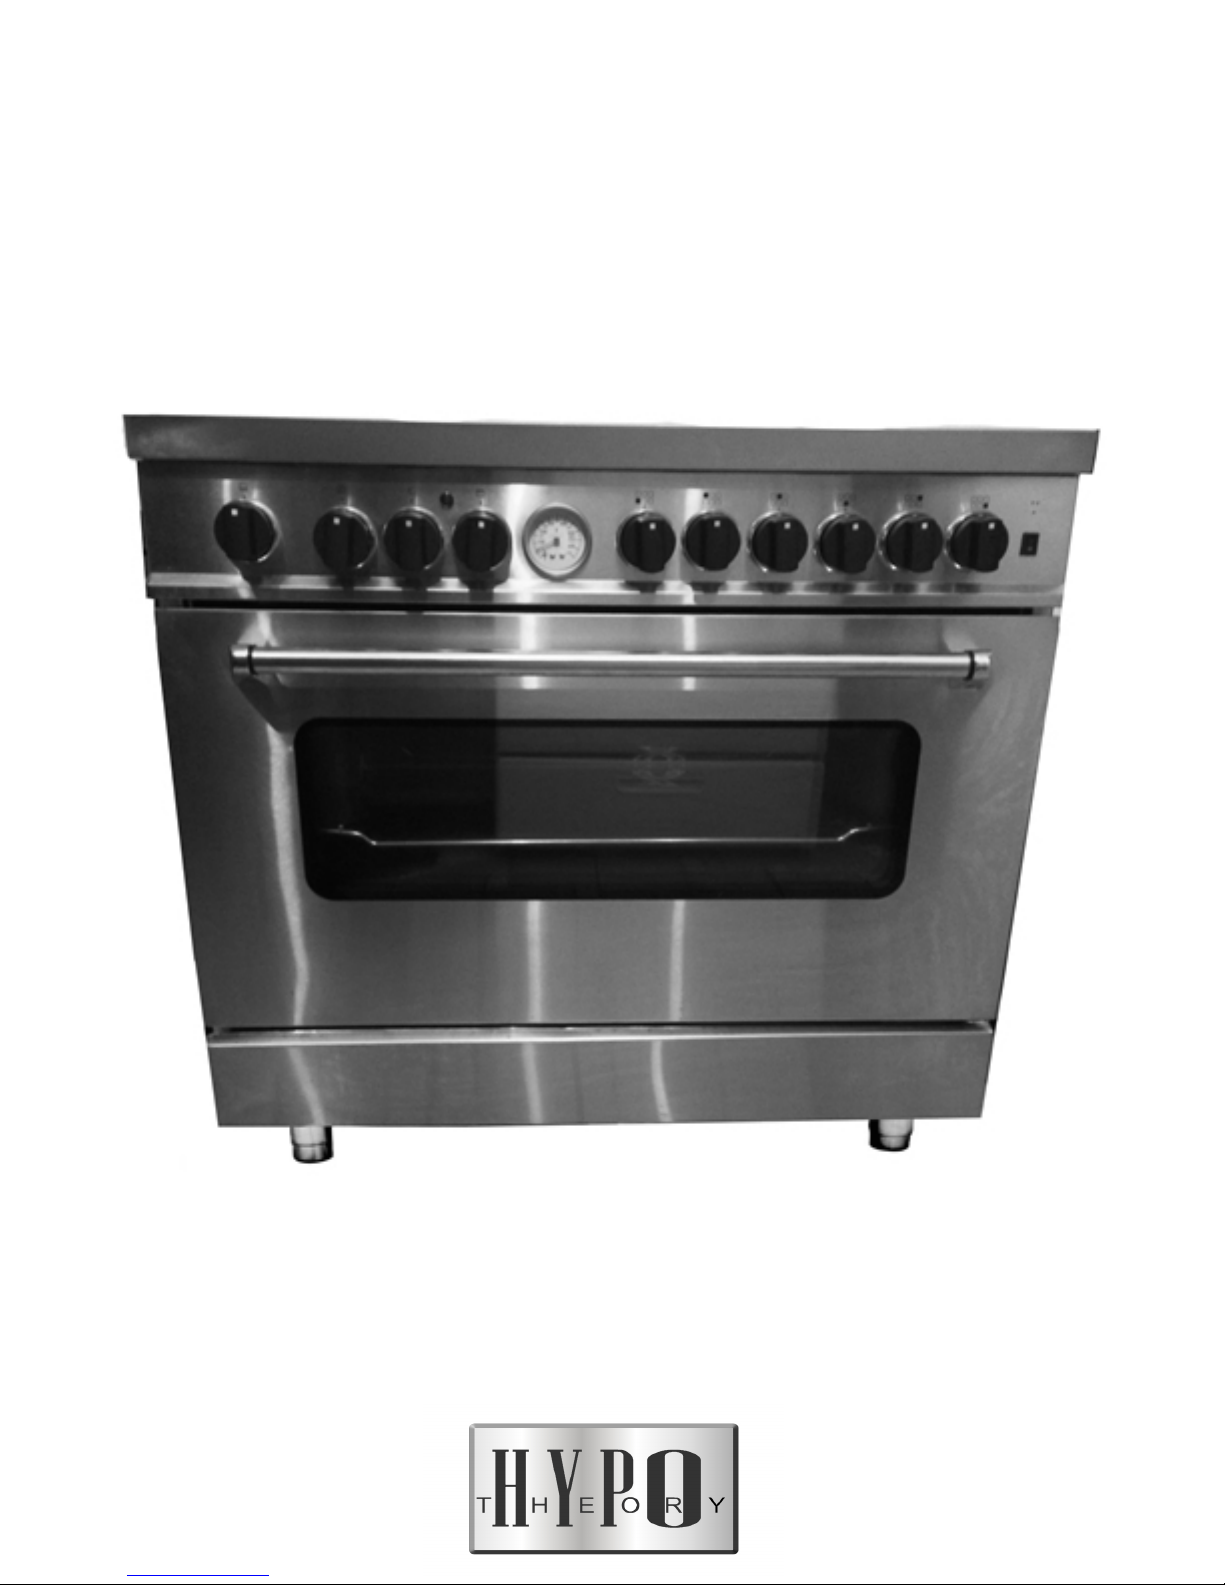
HypoTheory Affluent Series: Pro-Style Ranges
HTDF366NG/HTDF366LP
Page 2

2
HypoTheory Affluent Series: Pro-Style Ranges
www.hypotheory.com
Customer Care
The model and serial number are printed on
the back of the product or the product box.
For warranty purposes, you will also need
the date of installation and name of your
licensed plumber or electrician. Record this
information below for future reference.
If your product ever needs repairs after
product installation, be sure to use a
HypoTheory experienced service provider
recommended by our customer care center
by calling 800-928-4693 x 2
Important Note: To ensure this product is
installed and operated as safely and
efficiently as possible, take note of the
following types of highlighted information
throughout this guide.
Please fill out the service information form
on the right side of this page.
IMPORTANT NOTE highlights information
that is especially important.
WARNING states a hazard that may cause
serious injury or death if precautions are not
followed.
CAUTION indicates a situation where minor
injury or product damage may occur if
instructions are not followed.
Table of Contents
Registration Information
Serial Number
Date of Purchase
Installer Name
Installer Number
Authorized Dealer
Dealer Number
Model Number
Safety Precautions
Pages 4-7
Specif ications
Pages 17-23
Installation
Pages 9-16
List of parts &
accessories included.
Pages 31
Care & Cleaning
Page 8
Wiring Diagram
Page 30
Troubleshooting
Pages 24-29
Warranty Information
Pages 32-25
Page 3

3
HypoTheory Affluent Series: Pro-Style Ranges
www.hypotheory.com
Thank You
Thank you for your purchase. We look
forward to being part of your estate for
decades! With the proper care and
maintenance our appliances have a
reputation of lasting a very long time. Our
customer's satisfaction & support are what
allow us to instill the legacy our pioneers
have set. To offer longevity, beauty &
quality all in one, and ensure we truly do
stay simply above the rest.
HypoTheory was established in 1960, in
Wandsworth, London by Hymsley Politz,
Diana Politz & Theodore Waldorf . Their
once successful 3 decade old restaurant
chains were not progressing; due to slow
service resulting from outdated cooking
appliances. They were in need of new
kitchen appliances to compete with they're
competitors & stay in business. Mr. Politz
put a call into a well known steel factory in
Murano, Italy. They required the steel
factory to design all of their appliances by
hand and requested that they only obtain
the best of internal and external
components. Several months later some of
the most extravagant & energy efficient;
high end quality sets of ovens & ranges
arrived.
With your purchase, you receive one of the
strongest two year warranties in the
appliance industry with the flexibility of
extending for an additional five years for an
nominal fee. Take a moment to read the full
warranty statement. It’s also important to
register your HypoTheory appliance in the
unlikely event that service becomes
necessary during the warranty period, and
a proof of purchase(invoice) record in case
of a claim will be required. You may register
by doing the following:
Register online at hypotheory.com by
clicking “Product registration”.
As a HypoTheory owner, you can count on
royal treatment & support around the clock.
Our customer care center is available 24
hours a day, seven days a week and
staffed by knowledgeable product experts
at our sales & customer service center in
Manhattan, New York.
We are confident this guide will answer
your questions about the features,
operation, and maintenance of your
HypoTheory appliance, but if you have
additional questions, please contact us at
800-928-4693 or visit us online at
hypotheory.com.
Page 4

4
Safety Precautions/Instructions
www.hypotheory.com
GENERAL SAFETY REQUIREMENTS
Please read all safety instructions before
using this appliance.
●
Do not clean the range gasket,
because rubbing or moving the
gasket may eliminate the required
tight door seal.
●
Do not wear loose or hanging apparel
while using the range.
●
Do not touch heating elements or
interior surfaces of the range. Heating
elements may be hot even though
they are dark in color. Interiors of the
range become hot enough to cause
burns. During and after use, do not
touch, or let clothing or other
flammable materials come in contact
with the heating elements or interior
surfaces of the range until they have
had sufficient time to cool. Other
surfaces of the range may become
hot enough to cause burns. These
surfaces include the range door,
window, range vent and the surface
near the range vent.
●
Do not store items of interest to
children above the range, as they
could climb on the appliance to reach
items and be injured.
●
After removing the appliance from its
packaging, make sure your appliance
has all of its parts, and is in good
order.
●
The packing material (plastic bags,
poly foam,nails,metal strips,etc.) must
be moved away from the reach of
children.
●
Do not attempt to alter the technical
features of the appliance without the
permission of HypoTheory
Corporation- or your warranty may be
voided.
●
Make sure there is a ventilation
system available to duct/remove the
moist air/cooking debris away. Any
name brand ventilation system could
be compatible, it does not have to
bear the HypoTheory logo, the only
requirement is the ventilation motor
produces a minimum of 300 CFM.
You may review the diagram in the
manual for distance requirements.
●
Do not touch the appliance with
wet/damp hands or feet.
●
Do not allow the appliance to be
operated by children/disabled without
supervision.
Page 5

5
GENERAL SAFETY REQUIREMENTS
Please read all safety instructions before
using this appliance.
●
Use the range only for cooking tasks
expected of a residential/home range
as outlined in this guide. Not for
commercial purposes.
●
Before using the self-clean feature,
remove broiler grill and pan, range
racks, range rack guides and any
other utensils.
●
Do not use commercial range
cleaners or range liner protective
coatings, such as aluminum foil, on
any part of the range.
●
Do not use water on grease fires.
Smother any flames with a lid, baking
sheet or flat tray. Flaming grease can
be extinguished with baking soda or a
multipurpose chemical or foam
extinguisher.
●
Do not heat unopened food
containers as they could burst and
cause injury.
●
Do not store combustible, flammable
or explosive materials in the range or
adjacent cabinets.
●
Do not place cookware on the floor of
the range.
●
Do not repair or replace any part of
the range unless specifically
recommended in literature
accompany- ing this appliance. All
service should be referred to Wolf
factory certified service.
●
Do not use range for warming or
heating a room.
●
Do not leave children alone or
unattended in the area where the
range is in use. Never allow children
to sit or stand on any part of the
range. Do not let children play with
the range.
●
Do not use abrasive or caustic
cleaners or deter- gents on this
appliance as these may cause
permanent damage. Do not use
aerosol cleaners as these may be
flammable or cause corrosion of
metal parts.
●
The size of a flame does not
necessarily determine the burner
input, it is the proper distribution of
the flame, that dictates the BTU. That
is why it is important gas/propane
pressures are within the average 6” or
7” water column for natural gas, and
11” water column for propane.
Safety Precautions/Instructions
www.hypotheory.com
Page 6

6
GENERAL SAFETY REQUIREMENTS
Please read all safety instructions before
using this appliance.
●
Ensure proper installation and
servicing to avoid voiding the product
warranty for improper installation.
This appliance must be properly
installed and grounded by a licensed
plumber or licensed electrician.
●
This appliance must be
repaired/serviced by a qualified
service technician- available through
our nationwide service networks of
professionals. Please call technical
support at 800-928-4693 x 2 if you
are in need of a repair after the
product has been properly installed
by a licensed plumber or electrician.
●
Read this use & care guide carefully
before using your new range to
reduce the risk of fire, electric shock
or injury.
●
Warranty service must be performed
by a qualified licensed appliance
technician: that has had experience
working on HypoTheory appliances.
●
Have the installer show you where
the fuse or electrical box is located in
your home. Learn how and where to
shut off the electricity to the range.
●
Always properly clean and maintain
the range as recommended in this
guide. Clean only those parts listed in
this guide. Do not use any rough
object (Brillo pad, etc. to clean
delicate metals to avoid damage).
●
Do not place cookware on range floor
or use aluminum foil or other material
to line the range floor or side walls.
Failure to adhere to this notice will
damage the range and will void your
warranty.
●
Always use dry pot holders when
removing pans from the range. Wet or
damp pot holders can cause steam
burns. Do not let pot holders touch
hot heating elements. Do not use a
towel or other bulky cloth.
●
Be sure that the range cool air intake
(located above the door) and range
exhaust vent (located below the door)
are unobstructed at all times.
●
Position range racks in desired
locations when range is cool. If a rack
must be repositioned after the range
is already hot, be certain pot holder
does not contact a hot heating
element in the range.
Safety Precautions/Instructions
www.hypotheory.com
Page 7

7
GENERAL SAFETY REQUIREMENTS
Please read all safety instructions before
using this appliance.
●
The appliance must be solely used for
cooking food and not for any other
purpose, such as heating a room,etc.
Is dangerous and prohibited, and will
void all warranties.
●
Disconnect the appliance from the
electrical supply before carrying out
any cleaning or maintenance.
●
Never try to remove the plug from the
main supply socket by pulling the
cable. You should turn off the
breaker/fuse first.
●
Do not allow children to approach the
range while it is in use, to avoid
burning.
●
If the appliance malfunctions or does
not work properly, switch it off and do
not use it, until it is repaired. All
repairs should be performed by a
licensed appliance technician that has
or must be approved by HypoTheory
Corporation. All spare parts will be
provided at cost unless under
warranty. You may contact our
technical support department to order
parts or obtain service at 800-9284693 x 2.
●
After using the appliance you must
turn all of the knobs to the OFF
position.
●
Ensure a licensed plumber checks
the gas regulation and ensures the
burner flames are consistent and at
their optimal performance.
●
Please read the trouble shooting
section of your manual before you
call. If this is a pre-product
installation, please ensure your
licensed plumber or electrician
contacts technical support during
normal business hours, it is against
company policy to consult consumers
on installation questions, because of
liability (sorry).
●
All HypoTheory gas appliances must
be installed by a licensed plumber. All
HypoTheory 220 volt based electrical
appliances/ or appliances that require
wiring configuration must be installed
by a licensed electrician. All dual fuel
appliances must be installed by a
licensed plumber, and a licensed
electrician. At the purchaser's
expense.
●
Please ensure the range legs are
secure.
●
The range cleaning function should
last no longer than 4 hours.
Safety Precautions/Instructions
www.hypotheory.com
Page 8

8
Care & Cleaning Instructions
www.hypotheory.com
How To Clean Your Range- prior to the
self-clean cycle (recommended not
required).
Please read all cleaning instructions before
using this appliance.
Instructions
●
Remove the oven racks: Remove
your oven racks, and anything else
you have inside the oven. Distribute
aside.
●
Mix baking soda: In a bowl, mix a 1/2
cup of baking soda with a few
tablespoons of water. Adjust the ratio
of both as needed until you have a
spreadable paste.
●
Coat your oven, cast iron pan
supports, griddle & all other cast iron
accessories: Spread the paste all
over the interior surfaces of your
oven, steering clear of the heating
elements, lamps ,fans, motor shafts,
or anything else that the paste can
get stuck inside of and be hard to get
out. The baking soda will turn a
brownish color as you rub it in; it also
might be chunkier in some places
than others.
●
Let it sit for six hours: Allow the
baking soda mixture to rest for at
least 6 hours, or overnight.
●
Spray vinegar: Put a small portion of
vinegar in a spray bottle and spritz
wherever the baking soda residue in
your oven was applied. The vinegar
will react with the baking soda and
gently foam.
●
Clean out the oven & clean the
accessories: After 12 hours or
overnight, take a damp dish cloth and
wipe out as much of the dried baking
soda paste as you can. Use a plastic
or silicone spatula to help scrape off
the paste as needed.
●
Repeat the wiping cycle: Take your
damp cloth and wipe out the
remaining foamy vinegar-baking-soda
mixture. Repeat until all the baking
soda residue is gone. Add more water
or vinegar to your cloth as needed
while wiping to really get the oven
clean and shiny.Do not over-wet to
avoid damaging components.
●
Clean all stainless steel & chrome
surfaces & accessories: with a
stainless steel cleaner.
●
Begin the self-clean cycle. Please
read the instructions under the knob
conf iguration section of this manual,
prior to operating the self – clean
cycle.
Page 9

9
HTDF366 – Affluent Series Range Installation
www.hypotheory.com
The handle bar is already assembled
to the range, the instructions below
only apply to replacing the handle
bar.
Handle Bar Installation:
1.Insert the washer between the
handle and the handle latch, turn bar
by hand to tighten in place.
2.Screw in the latch screws behind
the range door wall.
Burner Assembly: The gas burner accessories are disassembled in the box.
The above diagram explains the right way- with a check mark, and the wrong
way with an “X” mark to install the parts. The best way to measure the burners
cups (ex.labeled F), is to align them next to each burner, the proper cup size
that fits will drop into the burner with ease by hand. Ensure all of the burners
lids (ex. Labeled C,A or B) are in their correct position. The cup nor the lid
should be removed or installed while the oven is on or in operation! Regularly
check the ignition pin labeled S, and do not trigger the ignition to light until the
burner lids and cups are correctly assembled to avoid damaging the unit.
Page 10
10
●
Gas Line Assembly: All gas
installation must be done by a
licensed plumber. The gas line is
located in the rear of the oven and
does not protrude out to allow the
oven to rest flush against the wall.
The gas line is a ½ inch threaded gas
pipe, there is a sample quick inlet
fitting that must be unscrewed &
replaced with a ½ inch female flare
fitting. Then a gas hose or a gas pipe
must be connected to the female
flare. (Accessories not included, can
be purchased in a home improvement
store/plumbing supply store)
HTDF366 – Affluent Series Range Installation
www.hypotheory.com
●
Converting to Natural Gas or
Liquid Propane.
1. Turn the knob to the maximum
position, and ensure the burner flame
is on.
2. Take off the knob by pulling
forward carefully, do not lose parts,
and use a screw driver to rotate the
screw in each gas valve.
3. Adjust the screw until the flame is
at the preferred height.
4. Please follow the instructions on
the next page to change the nozzles.
The nozzles must be changed first.
Page 11
11
HTDF366 – Affluent Series Range Installation
www.hypotheory.com
Propane LP Chart
Code Specification Related Burner
HT.02.07.00013 Ø0.91 #1 Triple Ring Burner 1
HT.02.07.00014 Ø0.75 #2 Rapid Burner 1
HT.02.07.00015 Ø0.6 #3 Semi-rapid Burner 3
HT.02.07.00016 Ø0.48 #4 Auxiliary/Simmer Burner 1
HT.03.13.00009 Ø0.8 Burner inside the Oven 1
Natural Gas NG Chart
Code Specification Related Burner
HT.02.07.00018 Ø1.35 #1 Triple Ring Burner 1
HT.02.07.00019 Ø1.2 #2 Rapid Burner 1
HT.02.07.00020 Ø0.97 #3 Semi-rapid Burner 3
HT.02.07.00021 Ø0.8 #4 Auxiliary 1
HT.03.13.00008 Ø1.32 Burner inside the Oven 1
Total QTY for
Each Oven
Total QTY for
Each Oven
Do not over tighten , just tighten by hand then use a socket wrench for one half turn
clockwise. Each nozzle is labeled with the specification number noted below to help
identify them. Like in the sample photo below. Reference below photo for nozzle position,
each burner type is numbered on the chart and in the diagram. Example- burner labeled 1
is also labeled #1 Triple Ring Burner in the nozzle reference sheet.
Page 12

12
HTDF366 – Affluent Series Range Installation
www.hypotheory.com
Electrical Oven Installation/Electrical Power Supply Connection: The installation,
debugging, connection & power supply on all HypoTheory 220 volt based electrical
appliances/ or appliances that require wiring configuration must be installed by a licensed
electrician. Each oven supplies a terminal that is compatible to connect to a standard 4 or
3 prong 220/240 volt range cord(sold separately). The rated power of the power supply
should be compatible with a standard 220v/60hz or 220 v/50hz system. The minimum
amp required is 35 amp per breaker (per hot wire)- that is 70 amp total. There are two
wiring configuration options shown below to power the range.
3 Wire Configuration (shown above):
The electrician can install wiring around the
screws or use a standard 3 prong range
cord connection. Please ensure the
terminal washers are resting on top of each
wire in order to conduct electricity to the
range. The two hot wires should individually
connect to the cord/wiring hot wires, the
one neutral wire should connect to the
cord/wiring neutral wire, the ground wire
should connect to the cord/wiring ground
wire. Please ensure all connections are
tight, and ensure the proper screw driver is
used, do not over tighten The
neutral/ground wire must be connected to
the service panel. If there is no ground the
strap will act as a ground shown above.
4 Wire Configuration (shown above):
The electrician can install wiring around the
screws or use a standard 4 prong range
cord connection. Please ensure the
terminal washers are resting on top of each
wire in order to conduct electricity to the
range. The two hot wires should individually
connect to the cord/wiring hot wires, the
one neutral wire should connect to the
cord/wiring neutral wire, the ground wire
should connect to the cord/wiring ground
wire. Please ensure all connections are
tight, and ensure the proper screw driver is
used, do not over tighten The
neutral/ground wire must be connected to
the service panel.
Page 13

13
HTDF366 – Affluent Series Range Installation
www.hypotheory.com
Installation of the Anti-Tip Device: This device will protect the range
from tipping forward, the anti-tip bracket must be installed. To ensure
the anti-tip bolt engages the bracket, refer to the illustration below to
determine proper placement. The size of the drill bit used is entirely
based on the application the device is being installed on
(Drywall,concrete,wood), you must consult with your range installer to
determine the proper drill bit sizes needed to drill holes with.
Step 2: Drill two 10 mm holes in the
wall, the two holes must be 60 mm
apart.
Step 3: Insert anchors into the holes, and
screw the anti-tip device in with M4x500
mm screws.(accessories included)
Step 1: The anti-tip device is
55 mm plus the height of
the bottom side of the oven
top with leg adjustments.
Step 4: Slide the range onto the anti-tip
device carefully: with assistance.
Page 14

14
HTDF366 – Affluent Series Range Installation
www.hypotheory.com
Installation of the stainless steel board enclosing the
decorating/storage/warming drawer compartment: This device will
beautify the range. It emphasizes the professional-style attribute the
range offers. The compartment can be used for storage of cooking
ware, or used as a warming drawer for already cooked foods. The
warming drawer feature can ONLY be used while the gas oven baking
feature is in use ONLY, the active gas oven will warm this region.
Please ensure the compartment is empty before the cleaning cycle is
initiated.
Step 2: Ensure all latches are connected
and the stainless steel board is balanced.
Step 1: Rest
the decorating
board into the
pre-installed
oven latches.
FYI: This is not the actual
image of the range displayed.
Some models may have hinges
some may have latches.
Page 15

15
HTDF366 – Affluent Series Range Installation
www.hypotheory.com
Installation of the Backsplash/Console/Back guard: This device
will protect the range from spills. It also offers an aesthetic value to the
range. It is an optional accessory. The size of the drill bit used is
entirely based on the application the device is being installed on
(Drywall,concrete,wood), you must consult with your range installer to
determine the proper drill bit sizes needed to drill holes with.
FYI: This is not the actual
image of the range,
The range does not have a
handle above the knobs,
only five burners nor a knob
configuration displayed,etc.
Step 1: Align screws into the backsplash &
screw holes, then tighten.(accessories
included)
FYI: The
screw holes
are located
on the rear
corner of
each side of
the range.
Step 2: Align screws under the backsplash
& screw holes, then tighten.(accessories
included)
Page 16

16
HTDF366 – Affluent Series Range Installation
www.hypotheory.com
Installation of the Range Legs & Optional Leg Shield: The four
legs must be installed to the range.The legs themselves will give the
range an estimated height of 880mm, they are adjustable and can
alter the range height approximately an inch lower or higher than
measurement indicated. The leg shield is an optional accessory and
can be used to hide the legs, if the owner did not wish to expose the
oven legs. The leg shield covers the front, left & right side of the oven.
(All accessories included).
FYI: This is how the oven will look if the
above mentioned accessories are installed.
This is not the actual image of the range.The
oven legs must be installed, however the leg
shield is optional.
Step 1: Tilt the oven- with the
help of at least two adults total,
try to lay the oven on it's side with
a thick blanket, do not set oven
on its back nor front.
Step 2: Insert the threaded
leg bolt welded to
each oven leg inside
the leg hole slots,
screw in the washer
via the inner slot by hand.
Step 3: Tilt the oven
upright - ensure the
oven is level. Rotate
the legs to adjust height.
Step 4: Insert the front of the leg shield. Step 5: Overlap the front leg shield with the
side leg shields & screw in.
Page 17

17
Knob Control Commands Part 1 of 2: for the HTDF366NG/HTDF366LP Models
●
The knob labeled 1 is for the optional/alternate bottom gas oven burner- the bottom
oven burner can be used for baking foods inside the oven, but can not be used at
the same time as the electrical oven. The gas oven baking temperatures range from
slightly under 300 Fahrenheit to slightly over 500 Fahrenheit.
●
The knob labeled 2 is an indicator light that turns on when the oven is in use.
●
The knob labeled 3 is the oven electrical oven baking element knob, you are able to
select between two baking cycles: normal or rapid heat technology
Rapid Heat Technology Icon: A unique feature offered by the electrical
oven, allows the user to rapidly bake, broil, pre-heat or self-clean the oven. The icon
is very similar to the normal bake icon in appearance, the only difference is the extra
horizontal line above the flame symbol, indicating two solid heating elements are on
at their maximum setting simultaneously.
Normal Baking Icon: Is a great feature for the everyday cook that simply needs to
use their oven for normal baking functionality.
●
The knob labeled 4 is the electrical oven temperature control knob, and it must be
turned on with the timer & the electrical oven baking element knob simultaneously,
in order for the electrical oven to work. The electrical ovens internal thermometer
sensor will automatically turn off the oven once it reaches the correct temperature
control dictated by the knob and turn back on when heat must be applied to
maintain the designated temperature, the knob ranges from 200 to 500 degrees
fahrenheit, and can attain much hotter fahrenheit settings if it is set for broil and
clean.
HTDF366 – Affluent Series Range Specifications
www.hypotheory.com
Page 18

18
Broil:The knob labeled 4 can be set to broil, however in order to adequately broil
food, the user must set the baking element to the rapid heat technology icon. The
cook must ensure the pre-broiled food are inserted in the absolute top shelve rack.
Please wait till the temperature pro-style gauge has reached the broil mark before
inserting food in the oven cavity. Please disregard the pro-style gauge if it appears
to increase or decrease slightly in temperature readings, this is normal and is due to
the convection fan temporarily blowing in the cavity.
Clean: Please ensure there are no accessories in/on the range during the cleaning
cycle. Please ensure you do not touch the oven while it is in use at all times unless it
is to turn the oven off. The knob labeled 4 can be set to clean, however in order to
properly clean, the user must set the baking element to the rapid heat technology
icon. The user must remove all pots, pans, oven accessories, etc- from the inside of
the oven. The user must wait approximately 40 minutes or until the pro-style gauge
is on or about- in-between the broil and clean mark- before declaring the start of the
cleaning cycle. The self cleaning cycle should last no less than 3 hours and no more
than 4 hours. Please disregard the pro-style temperature gauge if it appears to
increase or decrease slightly in temperature readings, this is normal and is due to
the convection fan temporarily blowing in the cavity.
●
The knob labeled 5 is the professional-style temperature gauge/thermometer. It will
accurately display the heat settings in the oven. It is perfectly normal for the gauge
to slightly decrease or increase (5% differentiation) in temperature readings during
the cooking or cleaning cycle due to the convection fan, cooling fan & oven safety
features.
●
The knob labeled 6 is the knob for the front-left burner
●
The knob labeled 7 is the knob for the back-left burner
●
The knob labeled 8 is the knob for the back-middle burner
HTDF366 – Affluent Series Range Specifications
www.hypotheory.com
Page 19

19
●
The knob labeled 9 is the knob for the front-middle burner
●
The knob labeled 10 is the knob for the back-right burner
●
The knob labeled 11 is the knob for the front-right burner
●
The knob labeled 12 is the turn-spit/rotisserie switch. Please read the How-To
Operate The Turn Spit/Rotisserie Kit section of this manual before using this
feature.
●
The knob labeled 13 is the timer control. When the timer is used during the
operation of the electrical oven it will instantly turn the electrical oven off. The timer
will also make a noise to indicate it has expired. The timer can be used as an on
switch without any timer settings by rotating the timer in the opposing direction.
Timer options normally range from 0 to 60 minutes.
HTDF366 – Affluent Series Range Specifications
www.hypotheory.com
Page 20

20
HTDF366 – Affluent Series Range Specifications
www.hypotheory.com
●
The burner labeled 3 is the semirapid burner. It is recommended that
you use cooking ware with a diameter
of no less than 16 cm and no more
than 24 cm with these 3 identical
burners. They offer a standard output
that can be compared to a
conventional ovens burner, allpurpose burners are great for the
every day cook, they can be used for
practically any application that does
not require maximum heat nor a low
heat setting.
●
The burner labeled 4 is the simmer
burner. It is recommended that you
use cooking ware with a diameter of
no less than 12 cm and no more than
24 cm. The burner offers a chef's
dream low output, great for allowing
a variety of cooking options. Simmer
burners are great for keeping your
food warm or maintaining a steady
low heat.
●
Each burner comes with an automatic
electronic igniter to light the burner's
flame, each burner has a controlling
knob to open or close the gas valve
as a safety precaution.
●
If your flame were ever to unlikely go
out; while on; the range has an
advanced flame retardant technology
that automatically turns off the knob.
●
HypoTheory does not guarantee
burner performance expectations.
Six Burner Cooking Functionality
●
The burner labeled 1 is the triple
ring burner. It is recommended that
you use cooking ware with a diameter
of no less than 26 cm and no more
than 30 cm with this burner. It is a
very high output & powerful burner,
and will quickly heat & boil.
●
The burner labeled 2 is the rapid
burner. It is recommended that you
use cooking ware with a diameter of
no less than 24 cm and no more than
28 cm with this burner. It is a very
high output all-purpose burner, that
can be used for applications that do
not require maximum heat but still
require an abundant amount.
Page 21

21
HTDF366 – Affluent Series Range Specifications
www.hypotheory.com
Burner Input Ratings Triple Ring
Burner
Rapid
Burner
Semi-Rapid
Burner
Simmer
Burner
Label 1 Label 2 Label 3 Label 4
Natural Gas 18,000 BTU 11,500 BTU 9,800 BTU 800 Low-
5,000 High
BTU
Liquid Propane 18,000 BTU 11,500 BTU 9,800 BTU 800 Low-
5,000 High
BTU
Input Ratings per Burner
Page 22

22
HTDF366 – Affluent Series Range Specifications
www.hypotheory.com
How-To Operate The Turn Spit/Rotisserie Kit: Cooking with the rotisserie kit
opens the user up to an array of additional cooking options. Please ensure you
remove all packing materials off of the rotisserie kit to avoid damage to the motorbefore operation. The kit can be removed and re-attached at anytime, or can remain
inside the oven, while other foods are being baked.
●
Put the spill tray at the bottom of the oven or directly below the rotisserie.
●
Rest the spinning element onto the spit rod, and insert the spit rod attachment into
the motor shaft hole in the rear of the interior oven wall.
●
When the cooking cycle has completed you may pull the spit rod out of the oven
cavity to retrieve food.
●
Please ensure you clean the rotisserie regularly and always ensure the spit rod and
spinning element are in perfect alignment prior to cooking. The motor shaft must
always be connected to the spit rod attachment in order for the rotisserie to operate.
Rotisserie Motor Connection
Page 23

23
HTDF366 – Affluent Series Range Specifications
www.hypotheory.com
The depth of the
range is 23.5 inches
(spill tray) or 25
inches to oven door
handle.
The inner oven is a combined 4.9 cubic foot of space with the oven cavity and storage
compartment combined.
The height of
the range is
34,5 inches
with legs.
The legs can
adjust the
oven height
from 34” to
35.25”.
Height:13”
Width:28.5 “
Depth:18”
Oven Cavity Measurement
Decorative Board Cavity
Measurement
Height:3.5”
Width:33”
Depth:19”
The width of the range
is 35.25 inches.
Page 24

24
Problem
May Be Caused By What To Do
Nothing Works
●
Appliance is not properly
connected to the power
supply.
●
The power supply
breakers are off.
●
There is a power outage.
●
Check to make sure the
power cord is connected to
the electrical outlet.
●
Turn on power at circuit
breaker or fuse box. Check
for tripped breaker or blown
fuse.
●
Contact power supply
company.
Igniters do not spark/ there
is no clicking sound.
●
Power not supplied to unit.
●
Wet or dry igniter(s).
●
The burner assembly is
not aligned properly next
to the igniter.
●
Wires loosened due to
improper handling.
●
See nothing works section.
●
Clean and dry igniter and
burner assembly according to
Care and Cleaning section.
●
Install the burner assembly to
allow the igniters to conduct.
They will not work if the
burners are not resting near
them.
●
Check for loose wiring.
No flame
●
See igniters do not spark
section.
●
Gas is turned off.
●
Gas supply is interrupted.
●
See igniters do not spark
section.
●
Clean & dry according to
care & clean section of the
manual.
●
Make sure the gas supply is
in the on position
●
Contact gas supply company.
Burner goes out at low
setting.
●
Air/gas intake holes are
obstructed.
●
Low gas pressure.
●
Only the three simmer
burners are designed to
be set low(simmer), all
other burners must be set
at their normal setting to
function. When the triple
ring is set to low only the
inner ring will light, this is
a normal occurrence.
●
Check to make sure air holes
above knobs are not blocked.
●
Contact gas company to
have pressure tested Ensure
gas pressure regulator is
installed.
●
Check to ensure you are
using the correct nozzles for
your gas type. Models ending
in LP mean propane, models
ending in NG mean natural
gas. You may need to
convert the appliance.
HTDF366 – Affluent Series Range Troubleshooting
www.hypotheory.com
Page 25

25
Problem
May Be Caused By What To Do
Flame is distorted, yellow
or very large.
●
Burner parts are dirty or
clogged.
●
Burner parts are not
properly positioned.
●
Appliance is set up to use
a different type of gas
(Natural or LP), you must
convert.
●
If you are at a very high
altitude you may need to
adjust the orifices
explained in the
converting to natural gas
or liquid propane section
of the manual.
●
Gas regulator is not
installed or faulty.
●
Clean and dry according to
Care and Cleaning section.
●
Burner parts are not properly
positioned.
●
Make sure burner is
assembled properly
explained in the installation
section of the manual.
●
Cooktop set up to use a
different type of gas (Natural
or LP). You must convert.
●
If you are an unusual altitude
you may need to adjust the
orifice/gas valve(s).
●
Please ensure a plumber has
installed this appliance.
●
Gas regulator may be
necessary (sold separately).
●
Re-adjust the gas regulator.
●
Contact your gas supply
company to verify the gas
supply pressure is 6” water
column for natural gas and
11” water column for liquid
propane. Further explained in
the technical spec section of
the manual.
Igniter continues to spark
(click) after flame ignites.
●
Burner is cold.
●
Flame distorted by air
draft.
●
Wet or dirty igniter(s).
●
Burner parts wet or dirty.
●
Burner parts not properly
positioned.
●
Power supply polarity is
reversed.
●
Burners may continue to
spark for up to 60 seconds
when cold and set to low.
●
Minimize any air drafts &
close nearby windows.
●
Clean and dry according to
Care and Cleaning section..
●
Make sure the burner is
assembled according to the
installation section.
●
Have a licensed electrician
check the electrical outlet.
HTDF366 – Affluent Series Range Troubleshooting
www.hypotheory.com
Page 26

26
Problem
May Be Caused By What To Do
The electrical oven does
not heat to the selected
temperature set on the
knob.
●
Incorrect electrical wiring
installation.
●
Check that your oven door
is completely closed.
●
Oven is being used in an
environment below room
temperature.
●
Contact the electrician that
installed the oven and ask
them to check the wiring,
please reference the wiring
diagram.
●
Attempt the baking cycle
again and see if it does the
same thing.
●
Ensure you have given the
oven an adequate amount of
time to reach the temperature
selected. Example: 10-15
minutes to reach 350
degrees Fahrenheit.
●
Ensure the oven is indoors
and not outdoors at room
temperature or higher.
The burner flame turns off
after I release the knob to
the burner.
●
Low gas pressure
●
Loose thermocouple or
solenoid magnet
●
Check the gas pressure
coming into the range.
●
Check for loose wiring.
●
Check for a loose solenoid
magnet located inside each
gas valve.
Loud noise in the back of
the oven
●
Convection fan motor
may be obstructed or
blocked.
●
Incorrect electrical wiring
installation.
●
Damage to appliance
due to mishandling.
●
Improperly installed
rotisserie kit.
●
Check the convection fan
motor located in the back
interior wall of the oven.
Ensure it is not loose and is
able to turn with ease. You
may need to disassemble
the back wall to check this.
●
Check rotisserie
connection.
●
Contact the electrician that
installed the oven and ask
them to check the wiring,
please reference the wiring
diagram.
HTDF366 – Affluent Series Range Troubleshooting
www.hypotheory.com
Page 27

27
Problem
May Be Caused By What To Do
The back of the oven
sparks after the wiring has
been installed.
●
Incorrect electrical wiring
installation.
●
Contact the electrician that
installed the oven and ask
them to check the wiring,
please reference the wiring
diagram.
The oven continues to heat
passed the temperature
selected on my oven knob.
●
Defective thermometer
●
Loose wiring connection
between the thermometer
and valve.
●
Incorrect electrical wiring
installation.
●
Improper usage.
●
Contact the electrician that
installed the oven and ask
them to check the wiring,
please reference the wiring
diagram.
●
Check for loose wiring.
●
Please read the knob
configuration specifications
section of this manual to
ensure you are properly
using the oven.
The pro-style temperature
gauge is not accurate.
●
Normal Occurrence
●
The gauge does not always
give an accurate reading,
this is normal and is related
to the convection fan
blower. The fan will
sometimes give the
temperature gauge a false
reading because it may cool
it temporarily. Please
disregard this 5-10%
discrepancy, it is a normal
occurrence in nearly all
convection ovens.
Can the gas baking oven
work at the same time as
the electrical baking oven.
My oven seems to be
getting very hot when I
utilize both features.
●
This is not allowed, it will
overheat the circuit
boards in the oven and
crack the oven door
glass.
●
Do not attempt this
procedure or all warranties
are void.
HTDF366 – Affluent Series Range Troubleshooting
www.hypotheory.com
Page 28

28
Problem
May Be Caused By What To Do
The oven light does not
work
●
Incorrect electrical wiring
installation.
●
Incorrect operation,
please read knob
configuration section of
manual.
●
Malfunctioning light bulb
●
Contact the electrician that
installed the oven and ask
them to check the wiring,
please reference the wiring
diagram.
●
Replace the light bulb by
contact our parts department
& unscrewing the heat
lamp/light bulb by unscrewing
counter-clockwise.
The electrical oven does
not work/ does not work
properly.
●
Incorrect electrical wiring
installation.
●
Incorrect operation,
please read knob
configuration section of
manual.
●
Malfunctioning light bulb
●
Contact the electrician that
installed the oven and ask
them to check the wiring,
please reference the wiring
diagram.
●
Check for loose wiring.
●
Please read the knob
configuration specifications
section of this manual to
ensure you are properly
using the oven.
Rotisserie kit doesn't work
●
Incorrect operation,
●
Please remove packing
materials off of the turnspit.
●
Damage to the rotating
motor(unlikely). If the
motor shaft spins it is
operating.
●
Contact the electrician that
installed the oven and ask
them to check the wiring,
please reference the wiring
diagram.
●
Please read the knob
configuration section of
manual.
Smoke after use
●
This is normal if the oven
has been used for the
first time.
●
Dirty oven cavity
●
Incorrect electrical wiring
installation.
●
Clean the oven according to
Care and Cleaning section
●
Contact the electrician that
installed the oven and ask
them to check the wiring,
HTDF366 – Affluent Series Range Troubleshooting
www.hypotheory.com
Page 29

29
Problem May Be Caused By What To Do
Can smell gas
●
Incorrect nozzle/orifice
installation
●
Incorrect plumbing
installation.
●
Contact the plumber that
installed the oven and ask
them to check the piping &
nozzles.
●
Close the gas and try to
ignite again, check if the
gas odor persists.
●
Check if the odor remains
while the oven is not
operation, call the local gas
company or plumber to
report a gas leak.
After you have read the entire troubleshooting section of the manual and followed all
recommended steps, you may contact our technical support/ parts department at
800.928.4693 x 2. Please ensure the appliance was installed by a licensed plumber/electrician
and ensure you have proof of purchase available in order to properly be assisted.
Problem
May Be Caused By What To Do
Can smell gas
●
Incorrect nozzle/orifice
installation
●
Incorrect plumbing
installation.
●
Contact the plumber that
installed the oven and ask
them to check the piping &
nozzles.
●
Close the gas and try to
ignite again, check if the gas
odor persists.
●
Check if the odor remains
while the oven is not
operation, call the local gas
company or plumber to report
a gas leak.
HTDF366 – Affluent Series Range Troubleshooting
www.hypotheory.com
Page 30

30
HTDF366 – Affluent Series Range Technical Data-Wiring Diagram
www.hypotheory.com
●
=
Page 31

31
HTDF366 – Affluent Series Range-List Of Parts & Accessories Included
www.hypotheory.com
# Type Count # Type Count
1 Roasting
Tray
1 piece 13 Leg shield
panels-right
1 piece
2 Inner grill 1 piece 14 Fixing Clips 2 pieces
3 Grill 1 to 3
pieces
15 ST3.9X10
screws
14 pieces
4 Turn-spit 1 piece 16 Backsplash/
Console
1 piece
5 Spit holder 1 piece 17 M4X25
screws
2 pieces
6 Oven
Handle
1 piece 18 M5X10
screws
2 pieces
7 Inlet Pipe
Joint
1 piece 19 Griddle Optional
8 Rubber
Washer
1 piece 20 Anti-Fall
Device
1 piece
9 Manual 1 piece 21 10 mm
anchors
2 pieces
10 Warranty
inside
manual
1 piece 22 M4X50
screws
2 pieces
11 Adjustable
Legs/Feet
4 pieces 23 Leg shield
front
1 piece
12 M10 nut 4 pieces 24 Leg shield
panels-left
1 piece
13 Pan Support 3 pieces 26 Burner
Assemblies
6 pieces
Page 32

32
Warranty Information
www.hypotheory.com
Full Two Year Manufacturer Standard
Warranty Parts & Labor (Limited)
This warranty agreement supersedes all
prior warranty agreements and
understandings (whether written or oral).
HypoTheory Corporation currently uses ,
AmTrust Financial Group subsidiaries &
other third party warranty vendors as their
North American extended warranty vendors
of choice. They are all A+ rated better
businesses, and provide service to the
entire United States Of America And
Canada. This does not mean our extended
warranty vendors of choice are an exclusive
warranty provider, we use over thirty
extended warranty providers nationwide.
You can buy an extended warranty through
any vendor, we work with them all! Your
appliance is automatically covered with a
two year parts and labor appliance limited
warranty, you may read the specifications
below.
All HypoTheory gas appliances must be
installed by a licensed plumber. All
HypoTheory 220 volt based electrical
appliances/ or appliances that require
wiring configuration must be installed by a
licensed electrician. All dual fuel appliances
must be installed by a licensed plumber,
and a licensed electrician. At the
purchaser's expense. If service is needed
immediately following an appliance
installation, HypoTheory reserves the right
to request a written statement - diagnosing
the issue from your licensed plumber or
electrician on company letterhead. Or if the
purchaser is unable to obtain a letter, we
will need the phone number and name of
the installer at minimum. HypoTheory
reserves the right to send an appliance
technician in to inspect the product and
ensure functional defects were/are not due
to improper installation/negligence. If the
appliance technician provides in writing the
defects were the fault of
negligence/improper installation, the
customer must pay the servicer's labor fee/
parts fee to correct the problem during the
warranty period. After the negligence issue
(if applicable) is corrected HypoTheory will
cover all future issues during the warranty
period. If the defect is not the fault of
negligence & improper installation,
HypoTheory will cover all parts & labor and
correct the defect in a period no more than
a year and no less than a week.
Technical Support
If you are having technical problems, you
may contact our technical support team
(Adco Service) at 800.928.4693, press
option 2, during normal business hours.
Monday through Friday 9 AM to 5 PM
(MST). Please read the trouble shooting
section of your manual before you call. If
this is a pre-product installation, please
ensure your licensed plumber or electrician
contacts technical support during normal
business hours, it is against company policy
to consult consumers on installation
questions, because of liability (sorry).
Page 33

33
A licensed electrician/plumber must install
any of our gas/electrical appliances or all
warranties may be voided at HypoTheory
Corporation's discretion. If this is a postproduct installation please ensure you have
a copy of your product invoice,full name of
purchaser, merchandise delivery address,
date of purchase and the model name- you
may need to fax or e-mail your product
invoice to our servicing department before
technical support is given and service is
dispatched.
Parts
You may purchase parts by calling
Technical Support at 800.928.4693 x 2 or
e-mail service@hypotheory.com, press.
Hypotheory will repair or replace the
following parts that prove to be defective in
materials or workmanship at no charge: gas
burners (excluding appearance),gas valves,
thermocouple(s),ignitor(s),solenoid valve(s),
electric heating elements, blower motors
(ventilation hoods), electronic control
boards, magnetron tubes, thermostats,
convection fans, induction generators, and
any other parts approved on a case by case
basis. Labor to remove and replace
defective parts is not covered after year two
and will be provided at cost to the customer
or paid by the customer's extended
warranty company (if applicable). The
warranty does not include parts that are
malfunctioning because of wear & tear:
nozzles, clogging, corroding, etc.
Service
Your warranty expiration will be based on
your warranty package. All HypoTheory
appliances are issued a limited parts &
labor warranty for a period of two years.
The customer has the option of extending
that warranty for five years from the date of
purchase- by purchasing additional
coverage via our website or a third party
extended warranty provider. All extended
warranties purchased through HypoTheory
are third party warranties, the customer will
obtain a warranty card via email from that
warranty company within 30 days from date
of purchase, the customer should contact
their extended warranty company (if
applicable) to request service, and
HypoTheory will work with the extended
warranty company to assist the customer.
We can warrant any of our appliances for
up to ten years! That is how confident we
are in the quality of our appliances. For two
years from the date of purchase, your
HypoTheory appliance product warranty
covers all parts and labor to repair or
replace any part of the product that proves
to be defective in materials or
workmanship. All repair warranty related
service(s) provided by HypoTheory
Corporation under the above warranty must
be pre-approved by HypoTheory before
work is performed or the customer will be
held responsible for payment.
Warranty Information
www.hypotheory.com
Page 34

34
Service will be provided in the home during
normal business hours. Labor/materials to
remove and replace defective parts is not
covered after the second year, the labor will
be paid for by the customer at an affordable
cost or the customer's extended warranty
company (if applicable) will cover the bill
after the expiration of the manufacturer
warranty.
Wear & tear is excluded from this warranty.
Please contact HypoTheory Corporation to
order any missing parts within 30 days from
date of delivery, after 30 days the customer
will be responsible for purchasing missing
parts . Defective parts are covered for two
years from the purchase date, after this
period the customer will be responsible for
buying parts at cost.
Cosmetic Warranty
Stainless steel doors, panels, handles,
product frames and interior surfaces are
covered by a limited 30 day parts and labor
warranty (DOP), for MANUFACTURER
cosmetic defects . THIS LIMITED 30 DAY
COSMETIC WARRANTY DOES NOT
APPLY TO ITEMS THAT HAVE BEEN
DAMAGED DUE TO THIRD PARTY
MISHANDLING. After such date parts shall
be provided at cost.
THE REMEDIES DESCRIBED ABOVE
FOR EACH WARRANTY ARE THE ONLY
ONES THAT HYPOTHEORY
CORPORATION, WILL PROVIDE, EITHER
UNDER THIS WARRANTY OR UNDER
ANY WARRANTY ARISING BY
OPERATION OF LAW. HYPOTHEORY
CORPORATION WILL NOT BE HELD
RESPONSIBLE FOR ANY
CONSEQUENTIAL OR INCIDENTAL
DAMAGES ARISING FROM THE BREACH
OF THIS WARRANTY OR ANY OTHER
WARRANTY, WHETHER EXPRESS,
IMPLIED OR STATUTORY. THIS
WARRANTY OVERRIDES ALL OTHER
WARRANTIES PRESENTED IN ANY
LITERATURE.
This device meets American National
Standards Institute (ANSI) standards for
U.S. gas appliances, equipment and
components. This device meets
Interprovincial Gas Advisory Committee
(IGAC) standards for Canadian gas
appliances, equipment and components.
Warranty Information
www.hypotheory.com
Page 35

35
Service will be provided in the home
during normal business hours.
Labor/materials to remove and
replace defective parts is not covered
after the second year and will be
provided to the customer at an
affordable cost or the customer's
extended warranty company (if
applicable) will cover the bill.
We shall pay for all repairs in our service
coverage area within the two year warranty
period. We currently cover the entire USA,
Canada, Australia & Europe (Italy, UK
only). In the unlikely event, the consumer
lives in a isolated region of the USA &
Canada, the customer must directly pay our
servicer an out of area fee of $1.50 per mile
(non-negotiable), to perform service,
Hypotheory will cover the cost of parts &
labor. All of our service providers are
dispatched through our well known
warranty administrators.
During Warranty Period
If you feel your appliance is malfunctioning
and is in need of service you may contact
us at 800.928.4693 option 2, please ensure
you have had your appliance installed by a
licensed plumber or electrician, we may ask
for their info. Please ensure you have a
copy of your product invoice,full name of
purchaser, merchandise delivery address,
date of purchase and the model name- you
may need to fax or e-mail your product
invoice to our servicing department before
technical support is given and service is
dispatched. Your merchandise must fall
within the warranty period to be issued free
parts & service.
After Warranty Period
If you feel your appliance is malfunctioning
and is in need of service you may contact
us at 800.928.4693 option 2. If your
merchandise has passed the warranty
period, we will refer several names of
qualified appliance service technicians in
your area via phone, you will be responsible
for paying them directly. You will also be
billed for the parts you order from us.
Limited Lifetime Warranty
For the life of the product. The warranty
applies only to products installed for normal
residential use. The warranty applies only
to products installed in any one of the fifty
states of the United States, the District of
Columbia or the ten provinces of Canada.
This warranty does not cover any parts or
labor to correct any defect caused by
negligence, accident or improper use,
maintenance, installation, service or repair.
All literature is copyright protected by
HypoTheory Corporation.
Warranty Information
www.hypotheory.com
 Loading...