

Hypex Electronics FusionAmp FA251, FusionAmp FA252, FusionAmp FA122, FusionAmp FA502, FusionAmp FA501 User Manual
...
User's Guide
FusionAmp

FusionAmp, an introduction
Thank you for purchasing the new Hypex Plate
Amplifier, powered by our NCORE technology.
This FusionAmp will be the basis of a powerful active
subwoofer, a two-way or a three-way monitor.
The FusionAmp family consists of the following
models:
FusionAmp One-Way models:
FA251, 1x250W
FA501, 1x500W
FusionAmp Two-Way models:
FA122, 2x125W
FA252, 2x250W
FA502, 2x500W
FusionAmp Three-Way models:
FA123, 2x125W + 100W Tweeter
FA253, 2x250W + 100W Tweeter
FA503, 2x500W + 100W Tweeter
RTFM (Read This Fine Manual)
Please read the safety instructions on the next page
before installing and/or operating the module.
Please note the different models. This guide describes
the one-way and multi-way models. In addition to the
analogue inputs, the one-way models have a high
level analogue input, whereas the multi-way models
have a digital input instead.
This user’s guide covers the general user instructions
for these models. For detailed 3D CAD models, please
refer to our website. In addition to the 3D CAD, files we
have 2D drawings and an FAQ section, with a lot of
additional support material.
Included in the box
The FusionAmp
This user guide
Speaker connection cable(s)
One-Way models:
4 way, pluggable terminal block, 5.08 mm
Default filter
To protect your valuable drivers, the DSP does not
contain a filter out of the box. One must first configure
a filter before the FusionAmp gives an output signal.
See chapter HFD.
Chapter
Page
Introduction, Table of contents
3
Safety precautions
4
Getting started
5
Fusion Accessories
5
Features
6-7
Using the remote (optional)
8
Example applications
8-9
Connections one-way models
10
Connections multi-way models
11
Installation
12-13
Connecting the speakers
14
System information
16
Advanced system information
17
Troubleshooting
18
Frequently asked questions
18
Support
18
Warranty
19
Disclaimer
19
Revisions
19
Notes
19
Hi there!
This user guide is preliminary, so things might
change, disappear, be added or whatever.
No rights can be derived from this information.
If you have questions, remarks or feedback,
please direct them to: sales@hypex.nl
3
FusionAmp, an introduction
Thank you for purchasing the new Hypex Plate
Amplifier, powered by our NCORE technology.
This FusionAmp will be the basis of a powerful active
subwoofer, a two-way or a three-way monitor.
The FusionAmp family consists of the following
models:
FusionAmp One-Way models:
FA251, 1x250W
FA501, 1x500W
FusionAmp Two-Way models:
FA122, 2x125W
FA252, 2x250W
FA502, 2x500W
FusionAmp Three-Way models:
FA123, 2x125W + 100W Tweeter
FA253, 2x250W + 100W Tweeter
FA503, 2x500W + 100W Tweeter
RTFM (Read This Fine Manual)
Please read the safety instructions on the next page
before installing and/or operating the module.
Please note the different models. This guide describes
the one-way and multi-way models. In addition to the
analogue inputs, the one-way models have a high
level analogue input, whereas the multi-way models
have a digital input instead.
This user’s guide covers the general user instructions
for these models. For detailed 3D CAD models, please
refer to our website. In addition to the 3D CAD, files we
have 2D drawings and an FAQ section, with a lot of
additional support material.
Included in the box
The FusionAmp
This user guide
Speaker connection cable(s)
One-Way models:
4 way, pluggable terminal block, 5.08 mm
Default filter
To protect your valuable drivers, the DSP does not
contain a filter out of the box. One must first configure
a filter before the FusionAmp gives an output signal.
See chapter HFD.
Table of Contents
Chapter
Page
Introduction, Table of contents
3
Safety precautions
4
Getting started
5
Fusion Accessories
5
Features
6-7
Using the remote (optional)
8
Example applications
8-9
Connections one-way models
10
Connections multi-way models
11
Installation
12-13
Connecting the speakers
14
System information
16
Advanced system information
17
Troubleshooting
18
Frequently asked questions
18
Support
18
Warranty
19
Disclaimer
19
Revisions
19
Notes
19
Getting Started
We understand you want to experience the sound of
your new FusionAmp powered speaker as quickly as
possible. Therefore, we have made you this ‘roadmap
to success’.
Selecting your Fusion Amps:
Before you order your FusionAmps, you have to select
the correct version that fits your design. Take a look at
the example applications in this manual and write
down your requirements.
Ordering your Fusion Amps:
Once you know which FusionAmps you need, you can
order them on our webshop. Cables to connect to your
woofers and tweeters are included. Other cables are
not included. If you do not have mains cables or a mini
USB cable, you can also add those to your order.
Additionally we offer a range of high quality audio
cables to make sure your have all the cables you need.
Designing and loading a filter:
Since the FusionAmp’s DSP does not contain a filter by
default, you need to get started with HFD. This free
software can be downloaded from our website. You
can start getting acquainted with the software, even
without a Hypex product connected. An elaborate
guide how to design the filters, can be found on our
website.
Installing the FusionAmp in your cabinet:
For best performance, the FusionAmp should be
installed in a sealed compartment of your speaker
cabinet. This guide includes basic dimensions for
installation. Refer to the chapter ‘Installation’ for
instructions. Detailed 3D models and 2D drawings can
be found on our website, to assist in design of the
speaker cabinet.
Start listening!
Once the filters are uploaded to the DSP and the
speaker cabinet is fully assembled, you can start
listening and tweaking your sound experience.
Attention: Obse r v e p r e c a u t i o n s fo r h a n d l i n g
electrostatic sensitive devices. This module uses
semiconductors that can be damaged by electrostatic
discharge (ESD).
The exclamation point within an equilateral triangle is
intended to alert the user of the prescence of important
operating and maintaining (servicing) instructions in
the literature accompanying the appliance.
The lightning flash with arrowhead symbol within an
equilateral triangle is intended to alert the user to the
prescence of uninsulated “dangerous voltage” within
the product’s enclosure, that may be of significant
magnitude to constitute a risk of electric shock to
persons.
1.
Read these instructions.
2.
Keep these instructions.
3.
Heed all warnings.
4.
Follow all instructions.
5.
Do not use this apparatus near water.
6.
Clean only with a dry cloth.
7.
Natural convection should not be impeded by covering the
module (apart from the end applications housing). Do not
block any ventilation openings. Install in accordance with
the manufacturer’s instructions.
8.
Do not install near any heat sources such as radiators,
heat registers, stoves, or other apparatus (including
amplifiers) that produce heat.
9.
Do not defeat the safety purpose of the protective earth
/ grounding mains inlet. Protective earth is provided for
your safety.
10.
Protect the power cord from being walked on or pinched
particularly at plugs, convenience receptacles, and the
point where they exit from the apparatus.
11.
Only use attachments/accessories specified by the
manufacturer.
12.
Unplug this apparatus during lightning storms or when
unused for long periods of time.
13.
Refer all servicing to qualified service personnel.
Servicing is required when the apparatus has been
damaged in any way, such as power-supply cord or plug
is damaged, liquid has been spilled or objects have
fallen into the apparatus, the apparatus has been
exposed to rain or moisture, does not operate normally,
or has been dropped.
14.
This apparatus shall not be exposed to dripping or
splashing, and no object filled with liquids, such as
vases or beer glasses, shall be placed on the apparatus.
15.
Do not overload wall outlets and extension cords as this
can result in a risk of fire or electric shock.
16.
This apparatus has been designed with Class-I
construction and must be connected to a mains socket
outlet with a protective earthing connection.
17.
This apparatus has been equipped with a rocker-style
AC mains power switch. This switch is located on the
rear panel and should remain readily accessible to the
user.
18.
The MAINS plug or an appliance coupler is used as the
disconnect device, so the disconnect device shall remain
readily operable.
19.
Do not run any cables across the top or the bottom of the
module. Apply fixtures to cables to ensure that this is not
compromised.
20.
Before using this product, ensure all cables are correctly
connected and the power cables are not damaged. If you
detect any damage, do not use the product.
21.
Changes or modifications not expressly approved by
Hypex Electronics will void compliance and therefore the
user's authority to operate the equipment.
22.
Service or modifications by any person or persons other
than by Hypex Electronics authorized personnel voids the
warranty.
This module operates at mains voltage and carries
hazardous voltages at accessible parts. These parts may
never be exposed to inadvertent touch. Observe extreme
care during installation and never touch module of the
unit while it is connected to the mains. Disconnect the
unit from the mains and allow all capacitors to discharge
for 10 minutes before handling it.
Damage due to inappropriate handling is not covered by
warranty. This product has no user-serviceable parts.
Warning: To reduce the risk of fire or electric shock, do not
expose this device to rain or moisture.
Safety precautions
Précautions de sécurité
Ce module est sous tension secteur et certaines de ses
pièces accessibles sont sous une tension dangereuse.
Ces pièces doivent dans tous les cas être protégées
contre contacts accidentels. Lors de l'installation, une
prudence extrême s'impose. Ne jamais toucher les pièces
du module quand celui-ci est relié au secteur. Isoler
l'appareil du secteur et attendre 10 minutes pour laisser
à tous les condensateurs le temps de se décharger avant
de le manipuler.
Les dommages causés par un usage non approprié sont
exclus de la garantie.
Ce produ it n e contien t aucune piè ce d evant êtr e
entretenue par l'utilisateur.
Avertissement: Pour réduire les risques de choc électrique, ne
pas exposer cet appareil à la pluie ou l'humidité.
Correct disposal of this product: This symbol indicates that this product should not be disposed of with your household waste, according to the
WEEE directive (2012/19/EU) and your national law. This product should be handed over to an authorized collection site for recycling waste
electrical and electronic equipment (EEE). Improper handling of this type of waste could have a possible negative impact on the environment
and human health due to potentially hazardous substances that are generally associated with EEE. At the same time, your cooperation in the
correct disposal of this product will contribute to the effective usage of natural resources. For more information about where you can drop off
your waste equipment for recycling, please contact your local city office, waste authority, or your household waste disposal service.
This product must be earthed.
Laite on liitettävä suojakoskettimilla varustettuun
pistorasiaan.
Apparatets stikprop skal tilsluttes en stikkontakt med
jord, som giver forbindelse til stikproppens jord.
Apparatet må tilkoples jordet stikkontakt.
Apparaten skall anslutas till jordat uttag.
Dit fertuut mout aansloten worden op raandeerde.
4
Getting Started
We understand you want to experience the sound of
your new FusionAmp powered speaker as quickly as
possible. Therefore, we have made you this ‘roadmap
to success’.
Selecting your Fusion Amps:
Before you order your FusionAmps, you have to select
the correct version that fits your design. Take a look at
the example applications in this manual and write
down your requirements.
Ordering your Fusion Amps:
Once you know which FusionAmps you need, you can
order them on our webshop. Cables to connect to your
woofers and tweeters are included. Other cables are
not included. If you do not have mains cables or a mini
USB cable, you can also add those to your order.
Additionally we offer a range of high quality audio
cables to make sure your have all the cables you need.
Designing and loading a filter:
Since the FusionAmp’s DSP does not contain a filter by
default, you need to get started with HFD. This free
software can be downloaded from our website. You
can start getting acquainted with the software, even
without a Hypex product connected. An elaborate
guide how to design the filters, can be found on our
website.
Installing the FusionAmp in your cabinet:
For best performance, the FusionAmp should be
installed in a sealed compartment of your speaker
cabinet. This guide includes basic dimensions for
installation. Refer to the chapter ‘Installation’ for
instructions. Detailed 3D models and 2D drawings can
be found on our website, to assist in design of the
speaker cabinet.
Start listening!
Once the filters are uploaded to the DSP and the
speaker cabinet is fully assembled, you can start
listening and tweaking your sound experience.
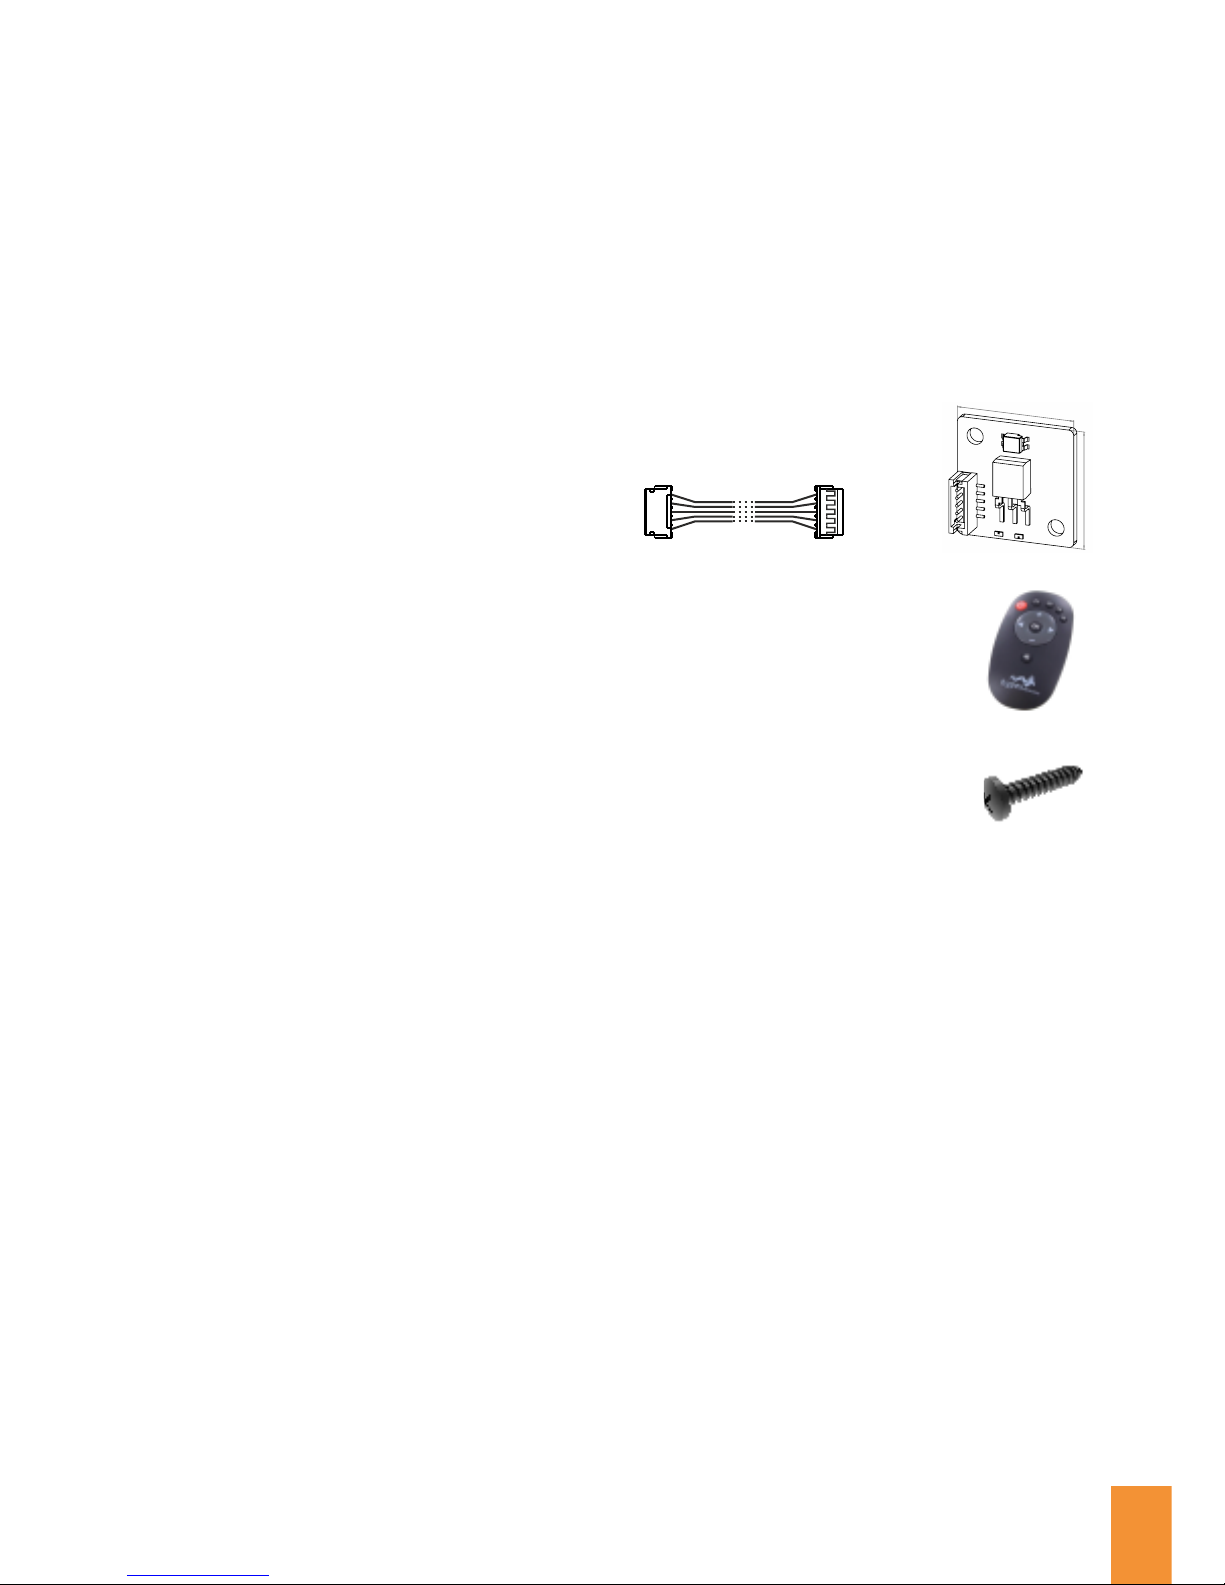
With your FusionAmp you may need some additional
accessories, these can be optionally ordered:
Fusion IR Receiver Kit
All modules can be extended with the Fusion IR
Receiver Kit. This set contains a PCBA with IR receiver
and bi-colour LED, and the necessary cable (125cm).
This set must be used in master devices if the Hypex
remote is to be used. Furthermore, this set can also be
added in slave devices, but the IR functionality will be
disabled. The green LED acts as on-off indicator, the
re d L E D m ir r or s t he pr o te c t
indicator. This set is available for
separate purchase.
Hypex Remote
The Hypex Remote can be used in
combi n a tion w ith t h e Fu s i on I R
Receiver Kit to control volume, source,
pr esets a nd put the sy stem into
standby.
Fusion Mounting Screws
The Fusion Amp must be mounted into
the speaker cabinet with 8 or 10
screws. This set contains 10 selftapp i n g, b l ack, Pozi d r iv s c r ews,
3.9x20mm.
USB 2.0 Cable
USB Type A Plug - Mini USB Type B Plug,
Powercord EU
IEC 60320 C13 - IEC Type F
Used in: Germany, Austria, the Netherlands and Spain
among others.
Powercord UK
IEC 60320 C13 - IEC Type G
Used in: UK, Ireland, Cyprus, Malta, Malaysia,
Singapore, Hong Kong.
Powercord AU/NZ
IEC 60320 C13 - IEC Type I
Used in: Australia, New Zealand, Papua New Guinea,
Argentina, China.
Powercord USA
IEC 60320 C13 - IEC Type B / NEMA 5-15P
Used in: North and Central America, Japan.
Hypex Filter Design
If you need a physical copy of Hypex Filter Design, you
can order a CD containing HFD from our webshop. HFD
is also available for free download.
6
1
6
1
Fusion Accessories
23
23
5
Thermal protection
All amplifiers produce heat, even highly efficient Class
D amplifiers. Therefore, the FusionAmp has an
internal thermal protection.
# Thermal limiting
If the amplifier is reaching its maximum temperature,
the output is lowered by 6dB. Additionally the protect
indication starts blinking once every second.
# Thermal shutdown
If the maximum temperature is reached, the amplifier
is switched off to protect it from damage. Additionally
the protect indication starts blinking twice every
second.
When the amplifier has cooled down to a safe
operating temperature, the thermal protection resets
and the FusionAmp resumes to normal operation.
Te prevent overheating, install the FusionAmp
according to the installation instruction. Never cover
the ventilation holes or place the FusionAmp near a
heat source.
Gain and volume
The FusionAmp has an advanced gain structure. First
of all, we distinguish a master gain (referred to as
‘volume’). This volume can be adjusted with HFD, via
the remote link, or with the Hypex remote.
Secondly, each FusionAmp as a whole, can have an
offset to the master volume.
Thirdly, each filter can have an offset to this volume.
This can be used to match less sensitive woofers with
more sensitive woofers.
Finally, the one-way models have a manual gain
offset, since these models are meant for use as a
subwoofer, one might want to ad a little extra punch at
a certain moment.
To prevent the FusionAmp to power up at maximum
volume, an optional startup volume (master) can be
configured in HFD.
Input sensitivity
Since different FusionAmp models have different
output power, the gain is adjusted in the DSP to make
sure dBFS equals full power output. This also applies
to the analogue inputs.
Filter protection
The presets loaded in the FusionAmp can be password
protected, so that unauthorized persons can not
overwrite the configuration. This feature can be
configured in HFD. Use this function with caution. If
you configure this function, you will be asked to enter
an email address. This address is stored in the
FusionAmp’s memory. If you lost your password, a
reset code can be requested and will be send to this
email address.
Features
Fan control
The FA502 and FA503 feature an advanced cooling
system. The software monitors the signal input and
mod u l e t e m perature. A proportiona l – integral
algorithm controls the fan speed. This ensures
sufficient cooling when needed and quiet operation
when desired.
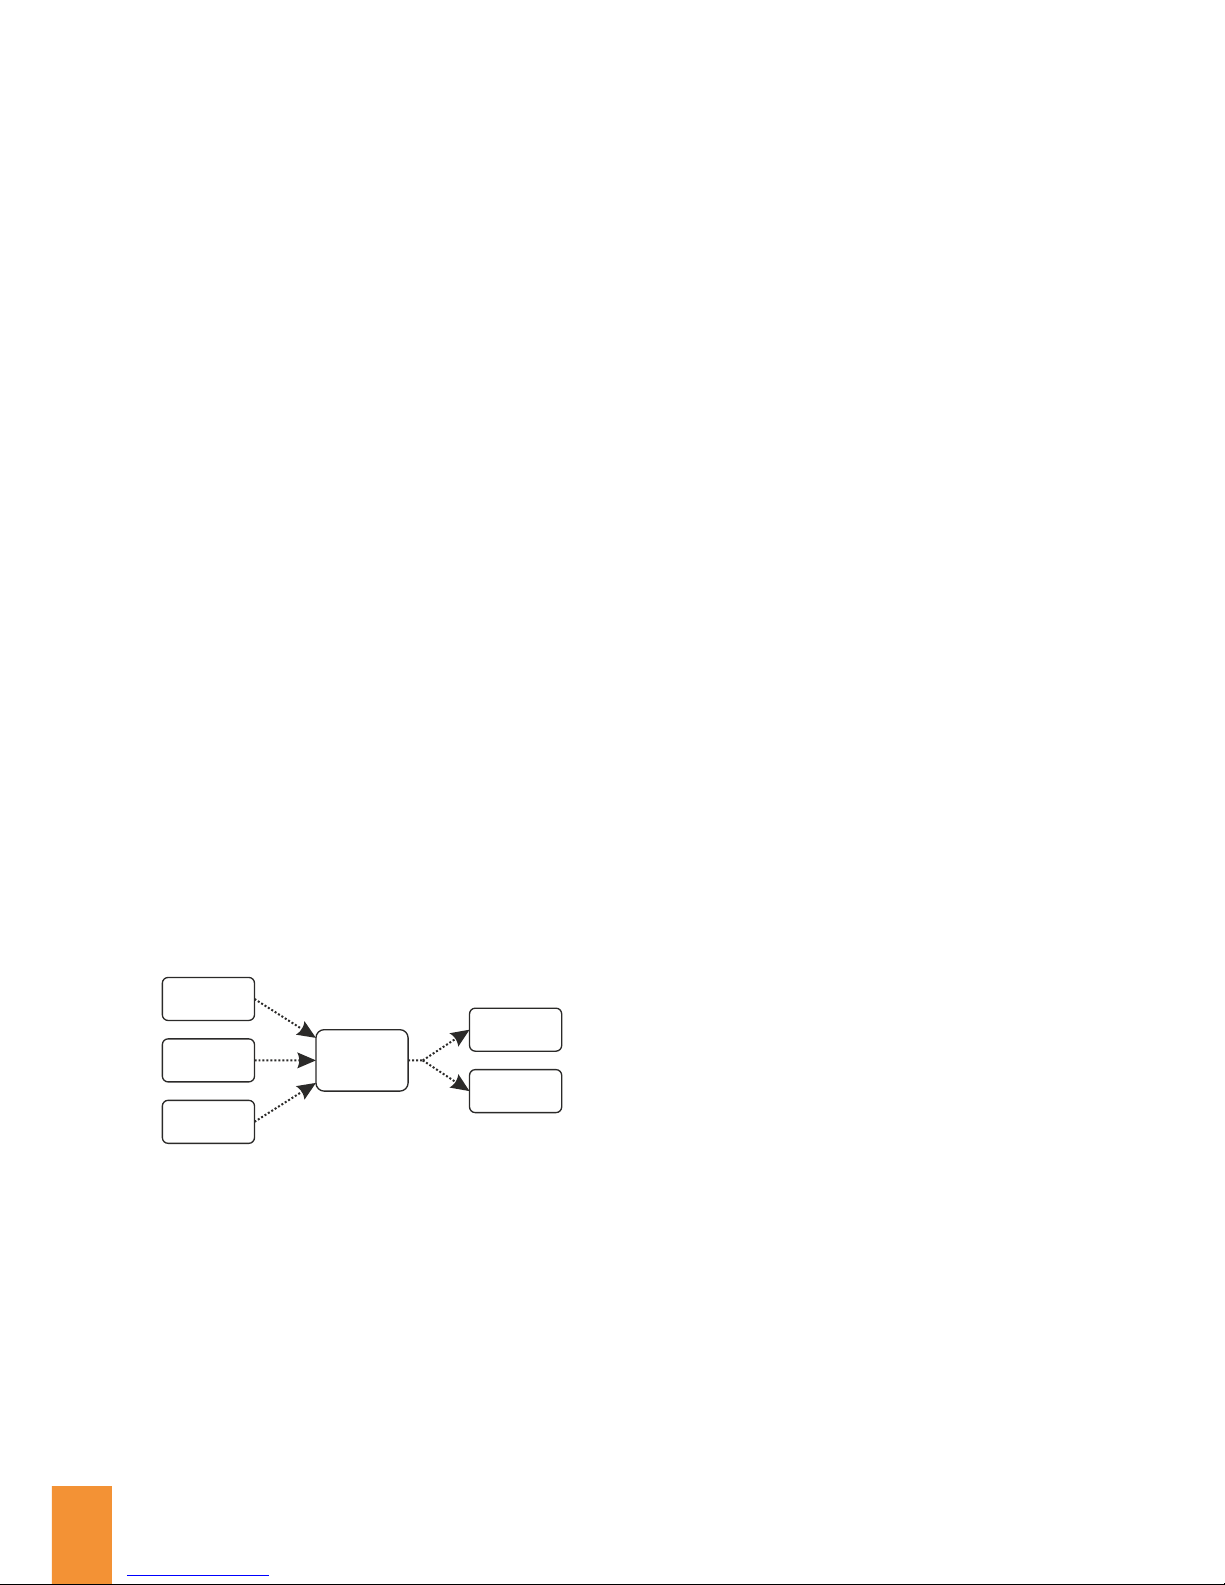
Source select
Automatic source select automatically locks to the
first available source. The input scanner scans in the
following order and loops:
# One-way models:
XLR | RCA | High Level Input
# Multi-way models:
AES | S/PDIF | Optical | XLR | RCA.
The source can also be selected manually. Configure
manual or automatic source selection in HFD.
Daisy-chaining
The balanced analogue input can be daisy chained
using the XLR through connector. This output XLR is
directly connected to the input XLR. The maximum
number of chained modules is limited by the source’s
capabilities.
Multi way versions:
The FusionAmp can also be daisy chained in the
digital domain. The signal on the AES and S/PDIF
output is the signal of the current selected digital
input.
Note: there is no link between analogue and digital
domains. Analogue input signal can not be routed to
digital output and vise versa.
Signal detect
Instead of a trigger input, the FusionAmp features a
signal detect function. Depending on the selected
power mode (explained next), the FusionAmp scans
for input signal and enables if it detects or locks on to a
signal. Signal detect can be configured in HFD.
Auto-shutdown
In addition to signal detect, the FusionAmp can
automatically switch off if there is no input detected
on any of the inputs configured with signal detect.
This feature can be configured in HFD.
AES
S/PDIF
Optical
AES
S/PDIF
source
select
Power modes
# Ultra-low power
Meets 2013 ERP Lot 6 0.5W. In this mode the
FusionAmp scans for analogue input only. If an
analogue input signal is detected, the FusionAmp
automatically turns on.
Power usage: 410mW (preliminary)
# Low power
In addition to ultra-low power mode, which only scans
for analogue input, this mode also scans the digital
inputs for signal. Multi-way only.
Power usage: 750mW (preliminary)
# Wake up on line
In this mode, the FusionAmp is always on, when
connected to mains.
In ultra-low or low power mode, the FusionAmp can
also be enabled by pressing the select button or via the
optional Hypex Remote. P ower modes can be
configured in HFD.
Bridge-tied load
The multi-way Fusion Amp can be configured for BTL.
BTL allows two amplifiers to be combined to double
the output power. This features can be configured in
HFD. Speaker connection must be done according to
the description in chapter: installation.
Soft-clip
Soft-clip minimizes audible distortion if the amplifier
is over-driven. By default, the FusionAmp DSP has
soft-clip enabled, to protect the amplifier from
clipping.
Every limiter has its effect on audio quality. For
optimal sound quality, one may want to disable this
feature. If soft-clip is disabled, the hardware clipping
takes over.
If the FusionAmp is driven into clipping (soft or hard)
the protect indicator lights up. Hardware clipping
only indicates when the amplifiers are over driven. It
does not protect the amplifier, nor your speakers.
Soft-clip can be configured using HFD. To correctly
configure soft-clip, the speaker impedance and
maximum output power parameters need to be set. By
default, soft-clip is configured to deliver maximum
power into 4Ω load impedance.
Critical failure
If a critical failure is detected, i.e. a DC error, the amp
shuts down immediately and the protect indication
will be enabled. A critical error is latching, meaning
only a power cycle might solve the issue. If a power
cycle does not work, contact Hypex support.
6
 Loading...