

Page 1
Document No. 480KHX-H3CL/WR.A00
HyperX Cloud Headset
Page 1 of 8
HyperX Cloud Headset
Page 2
Document No. 480KHX-H3CL/WR.A00
HyperX Cloud Headset
Page 2 of 8
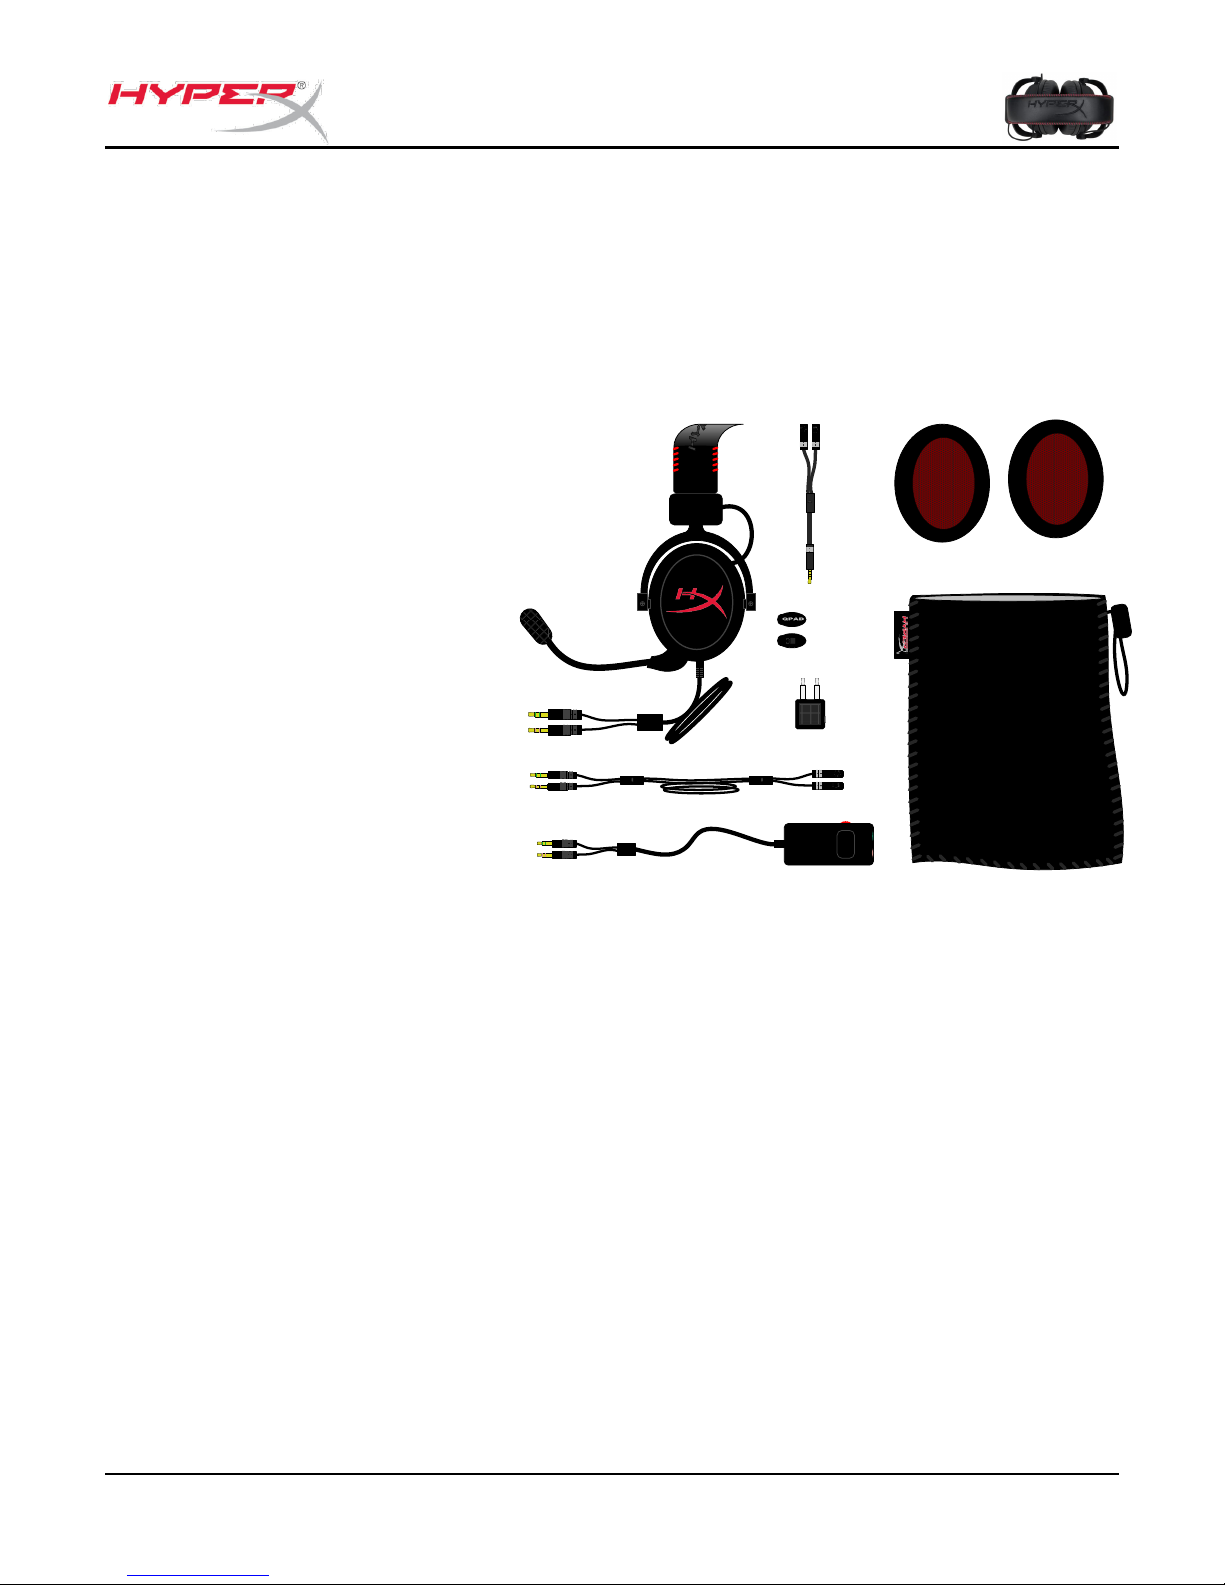
What’s Included:
1 HyperX Cloud Headset
1 Detachable Microphone
(attached to headset in figure 1.1)
1 Microphone plug
1 spare set of velour ear cushions
1 control box with 100cm cable
(cable has 3.5mm audio jacks)
1 extension cable (200cm)
1 headset splitter cable (10cm)
1 Airplane headphone adapter
1 Mesh bag
(Top)
(Bottom)
Figure 1.1 – Package Contents
Introduction
Optimized for pro-gaming, HyperX Cloud Headset (KHX-H3CL/WR) is a high-quality communicating device that
delivers superior sound, style and comfort. It uses an adjustable, soft-padded leatherette headband and features
a closed-cup design for enhanced bass reproduction and minimal sound leakage. The KHX-H3CL/WR is HiFi
capable and delivers a durable design for the most rugged gaming environments and is compatible with tablets
and smartphones for mobile use.
Features:
Hi-fi capable 53mm drivers for supreme audio quality
15-25 KHz frequency response (earphones)
Detachable microphone (quick and easy to plug/unplug for music-only purposes)
Solid aluminum construction for durability and stability
Super-soft padded leatherette headband and leatherette padding on cups
Closed cup design for enhanced bass-reproduction and sound leakage
Page 3

Document No. 480KHX-H3CL/WR.A00
HyperX Cloud Headset
Page 3 of 8
Technical Specifications:
Transducer type: Dynamic 53mm
Operating principle: Closed
Frequency response: 15Hz-25KHz (earphones)
Nominal impedance: 60 ohm per system
Nominal SPL: 98+/-3dB
T.H.D: < 2%
Power handling capacity: 150mW
Sound coupling to the ear: Circumaural
Ambient noise attenuation: approx.20 dBA
Headband pressure: 5 N
Weight with microphone and cable: 350g
Cable length and type: 1m + 2m extension + 10cm iPhone
Connection: Mini stereo jack plug (3.5MM)
Microphone Transducer type: Condenser (back electret)
Operating principle: Pressure gradient
Polar Pattern: Cardioid
Power supply: AB powering
Supply voltage: 2V
Current consumption: Max 0.5 mA
Nominal impedance: ≤2.2 k ohm +/- 30%
Open circuit voltage at f = 1 kHz 20 mV / Pa
Frequency response: 100 - 12,000 Hz (microphone)
T.H.D: 2% at f = 1 kHz
Max. SPL: 105dB SPL (THD ≤ 1.0% at 1KHz)
Microphone output: -39+/-3dB
Dimensions: 6*5mm
Length mic boom: 150MM(include gooseneck)
Capsule diameter: 6mm
Page 4

Document No. 480KHX-H3CL/WR.A00
HyperX Cloud Headset
Page 4 of 8
A
B
C
D
E
F G
H
I
J K L
A. Leatherette headband w/ HyperX logo
B. Aluminum arm to adjust headband
C. Attached cable (1 meter in length) w/
3.5mm input jacks (letter E)
D. Detachable microphone with
adjustable arm and condenser
E. 3.5mm audio input jacks attached to
the 1 meter headset cable
F. Extra set of ear cushions
G. 2-meter extension cable
H. Control box cable w/ 3.5mm audio
jacks and control box (letter I)
I. Control box w/ multi-function button
and volume control. The multifunction button can be used for:
a. Answering or hanging up a phone
call from a mobile device
b. Pausing a song when listening to
music on a mobile device
J. Headset splitter cable w/ 3.5mm audio
jack
K. Microphone plug (attached to headset
by default) where microphone (letter
D) connects to HyperX headset
L. Airplane adapter w/ 3.5mm audio
jacks and input converter jack
Overview
Page 5

Document No. 480KHX-H3CL/WR.A00
HyperX Cloud Headset
Page 5 of 8
Usage (Direct Connect)
Connect your headset directly to your computer (or other device) that has both a headset jack
and a microphone jack. The headset jack, which has green stripes, plugs into the port
signified by a green input or earphones symbol , and the microphone jack, which has pink
stripes, plugs into the port signified by a pink input or a microphone symbol . (Optional: The
included extension cable (letter G on Page 4) may also be used to add length to the existing
headset cable, as seen in Figure 1.3.)
Page 6

Document No. 480KHX-H3CL/WR.A00
HyperX Cloud Headset
Page 6 of 8
Usage (with Control Box)
Connect your headset to the control box that has both a headset jack and a microphone jack
on it. The headset jack (green stripes) plugs into the green input port on the control box and
the microphone jack (pink stripes) plugs into the pink input port on the control box. The control
box cable then connects to your computer (or other output device w/ dual microphone and
headset jacks) using the 3.5mm audio jacks on the end of the cable.
(Optional: The included extension cable (letter G on Page 4) may also be used to add length to
the existing headset cable and control box.)
Figure 1.4 – Extension Cable (Optional)
Figure 1.5 – Using Control Box
Page 7

Document No. 480KHX-H3CL/WR.A00
HyperX Cloud Headset
Page 7 of 8
Usage (with Control Box and Headset Splitter Cable)
If you are connecting the headset to a laptop or mobile device (phone or tablet) that has a
single audio jack, generally marked with an earphones or headset symbol :
Connect the control box to the headset splitter cable (letter J on page 4.) This will convert the
separate microphone and earphones jacks into a single 3.5mm audio jack as seen in Figure
1.8.
Figure 1.6 – Headset Splitter Cable
(Optional: The included extension cable (letter G on Page 4) may also be used to add length to
the existing headset cable and control box.)
Figure 1.7 – Extension Cable (Optional)
Figure 1.8 – Using Headset Splitter Cable
Page 8

Document No. 480KHX-H3CL/WR.A00
HyperX Cloud Headset
Page 8 of 8
Usage (with Airplane Adapter)
If you are connecting the headset to an airplane jack (generally found on the armrest of a seat)
as seen in Figure 1.9, connect the headset splitter cable to the airplane adapter (letter L on
page 4) that came with your headset and plug the airplane adapter into the audio jack found on
the armrest of your seat.
Figure 1.9 – Input Jacks on an Airplane Seat (Armrest)
(Optional: The included extension cable (letter G on Page 4) may also be used to add length to
the existing headset cable and control box.)
Figure 1.10 – Extension Cable (Optional)
Figure 1.11 – Using Airplane Jack
 Loading...