

Page 1
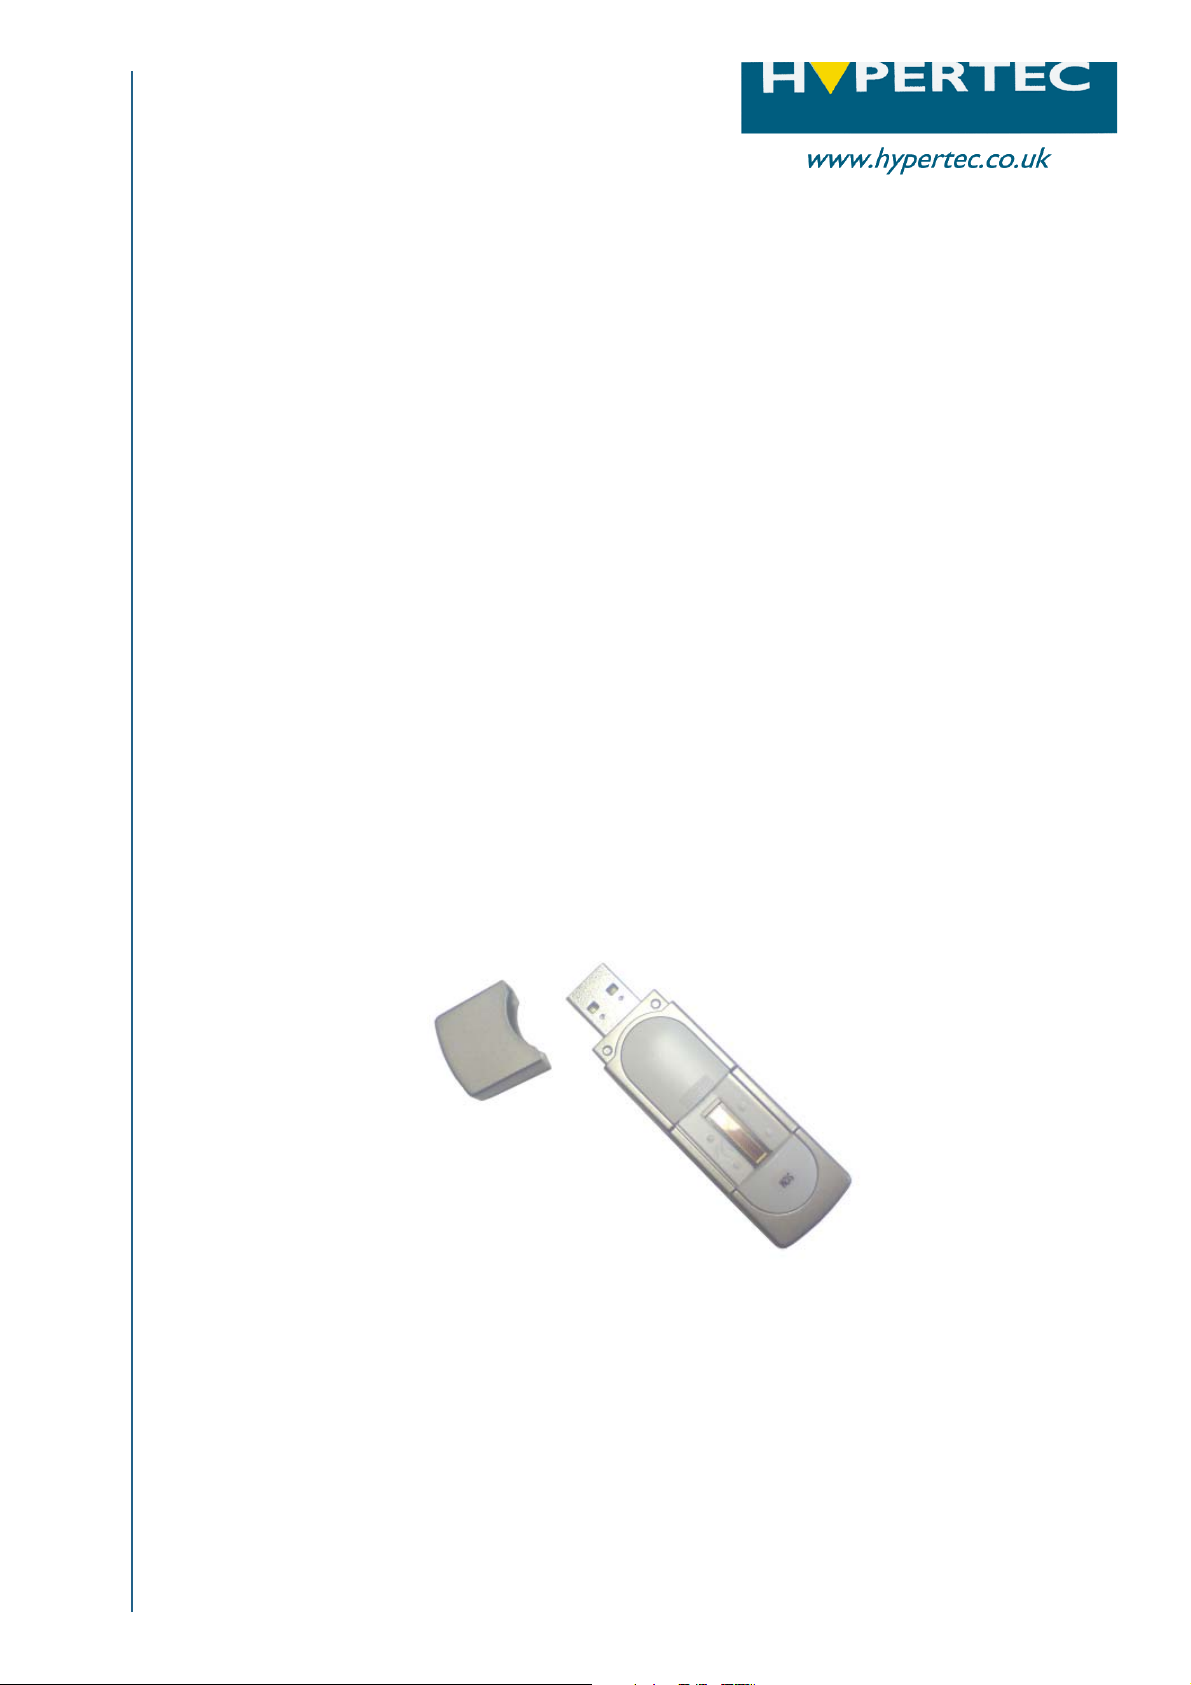
Hypertec BioDisk
Biodisk
Quick User Guide
User Guide
Hypertec - Quick User Guide
from
BioDisk
Page 2

Table of Contents
A. General Description
A1. About BioDisk 2
A2. Partition Arrangement 2
A3. Autorun Feature 2
A4. Password & Finger Prints 2
B. How to swipe finger prints 3
C. System requirements 4
D. Getting started
D1. Registering finger prints 5-7
D2. Setting security level and password 8-9
D3. Deleting finger prints and passwords 10
E. Finding the Device Serial Number 11
Hypertec - Quick User Guide
from
1
BioDisk
Page 3

A. General Description
A1. About the BioDisk
What is the BioDisk? What does it do?
The BioDisk is a USB Flash storage device with a finger print sensor, which allows you to use your
own finger print as a security key instead of (or as well as) a password. Because everyoneÊs finger
print is unique, the security level is much higher than with just a password-protect function. Besides raising the security level, there are many other benefits from using your finger print, including
convenience and privacy.
A2. Partition Arrangement
The total capacity of your BioDisk is divided into 2 partitions:
Partition 1 CD-Rom Area
Partition 2 Secure Removable Area
Partition 1 CD-Rom Area
This partitions can only be seen in Windows 2000 or Windows XP operating systems.
It stores the BioDisk application software, which will autorun when the BioDisk is connected to the
USB port of your computer (providing the desktop has autorun enabled). This is a read only area,
so you cannot write to, or delete, this partition.
Partition 2 Secure Removable Area
This is the area that your data is stored in, and is protected by a password and/or a finger print.
A3. Autorun Feature
The Autorun feature allows you to run the BioDisk without having to start any programmes yourself. When your BioDisk is connected to the USB Port of a computer, the software will automatically execute.
If you are using Windows 2000 or XP, you will only see the CD-Rom partition (Partition 1), and the
Removable partition (Partition 2). The Biodisk AP will be running from the CD-Rom
partition.
Hypertec - Quick User Guide
A4. Password & Finger Prints
from
Up to 10 fingerprints can be stored in the BioDisk, but for ease of use only 1 password is used.
BioDisk
2
Page 4
B. How to Swipe Finger Prints
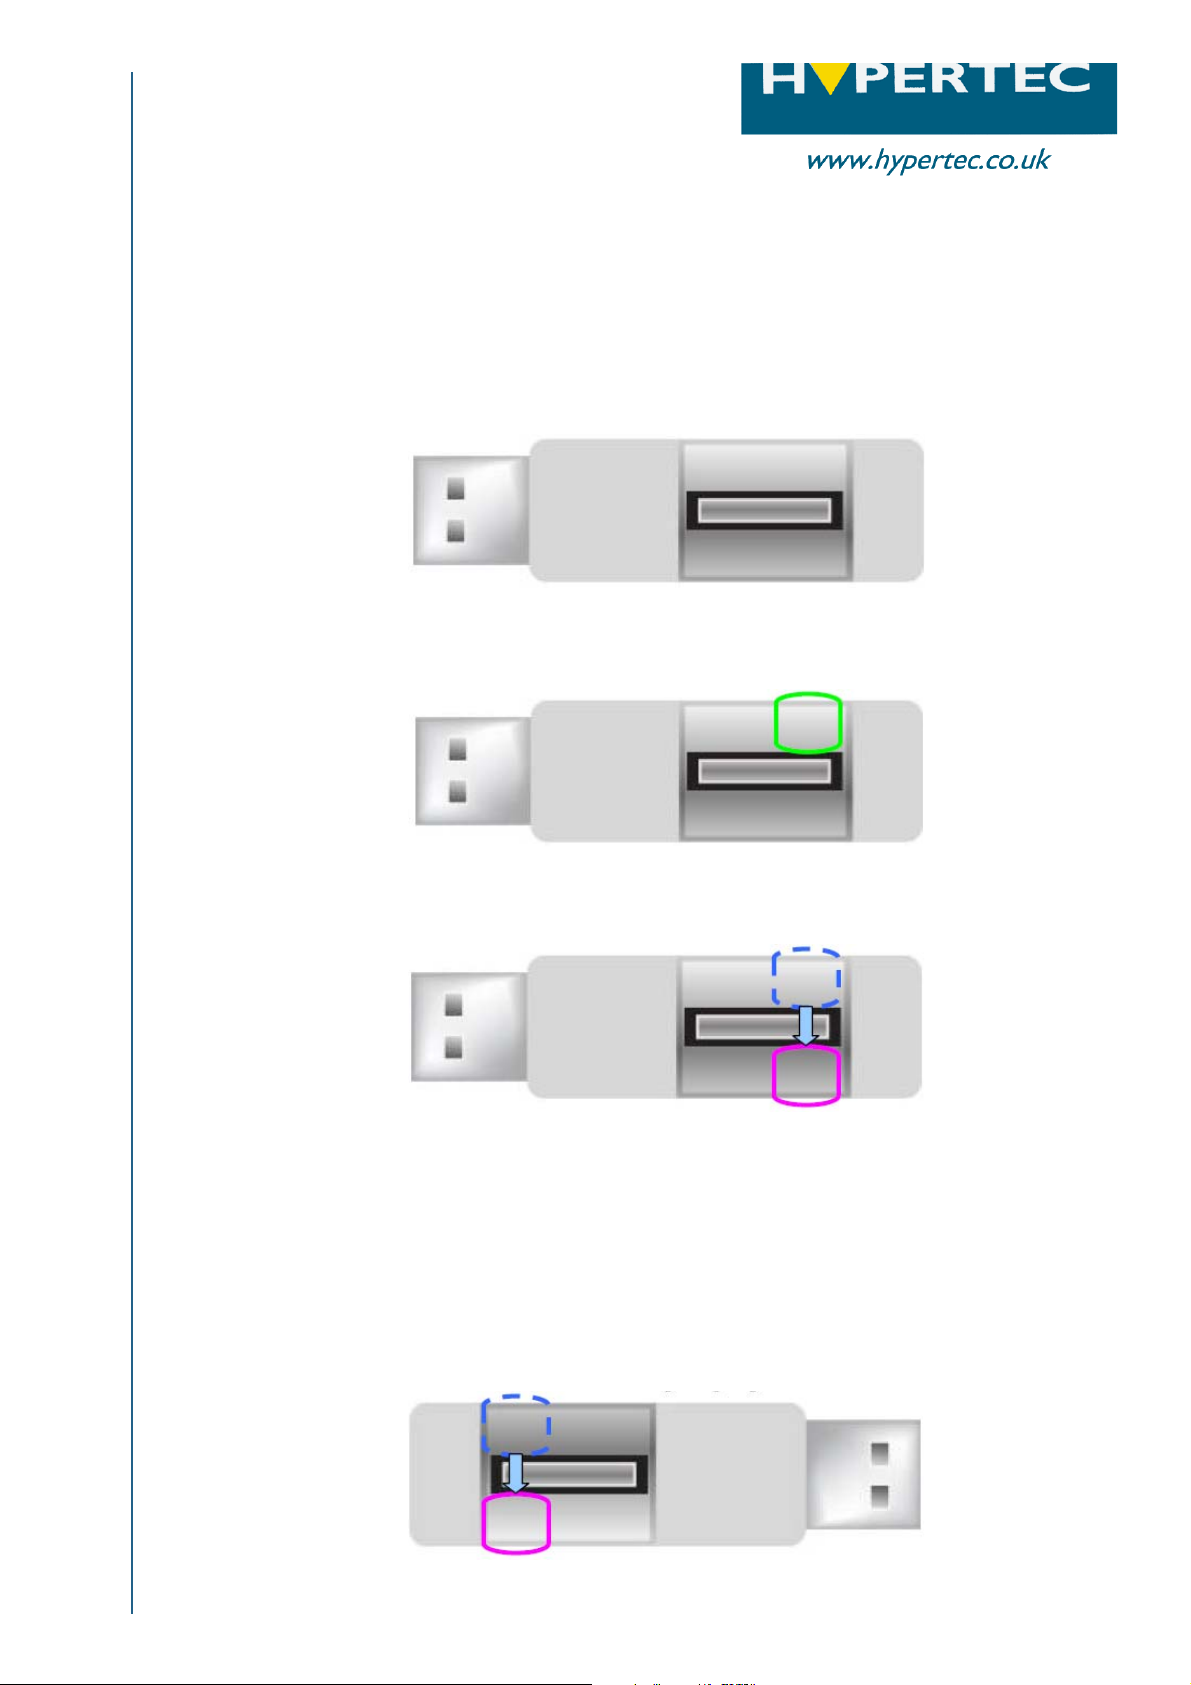
B. How To Swipe Your Finger Print
Step 1
Place your Biodisk on a flat surface. Make sure the USB connector is facing to the left.
(see picture)
Step 2
Make sure finger is clean and dry before swiping
Step 3
Place your finger on top and to right hand side of the sensor
Step 4
Press firmly down and swipe down across the sensor, keeping to the right hand edge.
Take about 1-2 seconds to swipe your finger across the sensor.
Hypertec - Quick User Guide
from
Note:
You may also rotate the BioDisk 180o and swipe. In this instance keep finger to left edge of sensor
area. We would usually, however, recommend scanning as outlined above for better performance.
BioDisk
3
Page 5

C. System Requirements
C. System Requirements
The following is the minimum system requirement for using the BioDisk:
Pentium II 133MHz Processor or above
256MB or above RAM
Microsoft Windows 2000 SP3 / Windows XP operating systems
USB 1.1 or 2.0
8MB free hard space
Hypertec - Quick User Guide
from
4
BioDisk
Page 6

D. Getting Started
D1. Registering Finger Prints
Step 1
When you first connect your Biodisk to your
computerÊs USB Port, you will see the
following screen:
Step 2
Enter your User Name as you would like it
to appear on screen
Hypertec - Quick User Guide
from
BioDisk
5
Page 7

D. Getting Started
D1. Registering Finger Prints (ctd)
Step 3
The Finger Print set-up screen will come up
automatically.
Select an un-registered finger from the
screen, the finger will be highlighted in green.
Step 4
Once selected, you are asked to enrol a
fingerprint. Press the finger firmly onto the
sensor and swipe. Each swipe should last 1-2
seconds. Each finger print needs to be
swiped successfully 3 consecutive times for
enrolment to work. If successful, numbers
1,2,3 will show on the left hand side.
Hypertec - Quick User Guide
from
BioDisk
6
Page 8

D. Getting Started
D1. Registering Finger Prints (ctd)
Step 5
Repeat until you are content with the number
of fingerprints registered (all 10 prints can be
registered if required). Enrolled fingers will
be highlighted in blue.
Step 6
When complete, click the button to continue.
You will reach this screen:
Hypertec - Quick User Guide
from
BioDisk
7
Page 9

D. Getting Started
D2. Setting Security Level and Password
Step 1
The drop down box allows you to choose the
level of security protection for the Biodisk:
FP Only (Fingerprint recognition only, no
password required)
Password and FP (Both password and
fingerprint recognition are needed to access
the Biodisk)
Password or FP (Either one or the other
can be used to access the drive).
Step 2
If a Password-inclusive option is chosen, you
will need to enter your chosen password
twice, along with a hint/reminder that you
can use if you forget the password.
Hypertec - Quick User Guide
from
BioDisk
8
Page 10

D. Getting Started
D2. Setting Security Level and Password (ctd)
Step 3
Once this step is complete, you will see
the main menu screen:
Hypertec - Quick User Guide
from
9
BioDisk
Page 11

D. Getting Started
D3. Deleting Finger Prints and Passwords
Step 1
On the main menu, choose ÂFP ManagerÊ.
You will be asked to verify a fingerprint and/or
password.
Step 2
You will be asked to choose which finger you
would like to delete (registered fingers are
highlighted in blue).
Tick to cancel registered print, or choose the
cross to cancel operation.
Hypertec - Quick User Guide
from
Step 3
To delete the need for a password, simply
go to the security settings (see page 8), and
select ÂFP onlyÊ, or ÂPassword or FPÊ.
BioDisk
10
Page 12

E. Finding the Serial Number
E. Finding the Device Serial Number
To obtain the serial number of the Biodisk device for use with the reset tool FP_Init (which is
downloadable from www.hypertec.co.uk under the „Downloads‰ section in „Technical Support‰):
Use explorer to navigate to the CD partition of your Biodisk (referred to as partition 1 earlier in
this document).
You will then see the utility „Serial.exe‰.
Execute this by double clicking and the serial number of the Biodisk will be displayed on screen.
Make a note of it for future use with FP_Init.
Hypertec - Quick User Guide
from
For any further advice, please contact our Technical Support Team on:
tel: 0870 243 5603
www.hypertec.co.uk
11
BioDisk
 Loading...