

Page 1

User’s Manual
USB 3.0 4-Port PCI Express Card
Page 2

ABOUT THIS MANUAL
This manual is designed for use with the External USB 3.0 4-Port PCI
Express Card. Information in this document has been carefully checked for
accuracy; however, no guarantee is given to the correctness of the contents.
The information in this document is subject to change without notice. The
manufacturer does not make any representations or warranties (implied or
otherwise) regarding the accuracy and completeness of this document and
shall in no event be liable for any loss of profit or any commercial damage,
including but not limited to special, incidental, consequential, or other
damage.
SAFETY INSTRUCTIONS
Always read the safety instructions carefully:
Keep this User’s Manual for future reference.
Keep this equipment away from humidity.
If any of the following situations arises, get the equipment checked by a
service technician:
The equipment has been exposed to moisture.
The equipment has been dropped and damaged.
The equipment has obvious sign of breakage.
The equipment has not been working well or you cannot get it to work
according to the User’s Manual.
COPYRIGHT
This document contains proprietary information protected by copyright. All
right are reserved. No part of this manual may be reproduced by any
mechanical, electronic or other means, in any form, without prior written
permission of the manufacturer.
1
Page 3

Table of Contents
1. Introduction ................................................................................................................... 3
Features...........................................................................................................................4
Package Contents ........................................................................................................... 4
System Requirements......................................................................................................4
2. Installation ..................................................................................................................... 5
A. Hardware Installation................................................................................................... 5
B. Driver Installation......................................................................................................... 6
3. Installation Verification...............................................................................................21
4. Driver Unistallation......................................................................................................22
5. Trouble Shooting......................................................................................................... 25
6. Specifications.............................................................................................................. 26
7. Regulatory Compliance .............................................................................................. 27
FCC Conditions ............................................................................................................. 27
CE.................................................................................................................................. 27
WEEE Information.........................................................................................................27
2
Page 4

1. Introduction
The USB 3.0 4-Port PCI Express Card is compliant to USB 3.0 Standards and
backward compatible with USB 2.0 devices. It also allows you to connect
multiple peripherals to your PC at the same time. The USB 3.0 4 Port PCI
Express Card enhances the performance of transmission that excessively faster
than existing USB 2.0 devices. It is the ideal interface for transferring extremely
large amounts of data from UBS 2.0/3.0 compliant products such real-time video
cameras, portable devices and others.
3
Page 5

Features
Add 4 ports to USB 3.0 devices.
Install easily into any PCI Express slot.
Supports USB 3.0 transfer rate.
Support ATX Power.
Package Contents
USB 3.0 PCI Express Card x1
CD( Driver and User’s Manual) x1
Quick Installation Guide x1
System Requirements
Windows -based (WindowsXP, Windows Vista, Windows 7) computer
with available PCI express slot.
Windows-based server.
Notice: Mac systems do not support this U
SB 3.0 4 ports PCI Express Card
4
Page 6
2. Installation
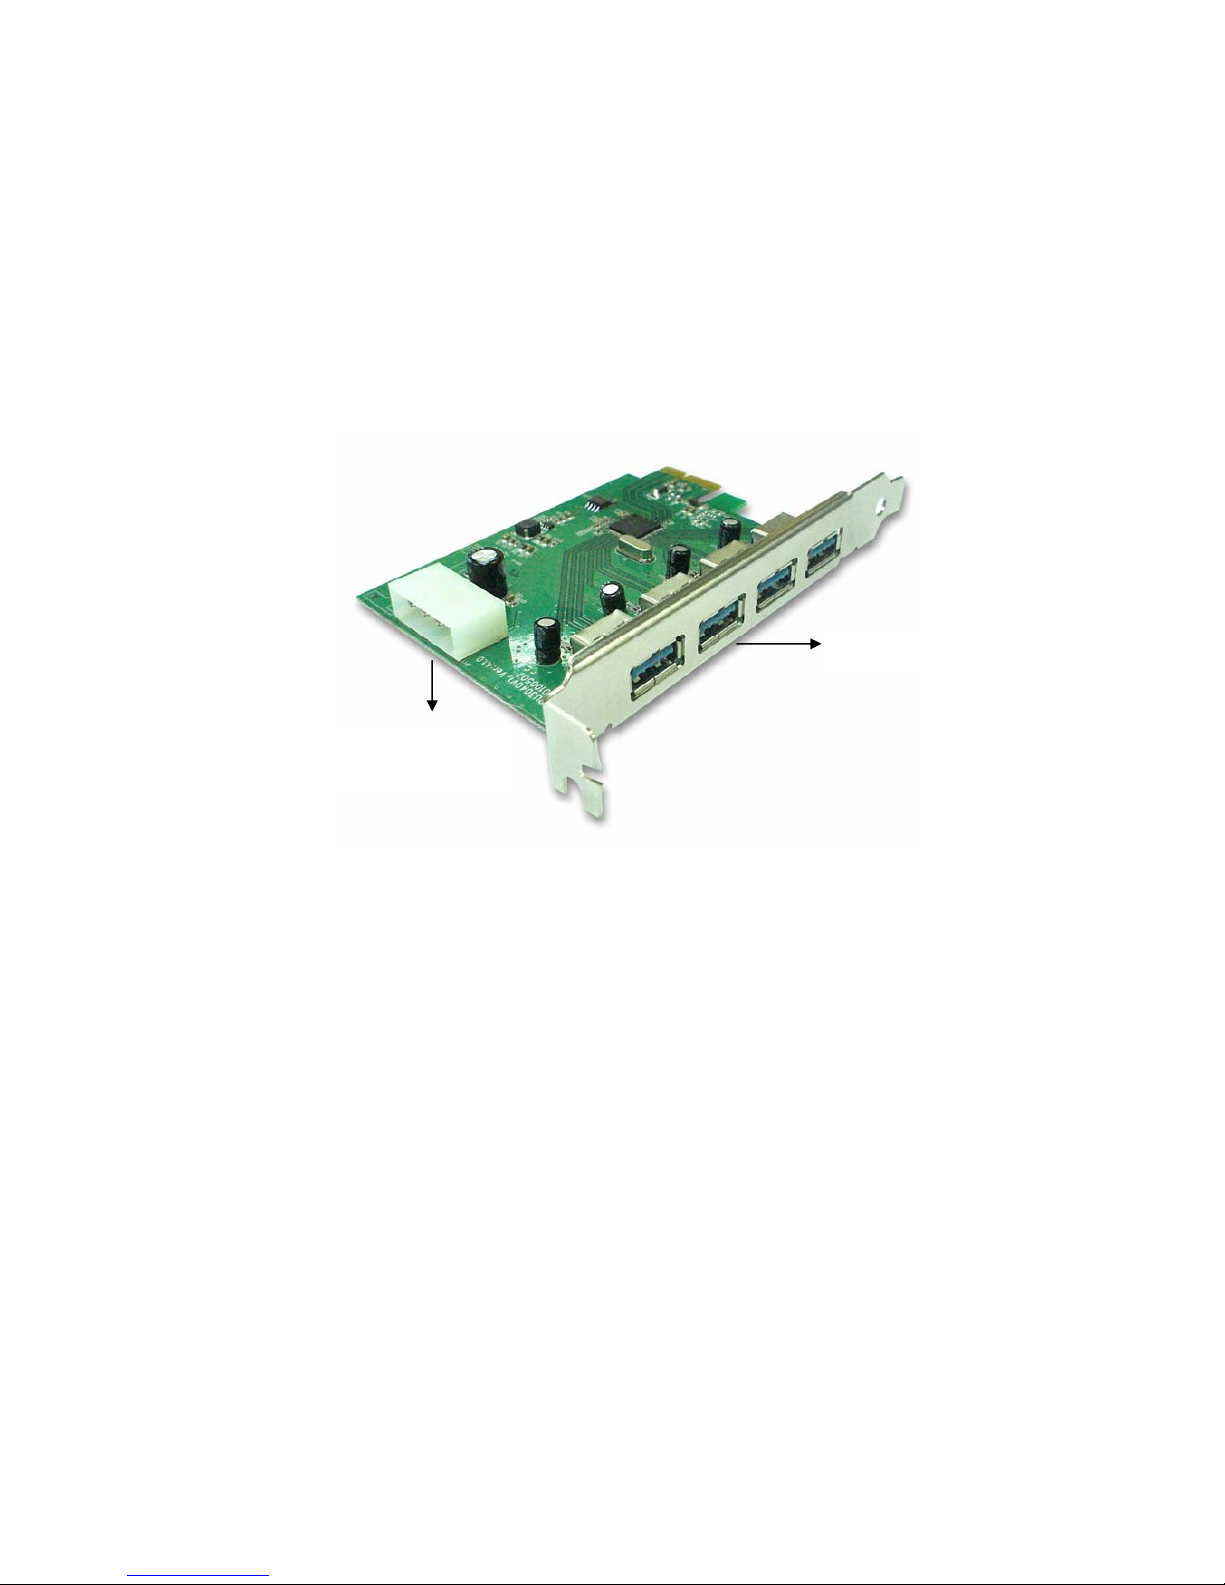
A. Hardware Installation
USB 3.0 Ports
4-pin Power Connector
1. Turn your computer off and any peripherals connected to the computer.
Unplug the power cable before installing the host card.
2. Remove the cover from the computer case.
3. Locate an available PCI Express slot and remove the bracket cover.
4. Insert the card into the open PCI Express slot and fasten the bracket to the
rear of the case.
5. Connect 4P power cable from the computer’s power supply to the card.
6. Place the cover back onto the computer.
7. Insert the power cable into the socket on the power supply.
5
Page 7

B. Driver Installation
On Windows® 7
To Install the Driver:
1. Insert the provided CD into CD-Rom locates and double-click the Setup.exe
file.
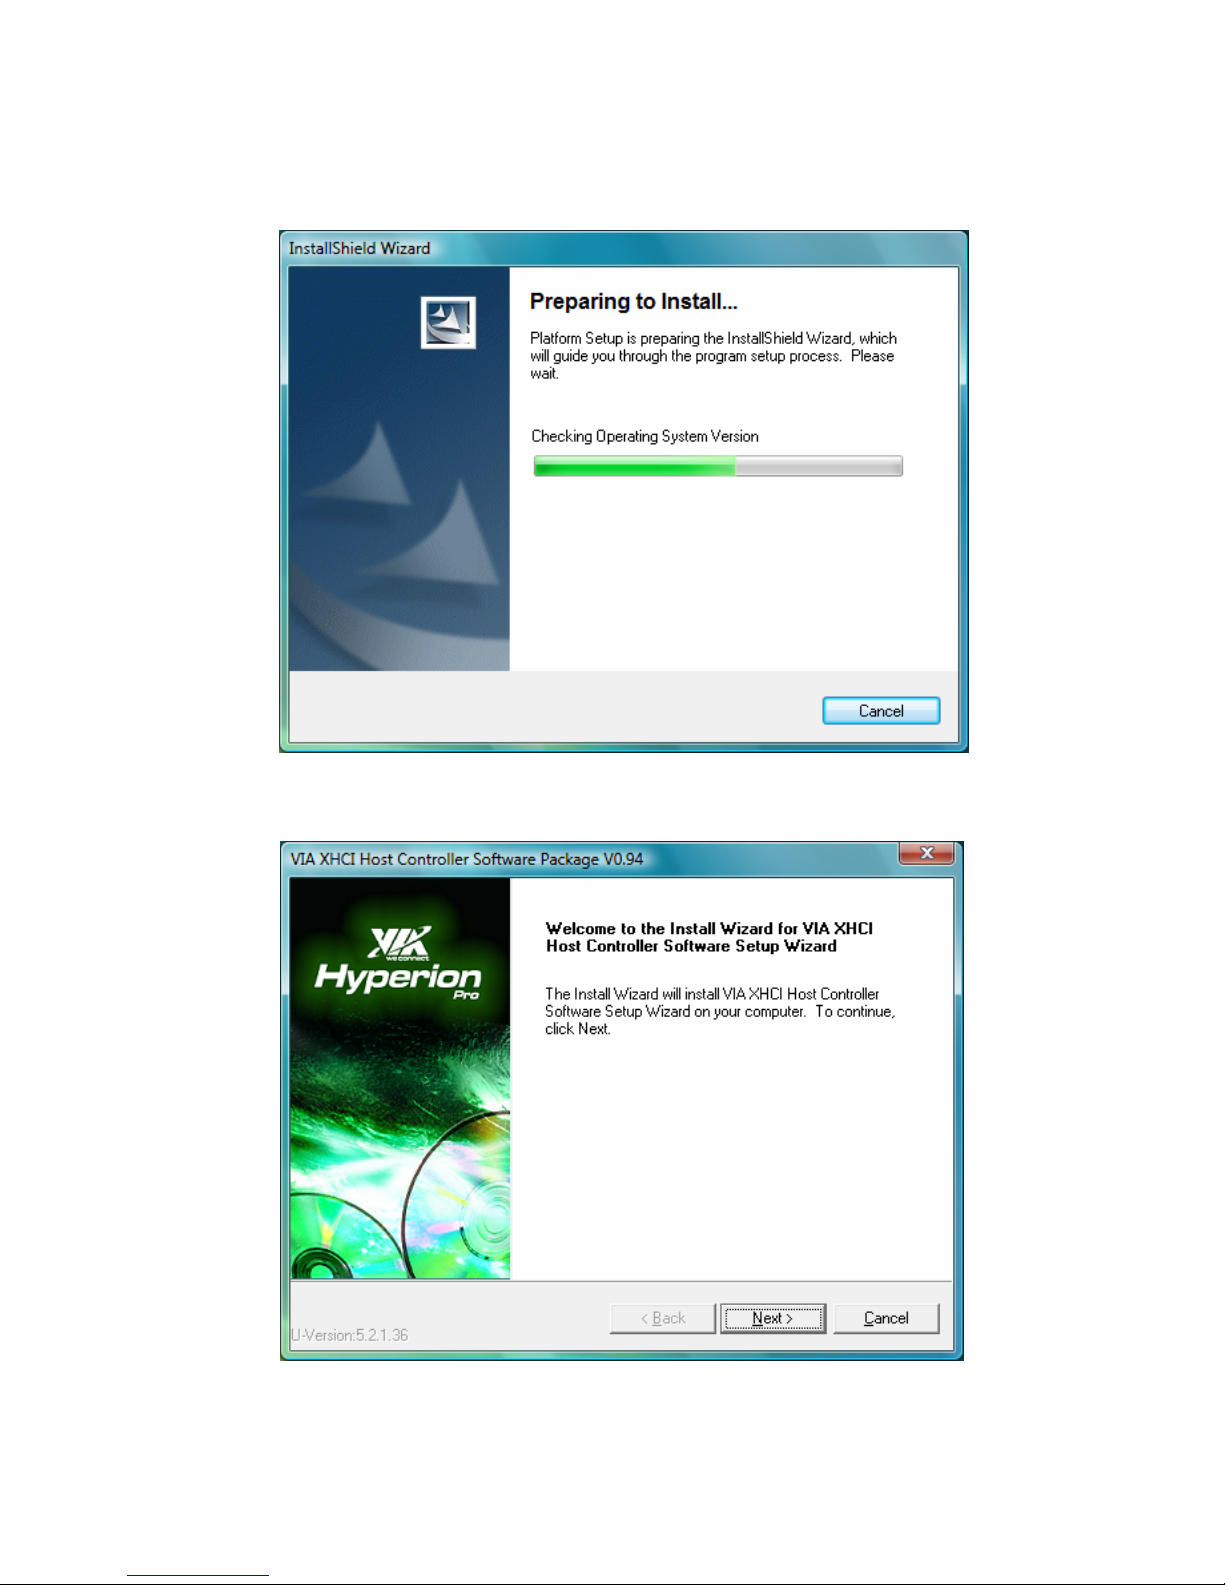
2. Preparing to install, please wait.
6
Page 8

3. The Install Wizard will install VIA XHCI Host Controller Software Setup
Wizard Setup Wizard on your computer. To continue, click Next.
4. To choose the components, the Setup will install them. Please click Next to
install the driver.
7
Page 9
5. The Windows Security will show up, please click Install this driver
software anyway.
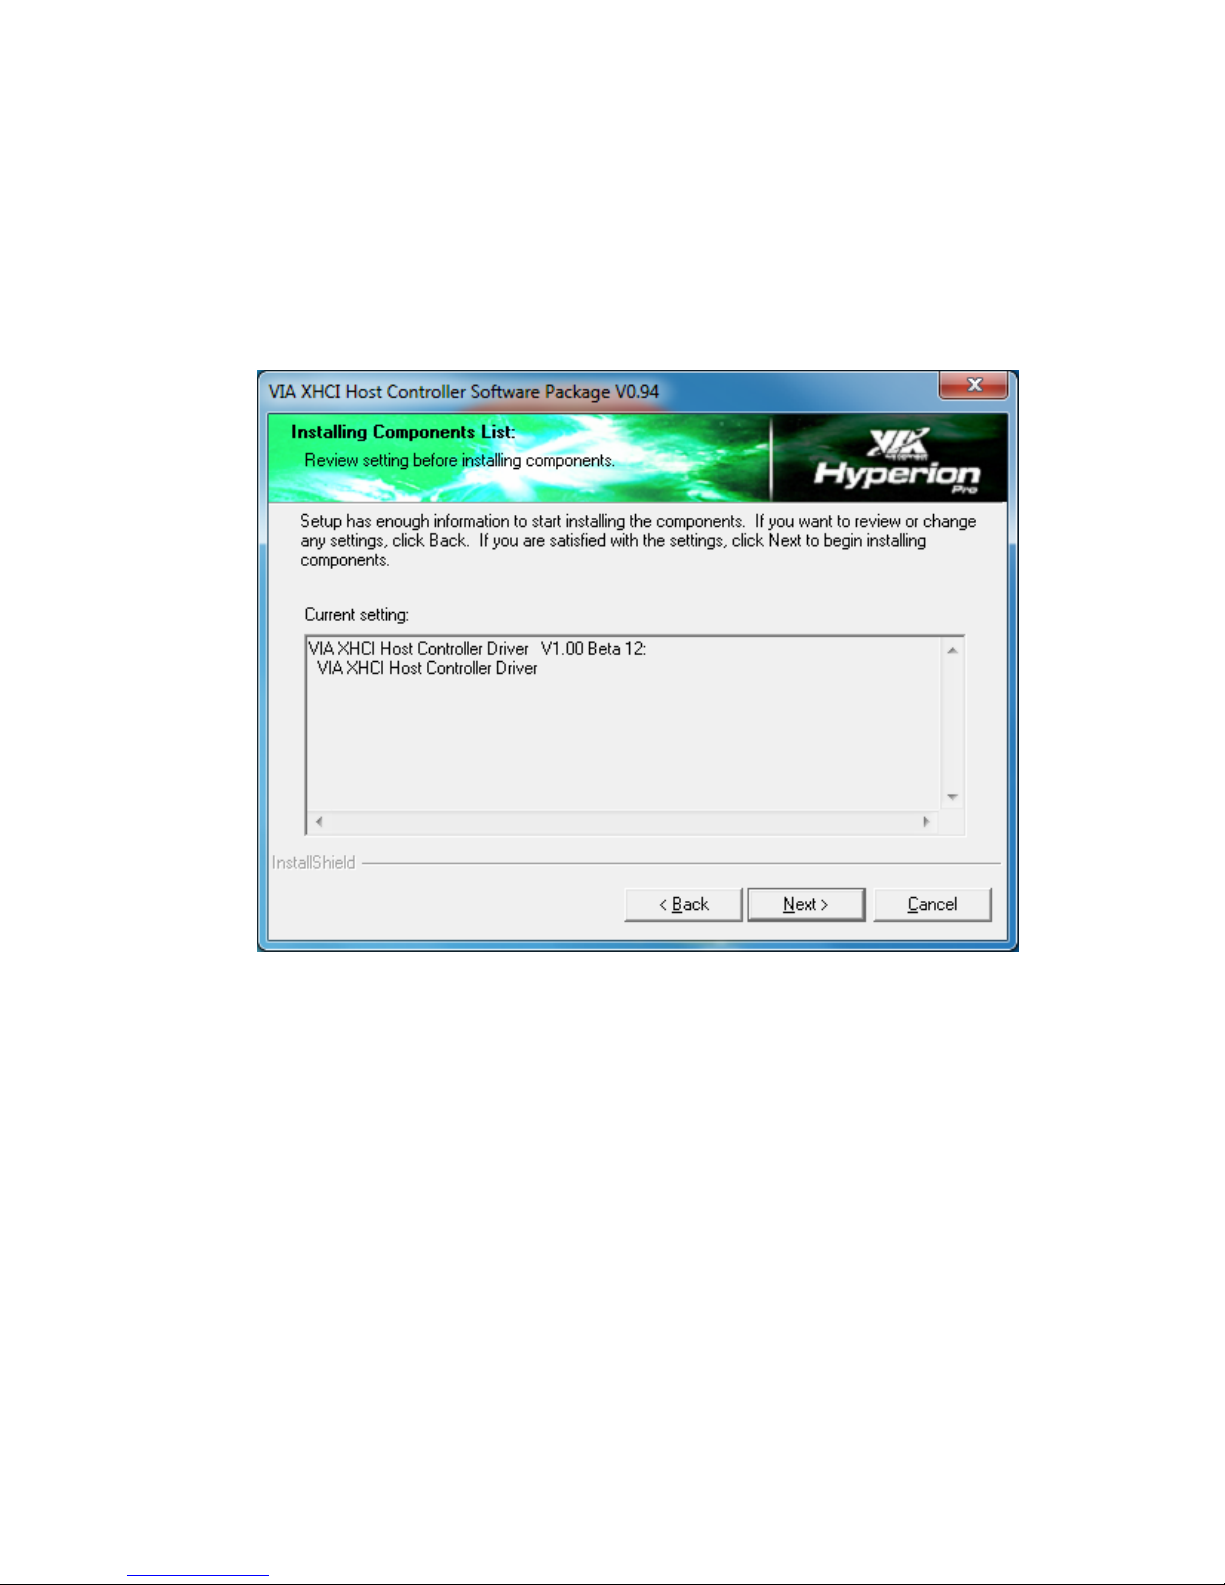
6. Setup has enough information to start installing the components. If you want
to review or change any settings, click Back. It you are satisfied with the
settings, click Next to begin installing components.
7. The Windows Security will show up, please click Install this driver
software anyway.
8
Page 10
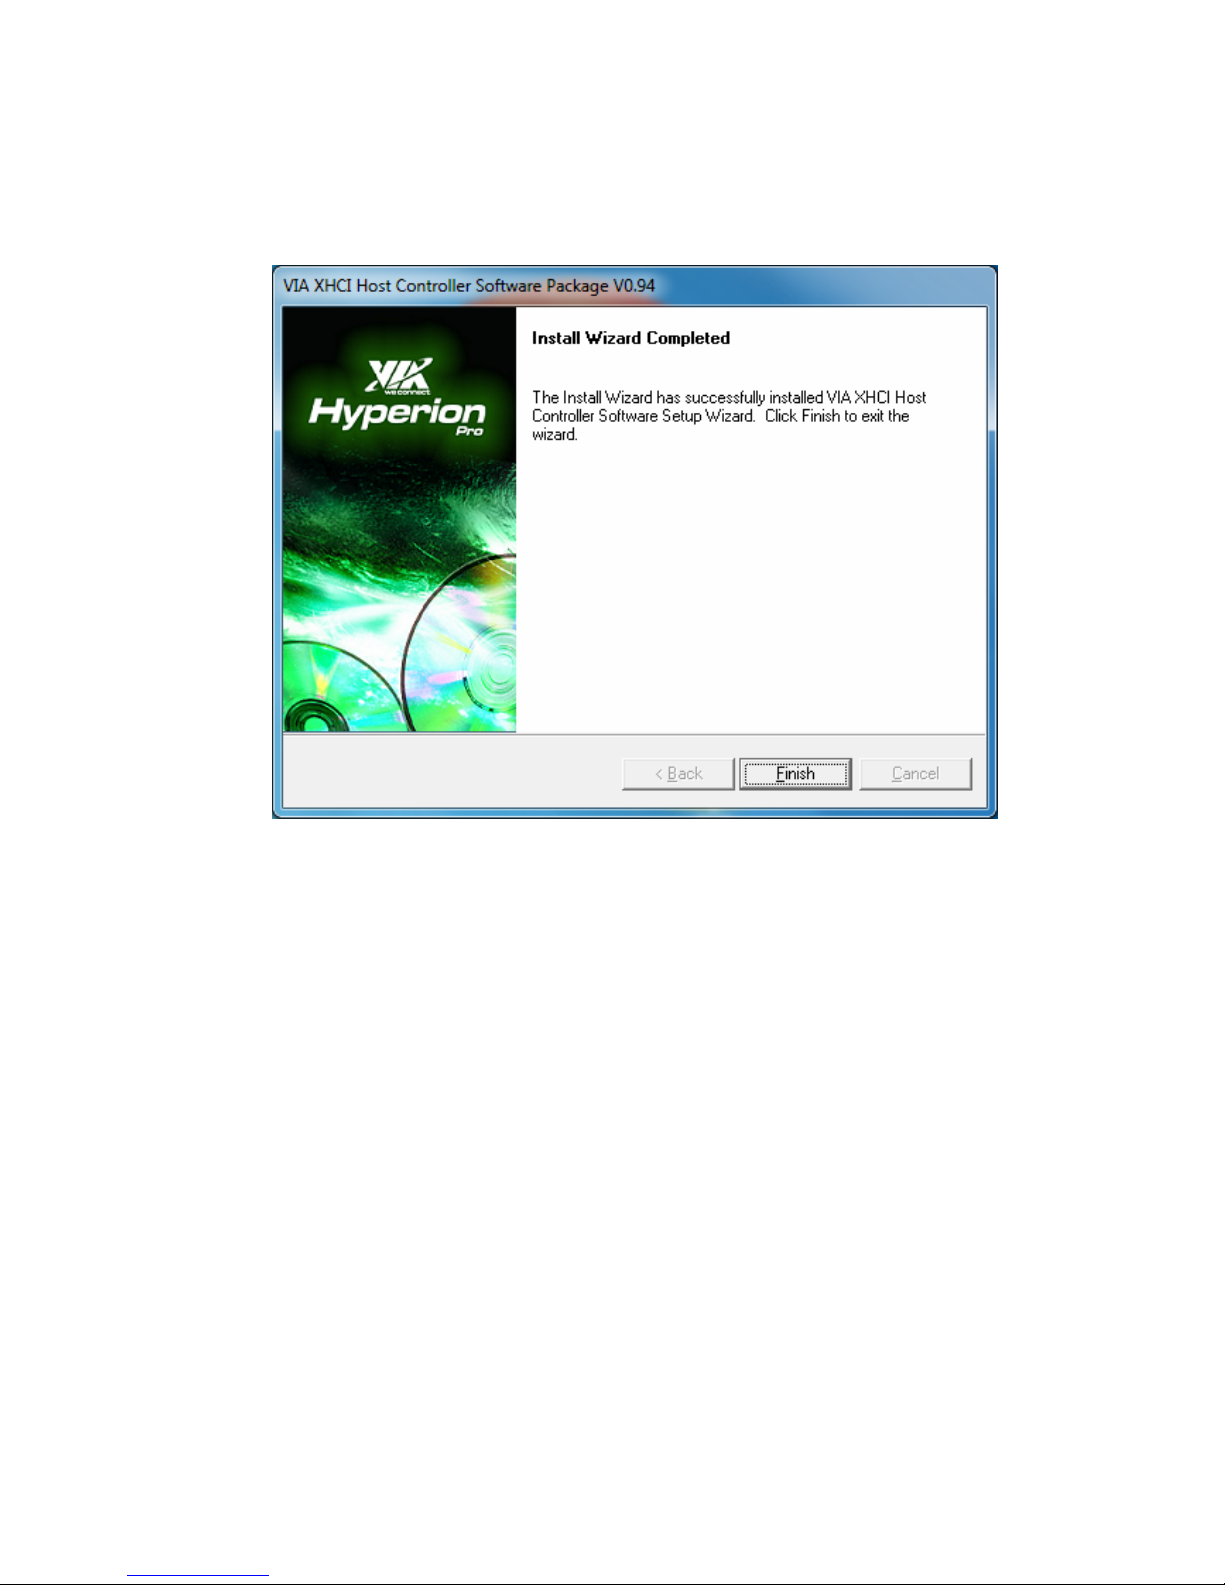
8. The install Wizard has successfully installed VIA XHCI Host Controller
Software Setup Wizard. Click Finish to exit the wizard.
*Actual strings depend on your operation system. These screen shots are from Windows 7 and might
vary slightly for each operation system.
9
Page 11

On Windows Vista®
To Install the Driver:
1. It is normal situation when the following window appears. Please click
Cancel.
2. Insert the provided CD into CD-Rom locates and double-click the Setup.exe
file.
10
Page 12
3. When the following screen show up, please click Next to install the Driver.
4. The Install Wizard will install VIA XHCI Host Controller Software Setup
Wizard on your computer. To continue, click Next.
11
Page 13
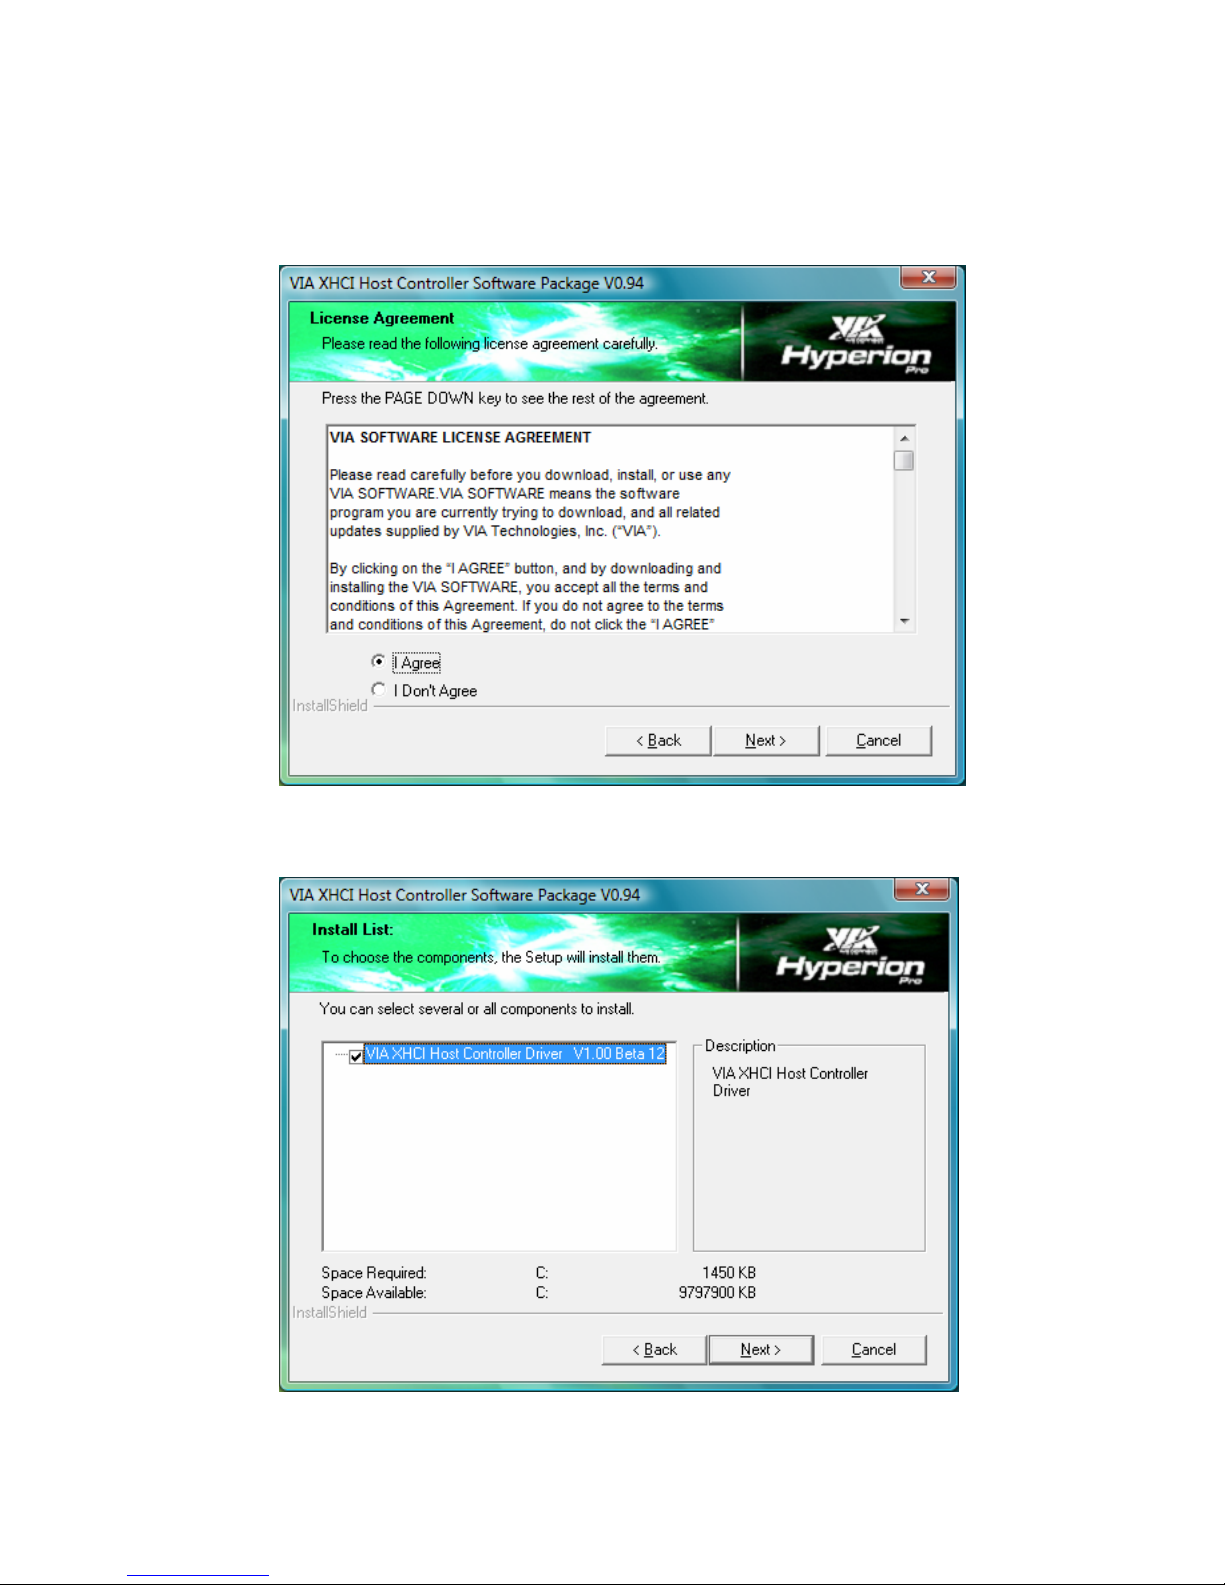
5. Please read the following license agreement and click I Agree and click
Next.
6. To choose the components, the Setup will install them. Please click Next
to install the driver.
12
Page 14

7. Setup has enough information to start installing the components. If you
want to review or change any settings, click Back. It you are satisfied with
the settings, click Next to begin installing components.
8. The Windows Security will show up, please click Install this driver
software anyway.
13
Page 15

9. Please click Next to install the driver.
10. The Install Wizard has successfully installed VIA XHCI Host controller
Software Setup Wizard. Click Finish to exit the wizard.
*Actual strings depend on your operation system. These screen shots are from Windows Vista and
might vary slightly for each operation system.
14
Page 16

On Windows® XP
To Install the Driver:
1. It is normal situation when the following window appears. Please click
Cancel.
2. The Install Wizard will install VIA XHCI Host Controller Software Setup
Wizard on your computer. To continue, click Next.
15
Page 17

3. Please read the following license agreement and click I Agree and click
Next.
4. To choose the components, the Setup will install them. Please click Next
to install the driver.
16
Page 18

5. Setup has enough information to start installing the components. If you
want to review or change any settings, click Back. It you are satisfied with
the settings, click Next to begin installing components.
6. When the Hardware Installation window appears, please click Continue
Anyway. Furthermore, when Found New Hardware appears, please click
Cancel.
17
Page 19

7. Please click Next to install the driver.
18
Page 20

8. The Install Wizard has successfully installed VIA XHCI Host controller
Software Setup Wizard. Click Finish to exit the wizard.
19
Page 21
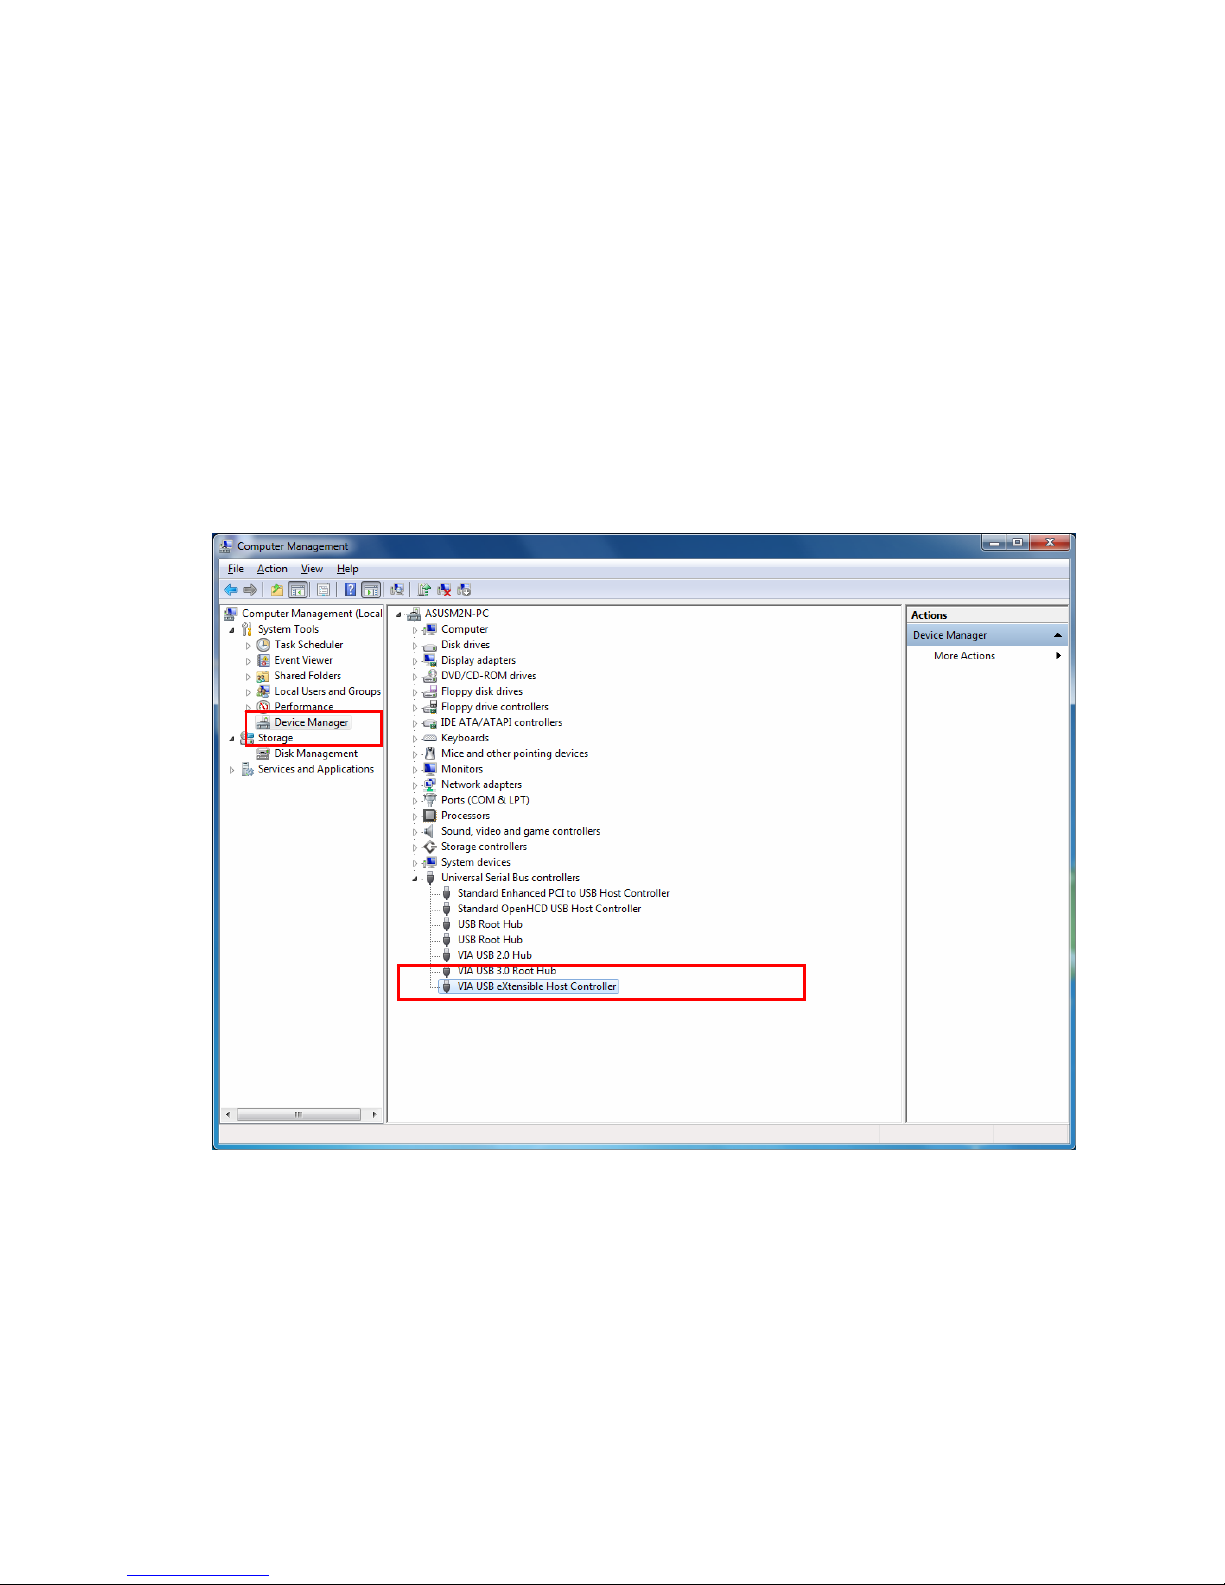
3. Installation Verification
After plugging this PCI Express Card to PC and finishing driver installation, the
system will detect the device. You can go to Device Manager to verify the entire
installation.
Windows
®
XP/ Windows Vista®/ Windows® 7
20
Page 22

4. Driver Uninstallation
1. To uninstall a program, select it from the list and then click Uninstall.
2. Please select Remove and click Next.
21
Page 23

3. To choose the components, the Setup will remove them. Please click Next
to continue to install the driver.
4. When the Caution appears, please click OK.
22
Page 24

5. Please click Next to continue remove the driver
6. The Install Wizard has successfully removed VIA Platform Device
Manager. Click Finish to exit the wizard.
23
Page 25

5. Troubleshooting
Since the driver has not passed WHQL, please take the following steps on
Windows Vista® 64 bit and Windows® 7 64 bit.
1. As the computer starts, watch for a progress bar at the bottom of the
screen. Press F8 about once every second.
2. Immediately press F8 before the progress bar reaches the right side of
the screen.
3. From the Windows Start menu, select “Disable Driver Signature
Enforcement“and press Enter.
4. After entering Windows system, please go to CD\Driver\X64 and
execute certmgr.exe
5. Add “VIATest.cer” into localMachine root & localMachine
trustedpublisher
6. From the Windows “Start” menu, click “Run” and Enter: “bcdedit -set
testsigning on” to install driver.
Note: You will need to follow above procedures as restarting the computer.
24
Page 26

6. Specification
Compliant with Universal Serial Bus 3.0 Specification Revision 1.0
Supports the following speed data rate as follows; Low-speed (1.5 Mbps)/
Full-speed (12 Mbps)/ High-speed (480 Mbps)/ Super-speed (5 Gbps).
Supports 4 downstream ports for all levels of speed.
Supports all USB compliant data transfer type; Control/ Bulk/ Interrupt/
Isochronous transfer.
Compliant with PCI Express Base Specification 2.0.
Supports PCI Express Card Electromechanical Specification Revision 2.0.
Supports PCI Bus Power Management Interface Specification Revision
1.2.
Supports power each port up to 900 mA.
*
Specification is subject to change without notice.
25
Page 27

7. Regulatory Compliance
FCC Conditions
This equipment has been tested and found to comply with Part 15 of the
FCC Rules. Operation is subject to the following two conditions:
(1) This device may not cause harmful interference
(2) This device must accept any interference received. Including
interference that may cause undesired operation.
Important! Changes or modifications not expressly approved by the
manufacturer responsible for compliance could void the user’s authority
to operate the equipment. Use an approved phone set.
CE
This equipment is in compliance with the requirements of the following
regulations: EN 55 022: CLASS B
WEEE Information
For EU (European Union) member users:
According to the WEEE (Waste electrical and electronic equipment)
Directive, do not dispose of this product as household waste or commercial
waste.
Waste electrical and electronic equipment should be appropriately
collected and recycled as required by practices established for your
country. For information on recycling of this product, please contact your local
authorities, your household waste disposal service or the shop where you
purchased the product.
26
 Loading...