

Page 1
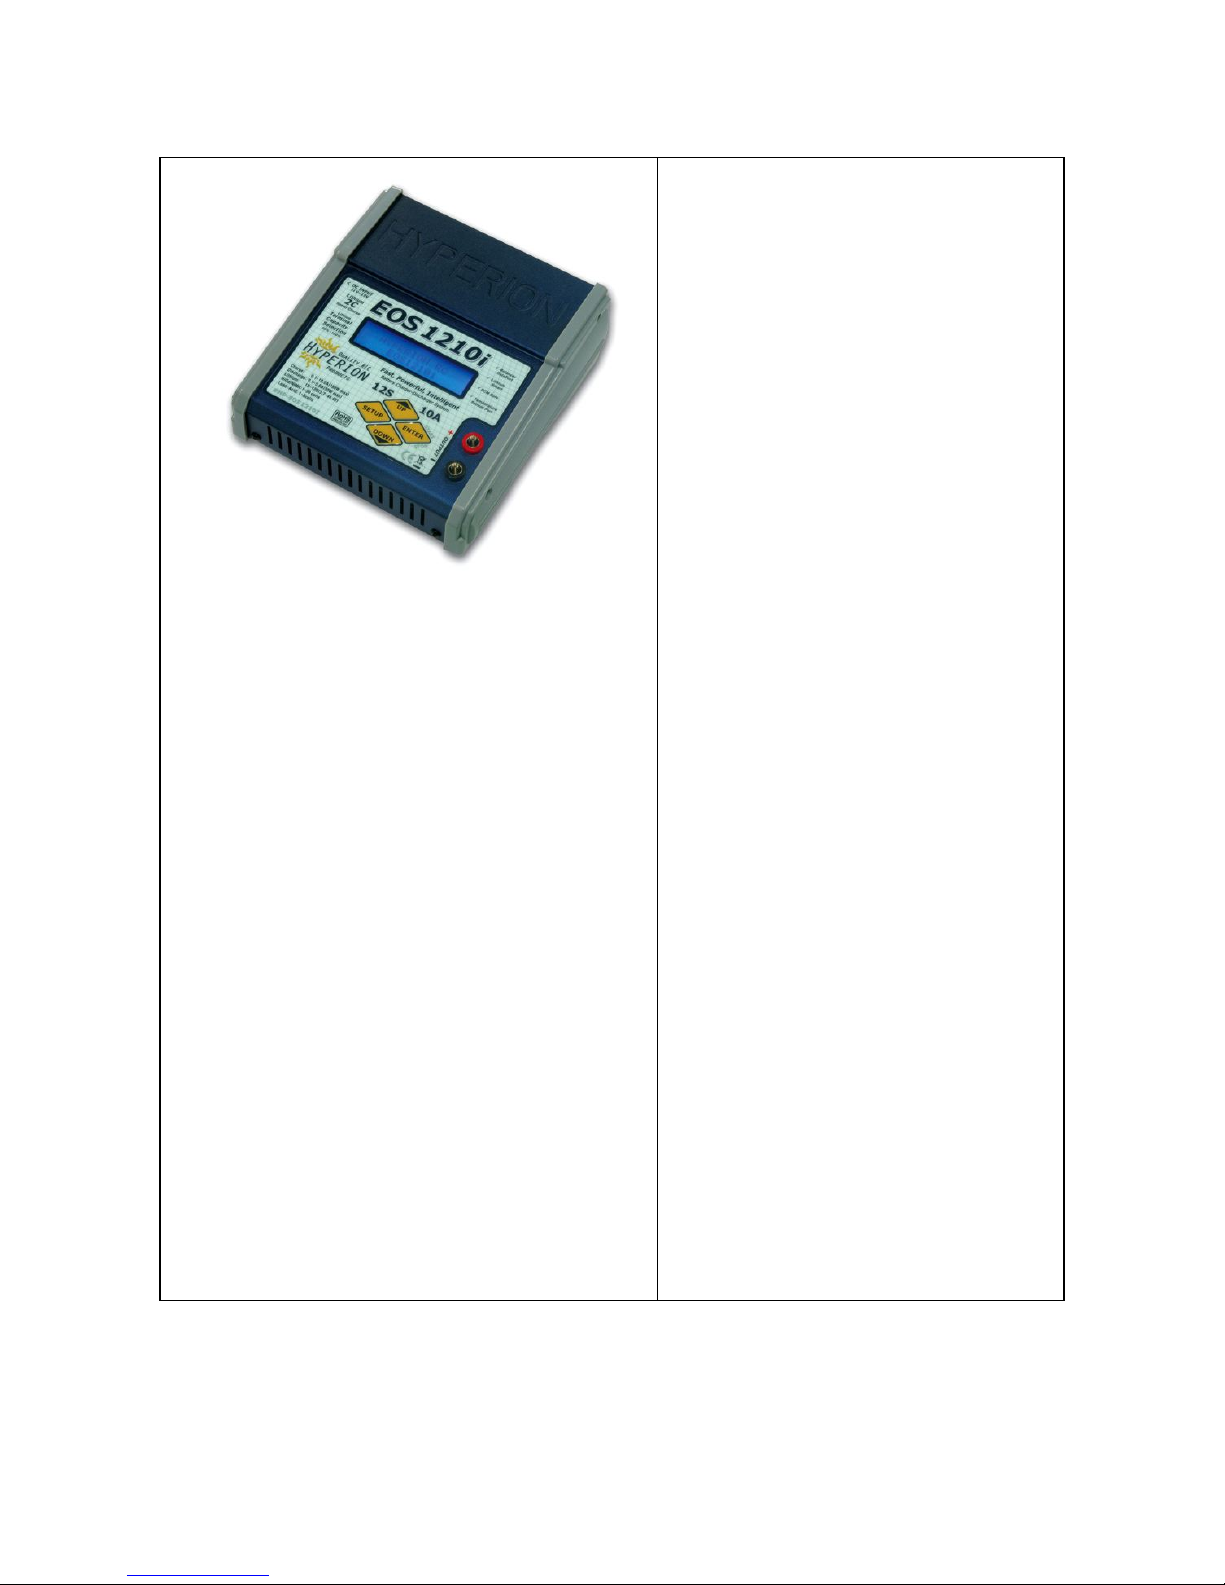
Hyperion EOS
1210i
Charger
User’s Manual for 1210I-A with A123 Mode
Warnings:
The EOS
1210i
is a carefully-designed charger with many built-in
safety features, such as reverse polarity protection, input voltage
error warning, and cell-count mismatch warnings for lithium
chemistry batteries. HOWEVER, IT IS THE RESPOSIBILITY OF THE
USER TO INSURE THAT THE CHARGER IS CONFIGURED AND USED IN
A SAFE MANNER IN PROPER ENVIRONMENT. Note that as cell count
of lithium batteries becomes higher, all warning systems become less
accurate. As such, we strongly recommend the use of Hyperion
LBA10 balancers when charging lithium batteries, and especially so at
4S or higher. LBA provide much additional safety, because the LBA
monitors each individual cell.
(for A123 cells, ALWAYS use balancer)
•
Always be sure that the charger is properly configured for
the correct battery type.
•
Be sure that the batteries you charge are capable of charge
at the rate you select.
•
Never charge batteries unattended.
•
Charge only in a fire-resistant environment, such as on
concrete or brick, rather than wood surfaces.
•
Do not charge near easily flammable materials.
•
Do not charge batteries inside a model.
•
Charging outdoors is recommended whenever practical
•
Use only high-quality gold 4mm bullet connectors for charge
output cable connection to the charger. See “setup”.
•
Insulate all Output connectors to eliminate the possibility of
short circuit. Damage caused by output short circuit is not
covered by warranty.
•
Do not drop or cause other shock to the charger, nor subject
it to moisture or water
•
Do not attempt to charge battery packs made from different
types of cells, a mixture of old and new cells, or cells made
with chemistry not supported by the EOS
1210i
•
Do not attempt to charge “non-rechargeable” dry cells.
•
Do not open the case of the charger under any
circumstances. Doing so will void the warranty.
•
Keep the charger away from children or pets at all times.
In the event of injury of any kind, seek the attention of
medical professionals immediately.
Specifications:
• 2-Line, 16-Char, Blue Backlit LCD Data Display
• 10 User-definable Memo
ry Positions
• Charge/Discharge 1 to 12 cells Lithium Batteries
(3.7V/cell nominal types)
• Charge/Discharge 1 to 12 A123 Brand cells
(3.3V/cell no
m
inal
types)
• Charge/Discharge/Cycle 1-30 cell NiCd/Ni-MH
• Charge/Discharge 2-12v Lead Acid Batteries
• Balancer Safe - 55V max out on open circuit
• DataPort for Hyperion LBA10 Balancers
• 0.1A -10.0A Charge Current (180 Watt Maximum)
• 0.1A - 5.0A Discharge Current (50 Watt Maximum)
• TCS - Lithium Terminal Capacity Selection
50%~
100
%
• Rich Data Displays during and after charging and
discharging
• Input Cable with 4mm Co
nnectors and Clamps
• Output Cable Set Included, with 4mm Connectors
• Integral, Thermostat-Controlled Cooling Fan
General Setup:
The EOS 1210i comes with male 4mm Bullet connectors
(also known as ‘banana connectors’) attached to the
power INPUT cables. These cables are appropriate for
attaching directly to most high-quality AC-DC 12V power
supply units, such as the BK Precision (USA) model
1692. Also included are large Terminal Clips with
matching 4mm female bullet connectors, for attaching
directly to 12V lead-acid batteries.
Output side connector/cable assembly is also supplied.
Carefully solder your preferred battery connector to the
free ends. If you make up additional output cables,
note that MINIMUM inner cable diameter should be
2.5mm (14ga) and MAXIMUM cable length is 20cm (8”).
It is critically important that you use either a fully
charged 12V lead-acid automobile battery - or a high
quality AC-DC power supply in the range of 12V to 15V
DC output, with minimum current rating of 8A. When
charging high voltage batteries at high current an
output rating of up to 25A may be required.
If you have any trouble charging after confirming that
input and output cables are properly connected and of
the proper materials, be sure to check the charger on an
automotive battery. Many problems are associated with
poor quality or inadequate switching AC-DC power
supplies.
If, after carefully reading the following pages on usage,
you have any difficulty using the charger please refer to
the final pages for troubleshooting guide and warranty
terms.
Page 2

Memory Position and Settings per Battery Type
The “Auto” modes for NiCd and NiMh battery types are preferred whenever you have a battery pack made from quality cells and
in good condition and balance. The EOS 1210i charges NiCd and NiMH in Auto Mode based on an intelligent algorithm which
maximizes performance and minimizes charge time.
These two pre-configured memory positions cannot be edited:
A1 - NiCd Automatic
A2- NiMH Automatic
Ten additional memory positions - M0 to M9 - allow you to choose parameters for charging or discharging, such as battery type
(NiMH, NiCd, LiPo,
A123,
Lead-Acid), battery capacity, discharge rate, cutoff voltage or temperature, and more.
Charging - Let’s try it once to learn it….
ENTER:
Select Memory Position to change / Charge Start, Charge Stop
SETUP:
Selects parameters for editing in turn
UP/DOWN:
Scroll through memory positions / Change parameter settings
After connecting the charger to a suitable power source, the LCD monitor will show the configuration
used in the previous charging session.
After the welcome screen, press
ENTER
then the UP button to scroll through the pre-set memory positions. Stop on
M8
(NiCd
24 cell). Press ENTER to choose Memory slot M8. Now press
SETUP
, and you will see that the text for battery type is blinking
(“NiCd”), and screen title has changed to BATTERY SETUP. Press the
UP
(or DOWN) button to scroll through battery type
selections. Press
SETUP
again at
LiPo
to set the battery type to Lithium Polymer; the cursor then moves to Voltage Selection.
For
lithium
polymer, voltages are listed as number of cells in series, or
“S”.
Press the
UP
key to choose “4S”, then press
SETUP
again. Press
DOWN
repeatedly to set Battery Capacity to 2500 (mAh), then press
SETUP
. The display changes from BATTERY
SETUP back to MEMORY SELECT. Now, press the
DOWN
button to move away from MEMORY SELECT screen, and go to CHARGE
MODE screen.
Note that CHARGE RATE (C:) will be 2.5A to start. This is default behavior, and is a “One C” charge rate based on the 2500mAh
capacity you set earlier, at the BATTERY SETUP screen. Now keep pressing the
UP
key, until the Charge Rate display stops
changing. You will see that it allows you to set up to 5A charge rate maximum, which is “2C” for our 2500mAh battery example.
Note:
Hyperion batteries all support charge rates of 2C+. But do check that your battery brand is capable of charge in excess of
1C before making such selections. See
Addendum
later as to why rates higher than 2C
are best
avoided.
Now, press SETUP again, to select estimated Terminal Capacity of Charge. Press the
DOWN
key, until the display shows 90%,
then press
SETUP
. Note: normally this setting is 100%, but we have altered it just to see how it is done, for training purposes.
(
see notes on TCS later in Addendum)
At this point, you have altered memory slot #8 to charge 4S 2500mAh LiPo batteries at 2C rate, to 90% of battery capacity. We
should still be at the CHARGE MODE screen. You should not have anything connected to the output port at this time. Now, we
are going to press the
ENTER
key to start “charging”, but will get a CONNECT ERROR from the charger; that’s ok, but do be
ready to press
ENTER
again to stop the Warning buzzer. So press
ENTER
now, then
ENTER
again after the warning tones.
Finished testing? Ok, now you know how to configure your new EOS 1210i, to charge a lithium
polymer
battery pack!
More About BATTERY SETUP and CHARGE MODE Screens
Consult the documentation or labels provided with your battery to determine the correct capacity setting. It is very important to
get this right, as the charger uses the capacity setting to determine nominal charge rate (amperage), TCS percentage, and
safety termination
. Incorrect settings could damage the battery, and could even cause an accident.
For
all battery types
CAPACITY is given in mAh
(at BATTERY SETUP screen). Selection is in increments of 100mAh. If your
battery does not fall on an exact division of 100 - for example
your
battery is rated 670mAh - you should choose the next
higher
setting. In our example, 700mAh would be appropriate.
CURRENT
is set in Ampere (at CHARGE MODE screen), so divide mAh
by 1000 to get Amperage. For 700mAh, current is 0.7A for 1C, up to 1.4A for 2C max.
For 1800mAh, 1.8A
(1C)
~3.6A
(2C)
and
so on….
Lithium
Polymer/Ion
:
Please be absolutely sure that you know the type of lithium battery you are charging, the capacity
in mAh, and the number of cells wired in series! The EOS charger is
only for lithium
Polymer/Ion
with 3.7V per cell
nominal
. If your battery does not have a number for “S” count on the label, like “3S”, but does show the nominal voltage, use
the chart below to set the correct “S” when charging:
Number of Lithium Cells Wired in Series (S)
1S
3.7V2S7.4V3S11.1V4S14.8V5S18.5V6S22.2V7S25.9V8S29.6V9S33.3V
10S
37.0V
11S
40.7V
12S
44.4V
A123 Brand Cells:
The A123 charge/discharge modes are intended for cells with 3.3V nominal produced by A123
Company
ONLY! While the EOS1210i A123 charge mode MAY work with other lithium cells having 3.3V nominal voltage,
Hyperion strictly cautions against charging other-brand cells with EOS 1210i A123 routine.
Customers who use A123 mode
to charge other-brand cells assume all risk.
Due to the nature of A123 cells and the very high rates at which they can be charged, one
MUST ALWAYS use a cell balancer
Page 3

when using A123 Mode. The original Hyperion EOSLBA10 can be used, but was originally designed for Lithium
Polymer
batteries.
The EOSLBA10 Balancer function works well with A123, but the overcharge and discharge protection voltages are higher than
optimal for A123. For best results,
EOSLBA10-A
(with LIPO and A123 modes) should be used; when in A123 mode, version
EOSLBA10-A
provides correct protection voltages for A123 cells - both for over-charge and over-discharge conditions.
EOSLBA10-A
should be connected to 1210i via
DataPort Cable (#HP- EOSLBA10-DPC).
Note:
Original LBA10 (w/o A123 mode),
when connected to Hyperion A123-capable Charger via
DataPort Cable, will cause charger to ERROR if charger is set for A123
cell type. Therefore original LBA10 should not use
DataPort Cable when charging A123 cell types.
To help distinguish between Lithium Polymer and A123 Modes, the screen for A123 CELL COUNT lists pack voltages, rather than
“S”
count as in LIPO mode. Use the chart below if your pack does not list voltage.
Number of
A123
Cells Wired in Series (
Pack Voltage
)
1S
3.3
V2S6.6
V3S9.9
V4S13.2
V
5S
16
.5V6S19.8V7S23.1
V
8S
26.4V9S29.7
V
10S
33.0V
11S
36.3
V
12S
39.6
V
Note on A123 CURRENT (A) setting:
The EOS 1210i does NOT limit max charge rate for A123-type cells. At time of this
writing, A123 cells come only in 2300mAh cell size, but in future other capacities may be available. Current A123 2300mAh cells
are capable
of 4.3C max charge rate (10A). But do consult the documentation provided with your specific A123 pack to
determine max charge rate.
Lead Acid Batteries:
Set Voltage of the battery, Amp Hour (Ah) rating of the battery at BATTERY SETUP screen, and
Charge Current at CHARGE MODE screen. Consult the battery manufacturer’s documentation to determine all of these settings.
Number of Cells in Lead Acid Battery
Pb
1 cell
2.0V
2 cells
4.0V
3 cells
6.0V
4 cells
8.0V
5 cells
10.0V
6 cells
12.0V
NiCd and NiMH:
Set Voltage of the battery, Number of Cells (C), and Capacity in mAh at BATTERY SETUP screen, and
Charge Current at CHARGE MODE screen.
If you only know the nominal rated voltage of the pack, but not the number of cells, divide voltage by 1.2 to get cell count:
Example: 9.6V / 1.2 = 8 , so there are 8 cells in the pack.
At the NiCd/NiMH CHARGE MODE screen, there is a setting for
ψ
: Delta V (
sensitivity to voltage change for charge termination).
If you have no good reason to change the defaults, don’t touch this. By default, NiCd is 8mV/C and NiMH is 4mV/C, in case you
change it by mistake…
Note again that in AUTO modes for NiCd (
A1)and NiMH (A2), you do not need to set anything. Just connect the battery after
choosing the correct Auto Mode, and press ENTER to start charging.
Other Screens and Settings
DISCHARGE MODE:
D
: Discharge rate in ampere (A), 0.1A increments
xV/CELL
: “x” is the stop discharge voltage cutoff per cell
Note: Typically
xV/CELL
would be 0.9V for NiCd/NiMH, 3.0V for Lithium. However, except for testing the condition of a lithium
pack, discharge or cycling of Lithium batteries has no advantage and is best avoided.
CYCLE MODE:
DCH/
CHG
: Choose to Discharge first, then Charge OR
CHG/
DCH
: Choose to Charge first, then Discharge
TIME
: Number of cycles to perform ( 1 = one cycle, 2 = two cycles…)
USER CONDITION SETUP:
The four settings below are global and
affect all memory positions. Push
ENTER
when at the USER CONDITION SETUP screen to
access these four sub menus, then UP/DOWN to make changes (if desired), then
ENTER
again to move to the next screen
(SETUP button is not used at all).
*
TEMPERATURE:
When the optional temperature probe (HP-EOS1210I-SEN) is attached to battery and charger, the
temperature in degrees Celsius at which charging will terminate. Use
UP/DOWN
buttons to choose an appropriate temperature
in a range from 10 to 55 degrees. Press
ENTER
to continue.
*TRICKLE CHARGE CURRENT:
(does not apply to Lithium batteries)
Trickle charge is a low-current maintenance charge that continues after the normal high-rate charge cycle is finished.
AUTO
: Determined by charger algorithm (best in most cases)
0mA
: OFF - No trickle charge
100mA~500mA
trickle charge current, in 100mA increments.
*DELAY BETWEEN CHARGE/DISCHARGE:
Applies only when
in
CYCLE MODE, from 1~30 minutes in one-minute increments.
*
SOUND VOLUME: OFF
, or one of five choices. Press
UP/DOWN
to hear each tone type.
ENTER
to choose and exit.
Page 4

Once you are satisfied that all the settings in the current memory position are correct for your battery, you are
ready to charge, discharge, or cycle your pack!
Note: When an LBA10 or compatible balancer is
not
connected to the 1210i
via DataPort, the initial screen after charge is started will recommend use of the LBA, for best safety.
•
Use the
UP/DOWN
buttons to select to the CHARGE MODE screen. Attach your battery pack to the charger outputs
using proper connector and cable assembly. Cable to charger, then Battery to Cable.
•
Press the
ENTER
button to start charging. You can press the
UP/DOWN
buttons during charging to increase/decrease
the charge rate.
•
When charging is complete, the charger will issue the tone you selected (if not OFF) and flash display.
•
HOLD DOWN
the
ENTER
button (0.5 sec+) to stop charging early, if desired.
USE of DISCHARGE or CYCLE MODE Functions follows the same button procedures as CHARGE.
DATA VIEW for Battery & Charger Conditions
During or after charge/discharge, there is much information available within the DATA VIEW screens.
*
During Charging:
Press
SETUP
once, then
ENTER
to scroll through the various Data Screens.
*
After charging:
From any top menu, press
UP/DOWN
to reach DATAVIEW,
then
ENTER
to see each sub-screen:
*
INPUT / OUTPUT voltage at the charger
*
TEMPERATURE
SET: Temp Cutoff Setting
PEAK: Peak temperature recorded
TEMP: Current temperature
*
CHARGE
PEAK: Voltage
CHARGE TIME in minutes and seconds
mAh accepted by the pack during charge
*
DISCHARGE
Avg. Voltage, discharge time, mAh from pack
*
CYCLE DATA (UP/DOWN to cycle the 5 previous data sets)
mAh input and output for each charge/discharge cycle
*
CELL BALANCER VOLTAGE
(with LBA10 Cell Balancer connected via DataCable)
Average and Current Voltage
*
INDIVIDUAL LIPO CELL VOLTAGE
Screen #1, Cells 1~6
(single LBA with compatible 1~6S battery pack)
Screen #2, Cells 7~12
(two Networked LBA with two compatible 1~6S battery packs in series)
Additional Information - Addendum
TCS Feature:
(Terminal Capacity Selection for Lithium Batteries)
This feature is selected at the CHARGE MODE screen. Estimated Capacity (EP) can be set from 50% to 100%. The charger uses
your setting for Battery Capacity in addition to sophisticated measurements and calculations to make a close estimate for the
currently charged capacity in the pack during charging.
There are two good reasons why you might want to charge a Lithium Battery to something less than full capacity. The first is for
long-term storage. Lithium batteries are best stored after charging to 55%~60% of nominal capacity. So this use is easy to
understand.
The second aim is to get more flight time in during a typical day at the field, by stopping the charge when the battery is 85% to
95% full, for example. But, reasonably, one might ask: “Wouldn’t that only speed the charge process by about 5~15%?
Actually, no. charging to 90% (for example), rather than 100%, pays a much larger bonus in saved charge time….
Lithium Polymer batteries are a bit special, in that they must use a “Constant Current - Constant Voltage” charging system.
Initially, a fully depleted battery (i.e. ~3.0V/cell) will be charged at constant “full current”, according to your setting for Current
at the CHARGE MODE screen. However, as the voltage of the pack rises, current must be steadily reduced. Toward the end of
the charge, voltage becomes nearly constant as 4.2V per cell is approached, and current is reduced to a trickle. This means that
charging the last few mAh back into the pack takes a LOT more time than the first few mAh did…
But Lithium Batteries
hold
large capacity
, considering their light weight
; so, if you want to charge quickly and get back in the air,
charging to less than full capacity may be a good strategy. For example, the EOS 1210i requires roughly 39 minutes to fully
charge a Hyperion lithium battery, when set to the max rate of 2C. At the same 2C rate, but with TCS set to 90%, the same
battery can be charged in as little as 27 minutes, saving 30% of the original charge time for a sacrifice of 10% capacity. And for
many pilots - who may usually land with 20% or more capacity remaining in the pack anyway - there is essentially no sacrifice at
all…
S
tart by flying fully charged packs, and measure how much remains in the pack after a flight, by checking
mAh-IN and
Percentage Charge
data
during next charges
to see what percentage you actually use
during an
average
flight
. That will give
you a good idea how much you can reduce Charged Capacity, and still leave a little margin extra.
T
he rolling TCS estimation of charged capacity is better as the pack nears full charge. That is, at the 90% mark the estimation is
very accurate, but at 50% mark is likely less accurate.
Note also
:
Case 1 -
When TCS is set for 50% to 60% (for battery storage): When the selected charge percentage is reached, the charger
stops and sounds the ‘finished’ tones.
Case 2 -
When TCS is set for 61% or higher (for quick charge): T
he EOS 1210i will
NOT automatically terminate
the charge
when your pre-set percentage is reached. Instead, it sounds a unique double-tone repeatedly, for an interval of 10 seconds. It
is up to the user to manually terminate the charge at that point, or to do nothing and allow the charge to continue until 100% is
reached. This is a safety feature to insure that packs are not inadvertently undercharged. And since the point of speed charging
is that you want to fly NOW, it is unlikely that you would miss the double tones when they do sound, as you are waiting nearby
to fly….
Page 5

Charging in Excess of 1C Rate:
Every Hyperion lithium polymer battery ever produced is capable of reliable charging in excess of 2C. Yet, until
recently
,
Hyperion has only ever specified 1C charge rates. Why? Because extensive test and our experience have shown the following:
•
Charge voltage in excess of 4.2V/cell is damaging to high-rate (15C+) lithium cells in particular
•
The potential for damage from over-volt charging increases with charge rate
•
Tests of other-brand chargers prove that many are poorly regulated, and that even some of the more expensive units
regularly overcharge batteries.
•
We can only be assured that Hyperion chargers will regulate properly (test one
, to see
…)
Therefore it was
best
to specify 1C max until this time, as now we have the powerful 1210i charger with 2C max rate, TCS, and
Hyperion’s typically excellent voltage regulation.
Note: These are the charge C rates for which less than 0.3% degradation was found in Hyperion Lithium Packs:
(50-cycle tests completed at 1.0, 2.5, 2.75, 3.0C rates, 0.3% is within measurement
error , so not significant, esp
if charged at lower rate)
HP VX: 3.0C
HP CL 16C: 2.75C
HP CL 20C+: 3.0C
If 2C is Good… Why not 3C?
2C is the sensible limit for fast charging lithium polymer. Due to the CC/CV nature of the lithium charging process, the returns
from increasing charge rate diminish very quickly after 2C. That is, total charge time is only a couple minutes shorter at 3C
compared to 2C, yet charge rate has to increase 50% for that small gain. Given this, the risk/benefit equation lands squarely on
the side of 2C max rates. Additionally,
s
ince many batteries are not capable of charging reliably past 2C, chargers which do
allow 3C charging are much more likely to cause damage to batteries, or even accidents. It is simply too easy to make a mistake
with the Charge Rate setting, and there are no electronic safeguards which can be reliably employed against making such a
mistake. Finally, most chargers that are theoretically capable of 3C charging can only do so for relatively low-S, low-capacity
packs, due to inadequate max power and/or current capability. (
see below for more on max power)
If using other than
Hyperion lithium packs, consult your battery’s documentation for allowed C rates, before exceeding 1C charge rate.
Charge Amps vs. Charge Watts
The EOS 1210i is rated for 12S, 10A, with
max
power limit of 180W. These
ratings make it one of the most powerful battery chargers in the world today.
However, please note that a 10A maximum does NOT mean that every battery
pack can be charged at 10A. The total power limit of 180W will determine
where the current limits lie at higher cell counts, and the 10A limit determines
total power output at low cell counts. The table at right assumes that the pack
is fully depleted at start of charge, and the capacities shown have been
rounded up/down slightly to make it easy to follow. Variations in pack type,
state of charge, wiring employed, or presence of balancer devices
will
all
impact on the observed charge rate initially, but will not affect total charge
time greatly in most cases.
If your battery is not FULLY
depleted
, you will not
observe max CURRENT in most cases, due to CC/CV curve.
The left column shows the lithium cell count in the pack. The middle column
shows the CAPACITY that can be charged at 1C per number of cells (S). The
right column is the same, but at 2C rate. Taking 6S packs as an example, you
could charge a pack of 7900mAh at 1C, or a pack with half that capacity 3950mAh - at 2C. Either way, the charger will be putting out about 7.9A avg.
during the initial portion of the charge curve…
So, you can see that even with a single EOS 1210i, you can charge at 2C, or nearly 2C, for some large lithium packs. For
example, packs in the range of 4S~6S, 3700~5000mAh are typically used for models in the “engine” .40ci to .90ci range, or
their equivalent (lighter versions) in Electric, such as Hyperion Extra 260 40e or Super Chipmunk 70e…
You can even charge a 4000mAh 12S pack at 1C. However, if you need a high-S, high-capacity lithium pack AND want to
charge it in 27 to 40 minutes, the Hyperion system of two packs wired in series really becomes helpful. That allows you to
separate the packs for charging on two sets of EOS1210i chargers mated to separate EOS LBA10 balancers, and charge each half
at 2C, or very nearly 2C. As an aside, the 1210i Cooling Fan will turn on if needed. Don’t worry if it doesn’t!
A123 2300mAh: The 1210i can charge A123 2300mAh packs at their max suggested rate of 8A~10A for all packs 1S to 6S. For
a 12S A123 2300mAh pack, charge rate would be roughly 4A~5.5A, depending on state of the battery initial charge state. Note
again that A123 REQUIRE use of a balancer during charging, so a 12S pack would have to be two 6S packs charged in series
with two LBA10-A in Network Mode. (
see LBA10 manual) NOTE THAT FOR ALL LIPO and A123 CHARGING, initial charge current
depends on many factors, especially the capacity remaining in the pack before starting (partially charged packs start at lower
peak current), and state of balance.
LBA DATAPORT FEATURE
The DataPort is a 3-pin output which fits the option cable #HP-EOSLBA10-DPC. See the label to locate the DataPort on the right
side of your EOS charger. There are two main functions of the DataPort connection to LBA10 balance adapter:
*The LBA communicates with the charger, giving notification when balance charging is completed, or when an error is detected.
In both cases, the LBA tells the charger to shut down. This insures maximum safety, and saves the user from having to
manually push the charger STOP (enter) button to stop the charge-end or error tones. The lithium battery should be
disconnected from the LBA as soon as possible after charging is completed.
Page 6

* The DataPort version EOS chargers, when connected to LBA10 balancer via cable #HP-EOSLBA10-DPC, allow the user to
monitor the individual voltages of each battery cell during the charge process. This is an important addition to pack diagnostics,
as one is able to see the exact balance status of the battery pack (or packs, when LBA10 is in NET mode).
To view individual cell voltages during the balance charging, connect a DataPort Cable (DPC) between Charger and LBA10 as
shown by the Green line in diagram below. No matter if single or networked LBA, connect DPC to
Master
LBA. Note that DPC
Port is on
right
side of EOS 1210i charger, not left as is shown in this generic diagram…
TROUBLESHOOTING
ERROR MESSAGES
INPUT VOL
TAGE ERROR
I
nput voltage is below 11.0V or exceeds 15V
OUTPUT BATT CONNECT ERROR
Battery not detected
OUTPUT BATT REVERSE POLARITY
Battery is connected in reverse polarity to Output leads
OUTPUT CIRCUIT PROBLEM
Non-Specific Circuit error. Check all connections, settings, battery condition
OUTPUT BATT OPEN CIRCUIT
Battery disconnected during charging
OUTPUT VOL
TAGE TOO HIGH
Battery voltage too high to match charger settings
OUTPUT VOL
TAGE TOO
LOW
Battery voltage too low to match charger settings
PAUSE... CHARGER TOO HOT
Charger Pauses due to overheating. Remove obstructions to Fan Airflow
TEMPERATURE SENSOR ERROR
Polarity Wrong or other connection error
DATA RANGE OVER ERROR
LBA10-A
Mode and Charger mode don’t match (LIPO vs. A123)
OR
Original
LBA10 is connected by
DataPort Cable to charger set for A123
(1) Check again that the battery you are trying to charge and the settings on the EOS 1210i match. Battery type (such as NiMH
or Lithium), battery capacity, number of cells (charge voltage), and charge rate must all be correct.
Note again that original (non
A123) LBA10 will cause Charger Error Message
DATA RANGE OVER ERROR
if LBA is connected to 1210i via
DataPort Cable and
1210i is set for A123 Cell Type.
(2) Check that the input cable and output cables:
*Have proper connectors in good condition *Are not frayed, worn, cut, or damaged
*Are the proper gauge (2.5mm, 14ga) *Are proper length - 20cm (8”) on output side
(3) Attach the charger input connectors to a 12V automotive battery that is in good condition and fully charged. Wiggle the
Terminal clips into the battery posts to insure that you have a good connection. Many charger problems are due to poor quality
or inadequate switching AC-DC power supplies, so this test is necessary to eliminate those from the list of suspects.
(4) Try another battery for charging. If your RC battery is in poor condition,
over discharged
, or in some other way defective
the charger may correctly refuse to charge it based on safety algorithms.
(5) Try another RC battery type. For example switch to a NiMH battery if you are failing to charge Lithium types. Success with
one type but failure with another generally indicates that the charger is working properly. The failing battery type is almost
certainly in poor condition, then, or you have improperly set the charger for it.
(6) Contact your dealer with full details and description of the problem, including the type of input power source, RC battery type
and cell count, and history of the charger - that is, has the charger been working properly before, or failing from new condition?
WARRANTY
HYPERION Chargers are guaranteed to be free from defects in materials and workmanship for a period of one calendar year from
date of purchase. Your selling dealer is your first point of contact for warranty issues.
Return postage costs are the
responsibility of the user in all cases. Submit copy of original receipt with the return.
Damage due physical shock (dropping on the floor, etc), inappropriate power supply (automotive battery charger, etc!), water,
moisture, and humidity are specifically NOT covered by warranty.
It is well to carefully check your charger before making a
return, as problems in setup, cabling, or power supply are much more common than defects in the charger.
Enjoy the Power!
The Hyperion Team
 Loading...