

Page 1
HYPERION EOS0606i-B USER’S MANUAL
Visit http://media.hyperion.hk/dn/eos for the newest manuals and news
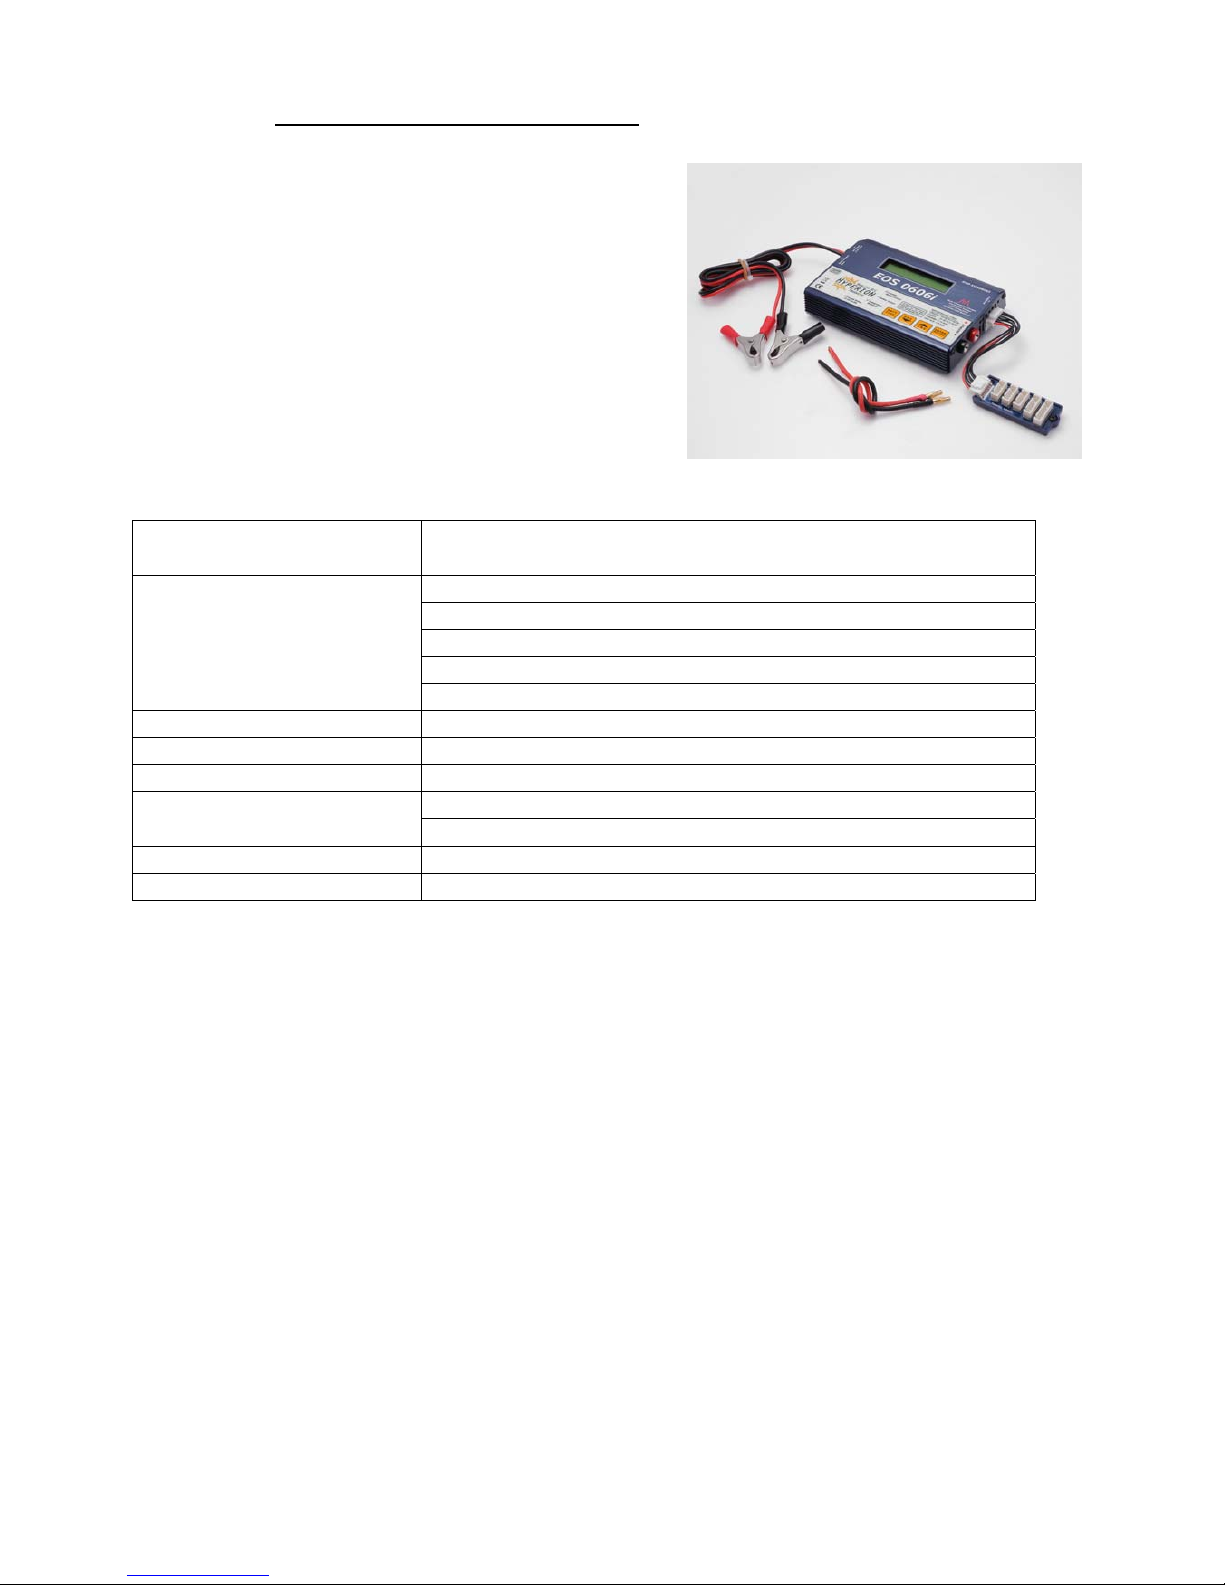
EOS 0606i Special Features (rev “B”)
*Powerful, yet compact and portable with wide support for battery types
*Integrated Hyperion LBA Balancer for LiPo (3.7v) and LiFe (3.3v) based cells
*Balance Multi-Adapter for 2S to 6S packs included (Hyperion Type)
*Charge, Discharge, and STORAGE Modes (and Cycling for NiMh and NiCd)
*Clear Yellow Backlit LCD Screen, Warnings for common setup errors
*Packaged in a rugged aluminum case - Long Input leads
*Hyperion Balance Multi-Connector Included. Option multi-connectors for
most common brands are also available (see details end of document)
*Output Harness with 4mm Gold Plugs included
Specifications
Input voltage range 11.0-15.0V DC
1-14 NiCd – Nickel-Cadmium cells
1-14 NiMH – Nickel-Metal Hydride cells
1-6 LiPo – Lithium Polymer cells, 100~20,000mAh (3.7V/cell type only)
1-6 LiFe – Lithium Iron (3.3V/cell types, inc. A123 brand cells / LiFePO4 cells)
Appropriate battery types and
range of series-connected cells
1-6 Lead-Acid cells (2V per cell nominal)
Charge current 0.1A ~ 6.0A MAX, by 100mA steps (50W limit)
Discharge current 0.1A ~ 1.0A MAX, by 10mA steps (5W limit)
Trickle charge current (NiCd, NiMH) 0 ~ 200mA
“Delta V” peak detection for NiCd/NiMH
Charge termination
“CV/CC” for Lithium and Lead-Acid Batteries
Cycling Modes (NiCd, NiMH) Charge>Discharge or Discharge>Charge
Display type 2-line, 16 character blue backlit LCD
Safety precautions
• KEEP CHARGER and BATTERIES AWAY FROM CHILDREN AND PETS AT ALL TIMES!
• This charger is ONLY for NiCd/NiMH, Lithium (3.7V/cell), A123 (3.3V/cell), and Lead-Acid (2.0V/cell)
type cells. DO NOT connect others, such as 3.6V/cell Lithium-Ion, or non-rechargeable batteries!
• Always place the charger on a firm, level, and fireproof surface for charging
• Do not place the battery or charger on or near flammable materials while in use:
Keep away from carpets, cluttered workbenches, etc
• Do not exceed cell manufacturer’s suggested max charge rates
• Do not use automotive type battery chargers to power the charger
• Do not leave the charger unattended while charging
• Do not allow water, moisture or foreign objects into the charger
• Do not open the charger, nor attempt any repair as it is dangerous and will void your warranty
• Do not obstruct the air intake or outlet holes on the charger
• ALWAYS follow correct connection sequence, as given below
• CAREFULLY FOLLOW THE BATTERY PACK MAKER’S RECOMMENDATIONS AND SAFETY ADVICE!
HIGH RISK CHARGING ADVISORY
Avoid charging batteries indoors. If you must charge indoors – or any place injury to persons or damage could result in the event of fire
– then be sure to:
* Keep battery well away from flammables (2 meters or more)
* Contain battery in a heavy fireproof container (such as a brick box)
* Always monitor the charge
HYPERION ACCEPTS NO RESPONSIBILITY FOR DAMAGE OR INJURY FOR INDOOR or other HIGH RISK CHARGING ACTIVITY
Initial Setup
The EOS 0606i requires 4mm Bullet Connectors (aka Banana Plugs) on 12awg wire leads for output harness between charger
and battery main wires. Harness wire leads should never exceed 20cm in length. Pre-assembled output harnesses are
available under Hyperion Part #HP-EOSOUTCORD, and one harness is included with each charger. Solder your chosen
battery-side connector to the bare wire ends of the harness, taking great care to observe proper polarity.
Page 2

If, after carefully reading the following pages on usage, you have any difficulty using the charger please refer to the final
pages for troubleshooting guide and warranty terms. It is well to carefully check your charger before making a return, as
problems in setup, cabling, or power supply are much more common than defects in the charger. Chargers returned by the
user and later found not defective will o n ly be returned to the user at the user’s expense and may incur a service charge.
ALWAYS FOLLOW this connection sequence, and reverse sequence to disconnect:
1) Connect OUTPUT harness 4mm plugs to the sockets located on the right side of the charger.
Take care tha t the Output Harness RED wire bullet connector goes to the (+) socket, and BLACK wire to (-) .
2a) Connect Charger INPUT alligator clips to an appropriate DC power source:
a) A 12V automobile battery
b) A quality, low-noise DC power supply of 12~15V with 8A+ rating
3) Set the battery type using the charger configuration buttons.
*The INC and DEC buttons are used to Increase or Decrease
values, such as Charge Current or Cell Count
*The INC and DEC buttons are also used to select MODE, such as Charge, Discharge, or Cycle, and to reach Lithium Type sub menu.
*The BATT TYPE and ENTER buttons both have two modes: SHORT press or LONG (~1 second) press
• Short press BATT TYPE: Scroll batt ery types
• Long press BATT TYPE: View input/outp ut Data
• Short press ENTER: Scroll settings for a battery type. Values will blink when selected. Blinking will stop after a few
seconds if you do not make a change. Short press Enter to re-select a setting to change. Short press BATT TYPE to re-select
Battery Type, then INC/DEC to change values.
• Long press ENTER: START/STOP charging (or discharging, or cycling)
Let’s start by using a NiMh battery as an example.
When the charger is first connected to in put power, it will display the previously used battery configuration. This is especially
convenient if you often charge the same type of battery.
1) If NiMh is not shown, short push the BATT TYPE button to scroll through all battery types. Stop when you reach NiMh.
2) Short press the ENTER button to select “C”, charge rate in Ampere
3) Press INC or DEC buttons to choose the proper rate for your battery pack.
Charging NiCd and NiMH is mostly automatic, and the setup routines are the same for both. You only need to consult the
documentation for your battery pack (or ask your dealer) to determine the proper charge current in Ampere (A). If the rate is given
in mA, note that 100mA equals 0.1A: so 900mA would be 0.9A, for example.
4) Attach your NiMH battery to the EOS 0606i Output side harness, checking that +/- polarity is correct.
5) Long press ENTER button (hold down for about 1~2 seconds) to begin charging
NO BATTERY error – if battery not connected
OPEN CIRCUIT error – if the battery becomes disconnected from the charger after START
REVERSE POLARITY error – if the battery is connected in reverse
In our NiMH charging example above, we pressed the ENTER button when “NiMH” was blinking, to go directly to charge rate
setting. However, if you want to enter DISCHARGE or CYCLE modes, you can press the BATT TYPE button to start NiMH
blinking, then press INC/DEC buttons to scroll through the various modes. Once the mode is settled (like CYCLE), short
press ENTER to start values blinking for editing.
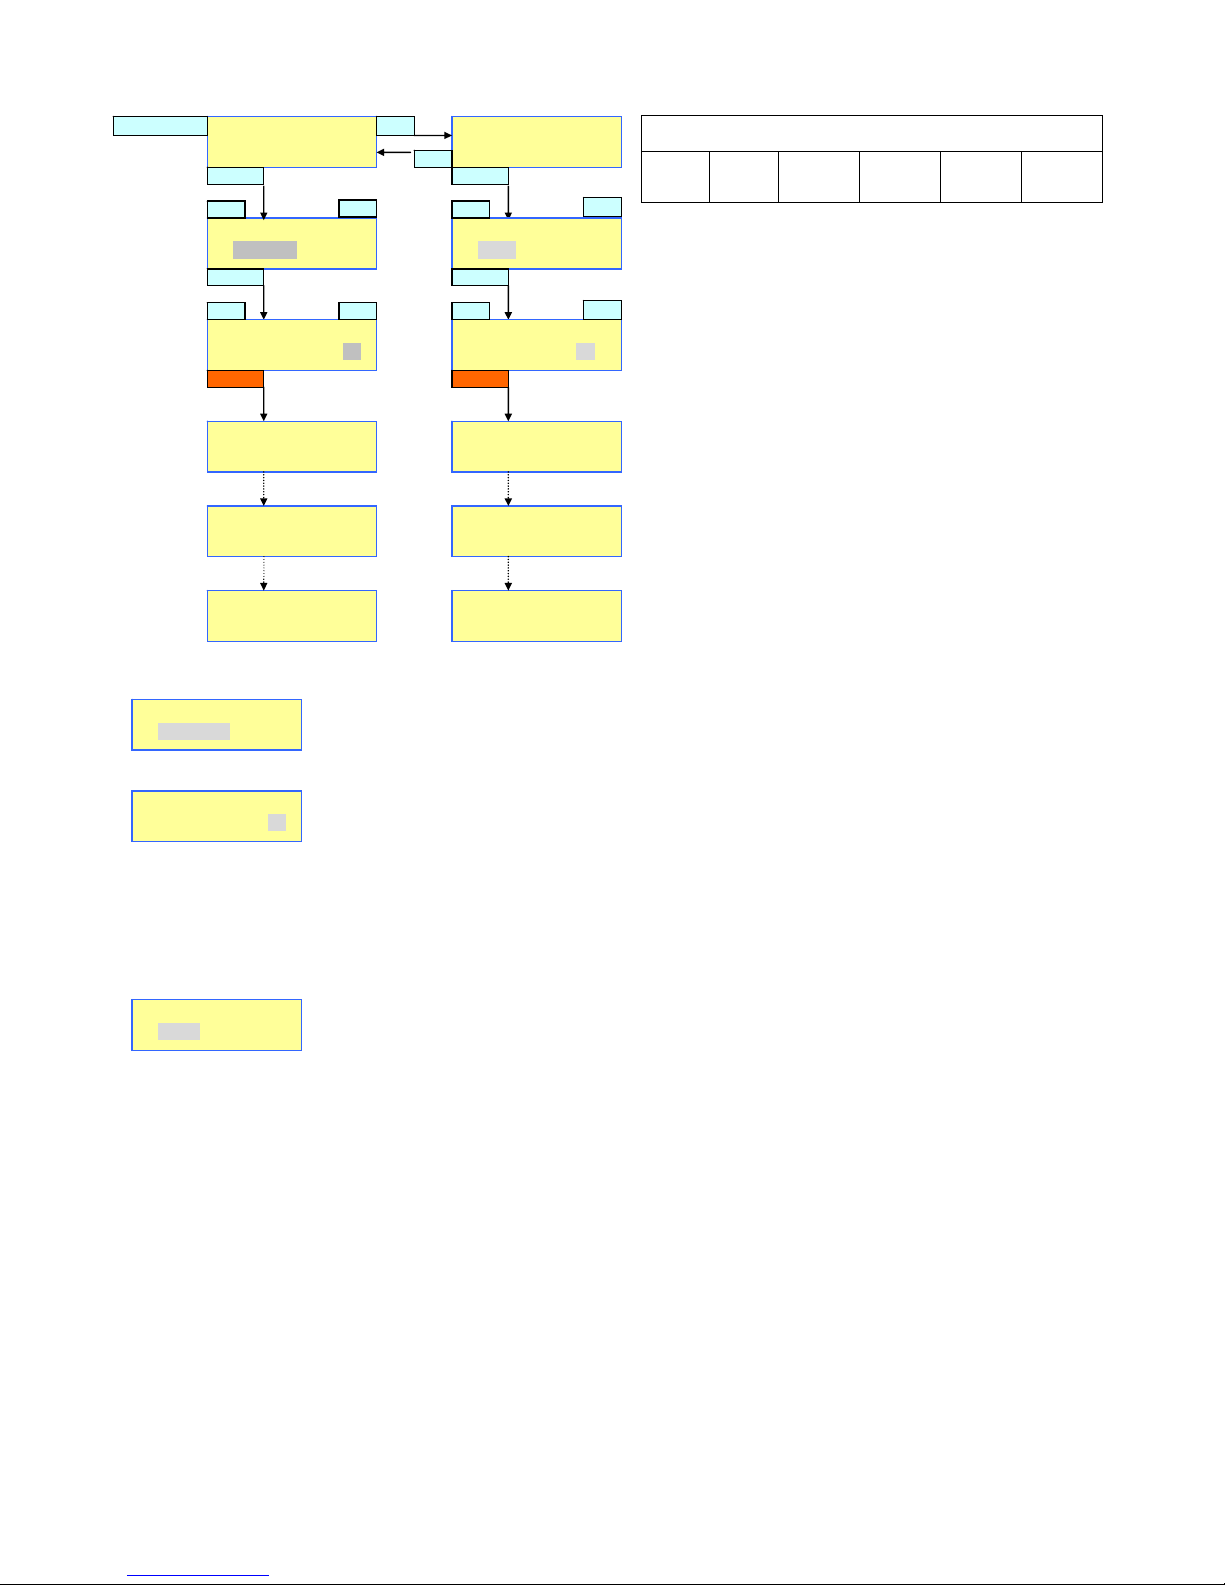
Changing Betw een Lithium Types (LiPo vs LiFePO4/A123)
Switching between LITHIUM battery types is done in a sub menu. Start by pressing BATT TYPE once,
then INC button twice. At the Lithium TYPE screen, pres s ENTER, then INC/DEC to select type.
Finally, press DEC to return to Discharge or Charge Screens
LiPo CHARGE
C=3300mAh 6S
LiPo DISCHARGE
D=1.00 A 6S
INC
DEC
INC
Lithium Type
LiPo
INC
DEC
ENTER
Lithium Type
LiPo
Lithium Type
ENTER
Lithium Type
LiFe
LiFe DISCHARGE
D=1.00 A 6S
LiFe CHARGE
C=3300mAh 6S
LiFe
Whenever Lithium battery charging is started with Balancer properly connected, the display will show:
BALANCER CONN. CONNECTED. If you see instead BALANCER CONN. NOT CONNECTED, stop and check your connections
carefully, and repair as needed. We strongly recommend lithium balance charging at all times.
Note: The EOS0606i does not support charging of legacy 3.6v Lithium Ion cell types. Never attempt to charge these cells,
under any circumstances, using this charger.
Page 3
LITHIUM POLYMER/ION MODE (for 3.7V/cell types only!)
Number of LiPo Cells Wired in Series (Pack Voltage)
1S
3.7V
2S
7.4V
3S
11.1V
4S
14.8V
5S
18.5V
6S
22.2V
LiPo CHARGE
C=3300mAh 6S
LiPo DISCHARGE
D=1.00 A 6S
LiPo CHARGE
C=3300mAh 6S
LiPo CHARGE
C=3300mAh 6S
BATTERY CHECK
WAIT PLEASE. . . .
BALANCER CON.
CONNECTED
CHG 0:00 00000
LP + 2.20A 22.200V
LiPo DISCHARGE
D=1.00A 6S
LiPo DISCHARGE
D=1.00A 6S
BATTERY CHECK
WAIT PLEASE. . . .
BATTERY CHECK
WAIT PLEASE. . . .
START
INC INC
INC INC
DEC
DEC
DEC
DEC
INC
DEC
BATT TY PE
START
ENTER
ENTER
ENTER
ENTER
DCH 0:00 00000
LP + 1.00A 22.200V
Setting LiPo battery capacity
Adjust and set the correct battery capacity from 100mAh to 20000mAh with INC & DEC buttons
(50mAh per step). Press the ENTER butto n to confirm setting. Charge rate is set on the basis of
selected capacity, at 1C rate. Example: Li-Po cell of 1500mAh capacity: 1C = 1500mA (= 1.5A).
LiPo CHARGE
C=6000mAh 6S
LiPo CHARGE
Setting Battery Voltage / Number of Cells in Series for LiPo battery packs
Select the total battery voltage to be charged with ENTER, INC & DEC buttons.
C=6000mAh 6S
LiPo DISCHARGE
The charger knows the pack’s voltage both from the balancer connector and the ce ll count e.g. ‘6S’
NOTE: The EOS Series chargers have intelligent detection routines to help you avoid making
mistakes, and LOW or HIGH VOLTAGE errors are displayed if battery voltage does not match your
setting. HOWEVER, under some circumstances, especially with over-discharged or damaged
batteries, the safeguard could fail. Ther efore, be absolutely sure that you have correctly set pack
voltage correctly before charging, every time! Using the cell balancer for all Lithium packs is
STRONGLY recommended, as it greatly increases safety.
Setting discharge parameters
Adjust to the desired discharge current from 0.10A to 1.00A (0.01A per step) with INC & DEC button.
Press the ENTER button to confirm se tting. Set pack voltage, 1S~6S as in charging example above.
Autocut occurs automatically at 3.0V per cell.
D=1.00 A 6S
LiFe MODE [LiFePO4, A123]
The LiFe charge/discharge modes are intended for cells with 3.3V nominal, with Lithium Phosphate chemistry. The LiFe
(LiFePO4 charge/discharge modes are intended for cells with 3.3V nominal produced by A123 Company, or other-brand
LiFePO4 cells which are recognized to be of good quality from well-known makers. Choose LiFe for BATT TYPE, for charging
such cells. The LiFe charge mode MAY work with “no brand” LiFePO4 cells having 3.3V nominal voltage, but Hyperion has
found some “knock off” cells in the market of very questionable quality. Customers who use A123 mode (LiFePO4
mode) to charge such off-brand cells assume all risk. In no case does Hyperion HK Ltd. Accept liability due to the
failure of the cell(s) during charging or discharging.
Due to the nature of A123/LiFePO4 cells (wide divergence in cell voltages during charging) and due to the high rates at which
some of these cells – such as A123 brand – can be charged, one MUST ALWAYS properly use the cell balancer function
whenever charging in LiFe Mode; failure to do so will result in poor pack perf ormance at best, and damage to cells at wor st.
Customers who charge in LiFe mode without balancer connected assume all risk of charger and battery failure!
Page 4

Number of LiFe Cells Wired in Series (Pack Voltage)
1S
3.3V
2S
6.6V
3S
9.9V
4S
13.2V
5S
16.5V
6S
19.8V
Setting charge current
The EOS 0606i will charge the battery at a 1C rate from the capacity you tell it. It is possible to
charge at higher than 1C but the user accepts all responsibility.
Setting battery charge voltages for A123/LiFe battery pack
Set the number of cells in series that make up your batter y pack. This in turn, with the correct
cell type, tells the charger the packs voltage. Used with the balancer makes for safer charging.
Setting discha rge current
Press Enter to find and adjust the desired discharge current from 0.10A to 1.00A (0.01A per
step) with the INC & DEC buttons. Press the ENTER button to confirm the setting.
NiCd / NiMH OPERATION MODES (NiMH mode is the same as belo w, except Mode shows ‘NiMH’)
NiCd/NiMH continued next page
DCH 0:00 00000
LF - 1.00A 19.800V
LiFe CHARGE
C=1100mAh 4S
LiFe DISCHARGE
D=1.00 A 4S
BATT TY PE
LiFe CHARGE
C=2300mAh 4S
DEC INC
INC
ENTER
ENTER
LiFe CHARGE
C=2300mAh 5S
BATTERY CHECK
WAIT PLEASE . . .
START
CHG 0:00 00000
LF + 2.50A 19.000V
LiFe CHARGE
C=4600mAh 5S
LiFe CHARGE
C=4600mAh 5S
LiFe DISCHARGE
D=1.00 A 5S
BALANCER CON.
CONNECTED
DEC
LiFe DISCHARGE
D=1.00 A 4S
DECINC
INC DEC
INC
DEC
ENTER
ENTER
LiFe DISCHARGE
D=1.00 A 5S
BALANCER CON.
CONNECTED
START
BATTERY CHECK
WAIT PLEASE . . .
NiCd CHARGE
C=3.0A 16.8V
ENTER
NiCd DISCHARGE
D=1.00A 16.8V
INC
DEC
see next page for
Trickle and Delta-v
settings
NiCd CYCLE D->C 5
C=3.0A D=1.00A
NiCd CHARGE
C=3.00A 16.8V
INC
BATTERY CHECK
WAIT PLEASE. . . .
START
CHG 0:00 00000
NC + 3.00A 16.800V
NiCd DISCHARGE
D=1.00A 16.8V
NiCd DISCHARGE
D=1.00A 16.8V
INC
BATTERY CHECK
WAIT PLEASE. . . .
DCH 0:00 00000
NC - 1.00A 16.800V
DEC
NiCd CYCLE D->C 5
C=3.0A D=1.00A
NiCd CYCLE D->C 5
C=3.0A D=1.00A
NiCd CYCLE D->C 5
C=3.0A D=1.00A
NiCd CYCLE D->C 5
C=3.0A D=1.00A
ENTER
ENTER
INCINC DECDEC
INC
DEC
INC
DEC
ENTER
ENTER
ENTER
ENTER
DEC INC
DEC INC
DEC INC
START
START
DEC
DEC
INC
NiCd CYCLE C->D 5
C=3.0A D=1.00A
BATTERY CHECK
WAIT PLEASE. . . .
BATT TY PE
DCH 0:00 00000
NC + 3.00 1.200V
Page 5

NiCd DISCHARGE
D=1.00A 16.8V
NiCd CHARGE
C=3.00A 16.8V
Setting charge current
Adjust and find the desired charge current which ranges from 0.1A to 6.0A with INC & DEC
buttons. Press the ENTER button to confirm setting.
Setting discha rge current
Adjust and find the desired discharge current, ranging from 0.1A to 1A, with INC & DEC buttons.
Press the ENTER button to confirm setting. The 5W max may reduce the current you set
depending on the voltage of your battery pack.
NiCd DISCHARGE
D=1.00A 16.8V
Setting discharge cutoff voltage
This is the voltage that the charger should stop discharging the batt ery.
Adjust and find total discharge cutoff voltages to be disc harged from 0.1V to 16.8V with INC &
DEC buttons. Press the ENTER button to co nfirm setting.
NiCd CYCLE C->D 5
C=3.0A D=1.00A
Setting cycle
This is to set cycling with two options ( Charge to Discharg e / Discharge to Charge). Set cycling
with INC & DEC buttons, and press the ENTER button to confirm setting.
Setting Delta-V and Trickle Options for NiCd/NiMH (NiMH mode is the same as below, except Mode shows ‘NiMH’)
NiCd CHARGE
C=3.0A
NiCd DISCHARGE
D=0.50A 4.8 V
NiCd CYCLE D->C 5
C=3.0A D=0.50A
INC INC
DEC DEC
INC
INC
DEC
NiCd Trickle
INC
DEC
Charge = ON
NiCd Trickle
Charge = OFF
ENTER
NiCd delta-peakvolt = 5mV/cell
DEC
Delta-V Defaults (and minimum values) are: NiCd 5mV/cell, NiMH 3mV/cell. In most cases these should be left alone.
Advanced users may wish to increase settings to archive a delayed charge ter mination, but if set to high can result in overcharge and could be dangerous.
Trickle charge maintains a NiCd/NiMH battery charge until the battery is removed. Trickle rate depends on charge current
setting and ranges from 50mA to 200mA. If charge current is <1A, there is no trickle. You can turn trickle such that it is
always OFF, as shown above.
Pb MODE (lead-acid battery)
Pb CHARGE
C=4.0A 12Vpack
DEC
INC
Pb DISCHARGE
D=1.00A 12Vpack
BATT TY PE
Pb CHARGE
C=4.0A 12Vpack
Pb CHARGE
INC
ENTER
C=4.0A 12Vpack
INC
ENTER
BATTERY CHECK
WAIT PLEASE. . . .
CHG 0:00 00000
START
Pb + 4.0A 12.000V
Pb DISCHARGE
D=1.00A 12Vpack
Pb DISCHARGE
D=1.00A 12Vpack
BATTERY CHECK
WAIT PLEASE. . . .
CHG 0:00 00000
INC
INC DEC
DECDEC
DEC
ENTER
ENTER
START
Pb - 1.0A 12.000V
Setting charge current
Pb CHARGE
C=4.0A 12Vpack
Adjust and find the desired charge current which ranges from 0.1A to 6.0A with INC & DEC buttons.
Press the ENTER button to confirm setting
Setting total battery voltage for Lead-Acid Battery
Pb CHARGE
C=6.0A 12Vpack
Select the proper total battery voltage to be charged or discharged with INC & DEC bu ttons – 2V, 4V,
6V, 8V, 10V, and 12V [2V per cell types only]
Pb DISCHARGE
Setting discha rge current
D=1.00A 12Vpack
Adjust and find the desired discharge current from 0.10A to 1.00A (0.01A per step) with INC & DEC
button. Press the ENTER button to confirm setting.
Page 6

STORE MODE for Lithium Battery Types
Store Mode is an important function to insure best performance from your lithium-based batteries. Connect your battery via
both main wires and balance connector as during normal balance charging, but select STORE mode as shown below. The
EOS 0606i will then charge or discharge as needed such that 60% of battery capacity remains at STORE End.
STORE MODE END SCREEN
Lithium Care
To maximize your investment in Lithium Battery packs, do the following:
INC
LiPo STORE
C= 3300mAh 6S
LiPo STORE
C= 3300mAh 6S
LiPo STORE
C= 3300mAh 6S
LiPo STORE
0:00 22.200V
INC
INC
DEC
DEC
START
ENTER
ENTER
DEC
INC
BALANCER CON.
CONNECTED
INC
DEC
BATTERY CHECK
WAIT PLEASE. . . .
Lithium type
LiPo
LiPo DISCHARGE
D=.1.00 A 6S
DEC
LiPo CHARGE
C= 3300mAh 6S
LiPo STORE END
0:00 22.200V
• ALWAYS Store your packs at 55~65% of capacity. After a day of flying, use STORE Mode to achieve this. It is
especially harmful to store lithium packs f ully charged, and should be avoided for more than a few days at most.
• AVOID discharging cells beyond 90% of capacity. NEVER fully discharge lithium packs.
• KEEP your packs in a cool, relatively dry location.
Displays during Charge, Discharge, and Cycle
Note that exact display may depend on type of battery and connection. For example, Lithium types when connected to a
balancer will alternately show CHG / BLC at top left while charging, and CHG / BLC / END when finished charging. Al so note
that after charging the EOS0606i may apply maintenance current or discharge as needed to maintain balance until
disconnected.
CHG 030:25 00000
NC + 3.00A 10 .75V
DCH 030:25 00000
NC: NiCd
NM: NiMH
LP: LiPo
LF: A123/LiFe
Pb: Lead-Acid
CHG: charge
DCH: discharge
C→D: cycle
D→C: cycle
NC - 3.00A 10 .750V
Time Delay in minutes between
Charging and Discharging or
Discharging and Charging
Capacity in mAh
Time in minutes : sec
DELAY TIME
5 : 00
Page 7

Completion Display
When the Enter button is pressed, charge or discharge will be stopped.
In order to move back to the main display, press the Enter button.
Data Display – Keys
Press BATT TYPE during charging or discharging to view the data display menu.
Use INC and DEC to scroll through the data screens.
Pressing BATT TYPE again will return you to the charge/discharge screen.
Data Display – Screens (Example: During a Balancer-Connected Lithium Charge)
END 030:00 00000
NC 100mA 10.75V
INPUT = 12.00V
OUTPUT = 23.50V
INPUT = 12.00V
OUTPUT = 23.50V
3.92 3.92 3.92V
3.92 3.91 3.93V
LCB-MAX =3.937V
LCB-MIN =3.923V
DEC
INC
ChgCAPA= 400mAh
DchCAPA = 0mAh
CHG PEAK= 23.62V
DCHG AVR = 0.00V
DEC
INC
DEC
INC
DEC
INC
DEC
INCENTER
ENTER
CHG 0:00 00000
LP + 2.20A 22.200V
CHG 15:00 00500
LP + 2.20A 22.200V
LCB-[01] =3.923V
LCB-[AVG =3.930V
-------------- NOTE: Balancing without Charging for LIPO and LiFePO4 (A123) Type Packs ----------------
If you have a Lipo or LiFePO4 type pack, and simply want to balance the cells without charging the pack, you o nly n eed to s et
the proper Battery Type first (just as if you were going to charge), then connect the battery to charger via main input leads
and balance adapter. The 0606i will che ck the voltage of each cell. If the pack is NOT already over-discharged, it will then
start discharging the cells with the highest voltage . As soon as all the cells in the pack are within balancing tolerance – or if
any one cell should reach the acceptable voltage lower limit for that cell type - the charger will stop balancing the pack.
TROUBLESHOOTING
(1) Check again that the battery you are trying to charge and the settings on the EOS 0606i match. Battery type (such as
NiMH or Lithium), battery capacity, number of cells (charge voltage), and charge rate must all be correct.
(2) Check that the input cable and output cables:
*Have proper connectors in good condition *Are not frayed, wo rn, cut, or da maged
*Are the proper gauge (2.5mm, 14ga or higher) *Are proper length – 20cm (8”) on output side
(3) Attach the charger input connectors to a 12V automotive battery tha t is in good condition and fully charged. Wiggle th e
Terminal clips into the battery posts to insure that you have a good connection. Try the AC input if failing while using DC.
(4) Try another battery for charging. If your RC battery is in poor condition, over discharged, or in some other way
defective the charger may correctly refuse to charge it based on safety algorithms.
(5) Try another RC battery type. For example switch to a NiMH battery if you are failing to charge Lithium types. Success
with one type but failure with another generally indicates that the charger is working properly. Th e failing battery type is
almost certainly in poor condition, then, or you have improperly set the charger for it.
(6) Contact your dealer with full details and descript ion of the problem, including the type of input power source, RC battery
type and cell count, and history of the charger – specifically, has the charger been working properly before, or failing from
new condition?
Page 8

ERROR MESSAGES
INPUT VOLTAGE ERROR Input voltage is below 11.0V or exceeds 15.0V
NO BATTERY Battery not detected
OUTPUT BATT REVERSE POLARITY Battery is connected in reverse polarity to Output leads
OUTPUT CIRCUIT PROBLEM Non-Specific Circuit error. Check battery condition
CHECK BATT OPEN CIRCUIT Battery disconnected during charging
CHECK BATT OVER VOLTAGE Battery voltage too high to match charger settings
CHECK BATT LOW VOLTAGE Battery voltage too low to match charger settings
BALANCER VOLTAGE TOO HIGH
If voltage per cell is too high during balancing, this message may appear.
BALANCER VOLTAGE TOO LOW
If cell’s voltage falls too low during balancing, this message may appear
DON’T CHARGE Lixx WITH THIS MODE
A Lithium pack is connected by balancer, but NiCd/NiMH/Pb mode is selected for charging
Note: If the incorrect number of cells is selected for a lithi um type battery, and charging is begun, the charger may give error
immediately and stop charging. In some cases, however, the charger will begin charging at the (lower) voltage it sees as
correct, and watch all cells to confirm the incorrect setting. For example, if you connect a 3S pack but set the charger for 4S
by mistake, the charger may begin by charging at 3S voltage level, and watch all cells. Wh en the mistake is confirmed, the
charger will give error and terminate. This is normal and correct behavior.
WARRANTY
HYPERION Chargers are guaranteed to be free from defects in materials and workmanship for a period of one calendar year
from date of purchase. Your selling dealer is your first point of contact for warranty issues. Return postage costs are the
responsibility of the user in all cases. Submit copy of original receipt with the return.
Damage due physical shock (dropping on the floor, etc), inappropriate power supply (au tomo tive battery charger, etc!), water,
moisture, and humidity are specific ally NOT covered by warranty. It is well to carefully check your charger before making a
return, as problems in setup, cabling, or power supply are much more common than defects in the charger.
Enjoy the Power!
The Hyperion Team
 Loading...