

Hyndsight Vision Systems CJRX, CJTX Users manual
WARRANTY
This Limited Product Warranty shall apply to Hyndsight Vision Systems, Inc. products including all
accessories as contained within the original package. Hyndsight Vision Systems, Inc. warrants that products
from its authorized distributors and retailers will meet the applicable product specifications and be free from
all defects in material and workmanship during the Limited Product Warranty Period, one year starting from
the date of original purchase, assuming the products are used in accordance with the user manual and
other documentation provided at the time of purchase. This Limited Product Warranty is subject to the
following terms and conditions:
1. To obtain warranty service, a proof of purchase in the form of an original or copy of the sales receipt from
the original retailer is required.
2. This Limited Product Warranty is only valid and enforceable in the country/region where the product is
sold.
3. This Limited Product Warranty is at sole option of Hyndsight Vision Systems, Inc. to either repair or
replace the defective product during the Limited Product Warranty Period. Hyndsight Vision Systems, Inc.
will not replace missing components from any package purchased through online auctions.
4.To obtain warranty service, contact your local Hyndsight Vision Systems, Inc. authorized retailer or
Hyndsight Vision Systems, Inc. for shipping instructions and an RMA number.
5. This Limited Product Warranty covers expenses for inspecting and repairing the product during the
Limited Product Warranty Period. The defective product shall be delivered by the purchaser at his/her own
expense to the designated premises together with the proof of purchase and RMA number.
6. Hyndsight Vision Systems, Inc. will return the repaired or replaced product to the drop-zone for collection
by the customer in good working condition. All replaced faulty products or components will become property
of Hyndsight Vision Systems, Inc..
7. If Hyndsight Vision Systems, Inc. repairs or replaces the product, the repaired or replaced product shall
continue to be warrantied for the remaining time of the original warranty period or for three (3) months from
date of repair or replacement, whichever is longer.
8. Hyndsight Vision Systems, Inc. reserves the right to add, delete, or amend the terms and conditions at
any time without prior notice on its website, www.hyndsightvision.com.
9. A two (2) year warranty is extended to the Flush Mount, as well as to all purchases made in the United
Kindgom.
10. This limited warranty shall not apply if the damage was caused by any of the following:
a. The product serial number has been removed, erased, defaces, altered, or is illegible.
b. The damage resulting from the use of the product in a manner other than its normal and
customary manner.
c. Deterioration of the product due to normal wear and tear.
d. The damage arising from improper installation, unauthorized repair, alteration, or
modification to this product by third parties other than Hyndsight Vision Systems, Inc. or its
designee.
e. The damage arising from operation with components or accessories not officially authorized
or provided by Hyndsight Vision Systems, Inc. or used in ways other than its intended use.
f. The damage arising from exposure to abnormally corrosive conditions or operation with
extreme heat/cold or humidity.
Hyndsight Vision Systems, Inc.
Instructions for Use
Operating instructions for the CRUZ and Journey
product lines by Hyndsight Vision Systems Inc
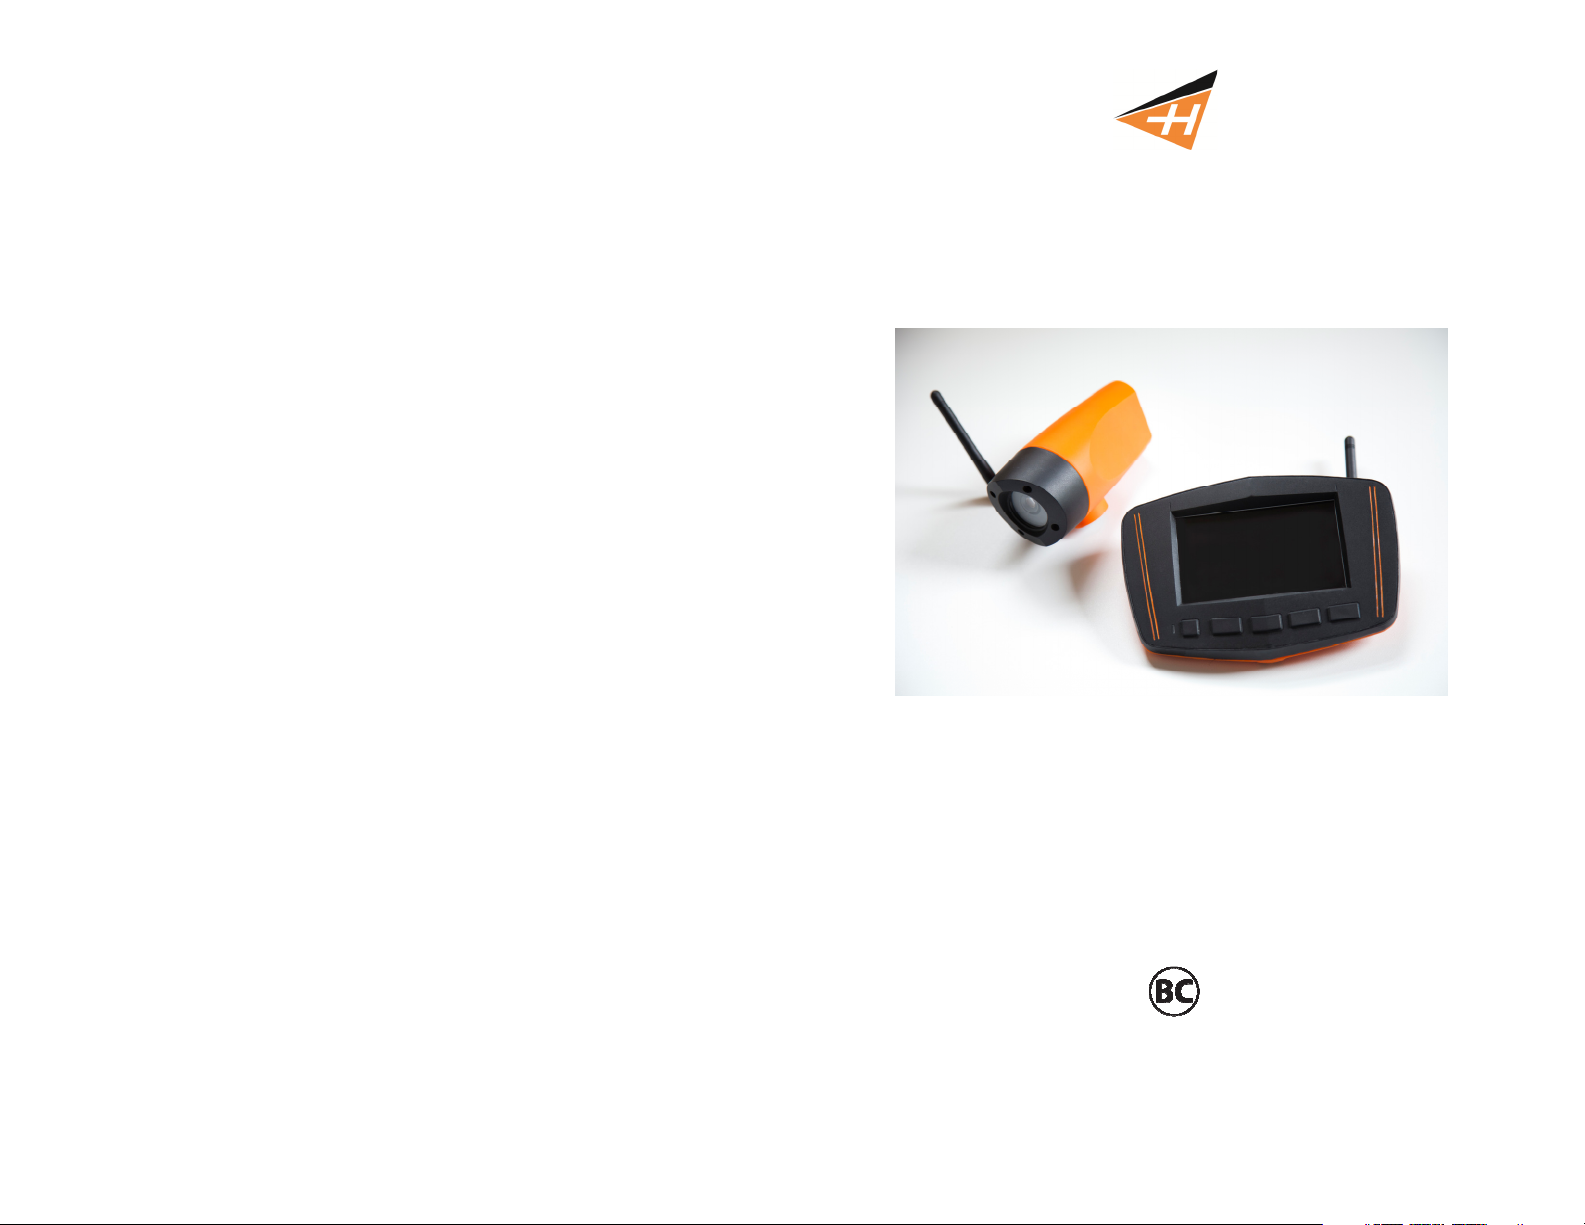
Applies to the following models:
HVS-001C (camera)
HVS-001M (monitor)

Page 2 www.hyndsightvision.com
A digital copy of the instruction manual can be found at www.hyndsightvision.com
Hyndsight Vision Systems Page 7
TABLE OF CONTENTS
Product Specifications ...........................................................................2
Intended Use .........................................................................................2
Important Safety Notice ........................................................................3
Caution ..................................................................................................3
Kit Contents ...........................................................................................3
Charging .................................................................................................4
Single Camera Set-Up ............................................................................4
Multi-Camera Set-Up .........................................................................5-6
Flush Bracket Mounting .........................................................................7
Troubleshooting .....................................................................................7
Warranty ................................................................................................8
PRODUCT SPECIFICATIONS
Transmission Frequency: 2.4 GHz
Unobstructed Effective Range: up to 300 ft.
Power Supply Input, per adapter: 100-240 V AC 50/60 Hz 0.2A
Power Supply Output, per adapter: 5V DC 1.0A
Monitor (CRUZ & Journey 1) - 5.0" sunlight-readable display (4.8" viewable)
Monitor (Journey 2) - 4.8" TFT LCD
Camera (CRUZ) - Tight Angle Lens
Camera (Journey 1 & 2) - Wide Angle Lens
Screen Resolution: 800x480
Live video stream without recording capabilities
Styles and colors may vary.
Hyndsight Vision Systems wireless cameras and monitors are to be used as an aid for visualizing blind spot
conditions or for monitoring locations not always in clear sight. Use of your own common sense and judgment is
always indicated before and during use of this product. Hyndsight is not responsible for accidents of actions that
result under use of this product.
INTENDED USE
To attach the Camera or Monitor to the desired smooth, clean, flat, non-porous surface, follow the instructions below.
Note: The mounting surface and the Suction Cup should be clean and dry. Wipe with a clean, damp cloth and let dry
completely. The Flush Mount should be installed at room temperature (avoid extreme heat or cold). Do not moisten the
Suction Cup.
Thoroughly clean the smooth, flat, non-porous surface, making sure the surface is dry and free of scratches.
Twist the Camera or Monitor onto the flush mount's threaded mounting stud. Do not remove the Rubber
Washer.
Hold the Camera in place and firmly tighten the Lock Ring.
Position the Suction Cup Lever in the "down" position.
Position the Suction Cup on your mounting area. In order to remove the Flush mount easily, HVS
recommends that the Suction cup Release Tab be at the bottom of the installation area.
Push the Suction Cup firmly against the mounting surface (the Suction Cup Lever should be in the "down"
position). Press the Suction Cup Button and pull the Suction Cup Lever up and over the Button. You will feel
the Button move out during this procedure; this action locks the Suction Cup into place.
Loosen the Flush Mount Adjusting Knob, position the Camera or Monitor, and then retighten the Adjusting
Knob.
Check the Camera's position as necessary by loosening the Adjusting Knob. Tighten securely when in
position.
To release the Suction Cup, move the Suction Cup Lever back into its "down" position. Lift the Suction Cup
Release Tab to help break the hold.
Problem Solution
Camera won't pair automatically
Camera 1 icon is displayed as in use, but
no image is showing and I can't pair to it
No Signal
Difficulty seeing screen
All four Camera icons are blue but I don't
have all 4 Cameras paired
FLUSH BRACKET MOUNTING
TROUBLESHOOTING
Press the Menu button
Select Pair by pressing Enter
The Monitor's green indicator light should flash and the screen will go
white, during which time you should press the Pair button on the
Camera.
Press the Menu button
Select Enable Multi-Camera
Select Pair by pressing Enter
Toggle to an inactive (gray) Camera icon
Press Enter
The Monitor's green indicator light should flash and the screen will go
white, during which time you should press the Pair button on the
Camera
Remember to Unpair Cameras 2-4 before Powering off.
Make sure antennas are attached and devices are within effective
range. Weather, interference and other such factors may reduce the
unit's ability to convey video.
Adjust angle of Monitor. Also, polarized sunglasses may affect
viewing.
Unpair unused Camera icons using Monitor; turning off the Camera
alone does not unpair it from the Monitor.
Press the Menu button
Toggle to a camera icon that shows to be paired but is not.
Select Unpair by pressing Enter
Repeat the above steps to Unpair any occupied camera icons that
actually do not have a paired Camera
For screen shots and instruction videos, please visit our website at www.hyndsightvision.com
or check out our YouTube page.
 Loading...