

Page 1
Page 2
Page 3
Page 4
Page 5

Page 6

602/5326
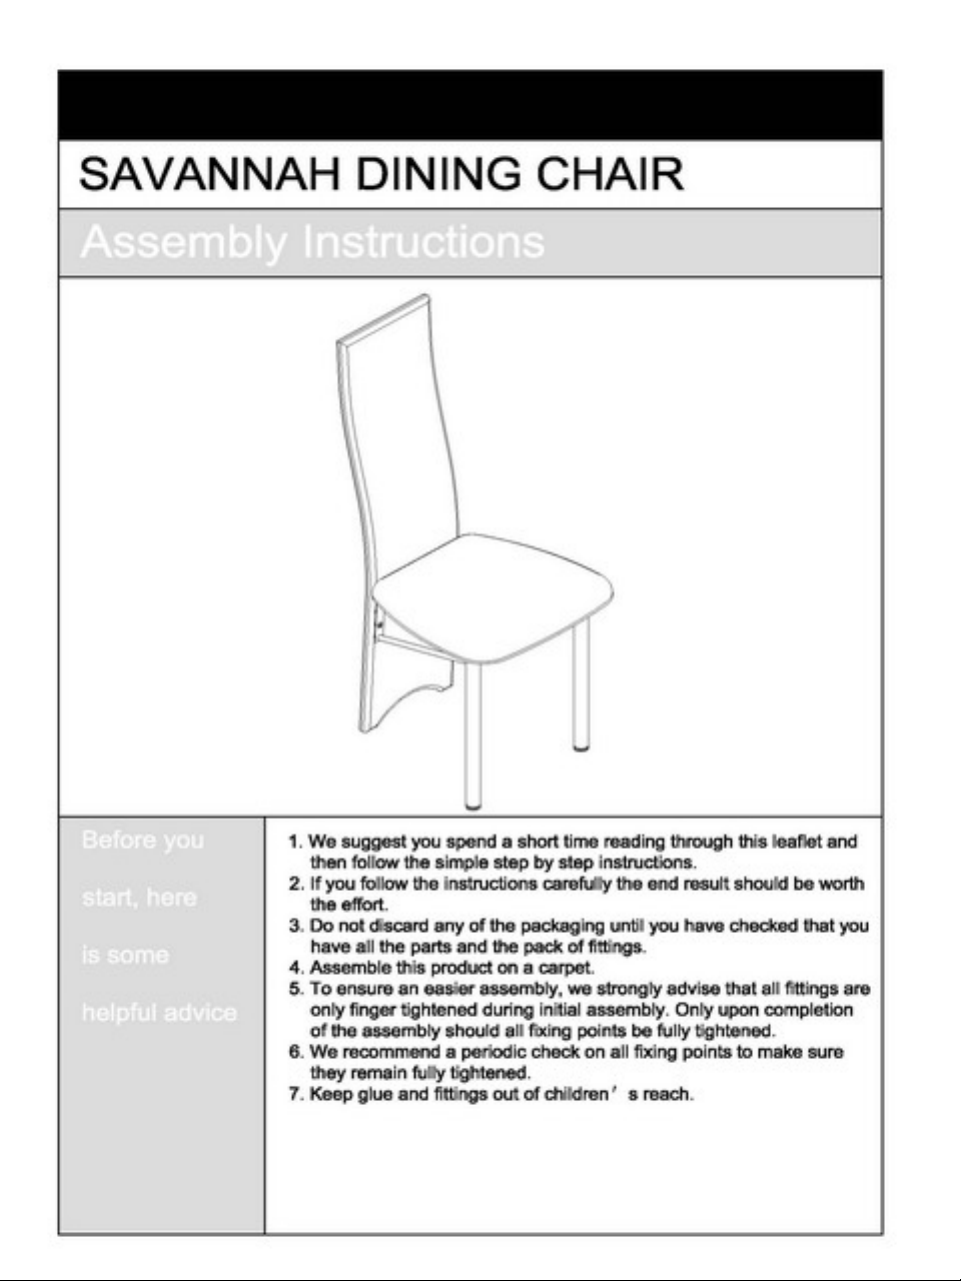
Assembly Instructions – Please keep for future reference
Important – Please read these instructions fully before starting assembly
Dimensions
Width - 37.5cm
Depth - 54cm
Height - 106.5cm
If you need help or have damaged or missing parts, call the Customer Helpline: 08456 400800
Issue 1 - 10/12/09
Savannah Dining Chair
602/3988
Page 7

Safety and Care Advice
Important – Please read these instructions fully before starting assembly
1
Care and maintenance
• From time to time check that
there are no loose screws on
this unit.
• This product should not be
discarded with household
waste. Take to your local
authority waste disposal centre.
Cleaning Guidance
• Minor stains and spillages
should be removed immediately
from cushion fabric, by wiping
over lightly with a damp cloth
and mild soapy water.
• Light marking can also be
removed using this method.
• To remove more stubborn
stains or marking, a good
quality proprietary domestic
fabric cleaner can be used,
although it should first be tested
on and inconspicuous area of
the fabric.
• Check you have all the
components and tools listed on
pages 2 and 3.
• Remove all fittings from the
plastic bags and separate them
into their groups.
• Keep children and animals
away from the work area, small
parts could choke if swallowed.
• Make sure you have enough
space to layout the parts before
starting.
• Assemble the item as close
to its final position (in the same
room) as possible.
• Assemble on a soft level
surface to avoid damaging the
unit or your floor.
• Dispose of all packaging
carefully and responsibly.
• Keep these instructions for
further use.
• We do not
recommend the
use of power
drill/drivers
for
inserting screws,
as this could damage the unit.
Only use hand screwdrivers.
• To ensure an easier assembly,
we strongly advise that all
fittings are only finger tightened
during initial assembly. Only
upon completion of the
assembly should all fixing points
be fully tightened.
Page 8

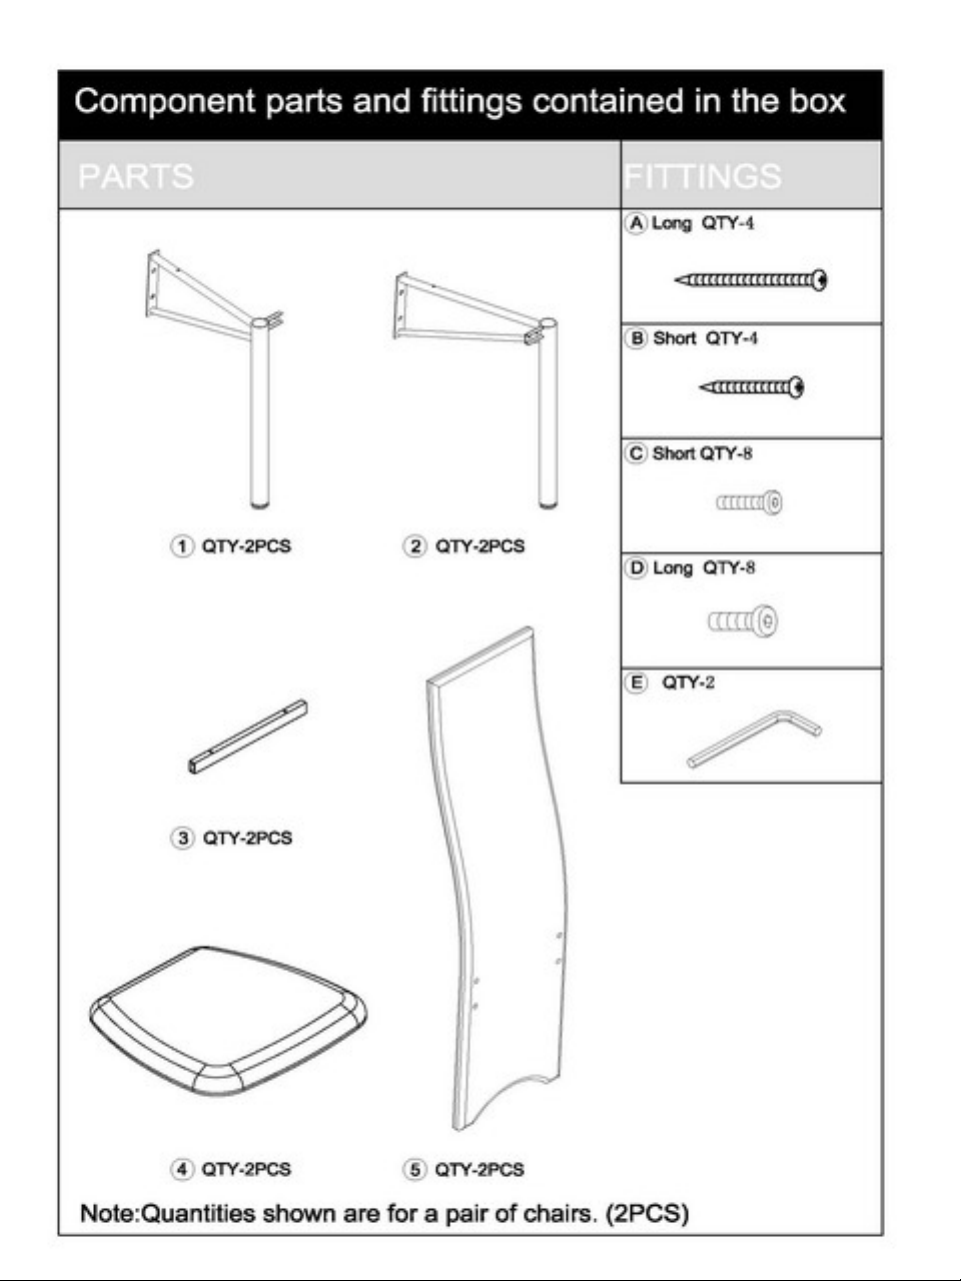
Please check you have all the parts listed below
Components - Parts
2
Left leg frame x 2
(44 x 37cm)
4
1
Right leg frame x 2
(44 x 37cm)
2
Stretcher x 2
(30 x 2.6cm)
3
Backrest x 2
(106 x 27cm)
Front
5
Seat pad x 2
(44.5 x 44cm)
Front
44.5cm
Back
33cm
Page 9

Components - Fittings
A
38mm Wood screw x 4
Please check you have all the fittings listed below
Note:
The quantities below are the correct amount to complete the assembly. In some cases more
fittings may be supplied than are required.
Allen key x 1
B C
D E
3
18mm Allen screw x 89mm Allen screw x 8 26mm Wood screw x 4
0
Ruler – Use this ruler to help correctly identify the screws
5
10 2015 4035
30
25 80
75
7060 65
45
50
55
160155150140 145120 125
130 135
85 90 10095 115110105 165 170
Tools required
Phillips screwdriver
(medium & large)
If you have damaged or missing components,
call the Customer Helpline: 08456 400800
Page 10

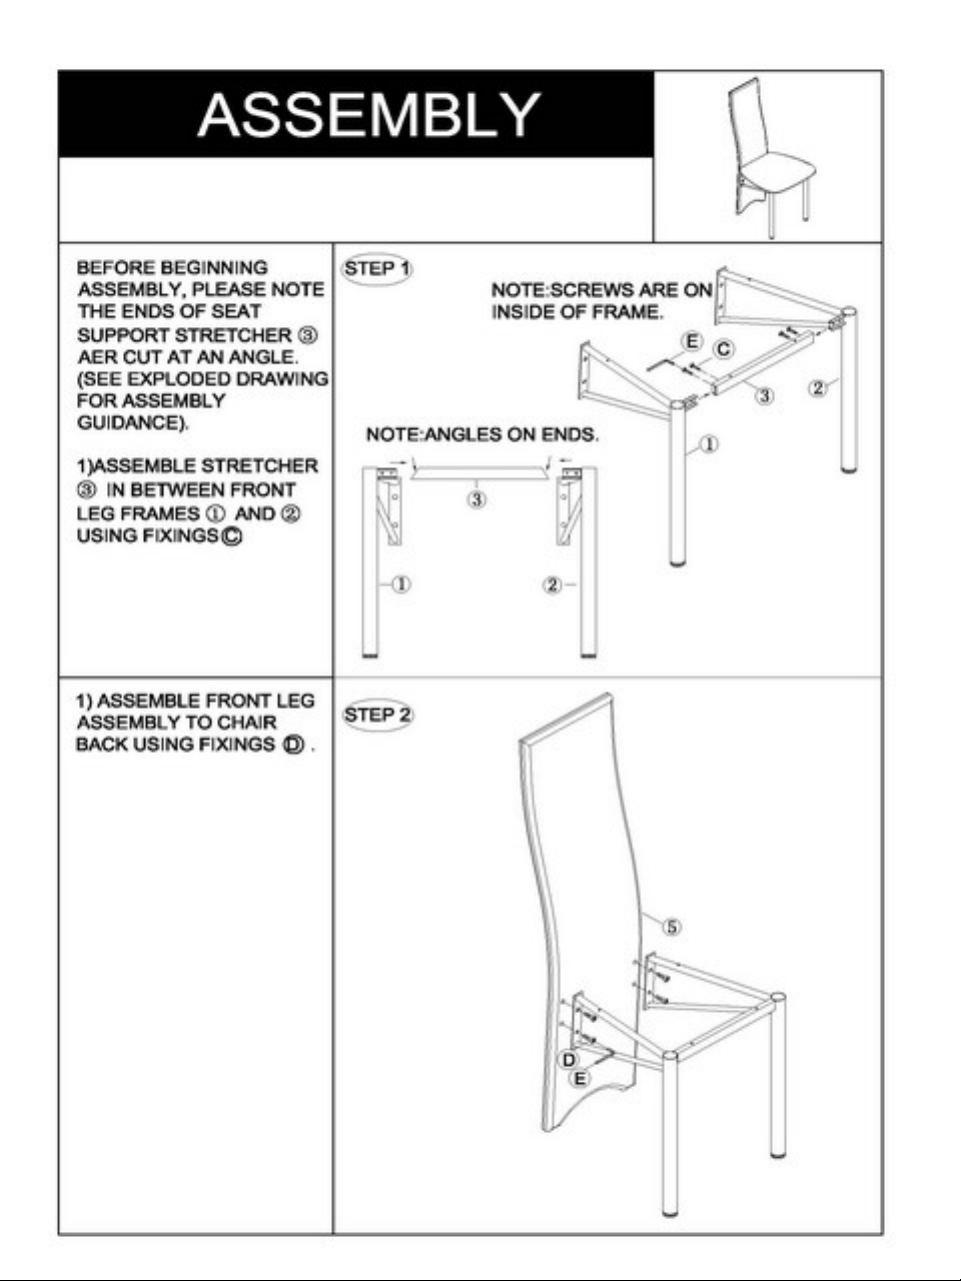
Step 1
Assembly Instructions
Step 2
4
B
Attaching backrest
Place backrest down
onto a clean flat surface.
Note:
fixing holes must
be facing up.
Turn the leg assembly
over and place it onto the
backrest as shown.
Secure to the backrest
using screws .
Note:
Do not fully tighten
screws .
B
4
4
Attaching legs
Assemble stretcher
in between left and right
leg frames and
using screws .
Note:
Ensure the arrow
label on stretcher is
facing 'up' as shown.
Note:
Do not fully tighten
screws .
A
2
3
1
4
3
A
B
1
2
3
A
Bottom
Top
A
Page 11

Assembly Instructions
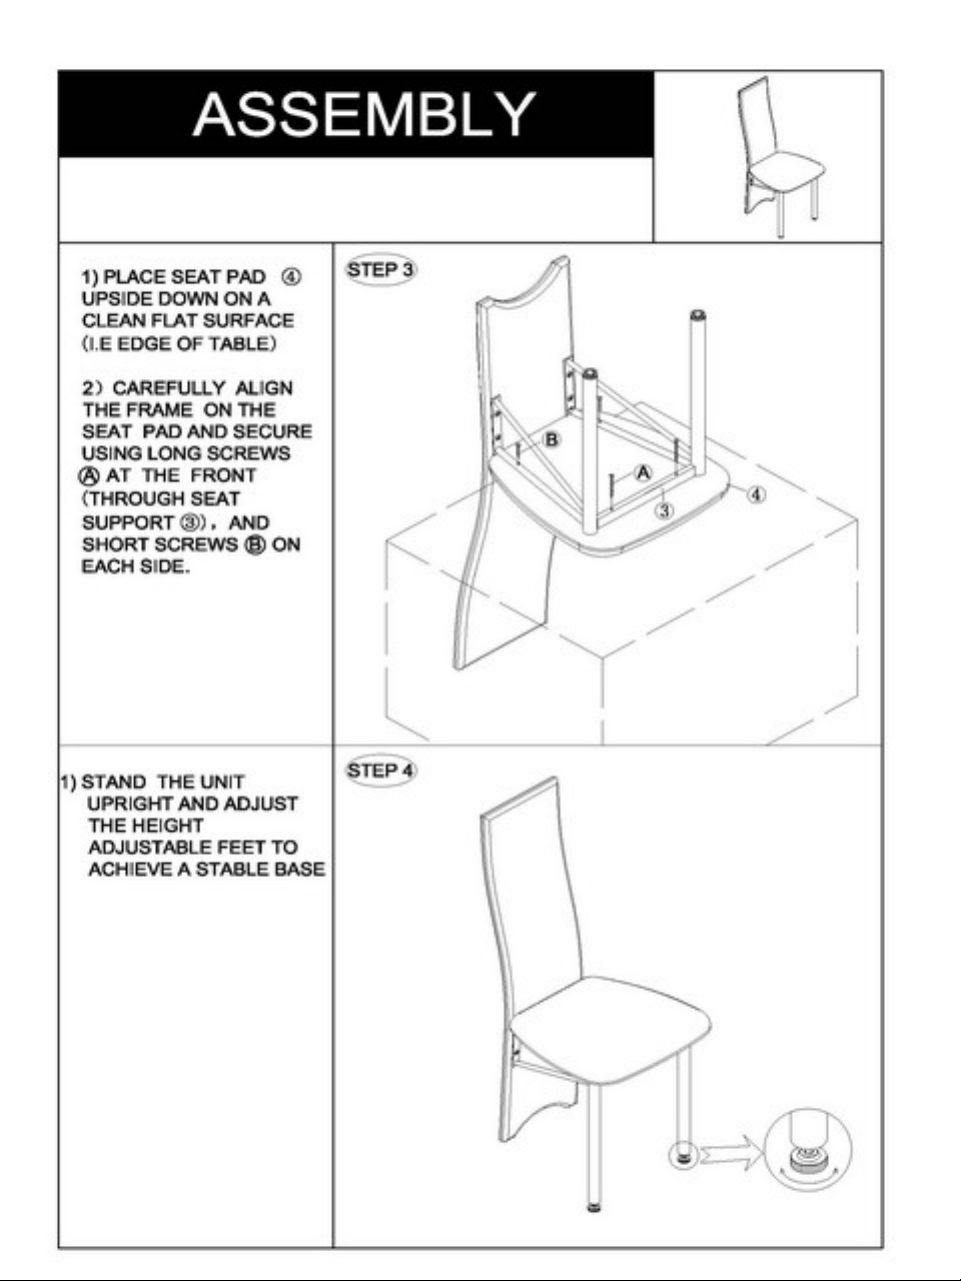
Step 3
Assembly is complete.
5
Step 4
Turn the chair upright
Attaching seat pad
Place seat pad upside
down onto a clean flat
surface (edge of table
top).
Align chair frame on top
of seat pad and secure
using screws and .
Note:
Longer wood
screws go through
stretcher at the front.
5
C D
5
C
D
Front
44.5cm
Stand the chair upright.
Whilst applying a firm
downward pressure to
ensure the chair is stable,
fully tighten all
screws.
If necessary, stability can
be further adjusted using
the adjustable front feet.
If you need help or have damaged or missing parts, call the Customer Helpline: 08456 400800
Home Retail Group. 489-499 Avebury Boulevard. Saxon Gate West. Central Milton Keynes. MK9 2NW
3
D
3
 Loading...