

Page 1
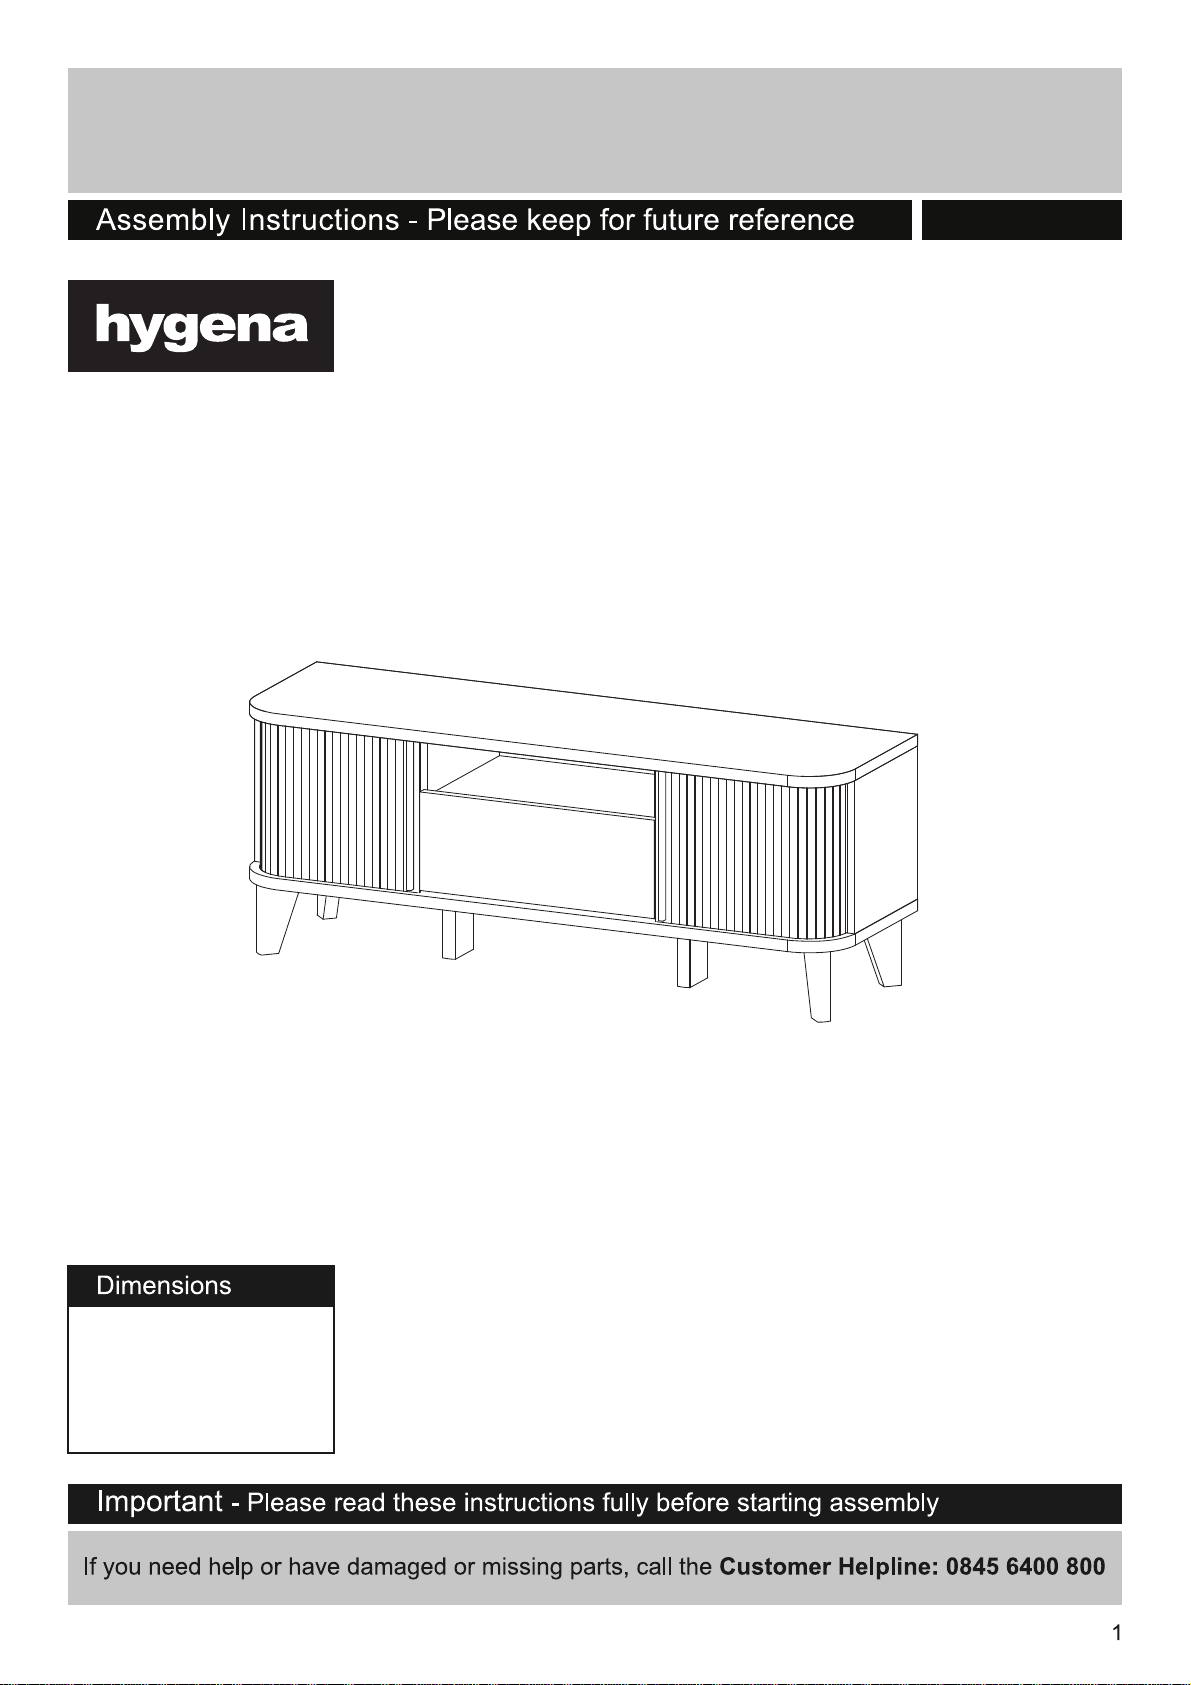
Sliding Door TV Unit
457/2170
Width - 117 cm
Depth - 35 cm
Height - 45.2 cm
Issue 1 - 11/09/2015
Page 2
Page 3
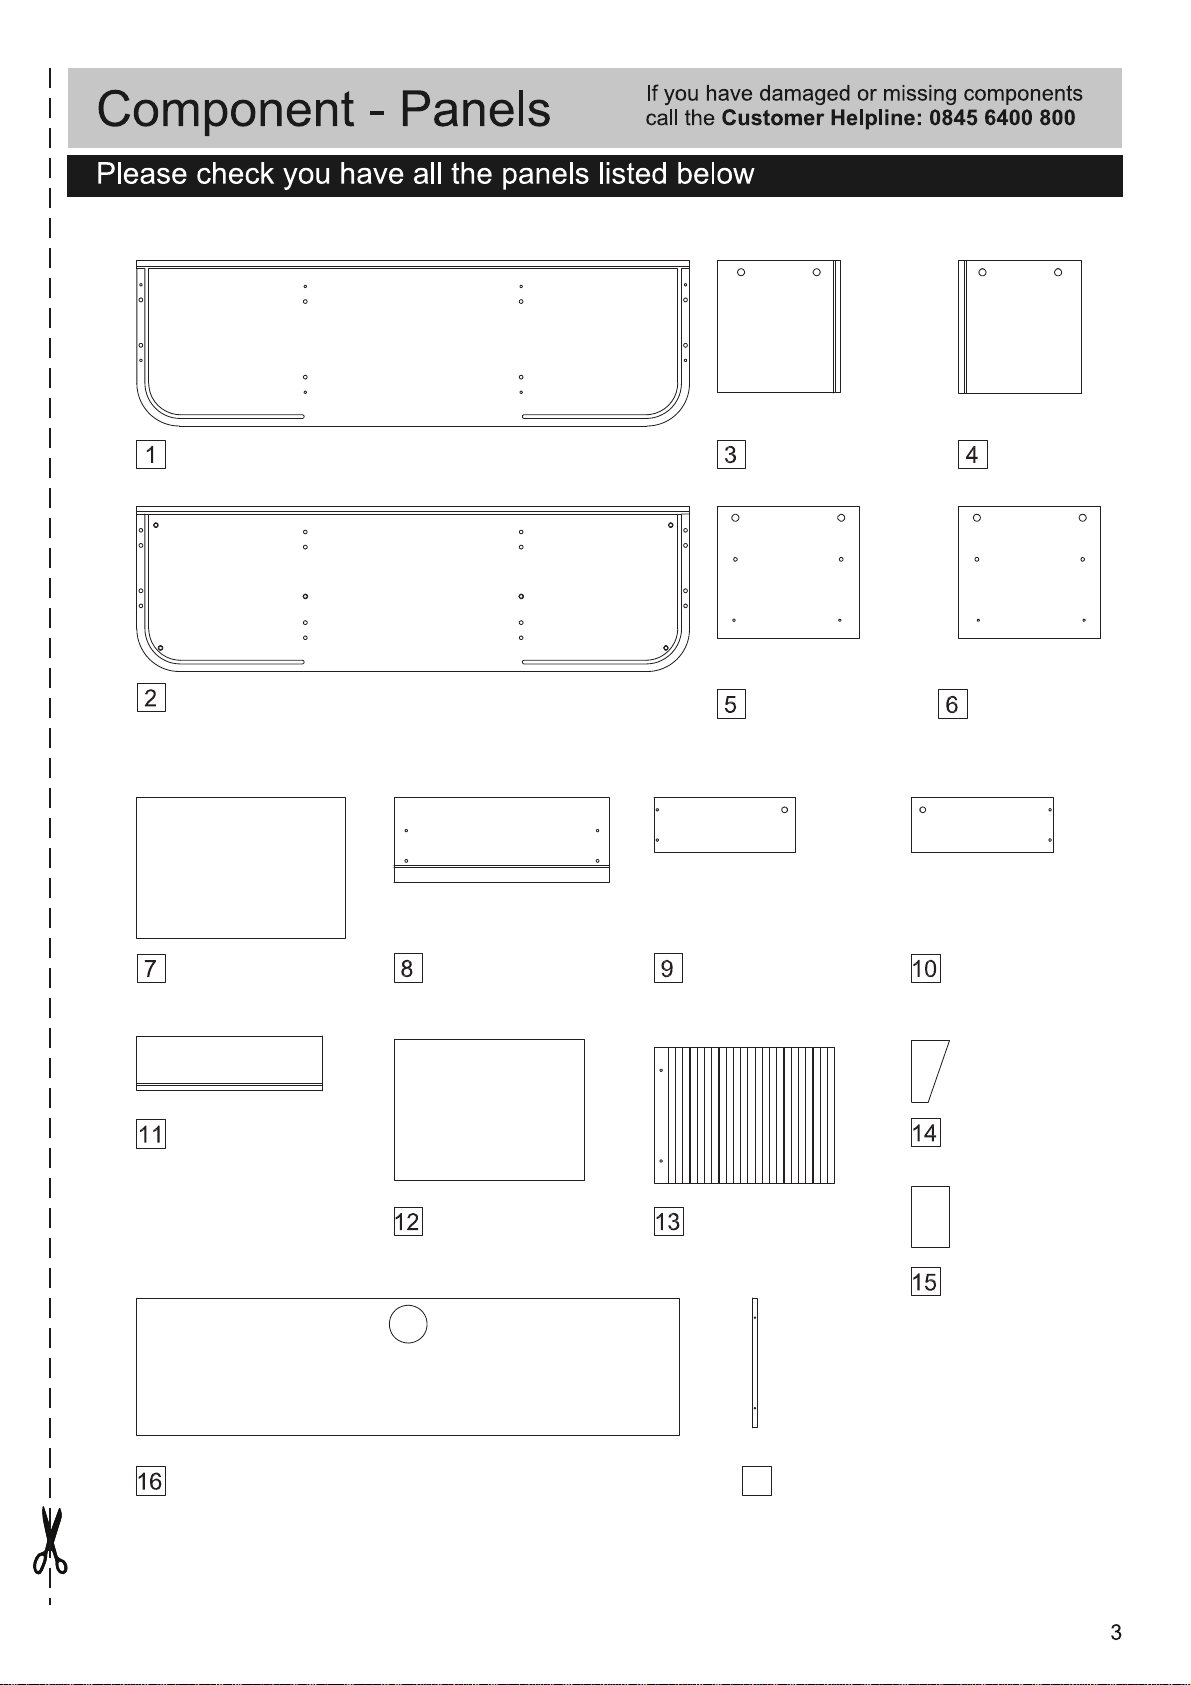
Top
(117 x 35 cm)
Left side
(28 x 26 cm)
Right side
(28 x 26cm)
Bottom
(117 x 35 cm)
Shelf
(44.2 x 29.8 cm)
Drawer back
(39.3 x 11.6 cm)
Drawer front
(45.7 x 18 cm)
Drawer bottom
(40.4 x 29.8 cm)
Vertical partition
(28x 30 cm)
Drawer left side
(30 x 11.6 cm)
Sliding door x 2
(38 x 28.8 cm)
Vertical partition
(28x 30 cm)
Drawer right side
(30 x 11.6 cm)
Leg x 4
(13 x 8 cm)
Leg x 2
(12.8 x 8 cm)
Back panel
(114.9 x 29.1 cm)
Wooden Handle x 2
17
(27.4 x 1.2 cm)
Page 4
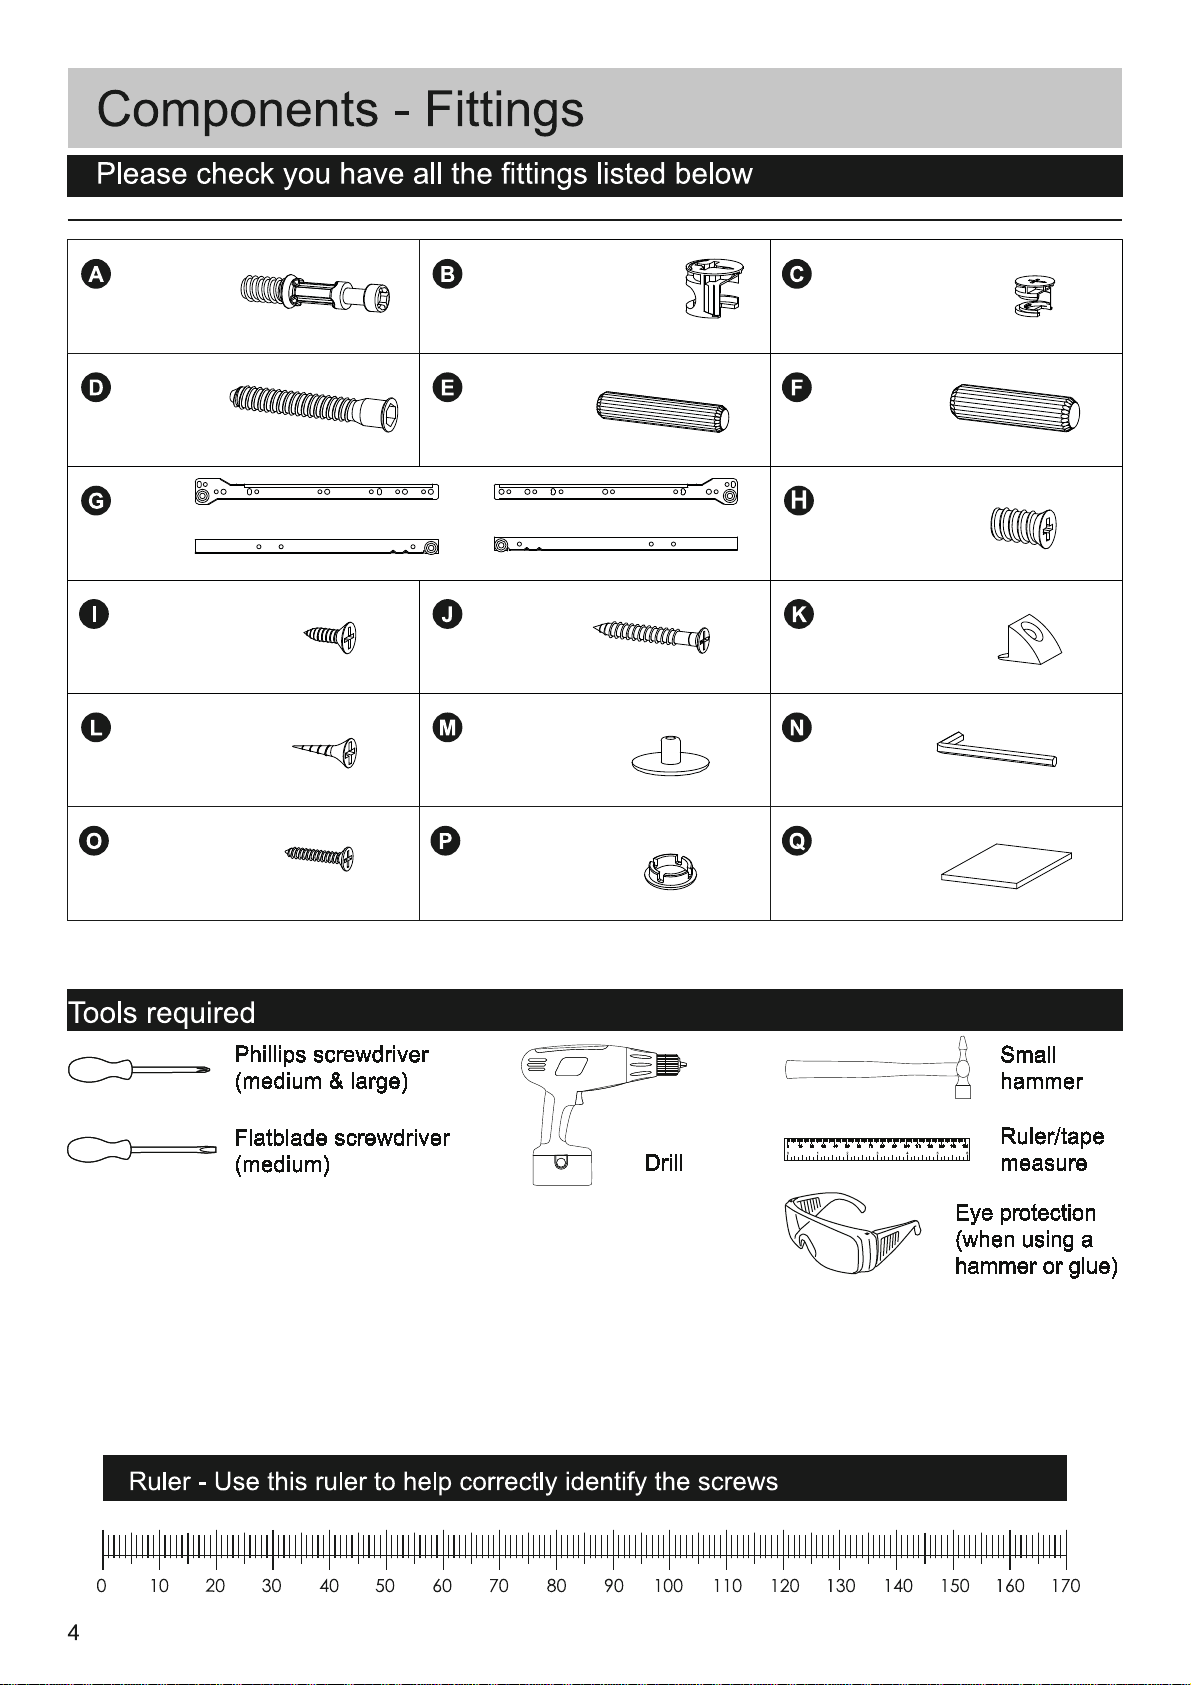
Metal dowel x 10
( 15x13 ) Locking nuts x 8
( 12x13 ) Locking nuts x 2
( 7x50 ) Hexagon bolt x 14
( 6x30 ) Wooden dowel x 2 ( 8x30 ) Wooden dowel x 26
Runner x 1 ( 6.5x10.5 mm ) Screw x 4
( 3.5x13 mm ) Screw x 6 ( 8x39 mm ) Screw x 4 Back panel connector x 8
( 3.5x15.5 ) Screw x 8
( 3.5x15.5 ) Screw x 4
Cap x 4
Cap x 4
Allen key x 1
Foot Pad x 6
Page 5
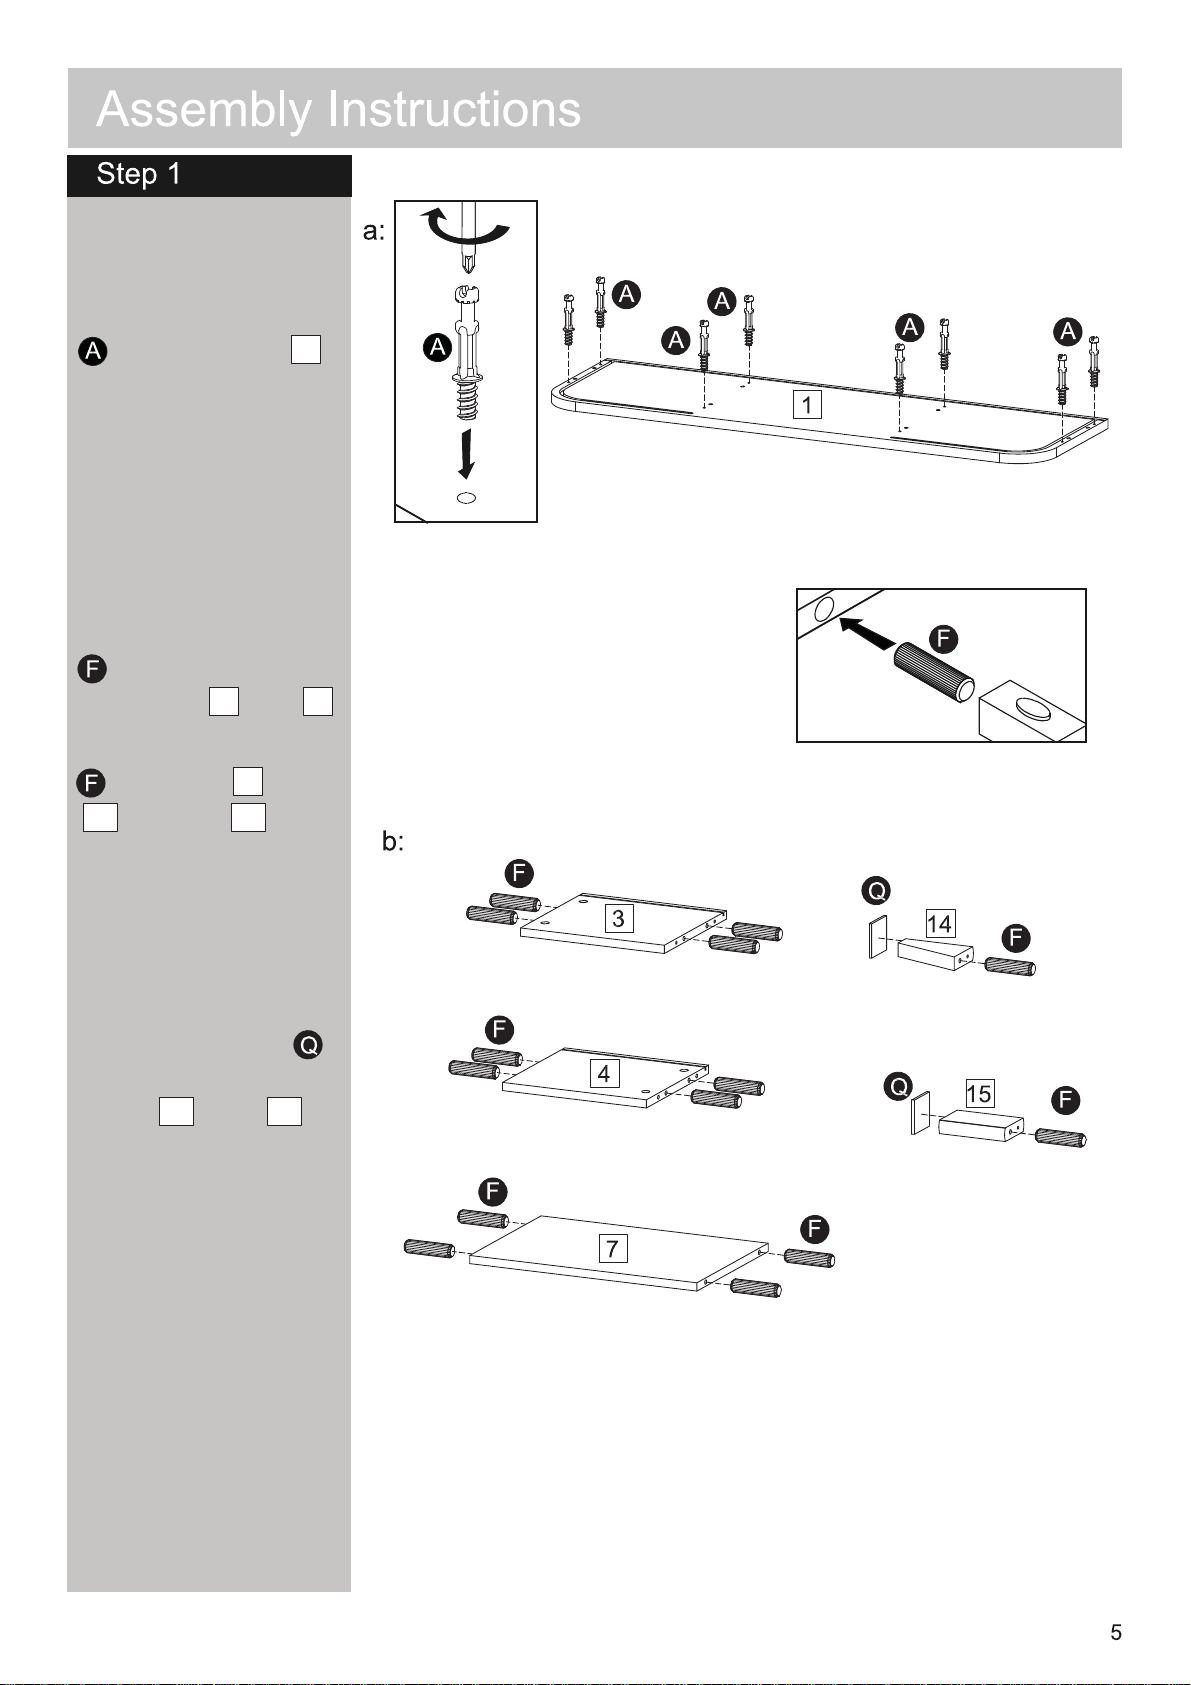
a: Fitting metal
dowels
Screw metal dowels
into Top Panel 1 .
Note: Insert metal
dowels as far as
shown.
Do not over tighten.
b: Fitting wood
dowels
Insert wood dowels
F into V ertical
Partitions 3 and 4 .
Insert wood dowels
F into Shelf 7 , Leg
14 and Leg 15 .
Gently tap dowels
into the components
with a hammer if
necessary.
Peel off protective
film off foot pads
and paste them onto
Legs 15 and 16 .
x 4
x 2
Page 6

Fitting wood
dowels
Insert wooden dowels
into the vertikal potitions
Insert wood dowels
.
F into Vertical
Partitions 5 and 6 .
Gently tap the
dowels into the
components with a
hammer if
necessary.
b: Inserting runners
Attaching runners
Attach runners (G) to
Vertical partition panel
Position runner G
(5) (6) using screw
Partition 5
on as
provided
H
shown.
Fix through holes
shown using screws
H
.
Repeat with
Partition 6 .
H
H
H
H
H
H
H
H
Page 7

Attaching panels
Attaching vertical
Position partition
pertition to the
panel
shelf .
onto shelf with
5 and 6
7
the finished front
edge facing up.
Finished
front edge
Finished
front edge
Front
Finished
front edge
Front
Finished
front edge
Attaching panels
Two people are
Attach shelf panel
needed here.
Position the panel
Attach Locking nuts
to the hole and use the
assembly onto Top
allen key ( ) to turn
Panel 1 .
locking nuts
clockwise to lock.
Insert two locking
nuts B into Panel
and Shelf where
shown.
Use Allen key N to
turn locking nuts B
clockwise to lock.
Cover locking nuts
B with caps .
N
M
6
7
N
Rear
N
Page 8

Step 5
Attaching side
panels
Attach Left side panel
Attach Right side panel
Position Left Side
3 Right Side 4
and
onto
Attach Locking nuts
to the hole and use the
as shown.
allen key ( ) to turn
locking nuts
Insert two locking
clockwise to lock.
nuts B into Panel
and Shelf where
shown.
Use Allen key N to
turn locking nuts B
clockwise to lock.
Cover locking nuts
B with caps .
Top Panel 1
N
7
N
N
N
6
N
Step 6
Step 6
Attaching handles
Attach Sliding door
Attach wooden
panel
13
handle
to the wooden handle
door
Using screws
screws .
17
to sliding
13
using
O
17
O
Repeat with
remaining door .
O
13
O
17
8
Page 9

Step 7
Installing doors
Attach Sliding door x2
Fit one door 13 into
Put the Sliding door x2
the groove on top
fit into the groove line
on top panel.
panel 1 .
Repeat with the
remaining door on
the other side.
Step 8
Step 8
Installing back
panel
Attach Back panel
16
Put the Back board
Turn the Back Panel
fit into the groove line
so that the long
16
on side panels end
bottom panel.
edge with cable hole
16
goes in first.
Slide
Back Panel 16
with so that it fits
into the grooves on
Side Panels 3
the
and 4 and
.Panel 1
Top
9
Page 10

Step 9
Attaching legs
Attach Leg and
Legs 14 and 15
Fit
to the bottom panel
Bottom Panel 2
to
Attach ( 7x50 ) Hexagon
bolt to the hole and
use the allen key
Attach Legs 14
to turn locking nuts
clockwise to lock.
15 to
2
Bottom Panel
using hexagon
N
bolts .
.
and
Step 10
Step 10
Installing base
Attach Bottom panel
Parallel dowel holes. Attach
Two people are
( 7x50 ) Hexagon into
needed here.
the hole and fasten using
allen key .
N
2
Position Bottom
Panel onto the
assembly.
Attach bottom
panel using
hexagon bolts .
With help,
carefully stand
the TV Unit
upright.
10
Page 11

Step 11
Drawer assembly
Insert ( 6x30 ) Wooden
a: Insert wood
dowel
dowels
left side and drawer
Drawer Left Side 9
right side .
and Drawer Right
Side 10 .
b: Inserting Metal
dowel
Gently tap dowels
Insert
into the components
into the front drawer
with a hammer if
necessary.
b: Screw metal
dowels into the
back of Drawer
Front 8 .
into the drawer
into
Metal dowel
c: Position Drawer
Sides and
Step 12
to the back of
Drawer Front
as shown.
Attach drawer left side
Attach drawer right side
Insert a locking
to the front drawer panel
Attach ( 12x13 ) Locing
nuts to the hole and
use screwdriver to turn
locking nuts clockwise
to lock.
C
nut each into
Drawer Sides
C
and where
shown.
9
10
Use a screw driver
to turn locking nuts
C
clockwise to
lock.
Continued on next
page.
8
C
C
11
Page 12

Step 11 (cont’d)
Drawer assembly
d: Slide Drawer
a: Attach Drawer back
Bottom
to the drawer sides
the grooves.
( 8x39 mm ) Screw
using
11
into
e: Position Drawer
Back over the
assembly.
Fix Drawer Back
to the Drawer
Sides with
Screws .
b: Attach Runner using
f: Position runner
screws
I
G onto the
C
bottom of Drawer
Sides.
Fasten runner G
with screws ..
12
Page 13

Step 12
Inserting drawers
Insert the drawer
into the unit,
matching the
rollers on drawer
slides with the slots
on the TV Unit
runners.
Step 15
Step 13
Fixing rear panels
Fix rear panel
Fit a Back Panel
to back of TV stand
using stabilizer
Connector K
and screw
between the Back
Panel and its
adjacent panel.
Fix with Screw L.
Repeat with the
remaining
connectors around
the perimeter of the
back as shown.
13
Page 14

Step 14
Attaching Cap
Fixing caps
Attach cap with Cover
Cover the screw
heads with caps
as shown.
P
P
Assembly is complete.
14
 Loading...