

Page 1
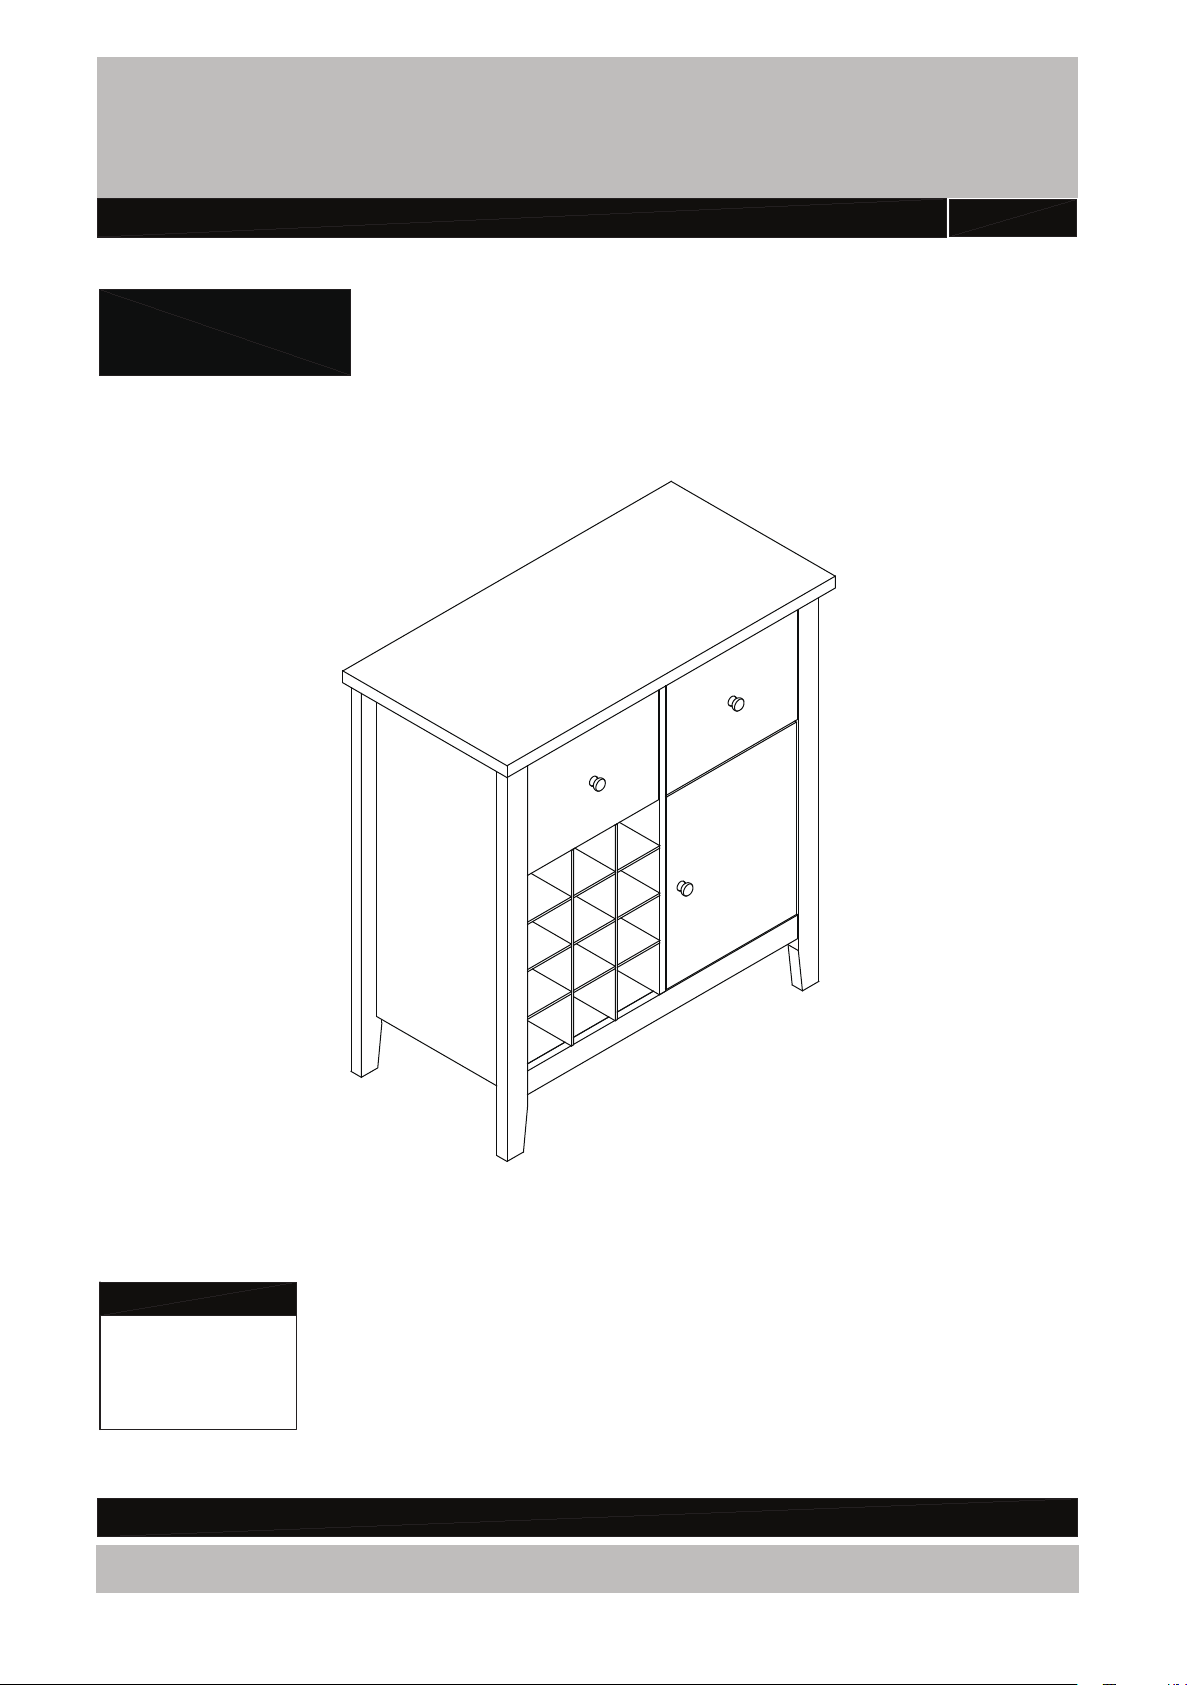
Luna Sideboard With Wine Rack
Assembly lnstructions - Please keep for future reference
hygena
459/6077
Dimensions
Width - 80cm
Depth - 40cm
Height -85cm
Important - Please read these instructions fully before starting assembly
If you need help or have damaged or missing parts, call the Customer Helpline: 0345 6400 800
Issue 1-28-10-15
Page 2
Safety and Care Advice
1
Check you have all the
components and tools listed on
pages 2 and 3.
Remove all ttings from the
plastic bags and separate them
into their groups.
Keep children and animals
away from the work area, small
parts could choke if swallowed.
Make sure you have enough
space to layout the parts before
starting.
This product has been nished using natrual materials. As a living material, you may notice some
variation in the grain and colour shade between the dierent components.
Unlike a synthetic or man-made material which has a uniform nish, a feature of natural wood is its
variation in grain and colour. We wish to reassure you that this is quite normal and is not the result
of any manufacturing fault.
Assemble the item as close
to its nal position (in the same
room) as possible.
Assemble on a soft level
surface to avoid damaging the
unit or your oor.
Assembly requires 2 people.
Do not stand or put excessive
weight on the product,this could
cause damage.
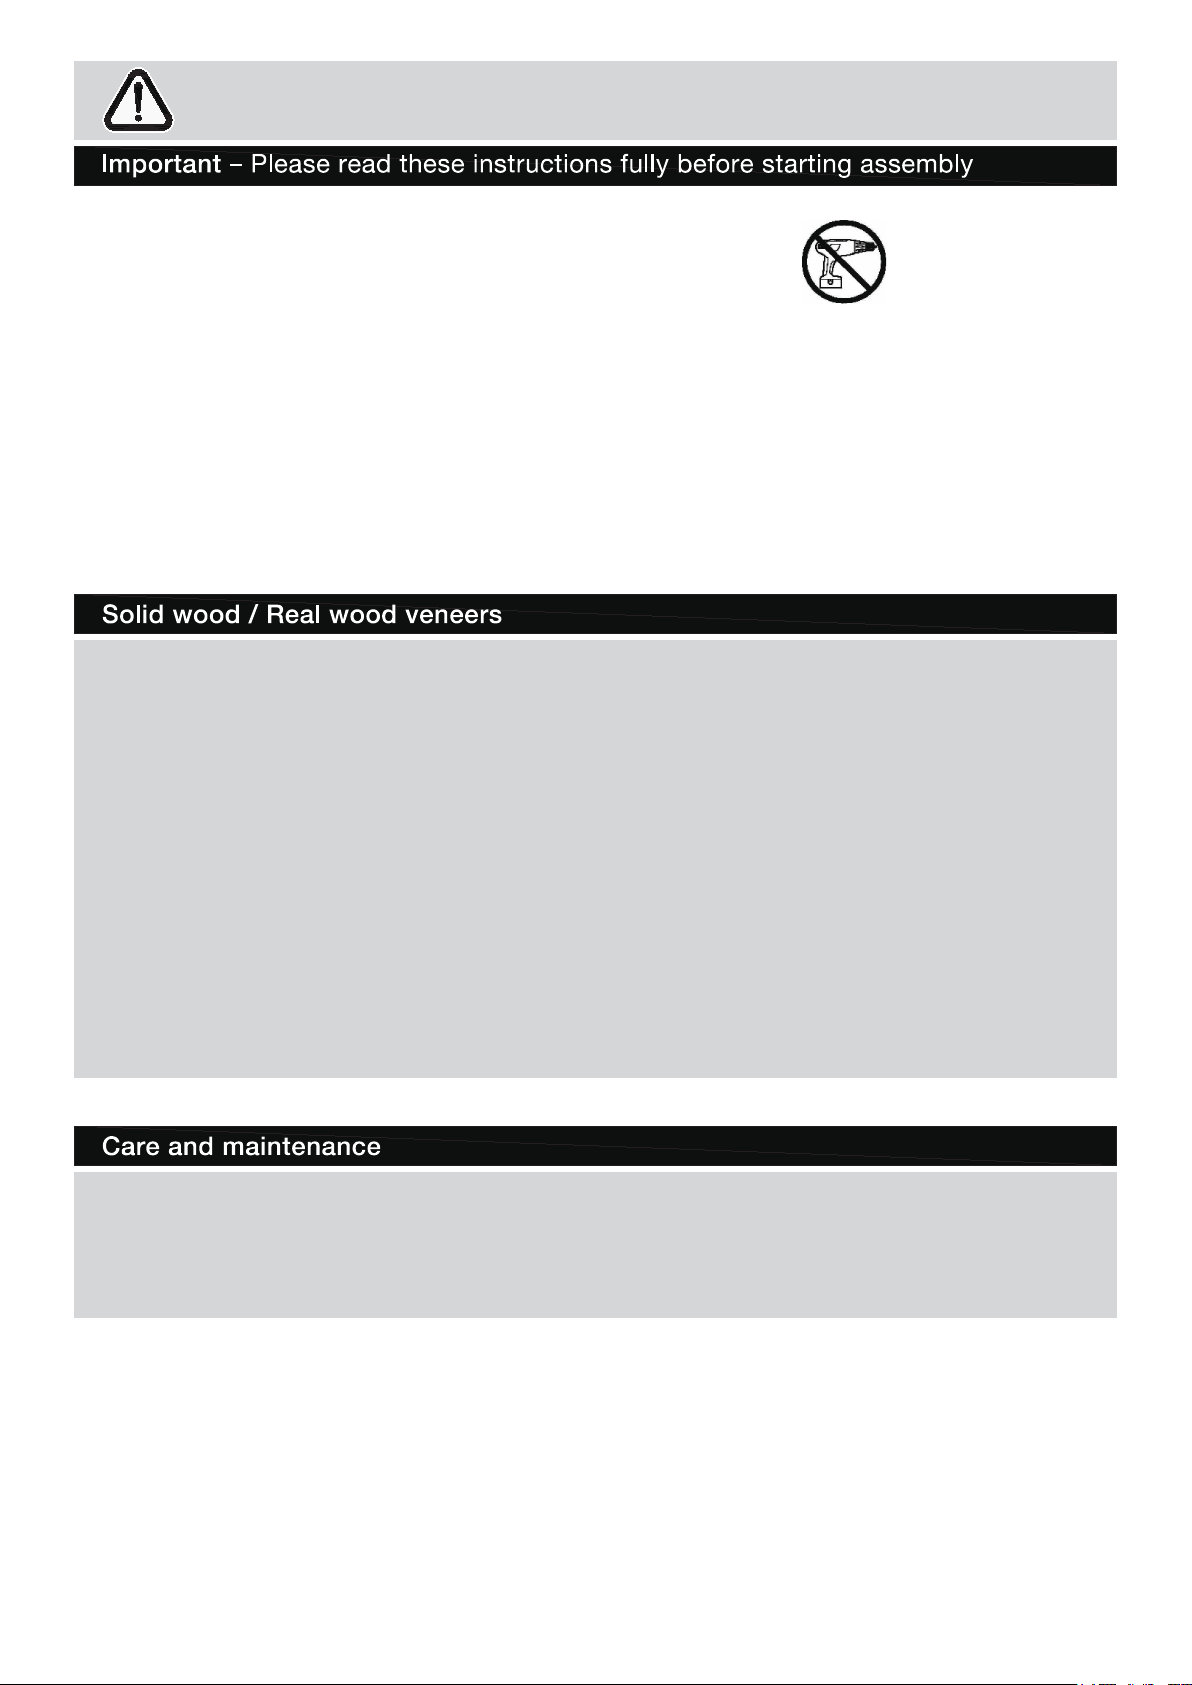
We do not
recommend the
use of power
drill/drivers
inserting screws,
as this could damage the unit.
Only use hand screwdrivers and
Allen keys.
Dispose of all packaging
carefully and responsibly.
for
Where sheets of wood are joined together, a line may be detected. Again, this is normal and is not
an imperfection.
The natural nish should be cared for by the periodic application of a good quality 'was' based
domestic furniture polish (Not silicone!!). Occasional / small spills should be removed immediately
using a damp cloth.
Do not allow hot articles to come into contact with the surface, as damage will occur!
Only clean using a damp cloth
and mild detergent, do no use
bleach or abrasive cleaners.
From time to time check that
there are no loose screws on
this unit.
This product should not be
discarded with household
waste. Take to your local
authority waste disposal centre.
Page 3

Components - Parts
Underside
1
Top panel
(80x40x2.5cm)
Inside
lf you have damaged or missing components.
call the Customer Helpline:
0345 6400 800
Inside
Side panel (left)
2
(83x38x5cm)
Side panel (right)
3
(83x38x5cm)
Base panel
5
(66x36x1.5cm)
Back panel X 2
7
(70x34x0.3cm)
Divider
4
(68x37.5x1.5cm)
Lower apron
6
(66x5x1.5cm)
8
Drawer back X 2
(29x20x1.2cm)
Drawer side panel (right) X 2
9
(35x20x1.2cm)
2
Page 4

Components - Parts
Drawer Side Panel (left) X 2
10
(35x20x1.2cm)
lf you have damaged or missing components.
call the Customer Helpline:
0345 6400 800
Drawer Base X 2
11
(34.4x29.4x0.3cm)
Drawer Front X 2
12
(31.8x25x1.5cm)
Wine Rack panel (vertical) X 2
14
(37x42.3x0.5cm)
13
Wine Rack panel (Horizontal) X 3
(32.8x37x0.5cm)
Upper Apron
15
(66x2x1.5cm)
Shelf
17
(35.4x32x0.9cm)
Door
16
(40.6x32.9x1.5cm)
3
Page 5
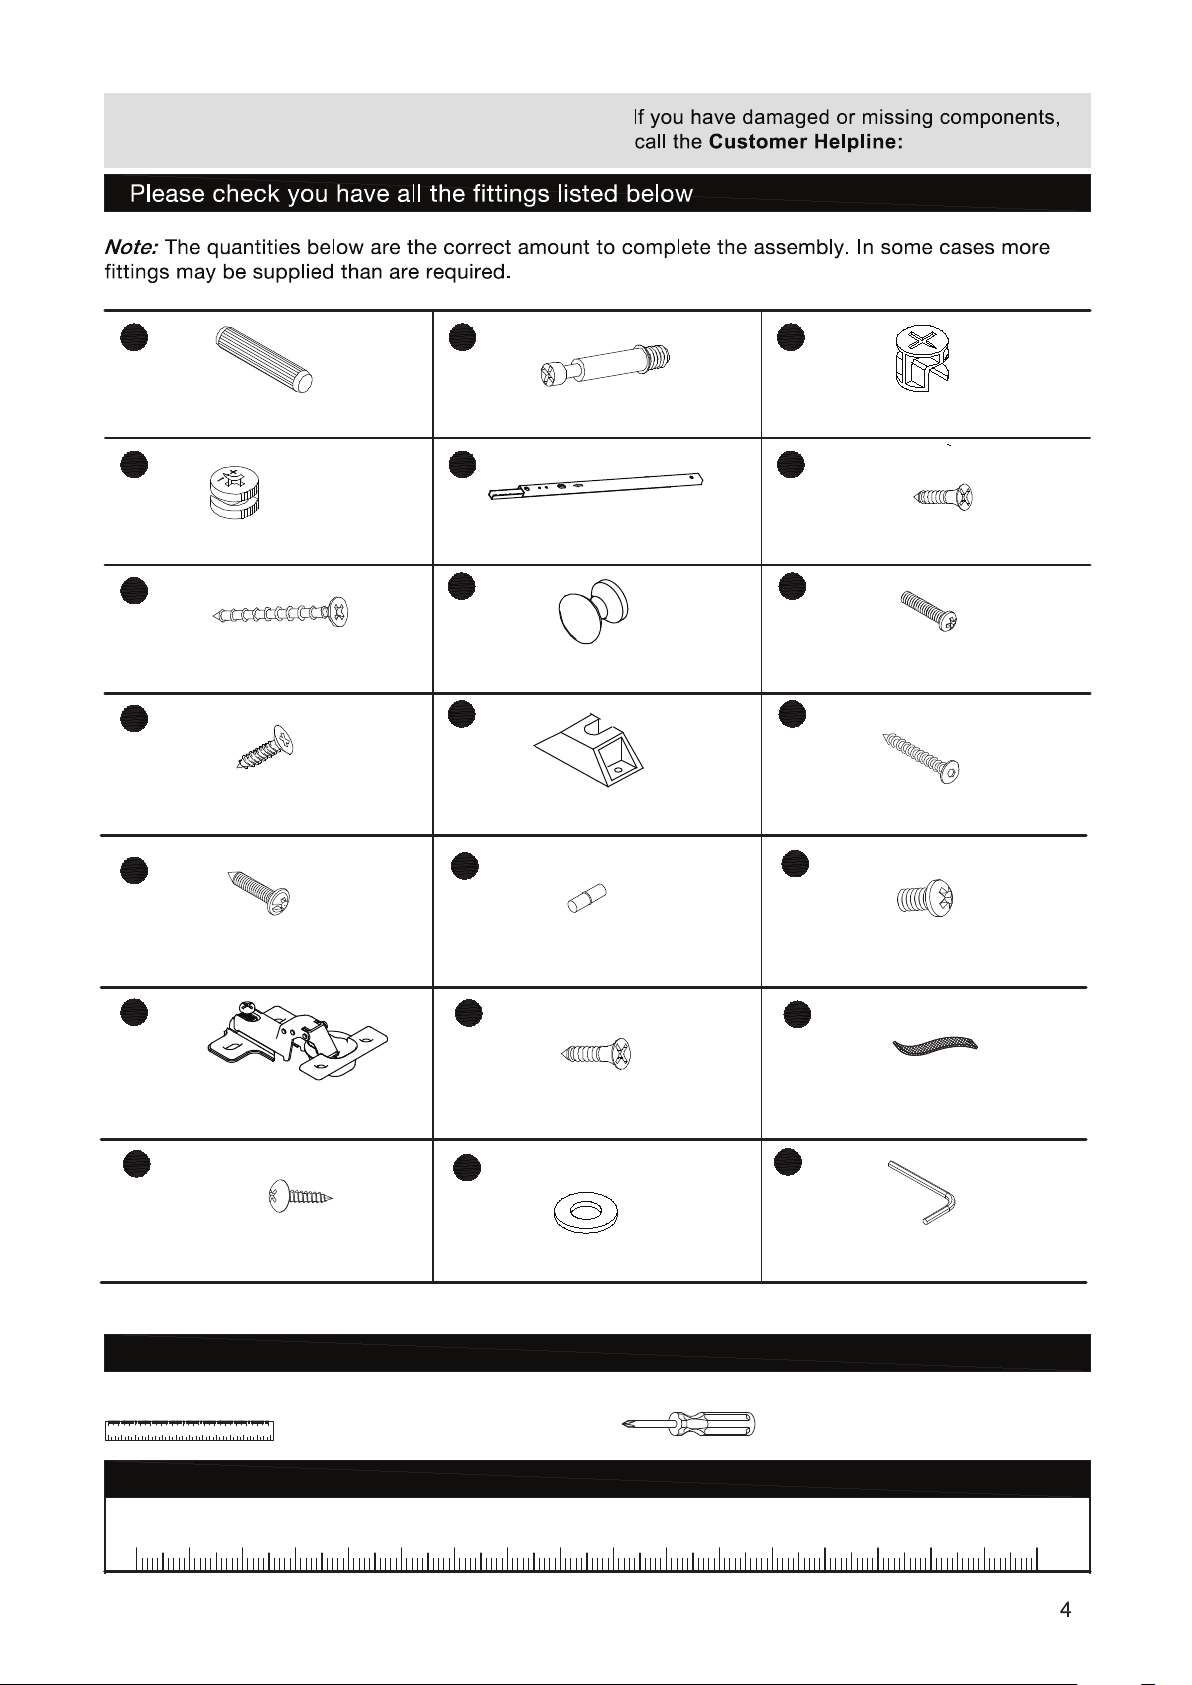
Components - Fittings
0345 6400 800
A
Wooden dowel x 20 (6X30mm)
D
Small locking nut x 12
G
Wood screw x 11 (4x30mm)
K
Screw x2 (3x10mm)
N
B C
Metal dowel x 20
E
Drawer runner x 4 (L342mm)
H
Handle x 3
L M
Plastic door catch x 1
P
Large locking nut x 8
F
F
Screw x 8 (3x12mm)
J
Screw x 3 (4x18mm)
Screw x 2 (5x40mm)
Q
Screw x 27 (2.5x10mm)
R
Door hinge x 2
U
Screw
x 2 (3.5x16mm)
Shelf support pins x 4
S
Screw
x 8 (4x12mm)
V
Washer x 2
Tools required
5 10 15 20 25 30 35 40 45 50 55 60 65 70 75 80 85 90 95 100 105 110 115 120 125 130 135 140 145 150
1 2 3 4 5 6
Ruler/tape measure
Ruler - Use this ruler to help correctly identify the screws
Screw x 2 (4x10mm)
T
Wall strap x 2
W
Allen key X 1
Phillips screwdriver
(Not supplied)
0 5 10 15 20 25 30 35 40 45 50 55 60 65 70 75 80 85 90 95 100 105 110 115 120 125 130 135 140 145 150 155 160 165 170
Page 6

Preparing panels
Place top , lower apron
, drawer front and
6
drawer side panels and
at onto the oor with
3
the xing holes facing up.
1
12
2
15
B
G
Screw metal dowels into
all panels as shown.
Insert wood dowels into
1
top , side frames and
and lower apron as shown.
Assemble upper apron to
top using screws .
1
B
A
32
6
15
G
A
B
1
B
A
6
B
X 2
12
B
2
A
3
B
A
5
Page 7

2
Preparing side panels
Place left and right side frames
2
and at on the oor with
the xing holes facing up.
3
F
F
F
F
F
F
E
E
Fit drawer runners to side
frames , and both sides
of divider using screws .
2
4
Assemble plastic door catch
to divider using screws .
4
E
3
F
L
K
F
3
F
F
E
F
E
F
F
F
F
2
E
F
F
F
F
F
F
F
F
F
E
F
F
F
F
F
K
F
E
F
F
F
F
E
4
4
F
L
F
F
E
6
Page 8

Step 3
Assembling panels
a: Locate apron onto base
panel .
Insert large locking nuts into
the underside of base panel
as shown.
Turn locking nuts clockwise to
secure.
b:
the bottom edge of divider
.
Assemble divider to base
panel using screws .
5
Insert wood dowels into
4
5
6
C
5
A
4
M
4
a:
b:
Front
Cut out
4
C
6
Underside
5
C
A
Front
M
5
Step 4
A
ssembling side frames
With help, carefully locate the
base panel assembly onto right
side panel .
Insert large locking nuts
into the holes in base panel
as shown.
Turn locking nuts clockwise
to secure.
Locate left side frame into
position and insert locking nuts
C
into base panel as
shown.
Turn locking nuts clockwise
to secure.
3
C
5
2
5
W
5
3
C
C
2
5
C
7
Page 9

Step 5
Assembling top
With help stand the unit
upright.
Insert wood dowels into
the top of side frames and
3
and divider .
A
2
4
1
Locate top into position.
Insert small locking nuts
into side panels and .
Insert large locking nuts
into divider .
Turn locking nuts clockwise
to secure.
1
D
32
C
4
Step 6
Assembling wine rack
With help, stand the unit
back upright.
a: With help, slot the vertical
wine rack panels
together with the horizontal
wine rack panels as shown.
13
14
a:
14
A
D
C
D
D
2
4
3
13
b: Carefully locate the
assembled wine rack into the
main cabinet from the back
as shown.
14
The back
of cabinet
3
b:
13
8
Page 10

Step 7
Assembling back panel
With help, carefully lay the unit
face down onto the oor.
a: Locate back panels into
position.
7
a:
7
7
7
b: Secure back panels using
screws .
N
7
7
b:
N
7
9
Page 11

Step 8
Assembling Drawer
a: Locate drawer sides
10
and onto drawer front .
9
12
a:
9
D
10
Insert small locking nuts
into the drawer sides as
shown.
Turn locking nuts clockwise
to secure.
b: Slide drawer base into
the grooves.
c: Locate drawer back in
between drawer side panels
9
and and secure using
screws .
10
G
D
11
8
b:
c:
D
12
X 2
11
X 2
X 2
d: Fit handle to drawer
front using screw .
12
Repeat for both drawers.
H
J
8
10
G
9
d:
X 2
J
12
H
10
Page 12

Step 9
Locating drawers
Extend the drawer runners
fully out.
Locate the drawers onto the
runners and secure using
screws as shown.
Q
Q
Q
11
Page 13

Step 10
Assembling shelf and door
a: Insert shelf support pins
at the desired height.
Carefully locate shelf
onto the support pins.
b
: Assemble hinges to door
using screws .
16
Fit handle to door
using screw .
S
H
J
P
17
R
16
a:
b:
P
17
S
J
R
16
c: Assemble door to left side
2
panel using screws .
16
S
H
c:
2
S
16
S
12
Page 14

11
Step 11
Hinge adjustment
a: To move doors up or
down, loosen screws
as shown and move doors
to suit.
Once doors are aligned,
insert 2 more screws
into the hinge plates and
fully tighten all screws.
S
S
b: To move doors in or
out, loosen screw shown
and move doors to suit.
Re-tighten screws.
a:
S
S
b:
c: To move doors left or
right, lossen screw shown
and move doors to suit.
Re-tighten screws.
c:
13
Page 15

Step 12
Fixing to the wall
It is recommended that
the wall to ensure stability.
Assemble wall straps
to the back of the unit using
screws and washer .
With help, move the unit
to the desired location.
locations on the wall and
remove the unit.
suitable plugs for your wall
type.
Note:
supplied.
drilling. Check the wall for
hidden pipes or
cables.Re-position the
unit and secure the wall
straps to the wall.
Note:
supplied.
BU
Wall plugs are not
Warning: Before
Screws are not
BT
V
V
U
T
V
U
T
Assembly is complete.
If you need help or have damaged or missing parts, call the Customer Helpline: 0345 6400 800
Home Retail Group. 489-499 Avebury Boulevard. Saxon Gate West. Central Milton Keynes. MK9 2NW
14
 Loading...