

Page 1
Ivy Small Sideboard
hygena
453/6563
Width - 90cm
Depth - 40cm
Height - 80cm
Issue 1-28-10-15
Page 2
Do not stand or put excessive
weight on the product, this
could cause damage.
Page 3
2
0345 6400 800
(90x39.7x1.5cm)
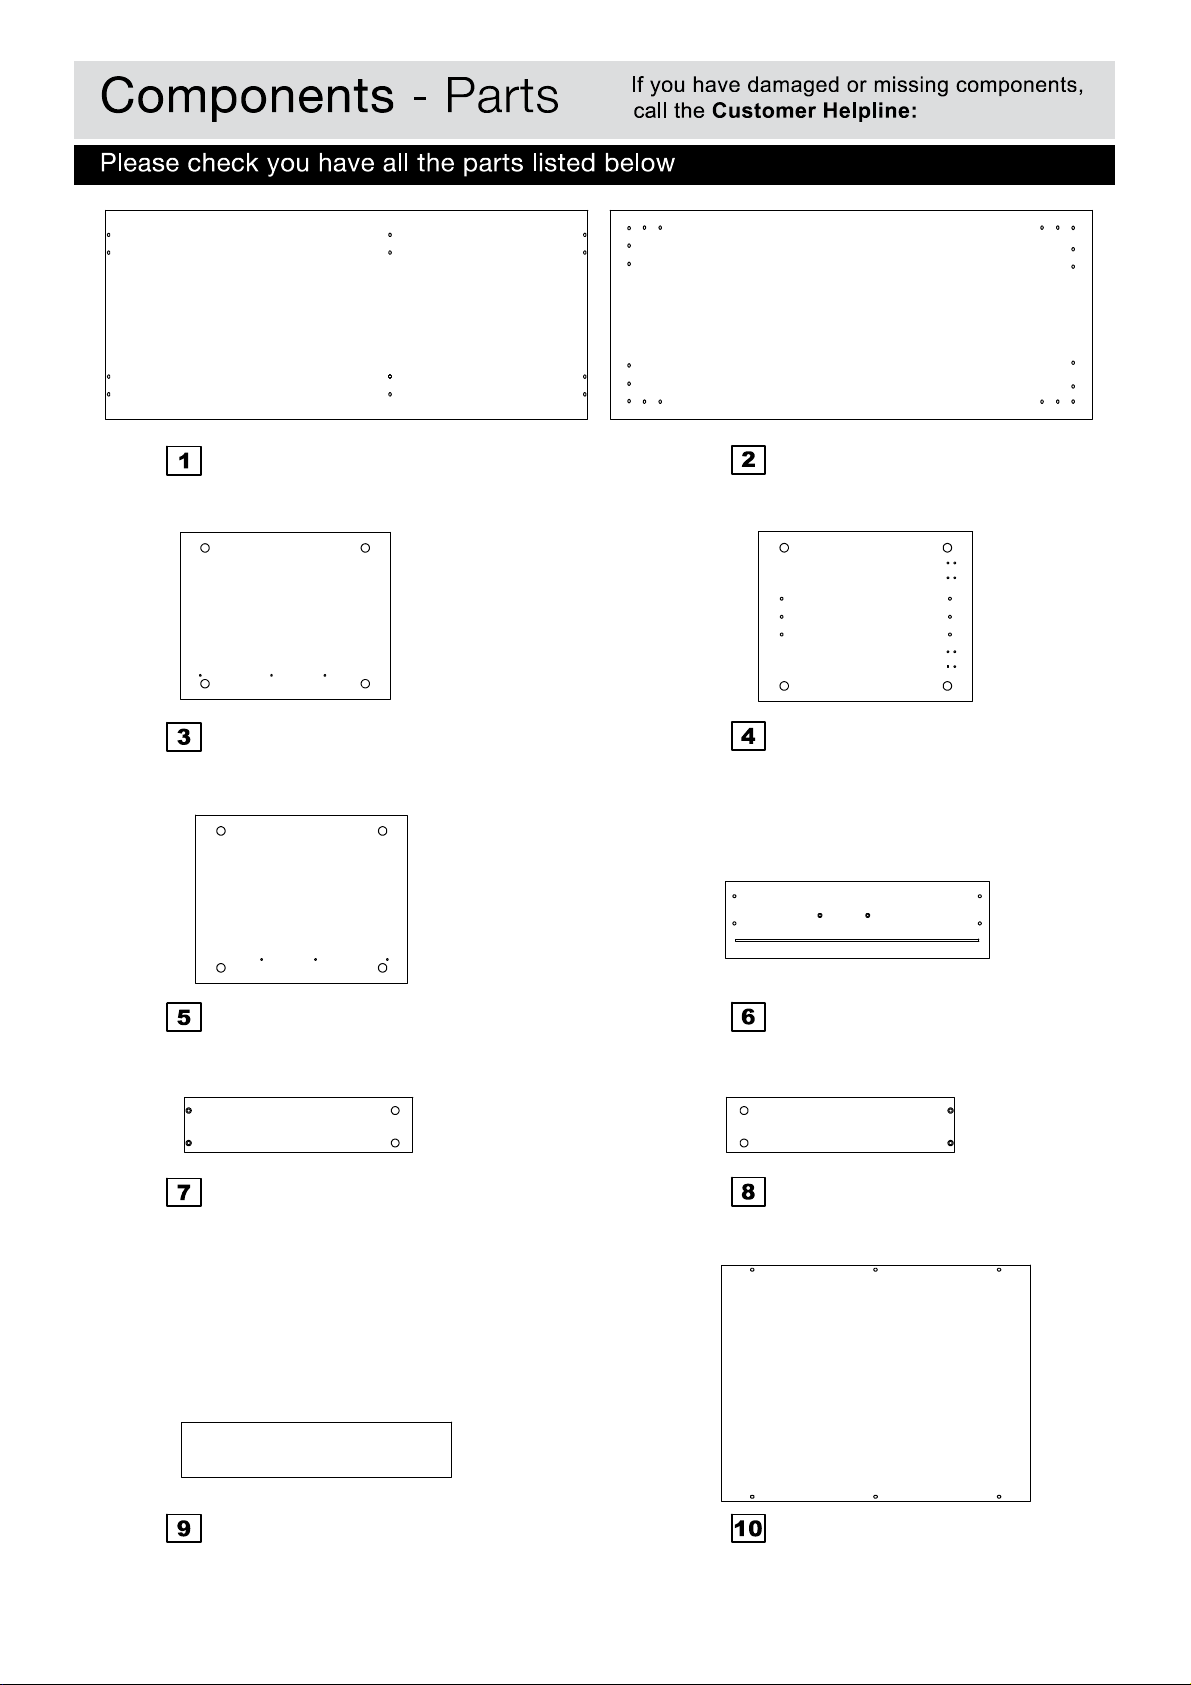
Top panel
(90x39.7x1.5cm)
Base panel
(32x39.7x1.5cm)
Side panel (right)
(32x39.7x1.5cm)
Divider
(53x15.5x1.5cm)
Drawer front x 2
(35x8.5x1.2cm)
Drawer side panel (left) x 2
(35x8.5x1.2cm)
Drawer side panel (right) x 2
(48.5x10x1.2cm)
Drawer back x 2
(50.8x34.5x0.5cm)
Drawer base x 2
(32x39.7x1.5cm)
Side panel (left)
Underside
Underside
Inside
Inside
Page 4
3
0345 6400 800
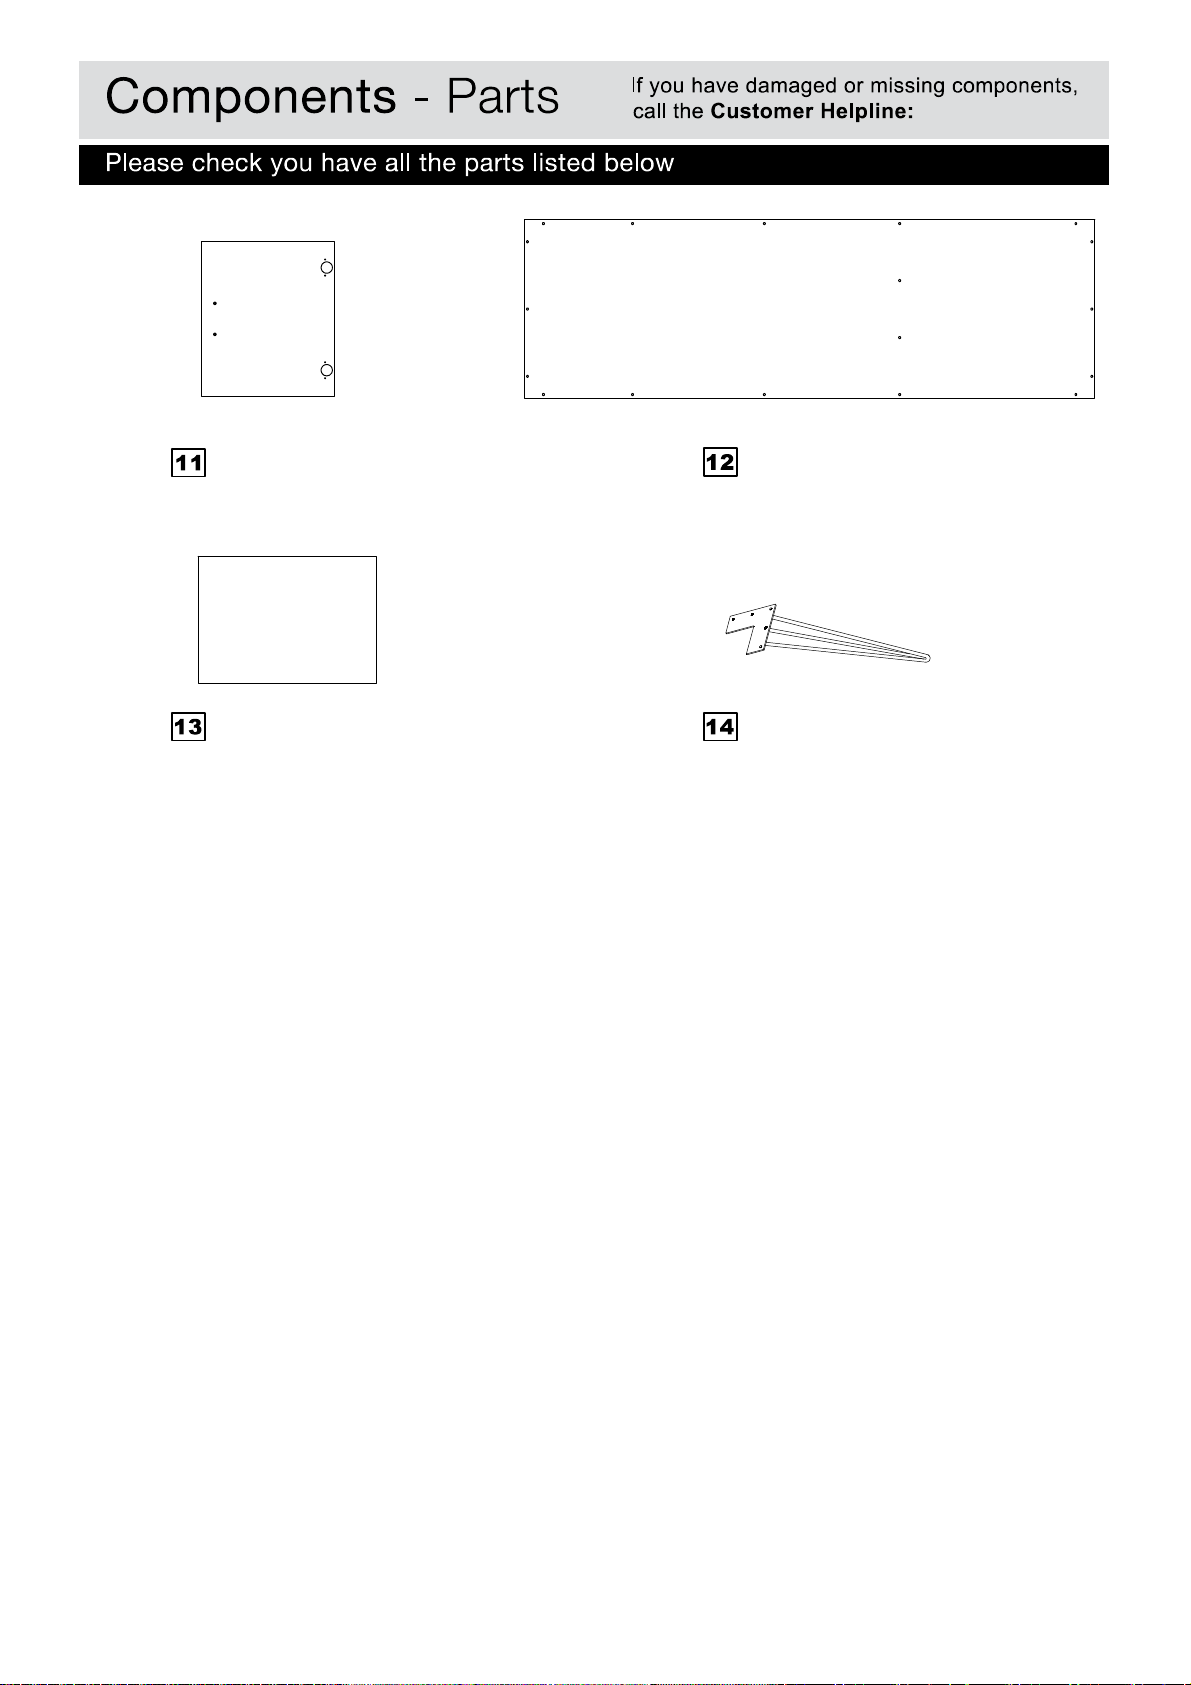
(31.5x31.5x1.5cm)
Door
(38x31.8x1.5cm)
Shelf
(89.8x34.8x0.3cm)
Back panel
Legs x 4
Page 5

4 x 14mm Screw x 12
4 x 25mm Screw x 2
Door hinge x 2
Wall strap x 2
0345 6400 800
B C
4
A
Ruler - Use this ruler to help correctly identify the screws
0 5 10 15 20 25 30 35 40 45 50 55 60 65 70 75 80 85 90 95 100 105 110 115 120 125 130 135 140 145 150 155 160 165 170
Components - Fittings
E FD
H JG
L MK
PN
Wooden dowel x 12
Handle x 3
M4 x 16mm Screw x 6
Shelf support pin x 4
Drawer runner x 2 sets
3 x 12mm Screw x 16
M6 x 12mm Screw x 20
3.5 x 12mm Screw x 24
4 x 30mm Screw x 8
Metal dowel x 20
Small locking nut x 8
Large locking nut x 12
R
Q
Plain washer x 2
Tools required
0
0
5 10 15 20 25 30 35 40 45 50 55 60 65 70 75 80 85 90 95 100 105 110 115 120 125 130 135 140 145 150
1 2 3 4 5 6
Ruler/tape
measure
Phillips screwdriver
(Not supplied)
S
Page 6

Assembly lnstructions
5
Preparing panels
Place top panel , base
panel and drawer
front flat on the floor
with the fixing holes
facing up.
Screw metal dowels
into each panel as shown.
Note: Screw metal
dowels as far as shown.
Do not overtighten.
Insert wood dowels
into top panel and
base panel as shown.
Carefully locate side
panels and and
divider onto top panel
in the locations shown.
Insert large locking nuts
into side panels and
and divider .
Turn locking nuts
clockwise to secure.
6
1
x 2
1
2
A
2
6
1
A
A
A
A
A
A
A
4
5
3
1
B
B
B
D
3
4
5
1
B
3
4
5
D
D
D
D
2
B
Shown upside down
Assembling side
Page 7

Assembly lnstructions
6
Assembling base panel
With help, carefully locate
base panel into
position as shown.
Insert large locking nuts
into side panels and
and divider .
Turn locking nuts
clockwise to secure.
Assemble legs to base
panel using screws .
B
3
4
5
2
B
B
B
B
2
M
M
2
4
5
3
B
14
2
14
Shown upside down
Assembling legs
Page 8

Attach one half of drawer
runners onto right side
panel and divider
as shown. Secure with
screws .
Note: The correct fixing
hole positions are shown in
the enlarged drawings.
Assembly lnstructions
7
Assembling back panel
With help, carefully turn
the unit onto it's front.
Note: Ensure the unit is
straight and square.
Place back panel into
the recess around the
back of the unit. Secure
using screws .
Note: As shown, ensure
you leave two holes clear
at the top of the back
panels for later assembly
of the wall straps in Step
11.
12
F
3
5
G
F
F
G
G
G
G
G
G
Base
12
L
L
With help, stand the unit
upright onto it's legs.
3
5
5
3
F
F
F
Assembling drawer
runners
Page 9

Assembly lnstructions
Assembling door and
shelf
a: Insert shelf support
pins into left side panel
and divider at the
desired height.
Carefully locate shelf
onto the support pins.
b: Assemble hinges to
door using screws .
Fit handle to door
using screws .
c: Assemble door to
left side panel using
screws .
11
13
N
P
11
H
J
a:
13
K
b:
c:
N
P
8
4
K
5
5
4
11
11
4
P
P
11
P
N
H
J
11
Page 10

Hinge adjustment
a: To move doors up or
down, loosen screws
as shown and move doors
to suit.
Once doors are aligned,
insert 2 more screws
into the hinge plates and
fully tighten all screws.
a:
P
P
b:
c:
P
P
b: To move doors in or
out, loosen screw shown
and move doors to suit.
Re-tighten screws.
c: To move doors left or
right, lossen screw shown
and move doors to suit.
Re-tighten screws.
9
Assembly lnstructions
Page 11

Assembly lnstructions
Assembling drawers
a: Locate drawer back
in between drawer side
panels and . Secure
using screws .
b: Place drawer base
into the groove in back
panel .
c: Locate drawer front
onto the drawer body.
Insert small locking nuts
into drawer sides and
.
Turn locking nuts
clockwise to secure.
d: Locate the other half of
drawer runners onto
each side of the drawer
with the rollers at the back.
Secure using screws .
e: Attach drawer handle
to drawer front using
screws .
Repeat for both drawers.
7
X2
a:
b:
E
E
7
9
8
10
c:
d:
e:
9
8
E
6
F
H
J
6
6
C
C
G
F
J
H
10
shown upside
down
8
7
10
8
C
7
8
G
6
C
F
G
G
Roller
8
Page 12

11
If you need help or have damaged or missing parts, call the Customer Helpline: 0345 6400 800
Home Retail Group. 489-499 Avebury Boulevard. Saxon Gate West. Central Milton Keynes. MK9 2NW
Assembly lnstructions
Locating drawers
Carefully slide drawers
into position as shown.
It is recommended that the
unit is fixed to the wall to
ensure stability.
Assemble wall straps to
the back edge of the top
panel using screws and
plain washer .
With help, move the unit to
the desired location.
Mark the fixing hole
locations on the wall and
remove the unit.
Drill the wall and fit
suitable plugs for your wall
type.
Note: Wall plugs are not
supplied.
Warning: Before
drilling. Check the wall for
hidden pipes or
cables.Re-position the unit
and secure the wall straps
to the wall.
Note: Screws are not
supplied.
R
S
Q
Q
R
S
Fixing to wall
 Loading...